We may receive a commission when you use our affiliate links. However, this does not impact our recommendations.
To turn wood safely, you need to know the correct way to introduce a cutting tool to a spinning workpiece. There are different ways to start a cut, depending on the type of tool you use. Here’s a look at how to start cuts with traditional woodturning tools and carbide tools.
Positioning the Tool Rest
The height of your tool rest should be just below the center of your workpiece. You want the cutting edge of your chisel or gouge to remove material from the center of the blank. It’s also important to work right over the tool rest’s post as much as possible to prevent chatter. If you find yourself cutting too far away from the post, stop the lathe and reposition the tool rest. Your cuts will be smooth when you work directly over the post.
Rounding Over a Blank with Traditional Tools
To round over a square work piece with a gouge, start the cut by placing the tool on the tool rest, an inch or so beyond one end of the blank. Hold the handle of the tool against your hip. Slide the gouge slowly into the work, taking only a thin shaving.
Don’t slide your arm away from you; keep it glued to your hip and move your whole body to make the cut. Never touch the blank with your hand to check for roundness. If there are any sharp edges left, you’ll regret it.
Lay the tool on top of the spinning workpiece to check your progress. If the blank isn’t quite round, the tool will bounce up and down.
Rounding Over a Blank with Carbide Tools
You can press a carbide tool directly into a blank instead of sweeping in from one end, but don’t do it too quickly. Place the tool on the tool rest, keeping it level with the floor, then take 1/16” to 1/8” deep stabs until you get the blank completely rounded. Keep the tool handle against your body, just like you would with a gouge.
Shaping with Traditional Tools
Once you have rounded over a workpiece, you can start shaping it and making detail cuts. To make beads, coves or V-grooves with a traditional tool, ride the tool’s bevel on the work so that it doesn’t remove any material. Then slowly lift up on the handle.
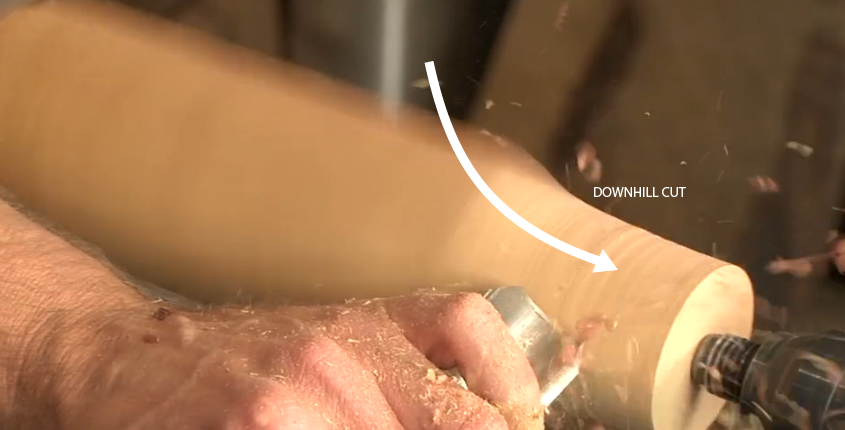
When the handle goes up, the tool’s edge will start to cut into the work. Lift higher to cut deeper, and rotate the tool downhill at the same time. Always cut downhill when turning.
Shaping with Carbide Tools
You might find carbide tools easier to use, especially when you’re just getting started in turning. When you want to make a bead, cove or v-groove, just press the tool straight into the wood and move it downhill to form the desired detail. Keep the tool level during all cuts.
Woodturning Catches
Sooner or later, you’re going to experience something known as a “catch.” A catch occurs when the wrong part of a cutting tool contacts the workpiece, or you try to make a cut that’s too deep.
Catches can be scary, and the best way to avoid them is to make sure the tool’s bevel is riding against the workpiece before starting the cut, then to lift up slowly on the handle. You want to keep the cutting edge of the tool about 45-degrees to the rotation of the work.
To see demonstrations of all the techniques in this article and a whole lot more, check out Woodturning A-Z from Popular Woodworking University. The woodturning videos and illustrations in this online course will teach you everything you need to know to start turning on your own.
Here are some supplies and tools we find essential in our everyday work around the shop. We may receive a commission from sales referred by our links; however, we have carefully selected these products for their usefulness and quality.


