We may receive a commission when you use our affiliate links. However, this does not impact our recommendations.
As a woodworker, what’s the first thing you notice when you open a cabinet’s drawer? The way it’s put together, of course.
A drawer made with half-blind dovetails really stands out. While a drawer that runs easily on metal slides doesn’t necessarily need the strength of a dovetail joint, well-made dovetails clearly signal good craftsmanship.
In this article, you’ll learn how to use a typical half-blind dovetail jig to make a standard drawer box. (It’s called a “box” because the front of the drawer—what you see on the outside of the cabinet—is applied later.) Let’s start by looking at the jig itself.
Also in this series: Kitchen Cabinet Essentials • How to Make a Cabinet Drawer Box • How to Install A Cabinet Drawer • How to Make a Cabinet Door • How to Install a Cabinet Door • Prefinishing Plywood
The Jig
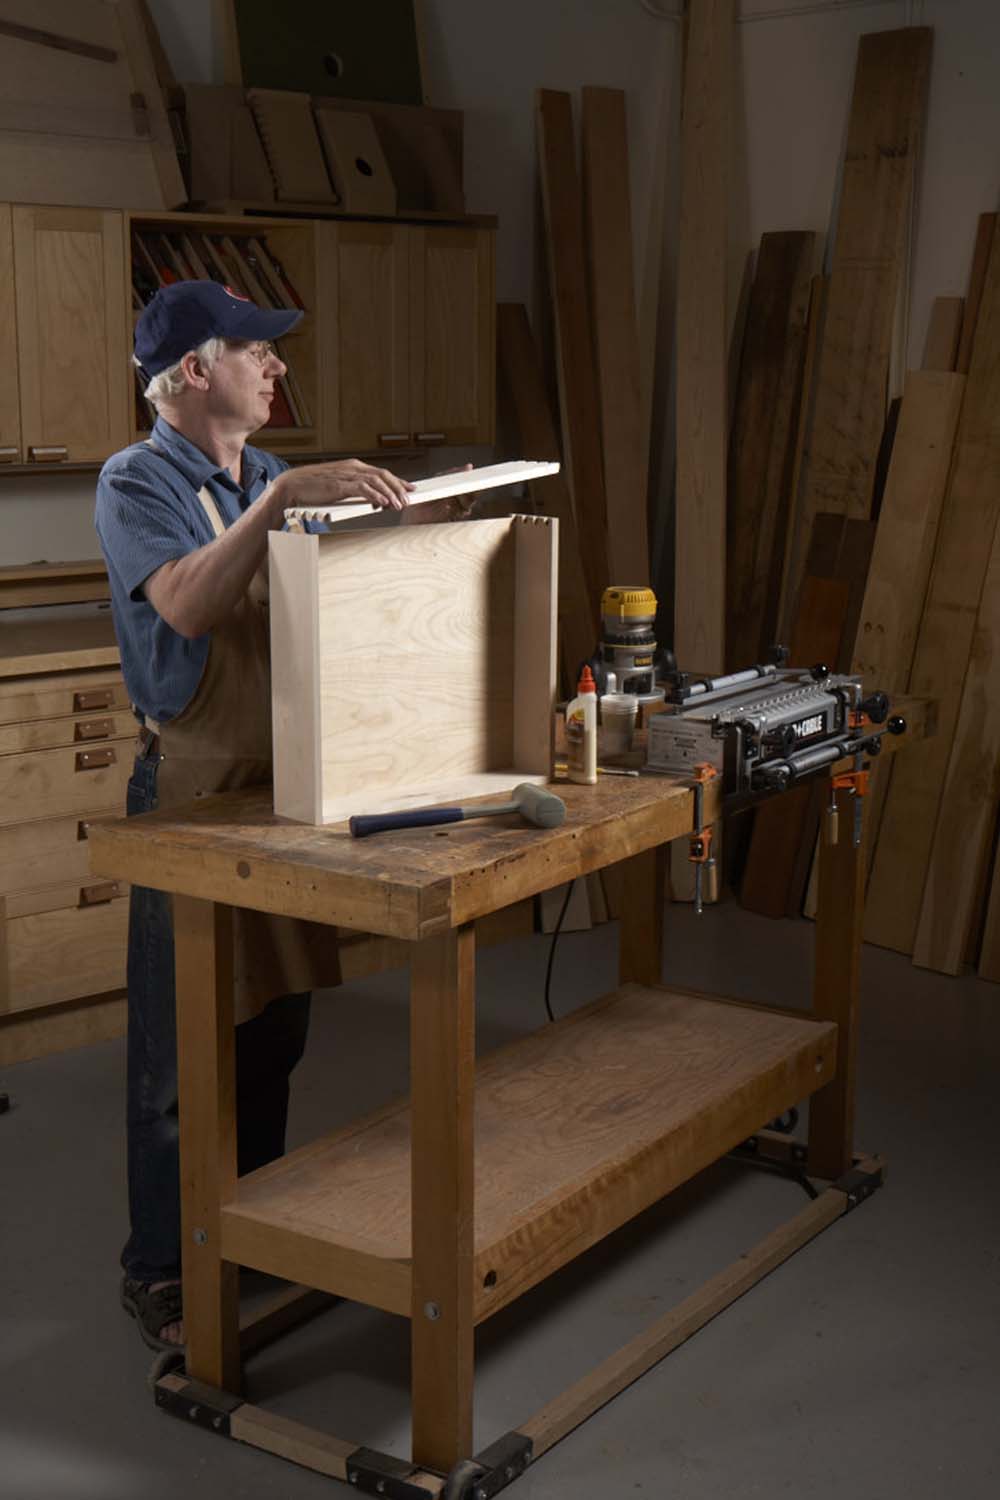
 Most half-blind jigs have essentially the same parts. The most important one is the comb. Using a router equipped with a dovetail bit and a template guide, you trace around the comb to make the joint.
You always rout two boards at the same time. One is held horizontally by the top clamp; the other is held vertically by the front clamp. The clamps on this jig operate on a cam. Rotating each handle pushes a long clamping bar against the workpiece.
Most jigs have a pair of stops that position both workpieces left or right, relative to the comb.
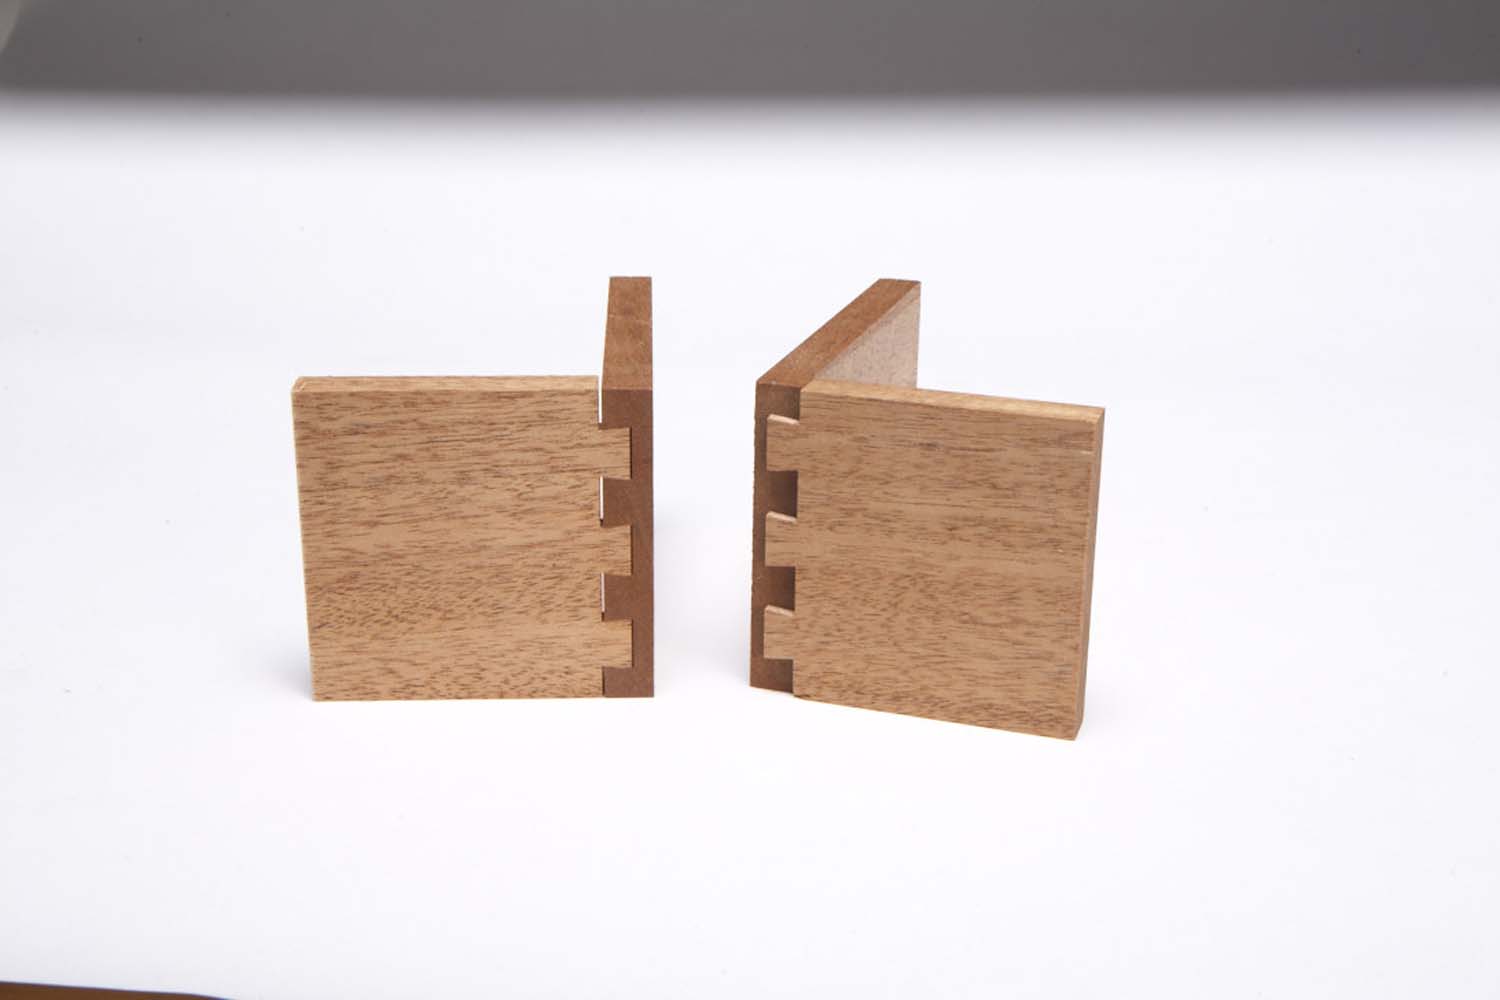
The Joint
 Here’s what a typical half-blind dovetail joint looks like. The boards are in the same orientation as if they were still sitting in the jig, freshly routed.
Tracing around the rounded fingers of the comb produces a series of sockets and tails. They’re exactly the same width; when you assemble the two pieces, they’ll automatically fit together.
The pieces will also align with each other, top and bottom, because they’re offset by just the right amount when you clamp them in the jig. The jig’s stops create this offset.
The Box
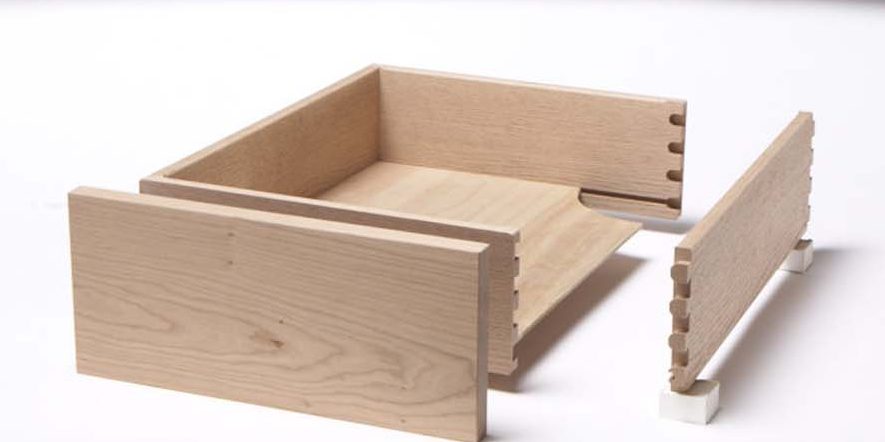 Here’s an exploded view of a typical drawer box. The front and back pieces have sockets cut into them; both are the same length. These pieces extend the full width of the drawer box.
The side pieces have tails formed on their ends. If all pieces are 1/2″ thick—typical for a drawer box—the sides are cut 1/4″ shorter than the overall depth of the box.
A typical drawer box has an applied front and a 1/4″ plywood bottom trapped in a groove. The groove runs around all four sides of the box.
Your Jig’s Spacing
On some jigs, the distance between the dovetails is 7/8″; on other jigs, it’s 1″. This is an important number when you’re figuring out how wide the sides of your drawers should be. Why? Dovetail joints look best when they have half-pins at the top and bottom of the joint. Of course, this rule limits the widths you can choose from. They will be increments of 7/8″ or 1″, plus the narrowest dimension of one half-pin, depending on your jig.
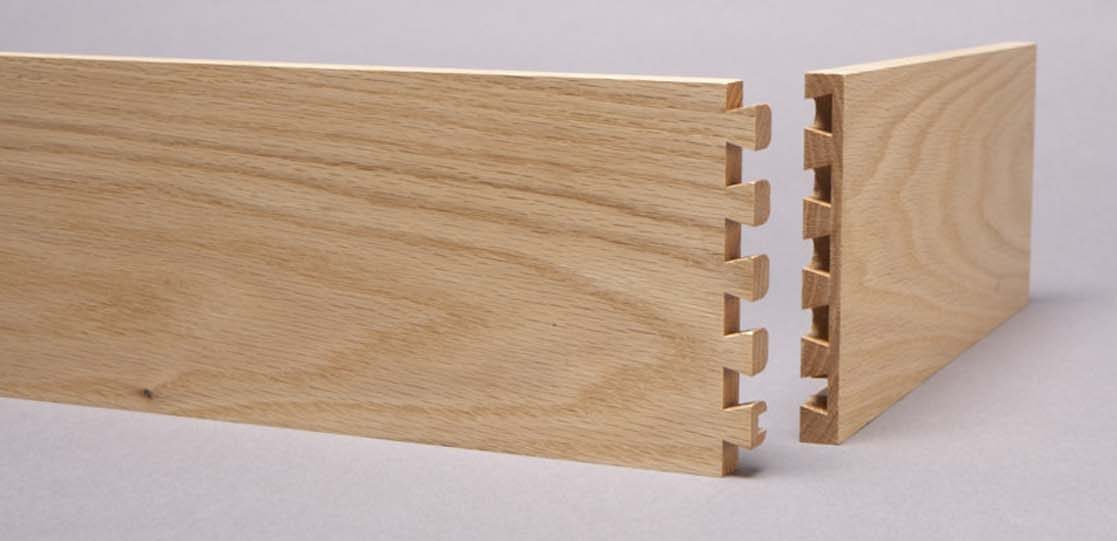
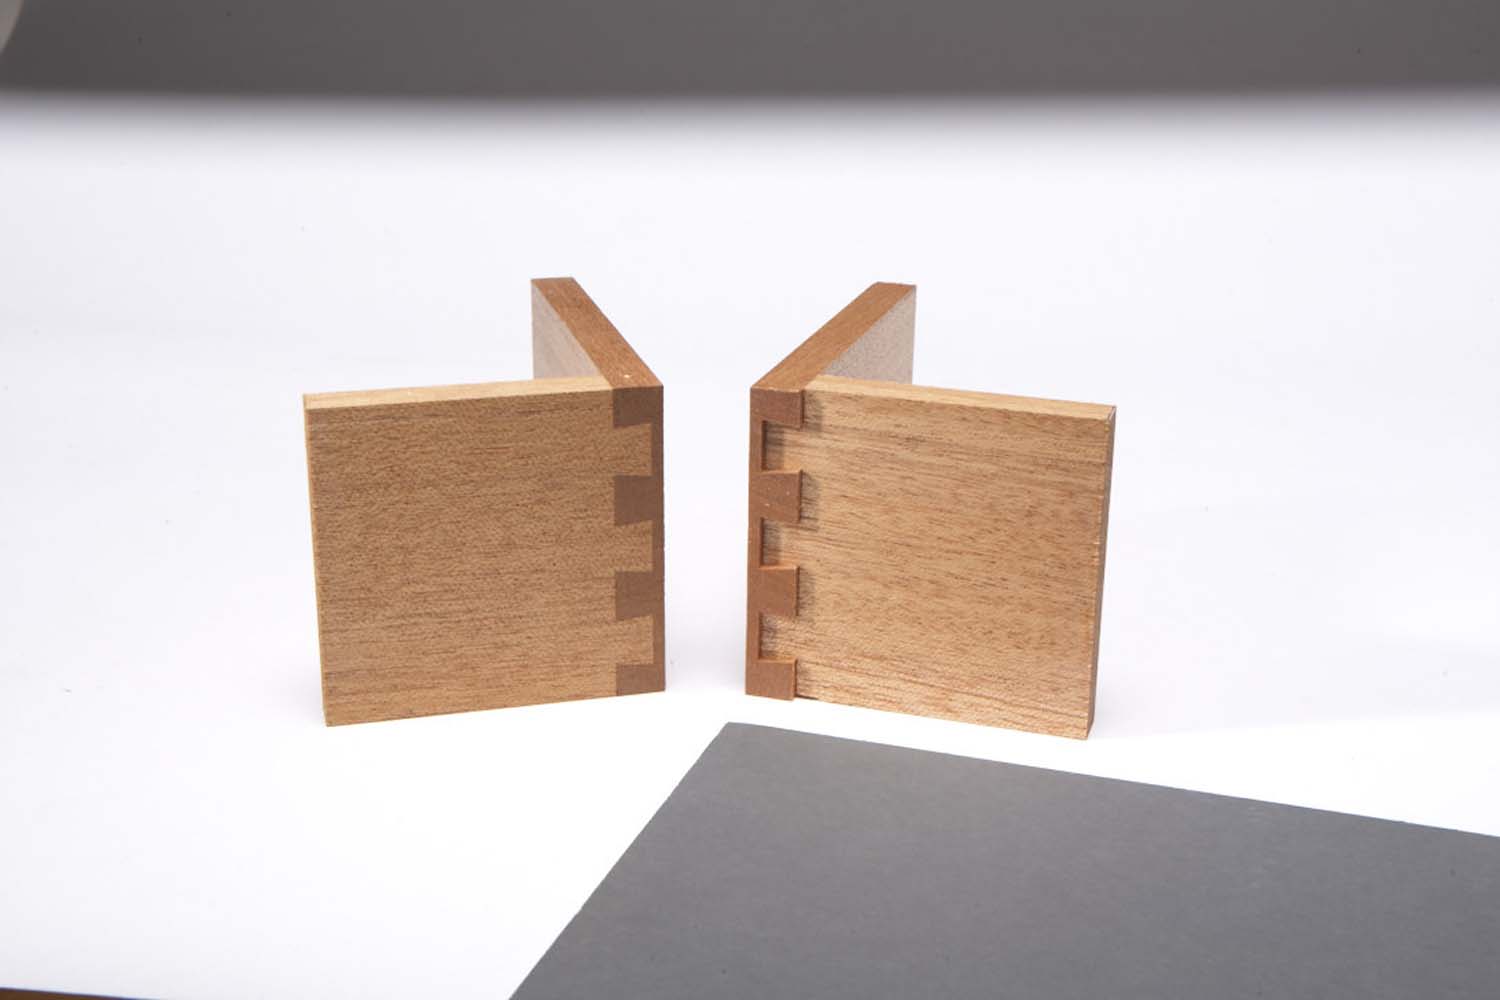
7/8″ Spacing
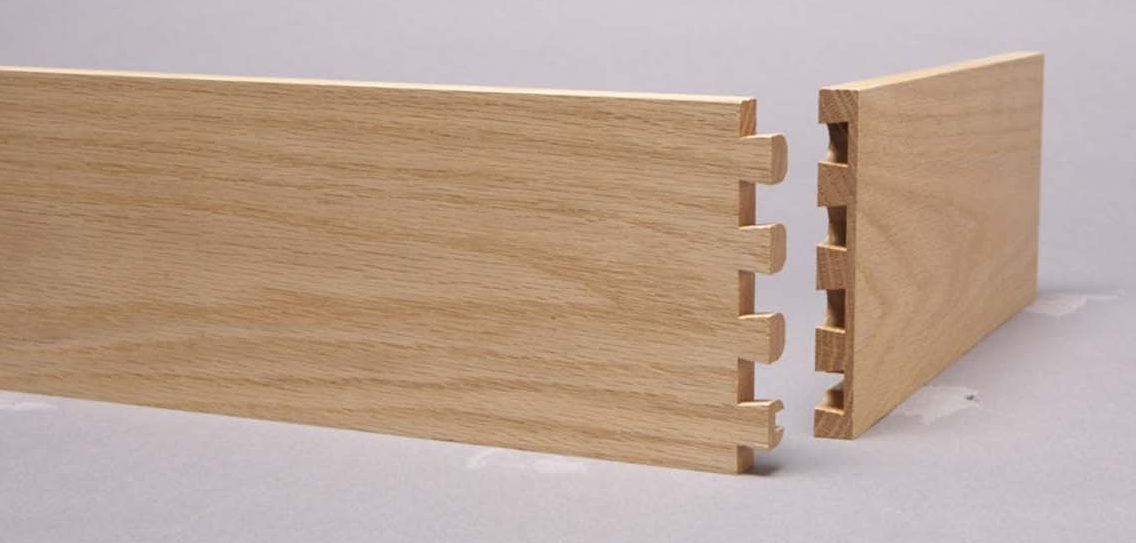
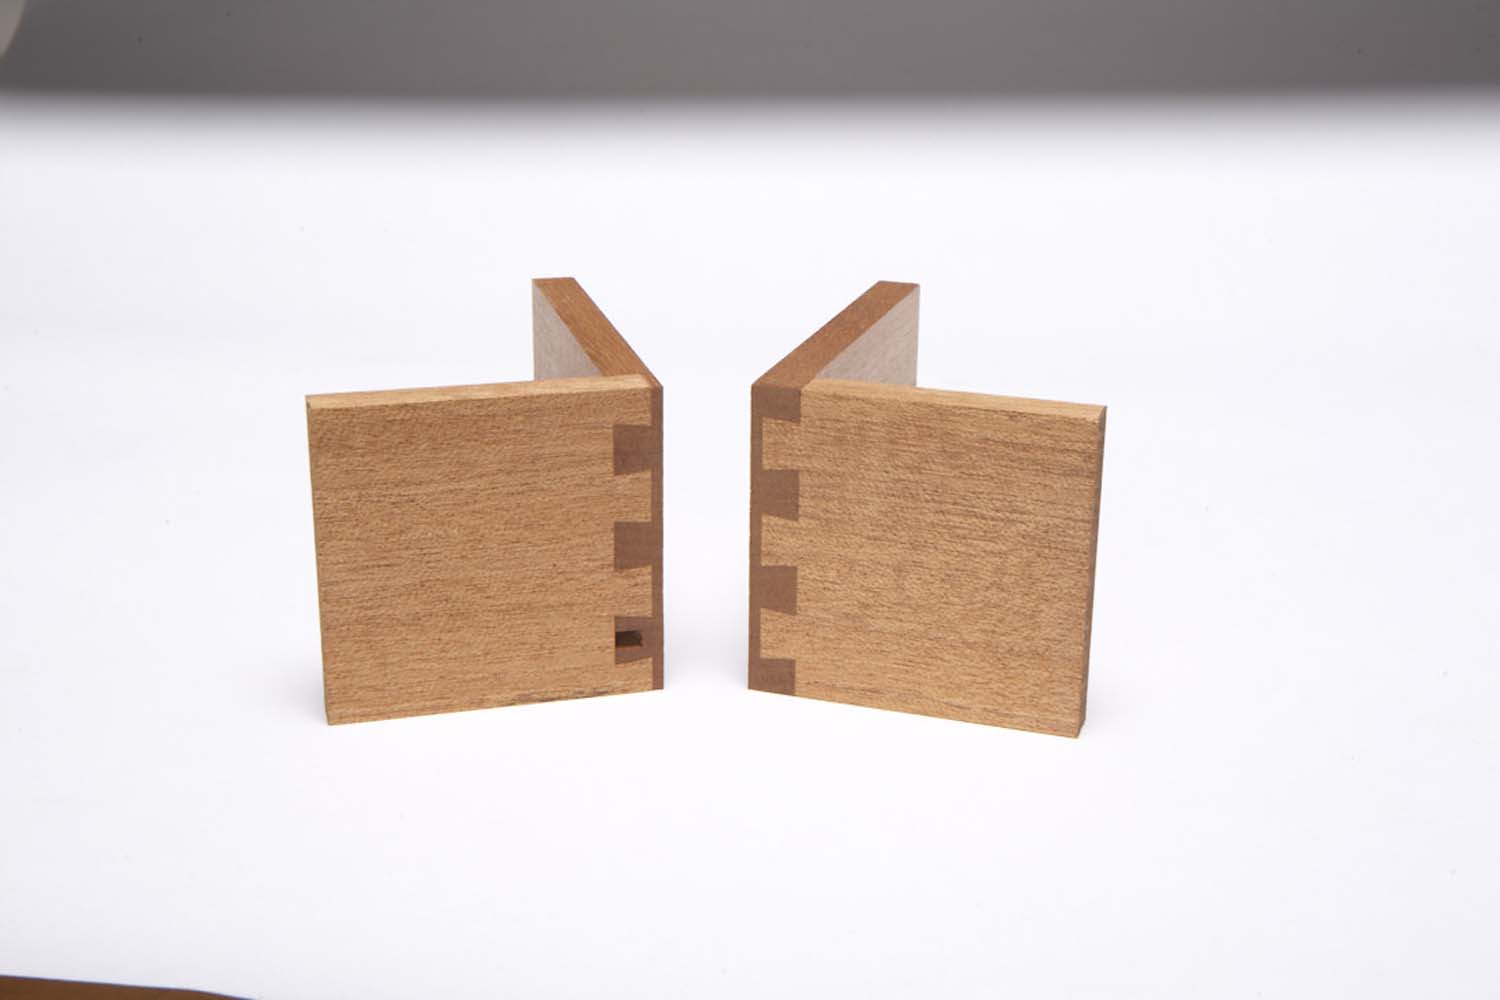
1″ Spacing
Fortunately, when you’re building drawer boxes that ride on slides and have applied fronts, the width of the drawer sides can be anywhere up to 1″ less than the opening in the cabinet. For our model cabinet, we used a 1″ jig and made the sides 4-1/4″ wide. If you have a 7/8″ jig, make the sides 4-1/2″ high. In addition, make the bottom half-pin a bit extra-wide, so the drawer-bottom groove runs through the center of the first socket.
Adjusting Your Router and Jig
Too loose on left, too tight on right.
Every time you rout a new set of drawers, you’ll make three adjustments to your router and jig. To test these adjustments, you’ll need some scrap wood that is exactly the same thickness and width as the wood you’ll be using for your drawer boxes.
Adjustment 2: Depth
Flush on the left, too deep on the right.
Next, adjust the position of the comb in or out. This affects how deep the sockets will be. Ideally, the sockets should be just deep enough so that the pins are flush when the joint is assembled.
In practice, it’s best to position the comb so the sockets are about 1/64″ too deep. This will compensate for any small error in your setup or minor variation in the thickness of the drawer’s sides.
Adjusting nuts behind the comb’s brackets determine the position of the comb. Both nuts must be the same distance from the front of the jig, so the comb remains parallel to the jig.
Examine the depth of the sockets on the test pieces you’ve made so far. If they’re not deep enough (and this is easy to confuse with a joint that’s too tight), turn each adjusting nut clockwise, closer to the jig, then tighten the bracket knobs. If the sockets are too deep—and this is the best place to start—loosen the knobs first, then turn the adjusting nuts counterclockwise, away from the jig.
Adjustment 3: Spacing
Incorrect on left, correct on right.
Lastly, adjust the position of the stops on the jig. Moving them left or right affects how the joint looks. Your goal is to make a joint that begins and ends with half-pins rather than half-tails.
A half-pin doesn’t have to be precisely half the width of a full pin, though. Close is good enough.
To set the stops, start with a new pair of test pieces. Determine where you want the groove for the drawer bottom to go, then draw “grooves” on the pieces. (Typically, grooves are located 3/8″ to 1/2″ above the bottom edge of a drawer.)
The groove should fall approximately in the middle of a socket, so a tail will cover it when the drawer is assembled.
To position each stop, loosen its adjusting screw and slide the stop all the way toward the end of the jig. Place one of the test pieces underneath the jig’s comb and center the groove in the comb’s first “U”. Butt the stop up to the test piece and tighten it in place.
Mill the Wood
Some species are better than others for making drawers. You’ll want a wood that’s relatively stable; once it’s been milled, it should stay flat. And you’ll want a wood that doesn’t chip out when you rout it.
Maple and red oak are two excellent choices. We used maple for our model cabinet because it contrasts nicely with cherry, the cabinet’s primary wood.
If you have a tablesaw, jointer and planer, it’s best to mill the wood yourself, to ensure that it’s flat. (If the drawer pieces are cupped, the dovetails won’t go together properly; if they’re twisted, the drawer box will be twisted, too.)
Drawer boxes are typically made from 1/2″ thick material. Start with 4/4 (1″) rough stock and saw it into individual drawer pieces (front, back and sides). Cut them about 1/4″ extra wide and 1″ extra long. Be sure to mill some extra wood for testing the dovetail jig setups.
To ensure that your pieces stay flat, mill them down to 5/8″ thick and let them sit for a few days. Joint the faces of the pieces and finish planing them down to 1/2″. Joint the edges, rip the pieces to width and crosscut them to final length.
Saw Grooves First
After all this work, the last thing you want to do is get confused about which board goes where on the jig. Here’s an unorthodox marking system that’s almost foolproof: Make the grooves for the drawer bottom before routing the dovetails. Once the grooves are cut, there’s no mistaking which side of the board faces in and which side faces out on the jig—it’s obvious.
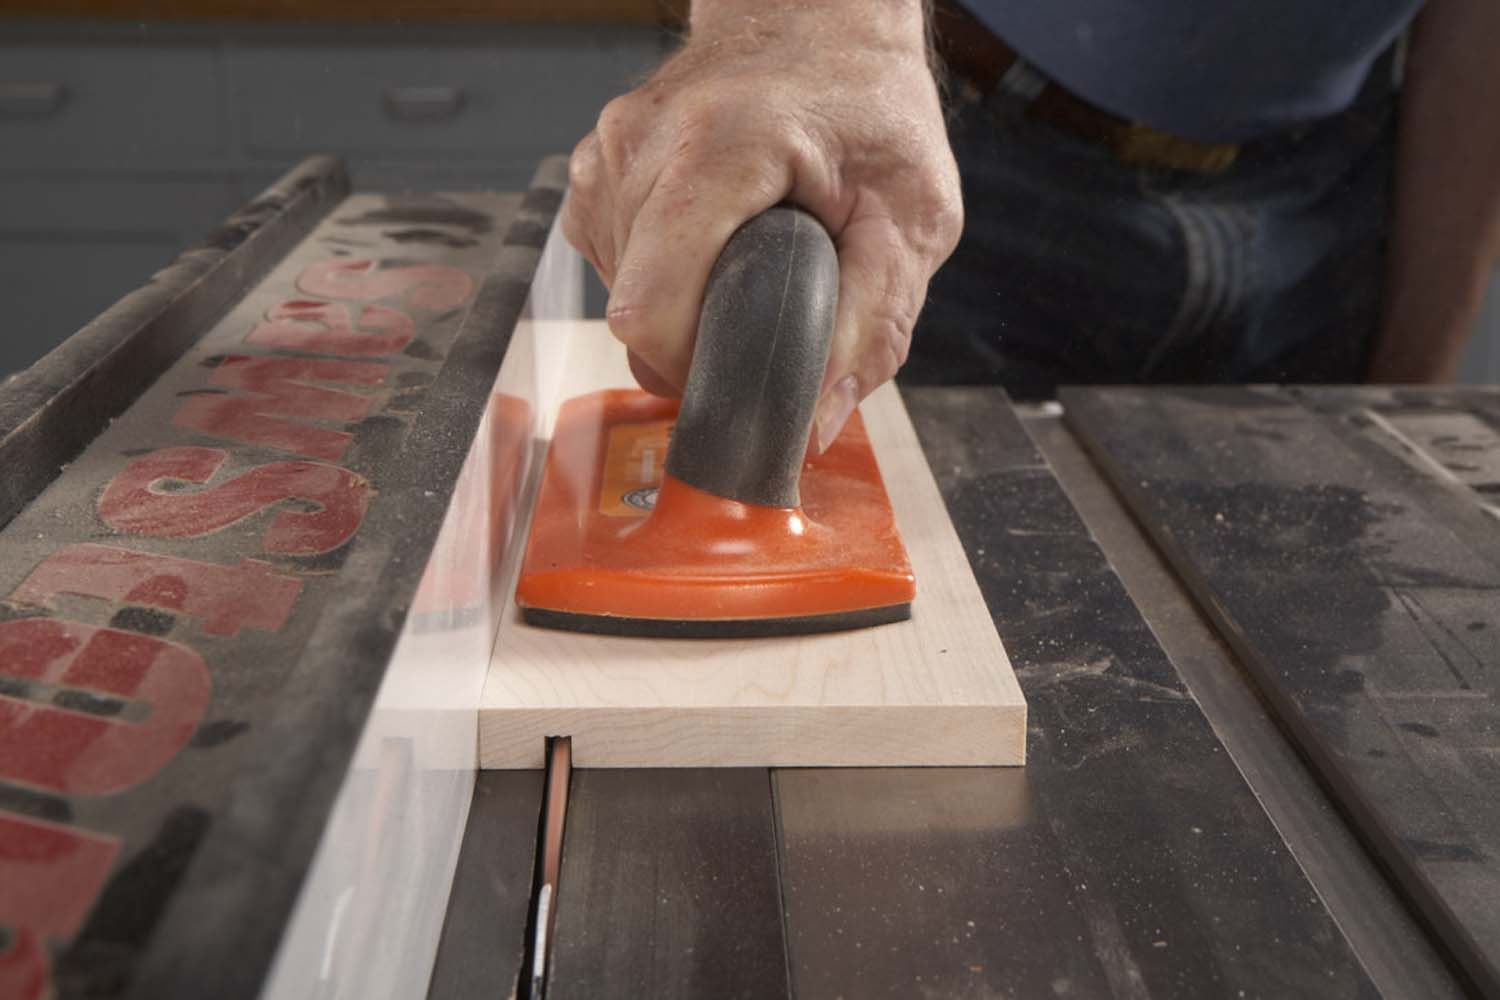
Photo 1. Cut all four drawer pieces to final size, then saw the drawer-bottom grooves. These grooves will help you position each piece in the dovetail jig.
Cut the grooves on the tablesaw using a standard blade (Photo 1). Raise the blade 1/4″ high. You’ll saw two overlapping cuts—start with the cut that’s nearest the bottom edge. (If you’re making the drawers for our model cabinet, the distance from the fence to the blade must be 1/2″ to accommodate the undermount hardware.)
Make this cut on all of your pieces. Adjust the saw’s fence to make the second cut. Use a long piece of drawer-bottom plywood to test the groove’s fit—you should be able to push the plywood along the groove with little effort.
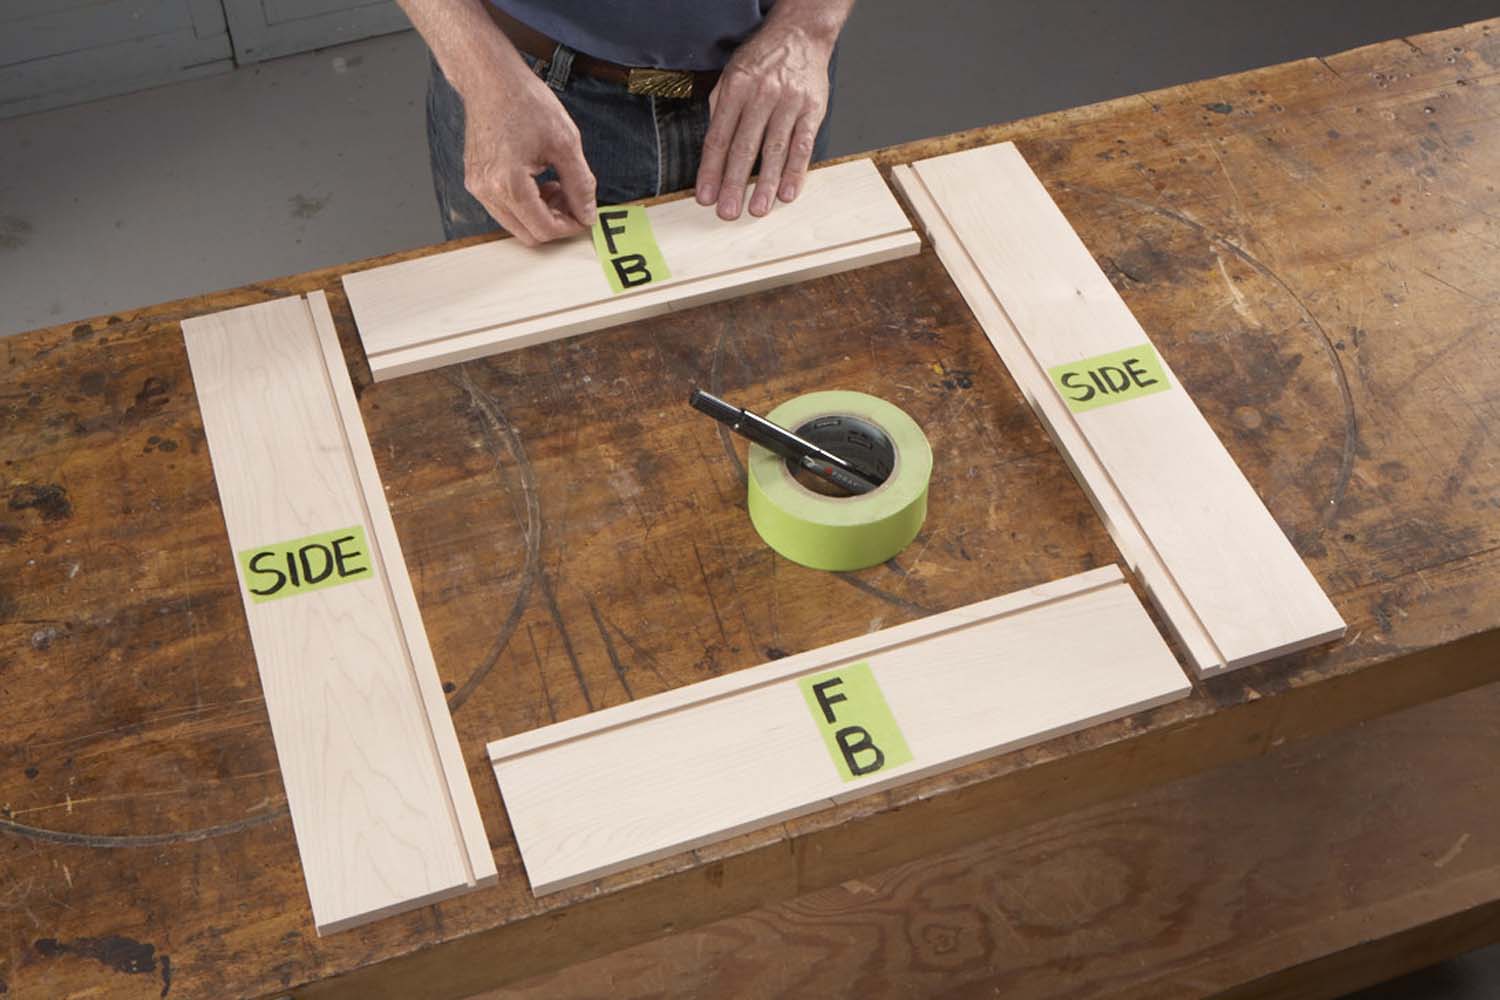
Photo 2. Arrange the four parts of the drawer box in the correct orientation and mark them. (“FB” indicates a Front/Back board.) The Left Corners are routed on the left side of the dovetail jig; the Right Corners are routed on the right side of the jig.
Finally, mark each part of the drawer as a front, back or side (Photo 2). You’re ready to rout.
Rout the Dovetails
Use the test pieces to set up the jig. It usually takes about a half-dozen tries to get everything right. Once you’re set, you can rout many drawers without making any further adjustments—as long as all the wood is the exact same thickness.
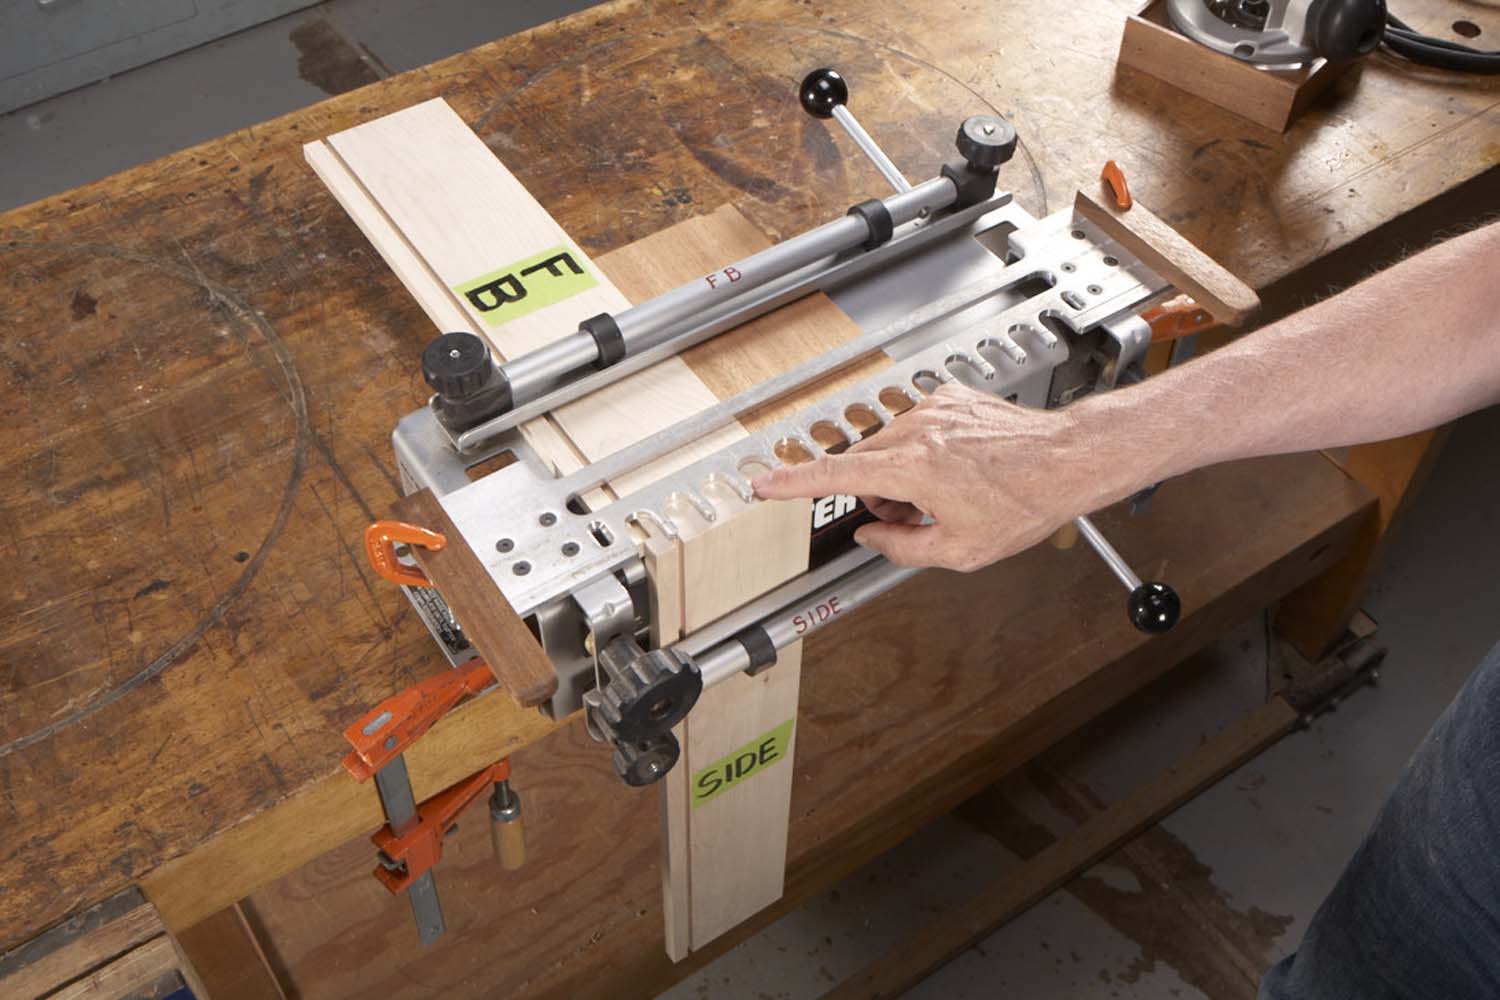
Photo 3. Place two pieces in the left side of the jig. The drawer grooves face the outer edge of the jig. Front/Back boards go on top of the jig; Side boards go in the front of the jig. To avoid error, draw “FB” and “Side” on the jig, too.
Let’s walk through how you’d make just one drawer. Place one of the drawer’s front/back pieces and one of the side pieces in the left side of the jig (Photo 3). (These pieces are interchangeable, so it doesn’t matter which two you use.) Make sure the boards are butted up to the stops and are flush with each other. It’s a good idea to place a backer board in the jig, too.
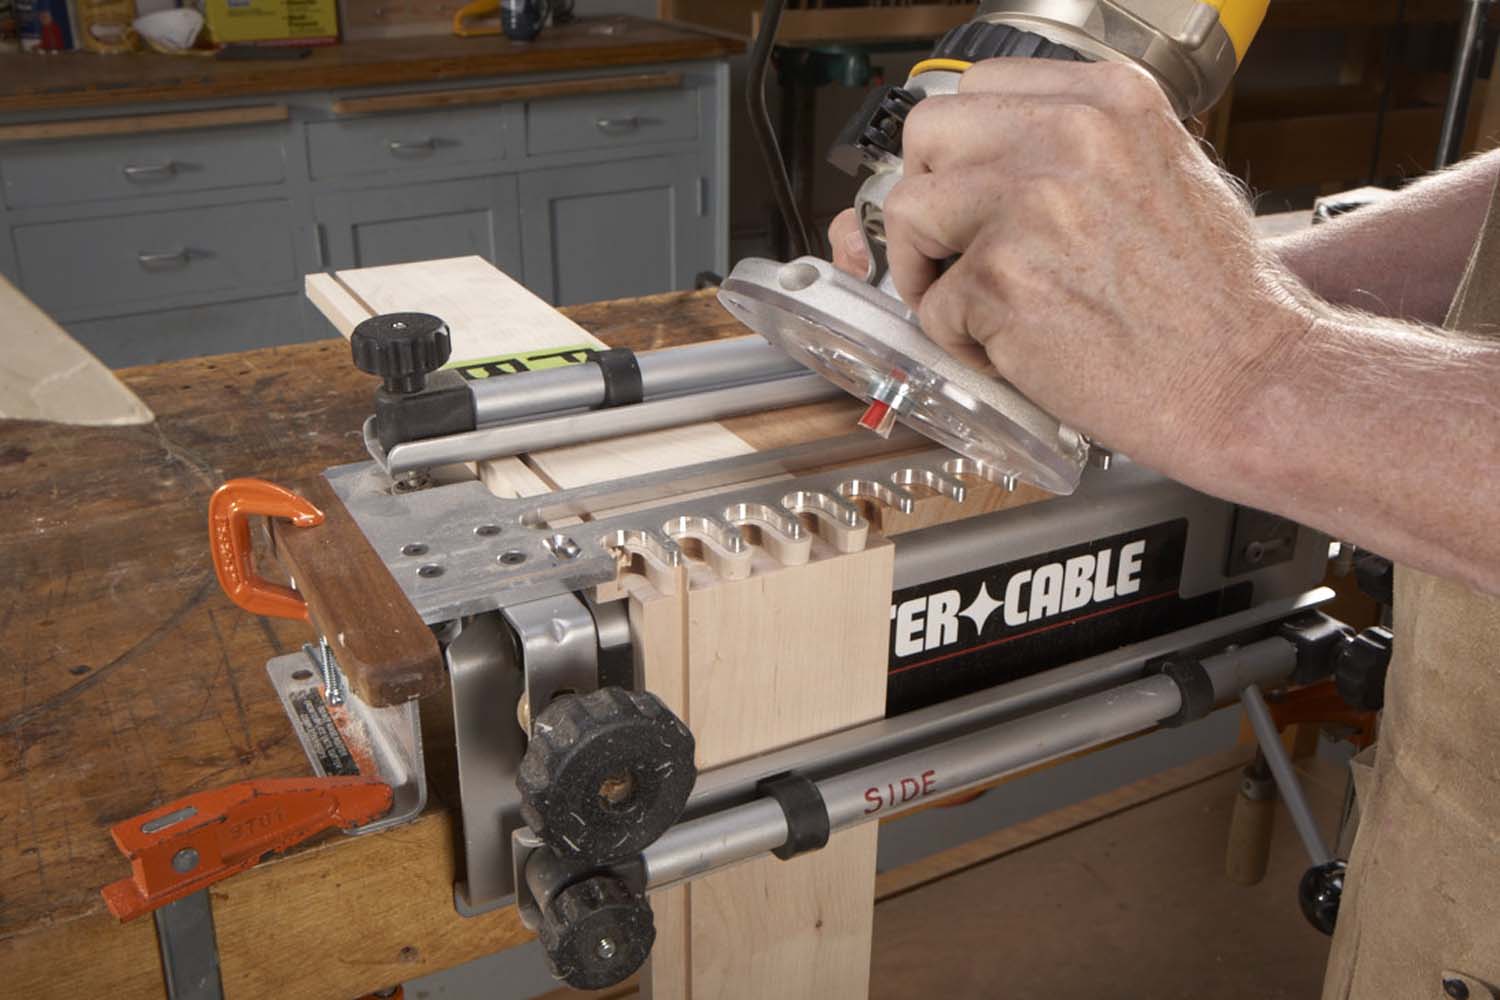
Photo 4. Rout the dovetails, then remove these boards from the jig. Place the other two boards in the jig, in the same orientation, and rout them. After routing both Left Corners, move on to the Right Corners.
Rout the dovetails (Photo 4). Place the router on the jig before you start it, and turn it off before you remove it. Be careful not to tip the router. When you’re done, inspect the joint before you remove the boards from the jig. If some portion is uncut, rout it again. Once the joint looks OK, remove the boards and place the other two Front/Back and Side boards in the jig. Rout them as well. Repeat this procedure on the right side of the jig (Photo 5).
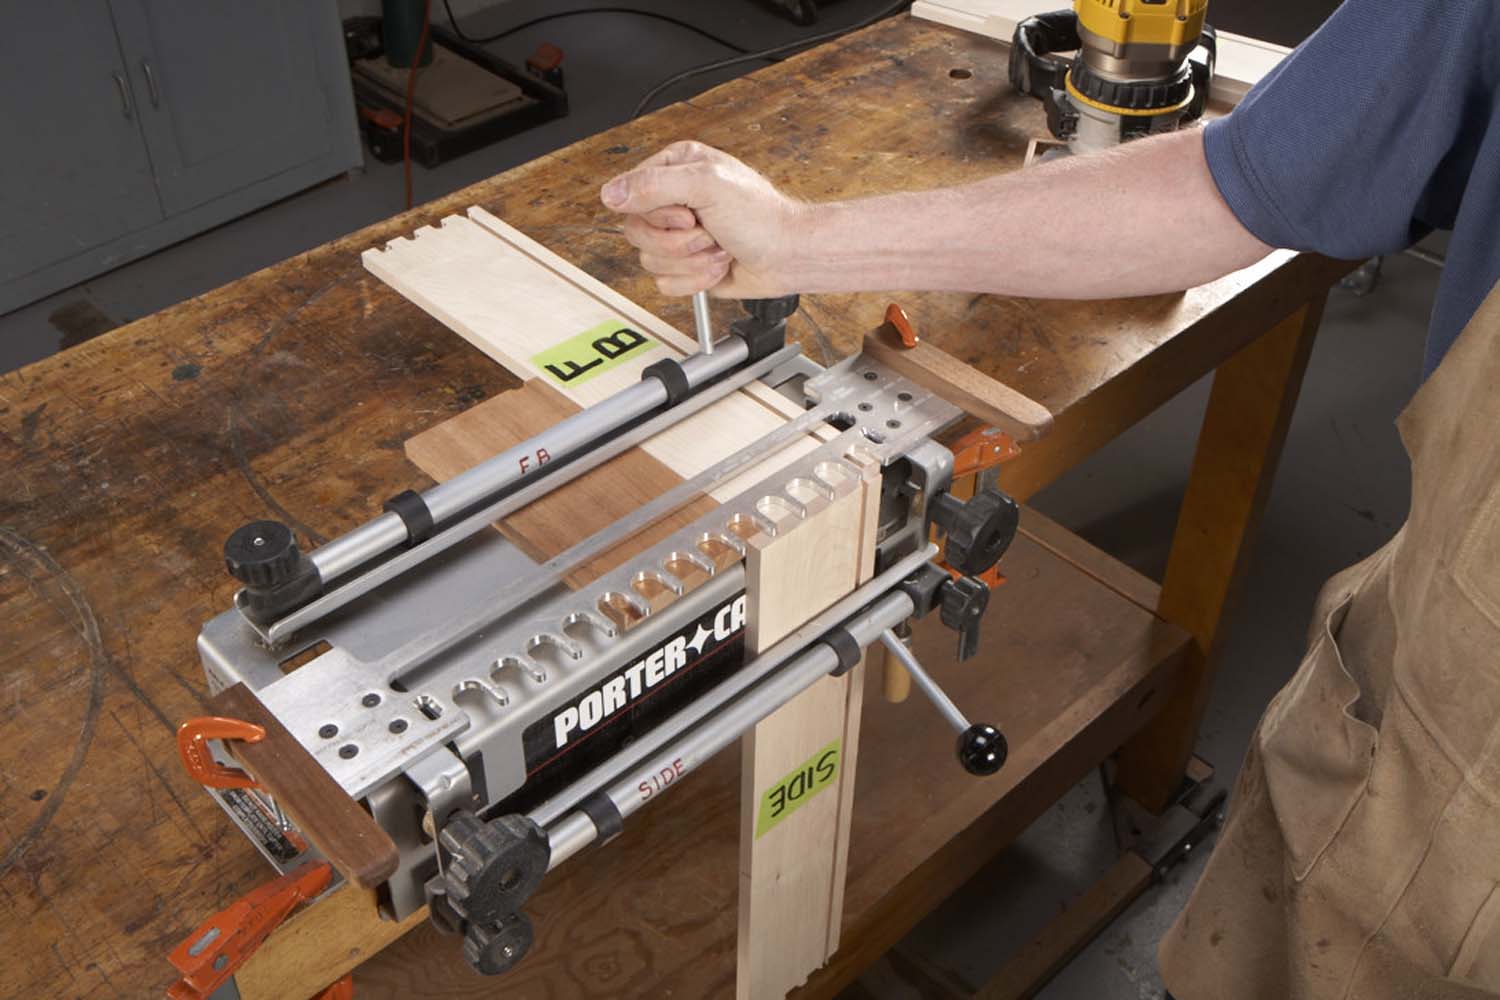
Photo 5. Place two boards in the right side of the jig. Once again, the grooves face the outer edge of the jig, the FB board goes on top and the Side board goes in front. Rout these boards, then place the remaining two boards in the jig and rout them.
Glue the Drawer
Assemble the drawer, without glue, so you can figure out the exact size of the drawer bottom (Photo 6). While you could use a tape measure, there’s no chance of making a math error if you use pinch sticks. (They’re 1/8″ thick and 3/4″ wide.)
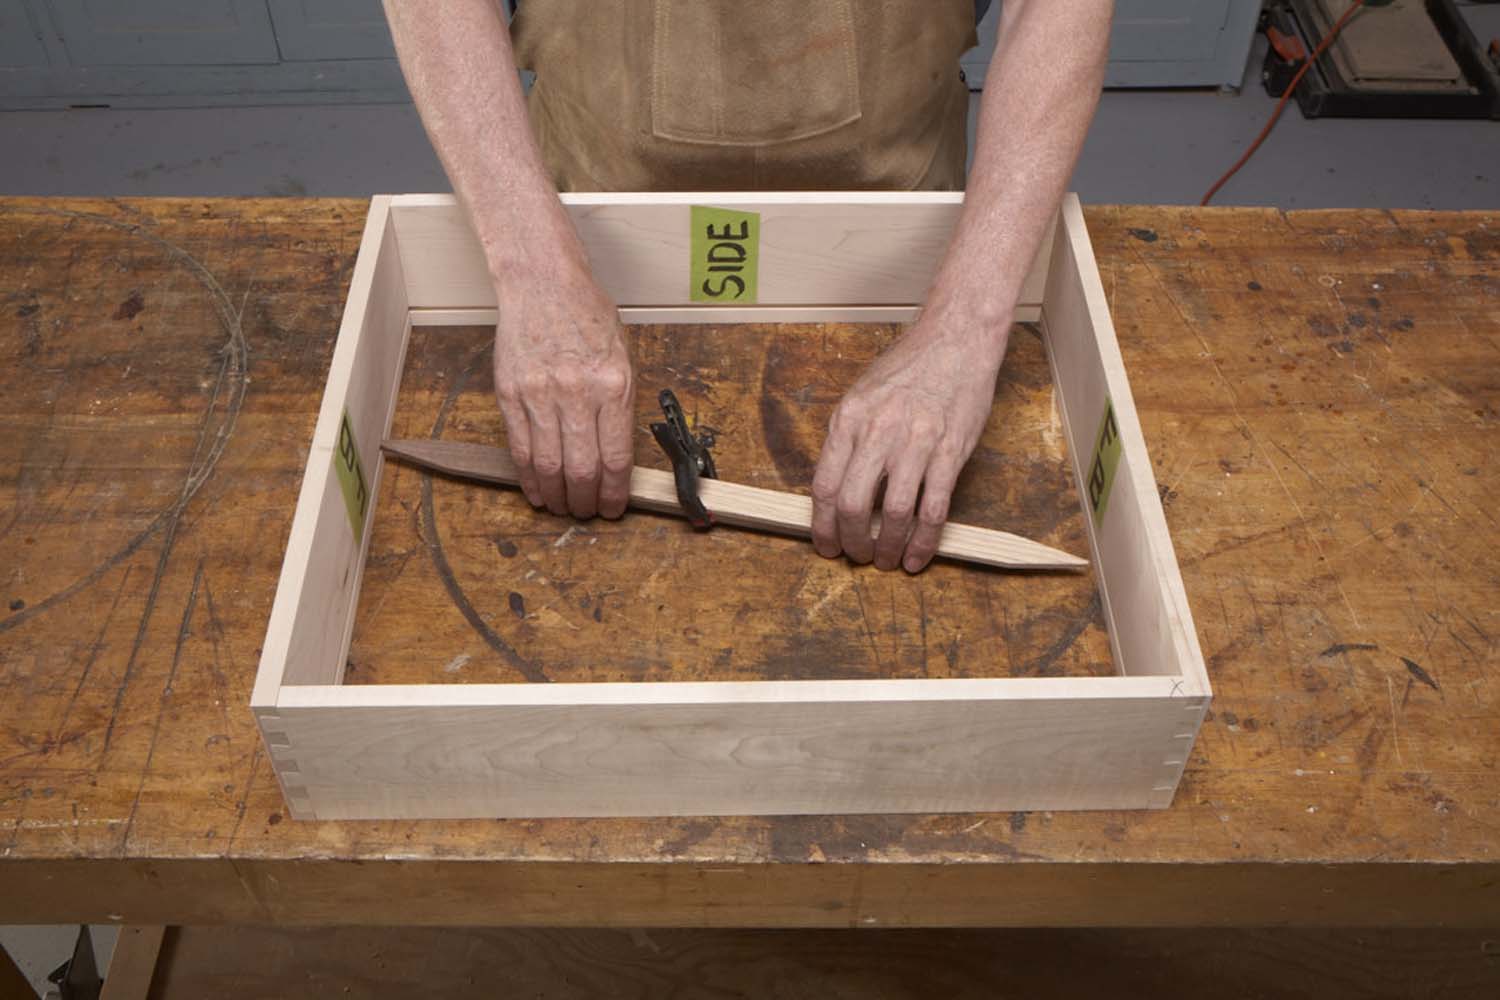
Photo 6. Assemble the drawer, without glue. Measure the distance between the bottoms of the grooves, in both directions, using pinch sticks. Cut the drawer bottom 1/16″ less in width and length than these measurements.
Here’s how pinch sticks work: Insert one end of a stick in a groove, then extend the other stick until it bottoms out in the opposite groove. Clamp the sticks together, then rotate the assembly out of the grooves. Measure the length of the two sticks and subtract 1/16″. Measure the drawer in the opposite direction and cut the drawer bottom to size.
Sand all of the inside surfaces of the drawer and the top side of the drawer bottom.
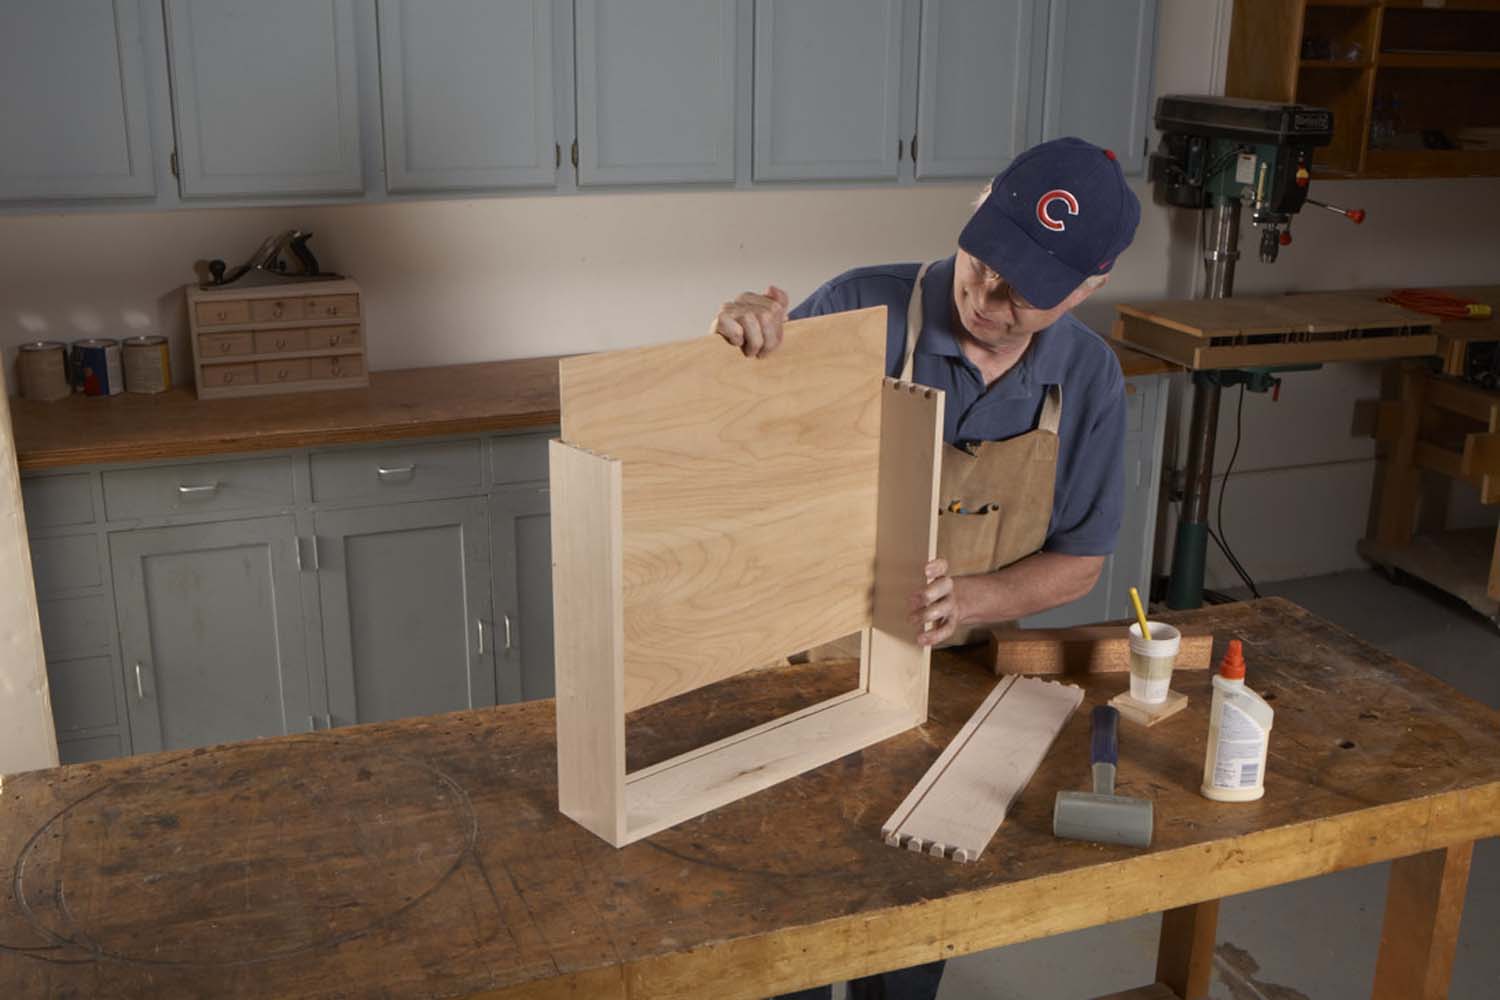
Photo 7. Glue the drawer together. Assemble the front and sides first, then slide in the bottom. Add the back last. If the joints are nice and tight, you won’t have to use clamps.
Glue the drawer together (Photo 7). You won’t need a lot of glue—just apply it to the sockets with a small brush. Keep a damp rag handy for cleaning up the squeeze-out on the outside of the drawer. Make the joints as flush as you can.
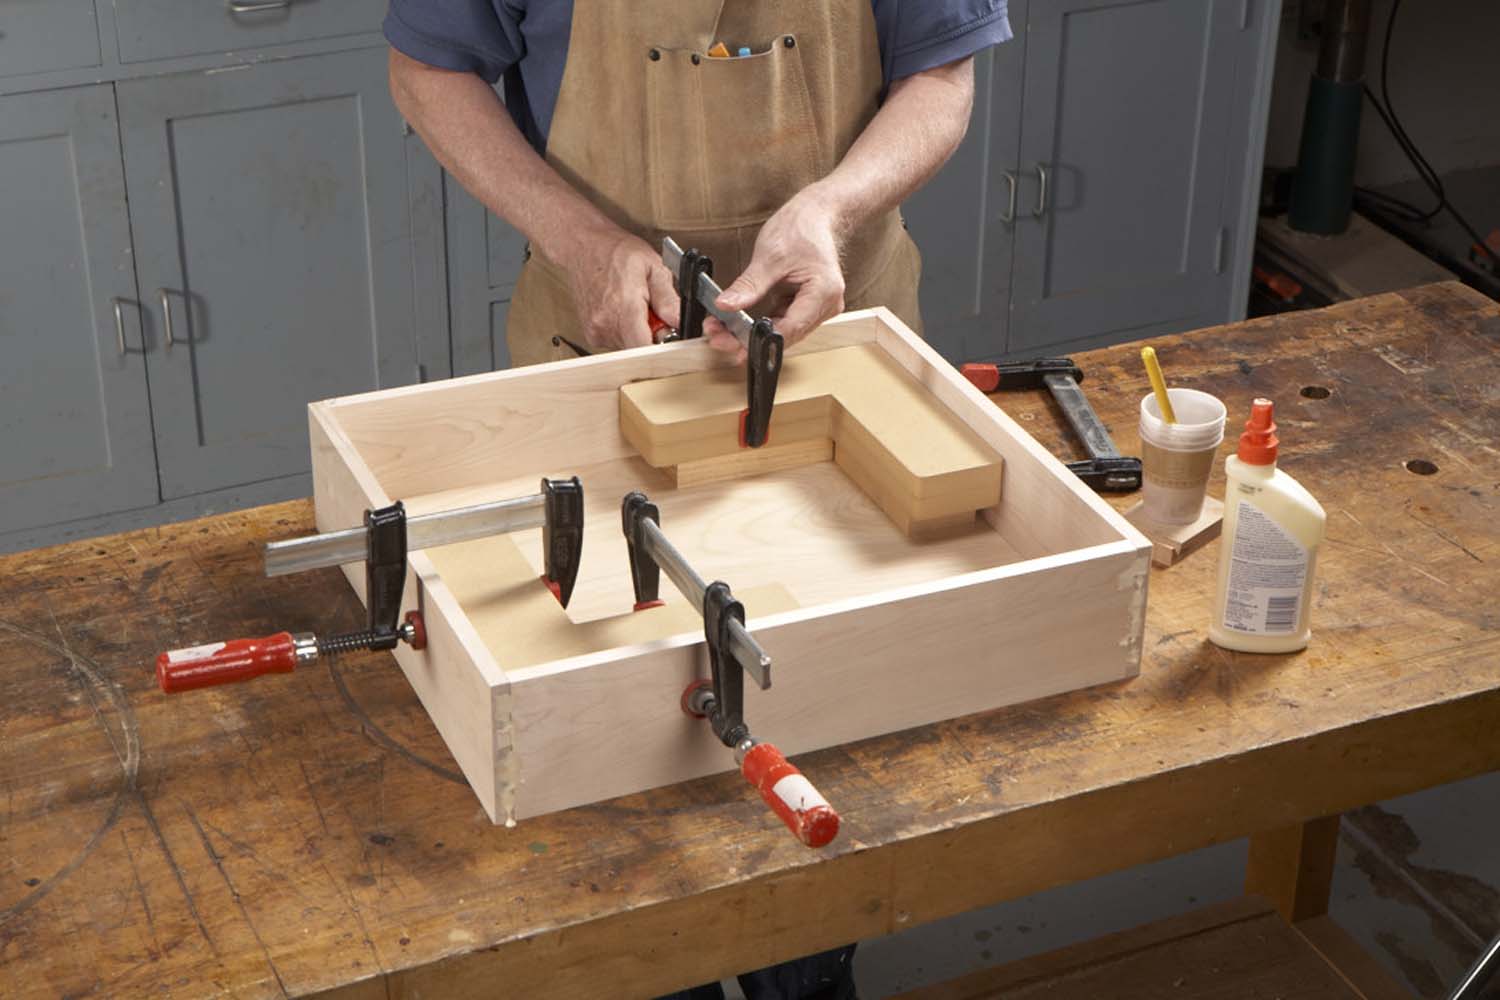
Photo 8. Square the drawer box by clamping large L-shaped blocks to opposite corners. These blocks are made from two layers of 3/4″ MDF.
After you add the last piece, make sure the drawer is square (Photo 8). You can measure from corner to corner to see how close you are, but the trick is bringing it in to square. L-shaped squaring blocks work quite well. After the glue dries, sand the joints flush.
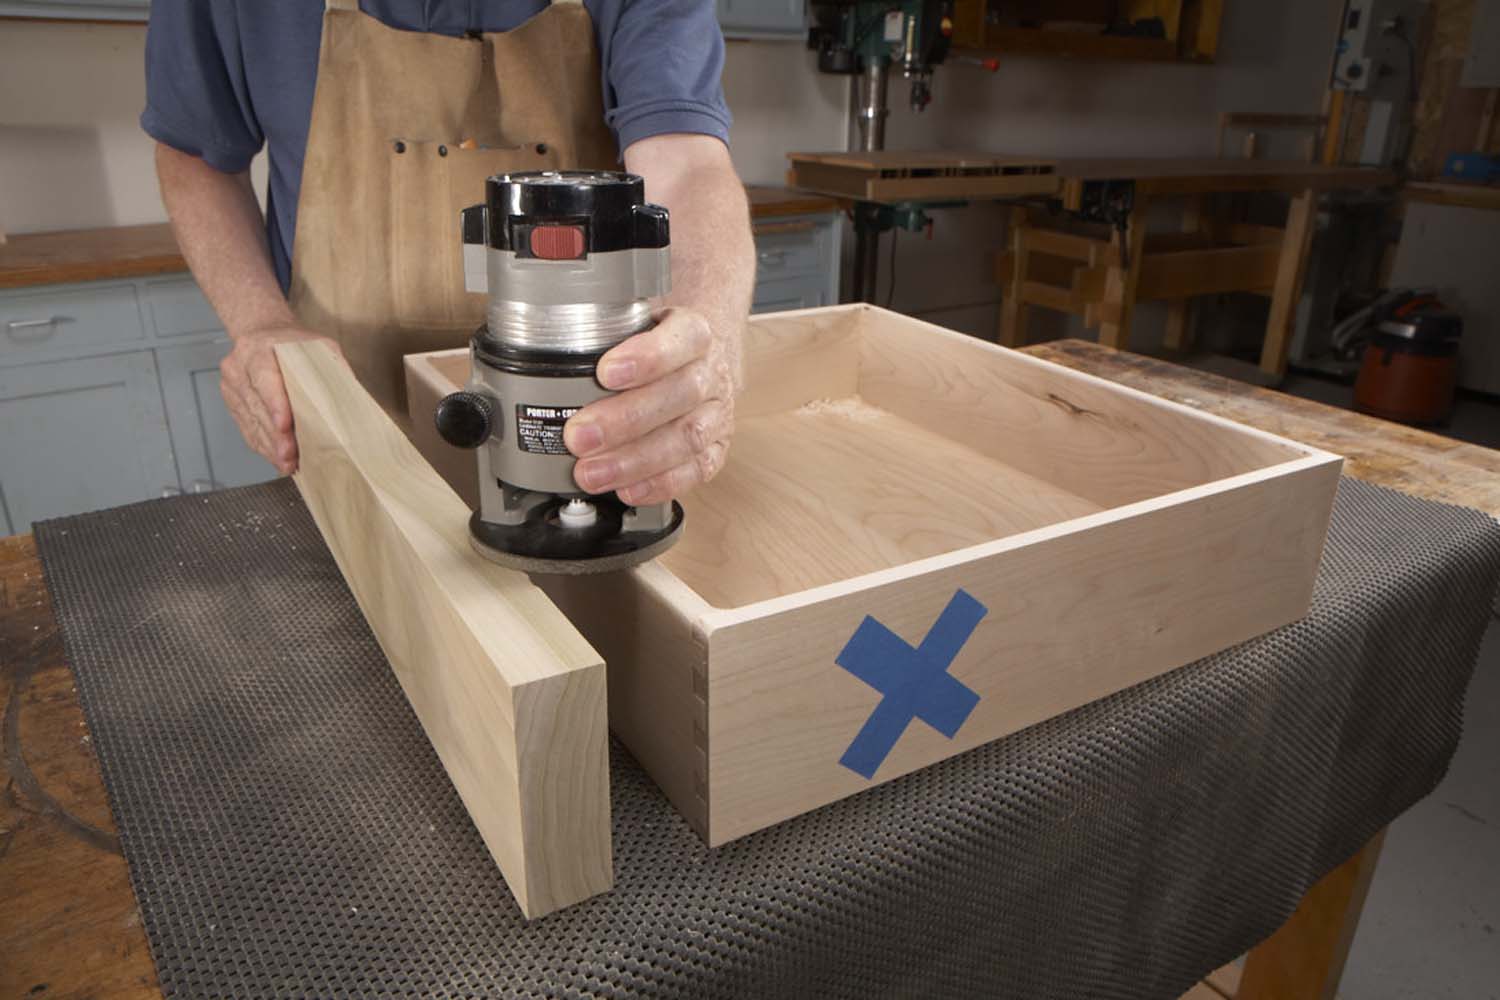
Photo 9. Round over all the edges of the drawer box—except for the front. Support the router with a thick scrap board that’s the same width as the box.
Lastly, soften the edges of the drawer box with a 1/8″ roundover bit (Photo 9). Before you start, put a big “X” on the front board—you don’t want to round the front edges of this piece, where the applied front goes. Balance the router by using a board that’s the same width as the drawer box. Use this piece to help rout both the inside and outside edges of each piece.
Here are some supplies and tools we find essential in our everyday work around the shop. We may receive a commission from sales referred by our links; however, we have carefully selected these products for their usefulness and quality.