We may receive a commission when you use our affiliate links. However, this does not impact our recommendations.
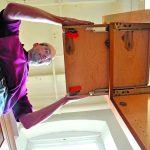
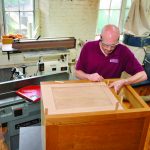
When you learn how to make cabinet doors, you will have mastered one of the basic skills in woodworking. Doors come in many variations—some have molded edges, arched tops or raised solid-wood panels—but to get started, it’s a good idea to start with a basic design: the tongue and groove, plywood-panel door.

We used two special bits to make this door. Both bits are adjustable to accommodate panels of different thickness.
To save setup time, we suggest using a set of adjustable bits . Bits that aren’t adjustable work fine, too, but require more trial and error cuts to make joints that fit tight.
Also in this series: Kitchen Cabinet Essentials • How to Make a Cabinet Drawer Box • How to Install A Cabinet Drawer • How to Make a Cabinet Door • How to Install a Cabinet Door • Prefinishing Plywood
Mill the Wood
Whether you purchase pre-milled wood for the doors, or mill the wood yourself, be certain that it is flat, straight and without twist. If the wood is warped in any way, you can’t make a door that’s flat, and if it’s not flat, it won’t hang properly. This may seem obvious, but it bears repeating—and applies to all the parts after they’re cut to final size, too.
Plan on making each door at least 1/8″ larger in length and width than its final size. You may need this margin to deal with a door opening that’s slightly out of square—or if the door itself is not square.
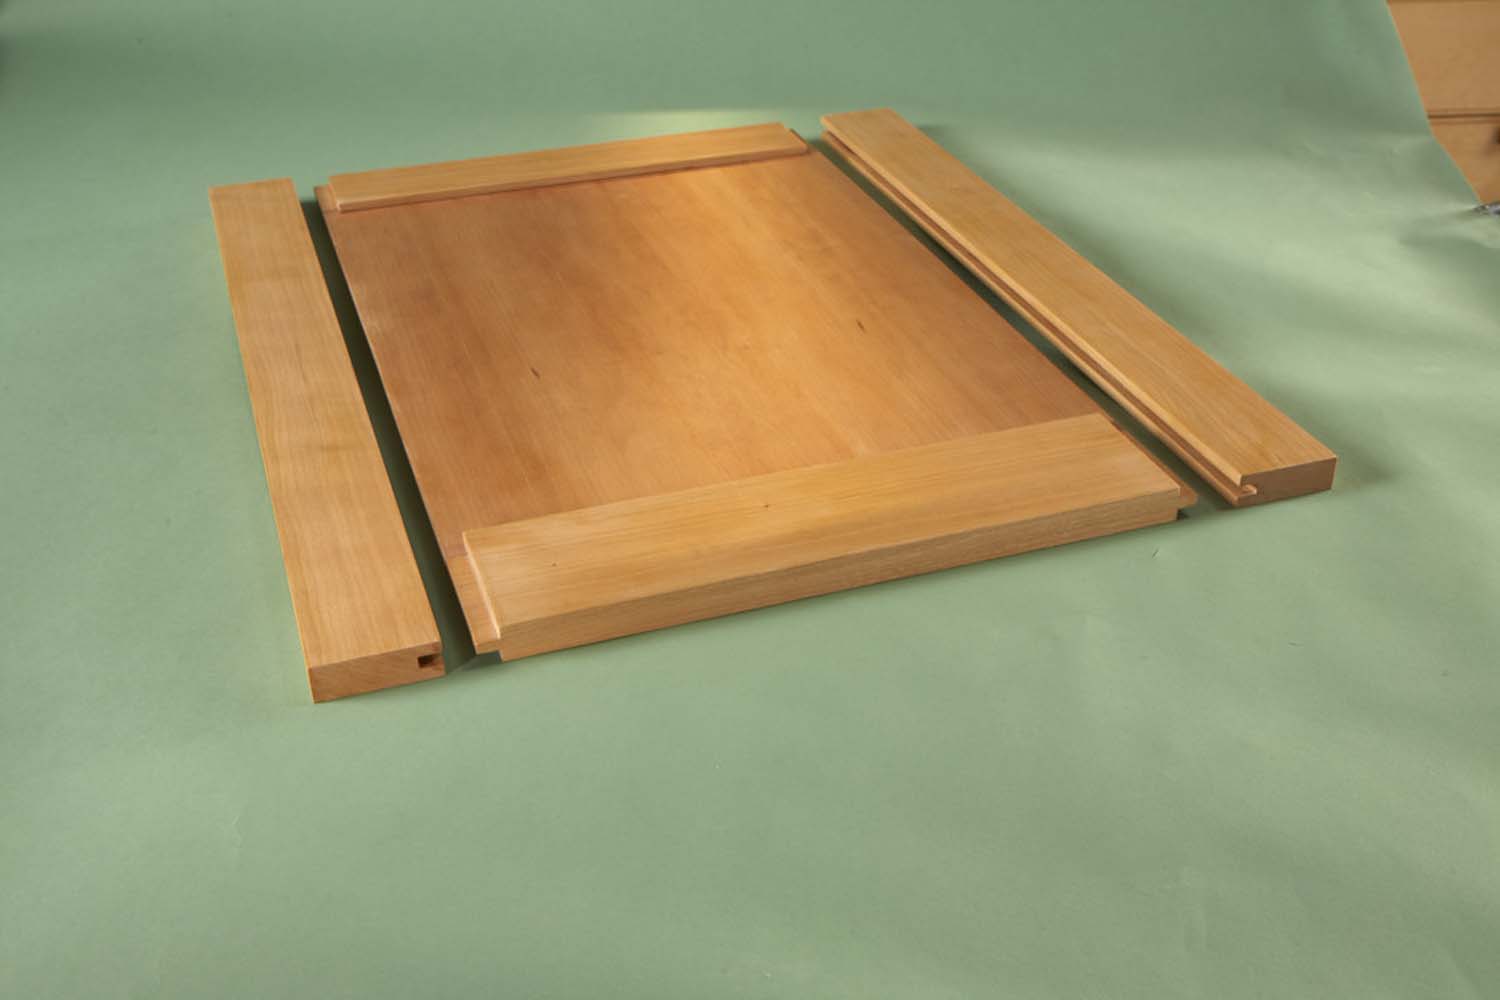
Mill all the pieces 3/4″ thick, rip them to width and cut them to length. (Be sure to add in the lengths of both tongues when you crosscut the rails. The tongues made by this router bit set are 3/8″ long.)
Set up the Groove Bit
When you build a tongue and groove door, you cut the grooves first, then the tongues. The place to start, then, is to figure out exactly how wide the grooves should be. They should be just wide enough to fit the plywood you’ll be using for the door panel, but no more.
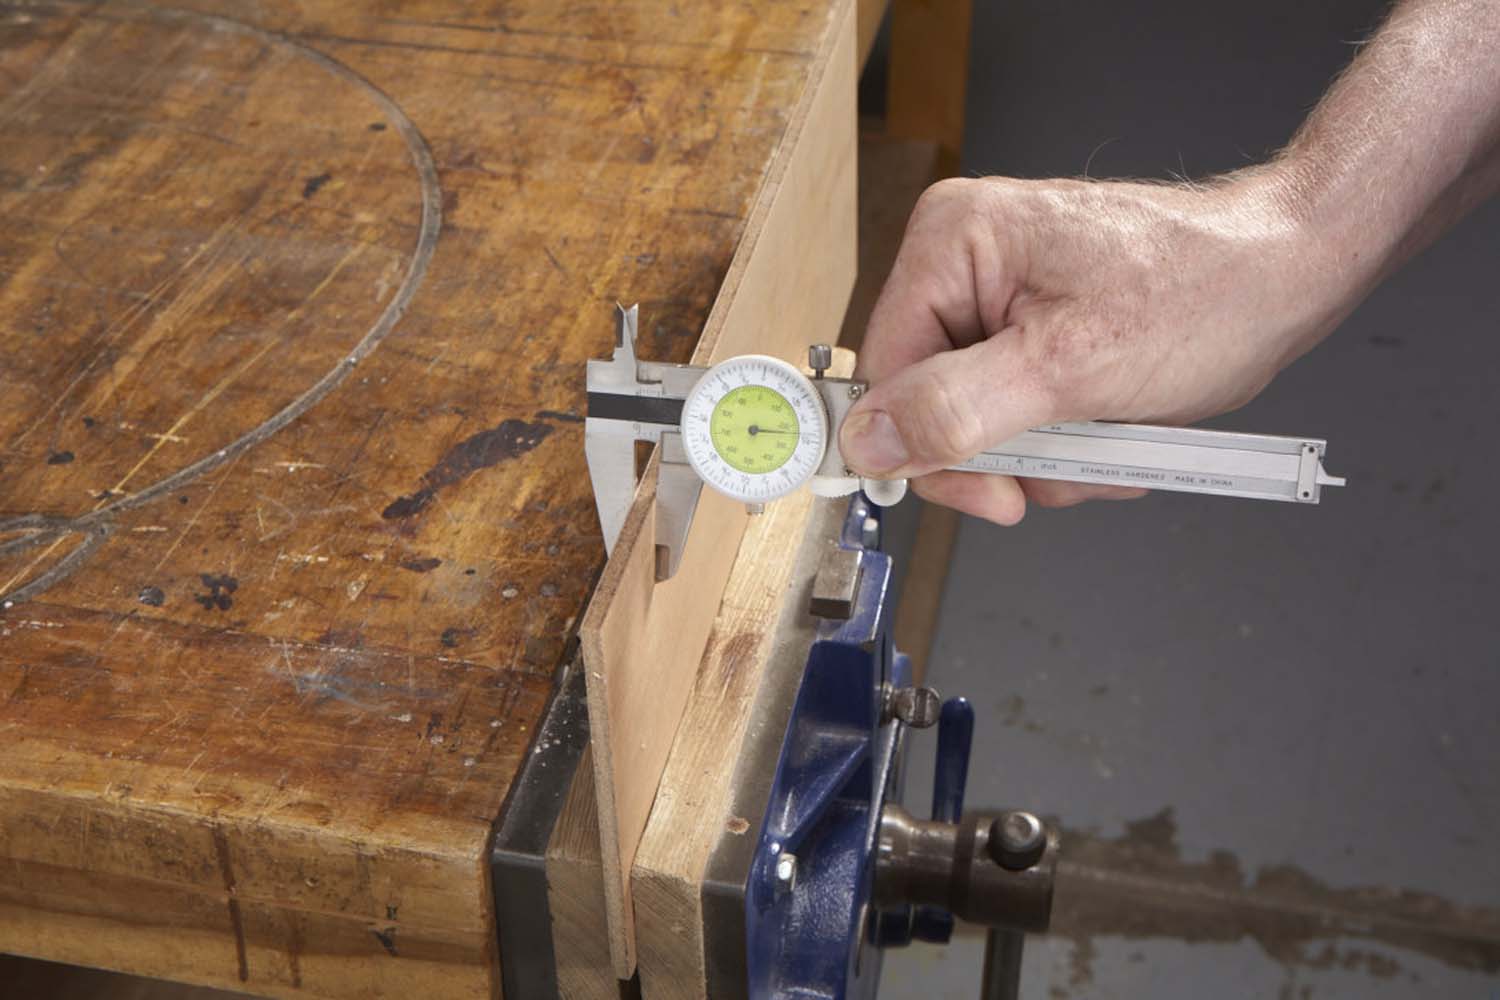
Photo 1. Begin by measuring the exact thickness of the 1/4″ plywood you will use for the door’s panel. This plywood is 1/64″ undersized, which is typical.
As you probably know, 1/4″ plywood really isn’t 1/4″ thick. It’s thinner, and the exact thickness varies from sheet to sheet. To measure your plywood, cut a piece that is at least 1″ wider and longer than you’ll need for the door panel. Be sure to remove at least 1/4″ from the factory edges—often plywood is extra thin here. Measure the plywood’s thickness with a caliper (Photo 1).
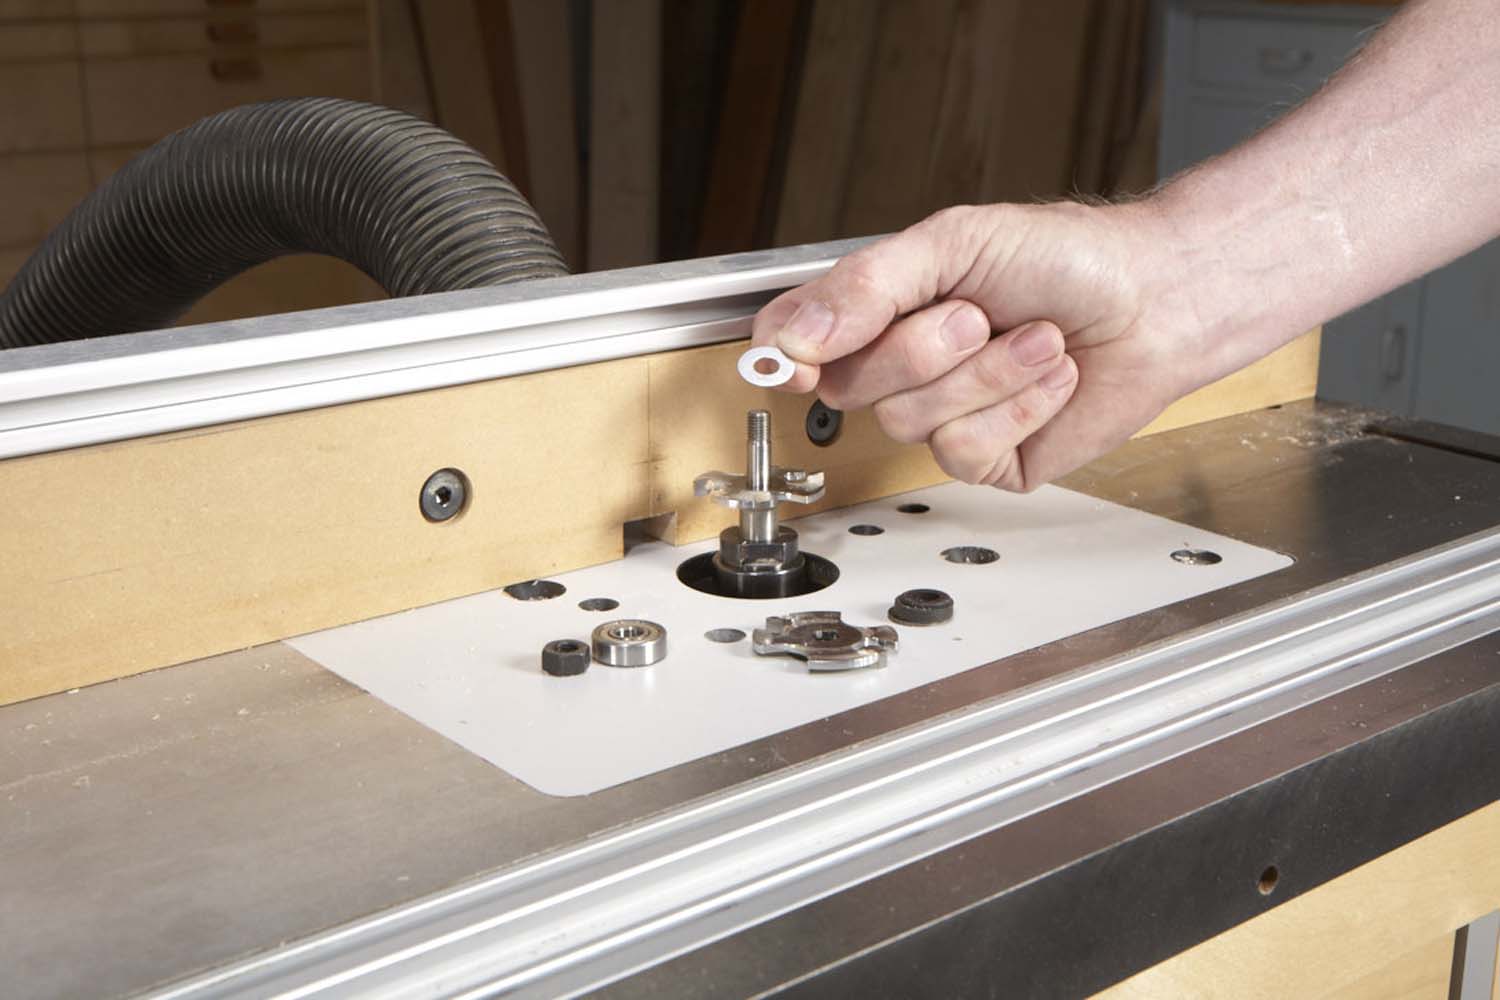
Photo 2. Take apart the two-piece groove bit. Add a washer of the appropriate thickness to make a groove that will fit the plywood.
Install the groove bit in your router table and tighten it in the router’s collet. Use a wrench to remove the nut on top of the bit. Remove the stack of washers under the nut, the bearing and the top cutter. Place one or more washers on top of the lower cutter (Photo 2). (The total thickness of these spacers will depend on the thickness of your plywood—refer to the chart that comes with the router bits.) Reassemble the bit.
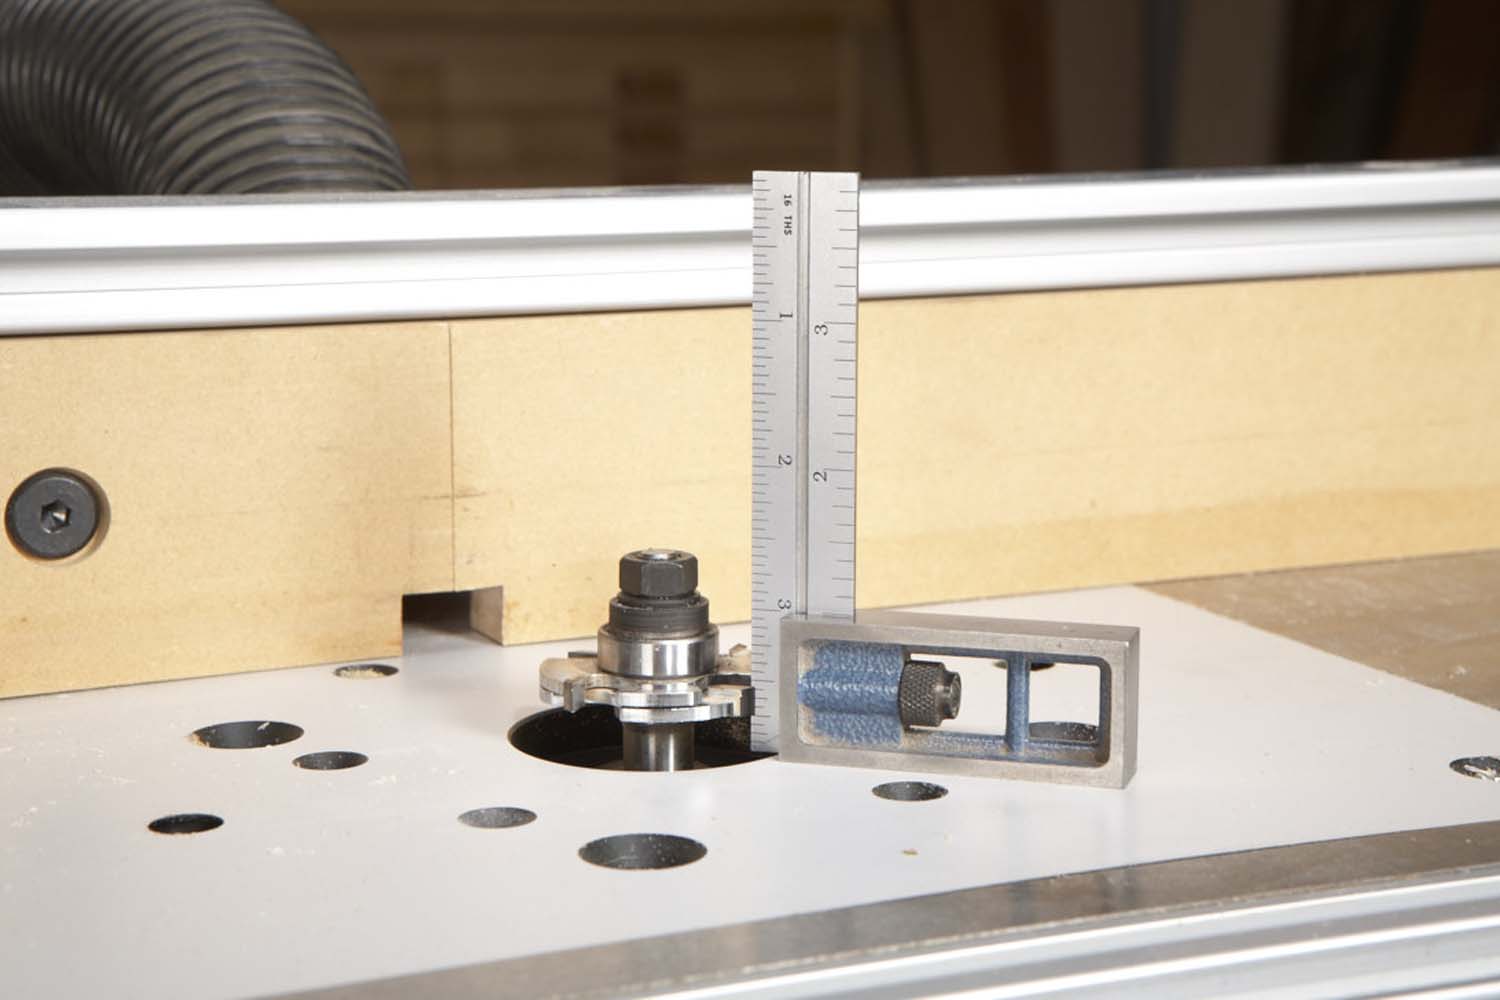
Photo 3. Position the bit so the lower cutter is 1/4″ above the router table.
Position the bit so the lower cutter is 1/4″ above the router table (Photo 3). Position the fence so it’s flush with the bit’s bearing (Photo 4).
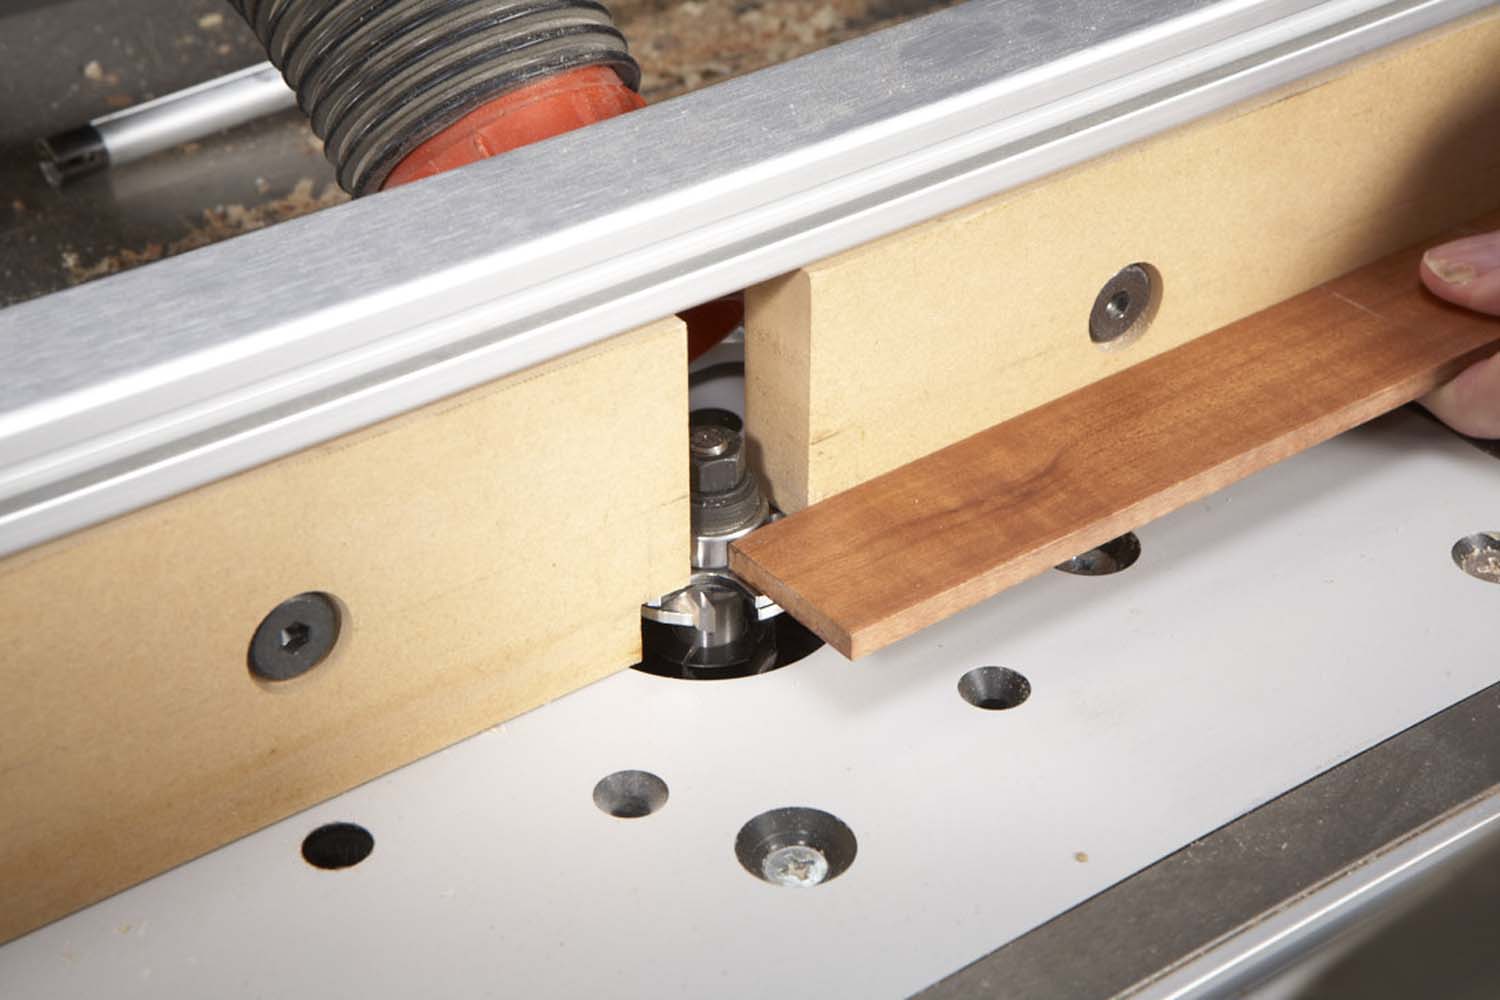
Photo 4. Use a straightedge to position the fence flush with the bit’s bearing.
Mark the Stiles and Rails
It’s essential to mark all the pieces of your door in a way that leaves no room for error. You’ll need to indicate the face side of each piece, the inside edge of each piece and distinguish the left stile from the right stile.
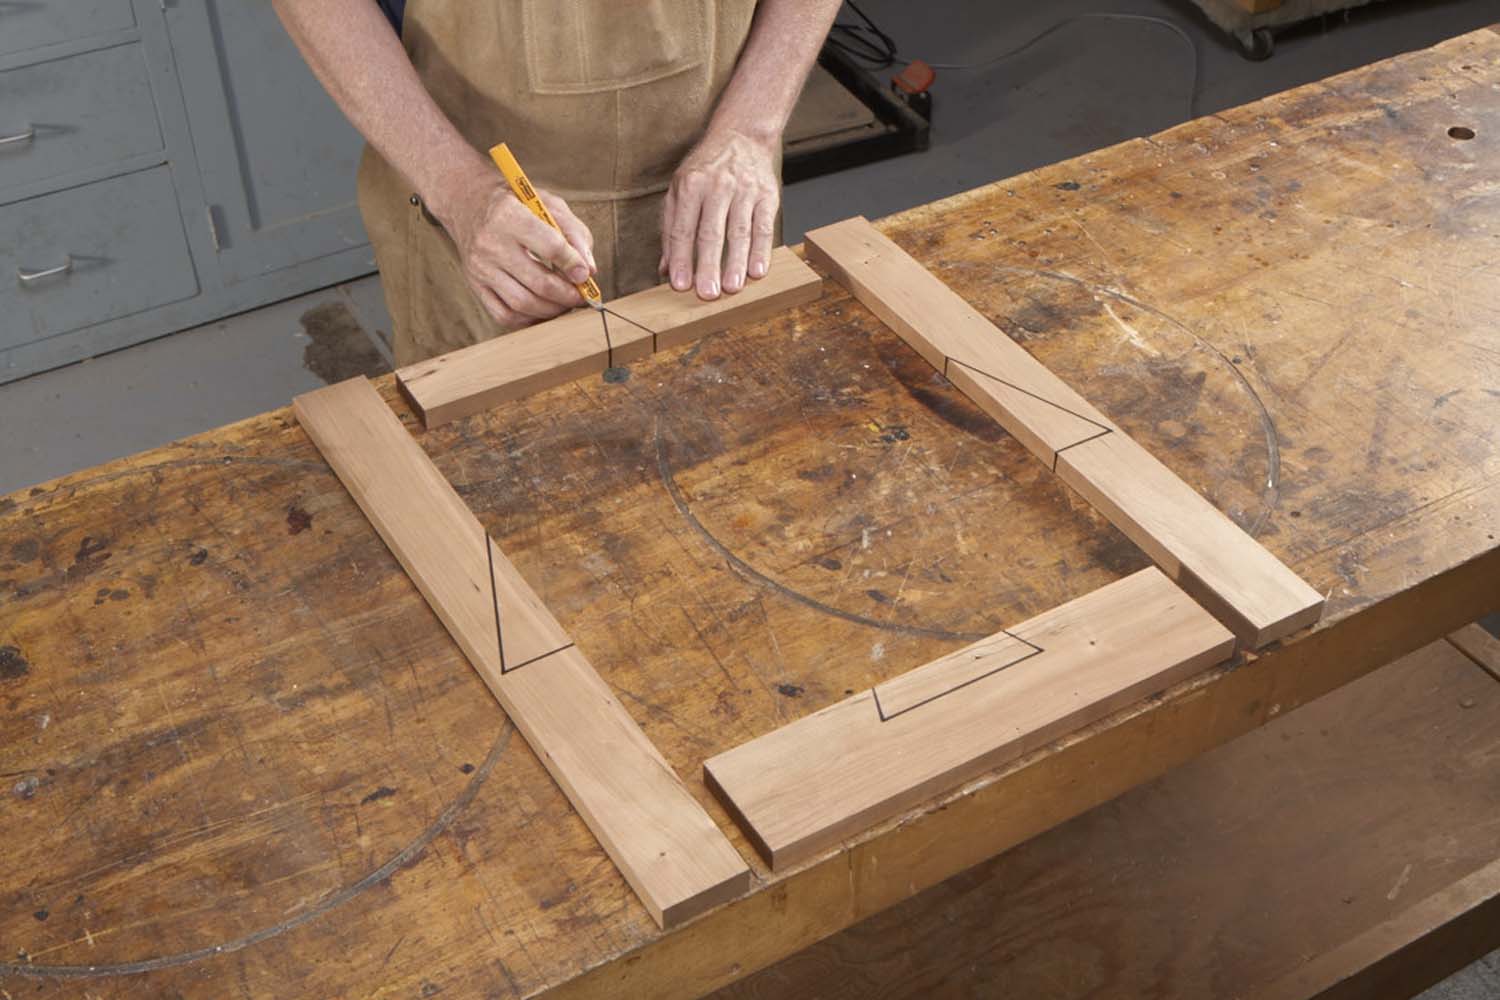
Photo 5. Mark the stiles and rails with a cabinetmaker’s triangle. Mark the face and inside edge of each piece.
Cabinetmakers figured out a system for doing this a long time ago (Photo 5). Mark each piece with one portion of a triangle. Extend the face marks down the inside edge of each piece.
Rout the Grooves
For safety, install a featherboard (see Sources) or a guard on your router table. A featherboard is preferable because it presses the workpiece tight to the table, ensuring a straight groove.
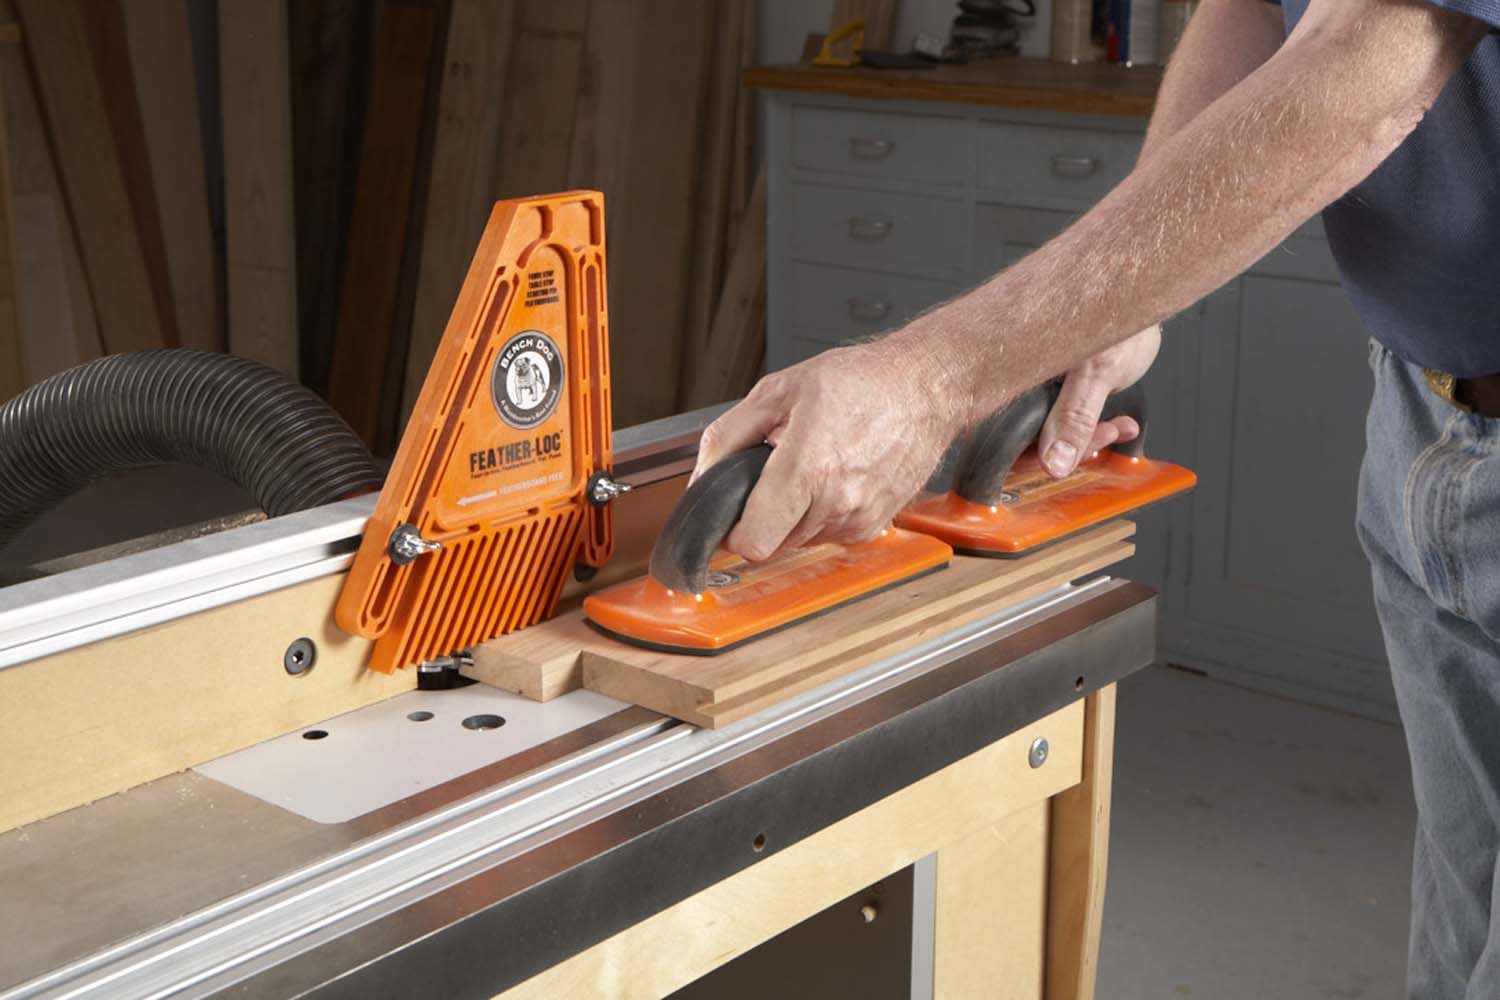
Photo 6. Rout grooves in the stiles and rails, face side down. Place two pieces side by side to make it easier to balance a push pad on the wood.
The safest way to feed the stiles and rails across the router table is to use a pair of push pads (Photo 6). When you cut the grooves, be sure that the face sides are down, and the inside edges are against the fence.
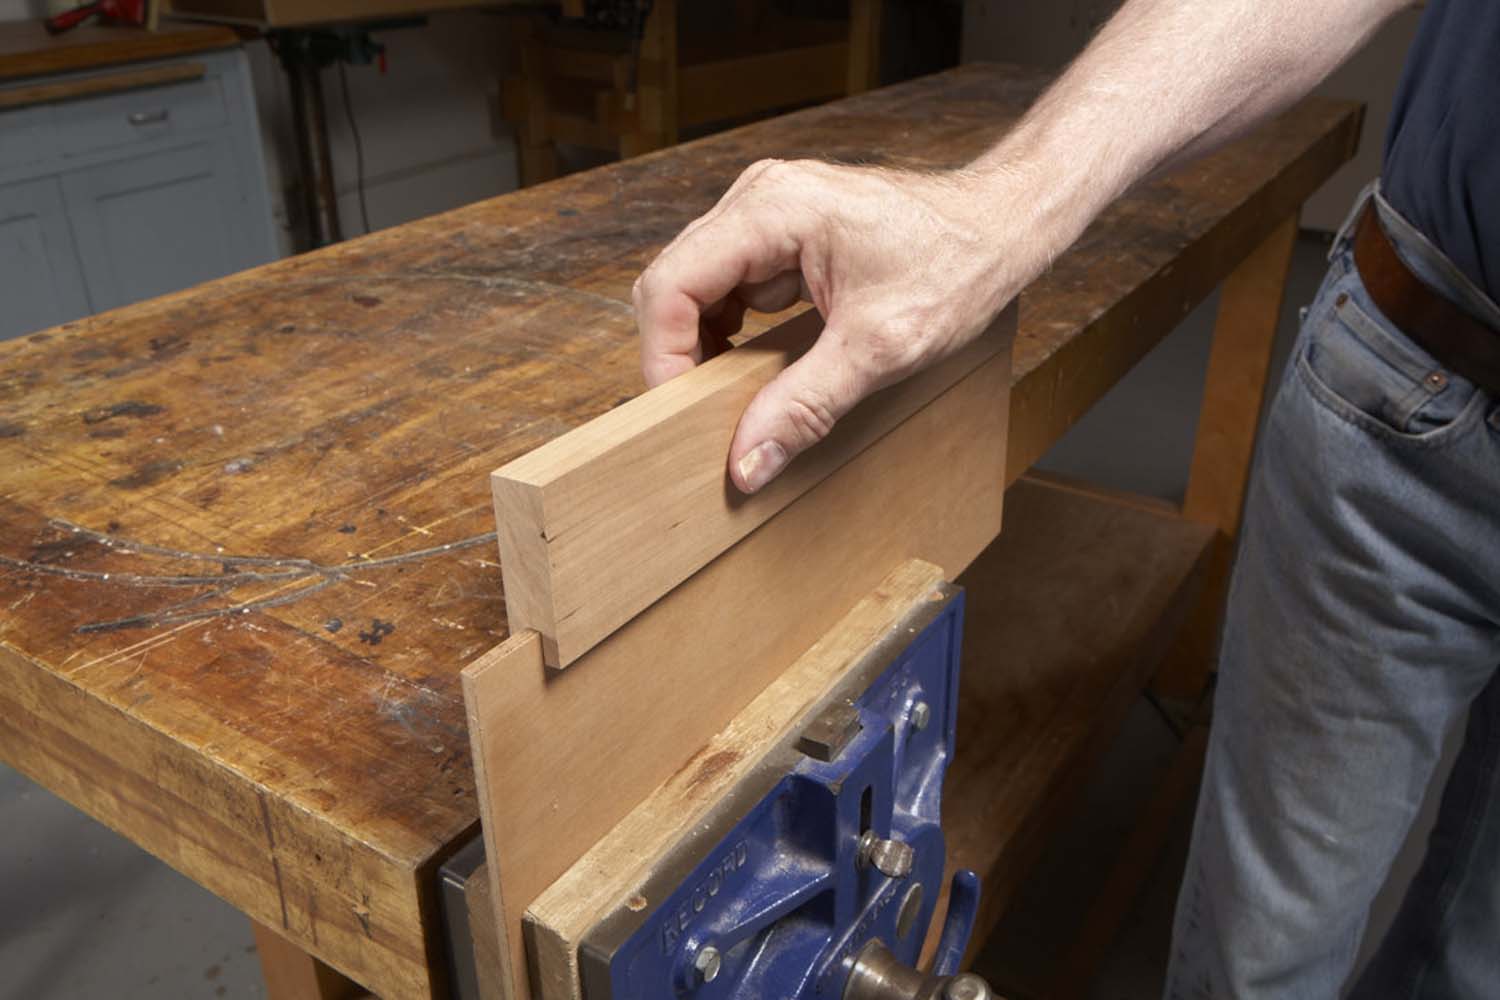
Photo 7. Test the groove’s fit. The pieces you routed should slide easily along the plywood.
It’s a good idea to rout a test piece first to be sure that the groove is the correct width (Photo 7). When you assemble the door, the panel will have to slide down the groove, so the fit can’t be too tight. You’ll also be gluing the panel into the grooves, so it can’t be too loose.
Rout the Tongues
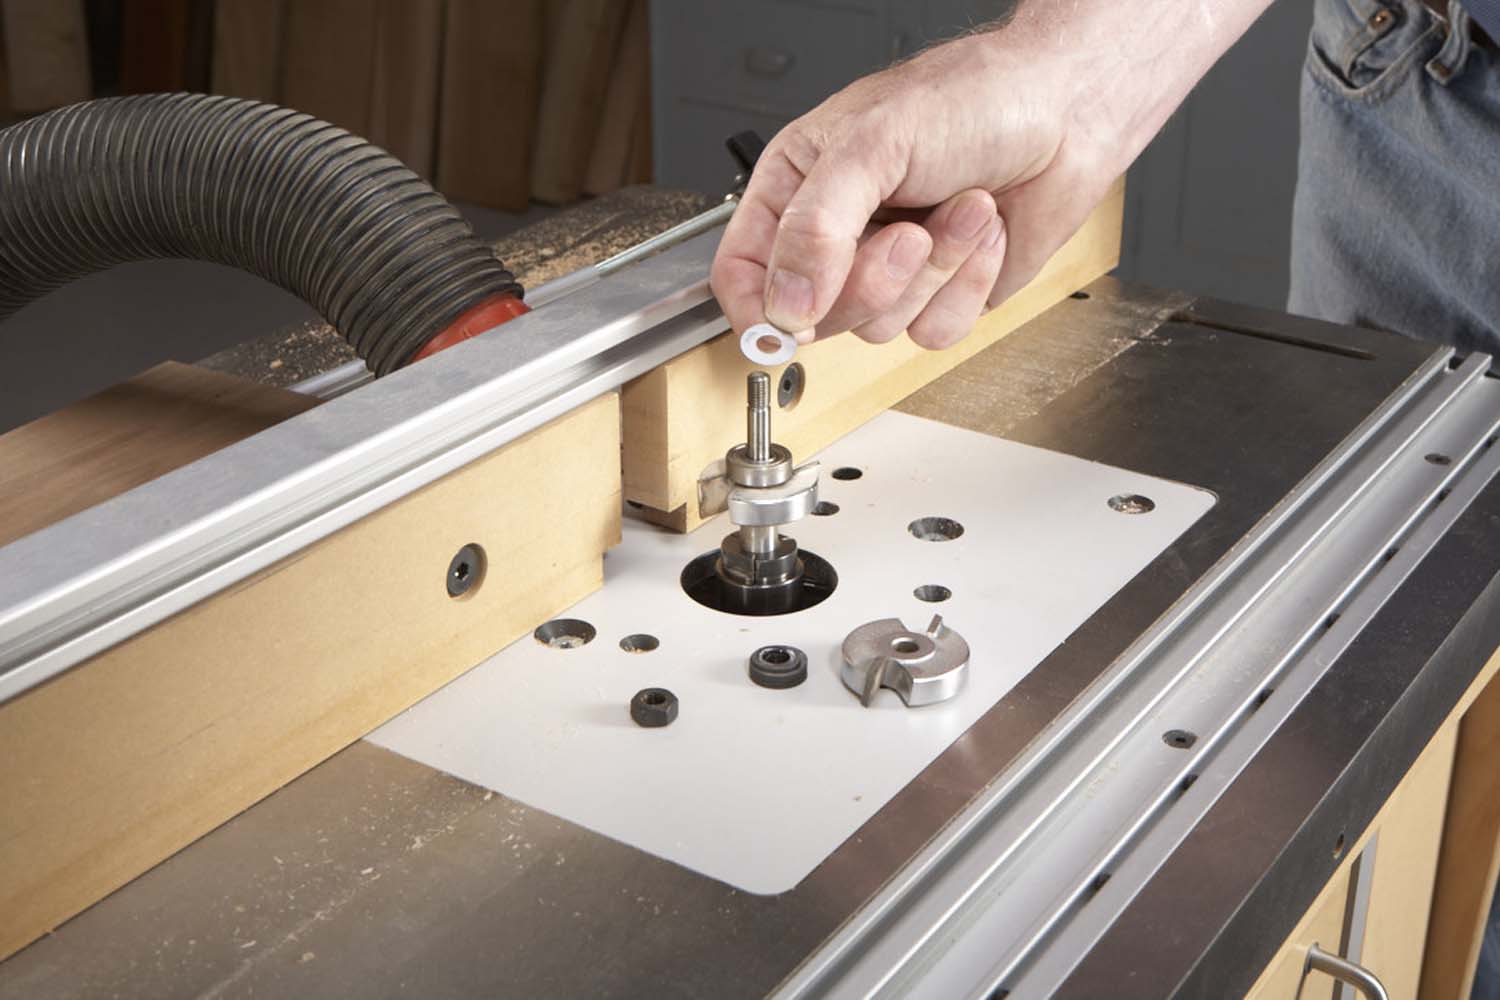
Photo 8. Take apart the tongue bit and add a washer of the same thickness that you added to the groove bit.
Remove the groove bit from the router table and install the tongue bit. Remove the nut, the stack of washers and top cutter from the bit. Place a washer or two of the same thickness you used with the groove bit on top of the bearing (Photo 8). That’s all it takes to make a tongue that will precisely fit the groove.
You’ll need a coping sled for routing the tongues. There are many types of coping sleds (you can buy one or make one yourself), but they all perform the same task. A coping sled holds the workpiece steady, like a miter gauge. The body of the sled rides on the router table; the rail sits on top of the sled.
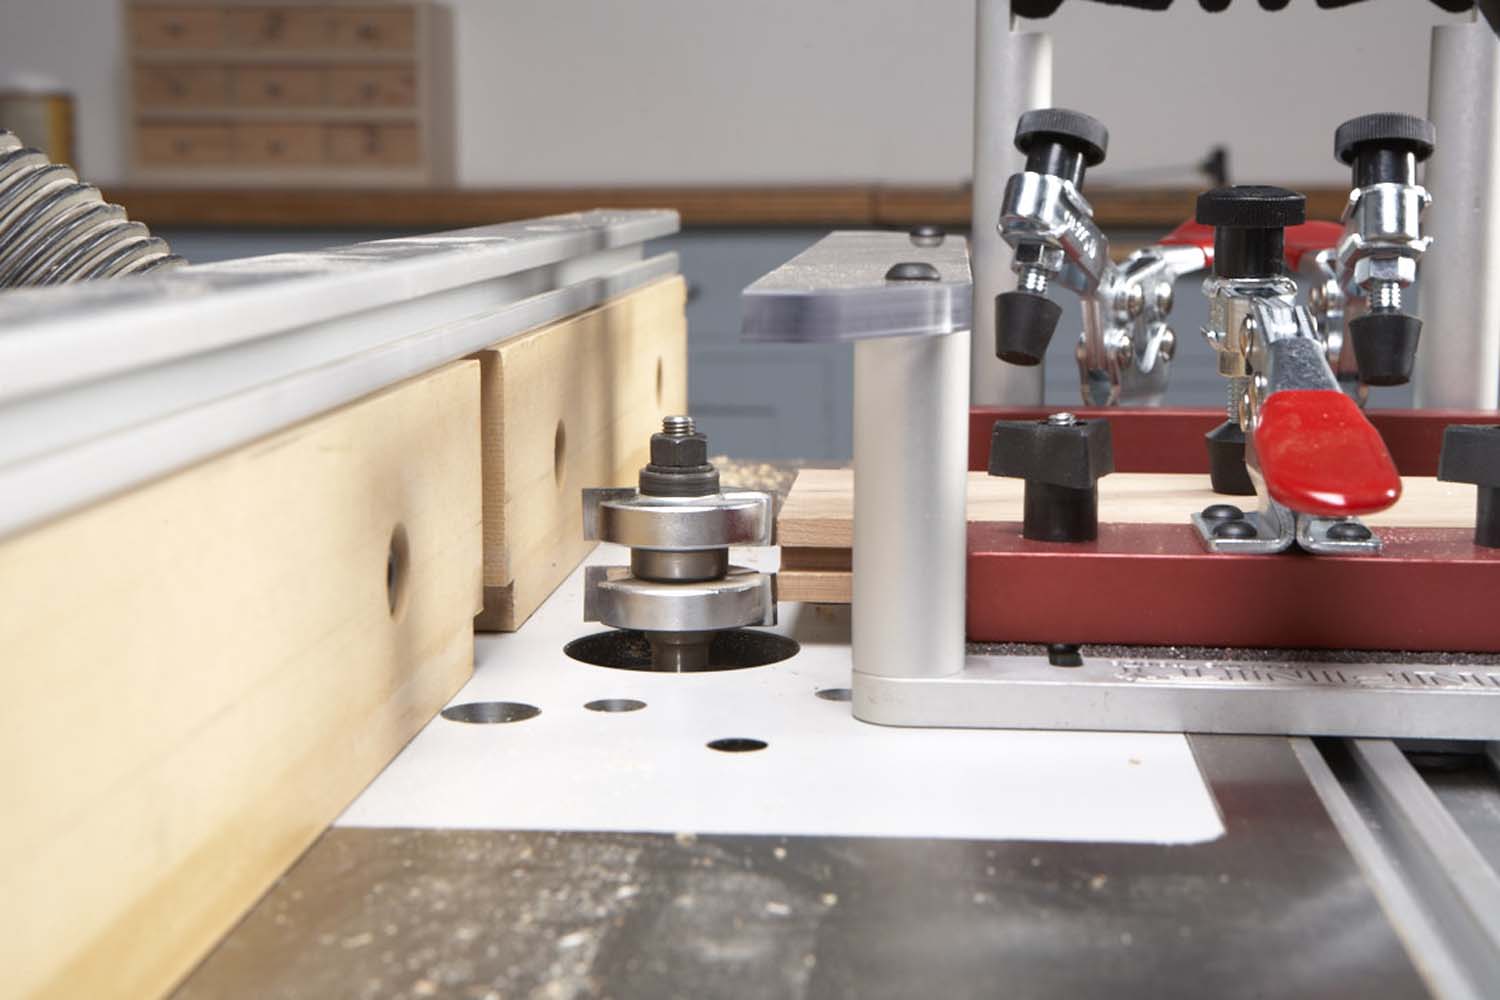
Photo 9. Position the bit so the cutters exactly line up with a groove. The workpiece sits face side down in a coping sled.
To set the tongue bit at the proper height, place a rail on the sled face down. Butt the rail up to the bit, then align the bit with the groove in the rail (Photo 9). It pays to be fussy about this setting, so it’s best to test it on some scrap pieces before you rout the rails for your door.
We used a top-of-the-line coping sled for this article. It has one unusual feature—it runs on an optional miter bar, like a miter gauge. This prevents the sled from wiggling as you cut a tongue. That’s an important benefit, because this cut must be absolutely straight to make a tight joint. Of course, your router table must have a miter slot to take advantage of this feature.
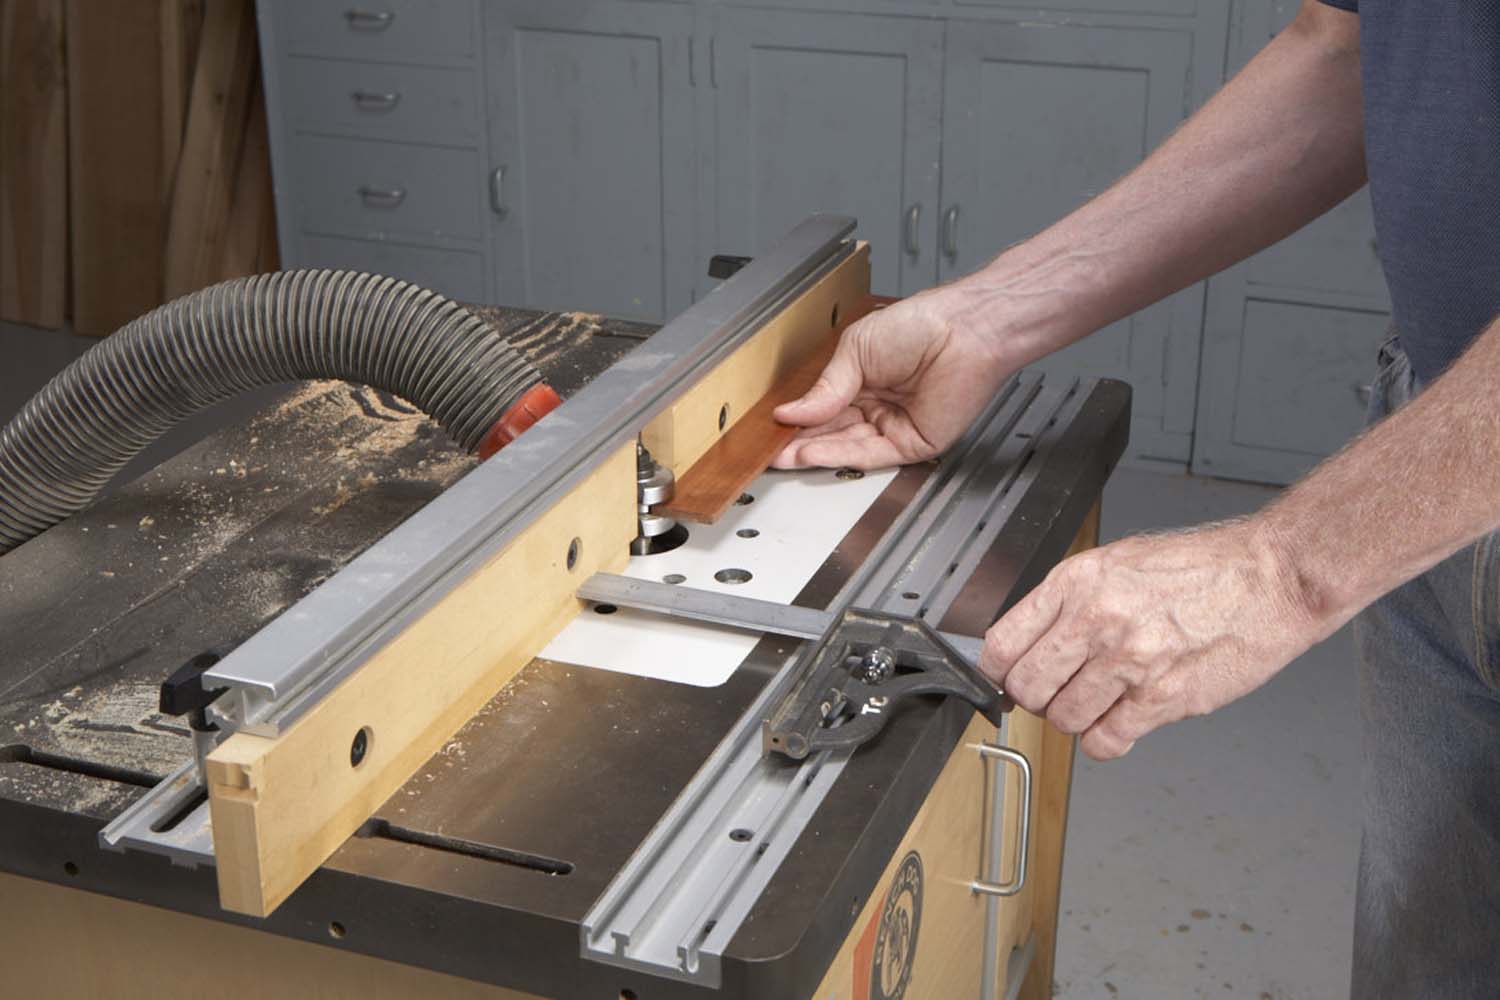
Photo 10. The coping sled we’ll use runs in the miter slot, so the router table’s fence must be parallel to the slot. Position the fence flush with the bit’s bearing.
Setting the router table’s fence for this type of coping sled is a bit more complicated than normal (Photo 10). First, the fence must be in line with the bit’s bearing—this applies to all sleds. Second, the fence must be parallel to the miter slot—this is not necessary for a sled without a miter bar. To make the fence parallel, position it flush with the bit first, but don’t tighten it down. Place a combination square in the miter slot opposite the bit and extend the square’s blade to touch the fence. Lock the blade, then slide the square along the slot, reposition the fence as needed, double-check everything and tighten the fence.
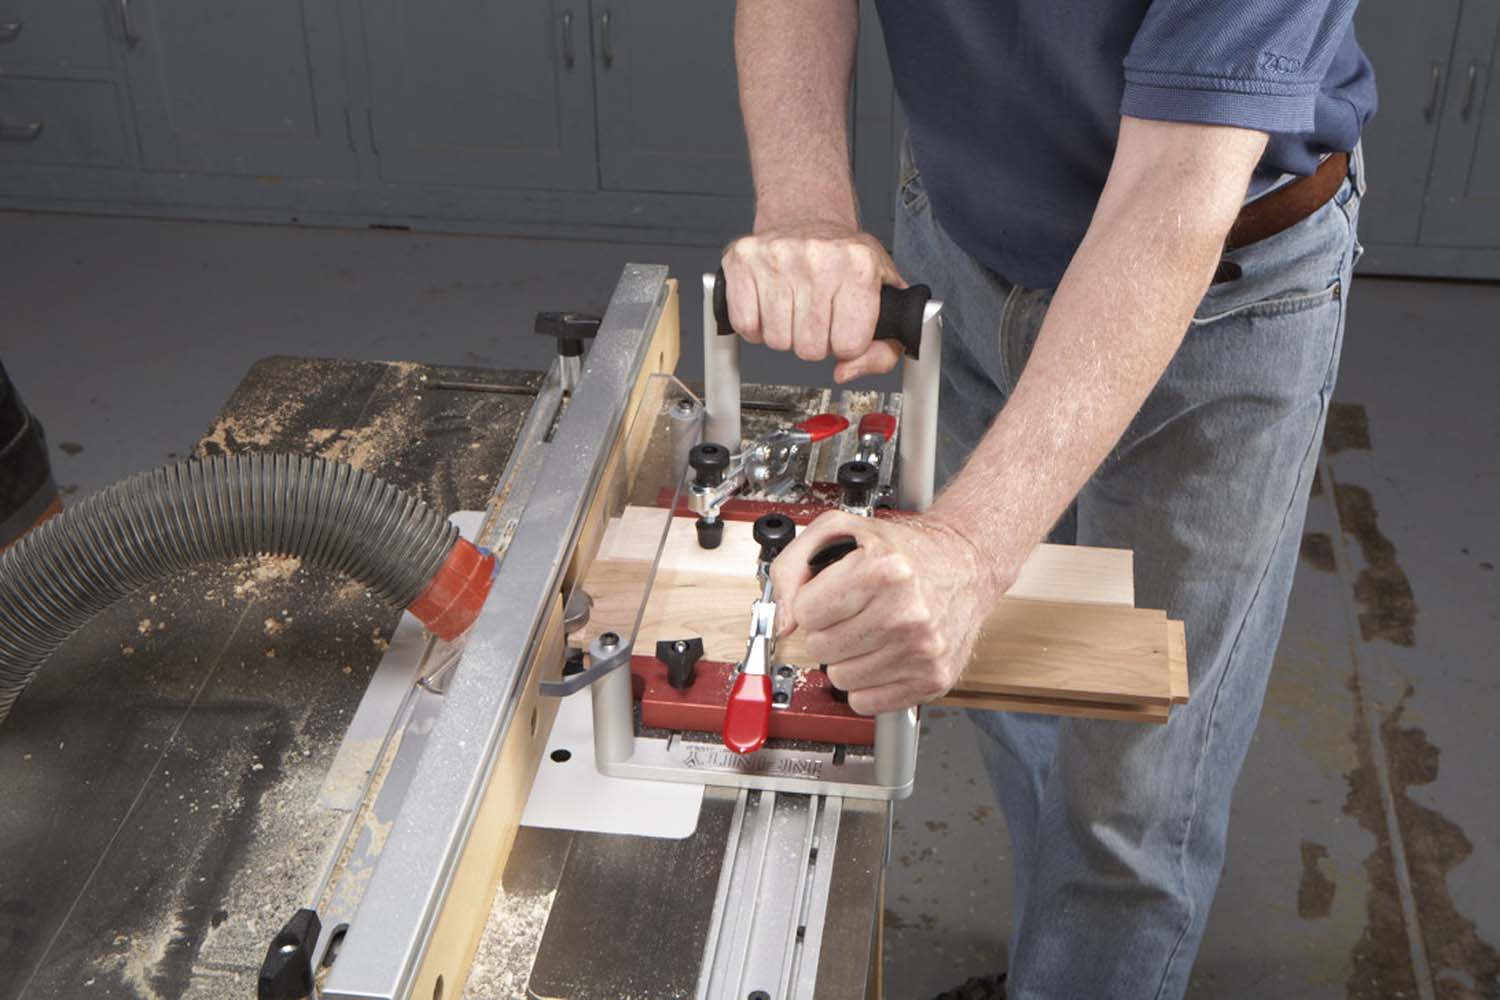
Photo 11. Rout tongues on the ends of both rails, face side down. Use a backer board to prevent chip-out.
Rout tongues on the ends of both rails (Photo 11). Be sure that the face sides are down. Test the joint’s fit (Photo 12). The tongue will automatically fit the groove, but if the face sides aren’t flush, adjust the height of the tongue bit.
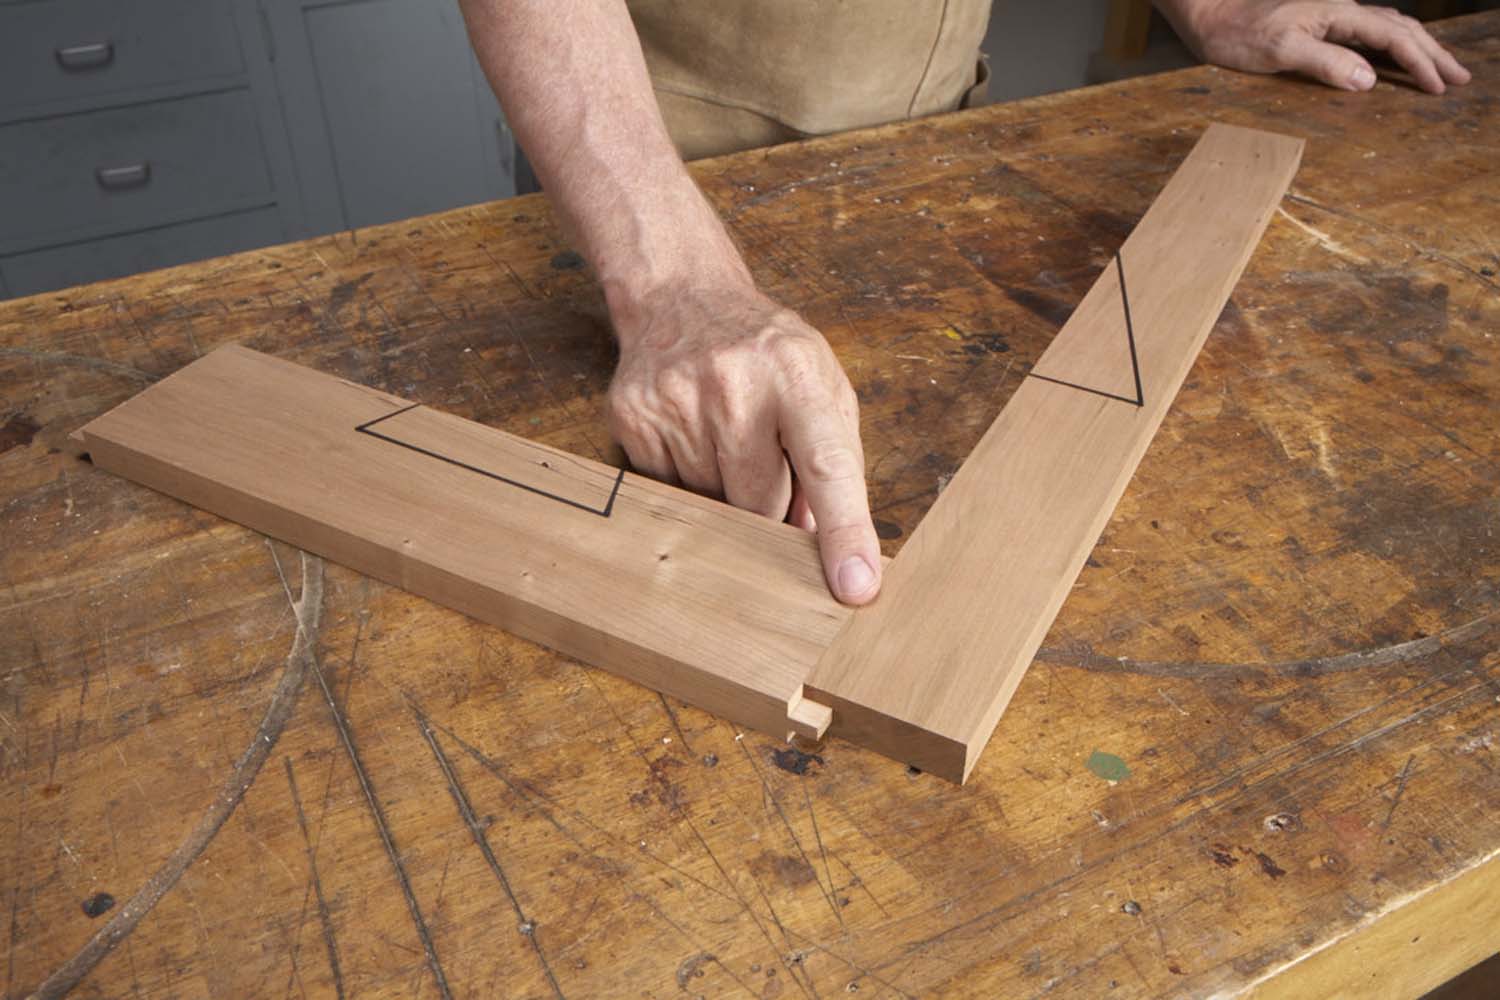
Photo 12. Test the joint. If the tongue bit is the correct height, the rail and stile should be flush. The tongue automatically fits the groove.
Size the Door Panel
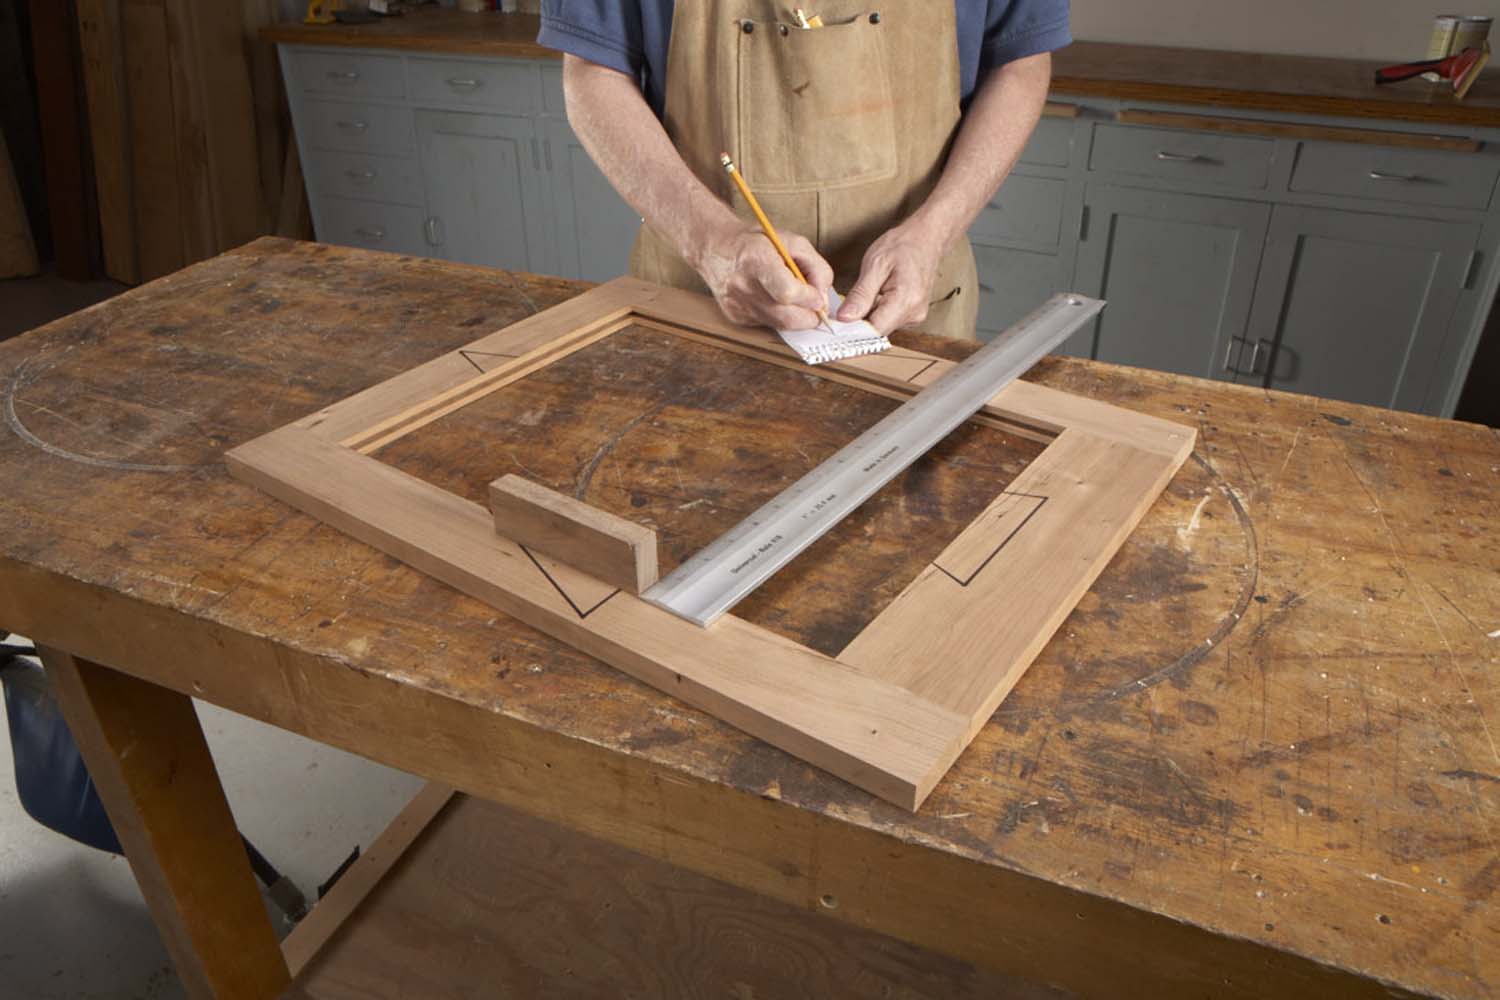
Photo 13. Measure the distance between the rails and stiles to size the door panel. The block stands in for the depth of two grooves less 1/16″, for clearance.
Assemble the door, without glue, and measure the size of the opening in both directions (Photo 13). To size the door panel, you’ll add to these measurements the depth of both grooves (3/8″ each) and subtract 1/16″, for clearance.
It’s all too easy to make a math error, so here’s an alternative. Make a block whose thickness is the sum of the groove and clearance numbers (in this case, 11/16″). Place the block on the door when you measure the opening and you’ll get an instant reading for the panel’s size, without any arithmetic.
Cut the door panel to size. Ease the edges and corners with sandpaper and sand both sides. In addition, sand the inside edges of the rails. Sand the inside edges of the stiles, too, but stay away from the portions that will butt the rails.
Glue the Door
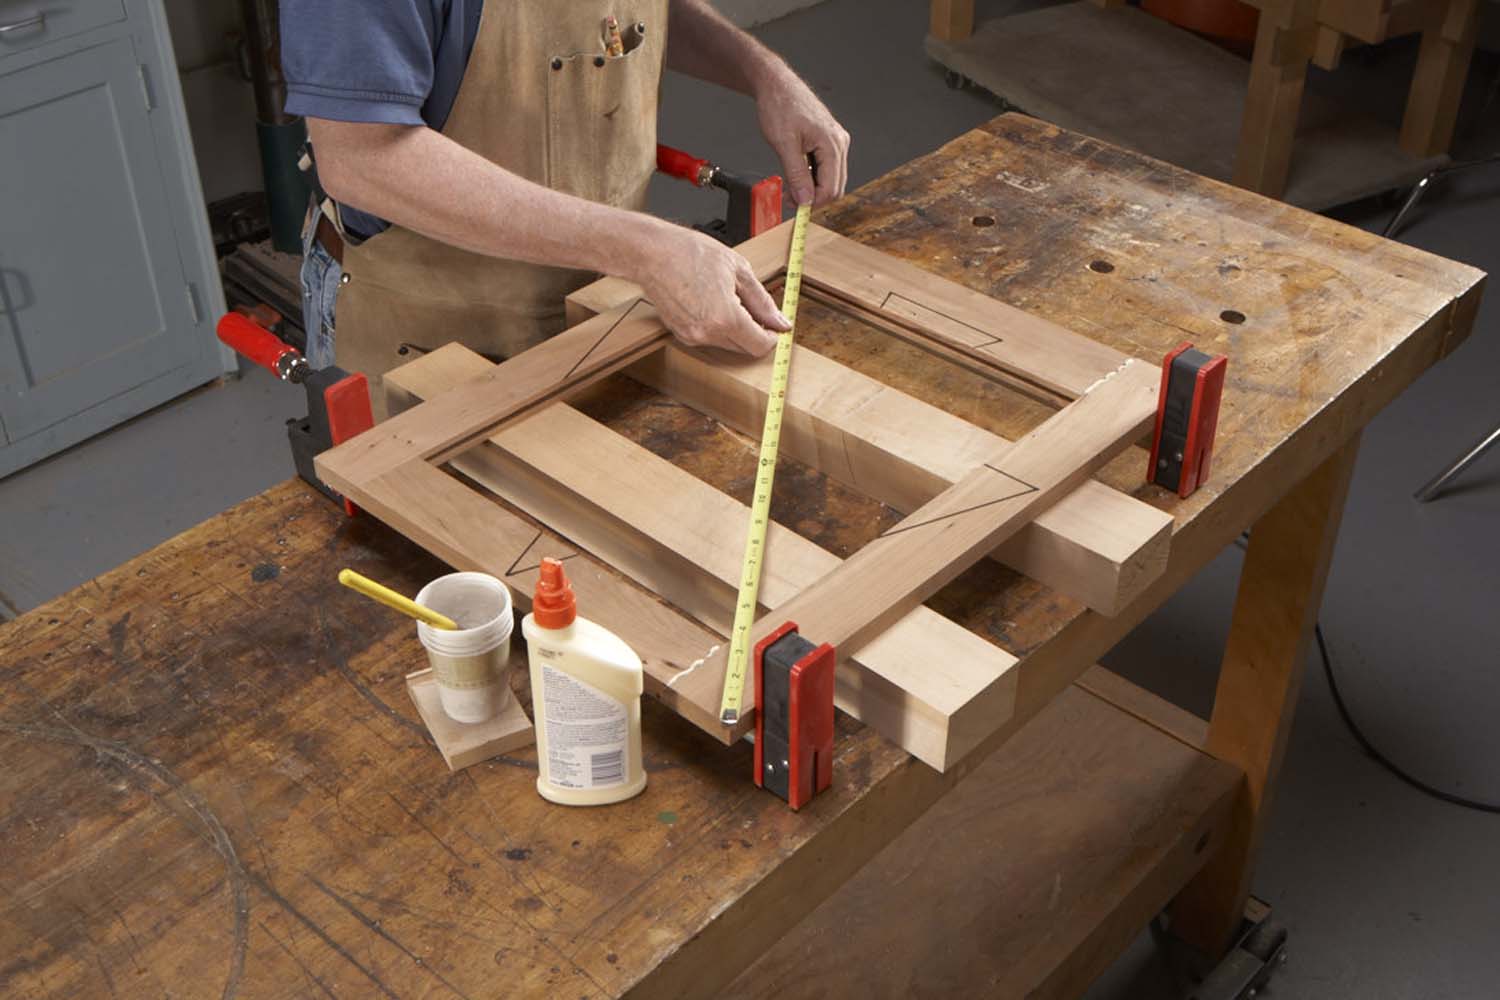
Photo 14. Glue the rails to just one stile. Make sure the door is square by measuring from corner to corner, both ways.
Aligning the joints side to side is a bit tricky, so it’s a good idea to glue the door in two stages. First, glue the rails to one of the stiles (Photo 14). Make sure the outer sides of the rails are flush with the ends of the stiles.
Put the other rail in place (without glue!), clamp and measure from corner to corner, both ways. If the measurements aren’t identical, the door isn’t square. To bring the door into square, skew one or both clamps a little bit and measure again. Clean off the excess glue and set the door aside for an hour or so.
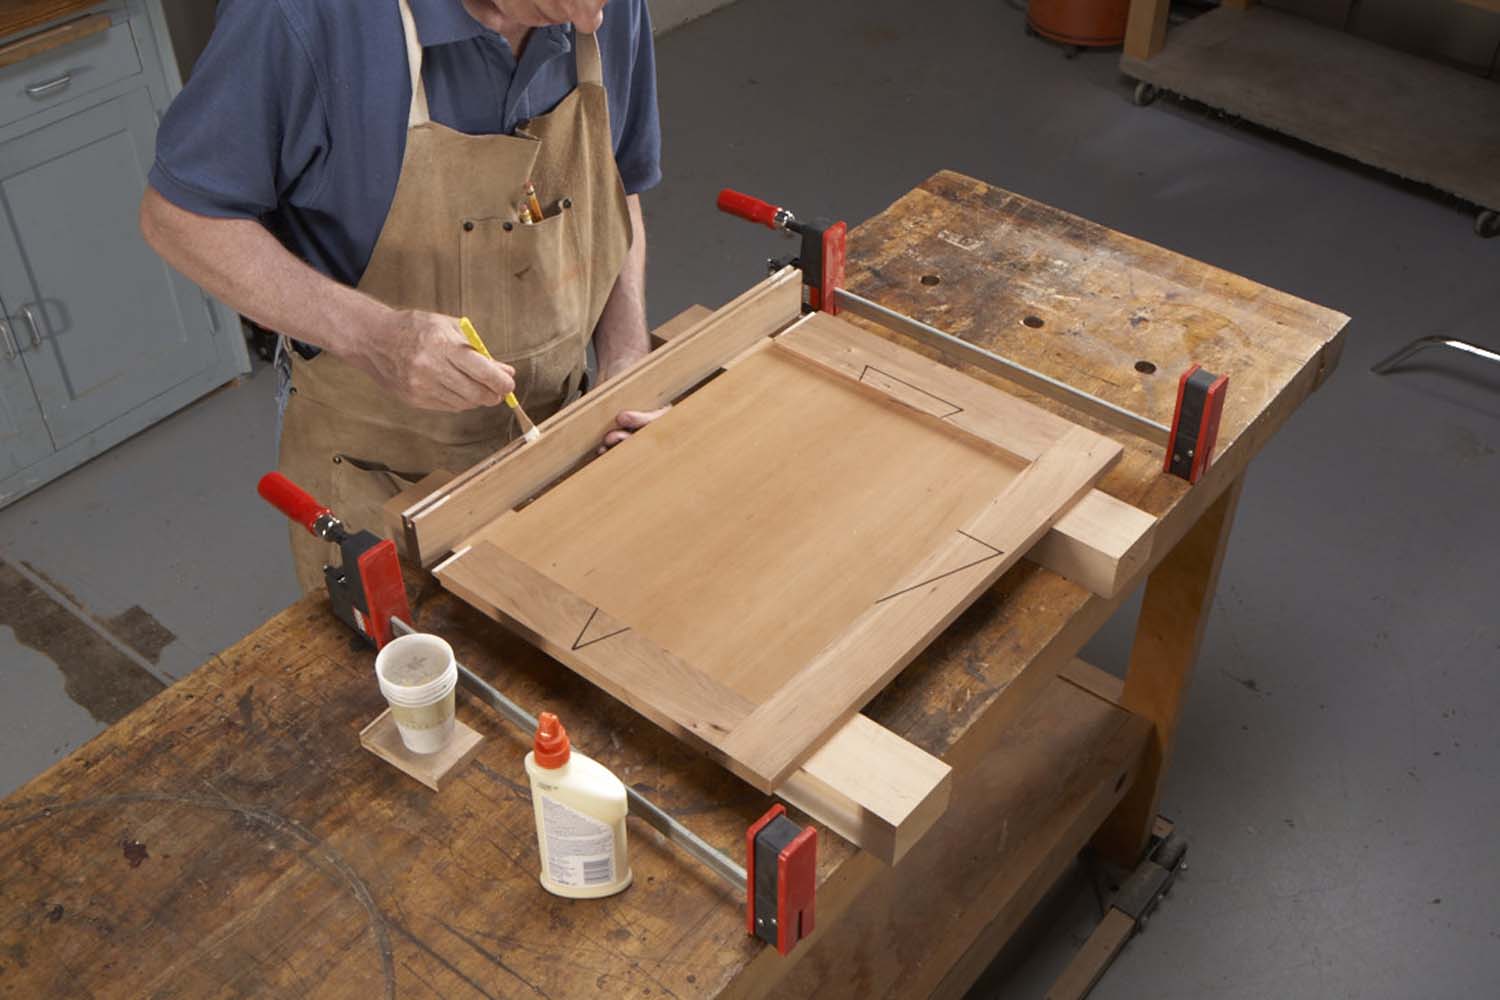
Photo 15. Glue the panel and the remaining stile. The panel is only glued to the stiles; you don’t have to glue it to the rails.
During the second stage, you’ll glue the panel to both stiles (Photo 15). This adds enormous strength to the door. You may want to glue the panel into the rails as well, but this complicates the gluing process, creates more squeeze-out to clean up and isn’t strictly necessary.
To start the second stage, brush glue into the stile that’s glued to the rails. Slip in the panel, then clean up any squeeze out. Brush glue along the length of the second stile. Slide the stile in place, make sure it’s even with the sides of the rails and clamp.
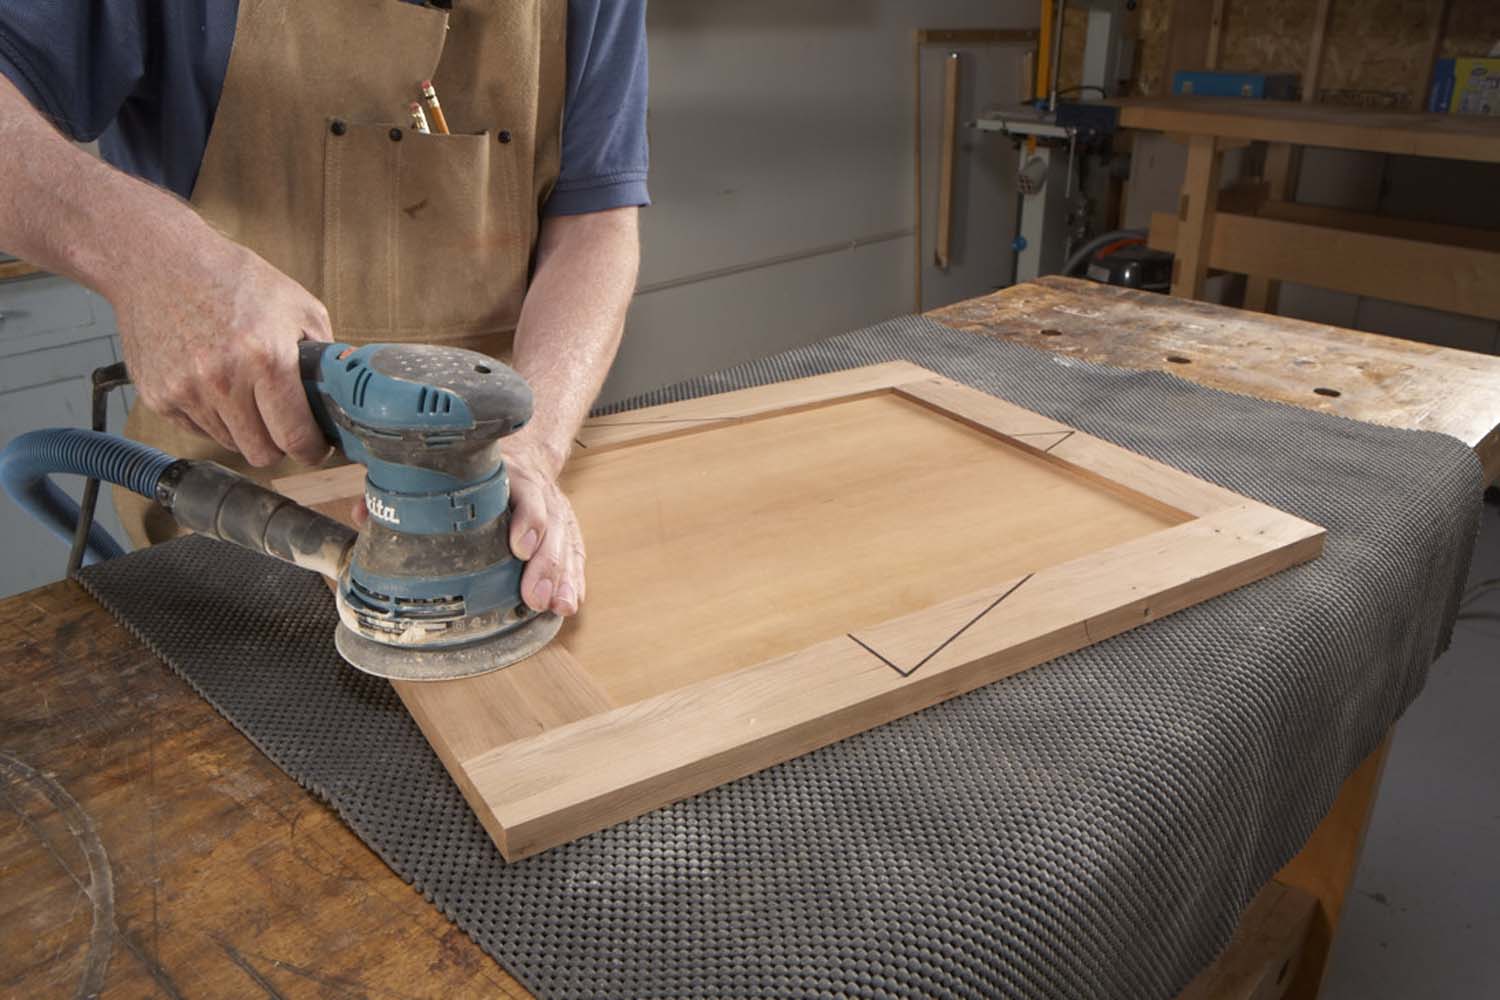
Photo 16. Sand the joints flush. To ensure they’re even, draw pencil lines across each joint and sand until all the lines disappear.
Let the glue dry overnight, then sand the joints even, front and back (Photo 16). Sand all the surfaces of the stiles and rails, too.
Here are some supplies and tools we find essential in our everyday work around the shop. We may receive a commission from sales referred by our links; however, we have carefully selected these products for their usefulness and quality.