We may receive a commission when you use our affiliate links. However, this does not impact our recommendations.
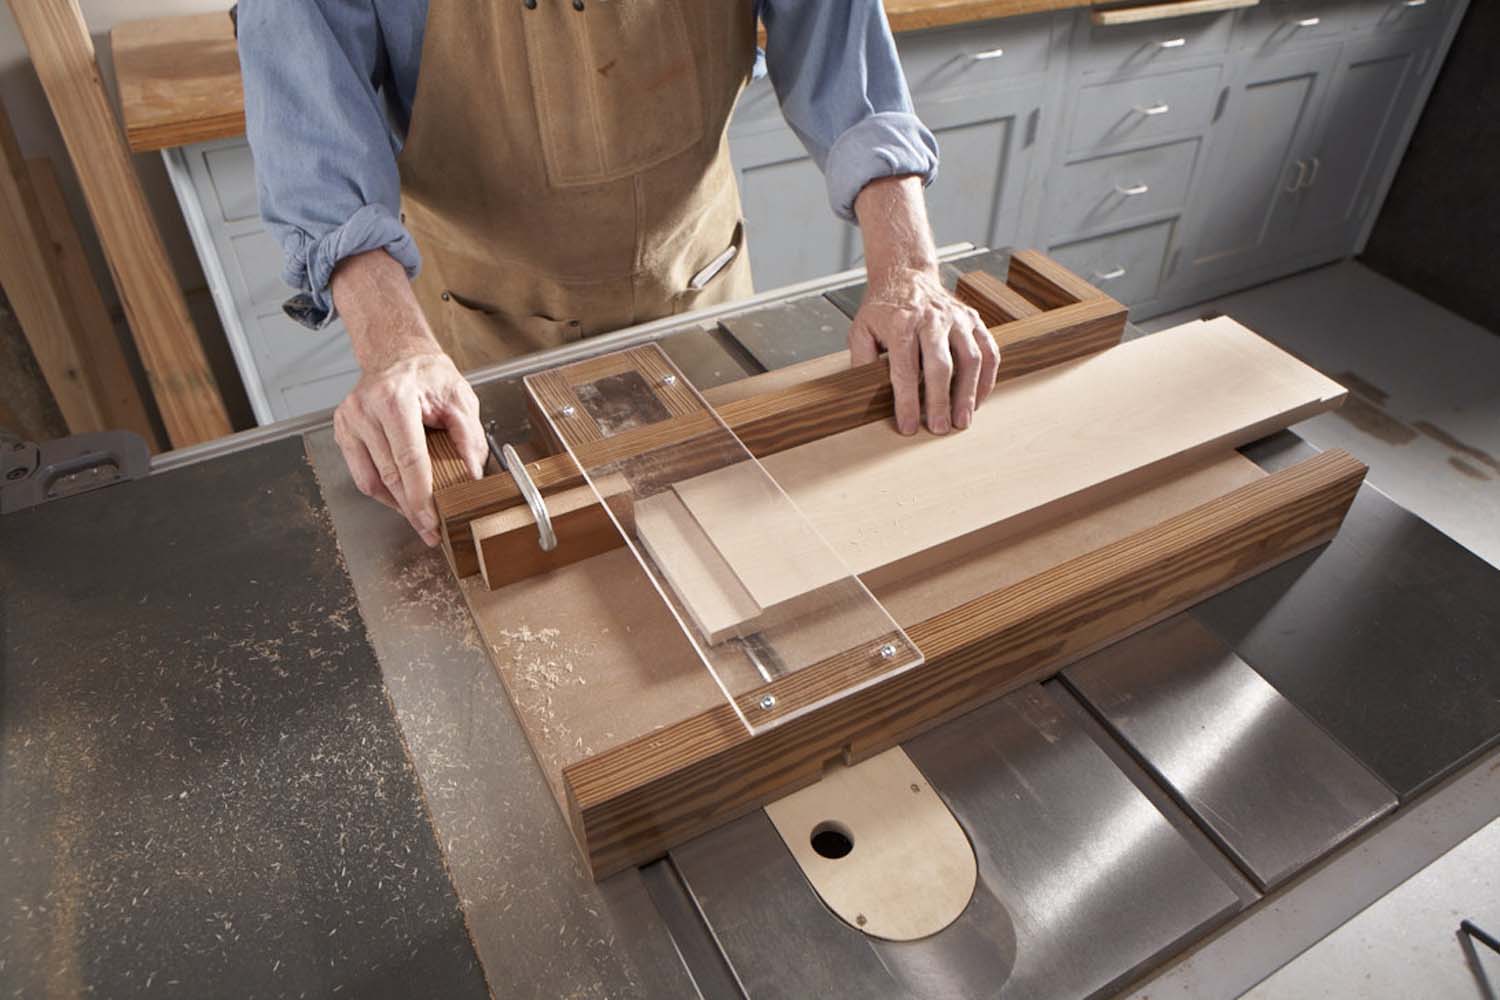
Whenever I make a right angle cut on my tablesaw, I use a sled. If I’m cutting large panels, I use a big crosscut sled. I pull out a smaller sled for rails and legs. To cut tenons with a dado blade, I use a third sled, one with a 3/4″ wide slot already cut into it.
Why rely on a sled? It’s a no-brainer: Unlike using a miter gauge, you don’t have to adjust anything. Once the sled is dialed in to make a perfect 90° cut (and I’ll show you a foolproof way of doing this), you’re set. Forever.
This precision is essential when you cut tenons. You probably know the drill. First, you cut one face of a tenon, then flip the piece over and cut the second face. Each cut creates a shoulder, and both shoulders must be exactly parallel. Flipping the workpiece doubles any error in the cut, so when the stakes are this high it makes sense to use the most accurate and reliable device on hand. Hands down, that device is a sled.
The directions I’ll be giving you work for a sled of any size, for any purpose. You won’t need any exotic materials, but before you begin, make sure that your saw is tuned up. The blade and fence must be parallel to the miter slots.
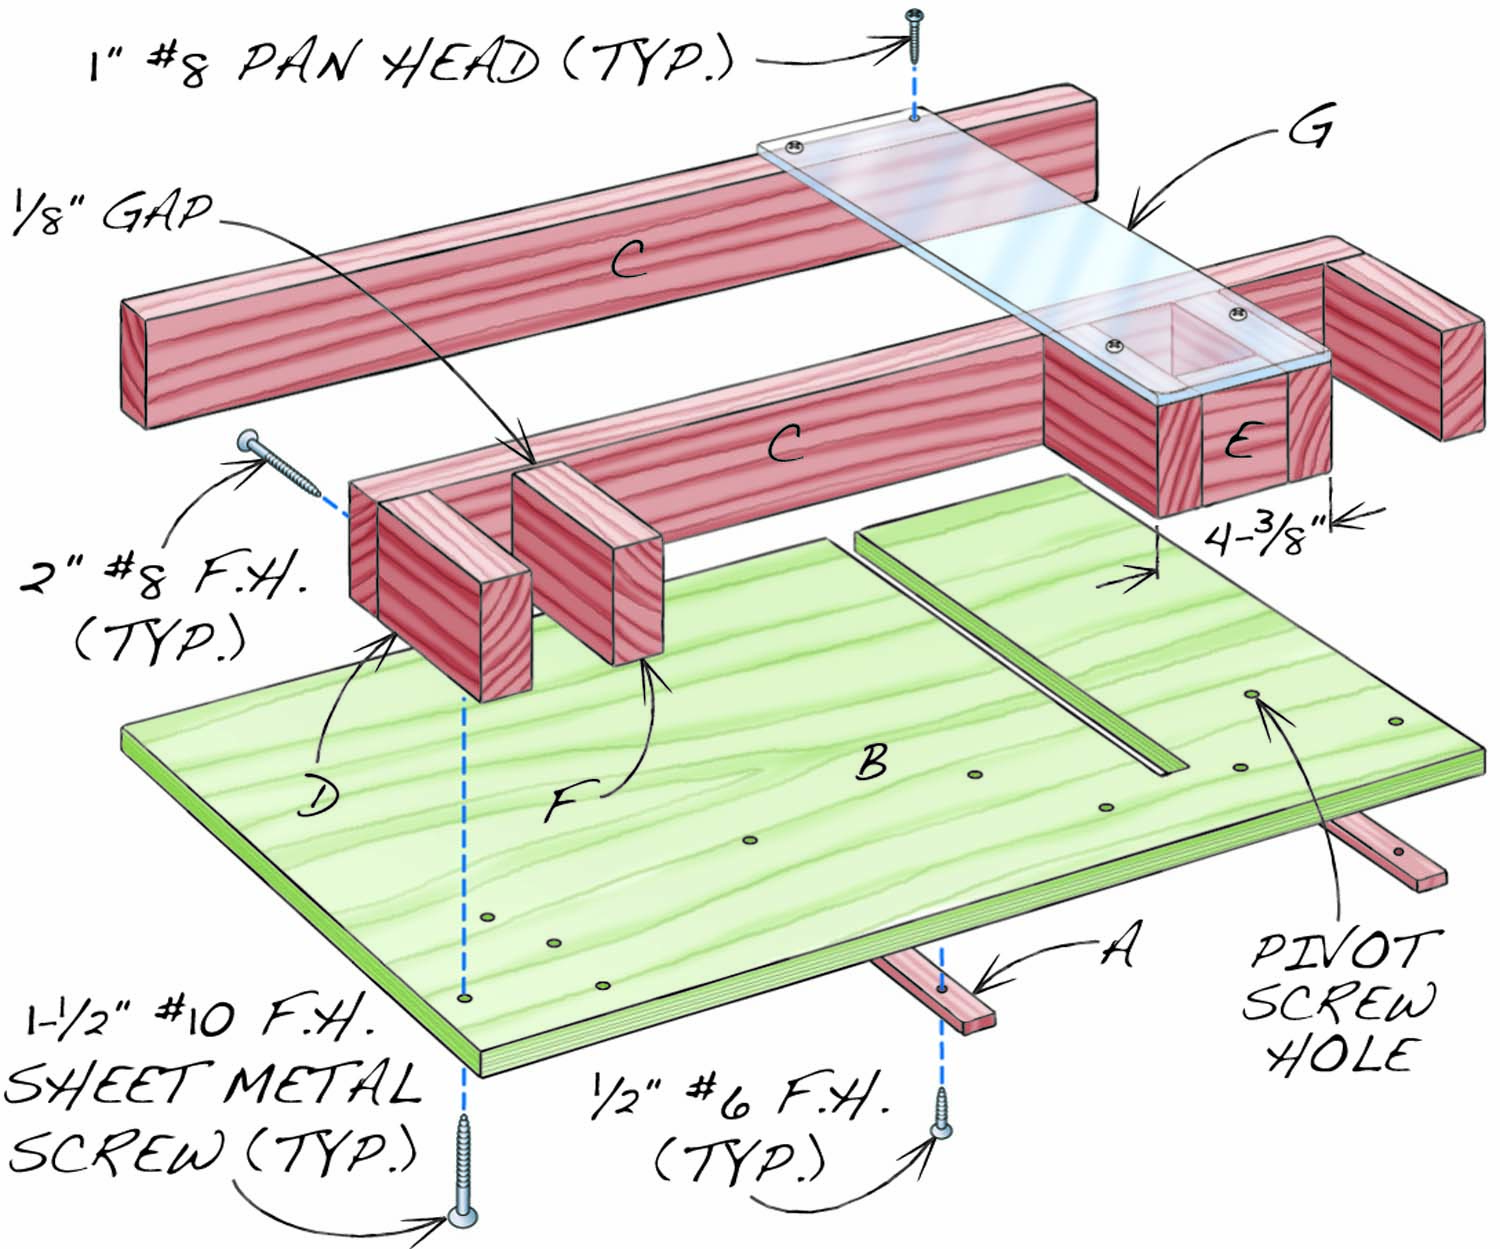
Fig. 01. Exploded View
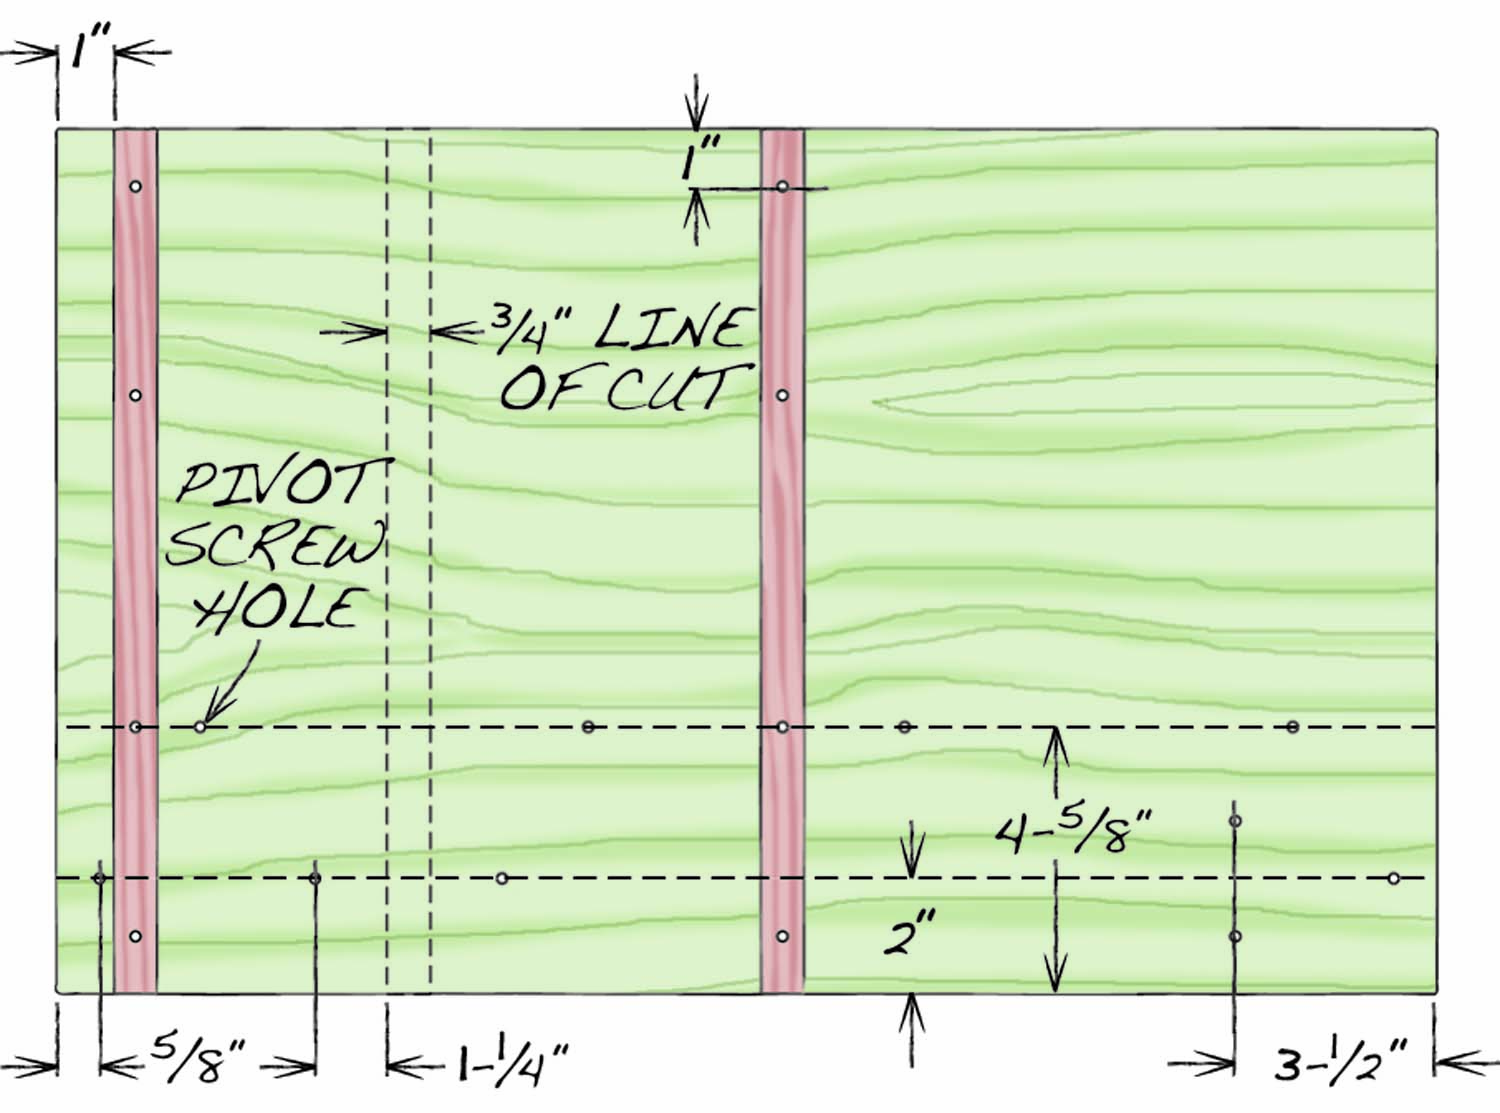
Fig. 02. Pilot Hole Layout
Cutting List
|
Tenon Sled |
||||
|
Overall Dimensions: 2-3/4″ x 15″ x 24″ |
||||
|
Part |
Name |
Qty. |
Material |
Th x W x L |
|
A |
Runner |
2 |
1/4″ Hardboard |
1/4″ x 3/4″ x 15″ |
|
B |
Base |
1 |
1/2″ MDF |
1/2″ x 15″ x 24″ |
|
C |
Fence and back brace |
2 |
1-1/8″ x 2-1/4″ x 24″ |
|
|
D |
Front brace |
4 |
1-1/8″ x 2-1/4″ x 4″ |
|
|
E |
End |
1 |
1-1/8″ x 2-1/8″ x 2-1/8″ |
|
|
F |
Alignment block |
1 |
1-1/8′ x 2-1/4″ x 3-1/2″ |
|
|
G |
Shield |
1 |
1/4″ Plexiglass |
1/4″ x 4-3/8″ x 15″ |
Make the Runners
To make accurate crosscuts, a sled can’t wiggle in your saw’s miter slots. Its runners must fit the slots just so—if they’re too tight, the sled will be hard to push; if they’re too loose, the cut won’t be straight. The difference between too tight and too loose is a few thousandths of an inch, so it pays to make the runners as carefully as possible.
I use 1/4″ tempered hardboard to make the runners (A). Years ago, I used solid wood, but I’ve found that it can expand and contract enough to be too loose in winter and too tight in summer. Hardboard is much less susceptible to this problem. (Baltic birch plywood would work as well.)
Getting the perfect fit will require a number of trial and error cuts. You’ll probably toss out a number of bum runners along the way, so it’s best to start out with a large piece of hardboard. The runners are 15″ long, so start with a piece that’s 15″ square.
Joint two opposing sides of the hardboard to make sure they’re absolutely straight. If you don’t have a jointer, you could tape a piece of 100 grit sandpaper to the top of your saw and use this to straighten the edges.
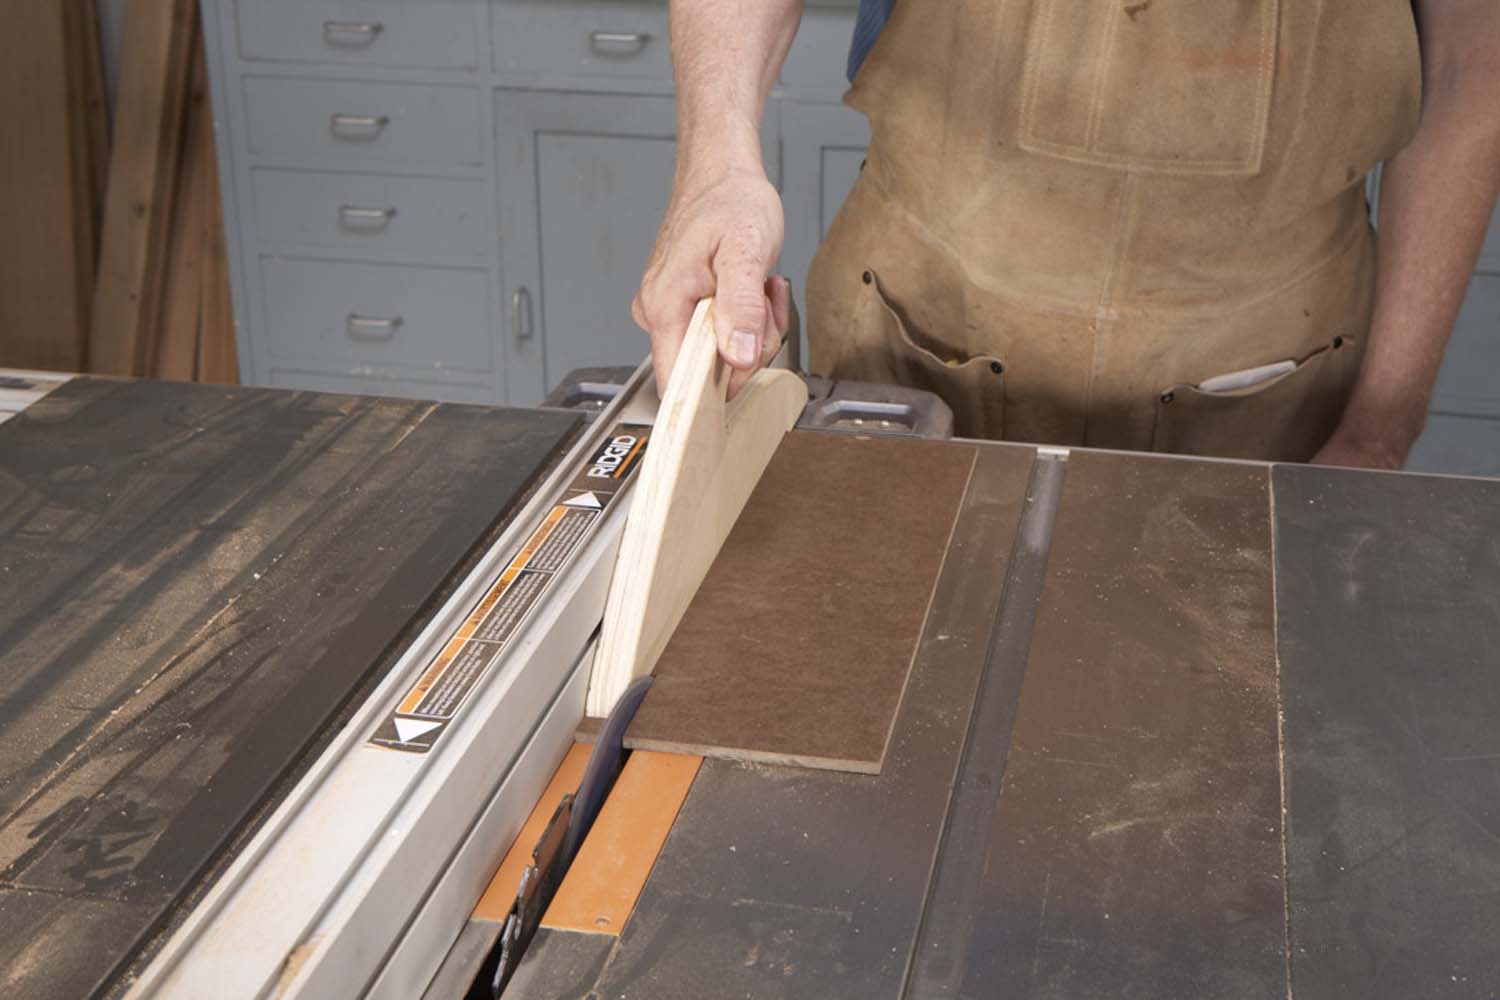
Photo 1. Make the runners first. Cut them from a piece of 1/4″ hardboard.
Before you start cutting, make a 15″ long push stick with a hook on its rear end (Photo 1). This will keep your hands out of harm’s way and prevent the hardboard from vibrating while it is sawn.
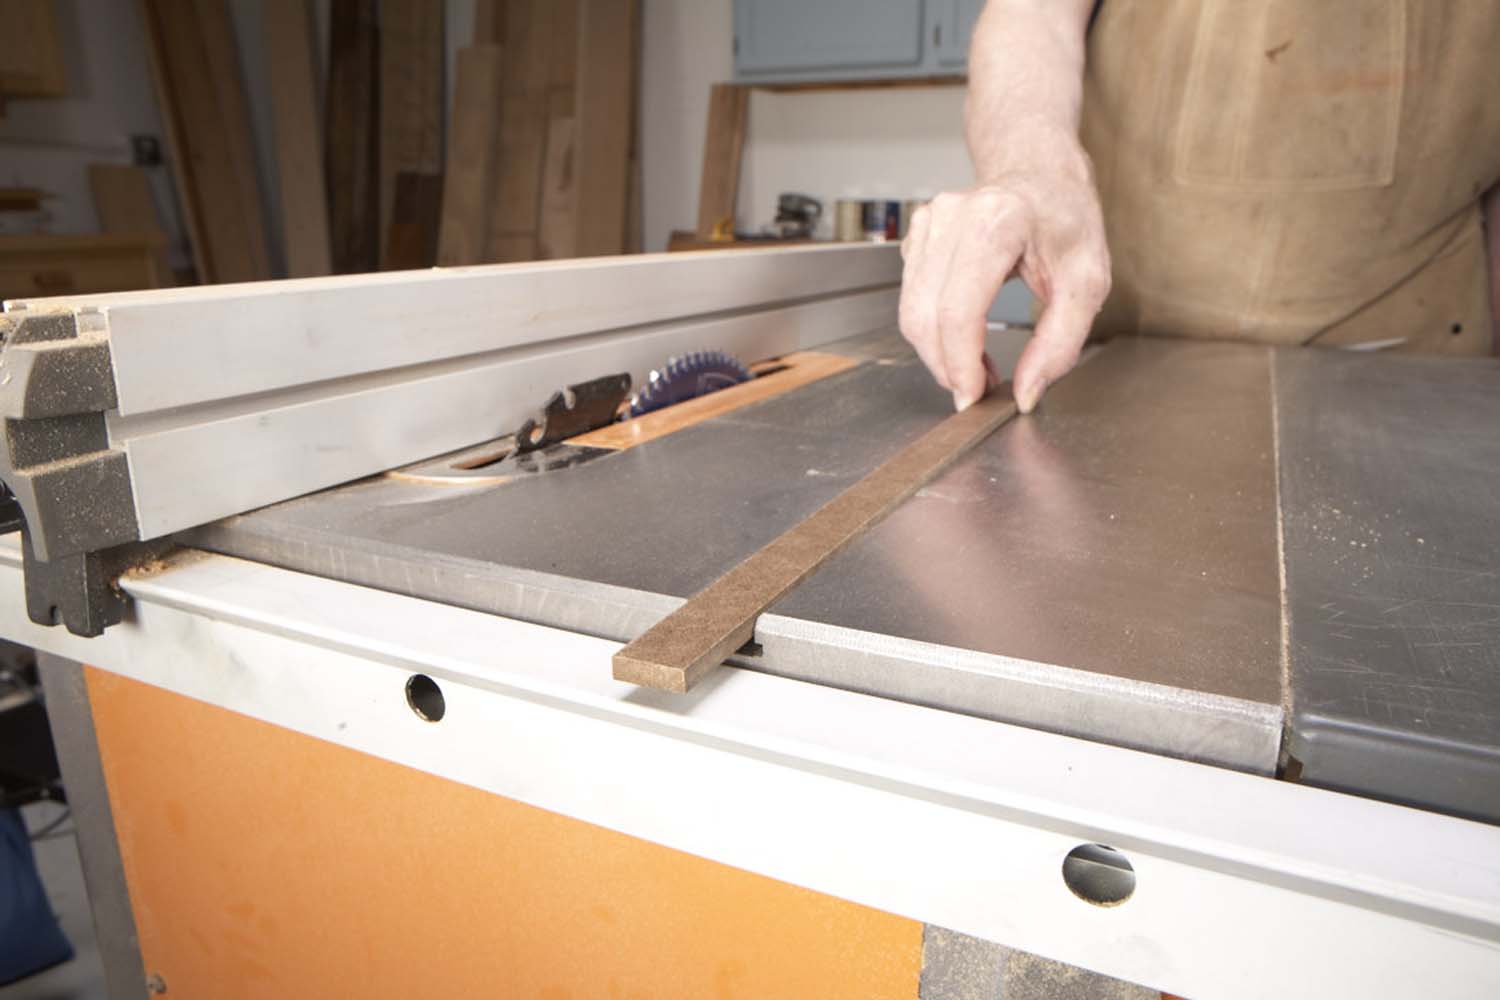
Photo 2. Adjust the setting of your rip fence until the runners precisely fit your saw’s miter slots.
Install a crosscut blade in your saw (a combination or general purpose blade is OK, but the cut won’t be as smooth). Set the fence 3/4″ away from the blade and cut one runner. Test it in a miter slot (Photo 2). Adjust the fence as necessary and cut another runner from the other side of the board. Chances are that you won’t get the width right quite yet, so here are a few rules to follow as you cut more pieces:
1) Discard the pieces that don’t fit. Don’t re-cut ones that are too tight.
2) Joint the blank each time before you saw.
3) If a runner is too tight in just one area, use sandpaper or a block plane to take down the high spot.
Prepare the Base
 Cut the base (B) to final size. Any plywood that’s flat will do—I prefer MDF, which is just about guaranteed to be flat. In addition, make some pieces of wood to place under the runners when you glue the runners to the base (Photo 3). These pieces should be thick enough to raise the runners about 1/16″ above the saw’s top.

Photo 4. Glue the sled’s base to the runners. Butt the base up to the saw’s fence and apply weight directly over the runners.
Brush a thin layer of glue on the runners, then position the saw’s fence 1″ from the right runner. Hold the base against the fence and lower the base onto the runners. Add weight directly above the runners (Photo 4).
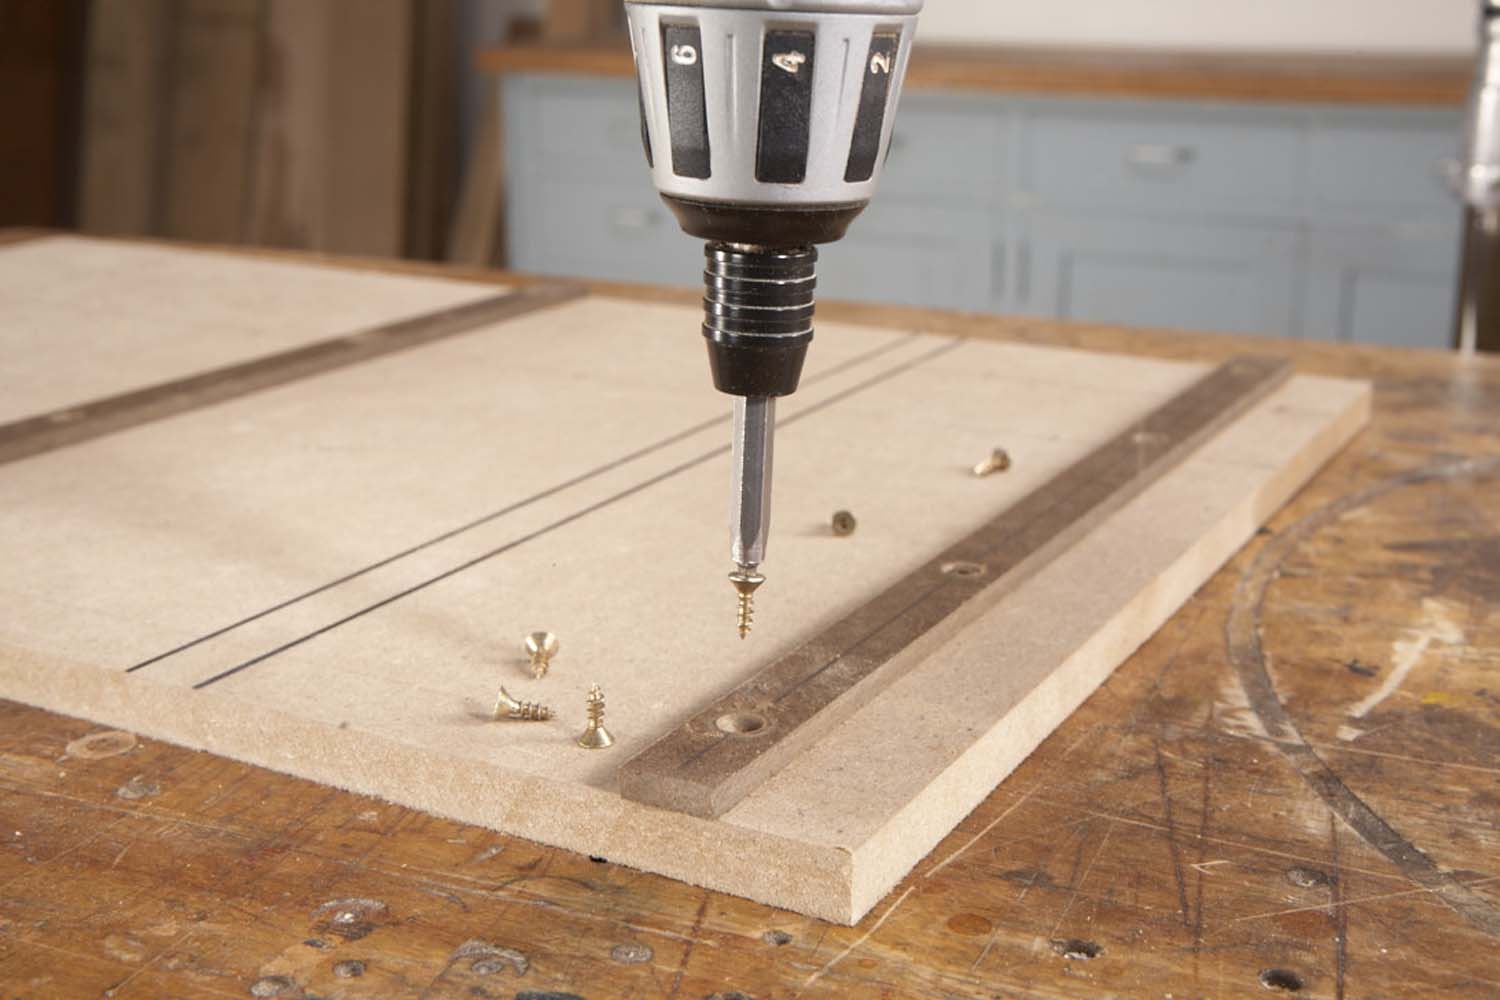
Photo 5. After the glue dries, turn over the base and run a few short screws through the runners.
After the glue dries, remove the assembly from the saw, turn it over and drill pilot holes through the runners. Add screws (Photo 5).
Place the assembly back on the saw and mark the base to indicate where a 3/4″ wide dado set will cut through it. Draw this area on the bottom of the base, then lay out the holes for the screws that will be used to fasten the fence to the base (Fig. 02). This drawing is just a guide; the distances between the miter slots and saw blade vary from saw to saw.
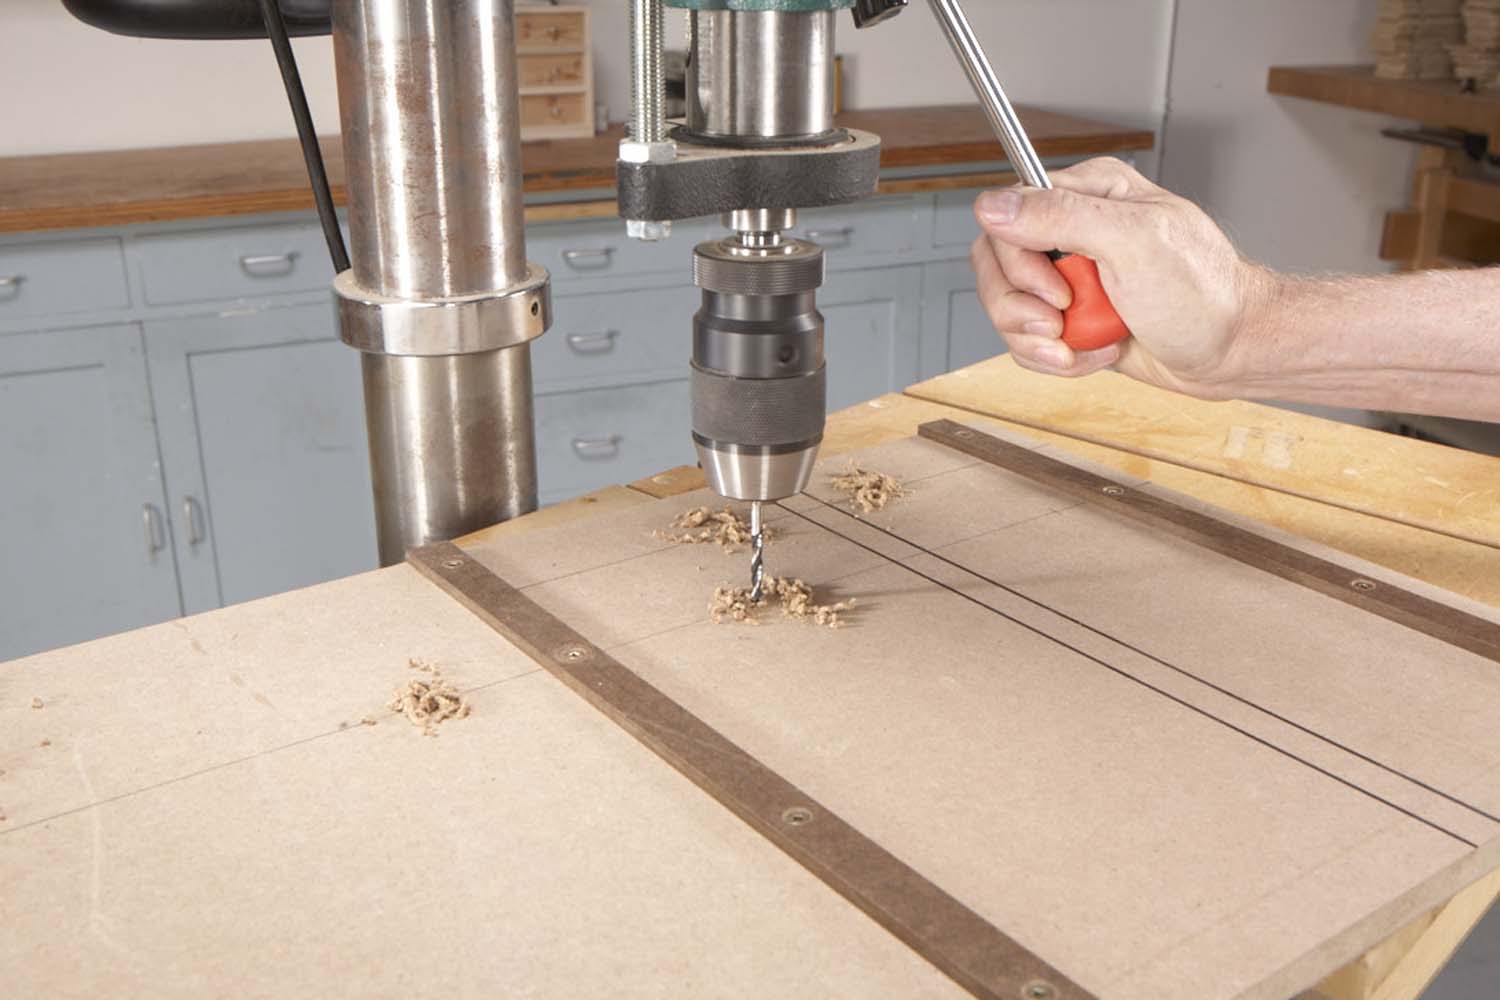
Photo 6. Drill holes through the base for fastening the sled’s fence. Mark the base to indicate where the saw will cut through it later on. Don’t drill any screw holes here!
Predrill and countersink the screw holes (Photo 6). The diameter of these holes should exactly match the outside diameter of the screws you’ll use. Basically, you’ll want the screws to slip through the holes with no wobble. I use sheet metal screws because they’re threaded down their whole length (wood screws have a shaft that’s smaller in diameter than the threads). Flip over the base and slightly countersink the top sides of the holes, too. This depression will catch any wood that mounds up around a screw.
Add the Fence
Make the fence (C), back brace and all the other parts that go on top of the sled (D, E and F) from well-seasoned, straight-grained wood that is free of knots. (If you’re making a sled for cross-cutting, these pieces should be about 4-1/2″ wide, to accommodate a taller blade.)
Mill the wood to final thickness and width in stages, over the course of a week or so—this is the best way to guarantee that it will stay straight and flat for years to come. You could also make these pieces by laminating solid wood, like a butcher block, or use pieces of Baltic birch plywood in order to ensure that they stay straight and flat.
For this sled, I lucked into some wood that is exceptionally stable: thermally modified Douglas fir. In case you were wondering about its color, the wood turns chocolate-brown when it’s dried in a super-hot kiln.
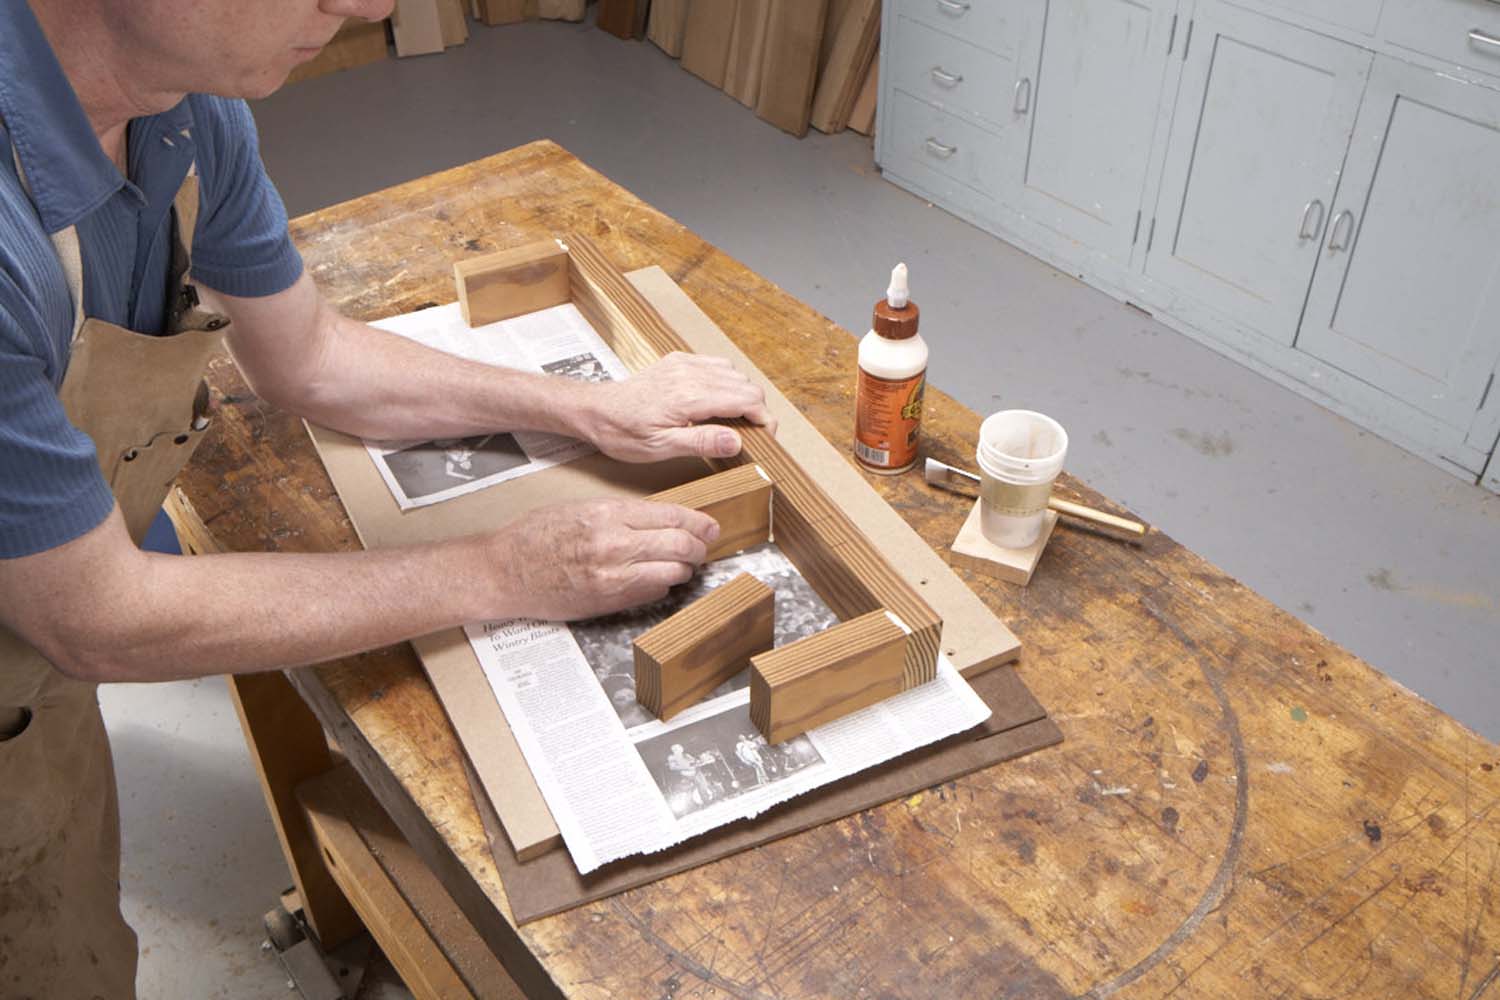
Photo 7. Build the fence assembly. Make sure the pieces are flush at the top. Just use hand pressure—you don’t need clamps, which can cause the pieces to slide up or down.
Cut all of the pieces—save one, (E)—to final length. Turn the base face up and mark the locations of the front braces on the fence (use the screw holes as centerlines). Glue the braces (D) to the fence (Photo 7). This may seem weird, but I don’t use clamps. I just brush glue on the ends of the braces, push them up tight against the fence until most of the glue squeezes out, then let go. The point of this method is to make sure that the braces and fence are flush, top and bottom. (If they aren’t flush, the fence assembly may become twisted or out of square.) Clamps can cause pieces to slip out of alignment, so I just use hand pressure, instead.
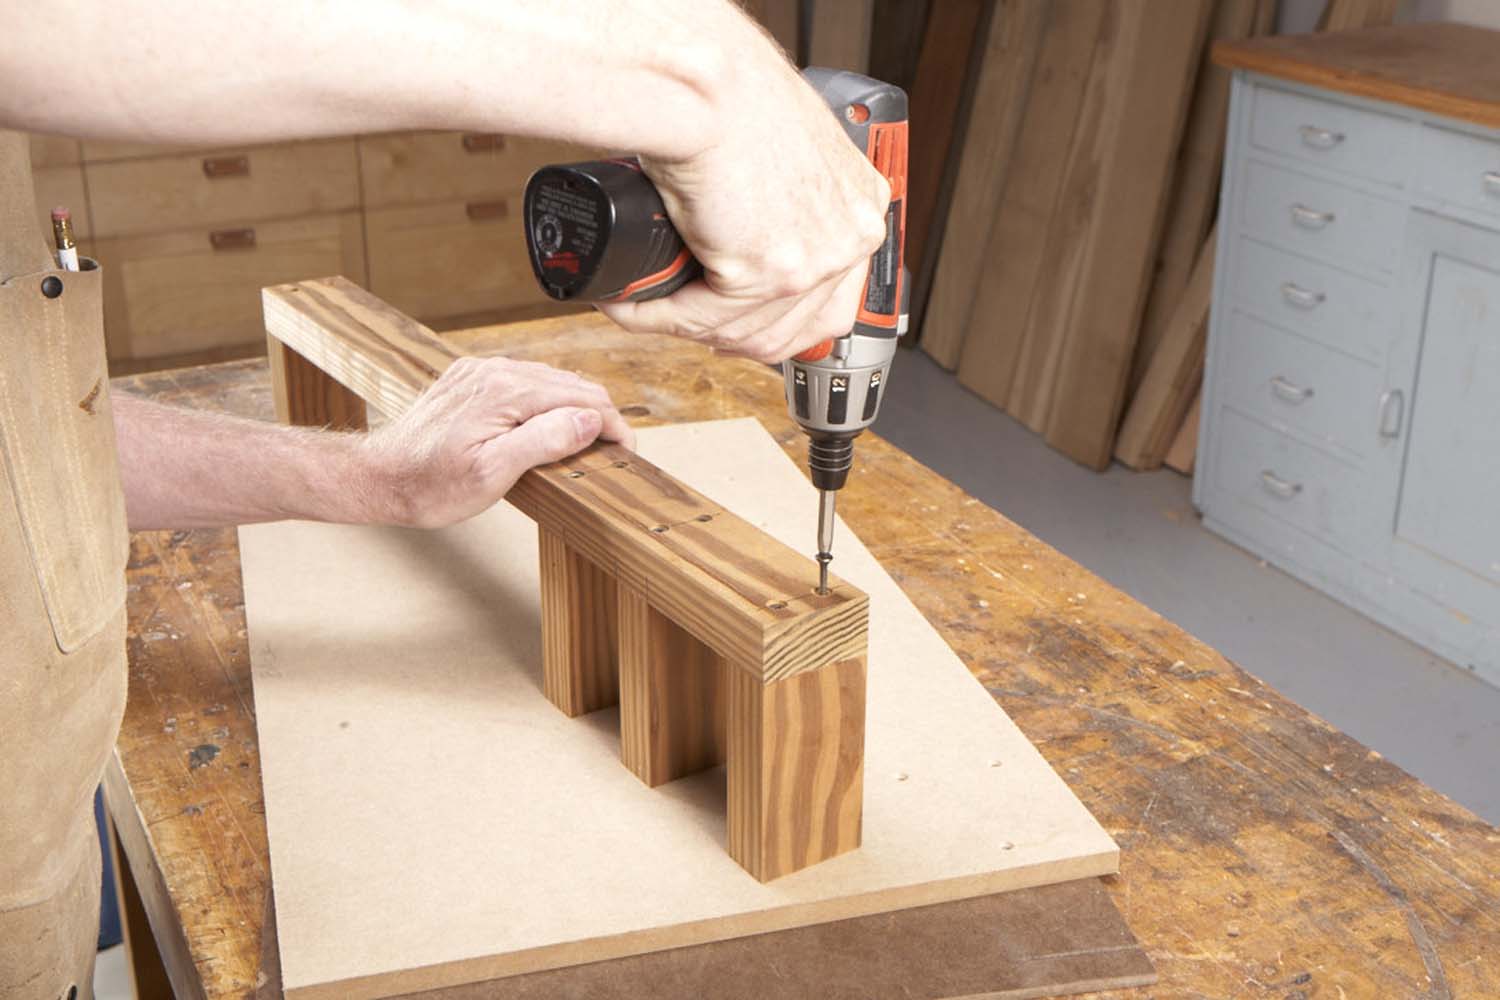
Photo 8. Add screws to the fence assembly, after the glue dries.
After the glue dries, reinforce the joints with screws (Photo 8). Cut the short piece (E) that goes between two braces to final length (it should be a tight fit) and glue it in place. (Don’t use any screws here, however; your saw blade could accidentally hit them.) Glue the back brace (C) to the sled.
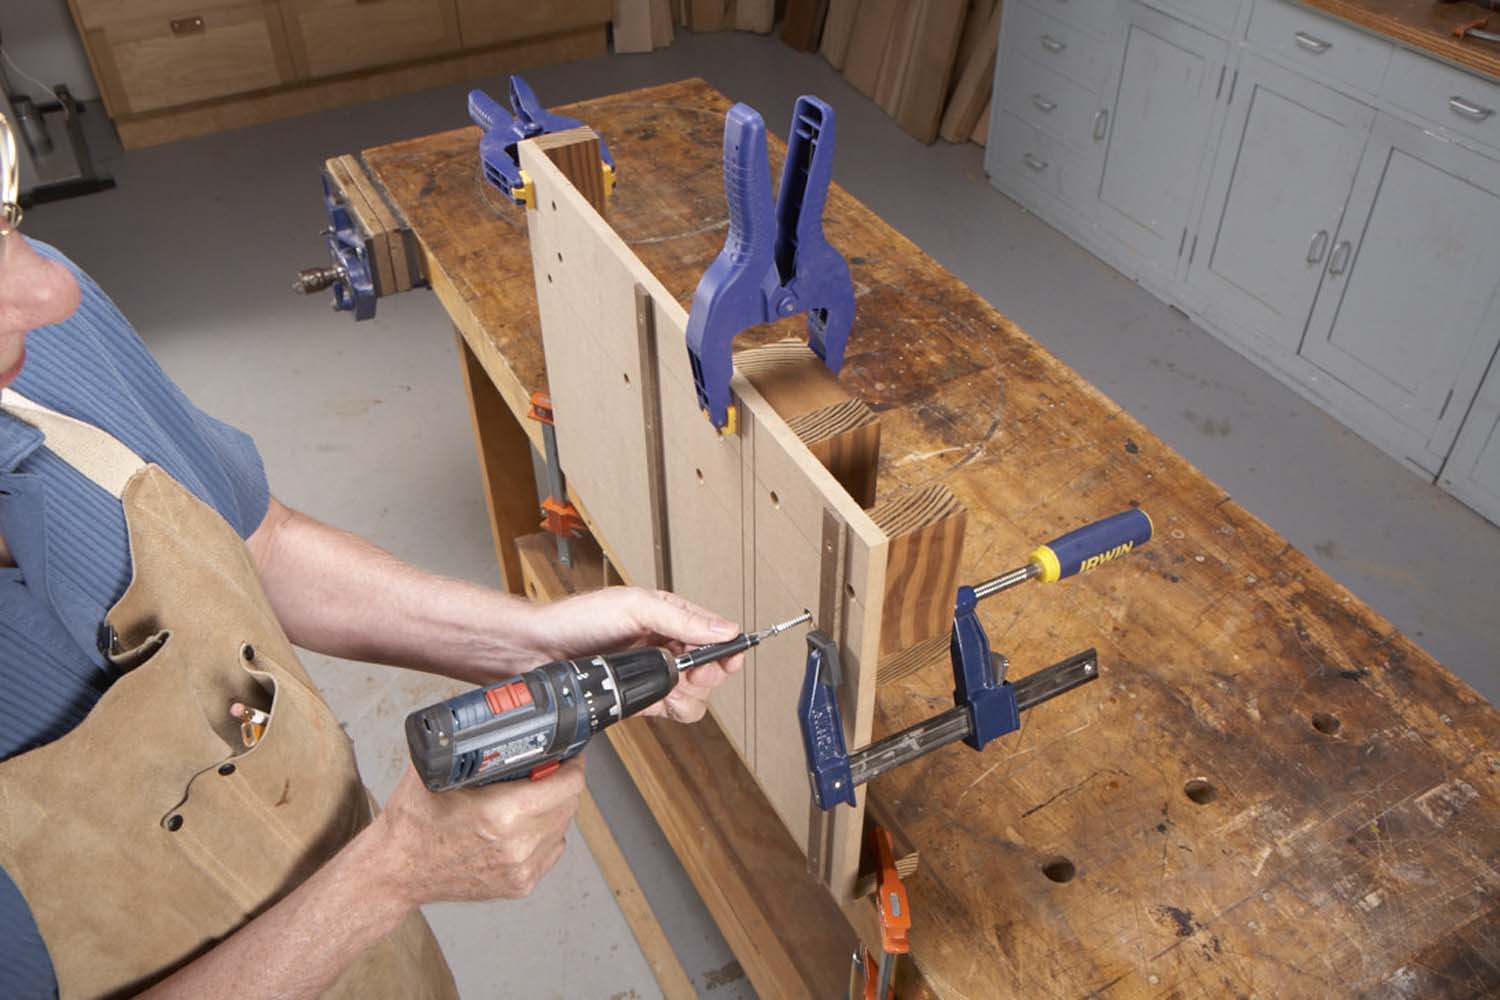
Photo 9. Fasten the fence assembly to the base with only one screw, for now. This screw allows the fence to rotate, like the head of a miter gauge, when you adjust it square to the saw blade.
Clamp the fence assembly to the base (Photo 9). Drill just one pilot hole—the one marked “Pivot Hole” in Fig. 02. This hole, and all the other pilot holes you’ll drill into the fence assembly later on, must be perfectly centered so running in the screws doesn’t shift the fence one way or another. I know this is picky, but it does matter. Your best bet is to start by using the same bit you used to drill the holes through the base. (It should be a twist bit, too—not a brad-point.) Drill about 1/4″ deep into the fence, then follow up with a smaller bit that matches the screw’s root diameter.
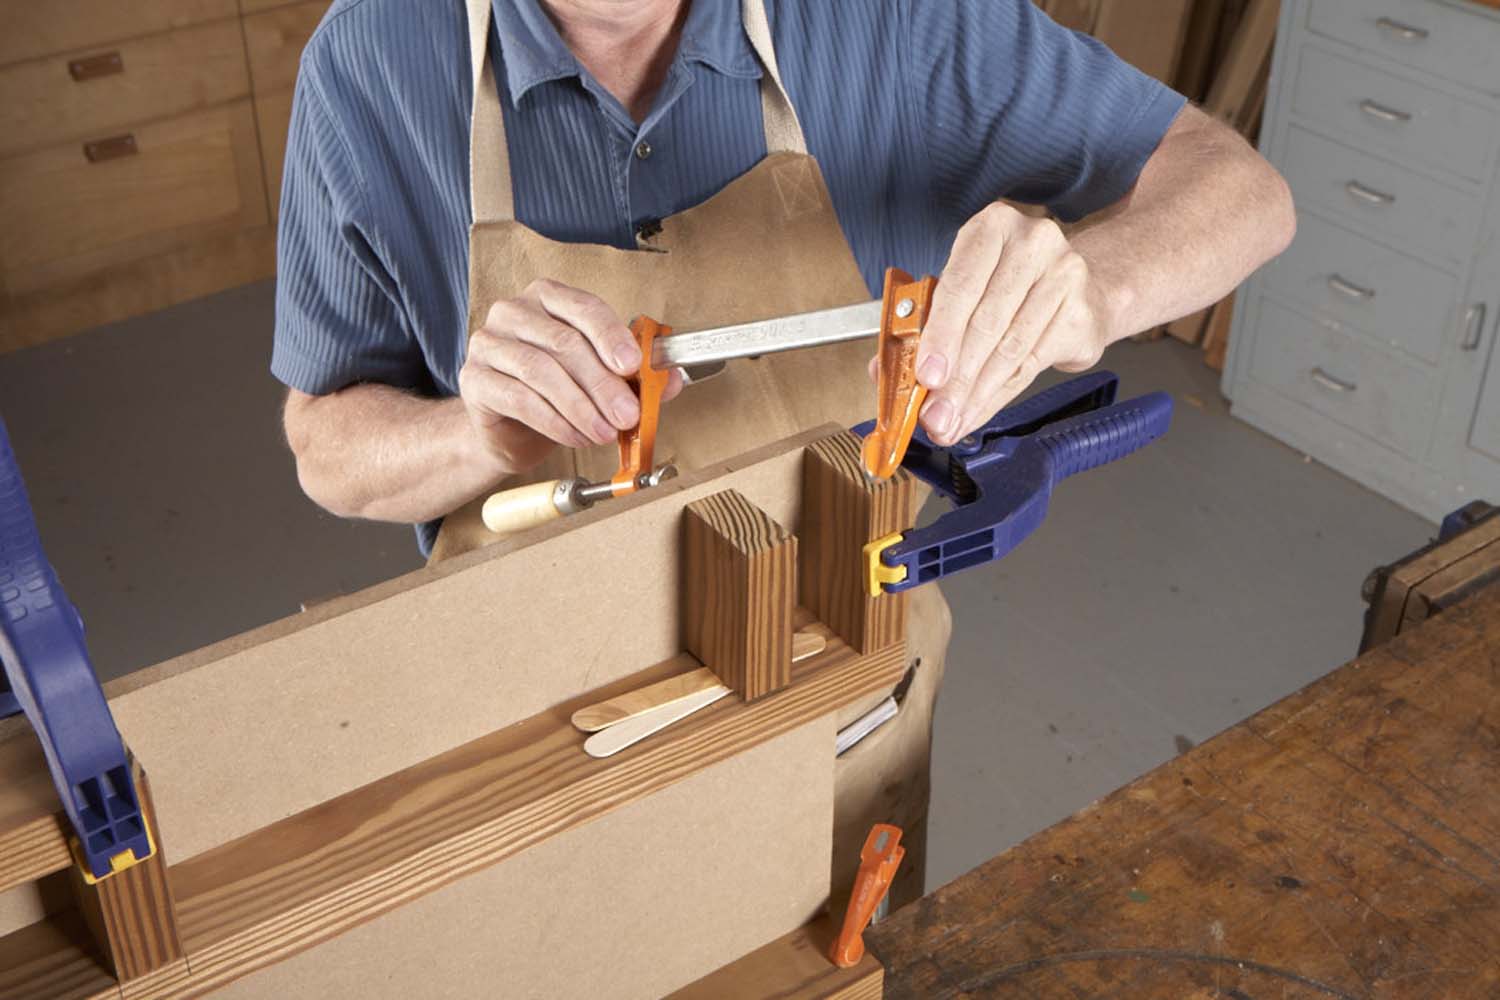
Photo 10. Clamp and screw an “alignment block” to the base for temporarily securing the fence. Place spacers under the block to create a 1/8″ gap between the block and the fence. Once the block is secure, remove the spacers.
Clamp and screw the alignment block (F) to the base (Photo 10). Note that there should be a gap approximately 1/8″ wide between this piece and the fence. After the block is fastened, insert a stack of shims into the gap—I use playing cards—and clamp the fence to the block. Remove all other clamps and place the sled on your saw.
Align the Fence
Before you make any cuts, clamp a stop block to the back of your saw, or to its fence, to prevent pushing the sled too far forward. You don’t want the blade to cut all the way through the sled, where it will be exposed near your hands. The cut should stop just shy of the short block (E) that spans the middle two braces.
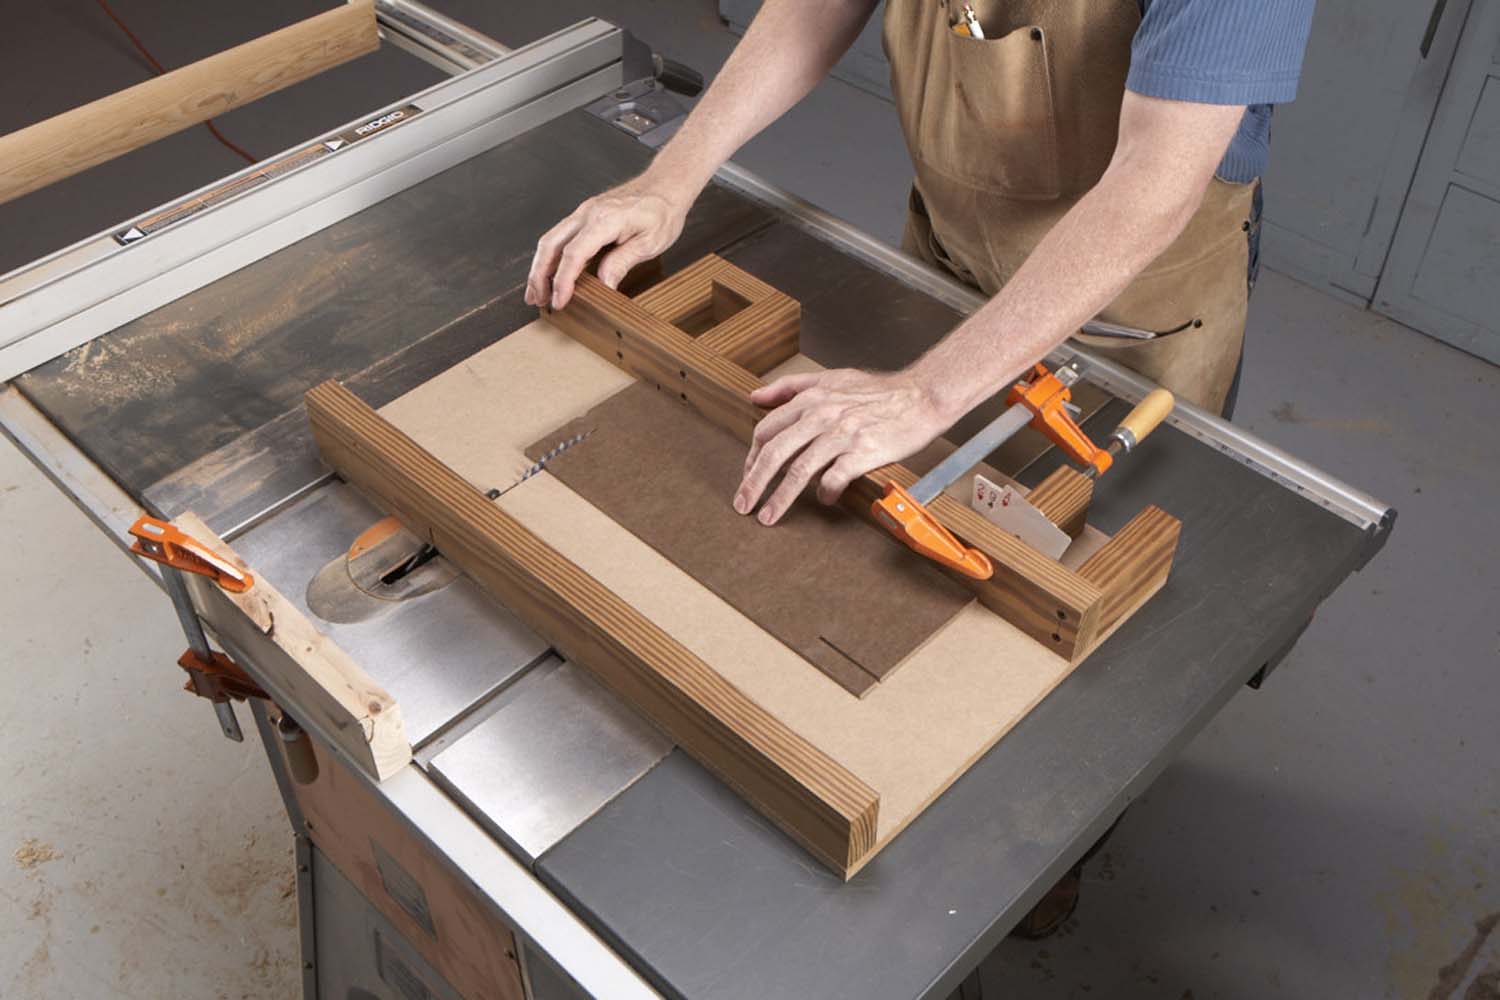
Photo 11. Place a few playing cards between the alignment block and the fence. Clamp a stop block to the back of the saw and make a test cut with a crosscut blade. Check the piece you’ve cut with a square.
Make a test cut with the sled (Photo 11) using a crosscut blade. Check the cut with a precision square or use the “flip the board” method. It will probably be off a bit, but that’s easy to remedy. Just add or subtract a shim or two (Photo 12) and try again. This is a very precise method of adjustment, and foolproof, as well. Take your time and get it right.
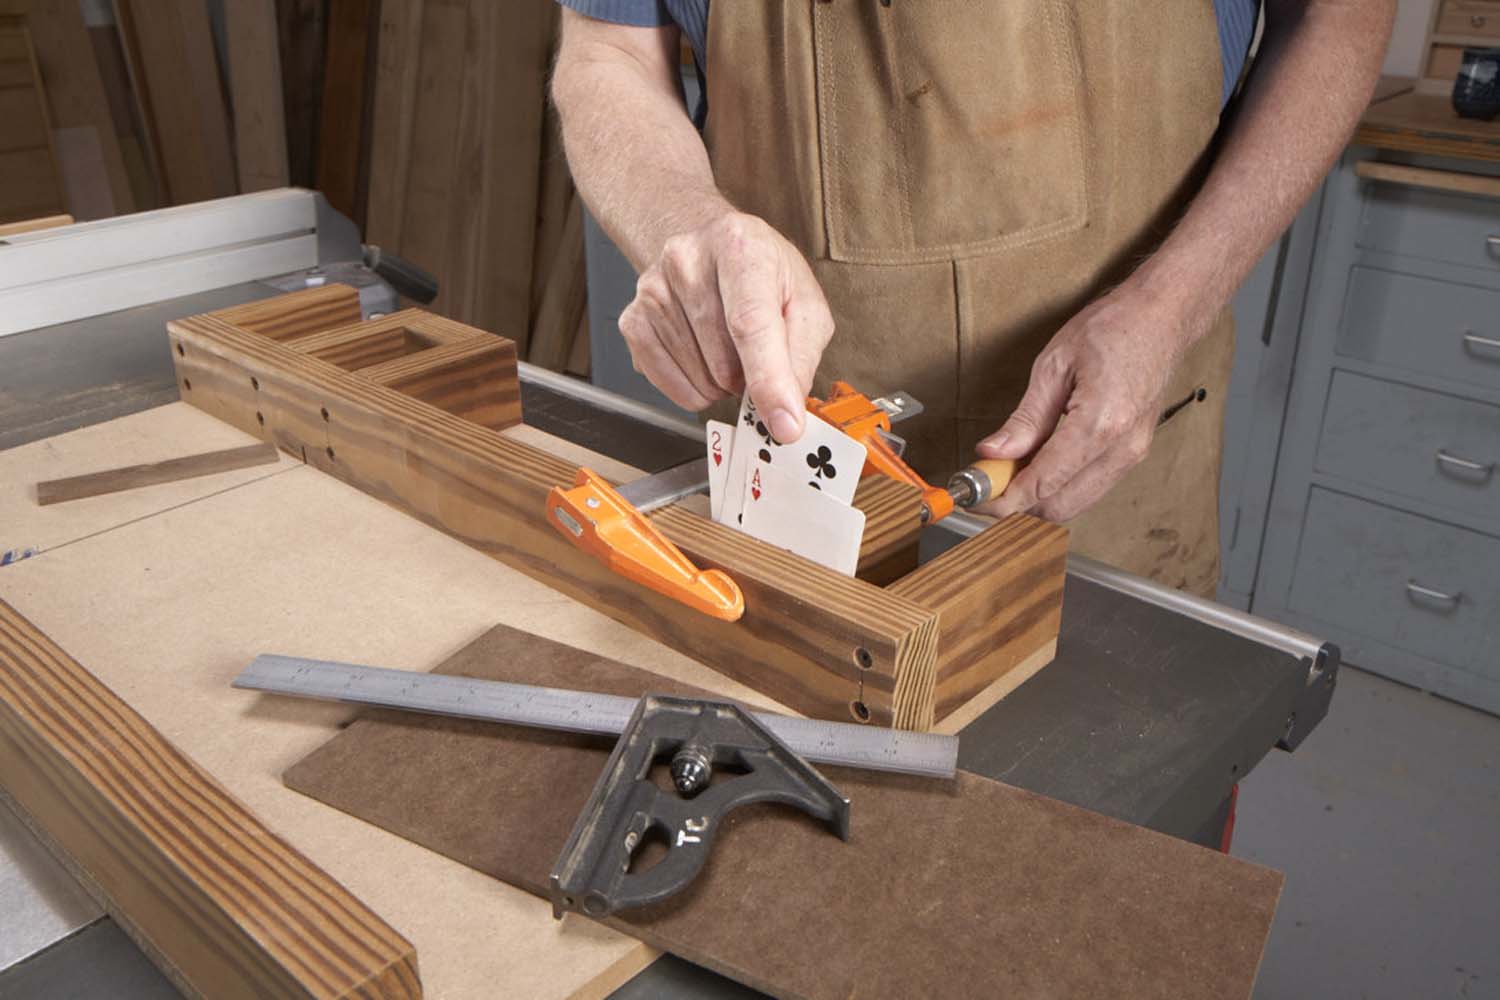
Photo 12. Add or subtract playing cards to rotate the fence, as needed. Continue making test cuts and adjusting the number of shims until the fence is square to the blade.
Once you’re sure the fence is in the right position, remove the sled from the saw and drill the rest of the pilot holes for fastening the fence assembly (Photo 13). Run in the screws, then turn over the sled and add a plastic shield over the path of the saw blade. Round over all sharp corners and edges with coarse sandpaper. Install a dado set to widen the slot in the sled and you’re good to go.
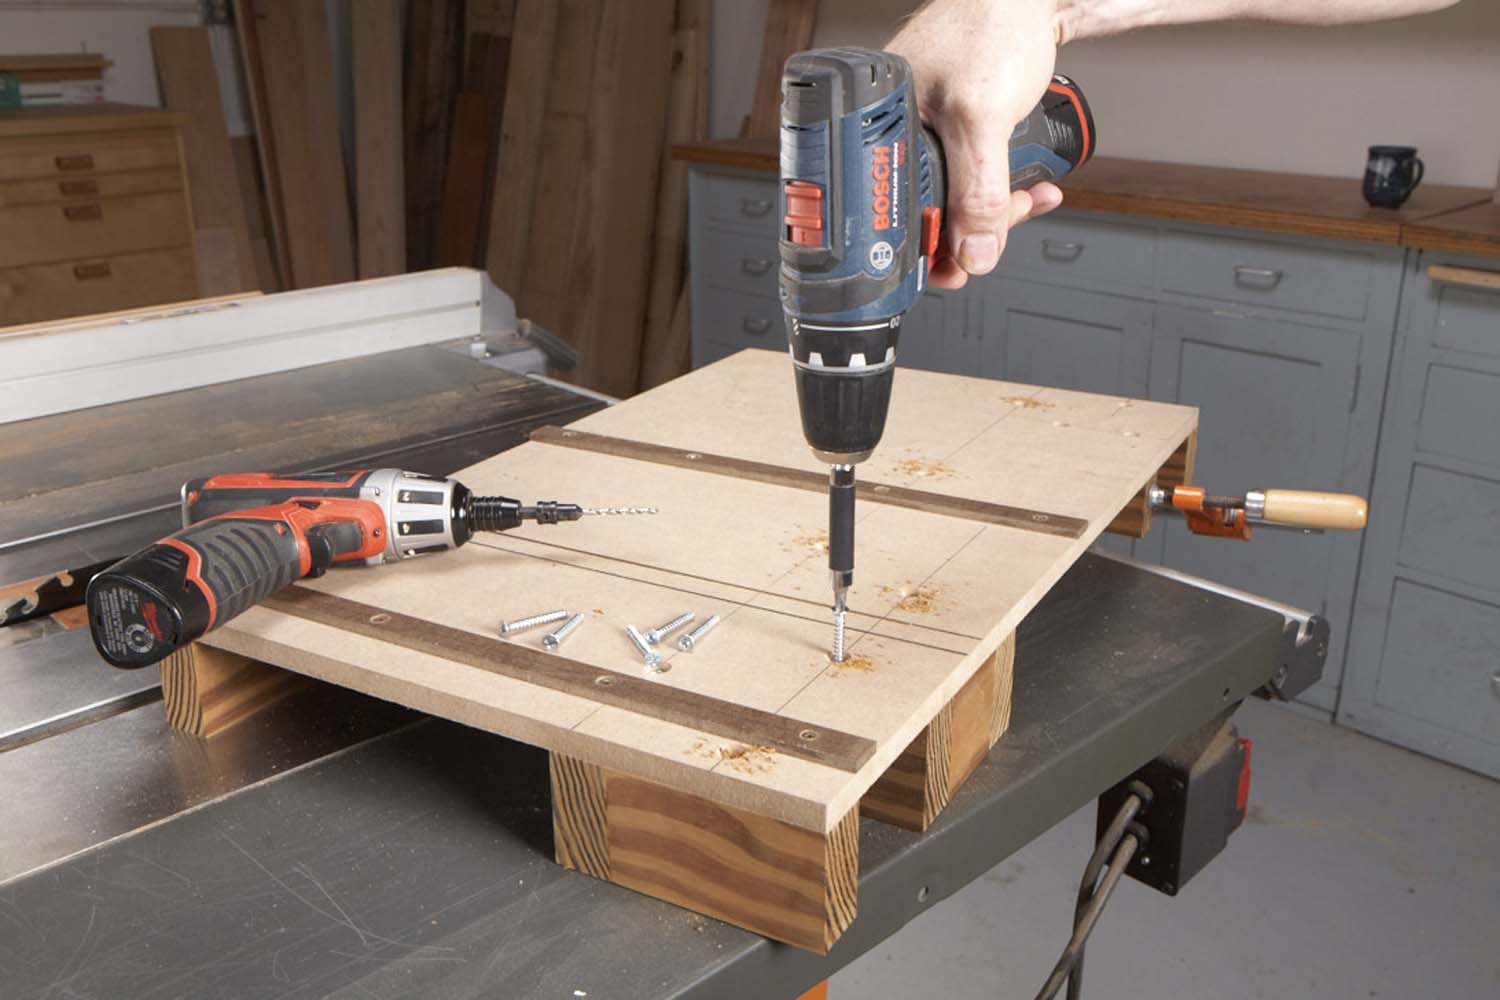
Photo 13. Add the rest of the screws through the base to lock the fence in place.
Finish the sled with a couple of coats of poly. (If you want to use a water-based finish, apply a coat of shellac first.) MDF can expand and contract with changes in humidity, causing the sled to bind. Sealing the MDF with a finish will minimize the amount that it moves. A finish will also help your sled glide easier on the saw. After the finish dries, scrape it off the sides of the runners, so they fit perfectly again.
Here are some supplies and tools we find essential in our everyday work around the shop. We may receive a commission from sales referred by our links; however, we have carefully selected these products for their usefulness and quality.


