We may receive a commission when you use our affiliate links. However, this does not impact our recommendations.
 Signature Details Create an Elegant Box.
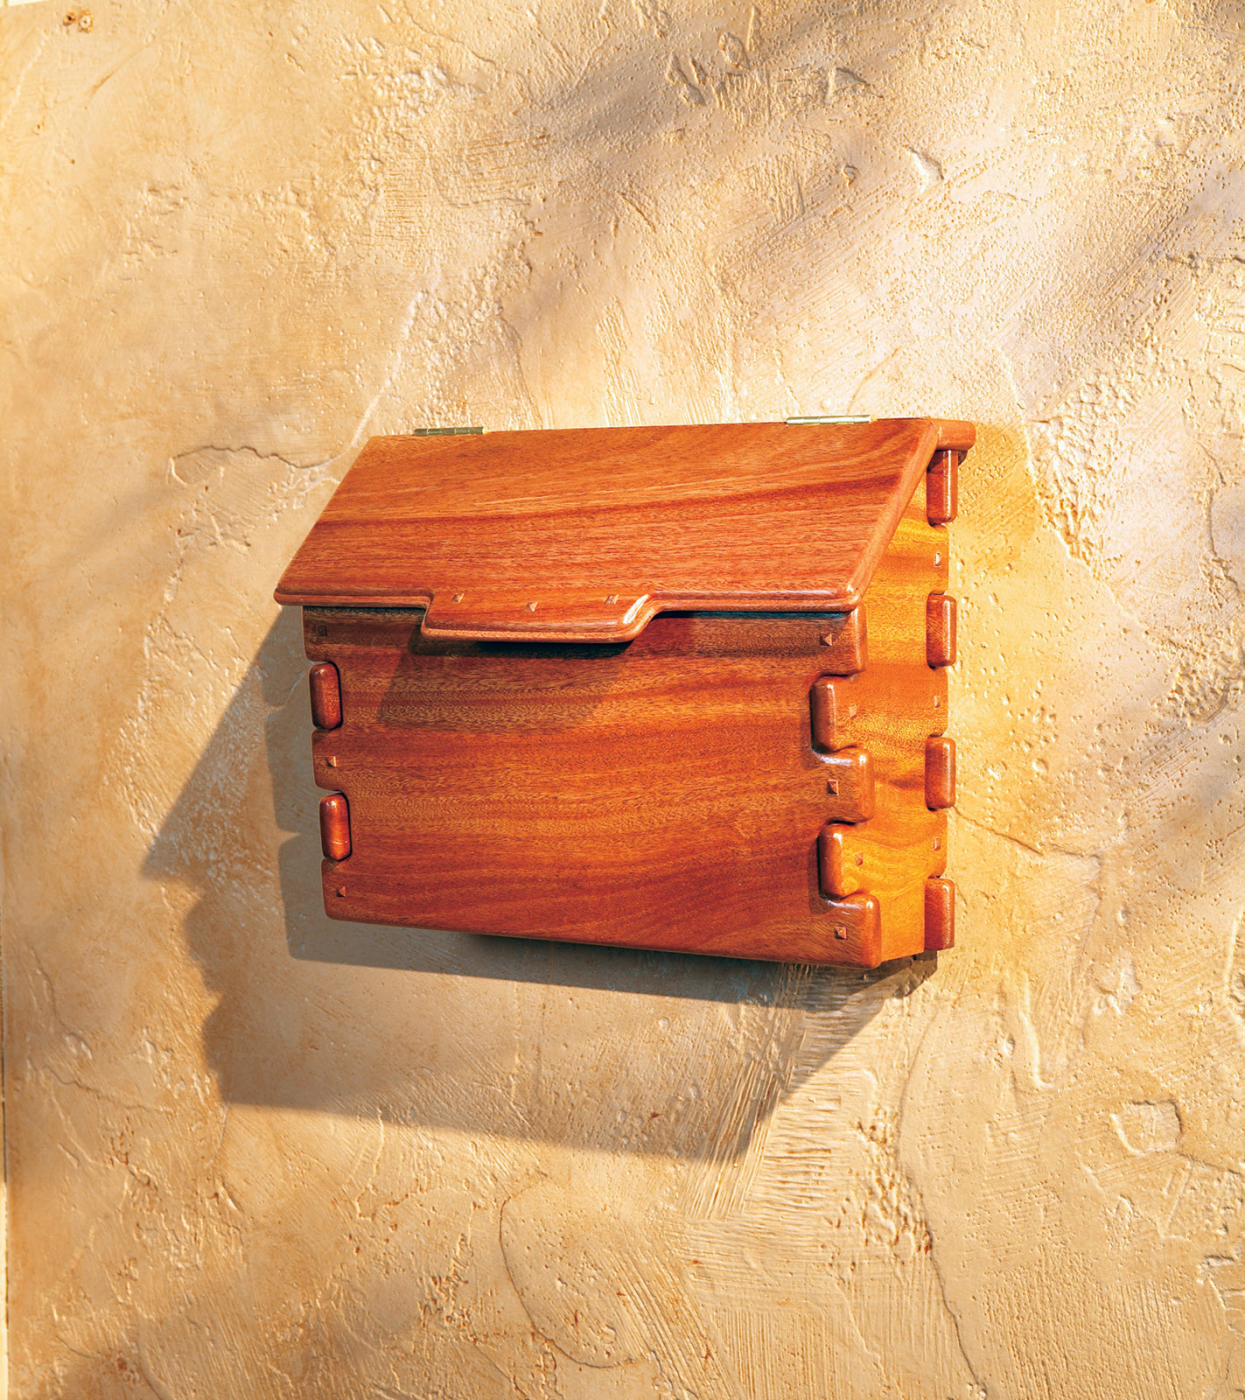 Signature Details Create an Elegant Box.
We needed a new mailbox, but I couldn’t find an off-the-shelf version that I liked. So I decided to build my own. As I’ve always admired the work of Greene and Greene, the architect brothers who fused Asian design with Arts & Crafts style during the early 20th century, I thought it would be cool to include some of their signature elements in my mailbox: Pronounced joints with heavily rounded edges make up the structure, gentle curved lines accentuate the lid, and faceted pegs add visual interest and overall balance. The pegs also hide the screws used to assemble the box.
I built my box of mahogany—a favorite of the brothers Greene and a wood perfectly suited for exterior use. white oak, cyprus or cedar would also be good choices. You’ll need 7 bd. ft. of 4/4 stock. I spent $80 for Honduran mahogany. Finish your box with exterior oil as I did, or leave it unfinished. Unfinished mahogany turns silver-grey when it’s exposed to the elements.
Extended Box Joints
The joints may look exotic, but they’re really just box joints with extended, rounded-over fingers (Fig. A). The inside corners of the sockets are also rounded, so they nest perfectly with the rounded fingers. These joints are easy to make with a router. You’ll need two templates, a 1/4-in. roundover bit and a 1/2-in. flush-trim bit with the bearing mounted above the cutting flutes (also called a pattern bit).
 Make both templates from 1/2-in. MDF (Fig. B). One template is used for the back and front pieces (Parts A and B, Fig. A). The other template is used for the sides (C). The fingers and sockets on these templates must fit together snugly. I cut my templates on the bandsaw, using the miter gauge and the fence to assure straight cuts.
 Cut the front and back pieces to final dimensions. Then use the front/back template to lay out the fingers and sockets.
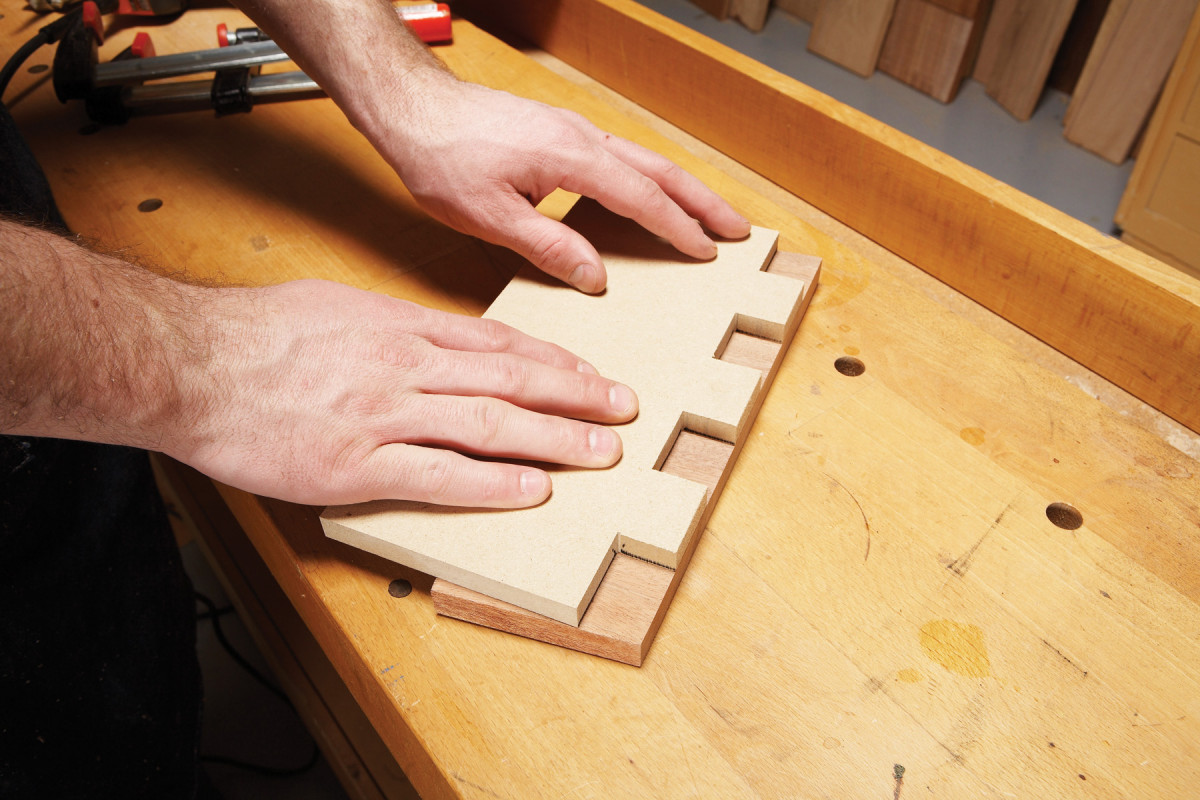
Cut out the waste between the fingers, using the bandsaw (Photo 1) Leave sufficient material in the corners— remember, they’re rounded to fit the fingers.
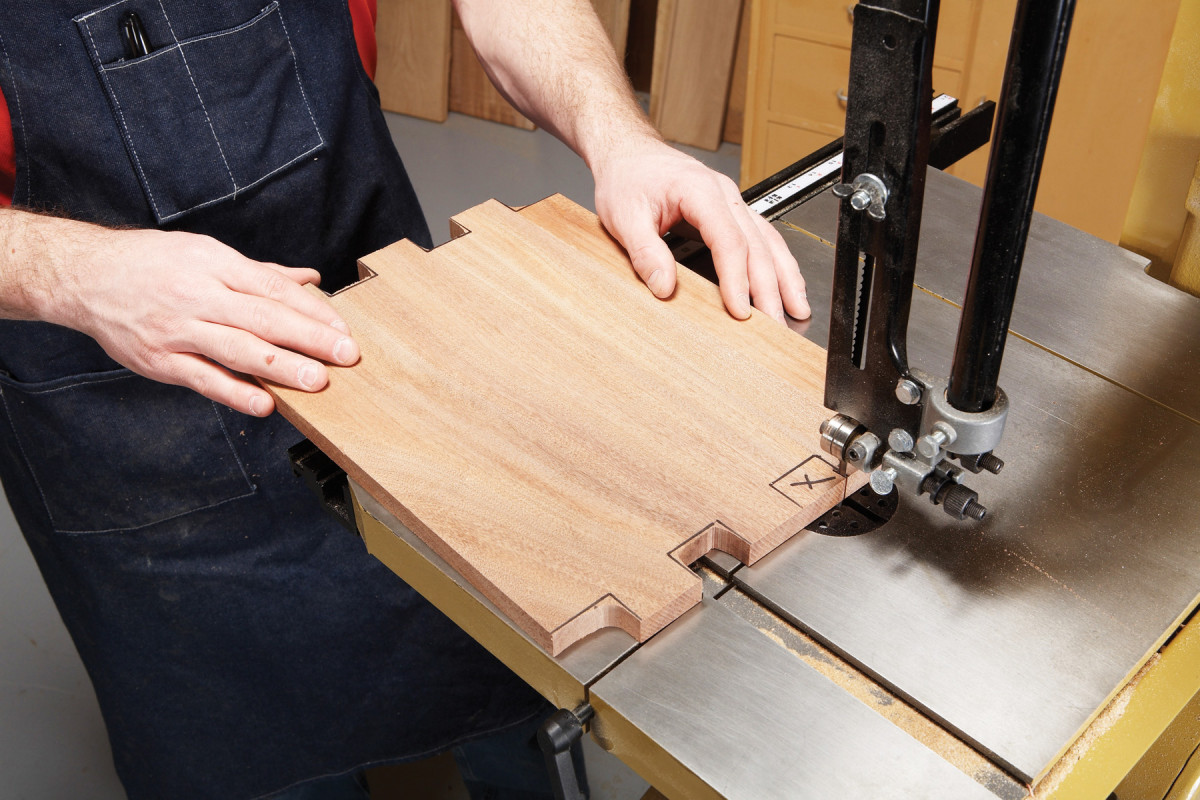
1. Start by marking and rough sawing the sockets. Their inside corners will be radiused by routing in tha later step, so don’t cut to far into them.
Fasten the template with screws or double-faced tape . If you use screws, mount the templates on the insde face of each piece, so the holes won’t show on your completed mailbox. Rout the sockets with a 1/2-in.-dia flush-trim bit. This leaves a 1/4-in. radius on the inside corners. Later, the fingers will be rounded over at the same radius, so they’ll fit perfectly (Photo 2).
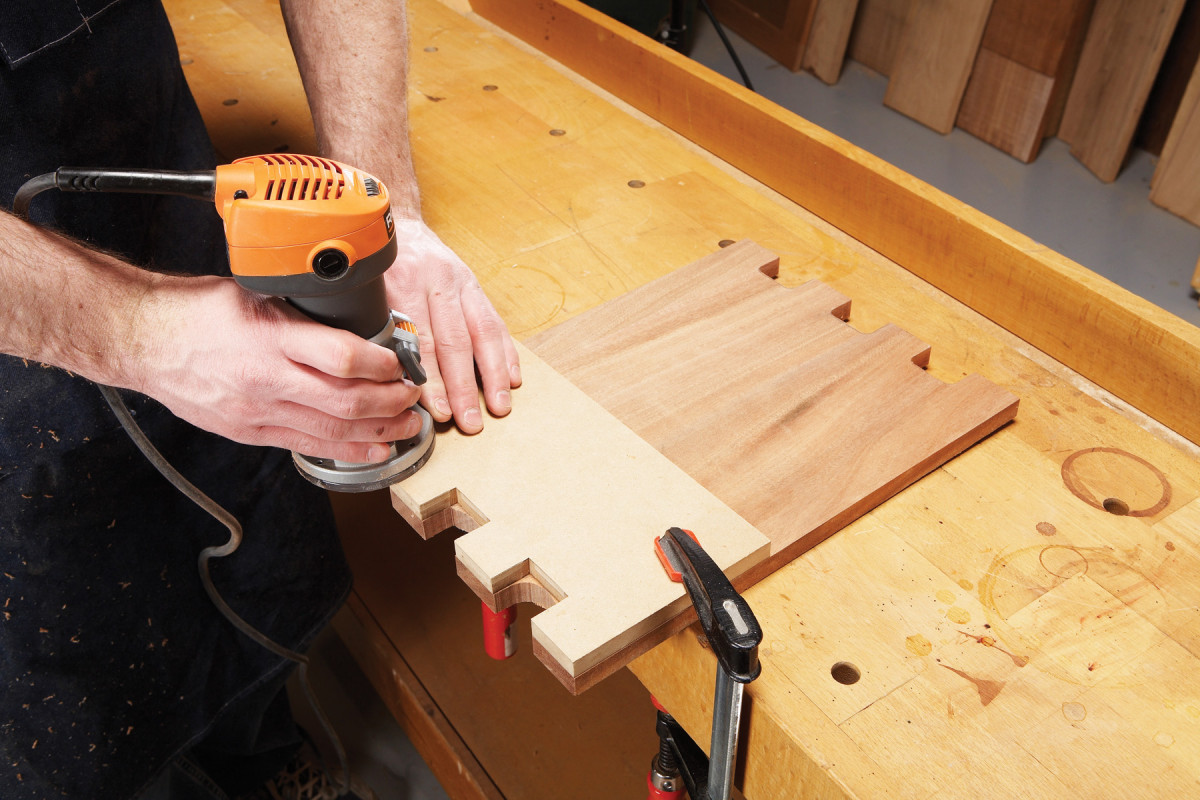
2. Rout the fingers and sockets using templates and a flushtrim bit. One template creates fingers at the top and bottom of the front and back pieces. Another template with opposing fingers and sockets is used to rout the side pieces.
Cut the sides to final dimension. Use your 12-in. miter saw with the blade swiveled 6 degrees to cut the angled fronts. Attach a stop block to make sure both side pieces are identically cut. If you don’t have a large miter saw, you could use a bandsaw to make these cuts and gang the pieces together to sand the edges smooth.

Mark, rough-saw and rout fingers and sockets on the side pieces. Carefully position the template to mark the front fingers (Photo 3). Before you rout these narrow pieces, add a board of equal thickness behind, to fully support the template.
3. The template must be carefully positioned on the sides’ angled front edges. The template’s fingers and bottom corner must both be flush.
Cut stopped square holes in all the fingers (Photo 4). Make sure to cut the holes on opposite faces of the two sides; otherwise you’ll have a pair of left (or right) sides.
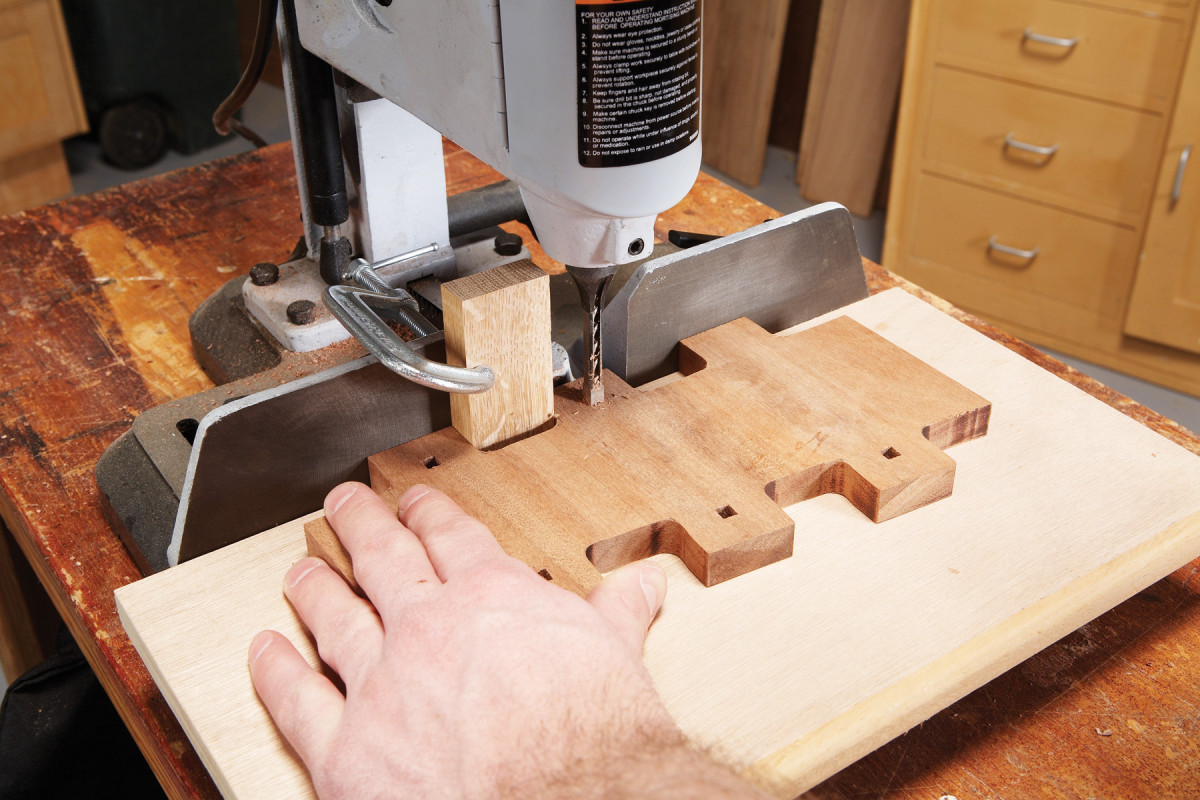
4. Cut stopped square holes in all the fingers with your mortiser. Use a clamped-on indexing block to position the workpiece, to assure that holes are precisely centered.
Drill shank holes for the screws through the stopped mortises.
Round the fingers and sockets with a 1/4-in.-dia. roundover bit (Photo 5). When you round the ends of the fingers, rout clockwise and make several shallow passes, to minimize tear out.
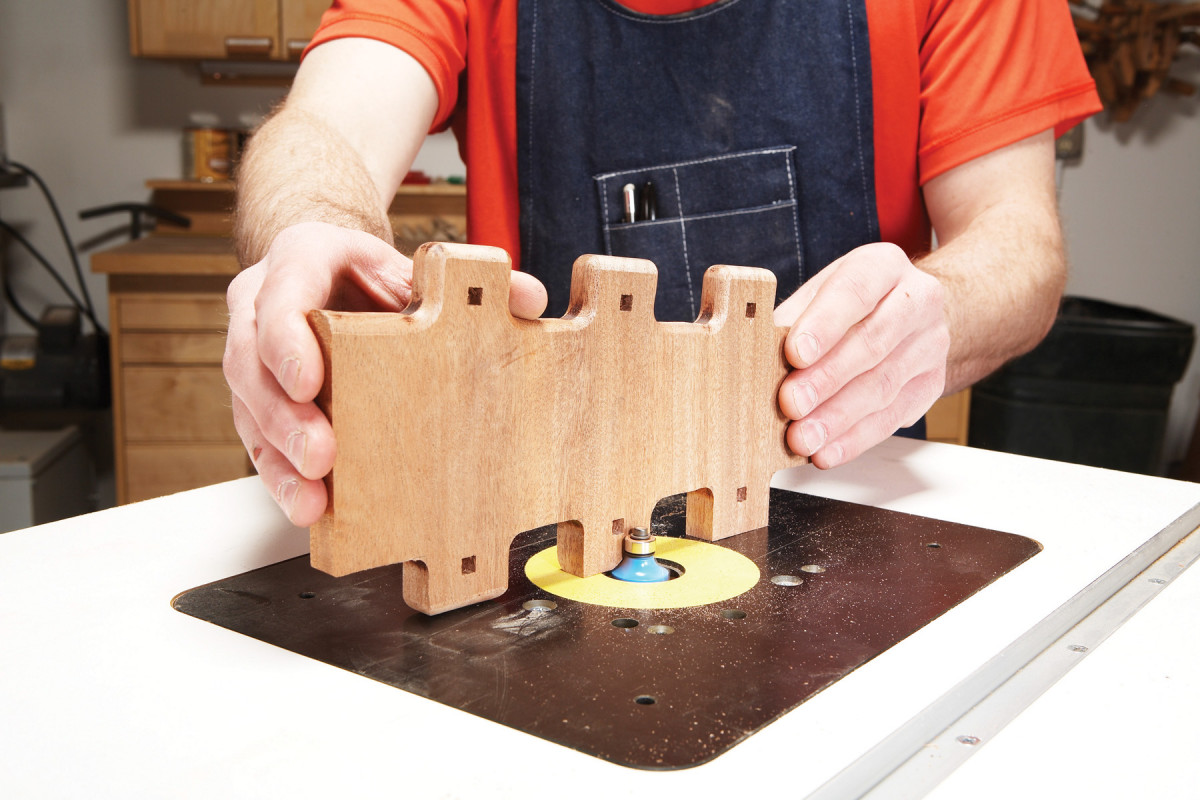
5. Round the fingers and sockets. First, hold the piece on edge and rout clockwise around each finger. Then lay the piece flat and rout full length on both faces.
Assemble the front, back and sides to check the fit and make any necessary adjustments.
Complete the Box
Cut the sides at a 45-degree angle to accommodate the lid (Photo 6). Use a stop block to guarantee identical parts.
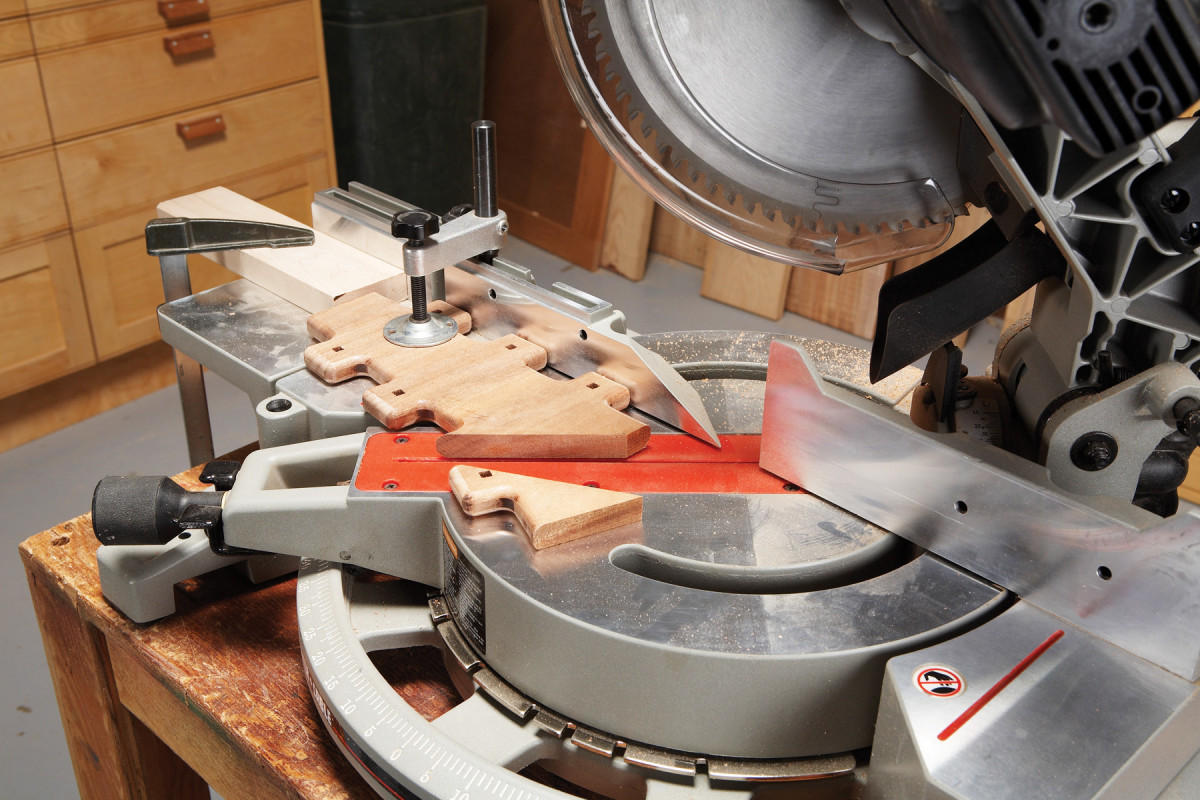
6. Cut the top of each side piece at a 45-degree angle for the sloping lid. Position a stop block so the angled cut leaves a 3/4-in.-wide flat section on the top of both pieces.
Rout through dados in the sides and stopped dados in the front and back pieces for the bottom. Cut the bottom (D) to final dimension, rout a rabbet all around and drill drainage holes. Dry-fit the box with the bottom installed.
Disassemble the box for sanding. Sand the flat surfaces up to 220-grit with a random orbit sander. Soften the rounded-over edges and ends of the fingers and sockets by hand sanding, so they look organic, rather than machined.
Assemble the box (Photo 7). Drill pilot holes to make sure the screws don’t break or split the wood. Remember to install the bottom before you fasten the last piece.
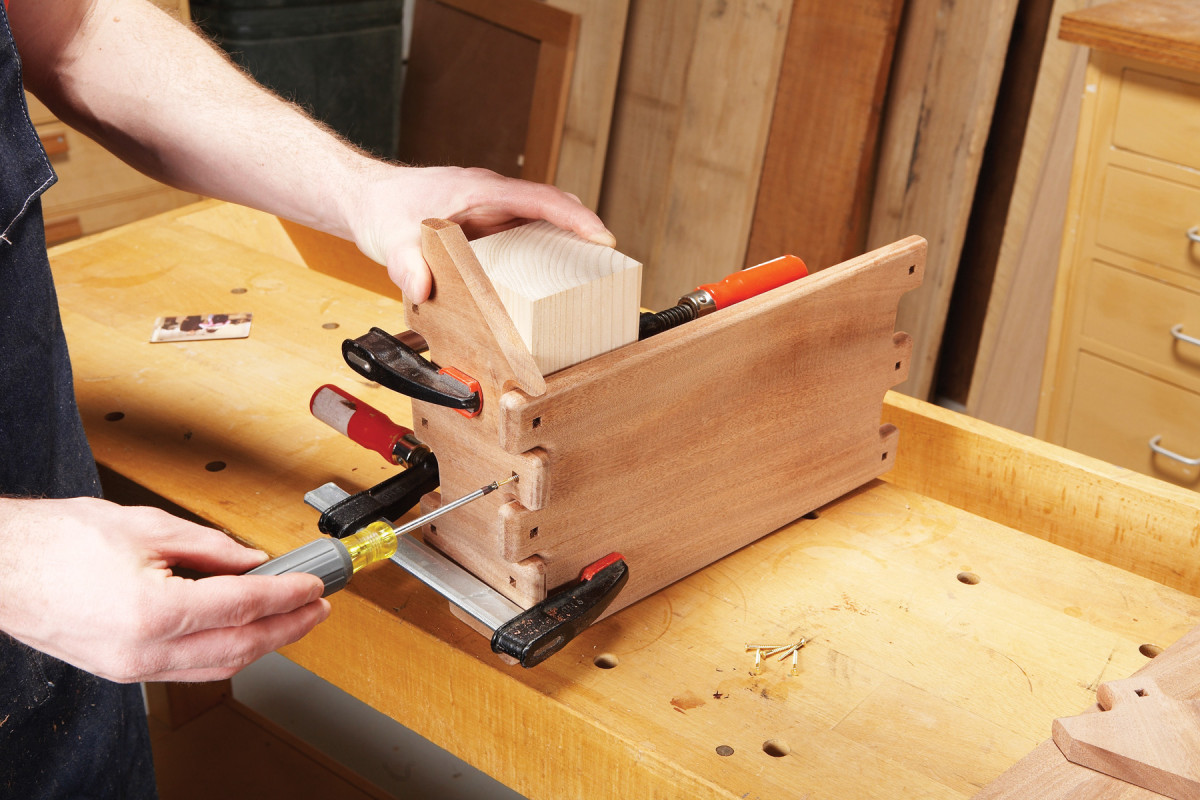
7. Assemble the box one corner at a time. Square the joint and clamp the parts firmly. A squarely-milled 4×4 makes this easy. Pre-drill, then install the screws.
Make and Install the Pegs
Rip a 2-ft. length of 1/4-in. by 1/4-in. stock.
Shape the end to form a pyramid with slightly rounded sides and a dulled point, by rubbing it on 220-grit sandpaper adhered to your bench. Use a handsaw to cut each peg to length. The pegs must be slightly shorter than the mortises, so they don’t bottom out.
Add a bit of waterproof glue when you insert each peg. Then tap it lightly in place (Photo 8). Immediately remove any squeezed-out glue.

8. Set the pegs with the tap of a hammer. Use a washer to guarantee they protrude uniformly.
Make the Top and Lid
For a good grain match, make the top (E) and lid (F) from the same piece of wood. Rip the top at a 22-1/2- degree angle. Turn the remaining piece over and adjust the fence on the table saw to cut the lid.
Using the tablesaw, cut a centered 1/4-in. by 1-5-16- in. groove in the front edge of the lid. To make a centered cut, set the blade 3/16-in. from the fence and make two passes. Rotate the lid 180 degrees to make the second pass.
Shape the ends of the top and lid on the router table, using the 1/4-in. round-over bit. Be careful not to let the bearing disengage when you reach the bevels.
Rout mortises for the brass hinges. The hinges must be positioned slightly lower than normal—with the barrels partially hidden—so the hinge screws won’t break through the angled lid. The mortises are deeper than the hinge leaf thickness, to minimize the gap between the top and lid. You can hand-chop the mortises, or remove most of the material with a straight bit chucked in a laminate trimmer and then clean up the corners with a chisel.
Install the hinges, so you can check the gap and their operation. Brass screws break easily, so drill pilot holes before installing them. Remove the hinges for the next step.
 Mark the handle profile onto the lid (Fig. D). This stepped profile, with its elongated S-shaped curves, is commonly called a “cloud lift.” Cut the profile on the bandsaw and smooth the faces by sanding.
Plane the spline blank (G) to match the width of the groove you’ve cut in the lid.
Install the spline and transfer the cloud lift profile, using a washer with a 1/8-in. rim to create the 3/16-in. lip (Photo 9).
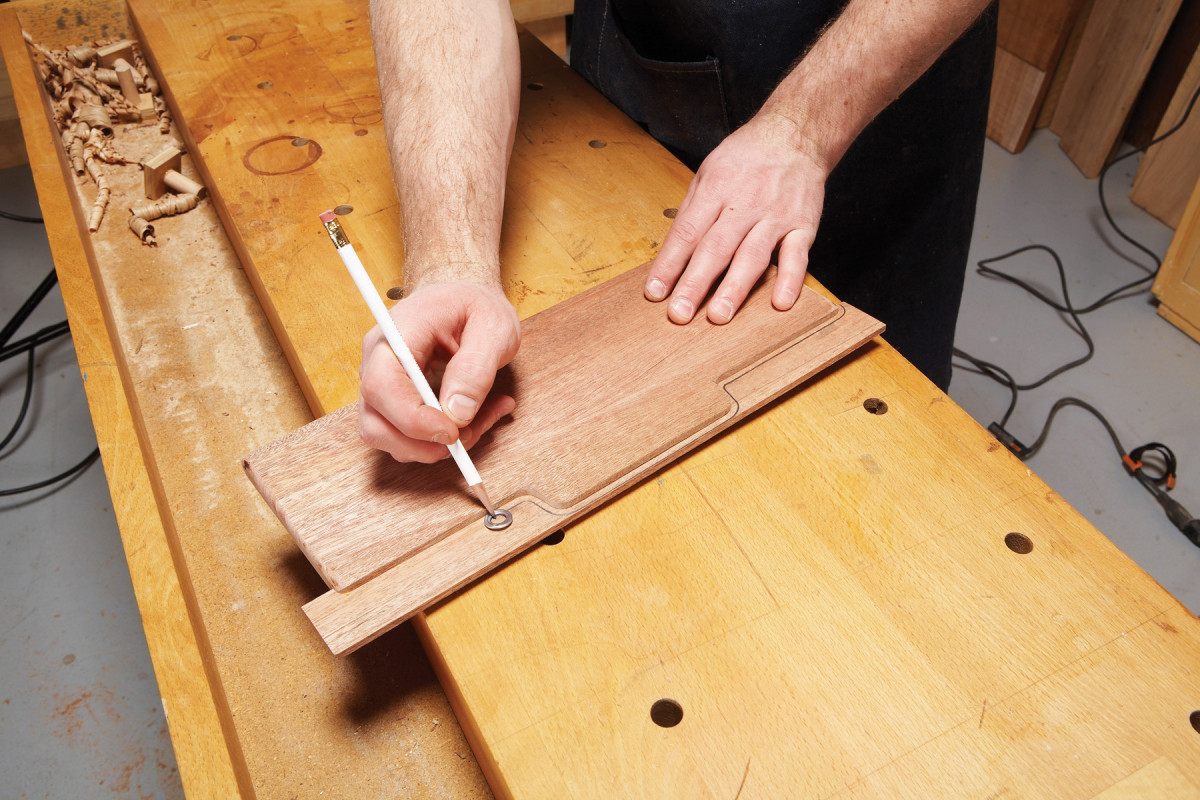
9. Use a washer to create a complementary profile when you trace the lid’s handle onto the spline blank. The groove for the spline was cut in the lid earlier, before the handle profile was sawn.
Remove the spline, cut the profile on the band saw and sand the sawn edge smooth. Install the spline to make sure the profiles are complementary. Remove the spline for final shaping. 28. Round over both edges of the lid’s cloud lift profile on the router table, with the 1/4-in. round-over bit lowered 1/16-in. During this process, the bit’s bearing will ride on the opposite side of the groove.
Create a half-round edge on the spline’s cloud lift profile by sanding or filing, or both.
Glue in the spline, using clamps to make sure it seats completely in the groove.
Mark and mortise stopped square holes on the lid and top and drill shank holes for screws (in the top, only).
Attach the hinges. Center the top/lid assembly on the box and fasten it with screws. Sand the top and lid while they are attached to smooth the transition between the two parts. Then remove the lid for final sanding.
Install the remaining pegs: Two in the top and three in the lid.
Final Details
Apply an exterior grade finish to accentuate the wood’s color. Exterior oil finishes are easy to apply, but they must be renewed annually. Spar varnish lasts longer, but it takes longer to apply and must be removed and replaced if it’s allowed to deteriorate.
Re-attach the lid when the finish is dry.
The top and fingers extend beyond the back of the box, so install spacers (J) to facilitate flush-mounting. Drill mounting holes through the back and the top spacer and mount the mailbox with fasteners appropriate for the exterior walls of your house.
Green & Green Mailbox Cut List

Here are some supplies and tools we find essential in our everyday work around the shop. We may receive a commission from sales referred by our links; however, we have carefully selected these products for their usefulness and quality.