We may receive a commission when you use our affiliate links. However, this does not impact our recommendations.
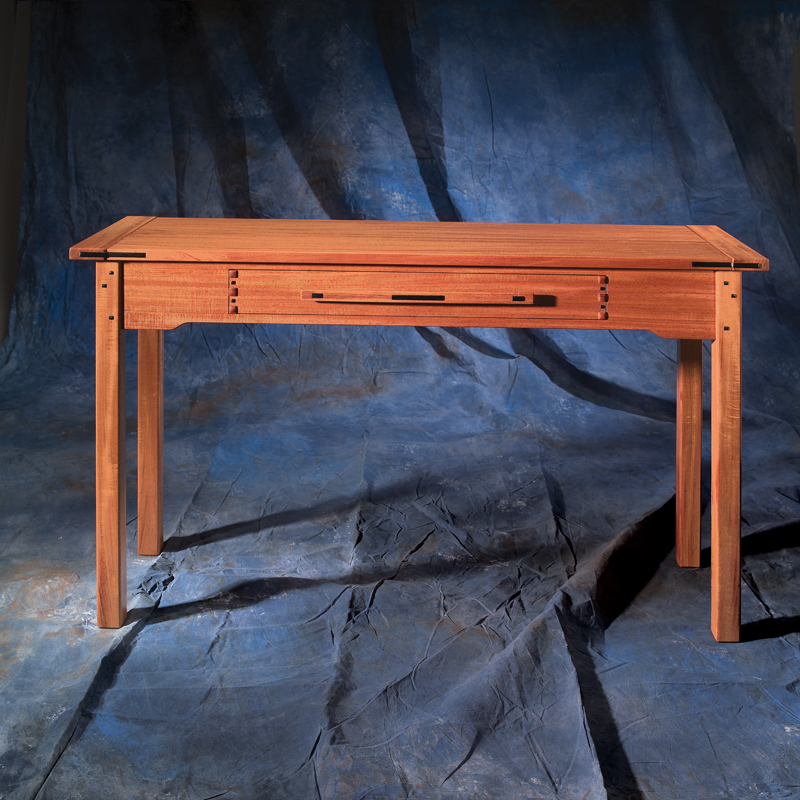
Greene and Greene-Style Hall Table
?Exquisite detailing turns
ordinary into extraordinary.
By Bruce Kieffer
| People just love this wonderful little table with its soft-colored mahogany, ebony accents and finger-jointed drawer. The spectacular detailing is characteristic of furniture designed by Charles and Henry Greene. The Greene brothers were prominent architects and furniture designers in Pasadena, Calif., during the early 20th century. They worked closely with Swedish master woodworkers John and Peter Hall to design one-of-a-kind furniture. | 
You may also like… |
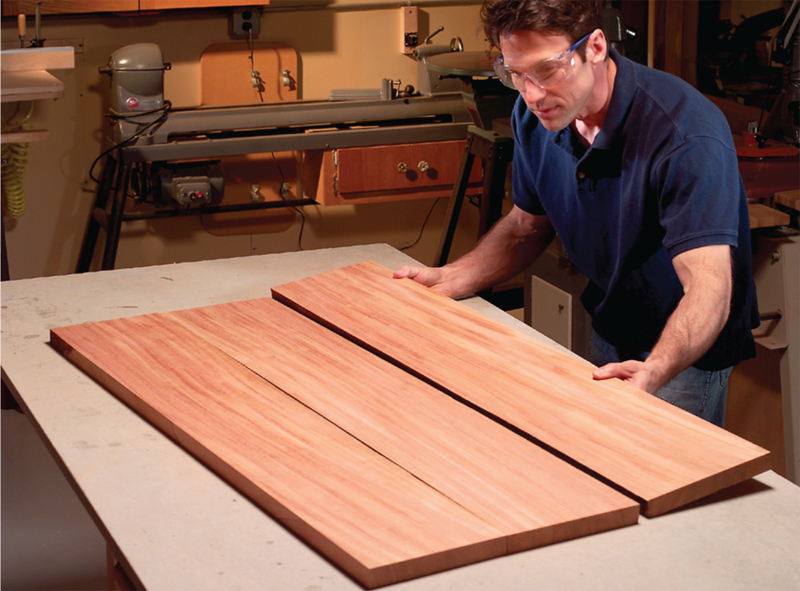
| Choose your best boards for the top. Look for boards with similar grain and color. With luck, the joints will be almost invisible on the finished top. | Click any image to view a larger version.
|
| Rout a tongue groove on the breadboard ends using a slot cutter. These boards help the top stay flat. Featherboards make routing safer and more accurate. | 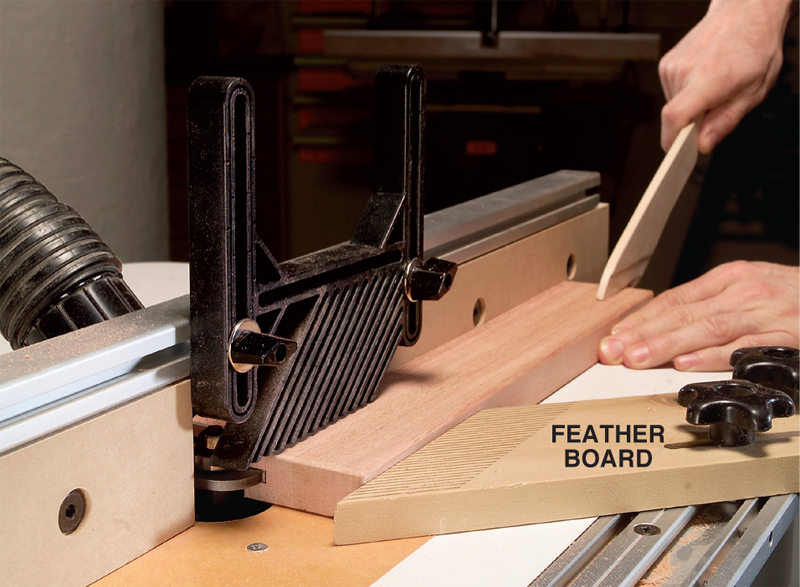 |
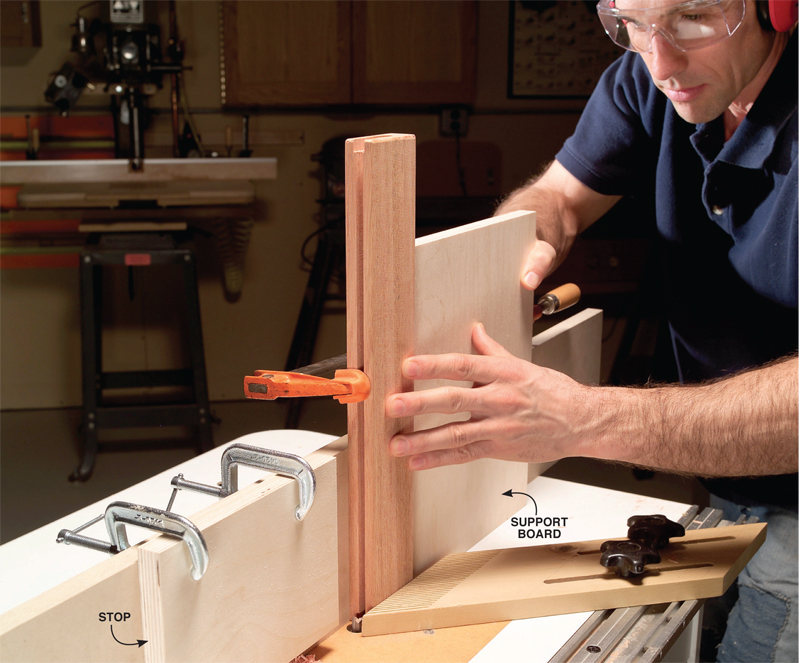
| Rout stopped grooves for ebony splines in the breadboard ends using a straight cutter. Clamp a stop to your fence to limit the groove’s length. Clamp a support board to the breadboard end and push them together for greater stability. Note: One groove is cut with the top surface against the fence; the other with the underside against the fence. This requires testing and resetting the fence for each pair of grooves. |
 |
| Rout plug grooves in the breadboard ends. Stops establish the beginning and end of each groove. Drop the piece onto the bit, slide it forward and then lift it off. Use scrap cut to the same size to fine-tune the setup. | 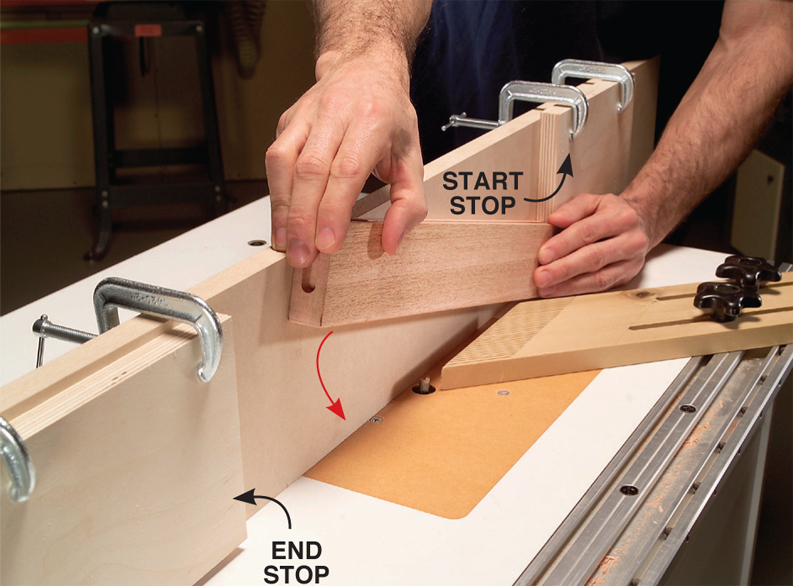 |
| Square the ends of the plug grooves with a mortising machine chisel. A wooden mallet prevents damage to the top of the chisel. | 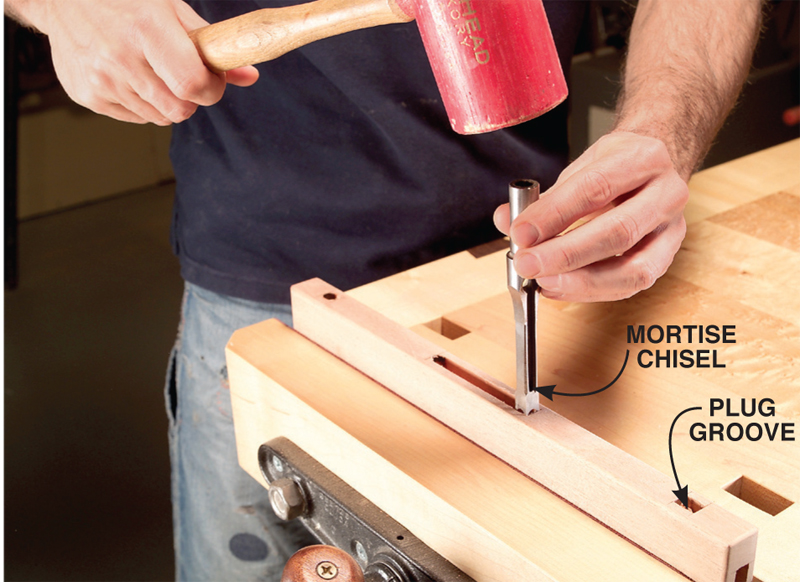 |
| Rout tongues on the top with a rabbeting bit. Clamp blocks to both edges to prevent the ends from chipping out. The blocks also prevent the router from accidentally sneaking around a corner and cutting on the front or back edge. | 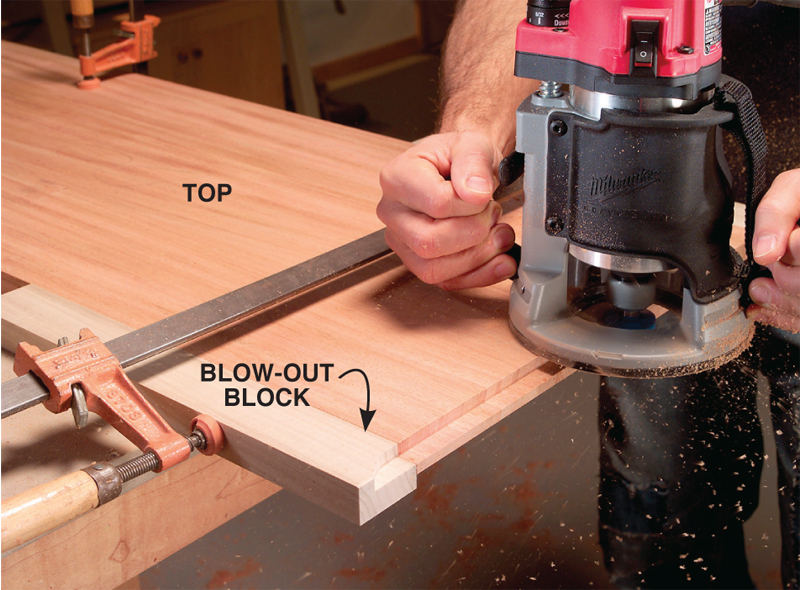 |
| Mark the screw holes’ location on the top by lightly tapping the screw heads. Make sure the breadboard ends are centered on the top. Remove the breadboard end and drill the pilot holes in the top. | 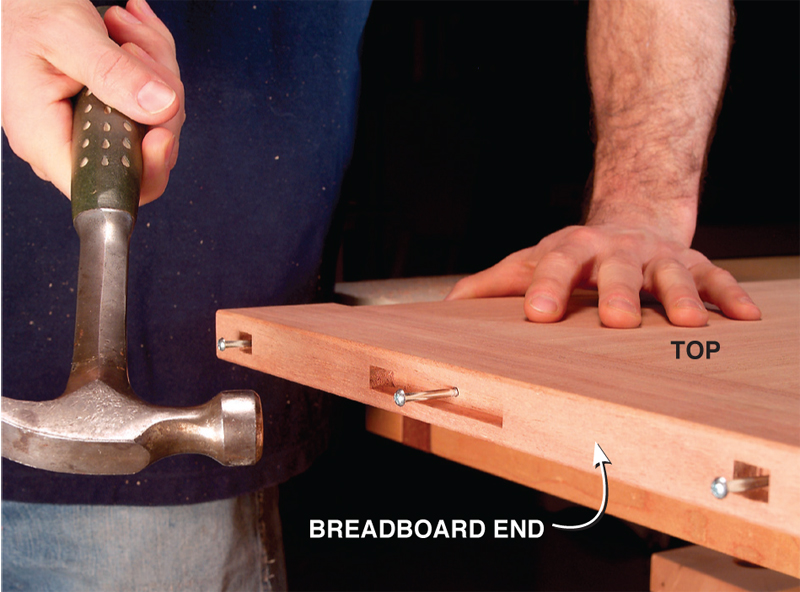 |
| Glue the front apron back together after it’s been ripped and crosscut into five pieces. Because the drawer front is cut out of the apron, it seamlessly blends into the surrounding pieces. | 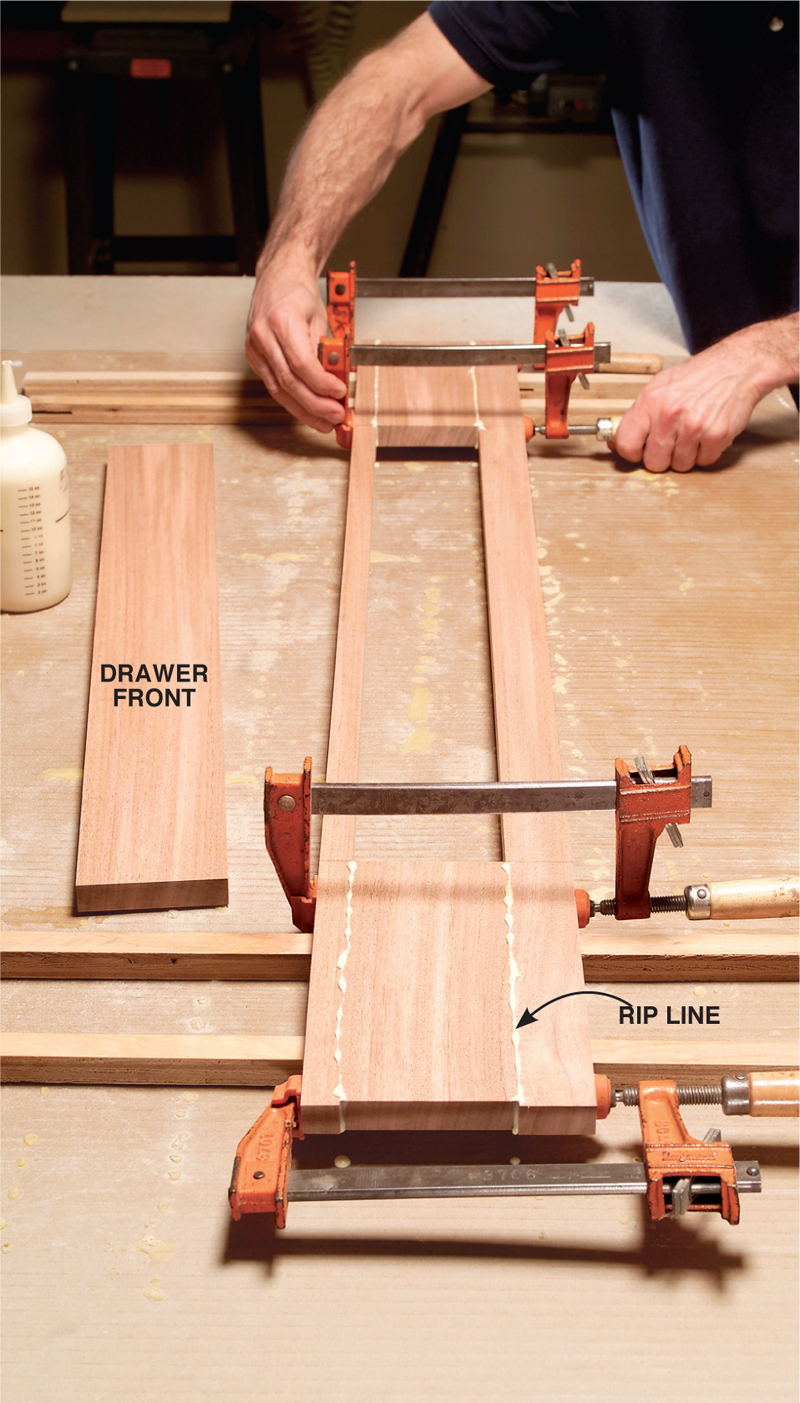 |
| Shape the bottom of the aprons with a router, flush-trim bit and template. This creates the Chinese-inspired “cloud lift” curve widely used by the Greene brothers. Most of the waste is removed with a bandsaw prior to routing. | 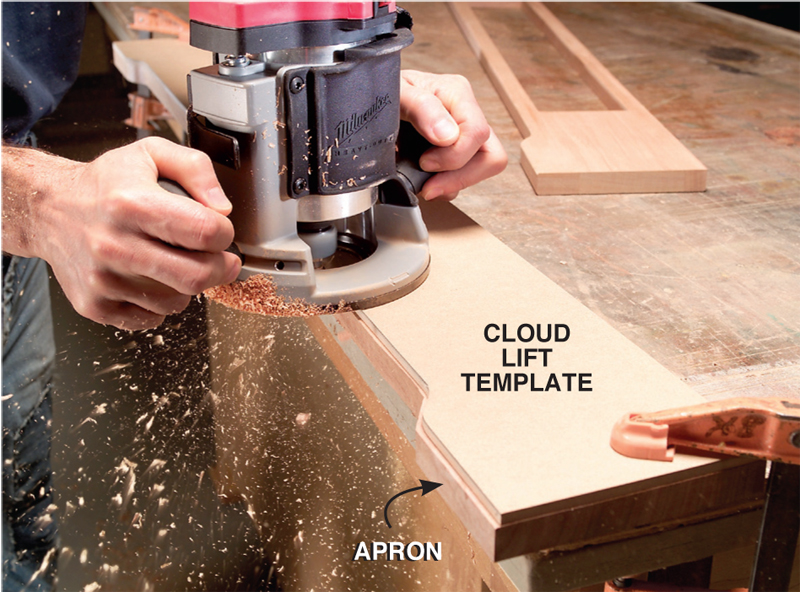 |
| Join the apron to the legs with biscuits. Offset the joint by placing a 1/4-in.-thick spacer under the biscuit joiner’s fence when cutting the aprons. Remove the spacer for the legs. | 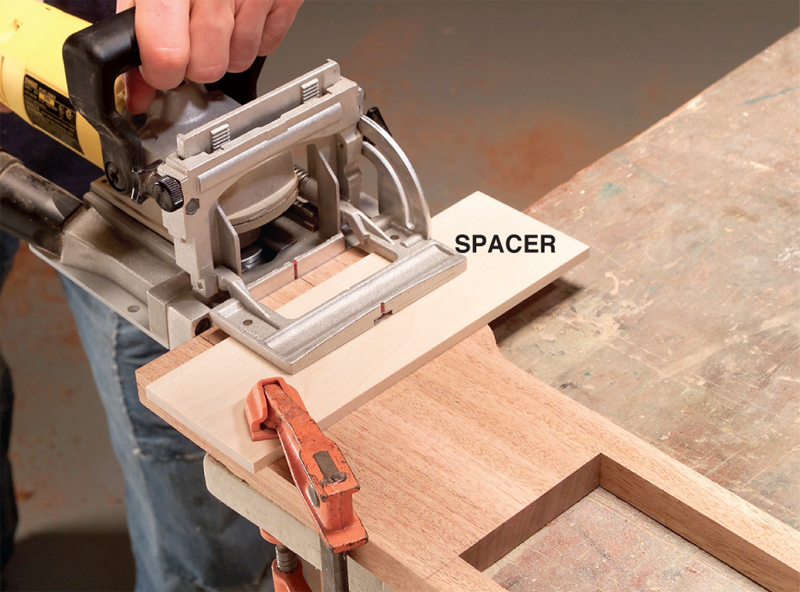 |
| Glue and clamp the base together. Two 10-in.-tall L brackets are like having an extra pair of hands to support the front assembly as you apply the clamps. | 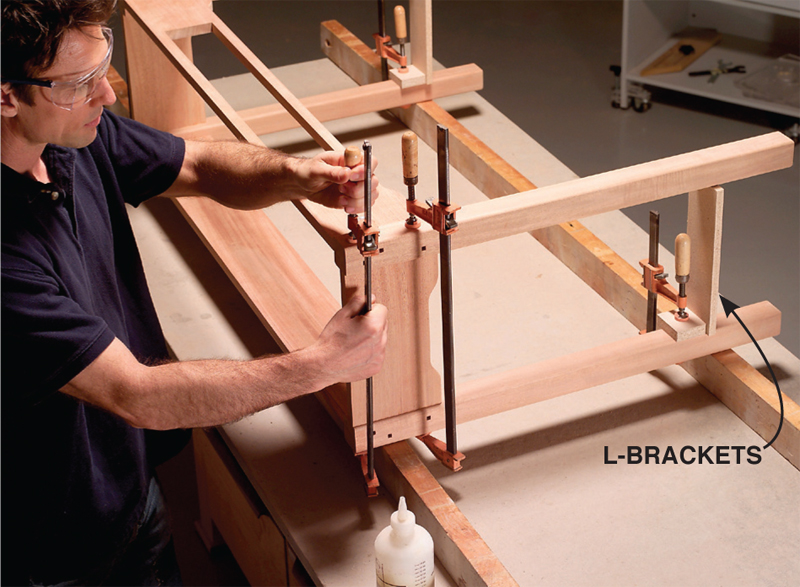 |
| Glue the drawer kickers and runners into place. Create the long grooves on the ends of each piece with a 5/32-in. slot cutter. | 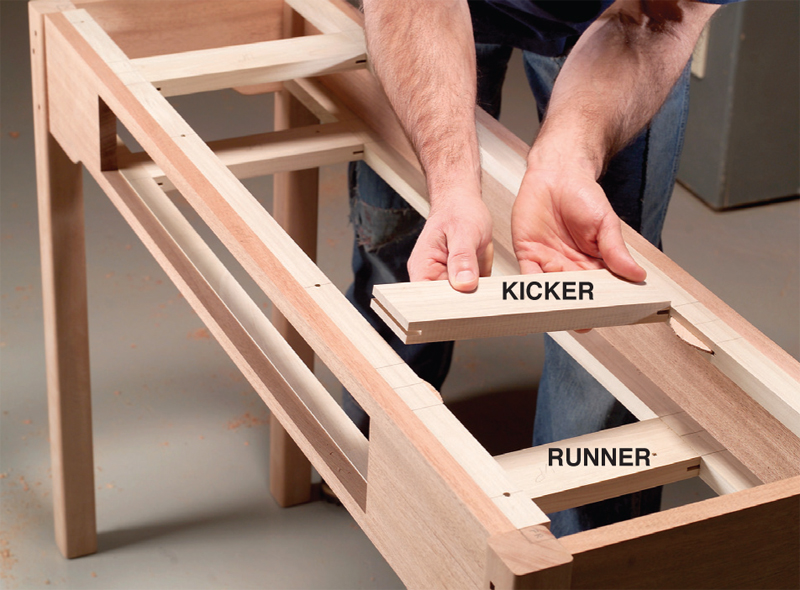 |
| Rip the ebony into strips on the bandsaw. It’s safer than a tablesaw and wastes less of this expensive wood. A fine-toothed saw blade makes a smooth cut that requires minimal sanding. | 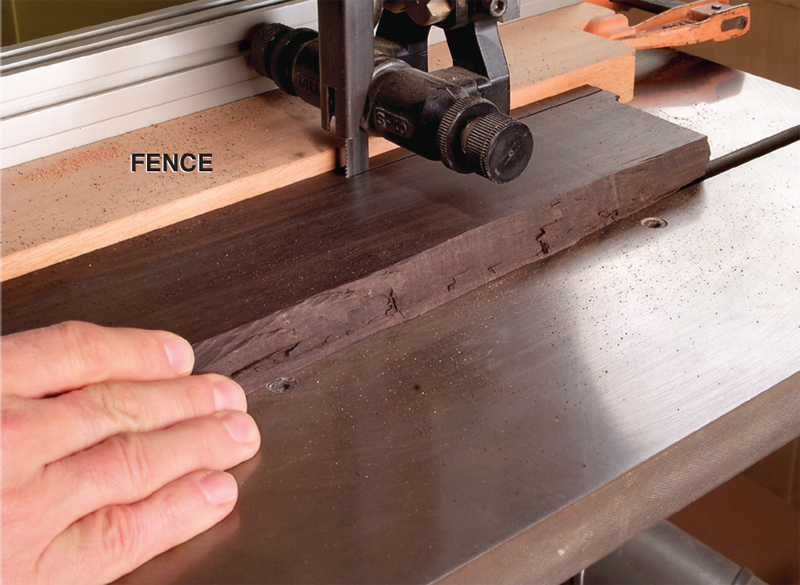 |
| Cut short plugs after sanding the gently rounded shape on the end. A simple wooden jig holds the ebony strips in place. | 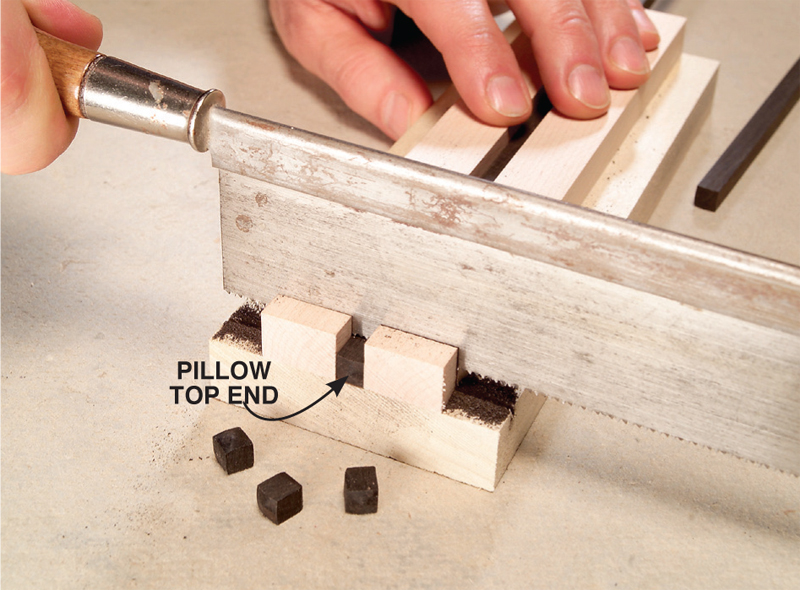 |
| Tap the plugs into their holes. The plugs stand slightly proud of the surface. Use a spacer made from plastic laminate to make sure all the plugs are equal in height. | 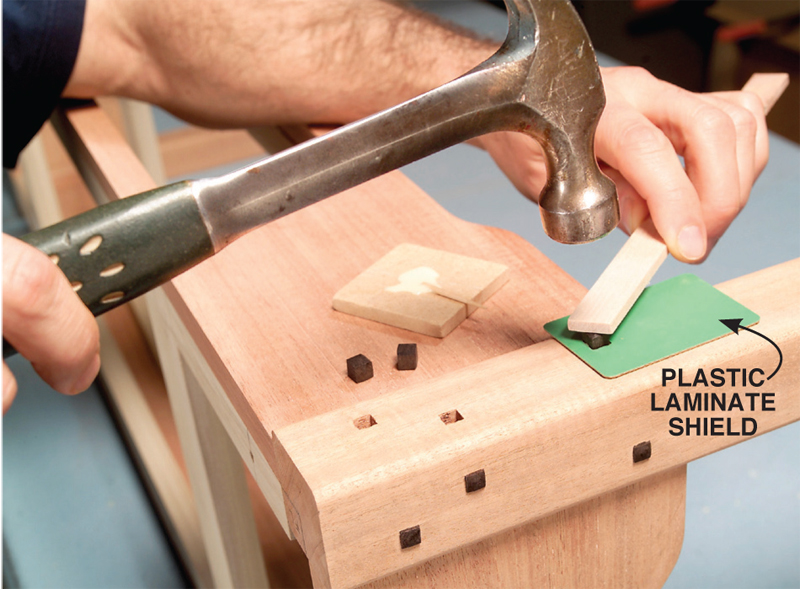 |
| Make spacers that exactly fit cuts made by your dado set. The spacers are used to cut the finger joints in the drawer. Test-fit fiberboard spacers into 5/8-in. and 3/4-in. notches cut by your dado set. Shoot for a snug fit. | 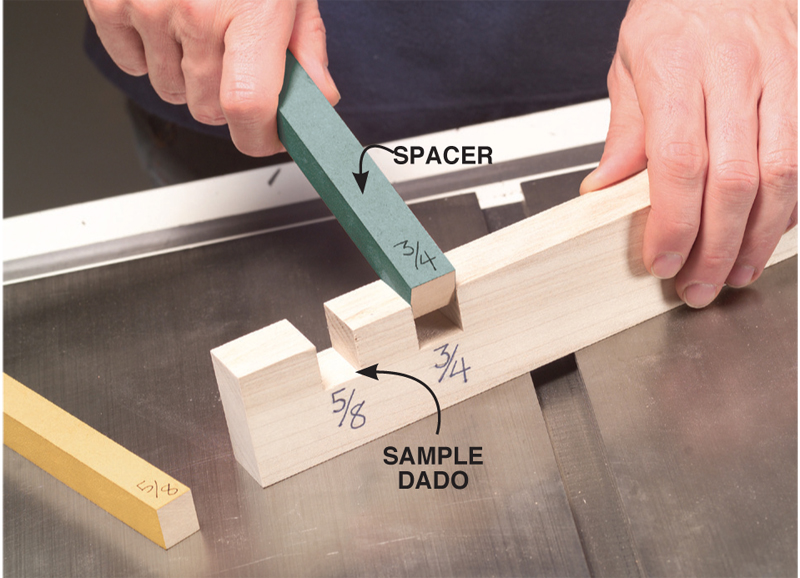 |
| Cut the first finger joint on the drawer side using a 5/8-in. and a 3/4-in. spacer. The tall fence is screwed to the miter gauge and has an adjustable stop to fine-tune the setup. The spacers are held in place with a short hold-in bar. |  |
| Add two more spacers for the second cut on the drawer sides. |  |
| Cut the first finger joint groove on the drawer front with a single 5/8-in. spacer. Set a 5/8-in.-wide dado blade 9/16 in. high. Shim out the hold-in bar with washers to accommodate the 7/8-in.-thick drawer front. | 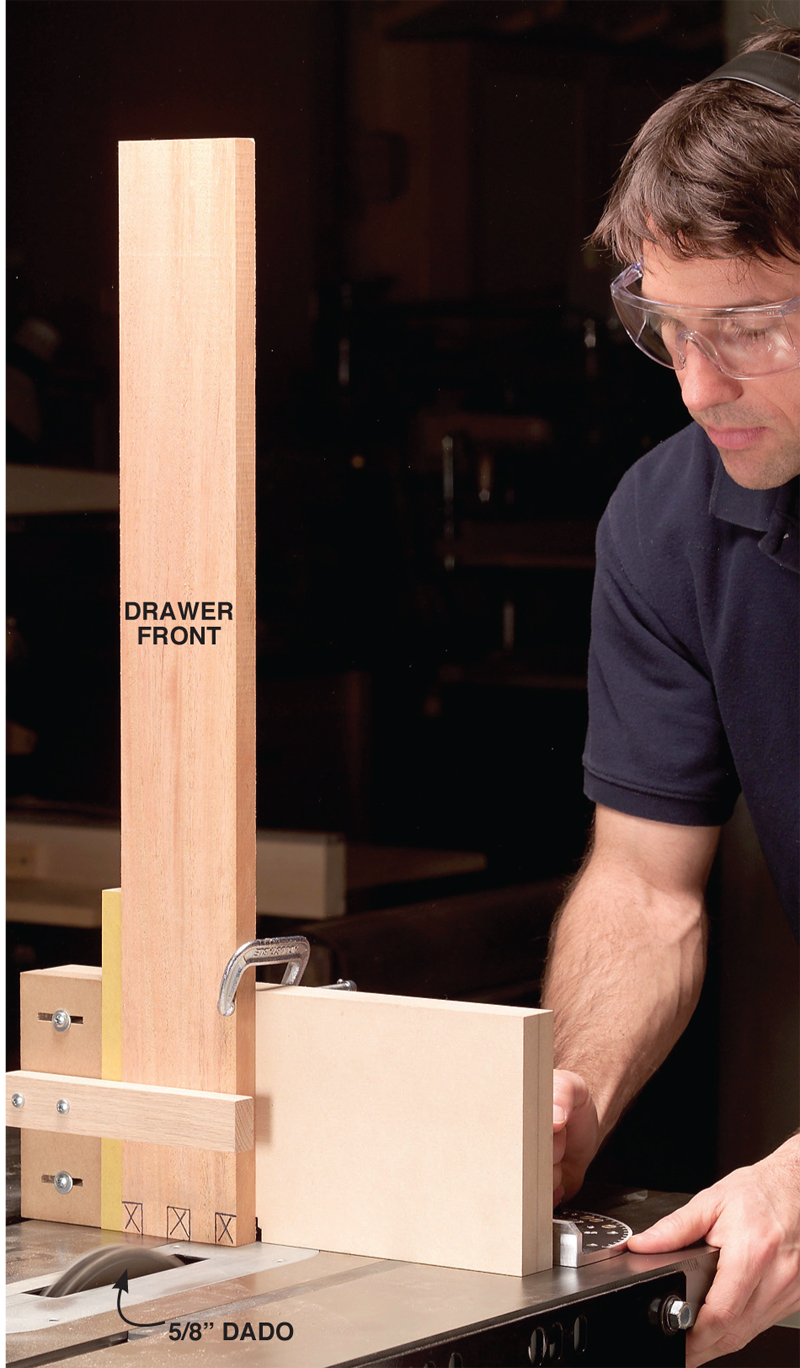 |
| Assemble the drawer with bandsawn clamp blocks. The finger joints’ ends stick out past each other. The blocks put pressure only where it’s needed. Drill relief holes in one set of blocks to accommodate the plugs. | 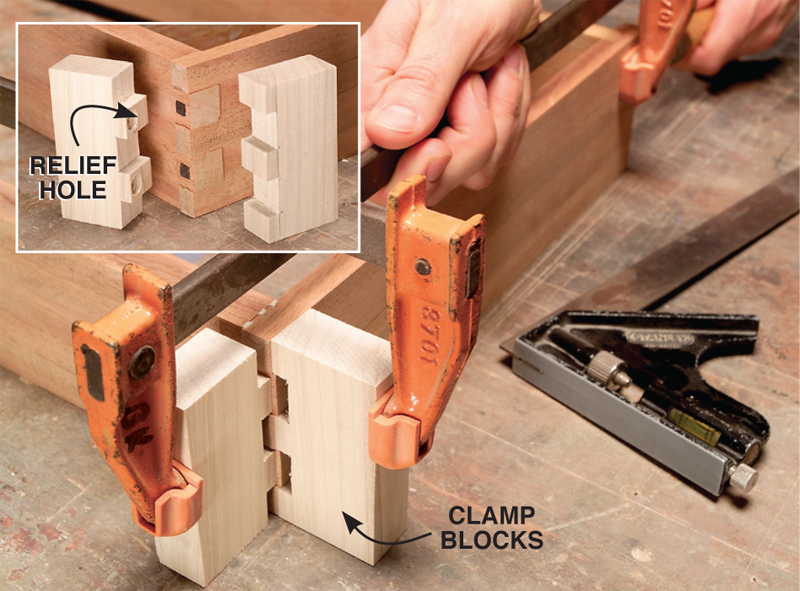 |
| Screw guides to the drawer runners with the drawer in place. Create the perfect gap between the guides and the drawer sides with two playing-card shims. | 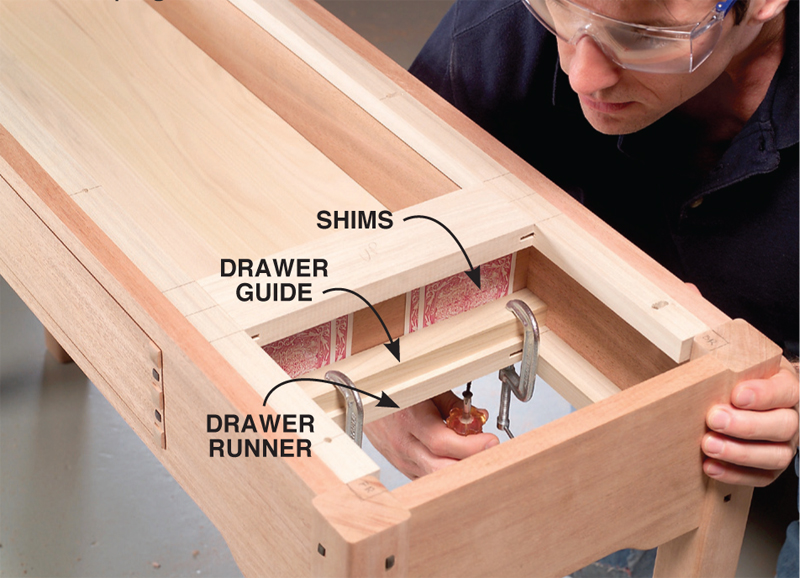 |
| Screw the base to the top. Make your own “sideways” screwdriver with a ratchet wrench to get into this tight space. Use a 1/4-in. socket and a screwdriver bit from a cordless drill. | 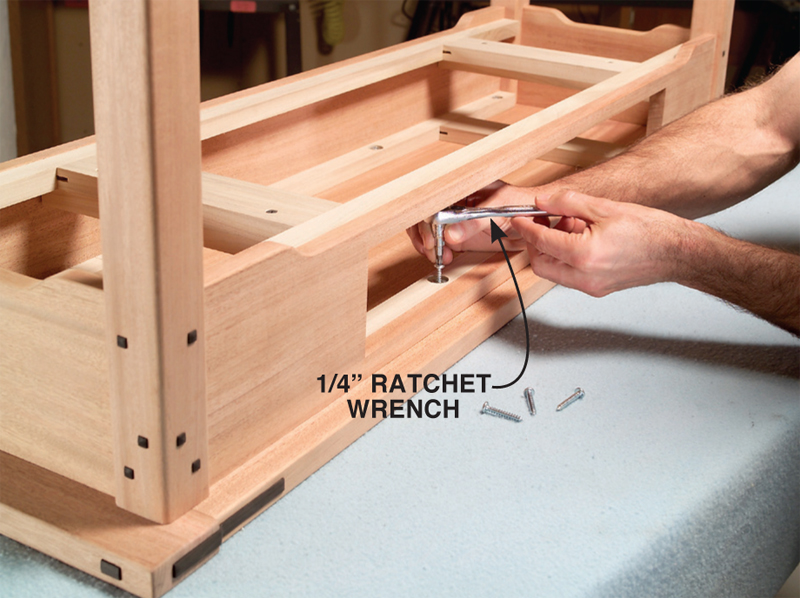 |
| This story originally appeared in American Woodworker July 2004, issue #108.
|

Product Recommendations
Here are some supplies and tools we find essential in our everyday work around the shop. We may receive a commission from sales referred by our links; however, we have carefully selected these products for their usefulness and quality.


Recommended Posts