


We may receive a commission when you use our affiliate links. However, this does not impact our recommendations.
A couple weeks ago I wrote about some teak that I salvaged from an old Adirondack chair. I started a project with it today; a long, slender dovetailed box with a sliding lid. I'm a big fan of boxes; particularly boxes with sliding lids because I love the sound that they make.

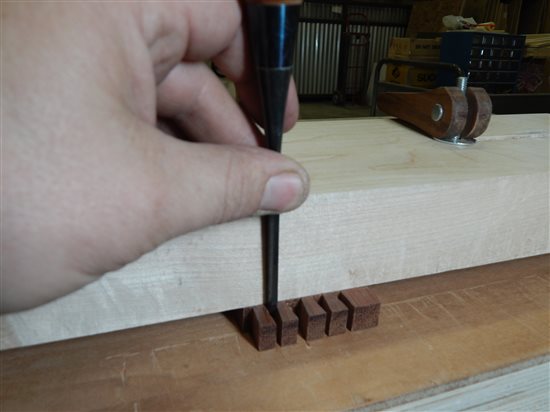
Here I've just got the first tails cut on one end of the first side. I set it up so you can see the proportions that I'm going for. Notice that there's no dovetail at the top edge. That's so I can cut a groove for the rabbeted top. Also, I left it a bit thick to allow for a little sculpting of the top edge. The 3/4" chisel is there for reference. I really enjoy making pieces like this – no plans, no measuring – just decide what looks good to your eye and go with it. I'll keep you posted on the progress as I go.
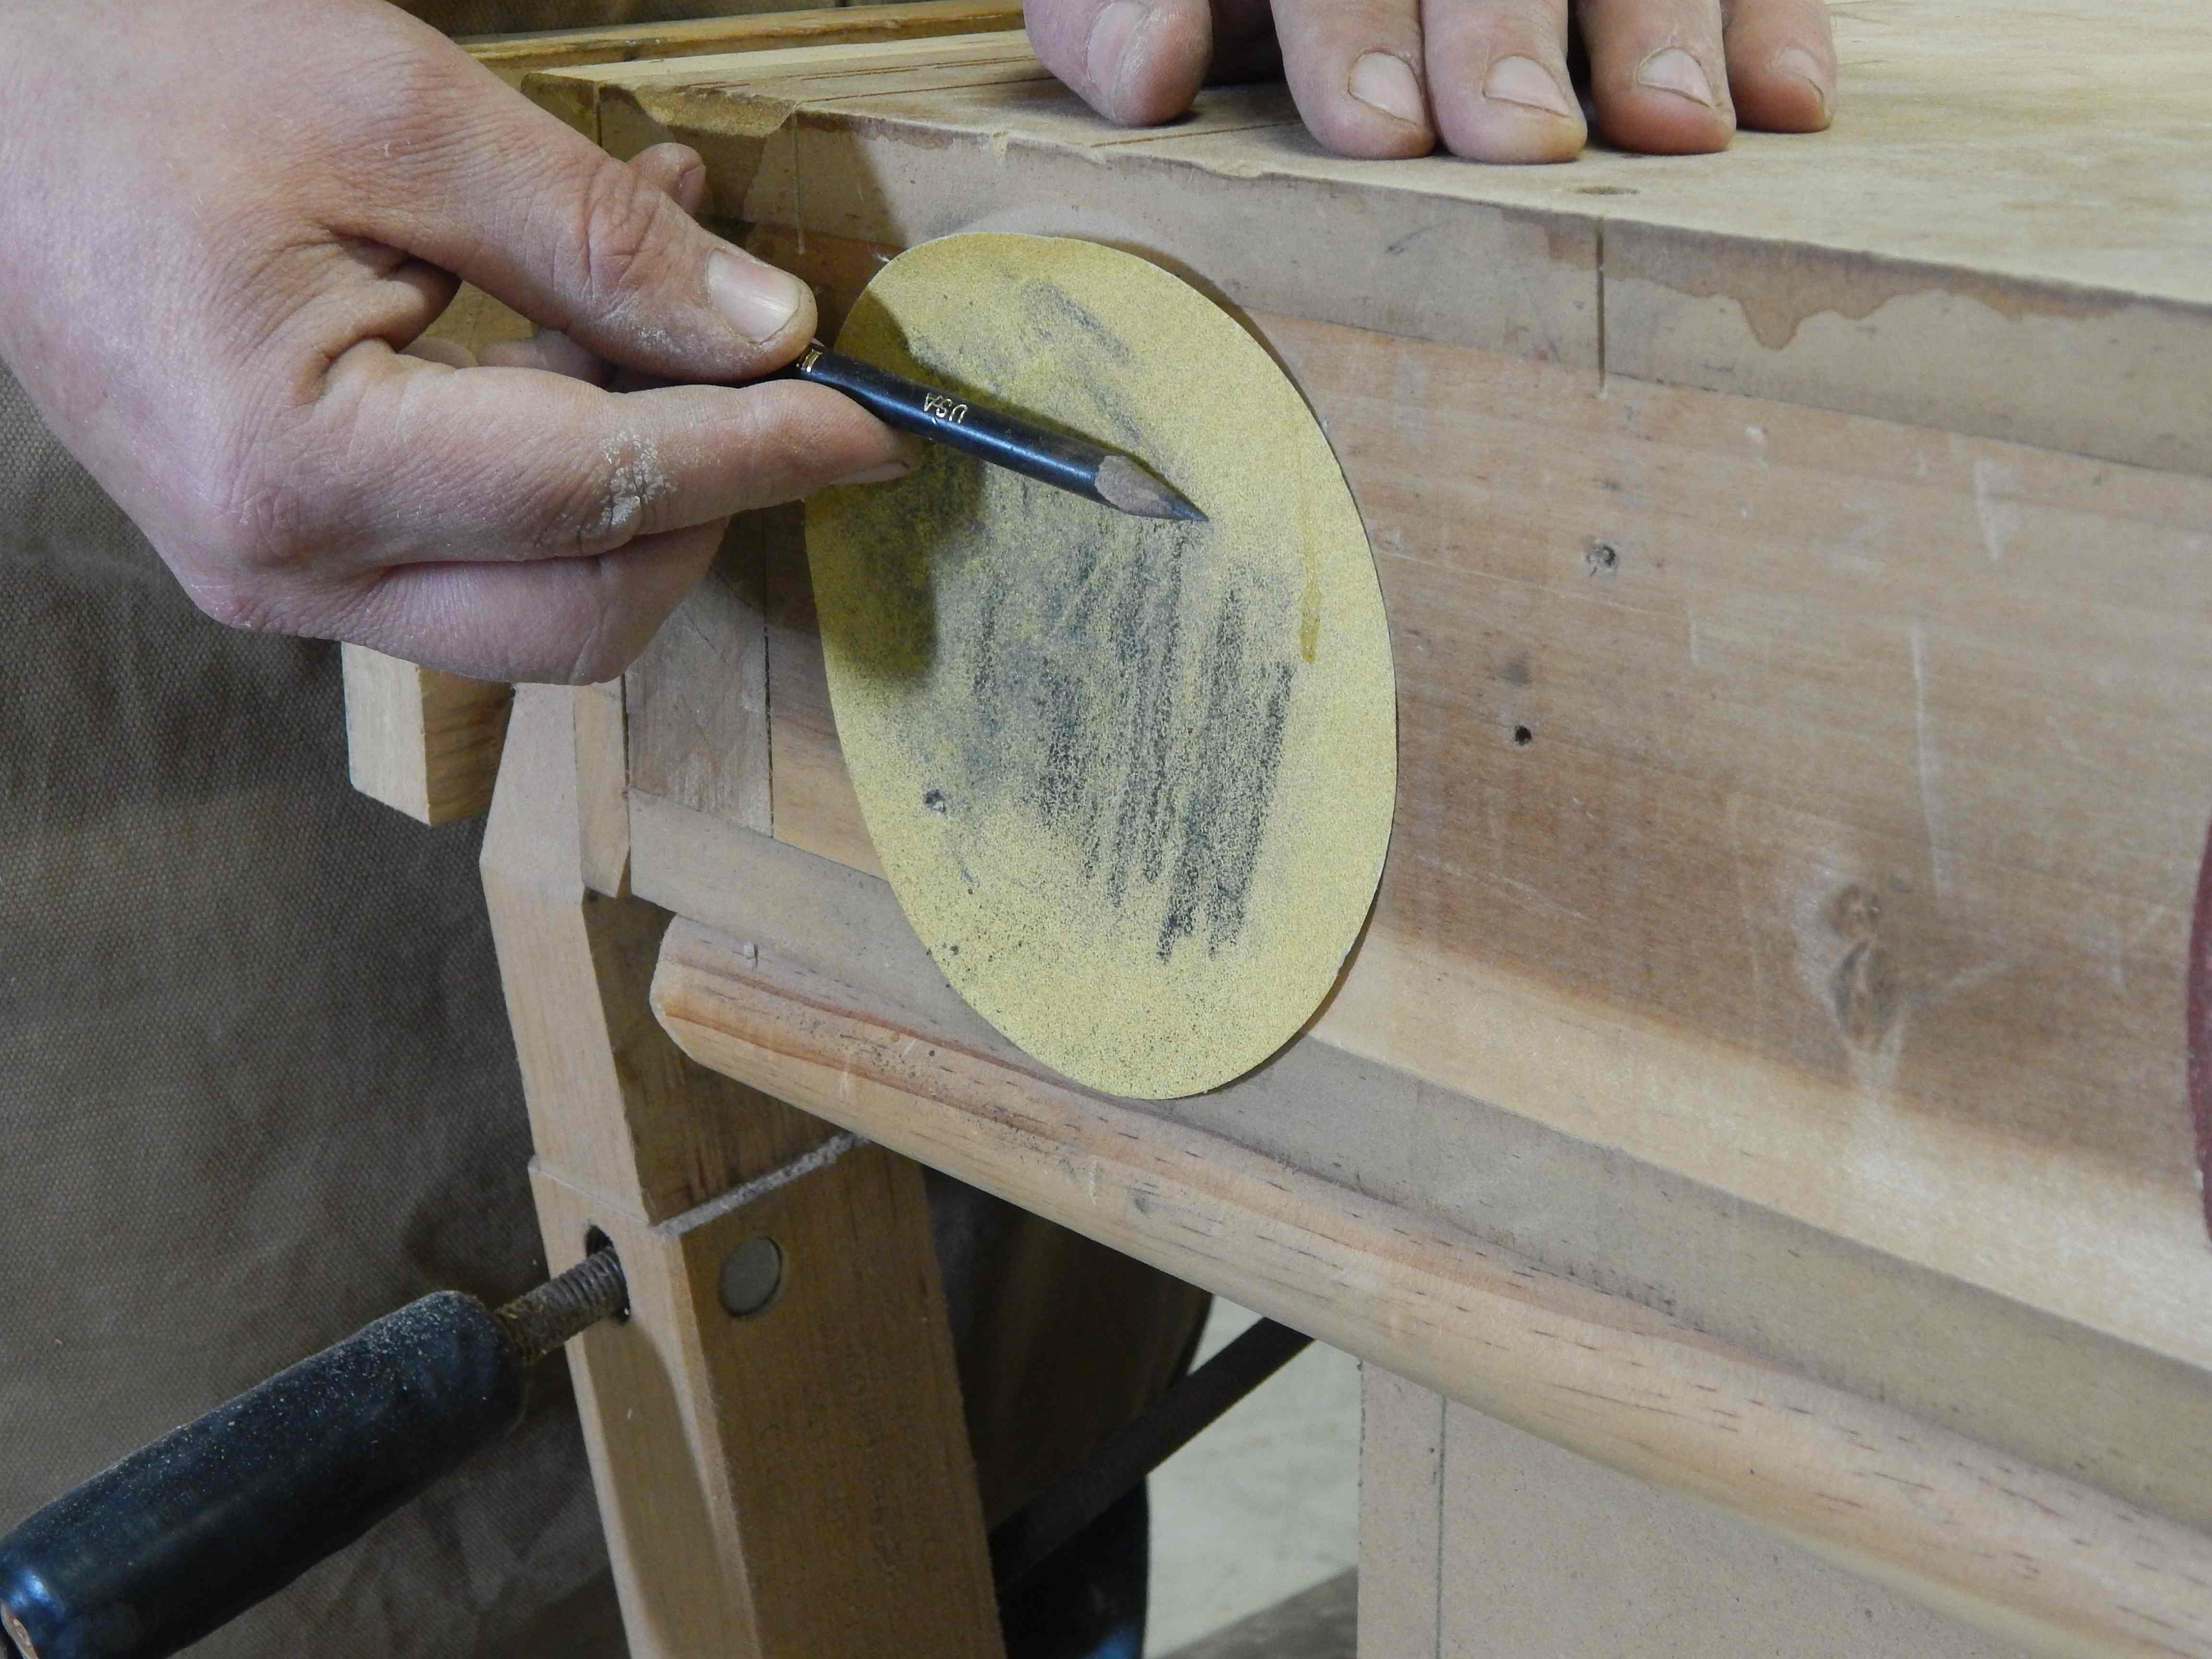
Here's a tip — When you're marking out tiny dovetails, a sharp pencil is a must. Below is a technique I've been using for years to keep my pencils sharp as a pin. I stick an adhesive backed sanding disc to the end of my bench and touch up the pencil's tip continually. Actually, I keep these discs stuck here and there throughout my shop.
Next week I hope to have at least a couple new tools for you to get a sneak peak at, so check back!
Here are some supplies and tools we find essential in our everyday work around the shop. We may receive a commission from sales referred by our links; however, we have carefully selected these products for their usefulness and quality.


