We may receive a commission when you use our affiliate links. However, this does not impact our recommendations.
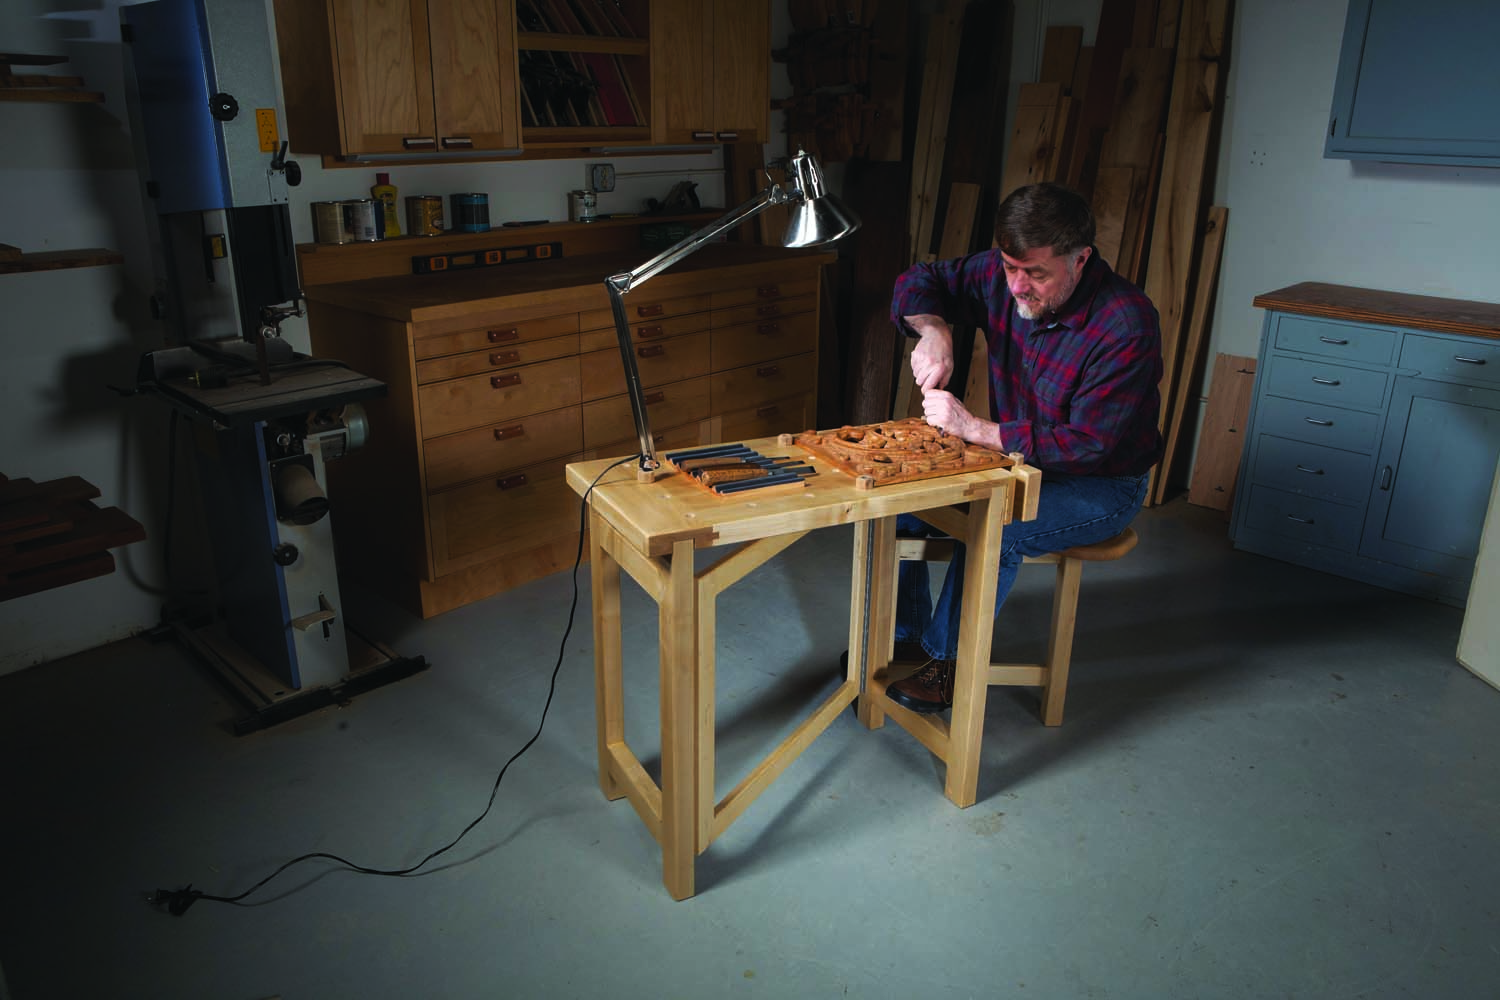
 “Have chisel, will travel.” As an itinerant carver, teaching classes here and there, I’ve always wanted a bench that I could store in a small space, carry around by hand and set up without any fuss. And, of course, be sturdy enough to carve on.
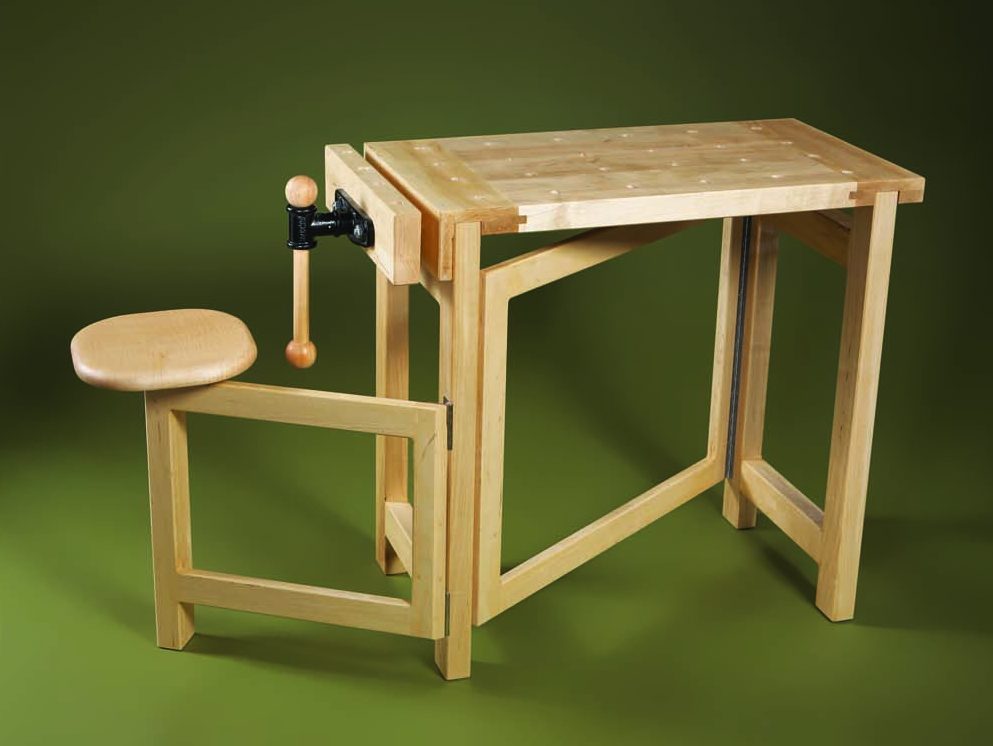
Sturdy Construction: When opened, this bench is strong and stiff.
This bench fits the bill in every way. It breaks down into two pieces—a top a base with an attached swinging seat. To be honest, the seat takes a little getting used to: It only has one leg. It won’t tip over, of course, but you must use your feet for balance. Carvers are used to that.
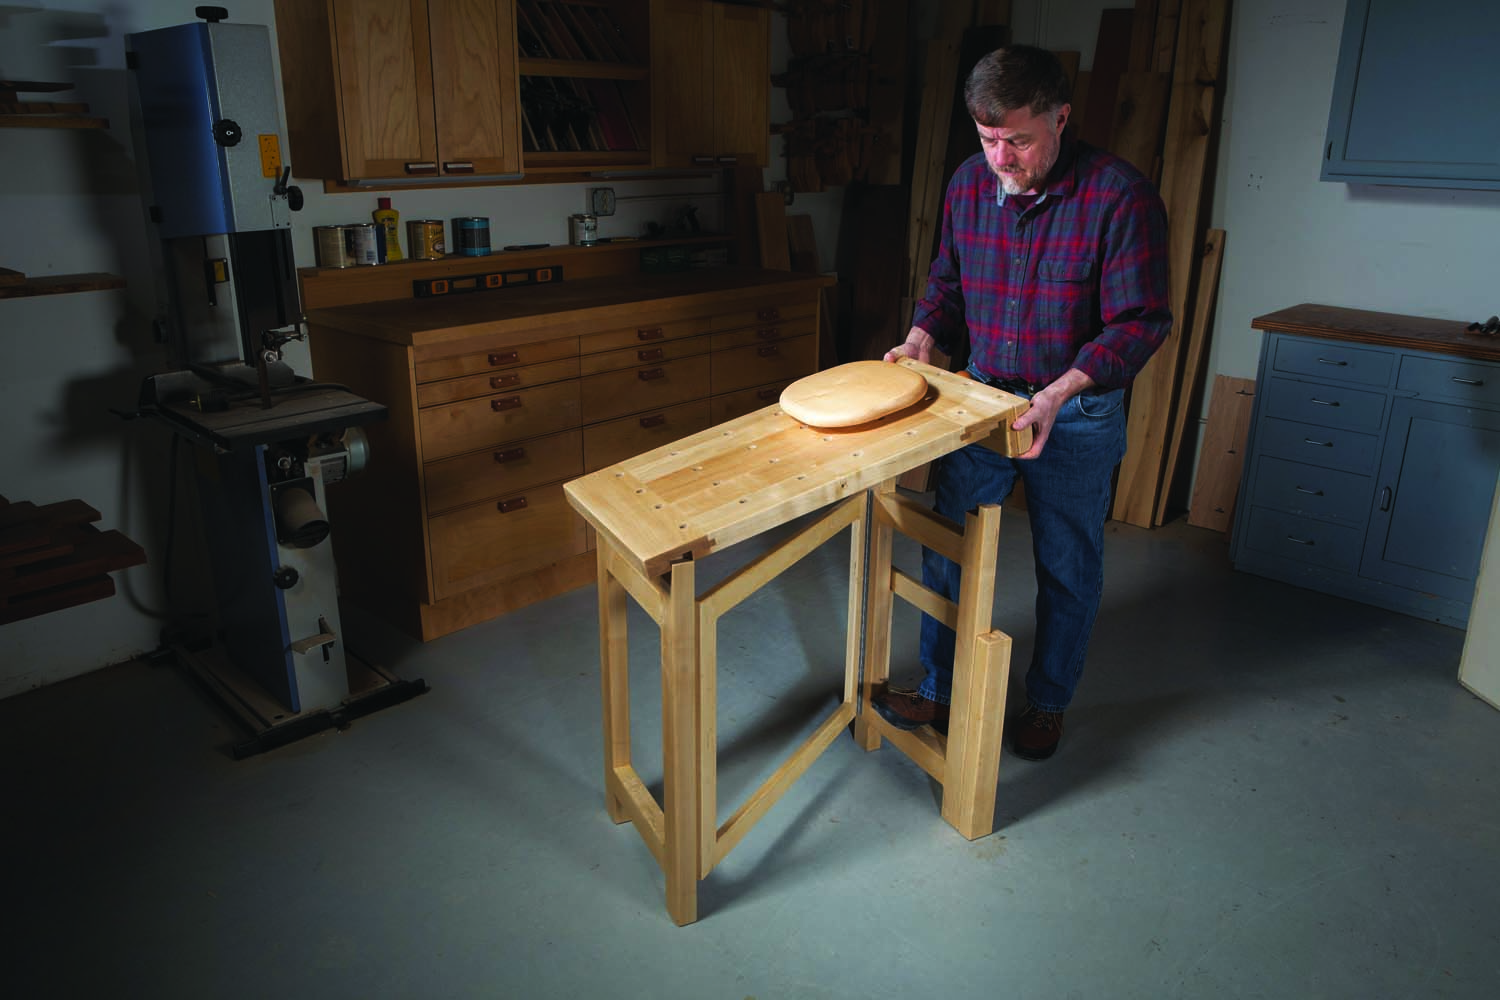
Easy to Disassemble: To store the bench, remove the seat and lift the top.
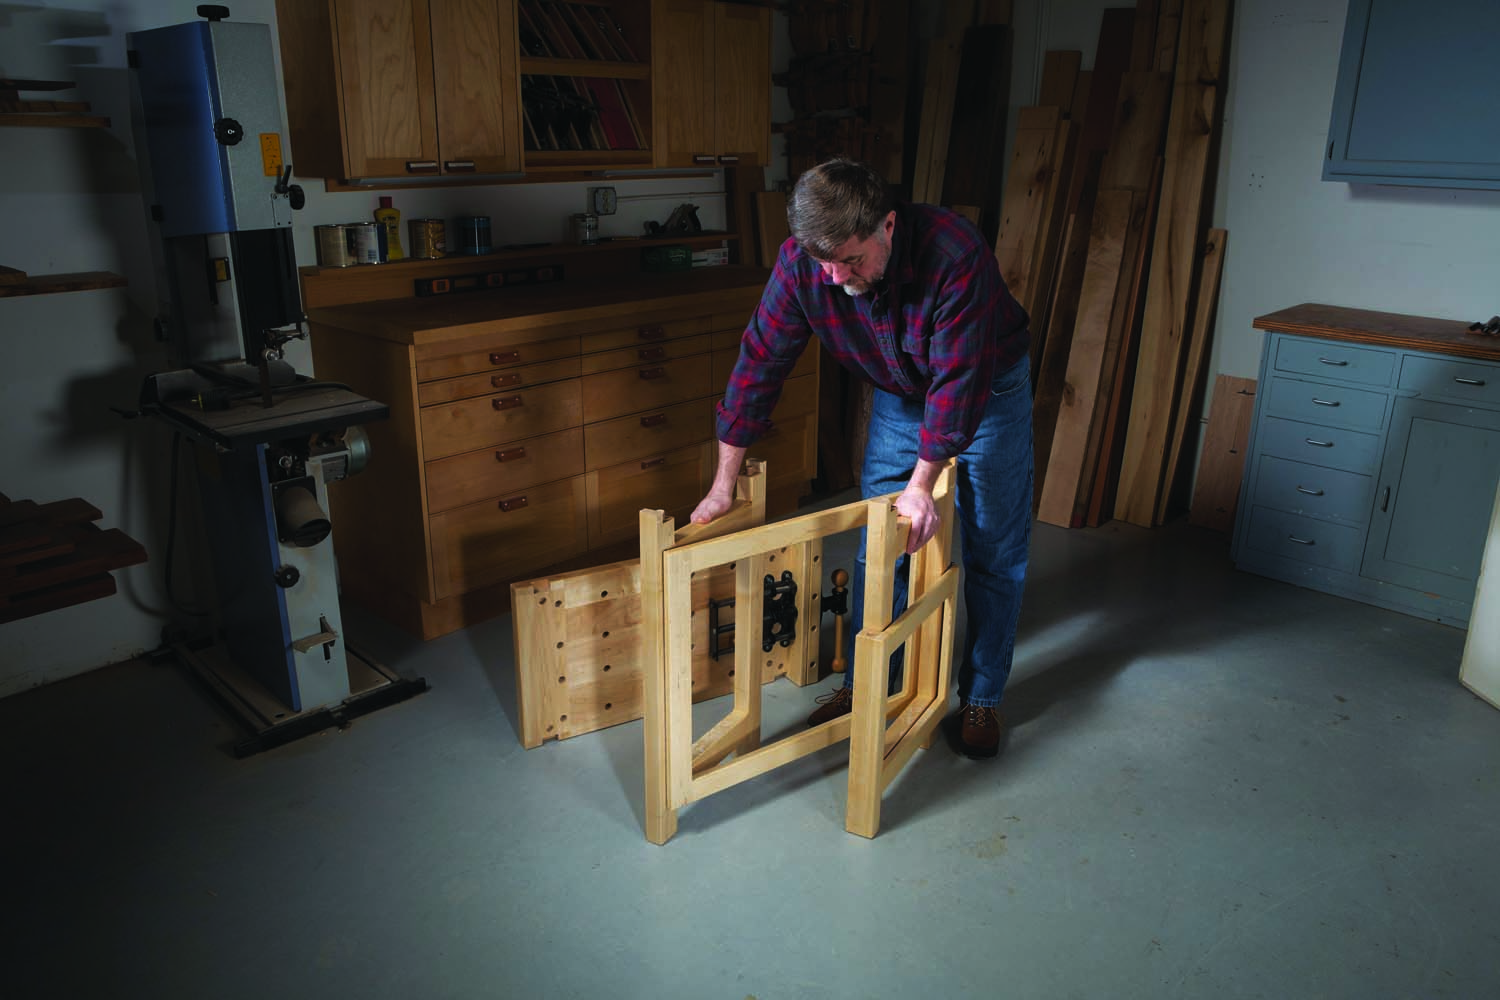
Folding Base: The base is hinged to fold flat.
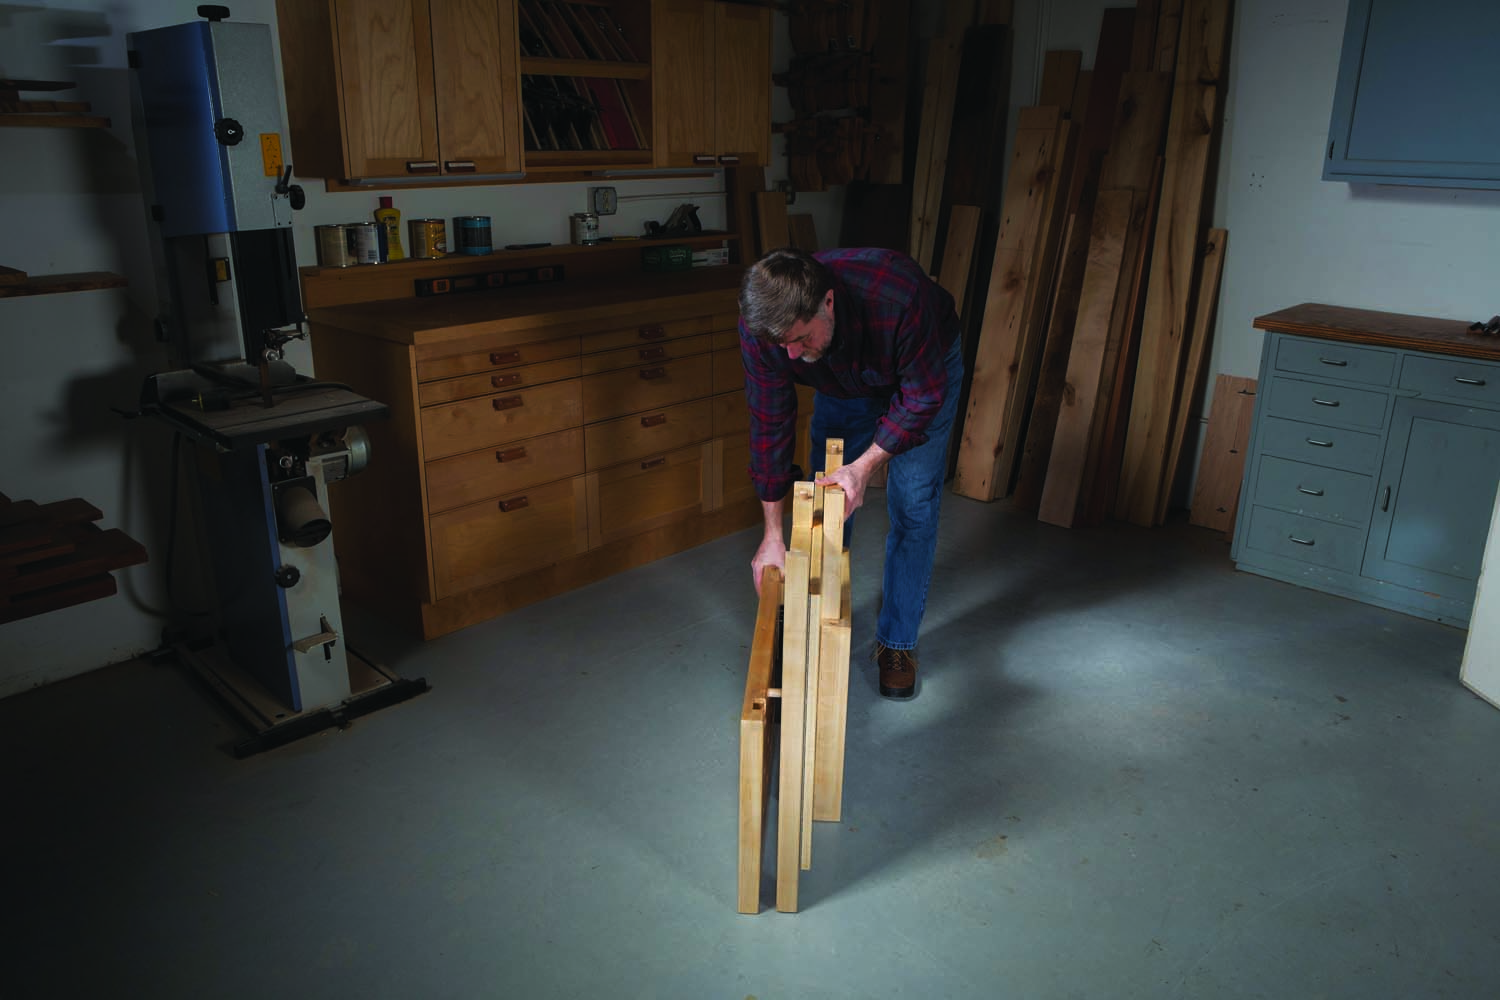
Compact Storage: Folded up, the bench is ideal for storing in a closet.
I’m sure that this bench would be suitable for all kinds of work. I built it from soft maple, for durability. You can mount any type of vise on the bench’s end—or none at all, to minimize weight.
Make the base
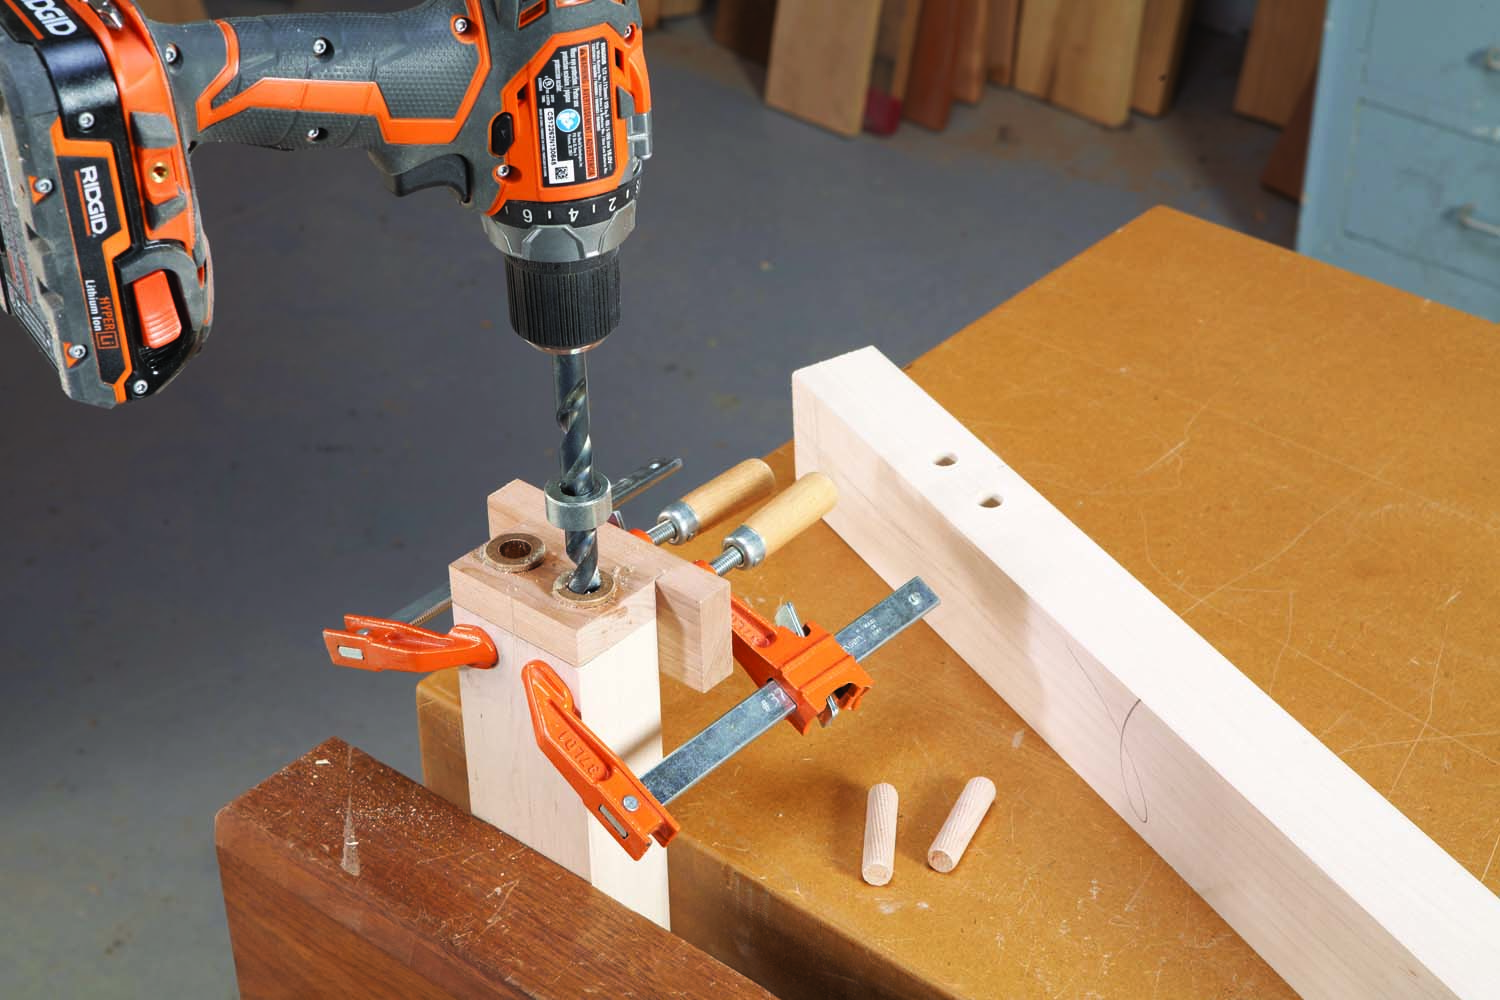
Photo 1. Drill the base’s legs and rails for dowels. Mortise and tenon or biscuit joints would work as well.
It’s best to make the base first, then fit the top to the base. Begin by milling the base’s legs (A) and rails (B). Cut these pieces to final length, then mark the positions of the rails on the legs (Fig. 03). Drill holes for 1/2″ dowels (Photo 1; Fig. 08). Dowels are just one of many options, of course, for joining the base. Mortise and tenon joints, or pairs of #20 biscuits, would work as well.
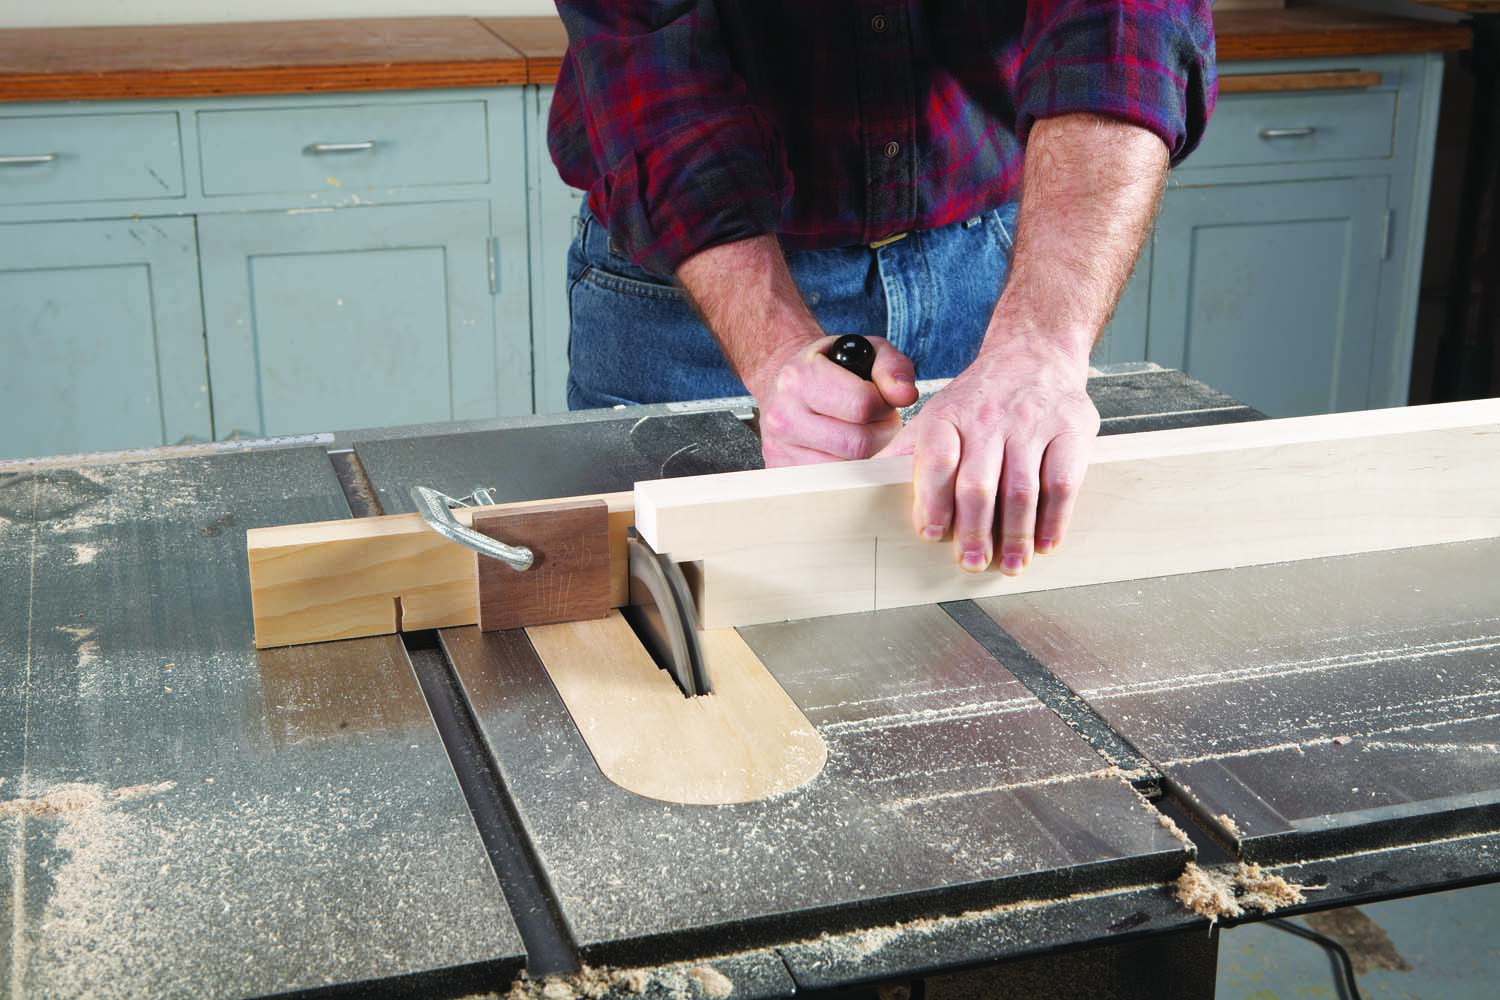
Photo 2. Notch the upper end of each leg to receive the bench’s top. When done, these parts will lock solidly together.
Using a dado set, cut notches in the top ends of the legs (Photo 2; Fig. 02). Remove the wood in stages, cutting the same amount from each leg in turn. Glue dowels in the rails, then glue the legs and rails together, forming the two ends of the base (Photo 3).
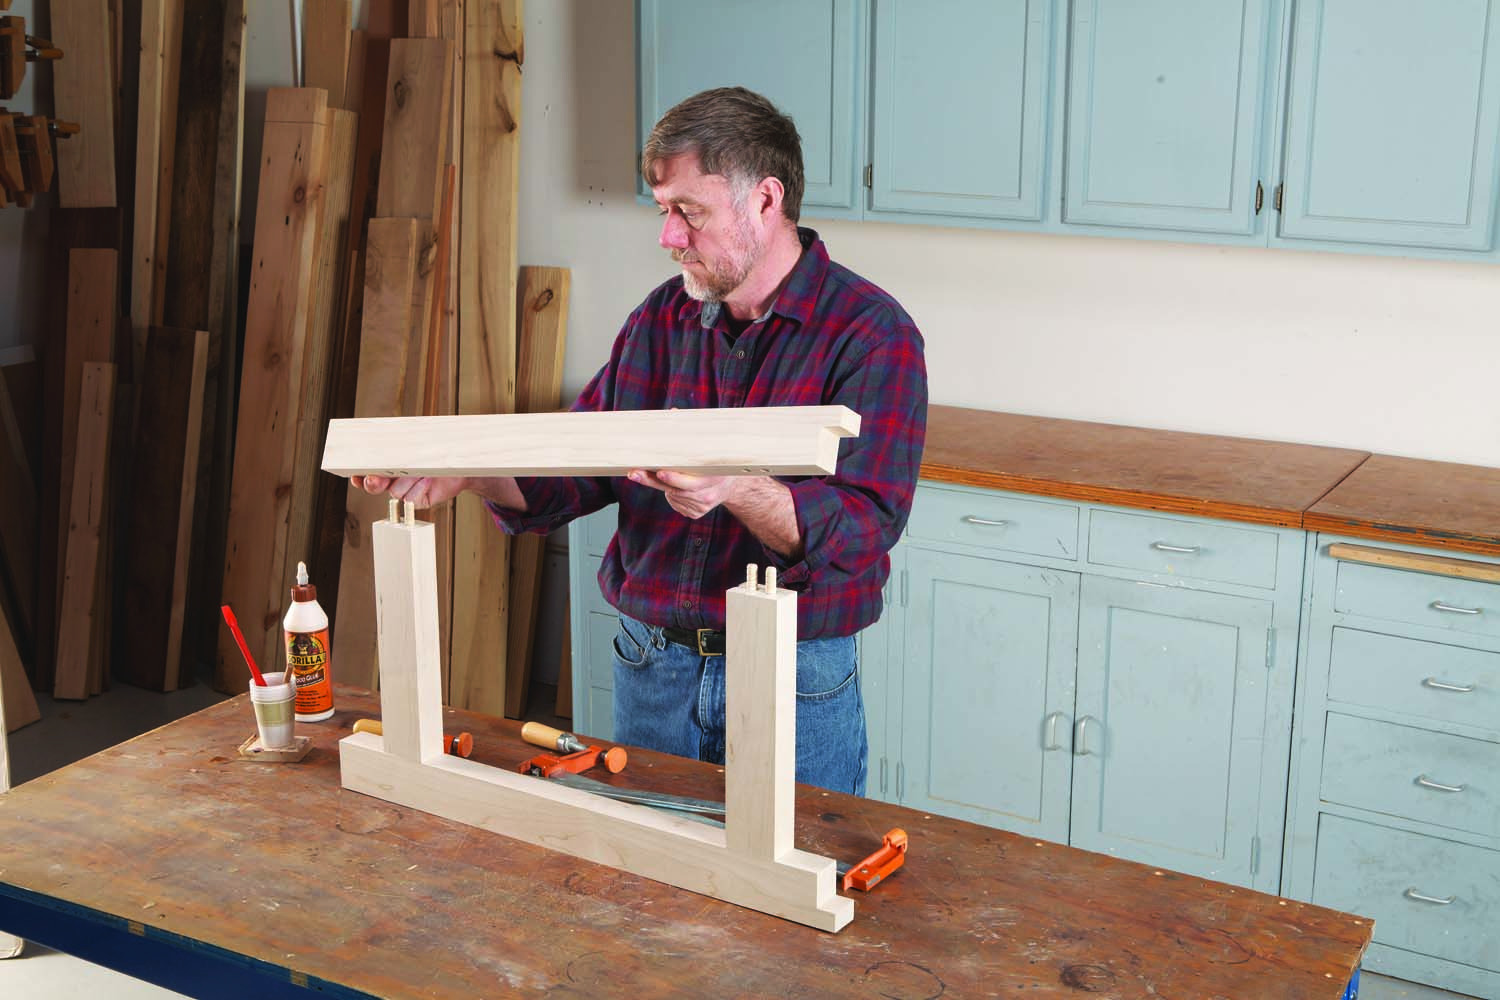
Photo 3. Glue both ends of the base. No complications here—these are just flush butt joints.
Make stiles (D) and rails (E) for the frame connecting the ends. Drill holes for 3/8″ dowels and glue the frame together. Cut a 48″ long piece of continuous hinge into two pieces (F), then cut rabbets in the frame’s stiles to receive the hinges. Note that the rabbets go on opposite sides of the frame (Fig. A). Fasten the hinges in the rabbets, then fasten the frame to the bench’s ends (Photo 4, Fig. 04).
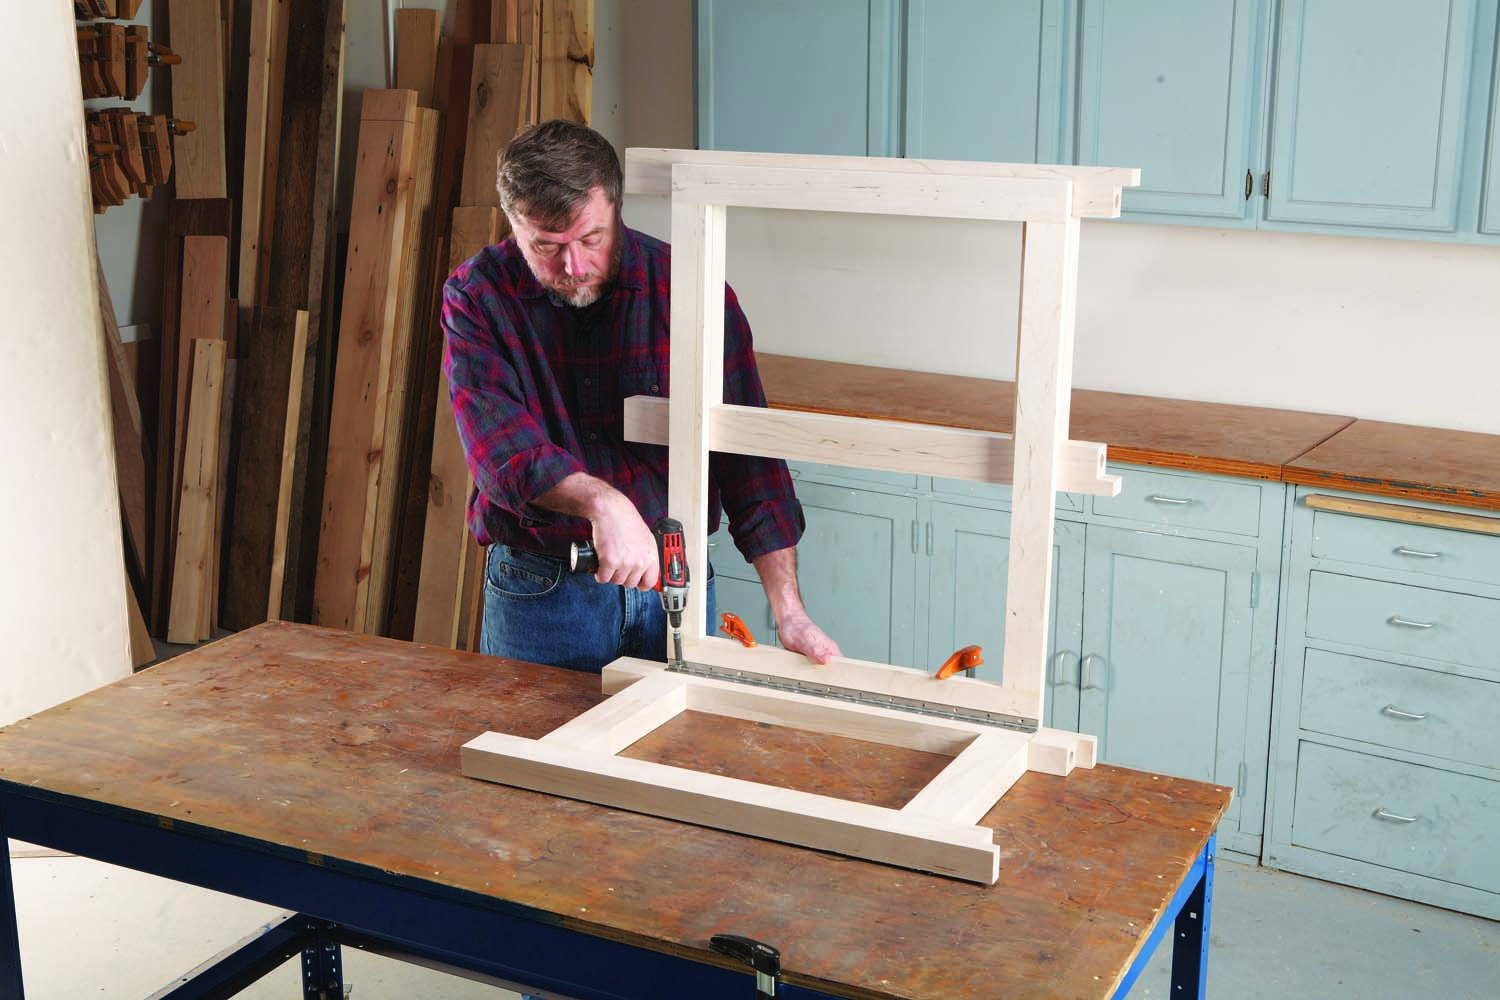
Photo 4. Connect the two ends with a rectangular frame. Fasten the frame to the ends with continuous hinges.
While you’re set up for dowelling, build the seat frame (G, H, J). Note that the frame’s stile must be angled in order for the seat to swing around both sides of the bench (Fig. 05). Build the seat, too (L, M, N). If you want to occasionally raise the seat for working on thick stock, make some plywood rings to fit under the seat’s subbase.
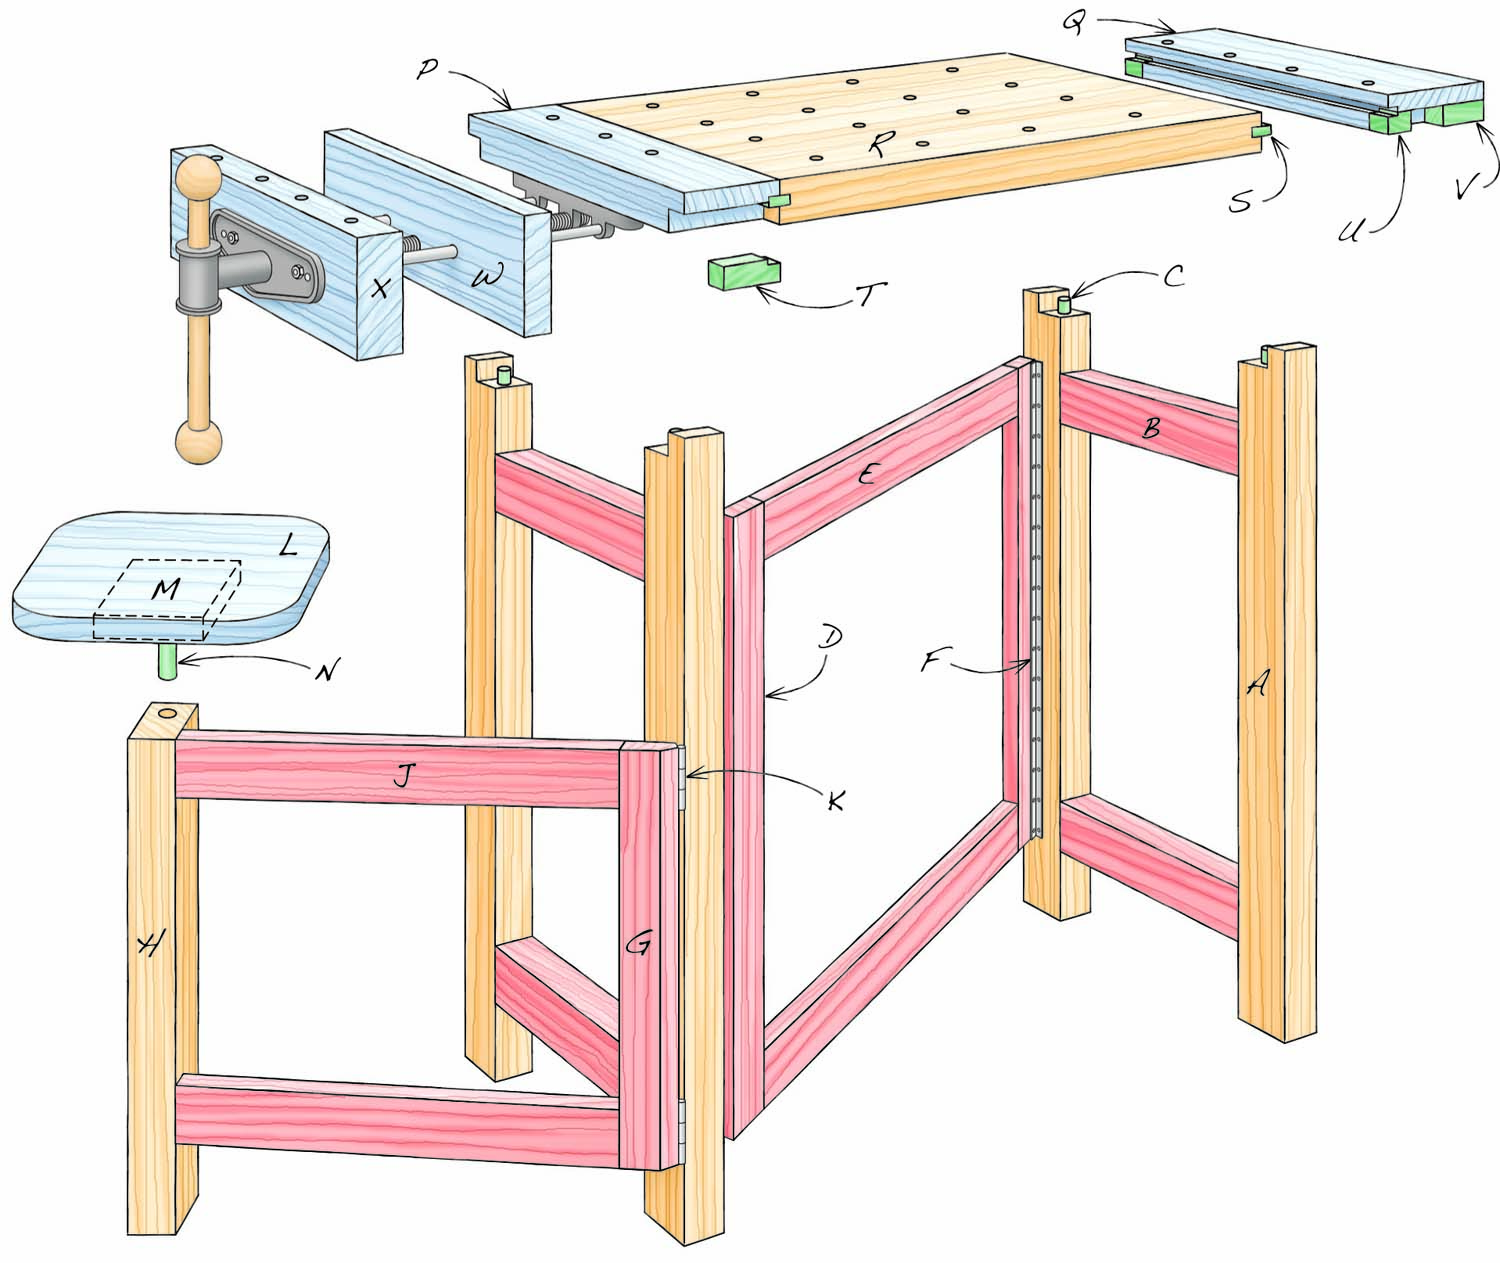
Fig01. Exploded View

Fig02. Top of Leg Joint
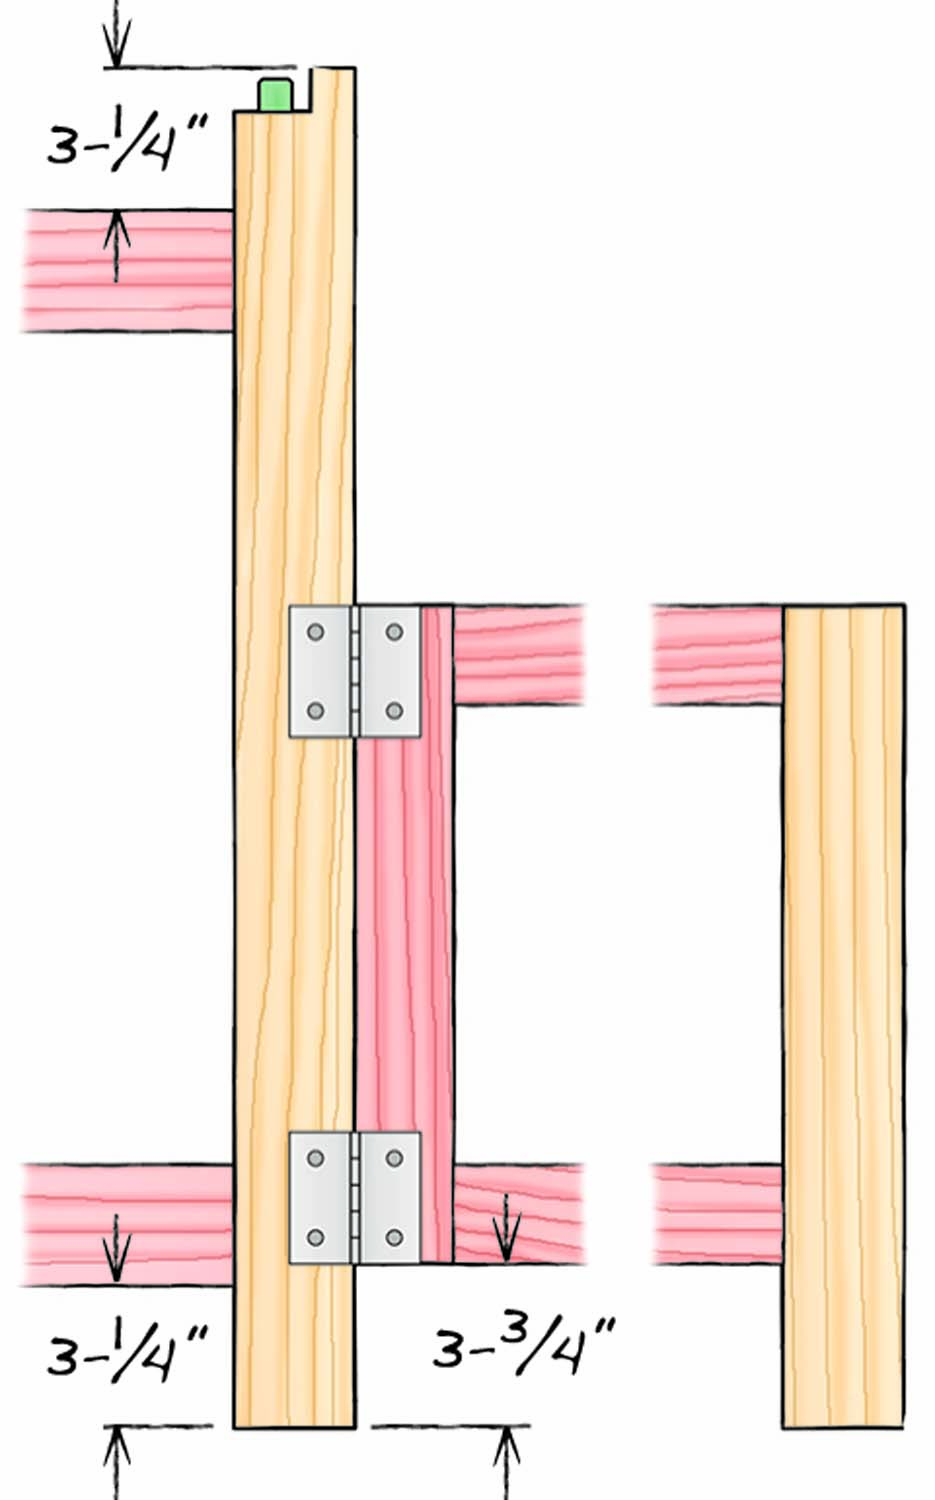
Fig03. Elevation of End and Seat Frame
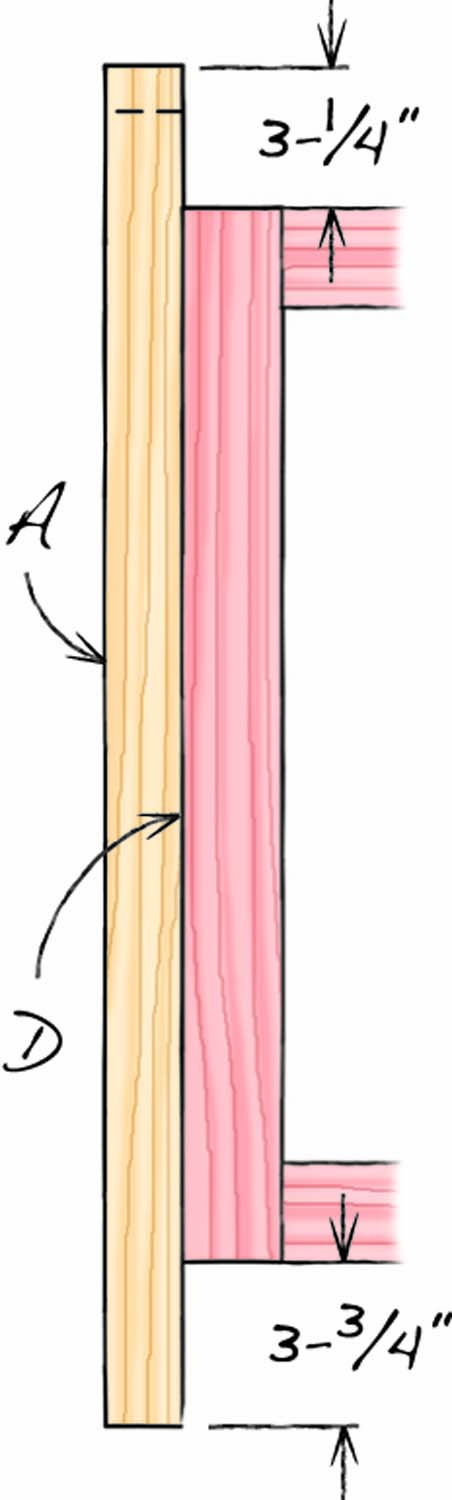
Fig04. Elevation of End and Center Frame
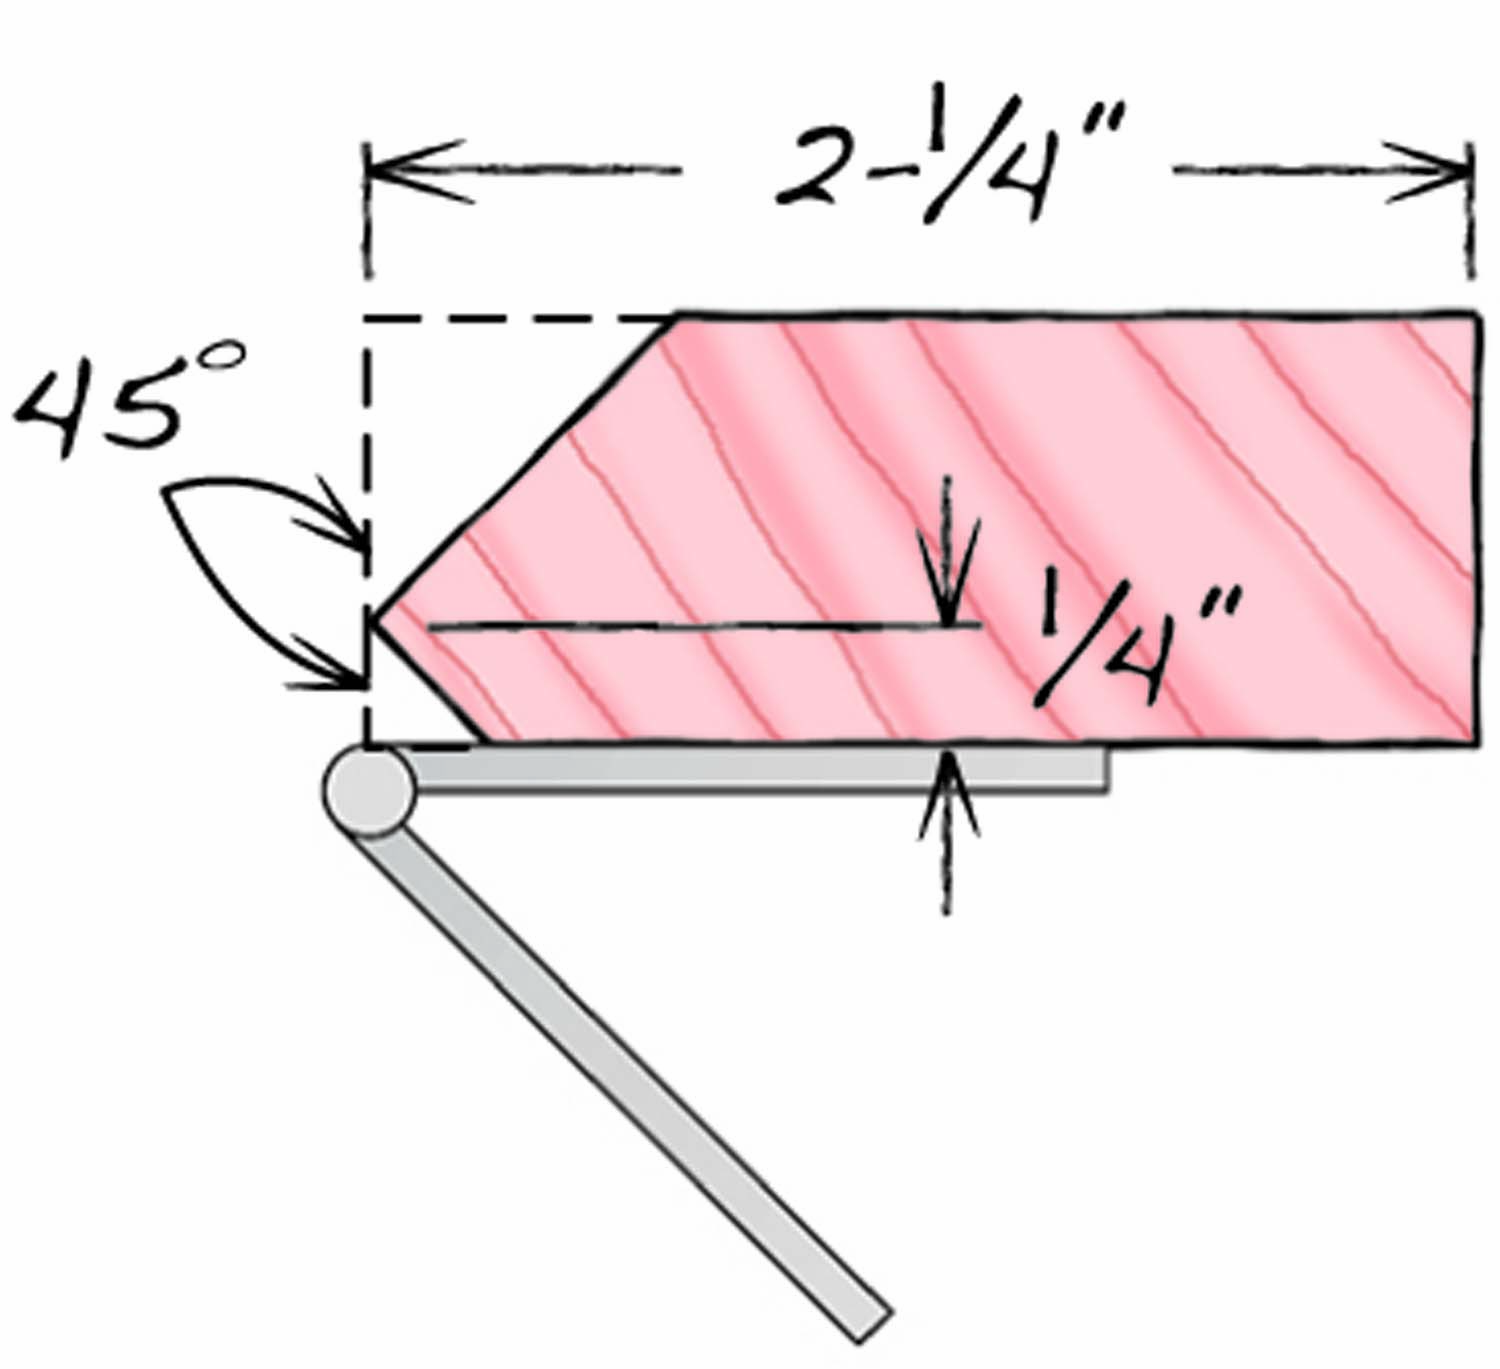
Fig05. Cross Section of Seat Frame Stile

Fig06. Plan of Base, Center Frame and Seat Frame
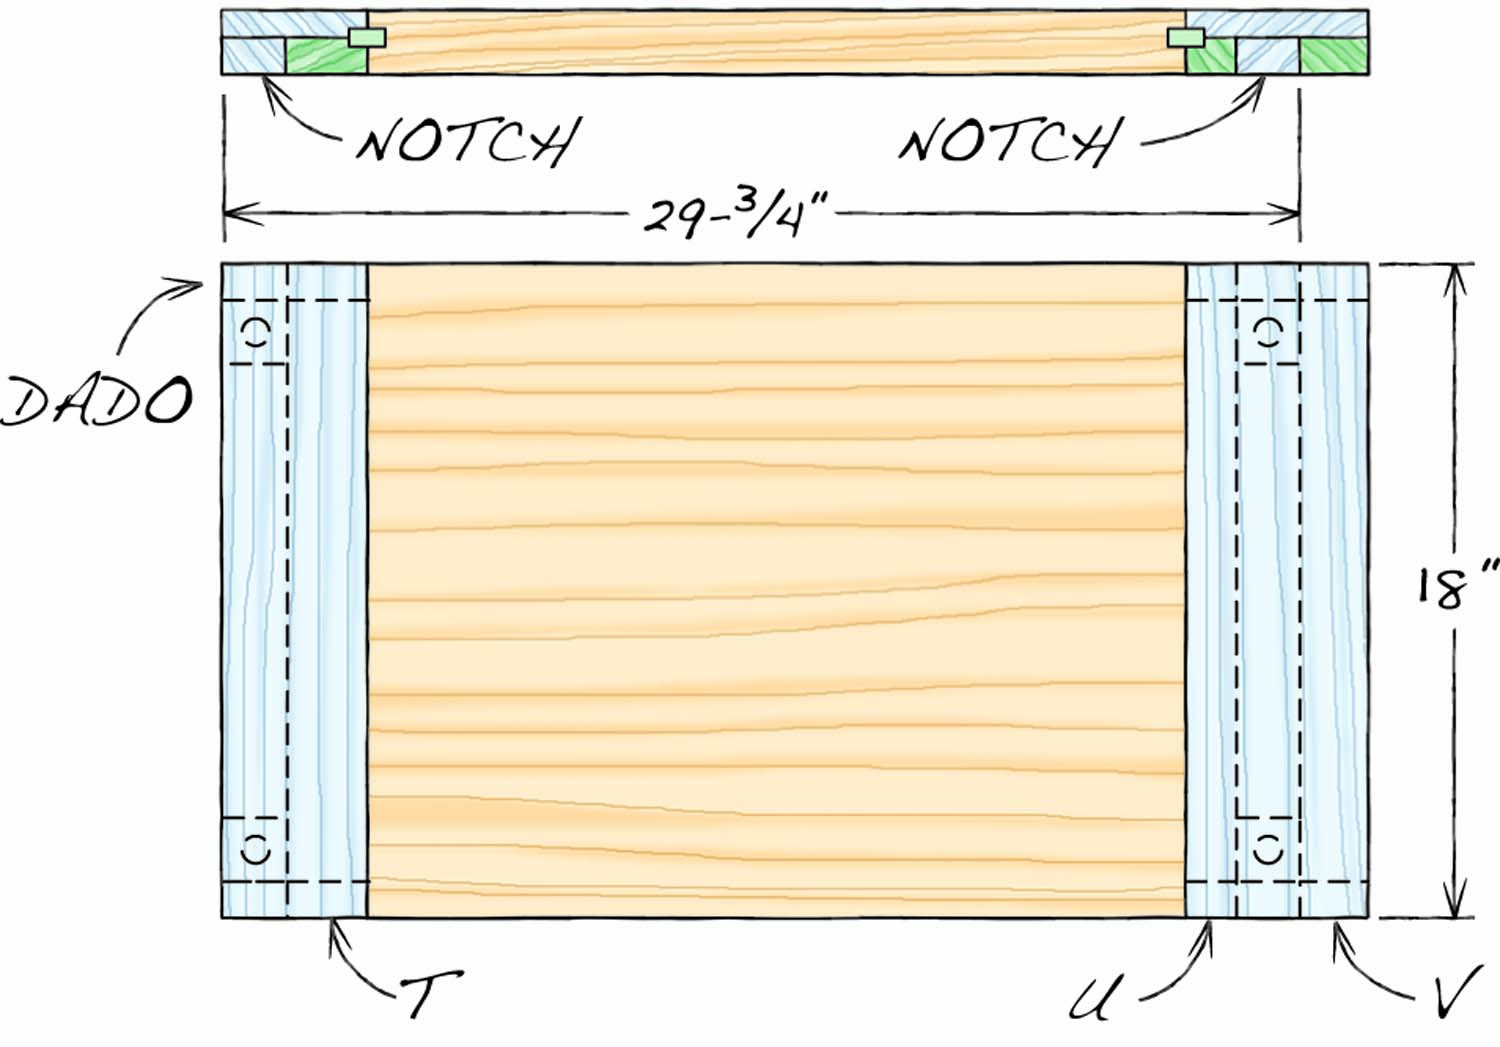
Fig07. Plan and Elevation of Top

Fig08. Dowel Joint Layout
|
Folding Bench Cut List |
||||
|
Overall dimensions: 31-3/4″ H x 34-1/4″ W x 18″ D |
||||
|
Section |
Part |
Name |
Qty. |
Th x W x L |
|
End |
A |
Leg |
4 |
1-3/4″ x 2-3/4″ x 31″ |
|
B |
Rail |
4 |
1-3/4″ x 2-3/4″ x 12-1/2″ |
|
|
C |
Peg |
4 |
3/4″ dia. x 2″ |
|
|
Center frame |
D |
Stile |
2 |
7/8″ x 2-1/4″ x 24″ |
|
E |
Rail |
2 |
7/8″ x 2-1/4″ x 26-1/2″ |
|
|
F |
Hinge |
2 |
1-1/2″ (open) x 24″ |
|
|
Seat frame |
G |
Stile |
1 |
7/8″ x 2-1/4″ x 16″ |
|
H |
Leg |
1 |
1-3/4″ x 2-3/4″ x 19-3/4″ |
|
|
J |
Rail |
2 |
7/8″ x 2-1/4″ x 16-1/4″ |
|
|
K |
Hinge |
2 |
3″ (open) x 3″ |
|
|
Seat |
L |
Platform |
1 |
7/8″ x 12″ x 12″ |
|
M |
Subbase |
1 |
7/8″ x 4″ x 4″ |
|
|
N |
Post |
1 |
3/4″ Dia. x 6″ |
|
|
Top |
P |
Breadboard end 1 |
1 |
1-3/4″ x 4″ x 18″ (a) |
|
Q |
Breadboard end 2 |
1 |
1-3/4″ x 5″ x 18″ |
|
|
R |
Center portion |
1 |
1-3/4″ x 18″ x 22-1/2″ (b) |
|
|
S |
Spline |
2 |
1/2″ x 1″ x 18″ |
|
|
T |
Fill block 1 |
2 |
1″ x 1″ x 2-1/4″ |
|
|
U |
Fill block 2 |
2 |
1″ x 1″ x 1-7/8″ |
|
|
V |
Fill block 3 |
2 |
1″ x 1″ x 1-3/8″ |
|
|
Vise |
W |
Inner jaw |
1 |
7/8″ x 4-1/2″ x 18″ |
|
X |
Outer jaw |
1 |
1-3/4″ x 4-1/2″ x 18″ |
|
|
Notes: (a) Rough width or length is 18-1/2″ (b) glue from boards 3″ to 4″ wide. |
||||
Make the top
It’s best to make the top the exact width of the base (Fig. 06). The top’s length isn’t as critical—but measure the length of your base before you begin making the top. (To do this, open the base to form a rectangle, then measure from corner to corner, both ways. When these diagonal distances are equal, the base is square and ready for measuring width.) If your base is too long or too short, no problem: Just adjust the length of the center portion (R) to suit (Fig. 07).
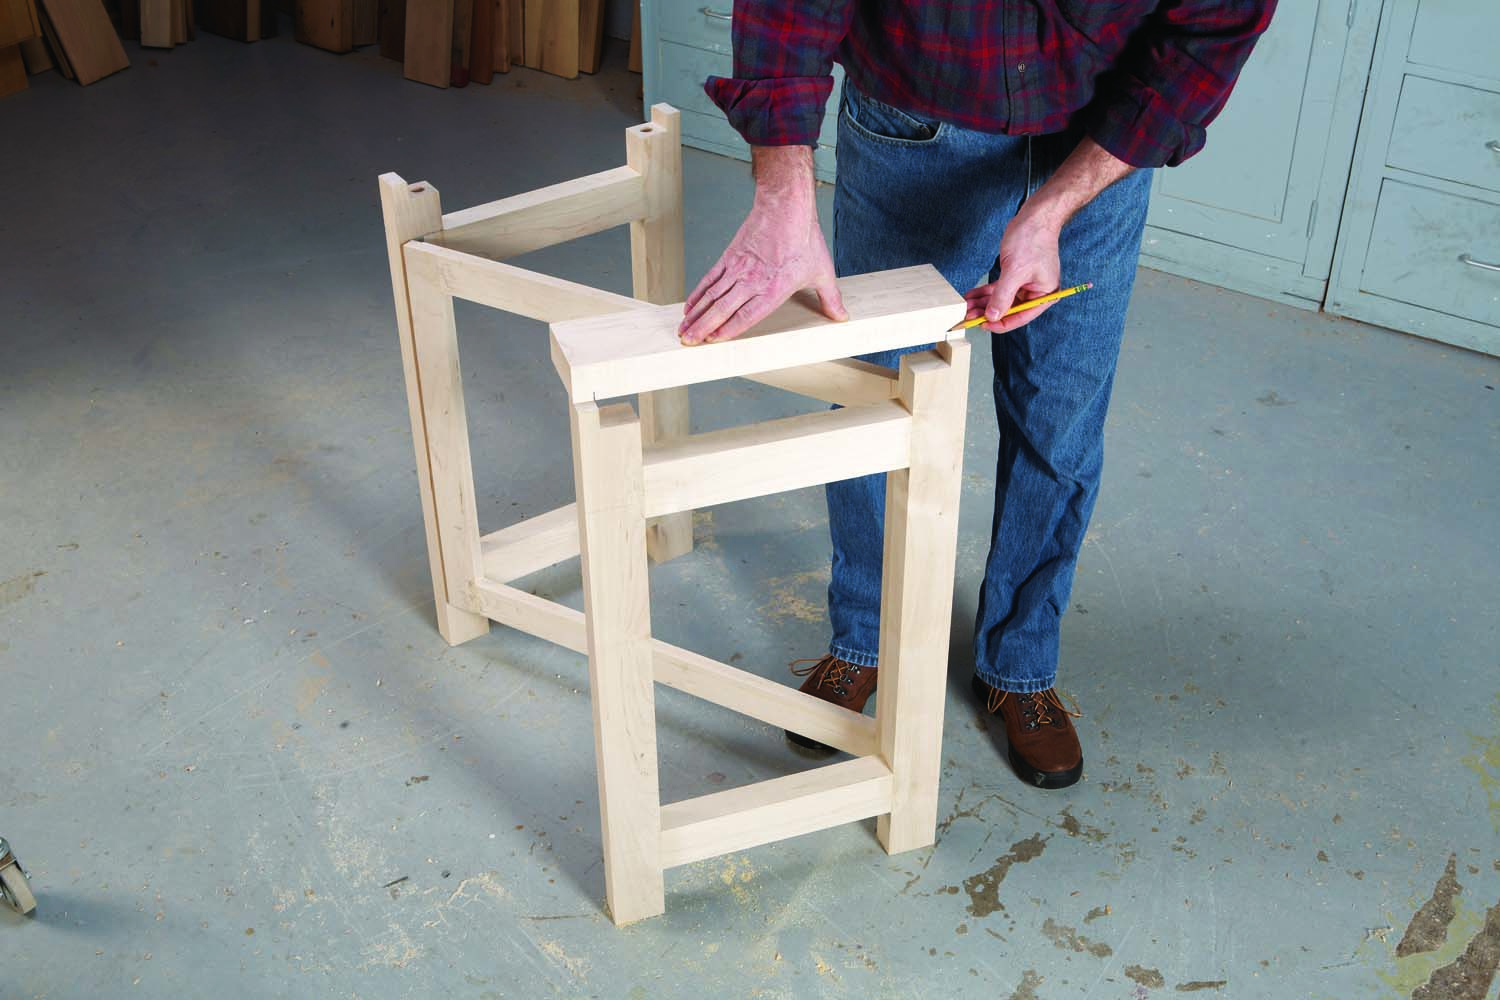
Photo 5. Mark the distance between the notches on one of the top’s breadboard ends.
Mill pieces for both breadboard ends (P, Q) and the top’s center portion. Glue the center portion from pieces that are about 2″ or 3″ wide (this will help the top stay flat) and about 1″ extra-long. Use biscuits or spline to align them. Make the center portion at least 1/4″ extra-wide, too.
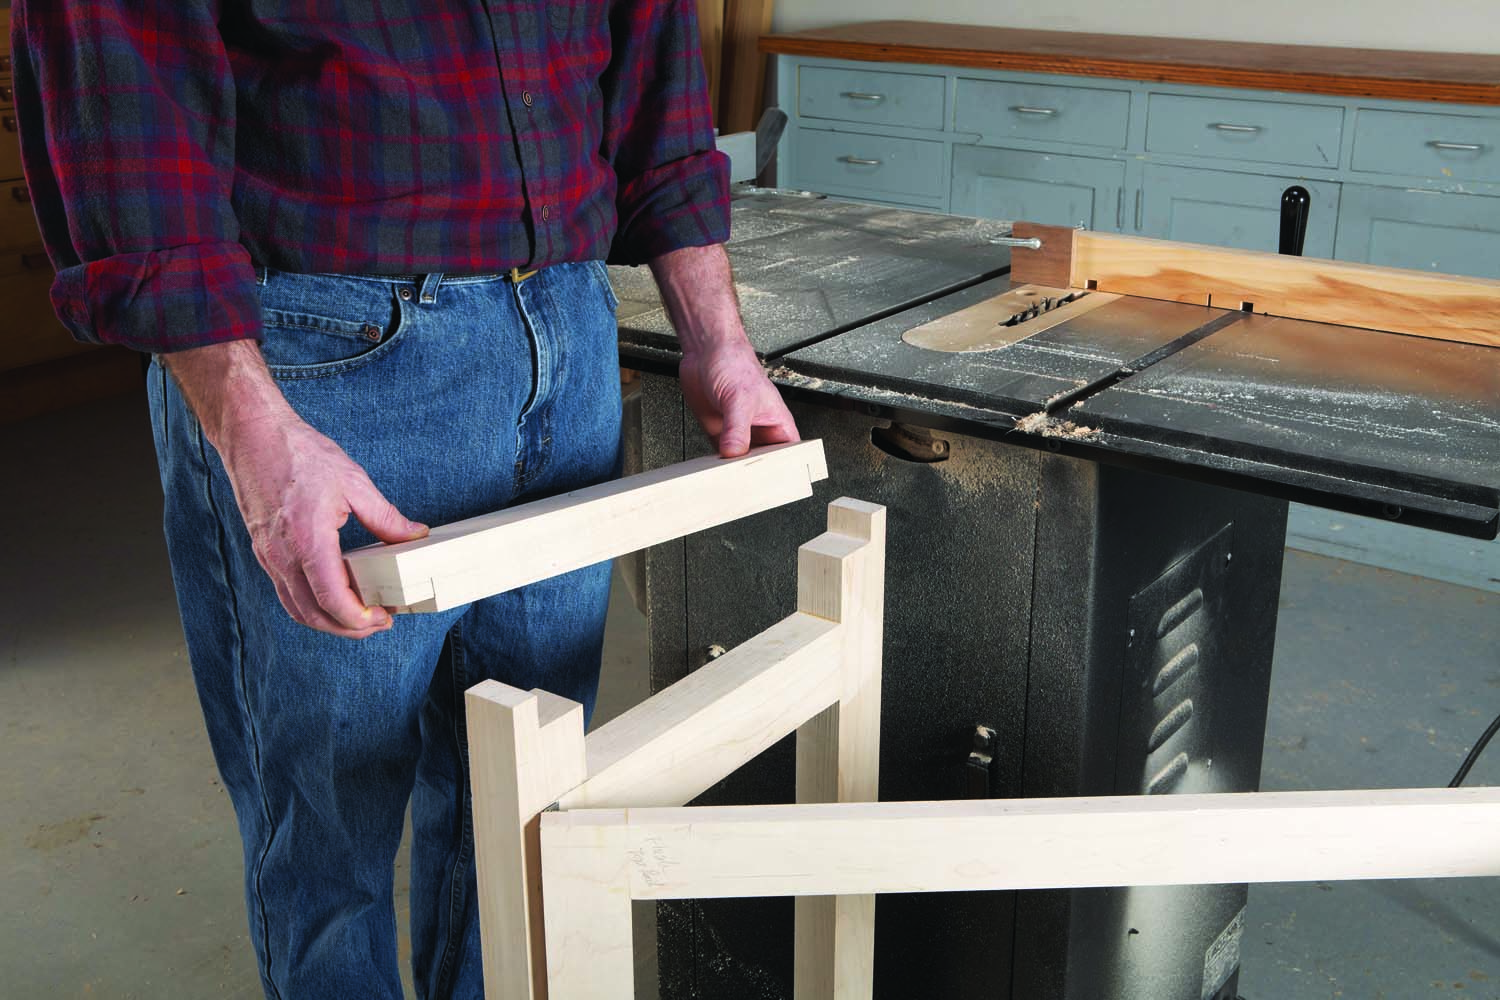
Photo 6. Cut dadoes in the both breadboard ends and test their fit between the notches.
Trim the breadboard ends so they’re the same length as the base is wide. Place one of these pieces on top of the base and mark the locations of both of the leg notches (Photo 5). Cut dadoes in both breadboard ends to fit these notches (Photo 6; Fig. 02). Cut all four dadoes at the same time. Use a stop block and start out a bit narrow—so the breadboard ends don’t quite fit between the legs. Gradually move the stop block, again cutting all four dadoes, until the breadboard ends fit between the legs.
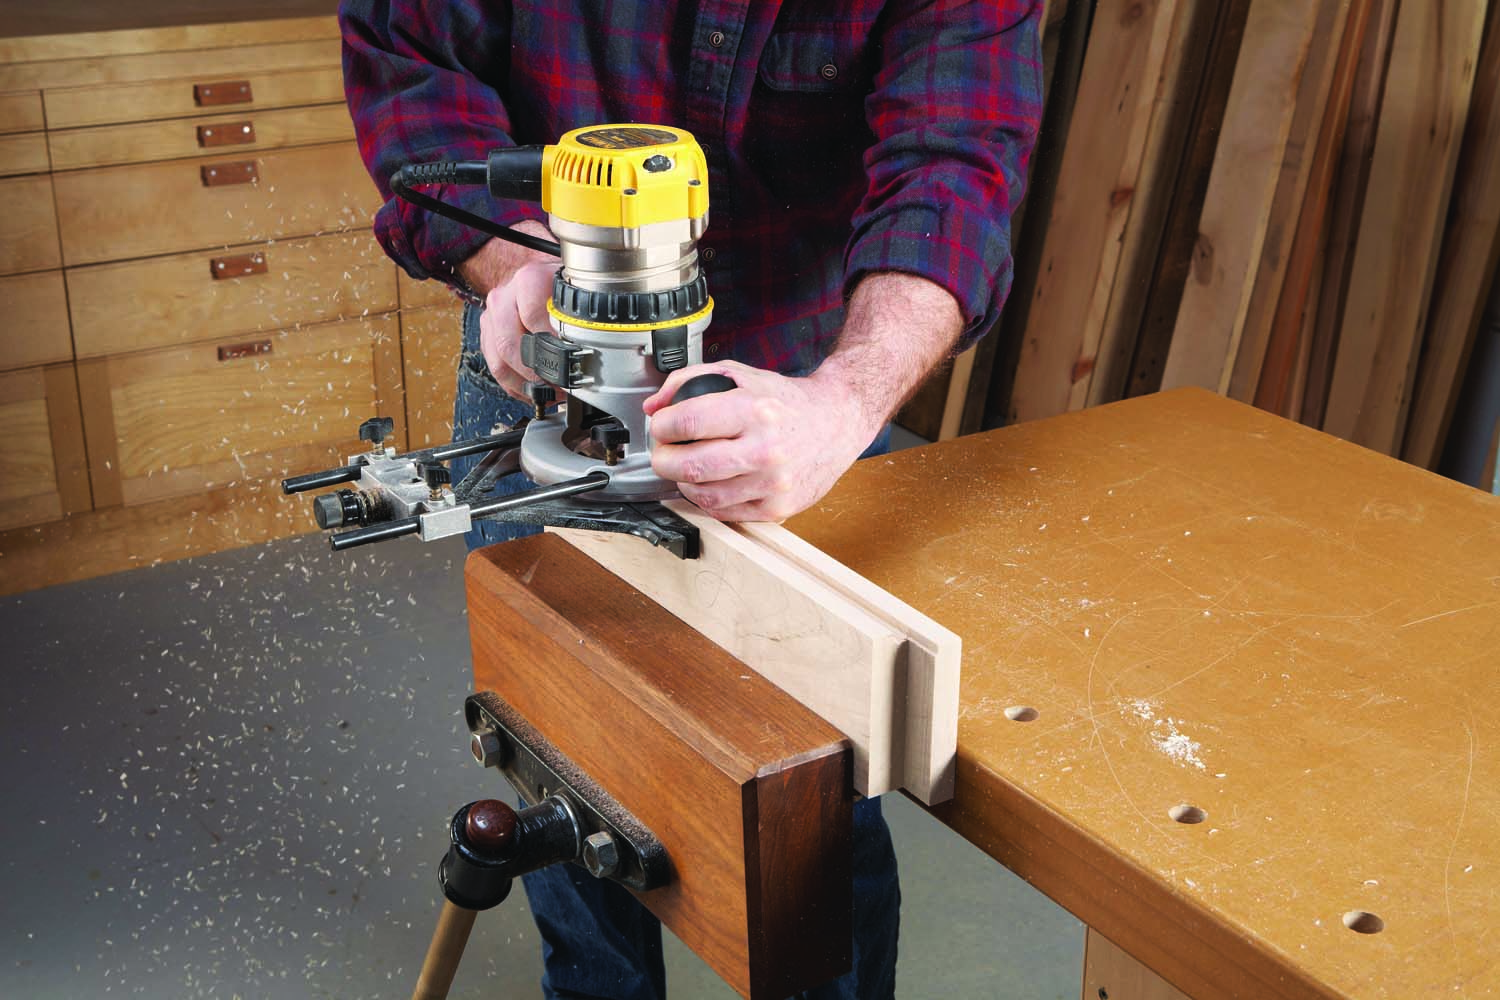
Photo 7. Rout a groove through each breadboard end to receive a spline. Glue the main part of the top together and rout a similar groove across both ends.
Rip the center portion of the top so its width is the same as the length of the breadboard ends. Trim the center portion to length. Rout a 1/2″ x 1/2″ groove in the middle of each breadboard end and matching grooves in the top’s center portion (Photo 7). Clamp a scrap block to the far side of the center portion to prevent blowout. Make spline (S) to fit the groove. Glue the breadboard ends to the center portion, one at a time (Photo 8). Even up the joints with a sander or plane.
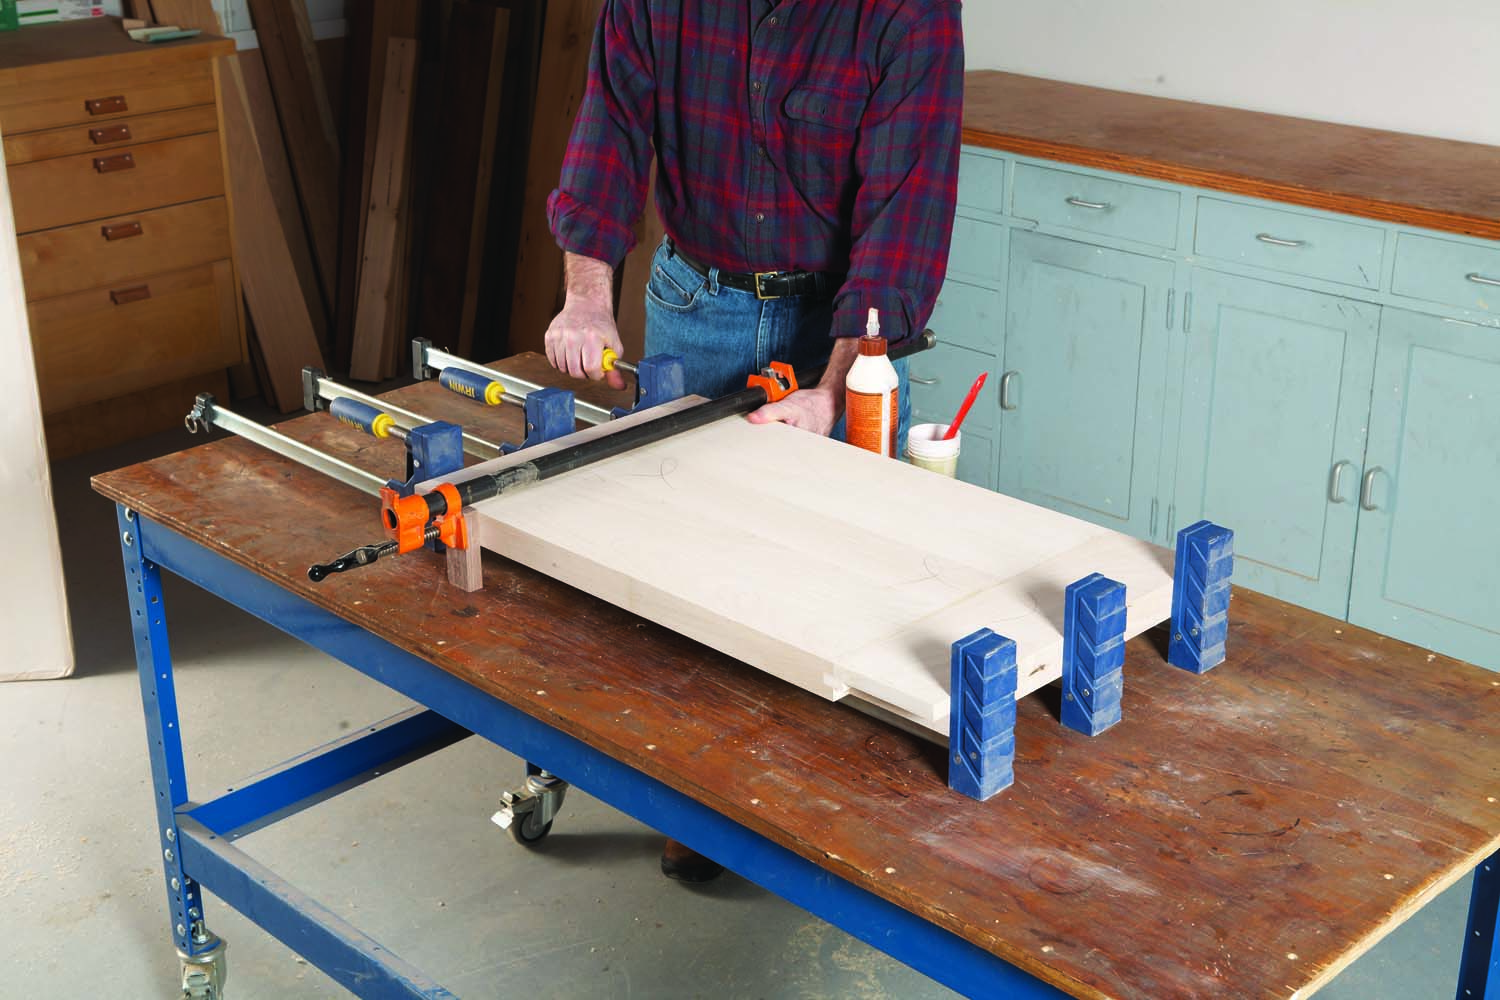
Photo 8. Glue the breadboard ends to the top. Use a clamp to make sure that the ends are flush, side-to-side, with the top.
Fit top and base
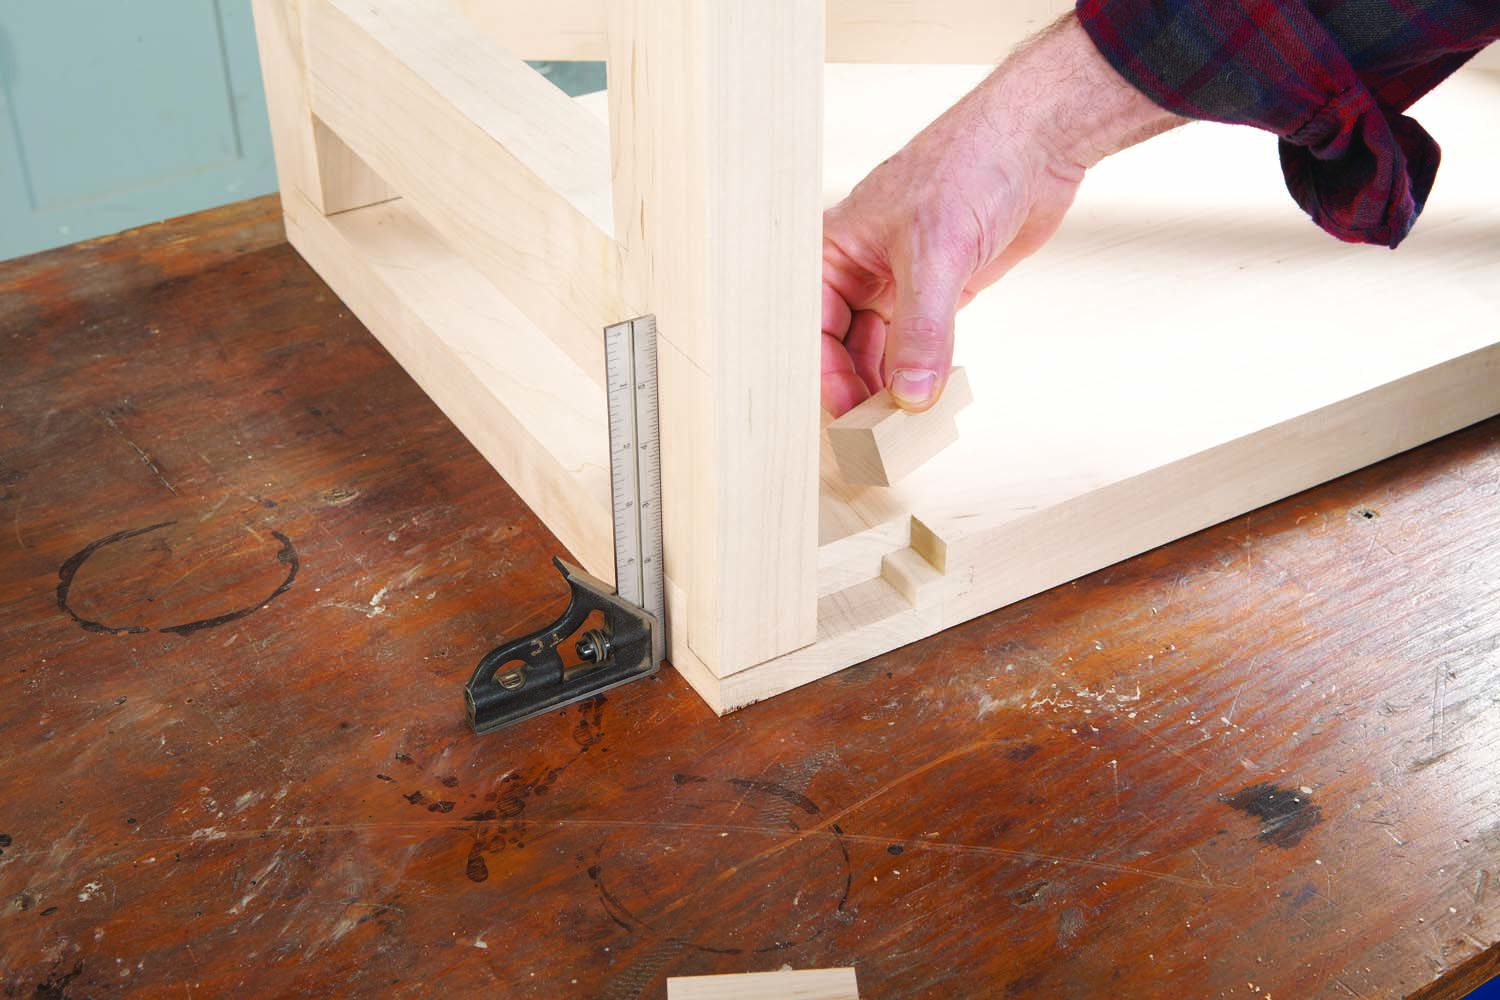
Photo 9. Turn over the top and place the base on it. Cut a small block to fit into the breadboard end’s dado.
Next, make “fill blocks” (T, U, V) to trap the legs in the breadboard ends. Four of these blocks must be notched to fit around the spline, before cutting to length. All of these blocks must be trimmed to fit. Start with the blocks that go in the narrower breadboard end (the vise end). Turn over the bench’s top and place the base in the breadboard ends’ dadoes (Photo 9). Adjust the base flush with the breadboard end, then cut a pair of blocks to fill the remaining space in the dadoes.
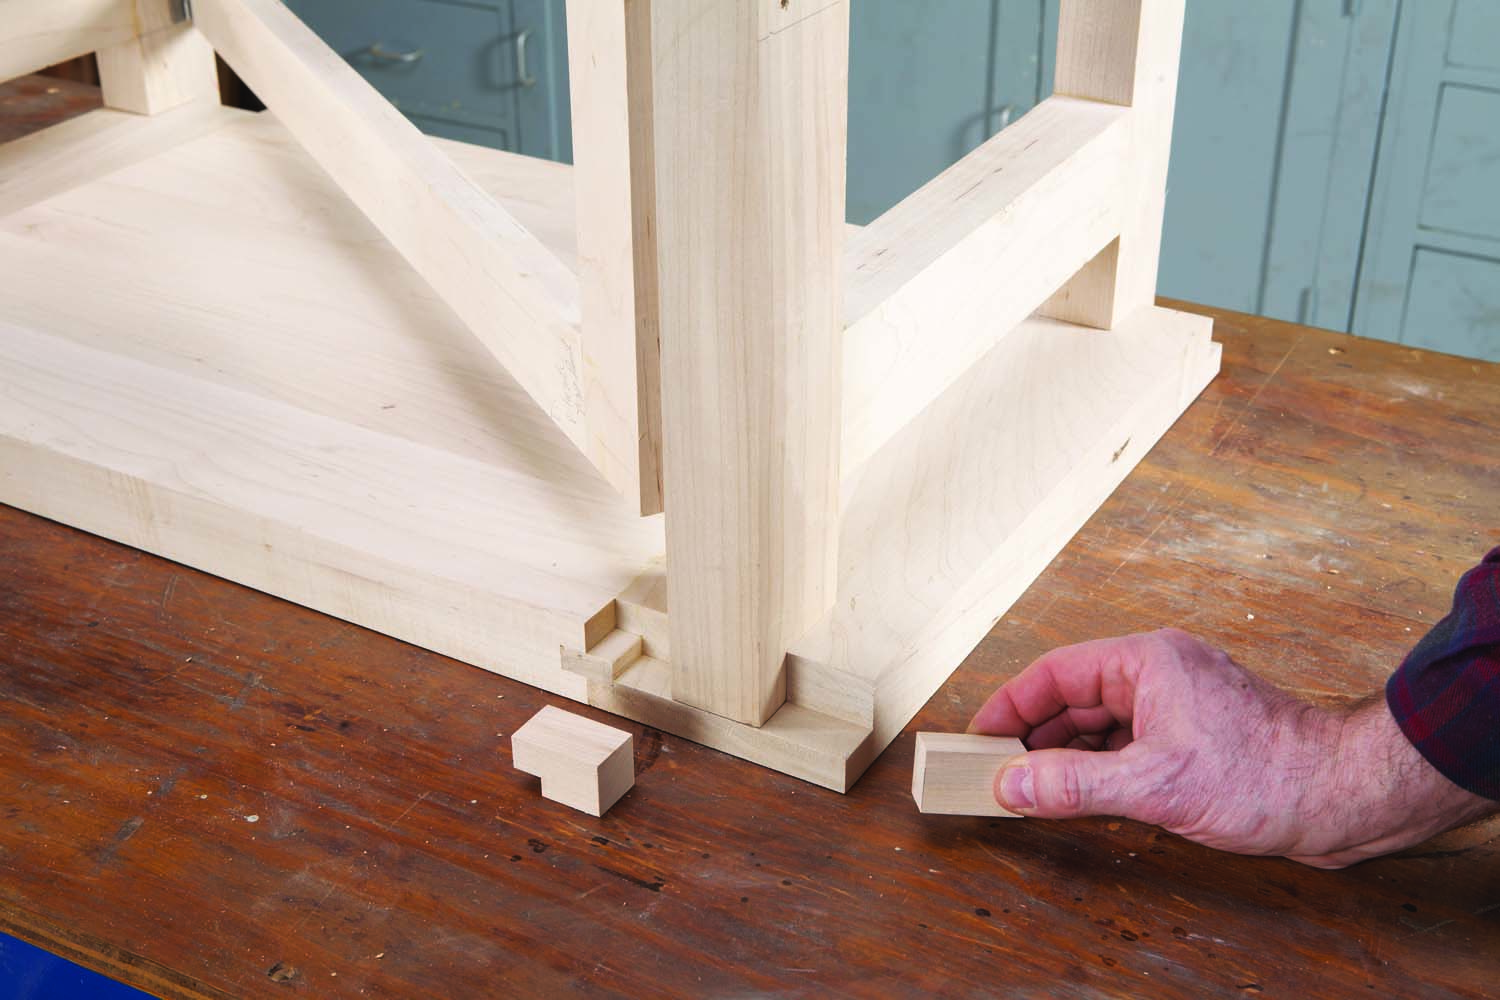
Photo 10. Make two blocks to trap the base on the opposite side of the top. The role of all three blocks is to form notches that lock the base in position.
Cut two more pairs of blocks to fill the spaces at the other end of the bench (Photo 10). Remove the base from the top and glue all of the blocks in place. Sand or plane them flush. Test how the base fits—it should drop into place without requiring any pressure. If the fit is too tight, sand or plane the legs.
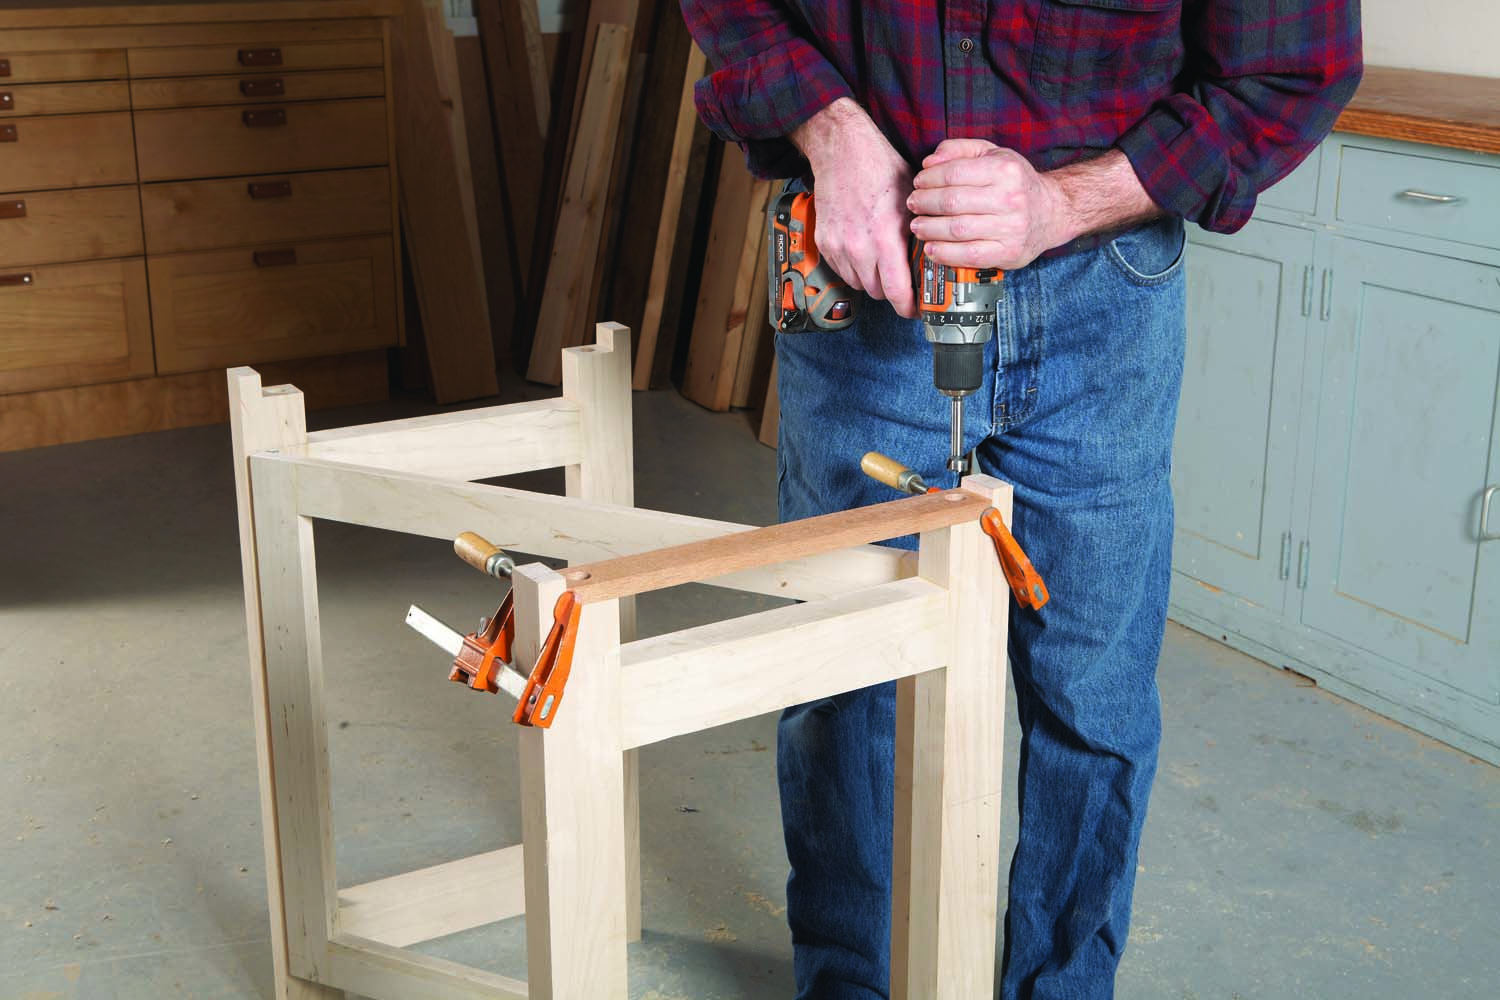
Photo 11. Drill holes for large pegs. These pegs will reinforce the joint between the base and top. Use a guide with pre-drilled holes.
Adding pegs (C) to the legs is optional. The pegs reinforce the joints between the top and base, but they’re not strictly necessary. The peg holes in the base and top must perfectly align with each other (Fig. 02). Make a drilling guide that’s the same width as the legs (Photo 11). Trim it to fit tight between the leg notches. Use a stop block and fence on your drill press to drill the two holes in the guide. Clamp the guide to the base, then use a Forstner bit to drill holes in the ends of the legs. Leave the guide clamped to the base, then place the base on the top (Photo 12). Clamp the guide to the top, remove the base and drill the mating holes. Repeat the procedure for the opposite side of the base. Insert pegs into the legs, but don’t glue them. With the pegs in place, test the fit of the top again. If the fit is too tight, shave or taper the pegs.
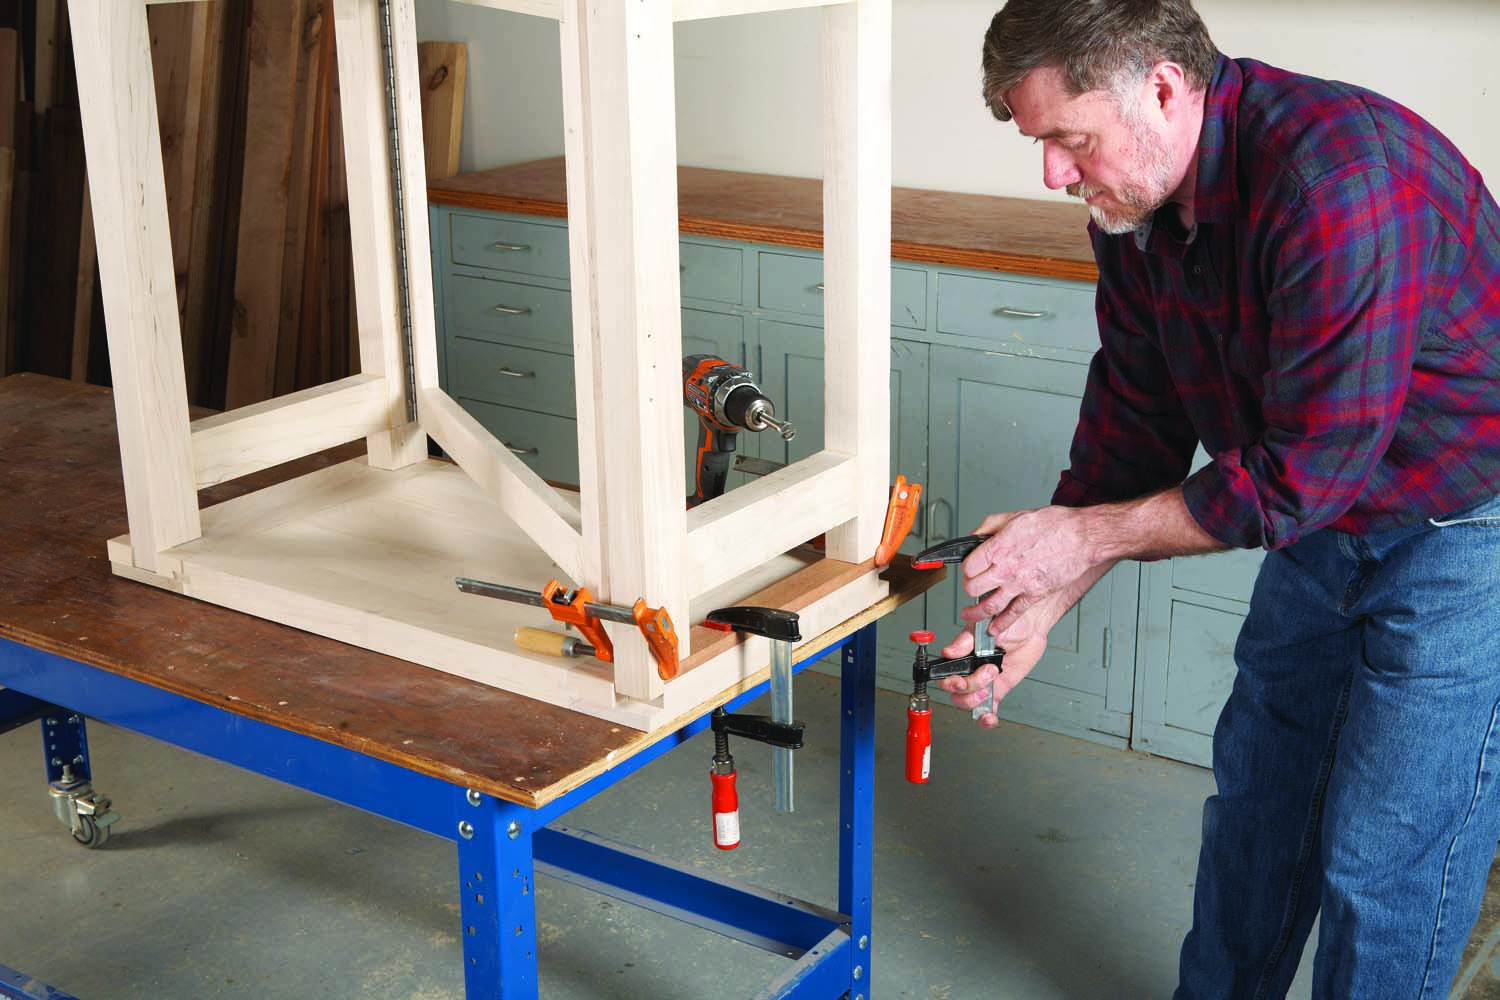
Photo 12. Drill corresponding holes in the top, leaving the jig in place. This method ensures that the holes will align.
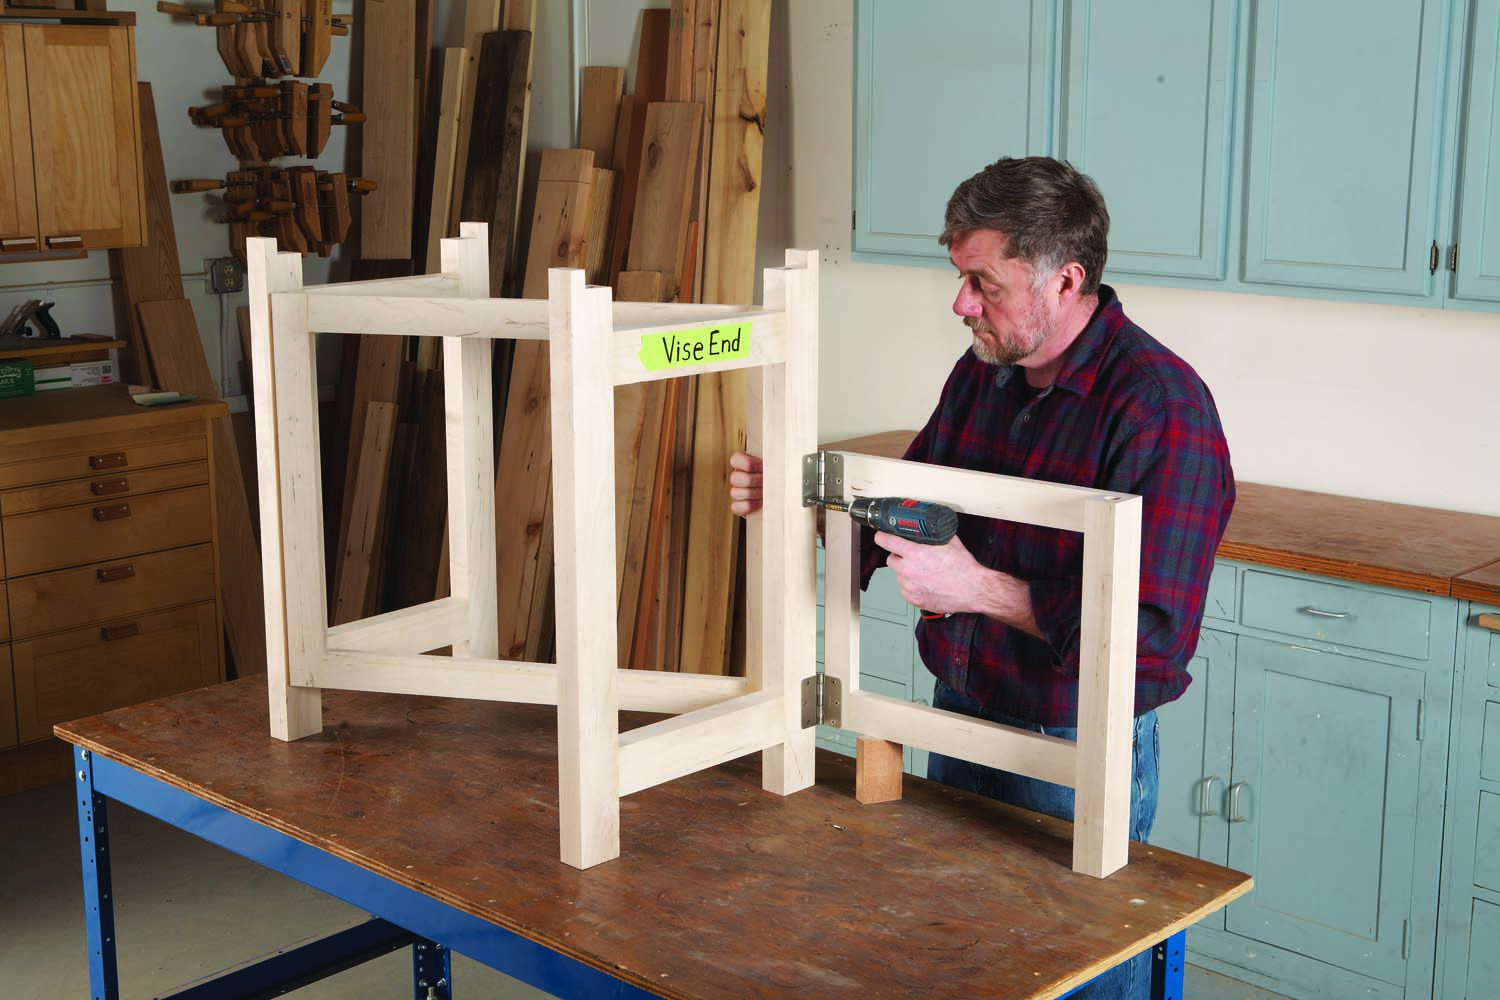
Photo 13. Fasten the optional seat support to the base to complete the base. Add any vise you want—or none at all—and you’re done!
To finish the base, install butt hinges (K) and add the seat frame (Photo 13; Fig. 03). You’ll need to have a vise in hand to finish the top. Make the two jaws for the vise (W, X). Drill holes in the jaws as necessary for mounting the vise. In addition, drill holes on the outer jaw for bench dogs, if desired, making sure that the holes clear the vise’s guide rods. (If the jaw is over 2″ wide, drill from both sides.) Drill mating holes in the bench’s top. (This is best done on a drill press, but measure the distance from its post to the bit before you lay out the holes in the vise and benchtop, to make sure your drill press has enough reach.)
Glue the vise’s inner jaw to the benchtop. Test the fit of the base again, because this piece also serves to trap the base. Rout a chamfer or roundover on all the bench’s parts so it’s comfortable to handle and you’re good to go.
Here are some supplies and tools we find essential in our everyday work around the shop. We may receive a commission from sales referred by our links; however, we have carefully selected these products for their usefulness and quality.