We may receive a commission when you use our affiliate links. However, this does not impact our recommendations.

Face Frame Cabinets
Master these
techniques to
open up a world of projects.
By George Vondriska
|
If you can make dadoes, rabbets and face frames,
you can make almost any cabinet. Master this
foundation of skills and you’ll be ready to launch
into complex variations of the simple cabinet
shown in this story. Here’s how:
Face-frame cabinets are little
more than plywood boxes covered
by a solid-wood frame. The
frame adds strength and rigidity
to the box, while covering the ugly
plywood edges. In this story I’ll
take you through the building of
a typical freestanding wall cabinet.
The concepts and techniques can
also be used for kitchen cabinets,
bathroom vanities and bookcases.
There’s plenty of room for mistakes,
and I’ve made them all over
the years. To stay in business,
and provide my students with
shortcuts to success, I’ve developed
systems for avoiding these
kindling-producing errors.
|
|
You may also like…
Sycamore Pantry
Shaker Sideboard
Cherry Pie Safe
|
|
Dado the case sides to receive the cabinet
bottom. Be certain the dado head is set up correctly
for your sheet stock. The shelf should slip
into the dado with no more than hand pressure, and the
parts should stick together when you try to separate them.
Setting up the dadoes can be fussy, and may require dado
shims (thin material that allows you to change the width of
the head a few thousandths of an inch; see Sources). Take the time to get it right. The correct depth for
dadoes and rabbets is one-half the thickness of whatever
they’re being cut into. 3/4-in. plywood gets a 3/8-in. dado.
Caution: The blade guard must be removed
for all of these dado blade cuts. Be careful.
|
|
Click any image to view a larger version.
|
|
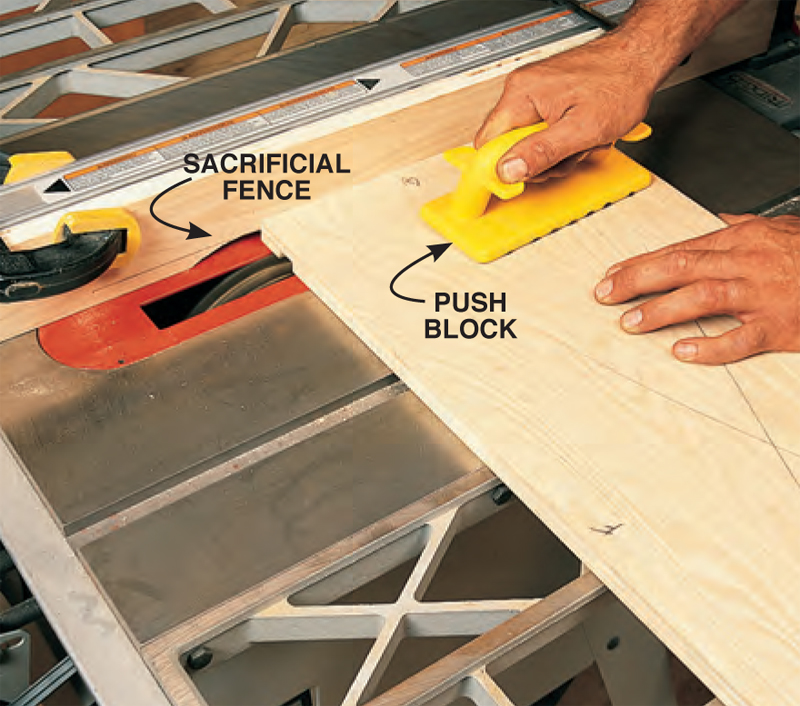
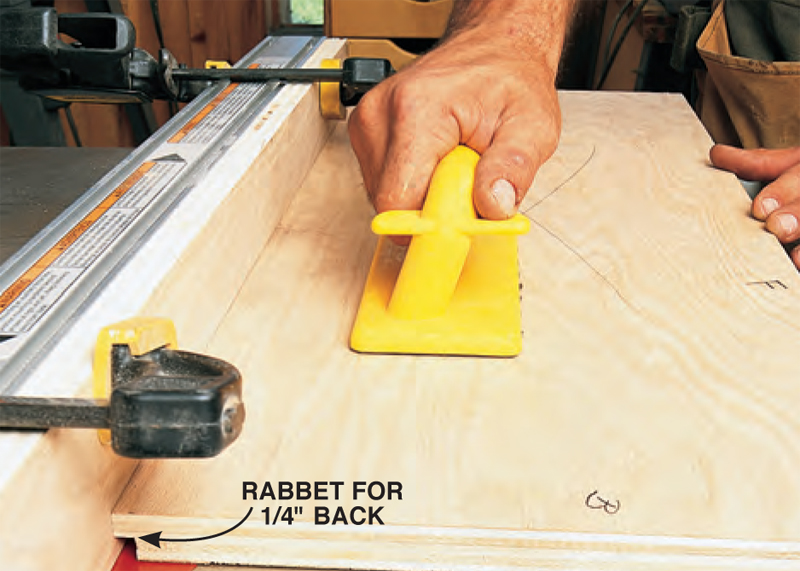
Rabbet the back edges of the case sides, top
and bottom to receive the back. Use the procedure
shown in Photo 4 to make the rabbets slightly
deeper than the back requires. Don’t disassemble the dado
head for this thinner material, just bury part of the head in the
sacrificial fence.
|
|
|
|
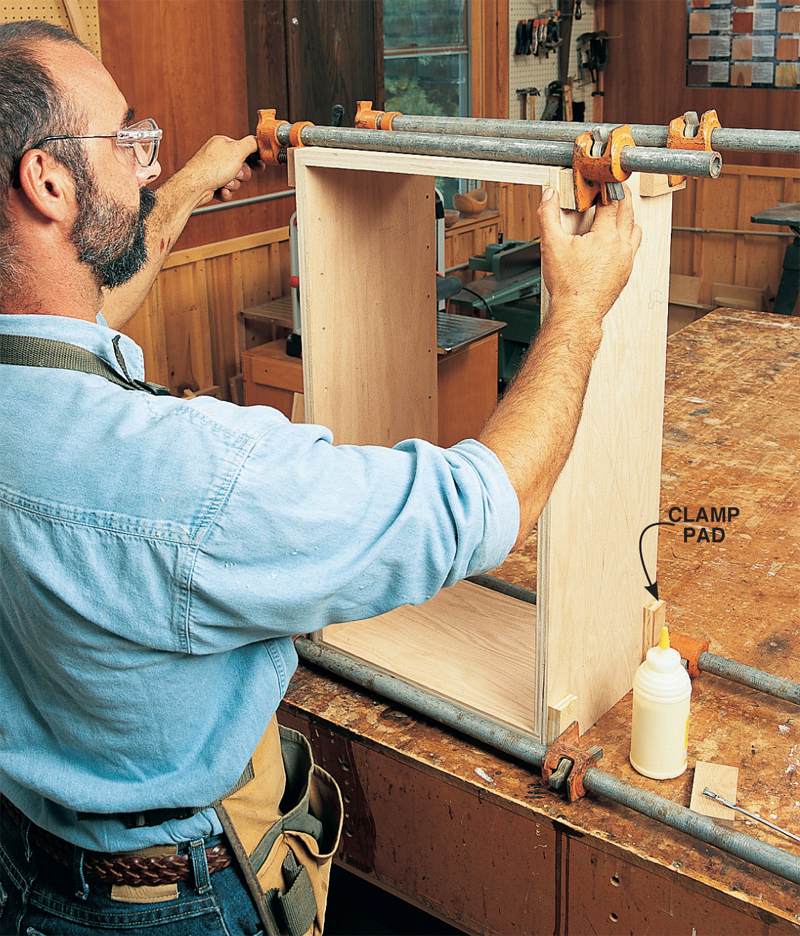
Assemble the
case, keeping the
front edges flush.
Clamp pads protect
the wood surface. Old plastic
honey bottles make great glue
bottles—just keep them out
of the reach of children. Use
just enough glue in the joint to
cover the surface; it’s just like
applying paint.
|
|
|
|
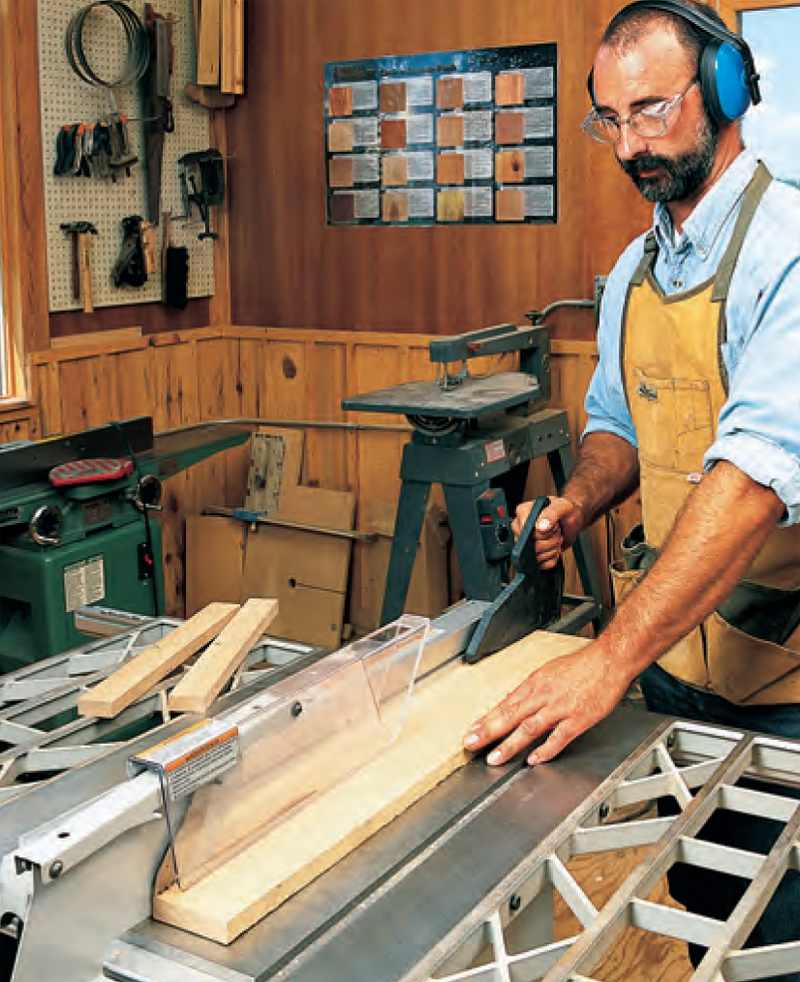
Rip the face frame pieces to
width with a jointed edge against the
fence. Make them 1/16-in. wider than
the finished size so the sawn edge can be cleaned up.
Use a push stick for these narrow pieces. My rule of
thumb for keeping both thumbs is to use a push stick
on rips less than 3-in. wide.
|
|
|
|
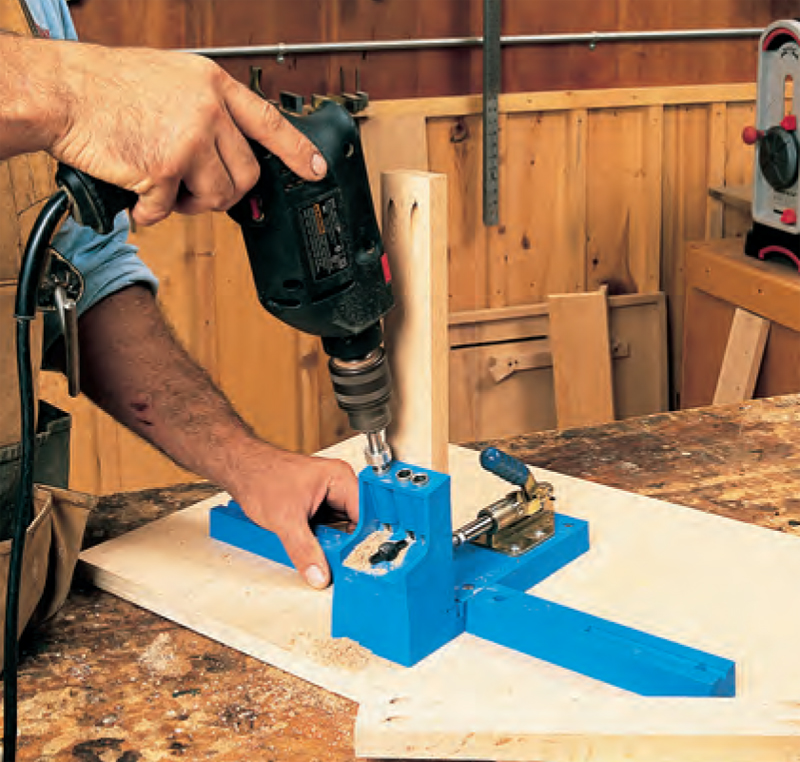
Use screw pockets to join the rails
to the stiles. Face frames can be joined
by dowels, mortises and tenons, minibiscuits
or simple, fast, effective screw pockets. Mark
the rail faces and be sure the holes get drilled only in
the backs of the rails. Incorrectly flipping parts around
has put some rails in my scrap pile.
|
|
|
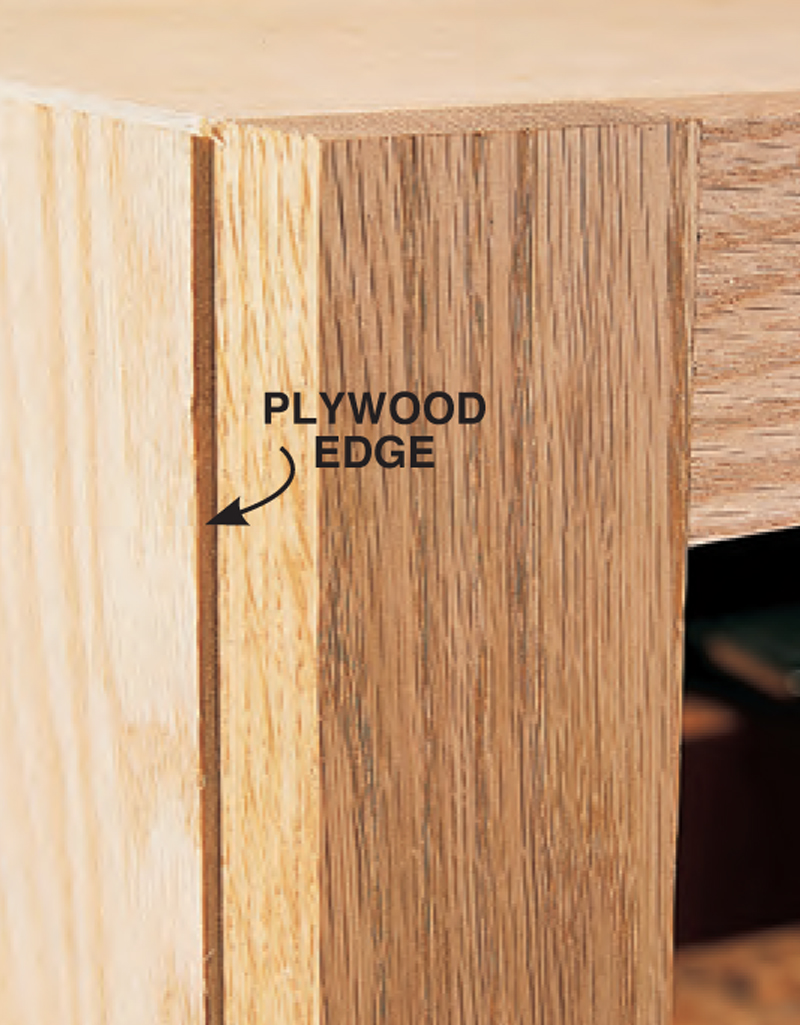
Oops!
It’s a temptation to cut the face frame exactly
the same size as the case. Unfortunately, this
often leads to disaster. When you glue the
face frame on, it often slips sideways a bit,
so you can end up with the unfortunate and
unfixable result shown at right. The solution is
to build the face frame slightly oversize, as we
show in Photos 13 and 15.
|
|
|
Product Recommendations
Here are some supplies and tools we find essential in our everyday work around the shop. We may receive a commission from sales referred by our links; however, we have carefully selected these products for their usefulness and quality.