We may receive a commission when you use our affiliate links. However, this does not impact our recommendations.
 Requiring sawing, planning, and shaping skills, this tray is the perfect project to put hand-tool lessons to practice.
 Requiring sawing, planning, and shaping skills, this tray is the perfect project to put hand-tool lessons to practice.
Project #2220 • Skill Level: Intermediate • Time: 1 Day • Cost: $45
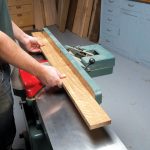
This tray is a slightly amended version of a shaker cutlery tray and is a great one-day project to help you hone your hand-tool skills while still producing a beautiful and utilitarian piece. I start by breaking down rough cherry lumber and mill pieces to thickness and length. Though the divider that makes up the handle will be slightly shorter than the long walls of the tray, I cut it the same length and will adjust it later. With planning and care, you can create an effect with the grain that wraps around from one face to the next, but since this is dovetail construction instead of miters, I don’t bother too much with that, preferring just to lay out the faces so the grain is pleasing to the eye.
 Gang-Cut Tails
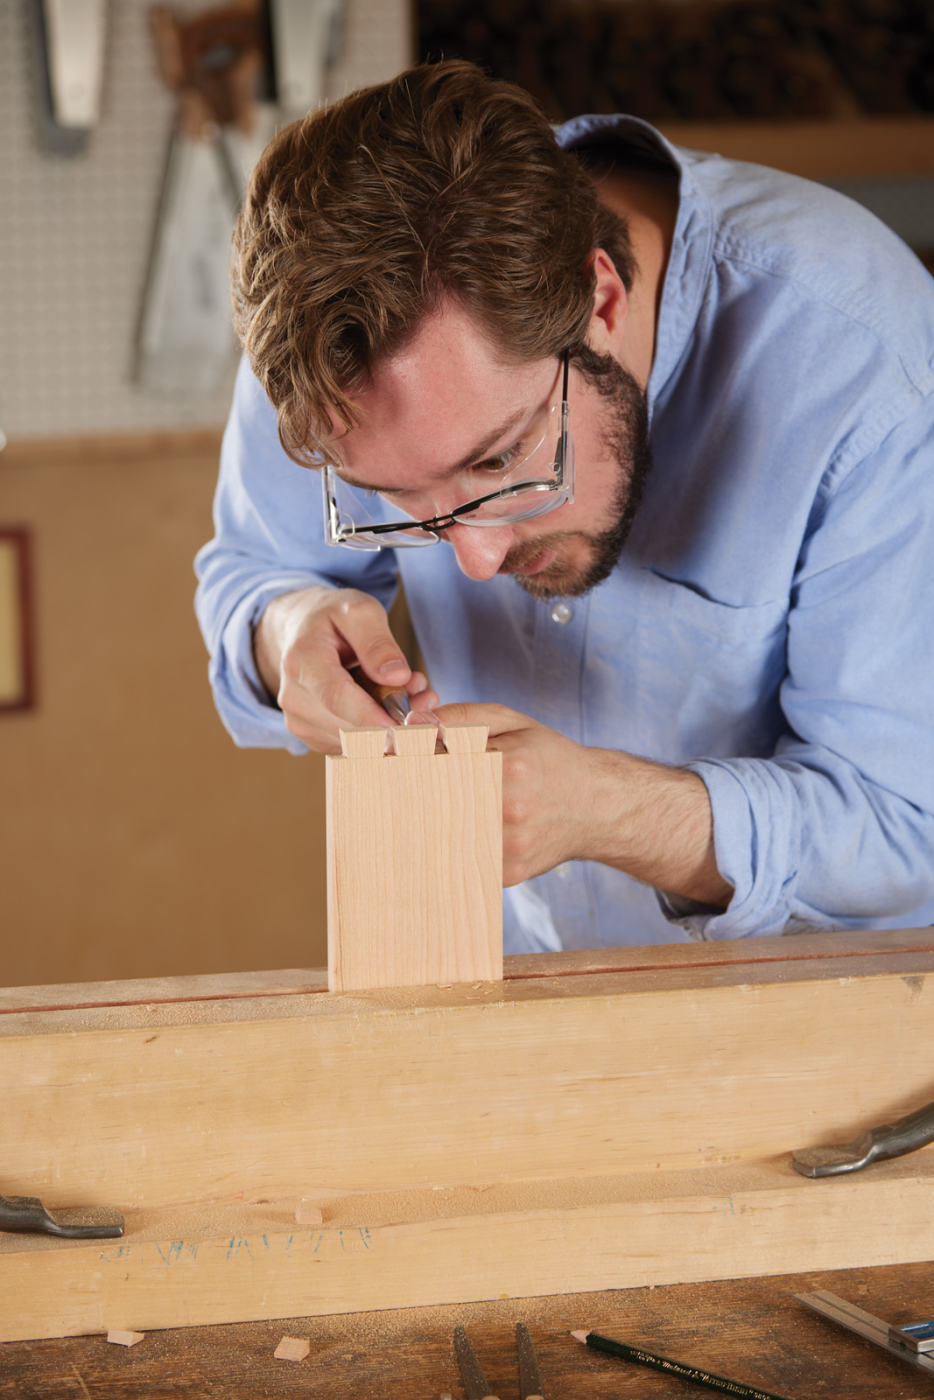
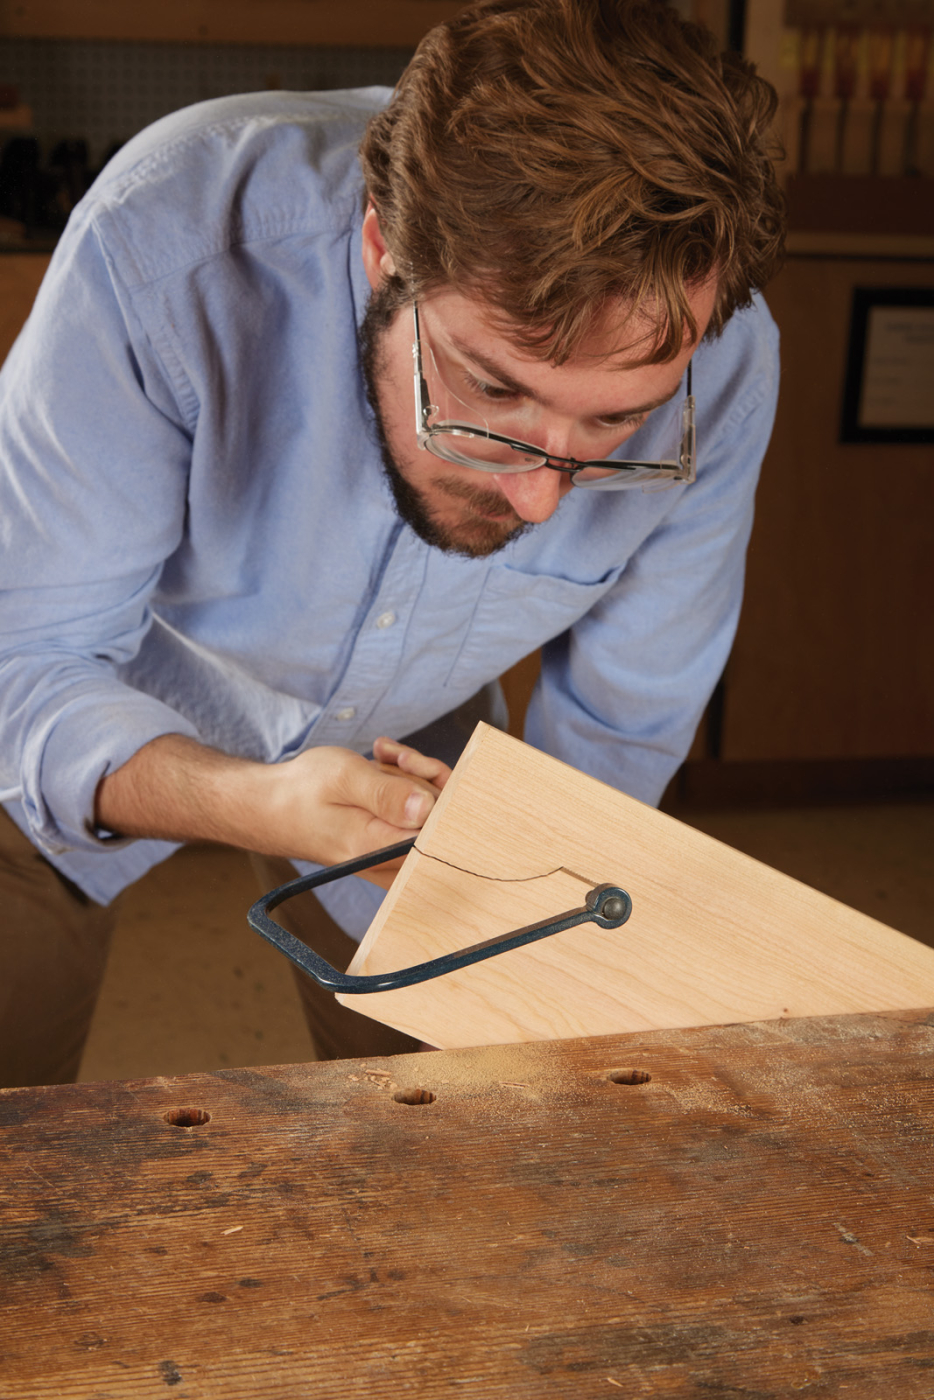
I start my dovetails by gang-cutting the tails. This method speeds up the process considerably. The trick with gang-cutting, however, is really paying attention to the baseline so that you don’t extend your kerf beyond it. Having a dead-level cutting action will help, but even I struggle with this sometimes, so as I near the line, I check the opposite face as well, sort of teetering between them. Then when the kerf touches the baseline on both faces, I use a very light touch and a few passes to make sure the kerf goes straight across rather than leaving a bump of unsawn waste in the middle.
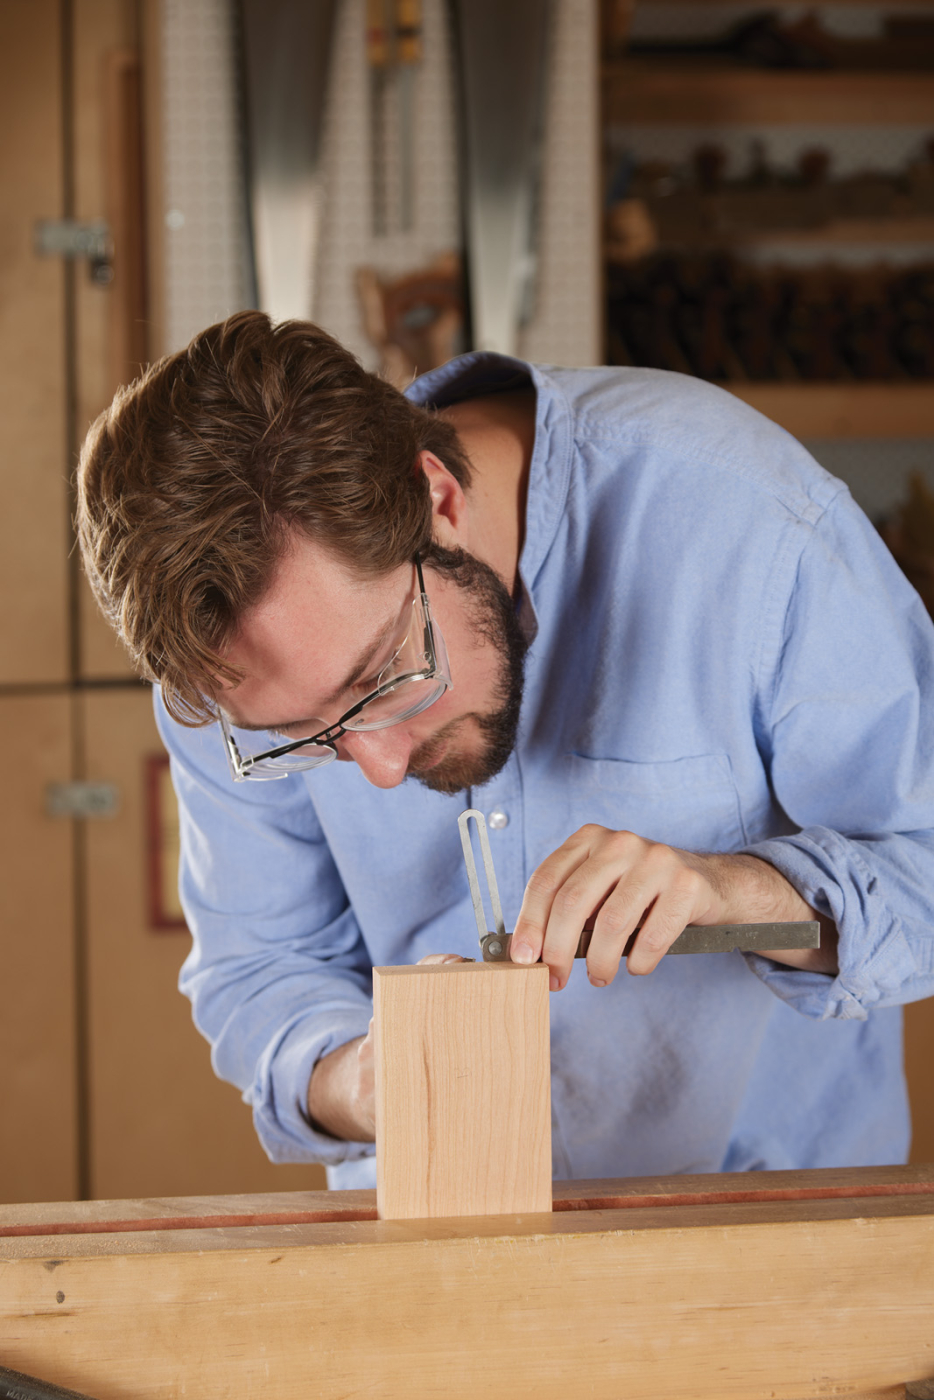
Layout the tails on the front and the back of the tray.
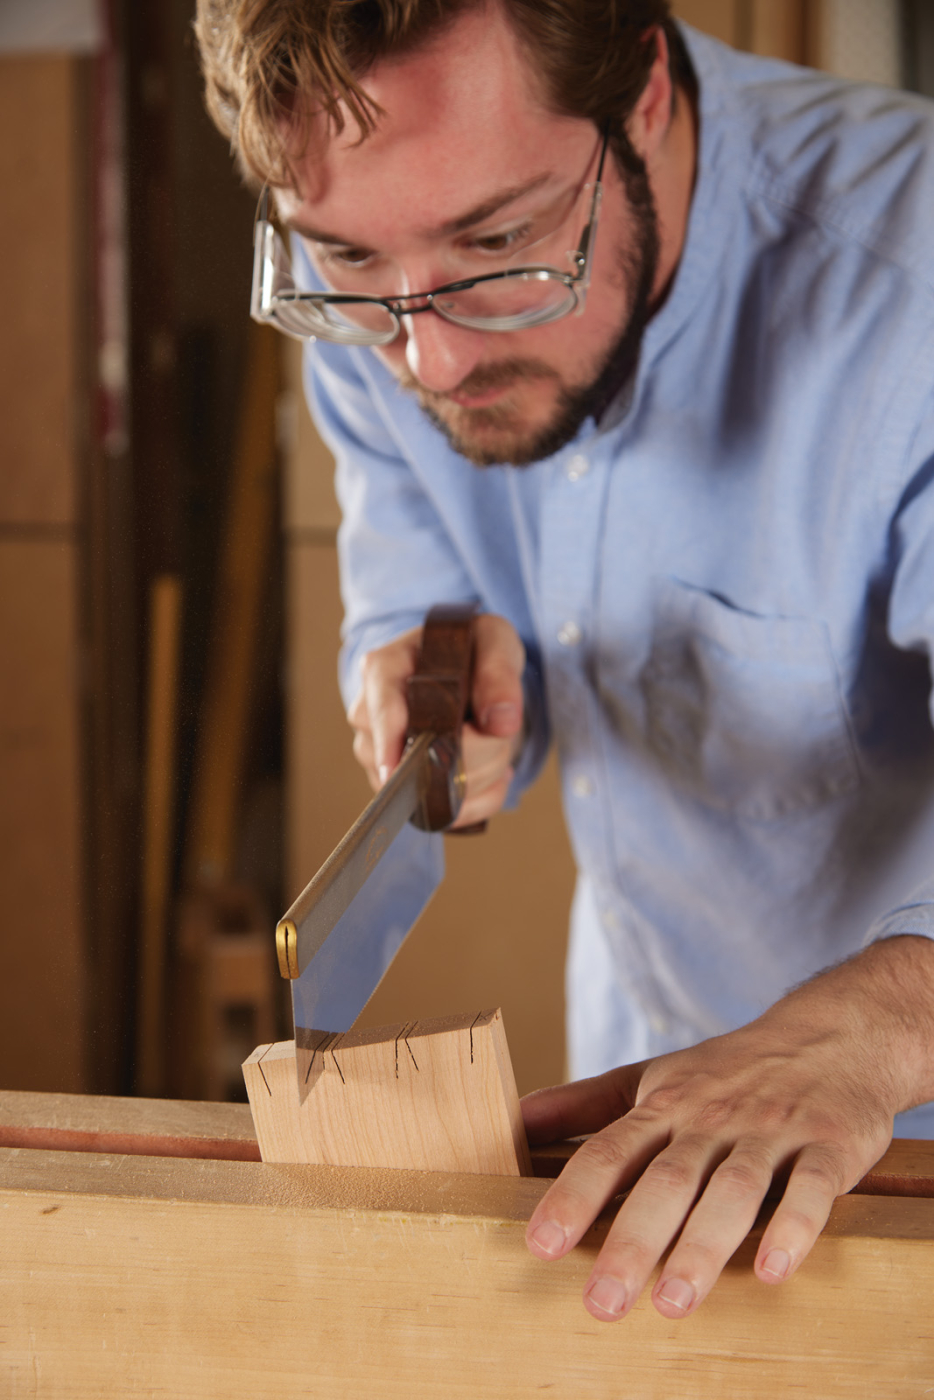
Angle the tail boards in the vise so you’re sawing straight down.
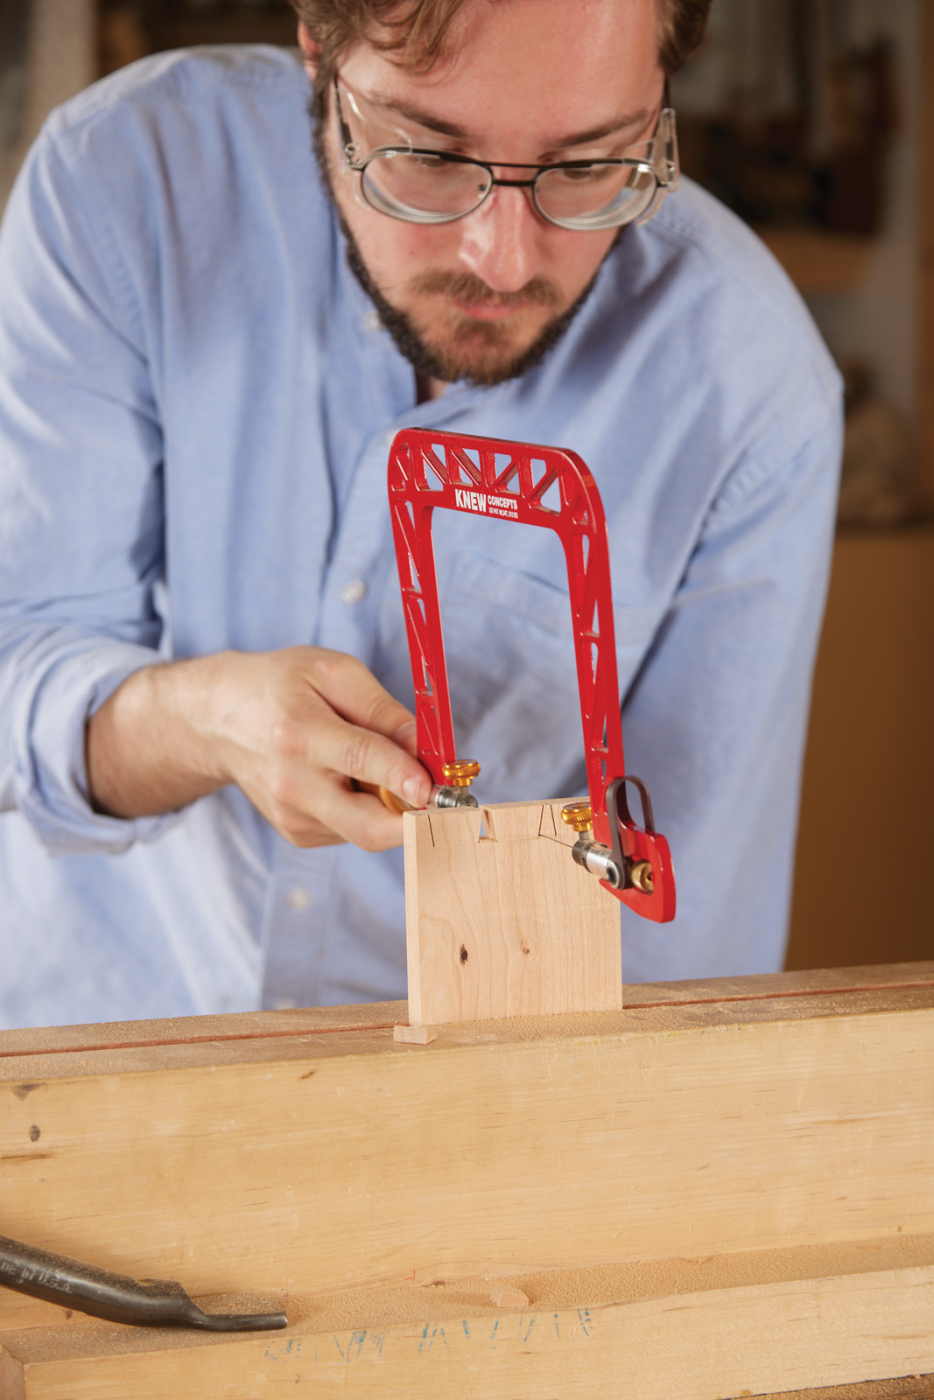
Remove the waste from between the dovetails.
Use a chisel to clean up any stray fibers, especially in the corners.
While cutting your tails, something to consider if you find that your line drifts, is to position your boards so that the line you follow with your saw is perpendicular to the floor. This really lets gravity assist with that straight line, and considering the secret to good dovetails is straight lines, that’s an assist that’s hard to pass up.
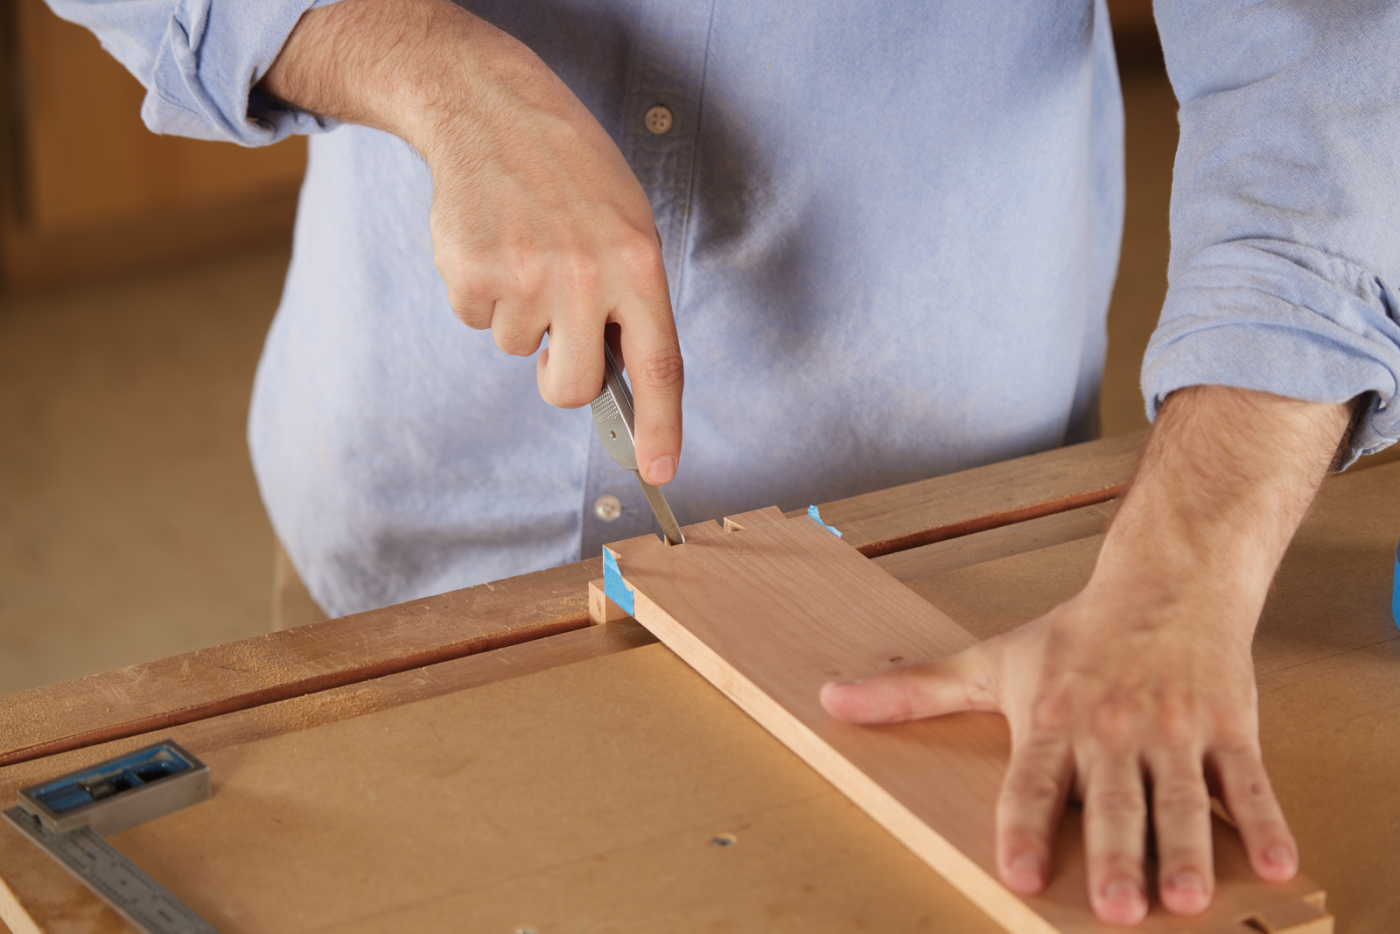
Transfer the tails to the pin boards.
Transfer Tails to Pins
When it comes time to transfer tails to pins, there are a lot of ways to get the boards lined up just so, from using special jigs and offsets to just holding it there with a hand and support. I’ve found for me the best way to get a square transfer right up to the baseline is to add a piece of blue tape to the tail board just under the baseline. This will register with the corner of the pin board much in the same way others use a little rabbet on the inside of their tails, but I don’t have to use a plane to do it or worry about blow-out. Then it’s simple knife marks made by light, successive scoring to not force an incorrect line.
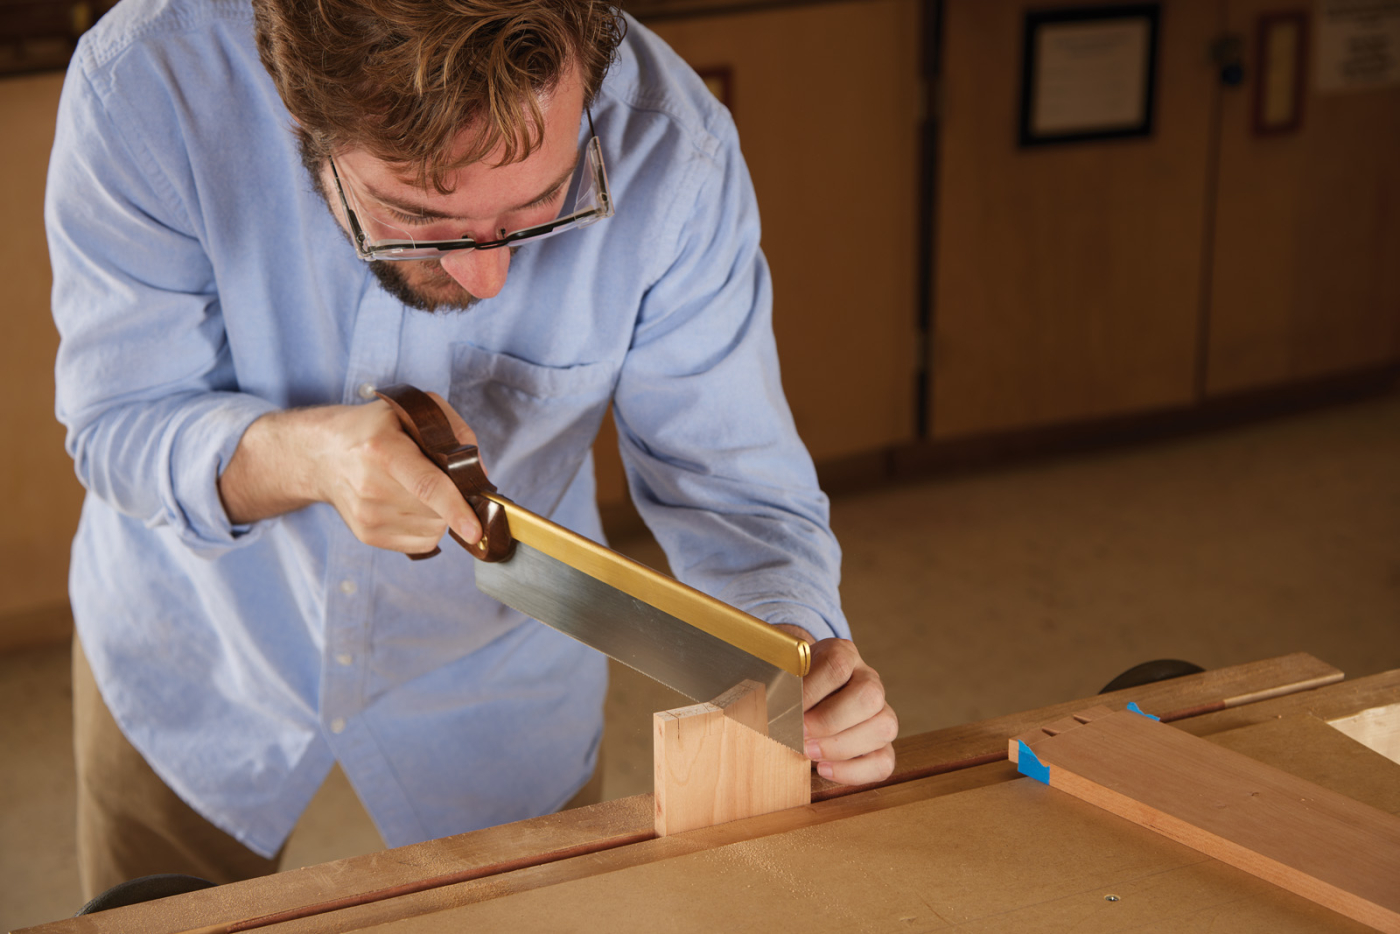
Cut the pins, staying right on the edge of the knife mark.
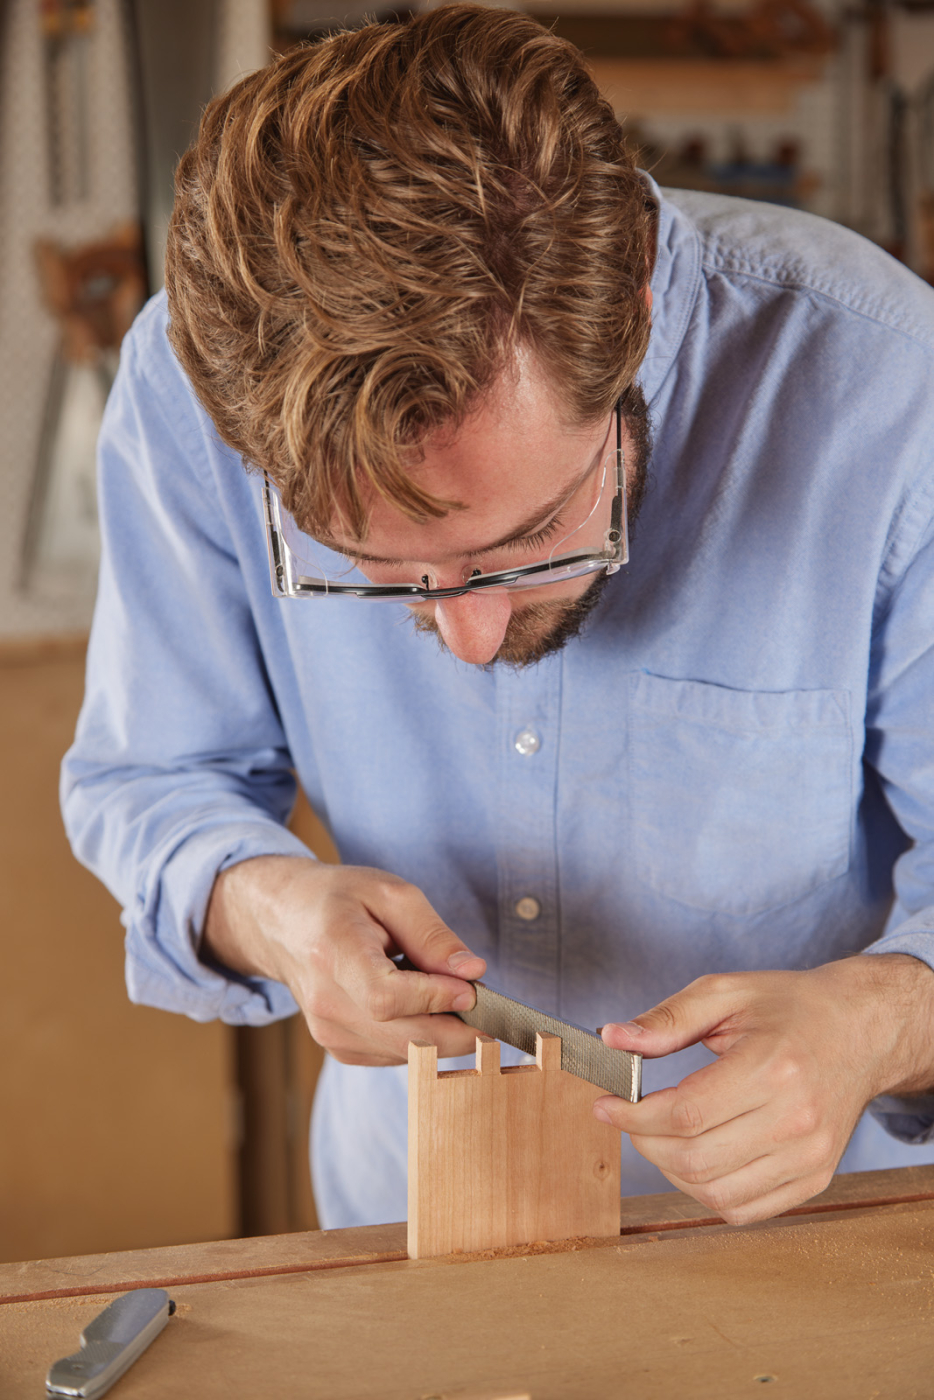
A float or file is a great way to fine-tune a joint and keep the pins straight.
When I go to cut the waste, I slip the very outside tip of the saw tooth into that knife line so I won’t have to pare any waste away. I’ve found that when paring pins, more often than not, the grain doesn’t cooperate with me and pulls my chisel too deep into the cut, removing part of the wood I wanted to keep. When you cut right at the edge of your knife line, you mostly remove this need to shave material, and your boards should come together off the saw. If they’re still a little tight, I recommend a file to take very light passes, maybe three at a time, off the tip spots until you get a snug fit. If, however, you don’t trust yourself to get that close or you know that you drift, go ahead and give yourself a half or full saw kerf of extra space into the marked waste, especially if you’re working with nice wood, but you should know that the only way to get to the point of sawing right on the line is by doing it in practice over and over again!
The divider gets a swooping cut on the edges. Do this with a coping saw.
Next Up, The Handle
With the tray walls ready, it’s time for the handle. I take the inside distance directly from the long wall, scribe line to scribe line.
This establishes the length of the handle minus its tongues, each of which will be 1/4“, so the board will be the interior length plus 1/2“. When it’s cut, I make sure everything is square at a shooting board, then transfer tick marks from the long wall again to mark where I will have to cut the notches for the handle board. Taking measurements from the pieces you have already made is the best way to guarantee dimensions match in crucial moments. I always recommend avoiding measuring with tapes and squares if you can avoid it.
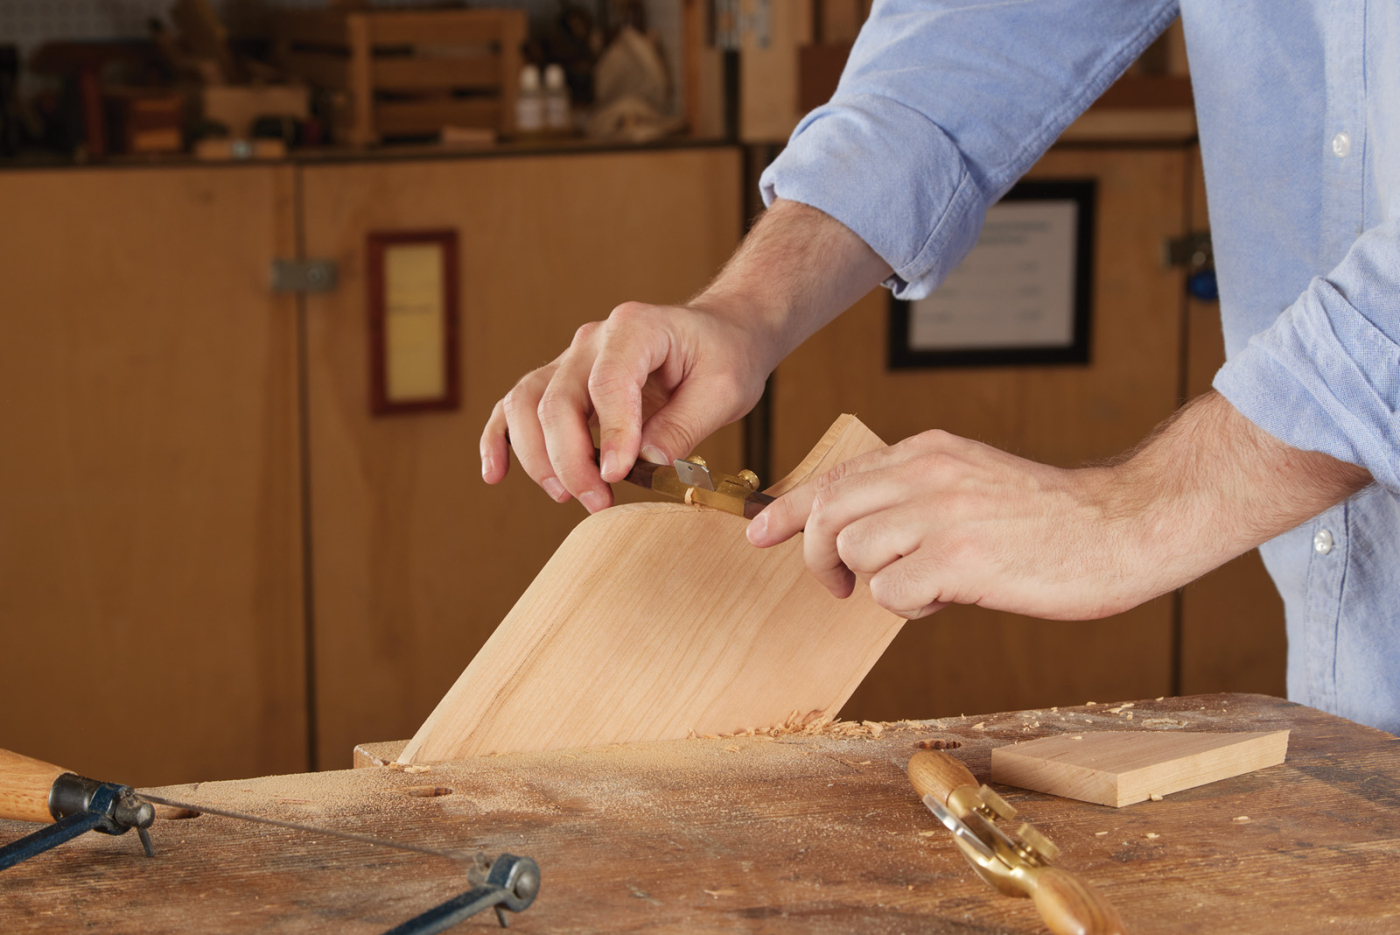
Refine the edges of the divider using a spokeshave.
Since I’ve made a lot of these trays, I use a stencil to lay out the curve and the finger slot. You can come up with your own rather easily by cutting out one half of the pattern from card stock or thin MDF and flipping it to make both halves so that you have a symmetrical handle, or if you’re a free spirit, freehand it! Either way, trust your eyes, as they are good judges of symmetry. With it ready, I cut the line with a coping saw and smooth the cut with two spokeshaves: the small, round bottom one for the concave and a flat bottom one for the convex. Take your time here; spokeshaves are wonderful tools, but they work best removing nice thin shavings, leaving a glass-smooth surface. If you want, you can cut at the band saw, but you’ll still need to smooth that rough surface.
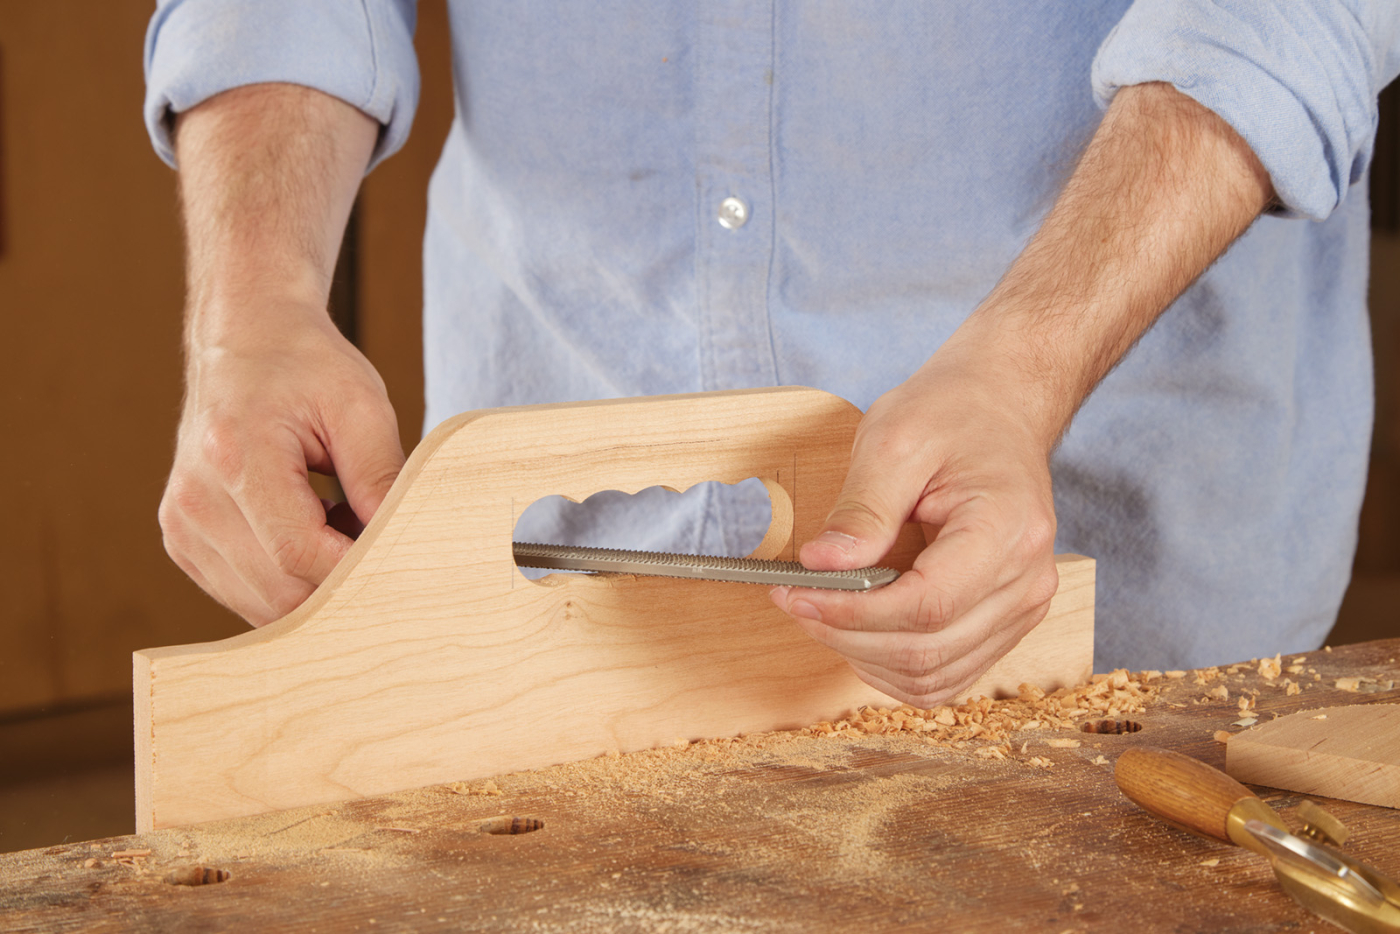
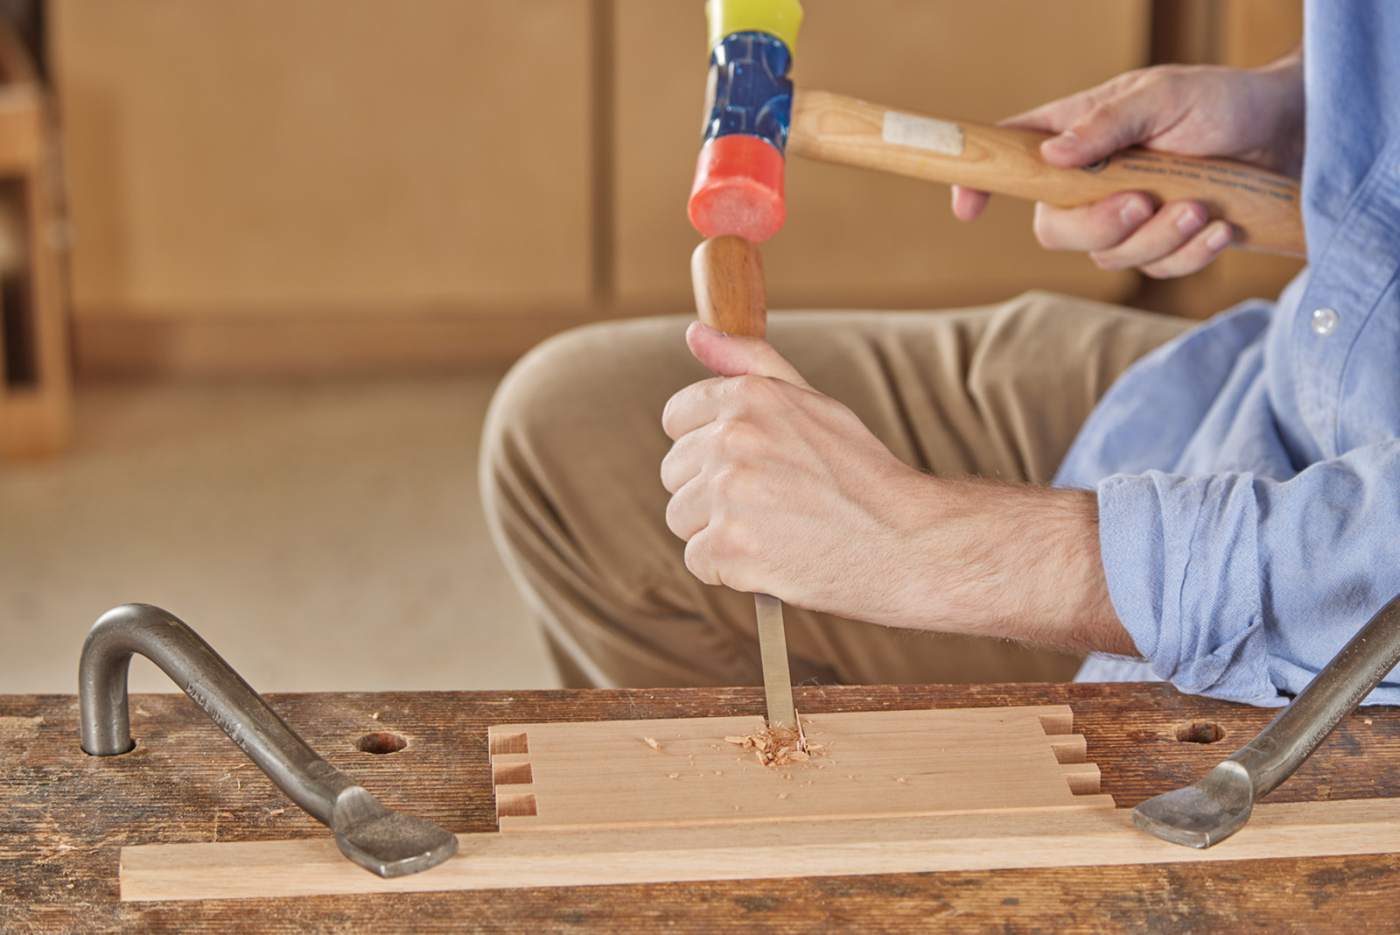
After drilling out the handle, use a file or rasp to smooth out the shape.
If you want to stick with hand tools for the finger slot, use a small bit to drill a hole near the line. Fit a coping saw blade through it and cut the hole. Alternatively, you can use a wide bit and a brace to remove a lot of the material then file it smooth with an aggressive rasp. I did the latter, but because my tool was acting up, I used a Forstner bit at the drill press to remove large chunks of waste, then rasped the ridges between the cuts flat and filed them smooth.
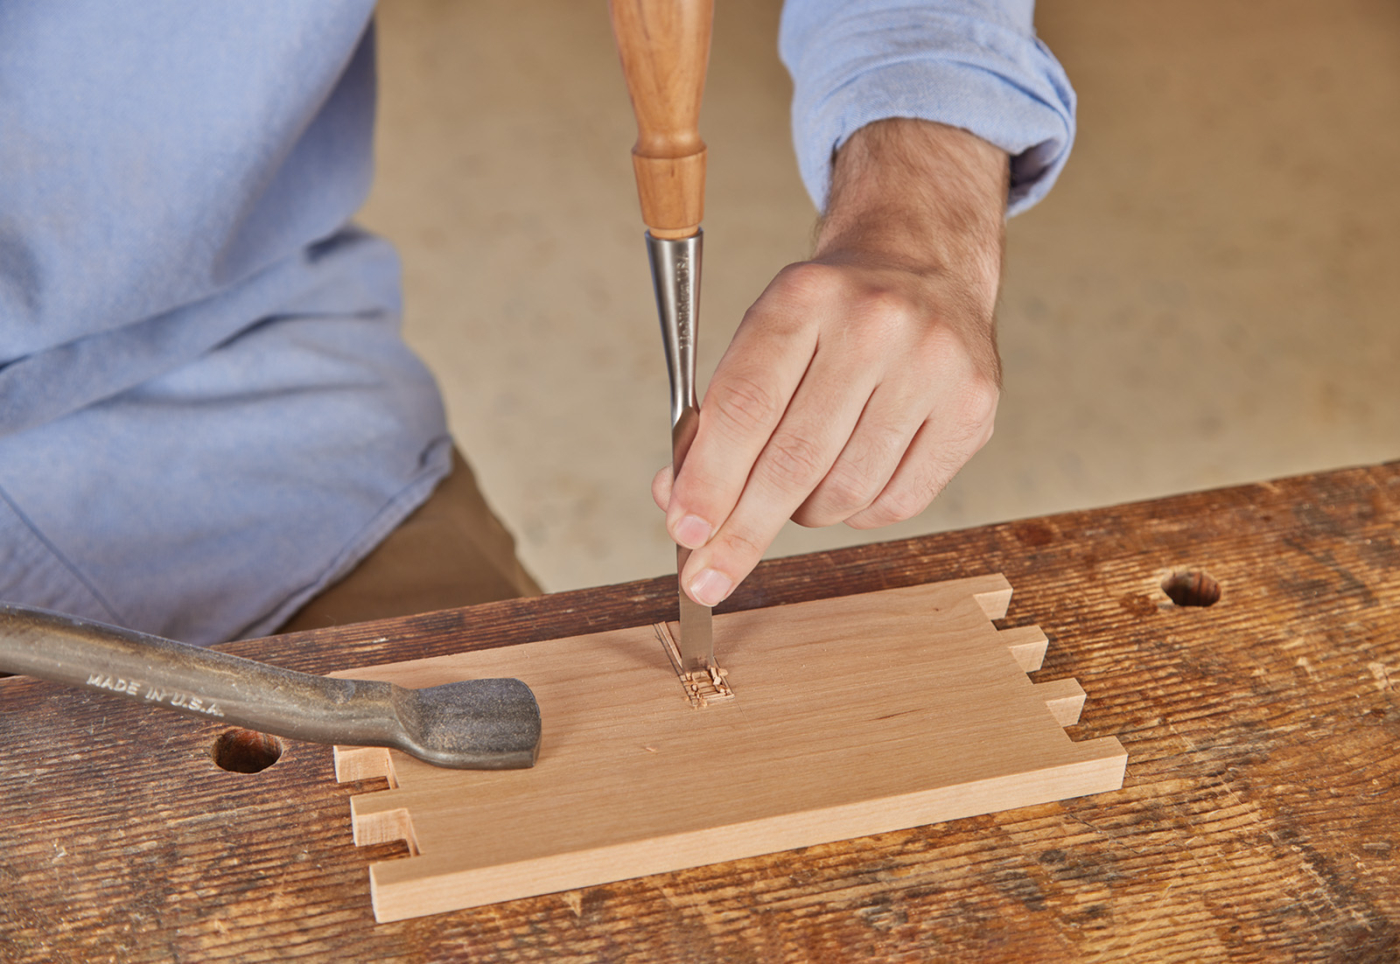
Chop a dado in the ends for the divider.
Chisel out the dado waste.
With the handle cut, I now cut away the waste at either end of the board that creates the tongue that will fit into the stopped dado we will make in the short walls. I use a chisel to chop right to my scribe line for a good, snug fit.
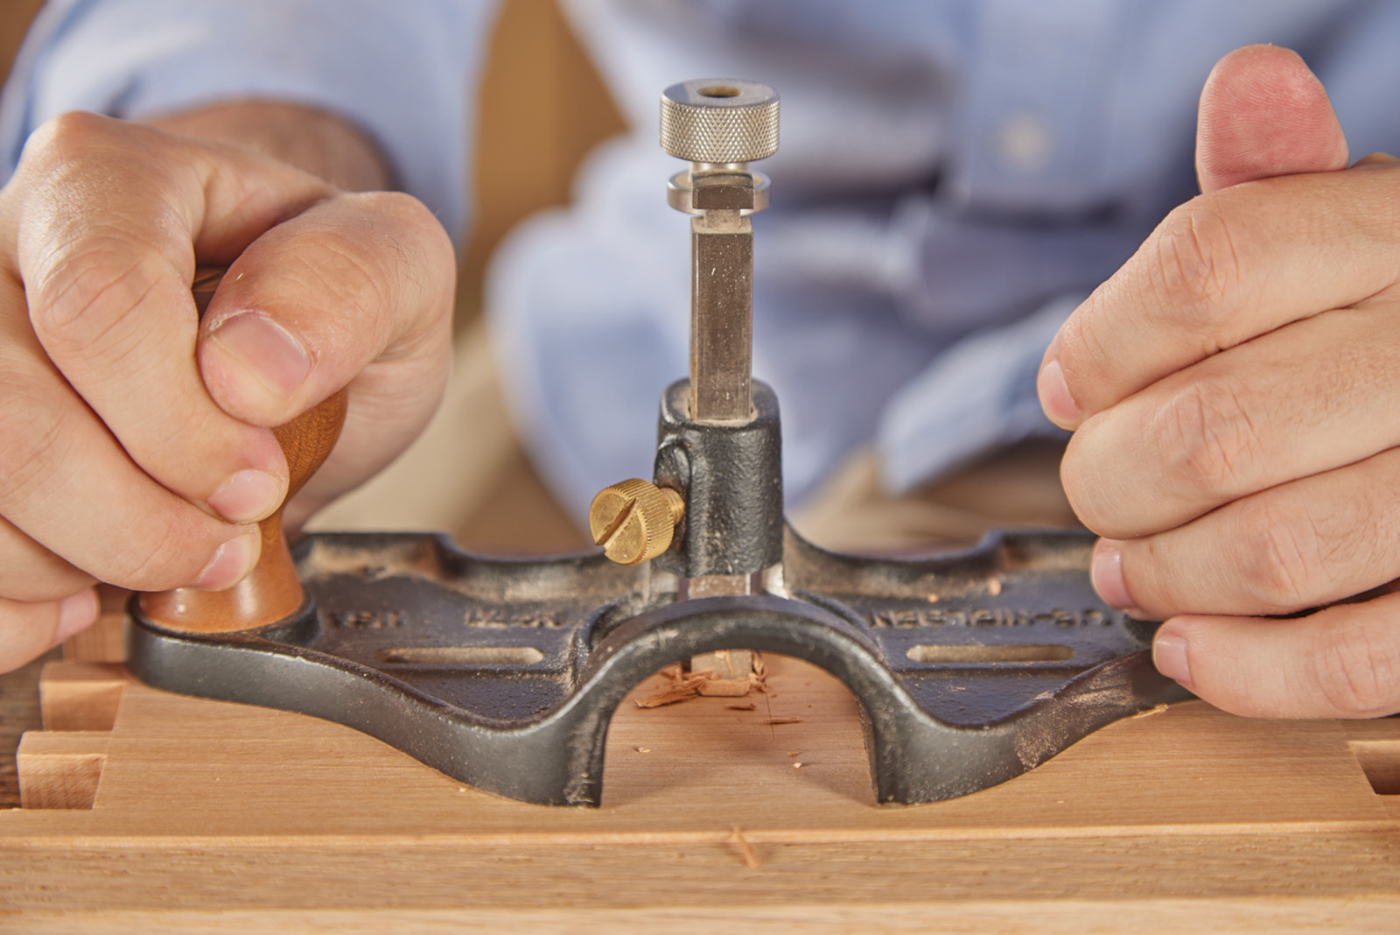
Bring the dado to a consistent depth using a router plane. This plane is the perfect tool for cleaning up the bottom of a dado or groove.
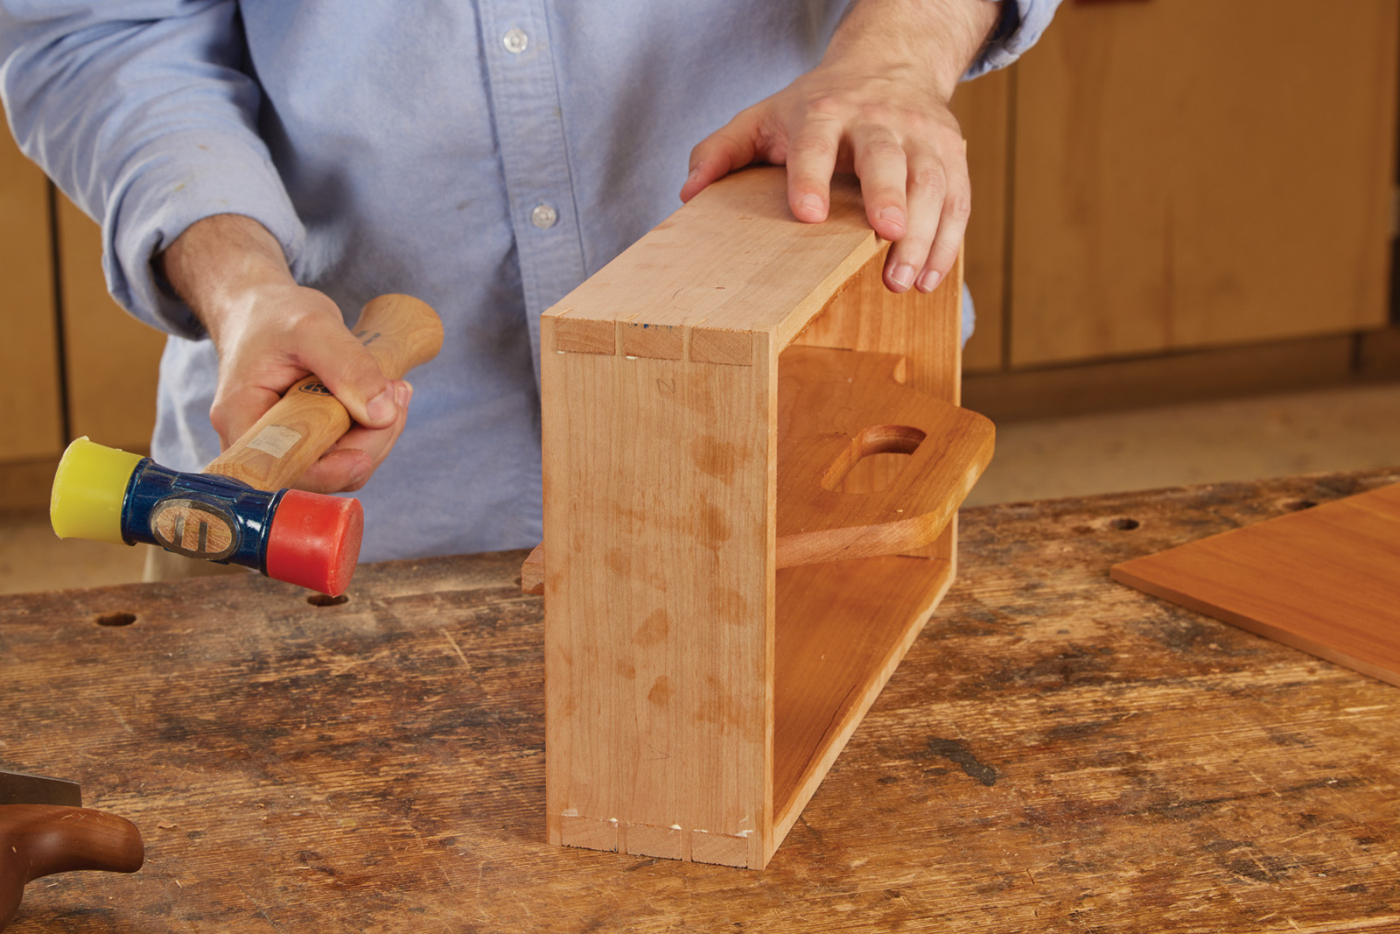
It’s time for the dado in the short wall. I measure out to the middle of the board, then make a mark 1/4” off center (half the thickness of the handle). Using the handle board, I register it to the tick and make another tick on the other side of the halfway point so that I have the dadoes’ wall measured exactly to the thickness of the board. Next, I use a chisel in much the same way a blind mortise is made — establishing the dado walls before using a router plane to remove the waste down to the appropriate depth (1/4“). Test the fit of everything by putting the handle into its dadoes, then tapping the tail boards lightly into the pin boards, but don’t seat them! I don’t even press them in, just get them started and registered to make sure the handle board doesn’t prevent them from coming together. If the handle board is a little long, take it to the shooting board and swipe a few shavings off, and test again.
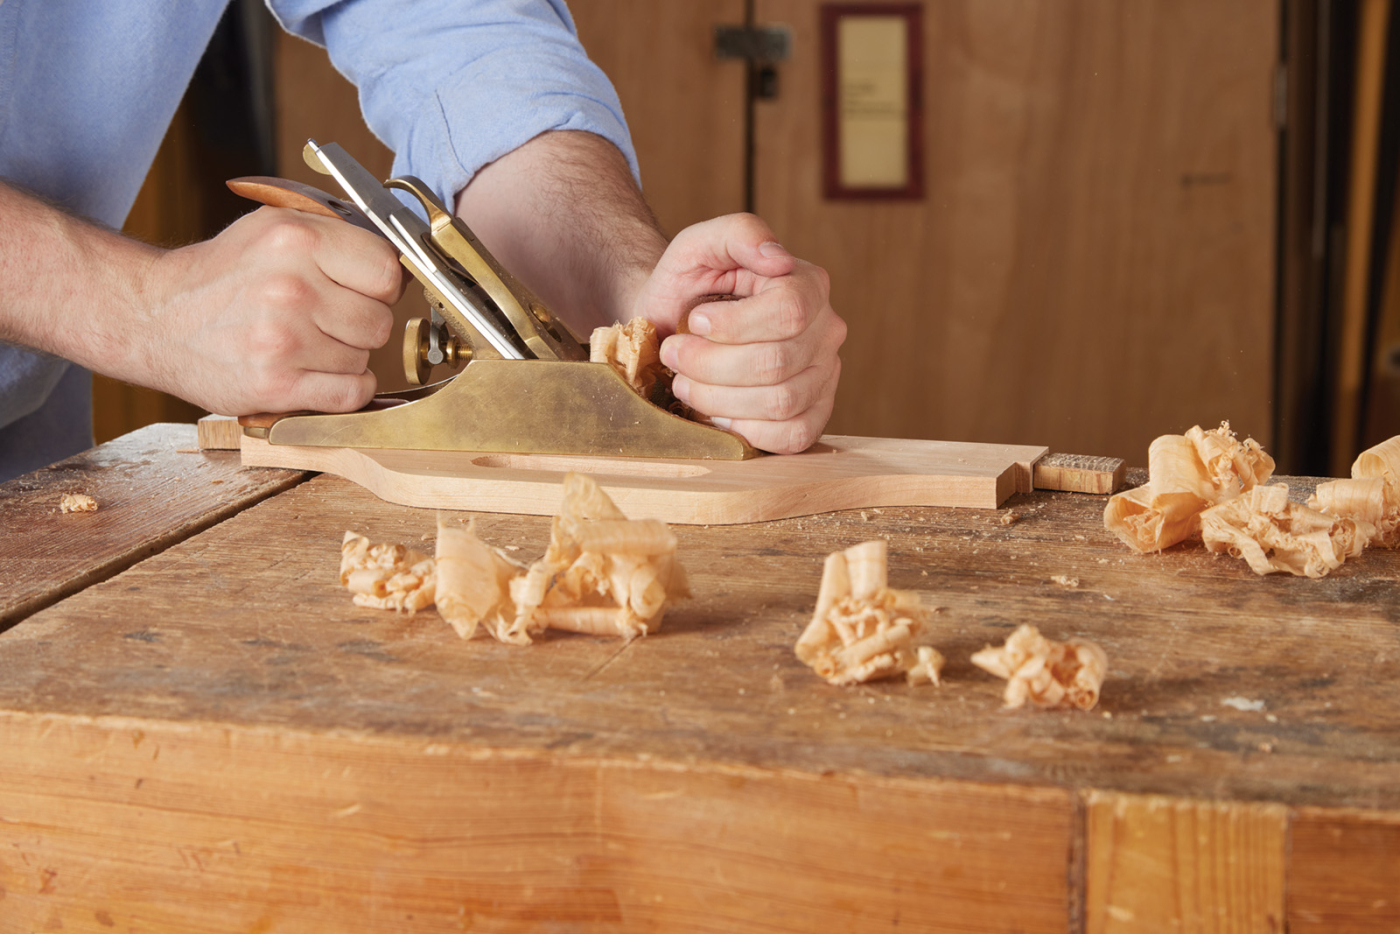
Before gluing up, use a handplane to smooth out the faces on all of the parts.
Pre-finish First
I like to pre-finish the inside before glue up. This ensures my interior has a perfectly applied finish but also allows for easier removal of glue squeeze-out. For most of my projects, especially small, tactile pieces, I use mineral oil followed by a coat or two of furniture wax as a finish which gives it a nice, muted luster and leaves the wood feeling like wood instead of plastic. I glue the tray up and slide in the middle section.
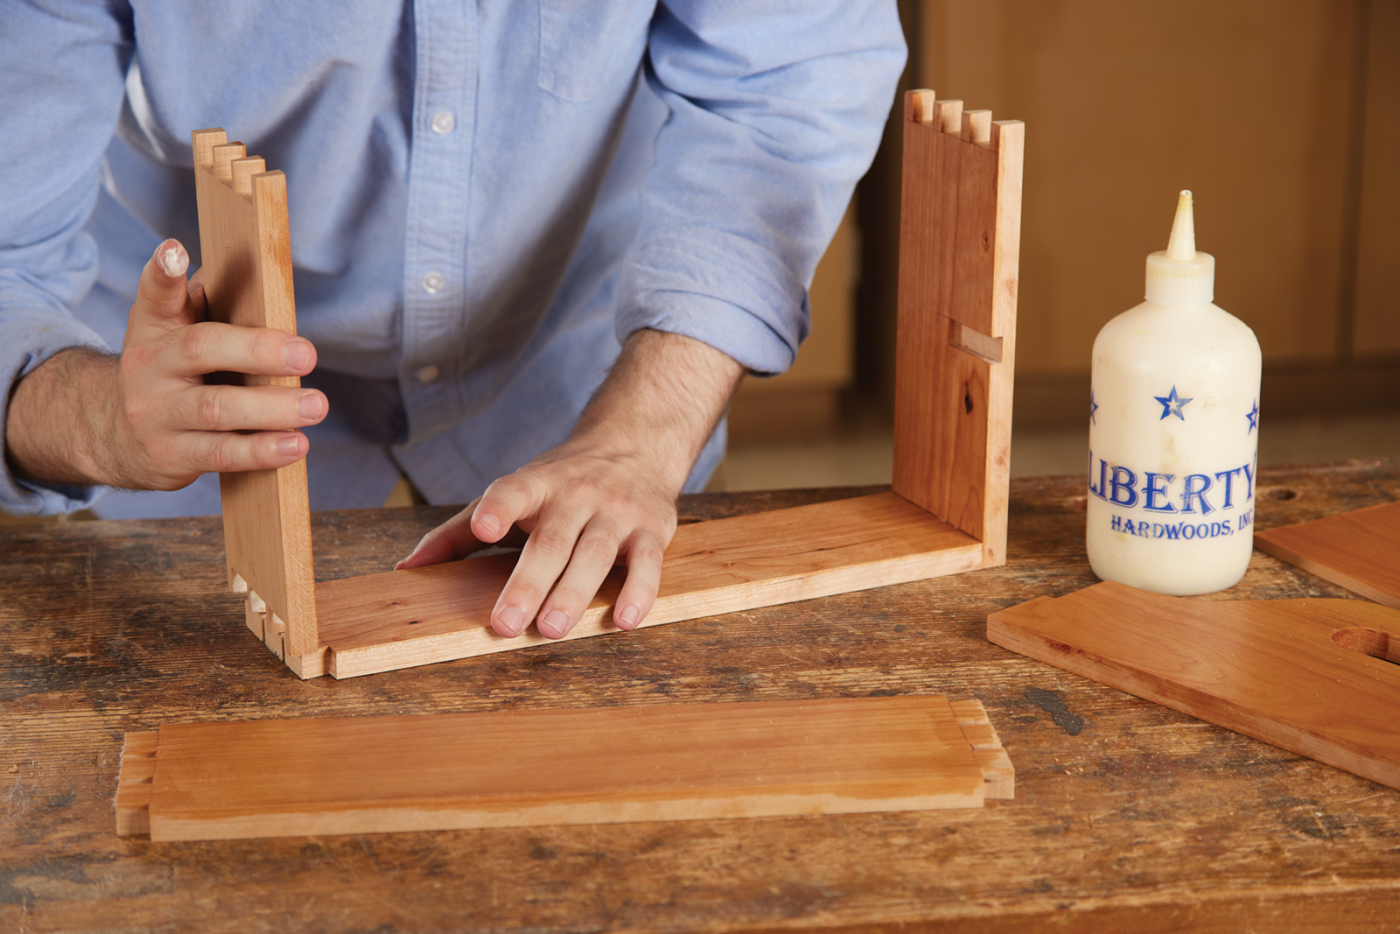
Carefully glue up the tray. A little bit of glue on the inside of the pins is all that’s needed for a rock-solid joint.
The divider is slipped into the dado from the bottom of the tray.
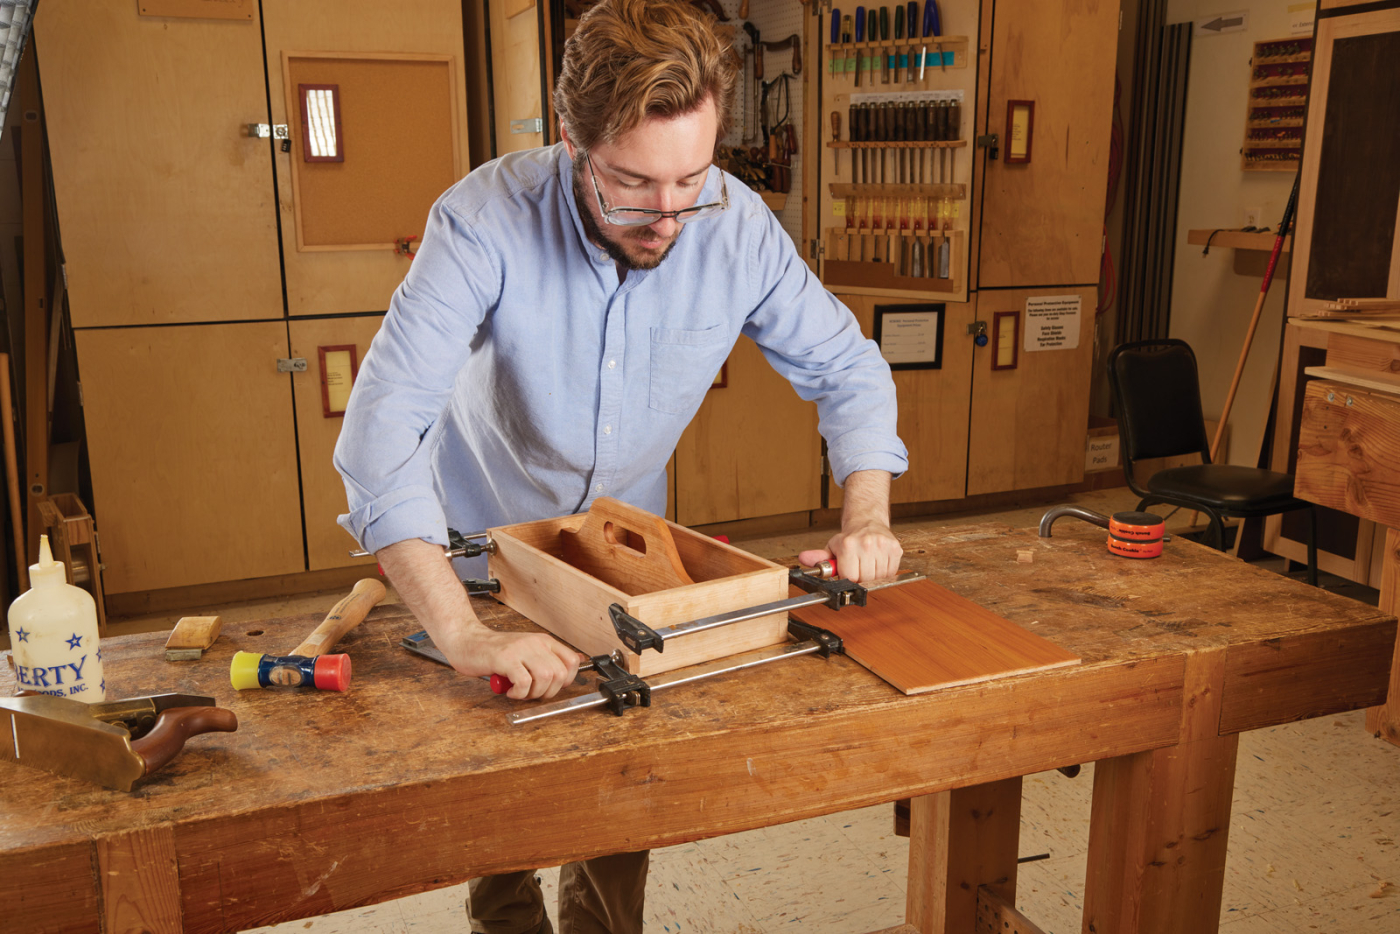
Clamp the tray together and allow the glue to cure. F-style clamps allow pressure to be applied directly to the tails.
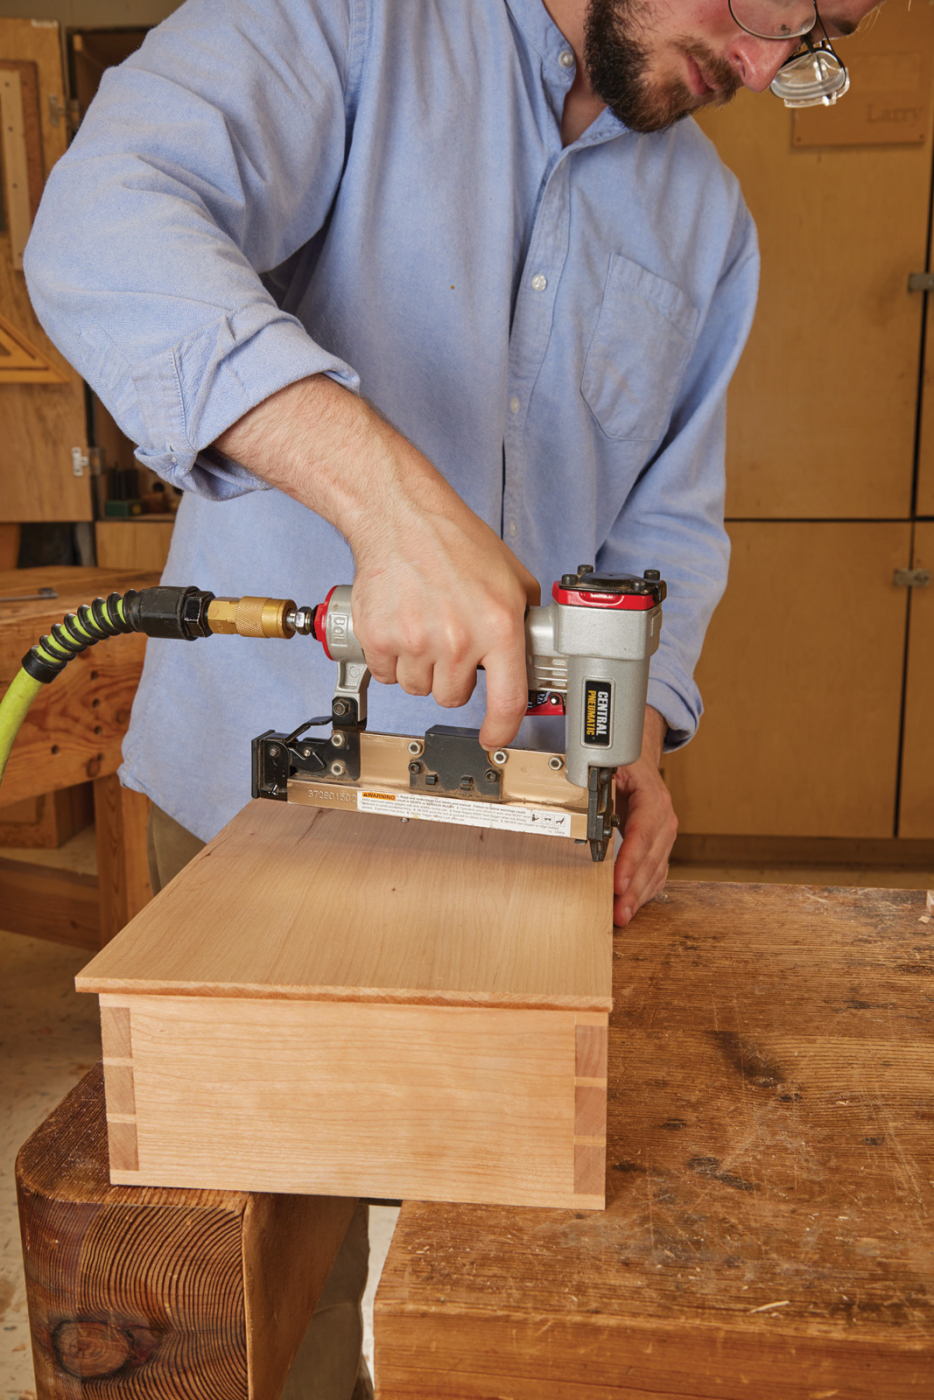
After cutting the bottom, it can be nailed in place.
Then Assemble
Once it’s dry, I plane the tails and pins flush and use a pin gun with a small bead of glue at the side to attach the base. At this size and with the thickness of the cherry, the wood movement isn’t enough of a factor to give me concern. With the bottom attached, I plane it flush and add a slight chamfer along all outside edges. Then I apply the rest of my finish before moving on to the cord wrapping.
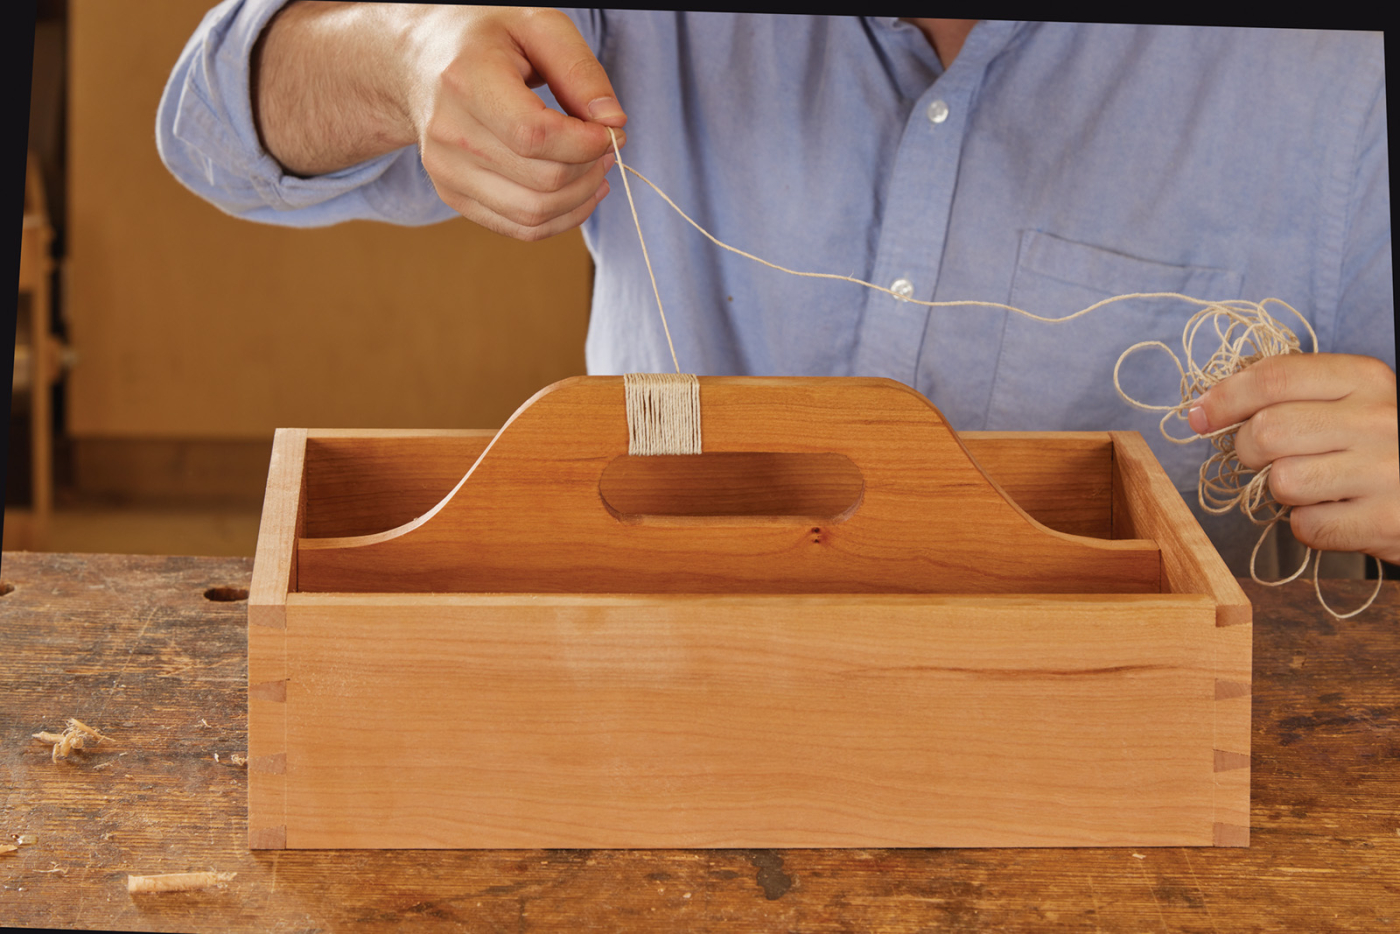
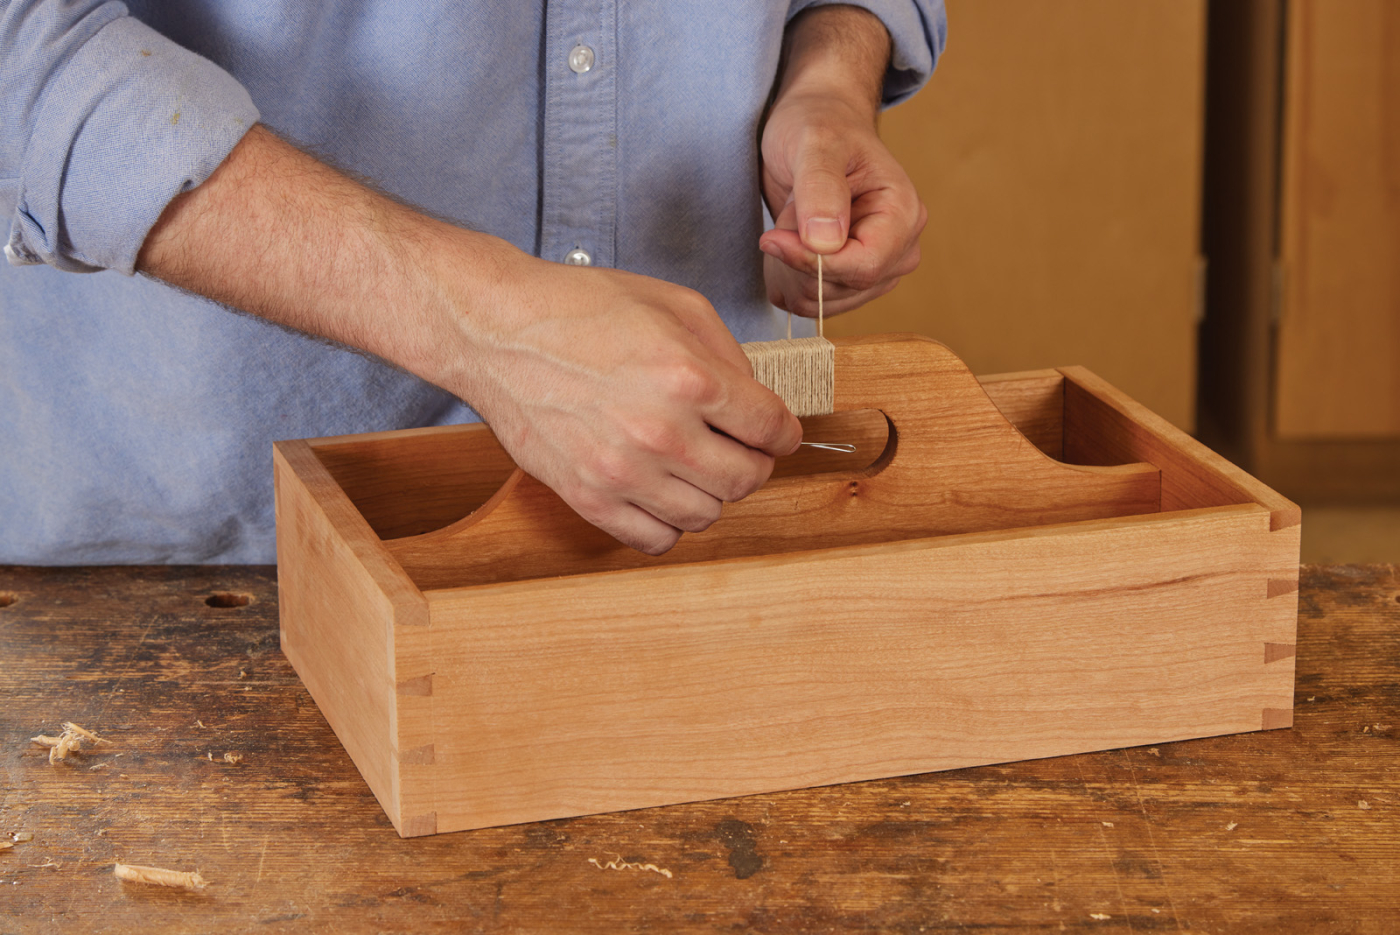
Start the wraps by holding the tail against the handle. Then, as you start wrapping, pinch the tail under the wraps to hold it in place.
Add the Cord Wrap
Wrapping the cord can feel a little tedious, but it should be quick work at this scale. I use hemp cord from my local hobby shop and start by securing two inches of cord from the end to the underside of the handle. This can be done with glue, tape, or a pin, but I find it’s easiest to just hold the end on the bottom of the handle to one side and then wrap it so that the cord wraps itself over the end and secures it in place. Then it’s just a matter of wrapping until you near the other end of the handle. With maybe two inches of wrapping left, I put a bent paperclip under the handle and wrap the cord around it much like I did with the start, but when I’m finished wrapping, I slip the remained of the cord through the paperclip and pull it out, so that the cord is securing itself at both ends. Then I just give the tail end a little tug to snug it down and cut the cord. Now, the tray’s ready to be put to use in your home.
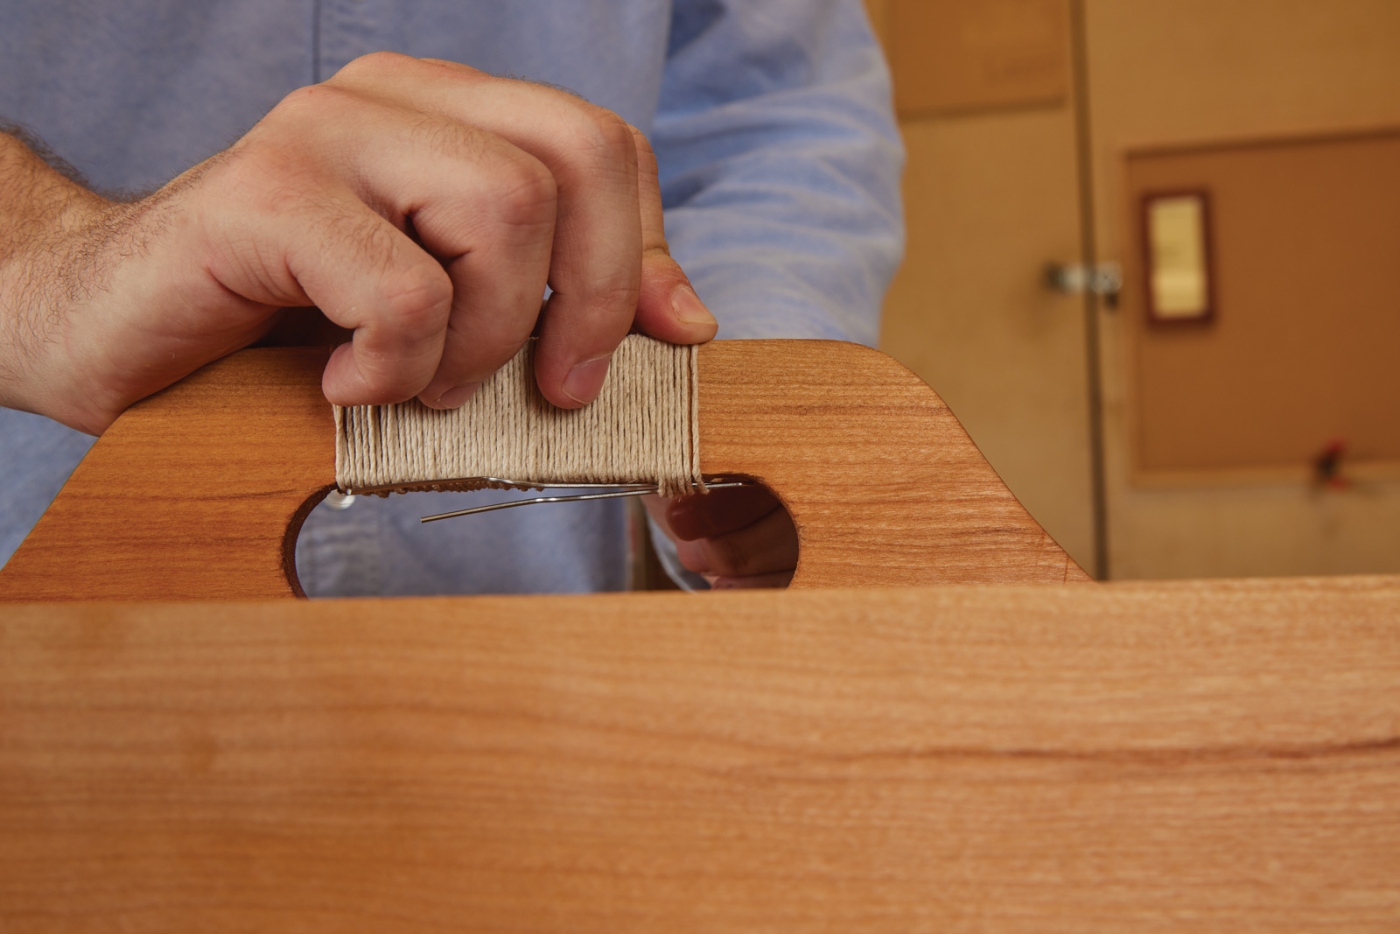
When you get to the end, wrap a paperclip under five or six wraps. Feed the free end through the paperclip eye and pull the tail under those final wraps.
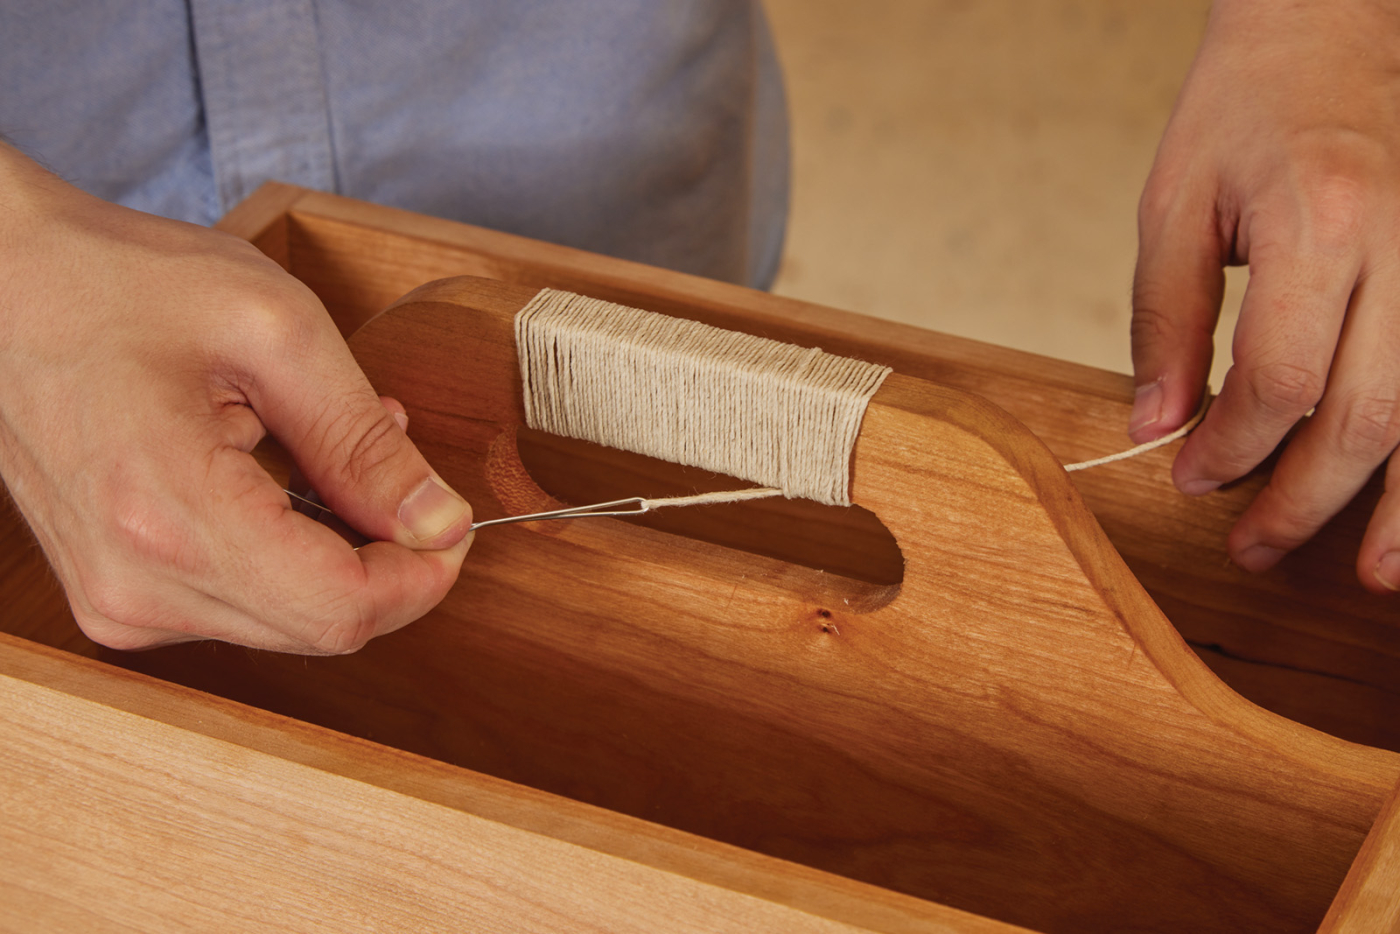
Once the tail is through the wraps, grab it and pull it tight. You may have to “tidy up” the wraps, but once they’re in place, they’ll stay. Trim the end flush.
Here are some supplies and tools we find essential in our everyday work around the shop. We may receive a commission from sales referred by our links; however, we have carefully selected these products for their usefulness and quality.