We may receive a commission when you use our affiliate links. However, this does not impact our recommendations.
 Build a tool chest that’s worthy of your tools. Customize it to fit exactly the tools you want.
Project #2115 • Skill Level: Intermediate • Time: 4 days • Cost: $250
I have a confession. I like nice tools. There’s something about boutique tool makers that I love. I’m guessing it’s the combination of high-quality tools and the maker’s backstory that speaks to me. Understandably, most of the time, the tools from these types of companies are pretty pricey. With that being said, I’ve been tossing a lot of my tools into a tool tote over the last few years as I travel to give demonstrations or teach classes. Every time they rattle and bang together, I cringe. So, that’s what drove me to build myself a little nicer toolbox that would keep my tools protected.
 The style of this tool chest is based on one that I saw in a David Barron video years ago. Mine is a bit bigger, and once it’s loaded with tools, it’s decently heavy. However, it’s still fairly easy to carry to and from demonstrations, and it keeps everything safe and organized.
Customization is Key
Now, this project is probably a little different than past Popular Woodworking projects. The reason is that I’m fully expecting if someone builds a chest of this style, it will be completely different than mine. And that’s the point. I want to show you the process, but the sizing and customization is up to you, your tools, and what you want to store in your tool chest. To be honest, it doesn’t even have to be a tool chest. It could be a hope chest, sewing chest, or anything else you could imagine.
From a sizing standpoint, the first thing I want to do is figure out exactly what tools will ride in it and divide them up into different groups. Of course, the heaviest items should always go in the bottom. As you can see below in Photo 1, that ends up being a low-angle jack plane, a smoothing plane, my miter plane, a few oil stones, and my oil can.
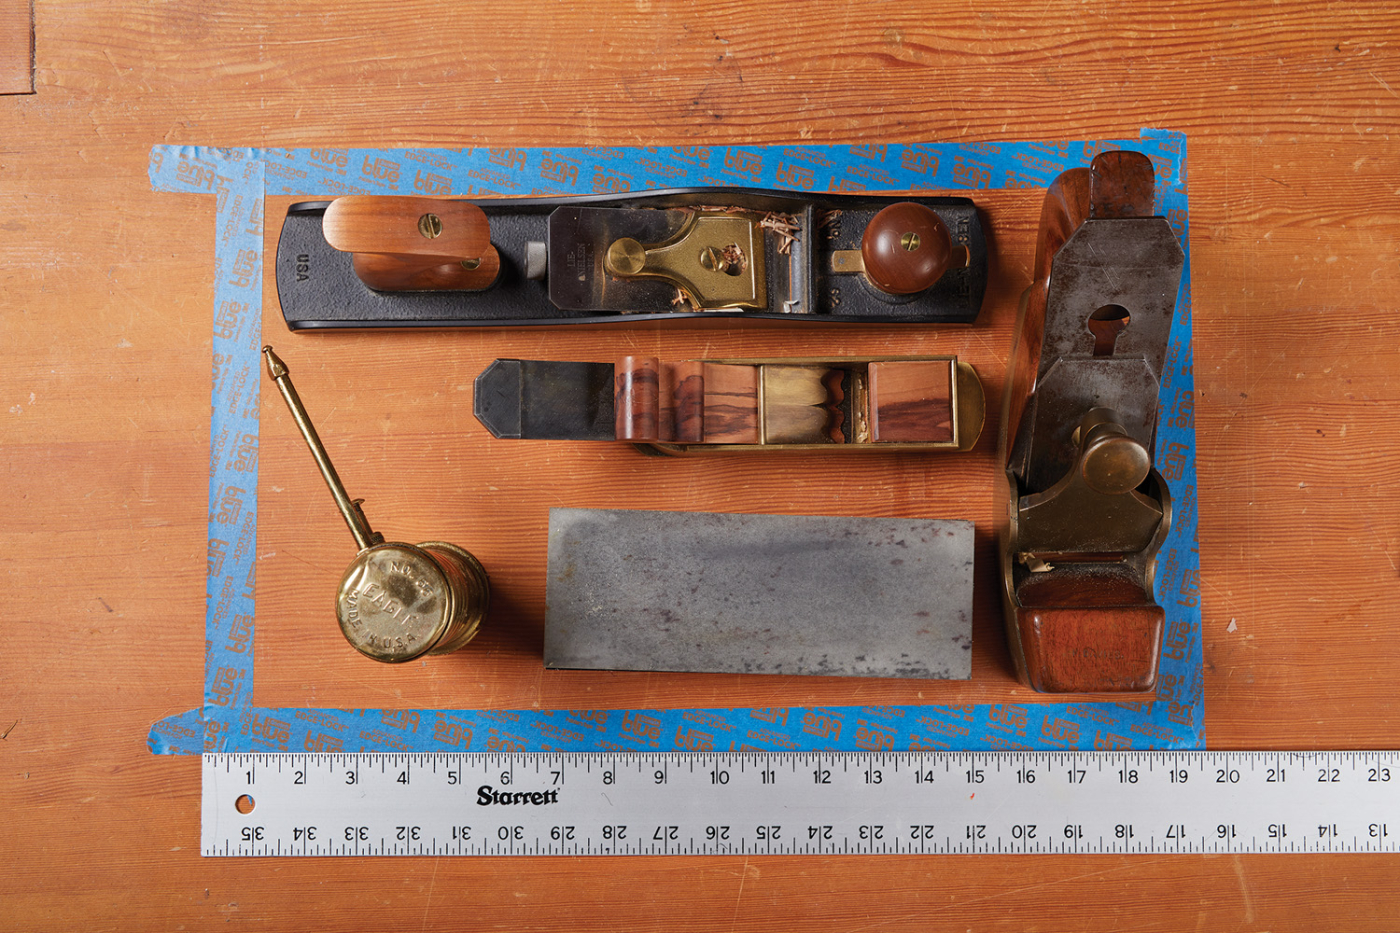
1 BOTTOM OF CHEST — The heaviest tools live here. Just because the chest will hold these does not mean they will all make every journey with me.
I suggest nesting your tools in a group and playing with the arrangement. It’s important to see how they fit together. The layout I settled on can be seen below. I used a few strips of painter’s tape to rough in the box size. I had planned on my tool chest having a tray. Quite obviously, the tray will be about the same size as the box. Technically, it’s a little smaller but close enough. Using the same painter’s tape outline, I made sure that a vast majority of the tools I need were going to fit within the tray.
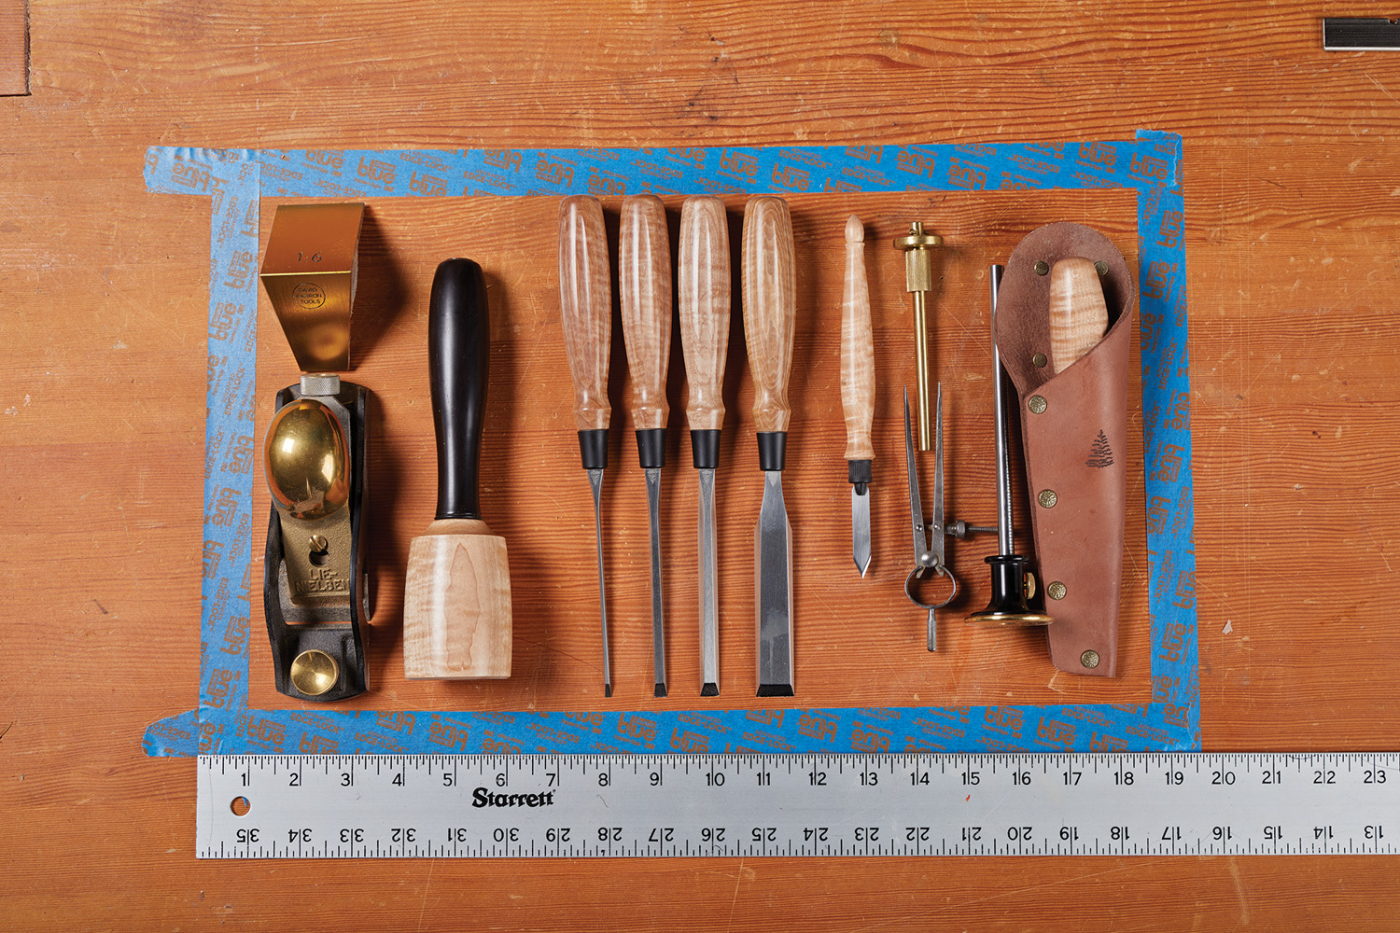
2 TRAY — The contents of the tray will shift as job or demonstrations change. To be honest, I know that it will probably be a catch-all, so the only organization that it will get will be a chisel tray to protect the edges.
The third and final layer of my chest is the inside of the lid. This are going to be the longer items that don’t really fit in the tray once I included a chisel case. My pull saw, coping saw, paring chisel, and square pretty much filled this out. Technically, I could probably squeeze a few more tools into the inside of the lid, but this is good for now.
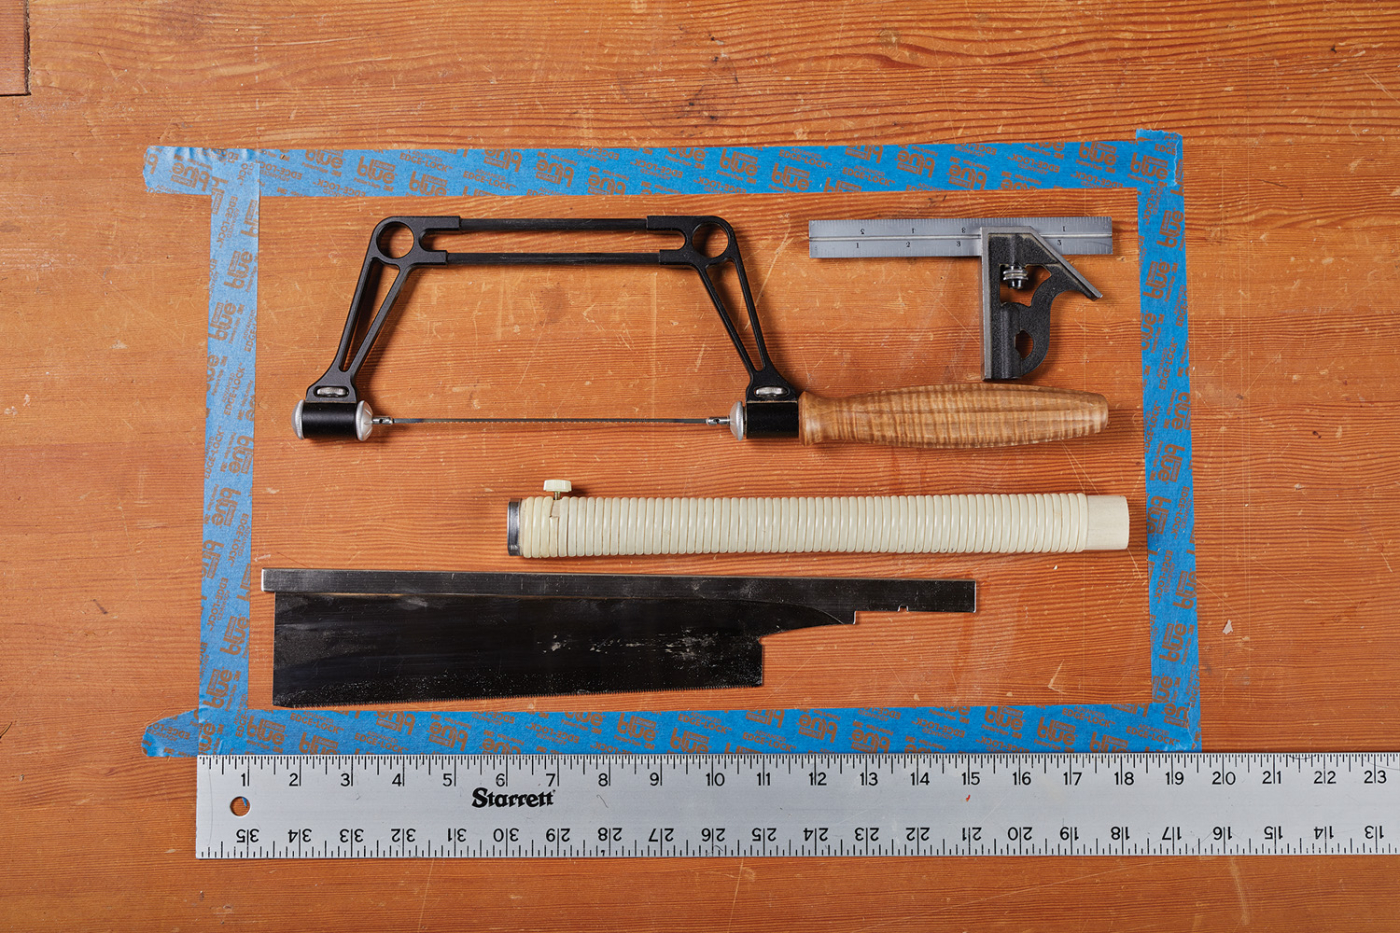
3 INSIDE OF LID — Finally, this is the valuable real estate for some of the lighter, longer items. As needs evolve, I could see myself changing the tools and holders that are located inside the lid. Always keep your options open.
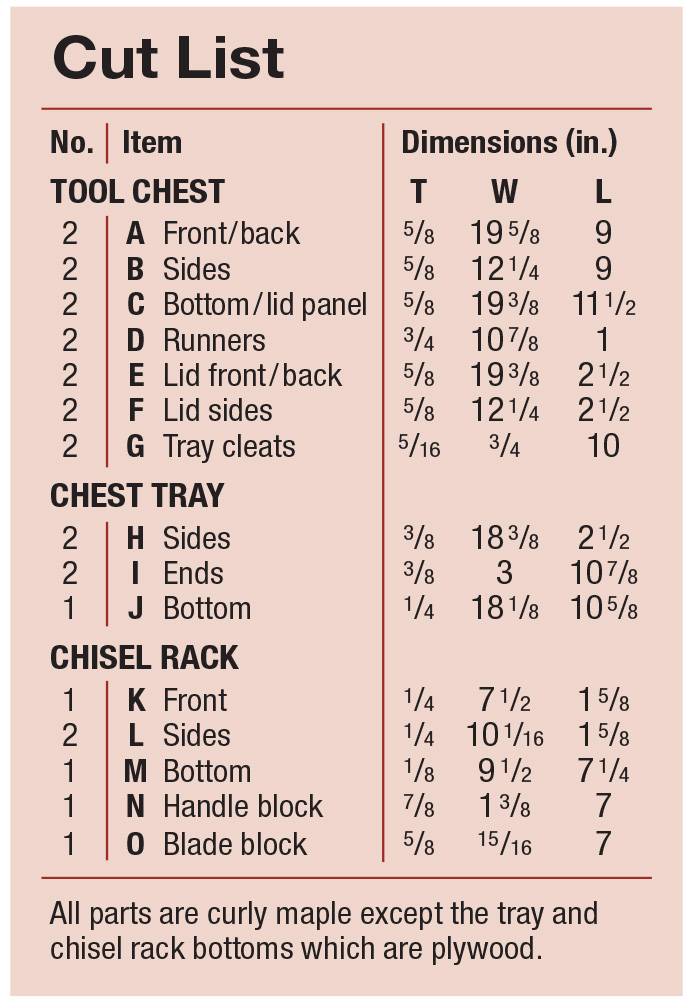
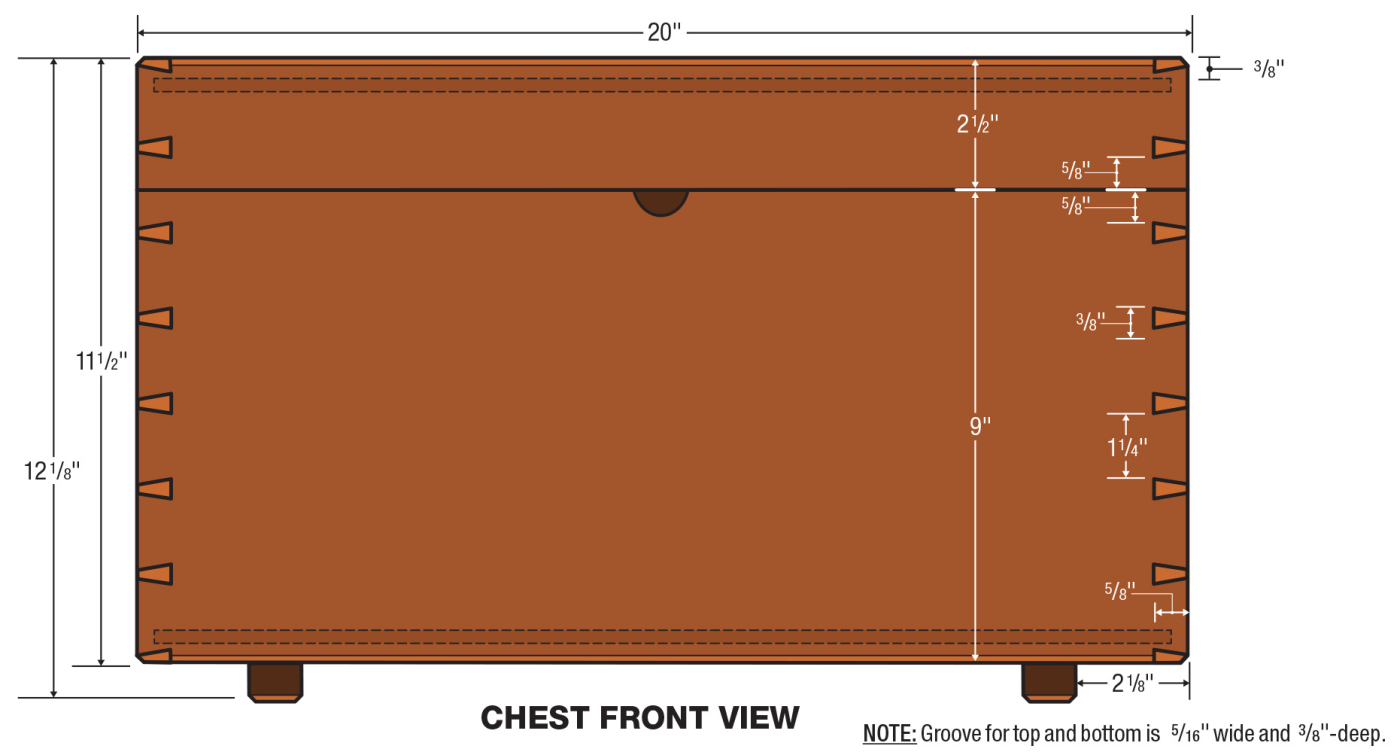
Cutlist and Diagrams


 Case Construction
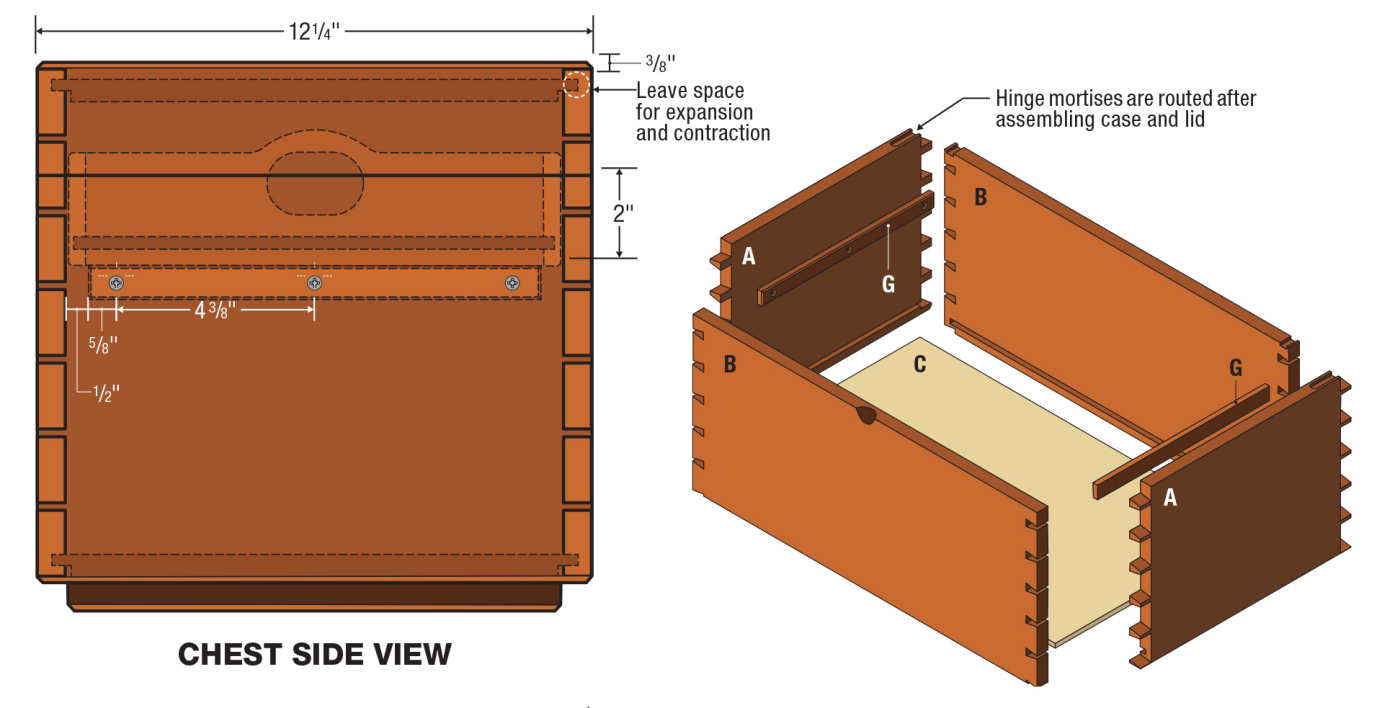
The carcass of the tool chest consists of the front, back, sides and bottom. Here, I’ll talk about building the carcass, but the lid and tray are pretty much identical, just a different size.
I start by breaking apart my stock into the necessary parts. For this chest, I chose some nicely figured soft maple. Something like pine or fir would work as well and be lighter, but I liked the look of this maple.
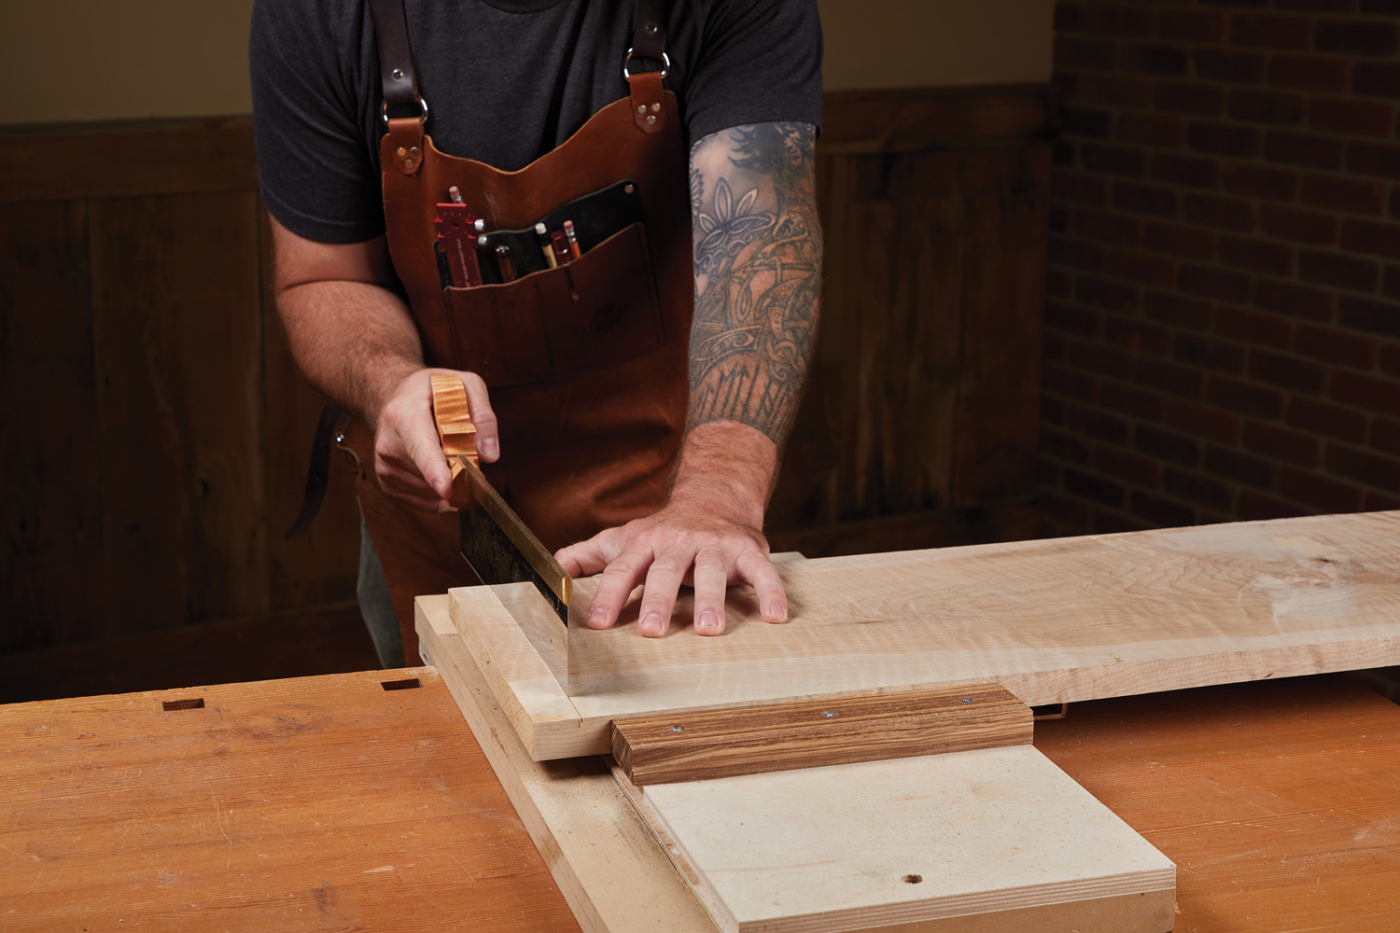
4 A carcass saw makes quick work of breaking down rough stock into parts.
Because this is for my hand tools, I felt it would be bad ju-ju not to use as many hand tools as I could. A carcass saw rough cuts parts easily, and I used my shooting board and low angle jack to make sure everything was square with equal lengths.
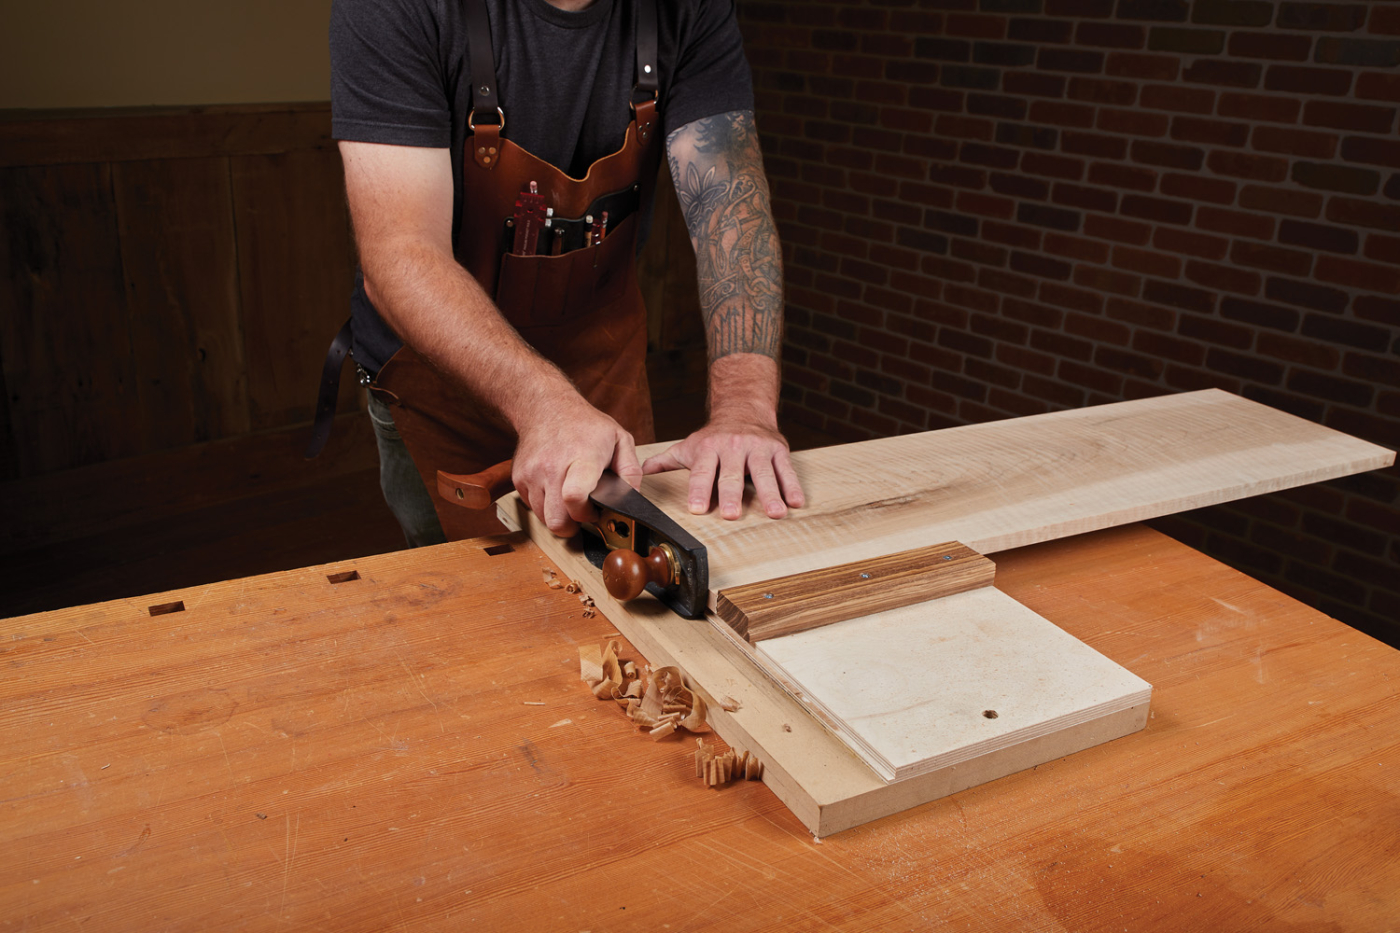
5 A shooting board is an essential tool for squaring up boards and sizing parts in any hand tool shop.
After sizing the parts, the majority of the work on the tool chest is cutting the dovetail joints. You could go with some fancy dovetails here if you want, but I chose tried and true through dovetails. If you’ve never hand-cut dovetails, this is a great little project to try them out on. A step-by-step for cutting dovetails can be found here.
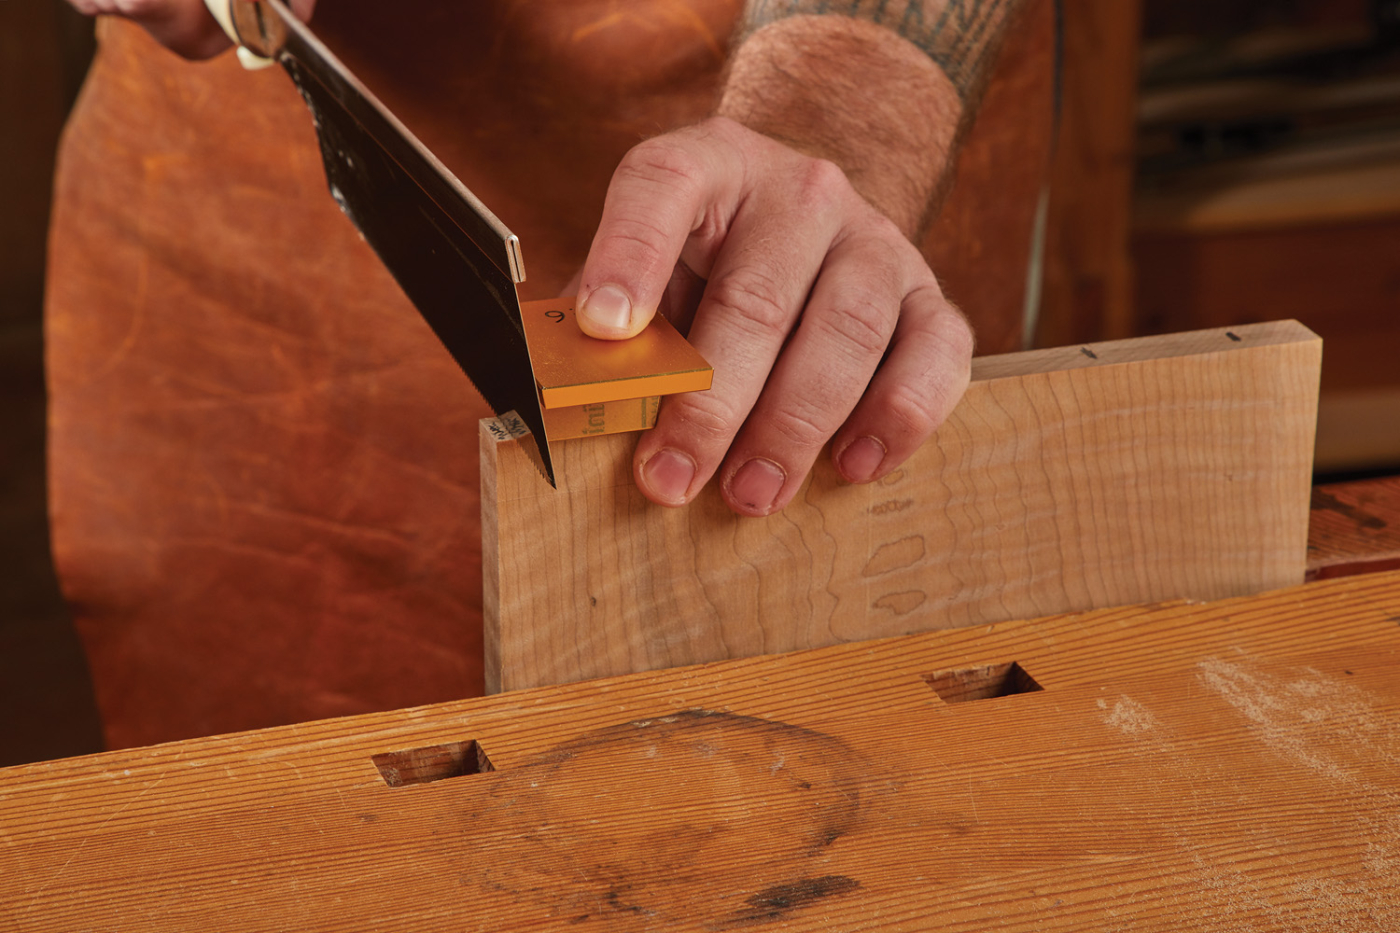
6 A David Barron dovetail saw guide is my go-to system for cutting dovetails.
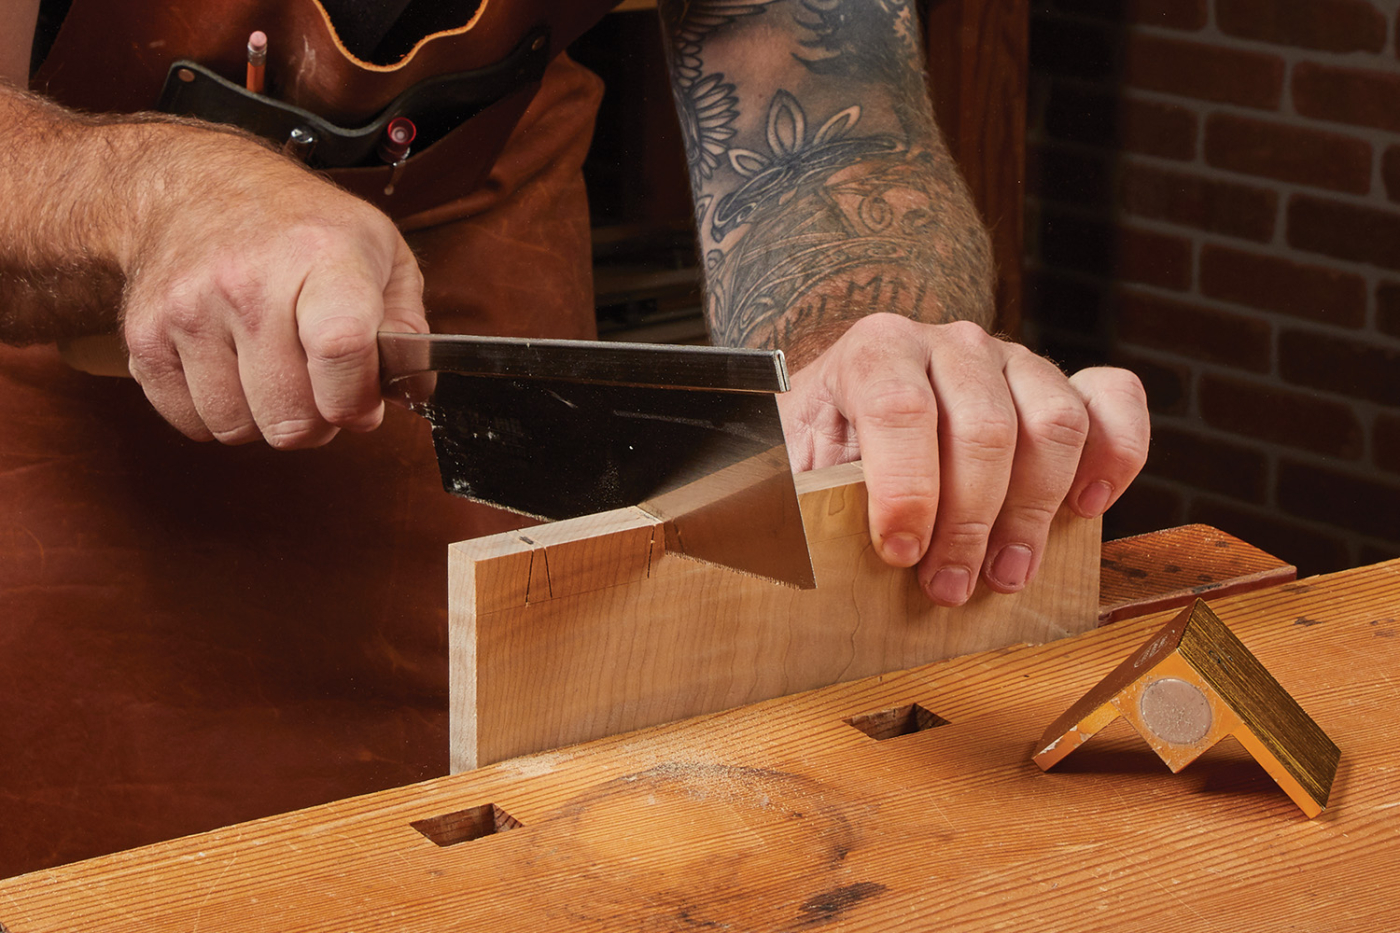
7 After starting the kerf with the guide, I’ll often pull the guide away and sneak down to the baseline.
After cutting the joinery on all of the parts, you now have to rout a groove along the bottom edge of the inside of the box. This will be for the solid wood bottom. Routing this groove can be a little tricky, as you don’t want to rout through the end of the tails—it would be visible on the finished box. Instead, I mark a line on my router fence where I will plunge the front of the workpiece onto the bit (Photo 8). Likewise, I mark a stopping point where I will stop the workpiece and shut off the router (Photo 9). Then, it’s a simple matter of lining up the workpiece with the starting mark and lowering the workpiece over the running router bit. As I reach the stopping mark, I shut off the router and raise the workpiece off the bit. The groove falls between the pins on the sides, so you can just rout straight through the workpiece as seen in Photo 12.
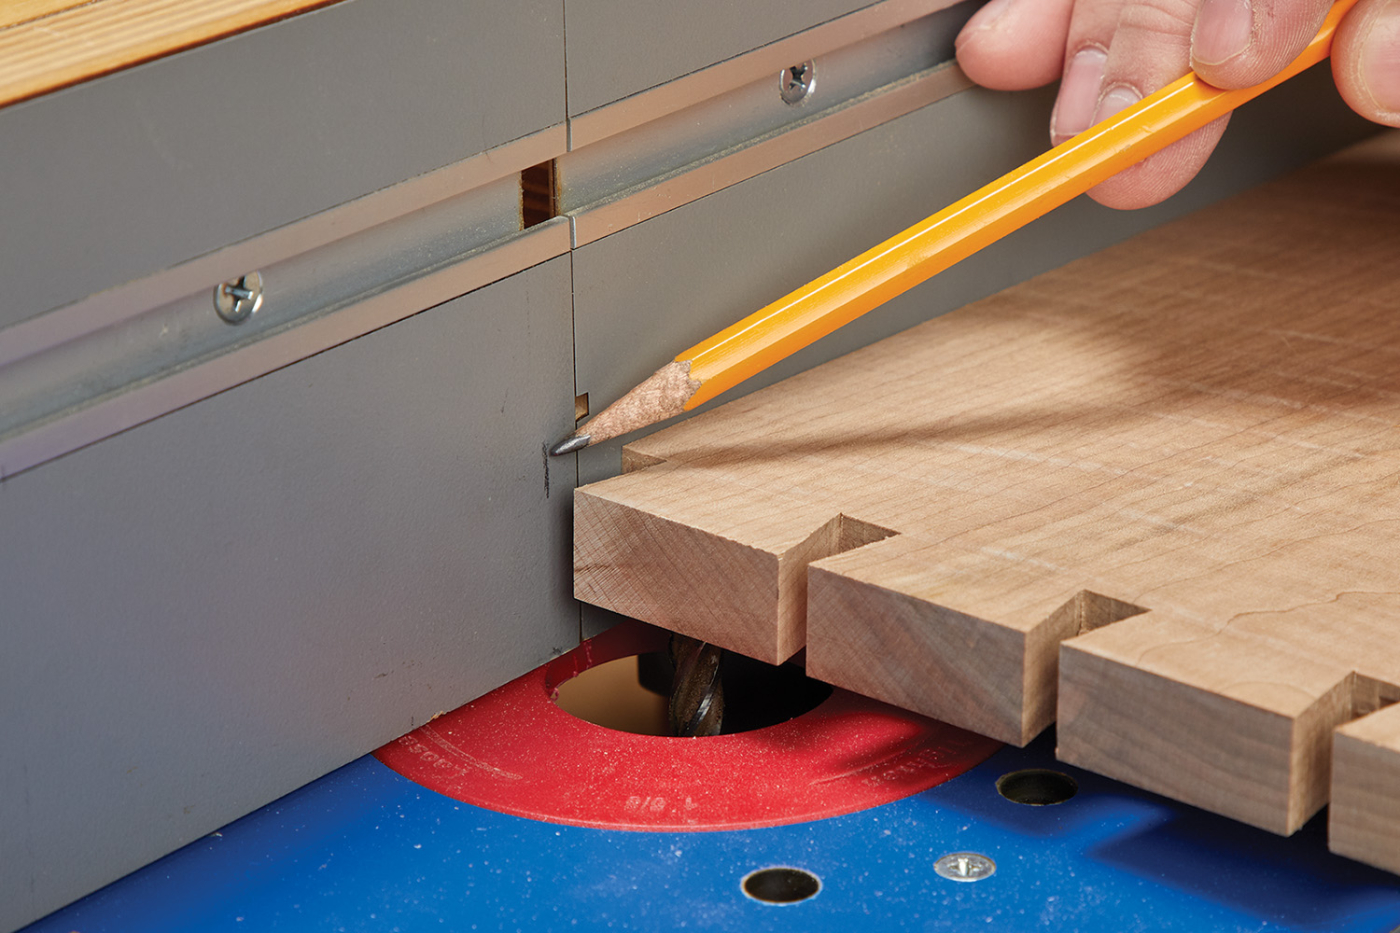
8 Mark the lead edge of the workpiece on the router table fence.
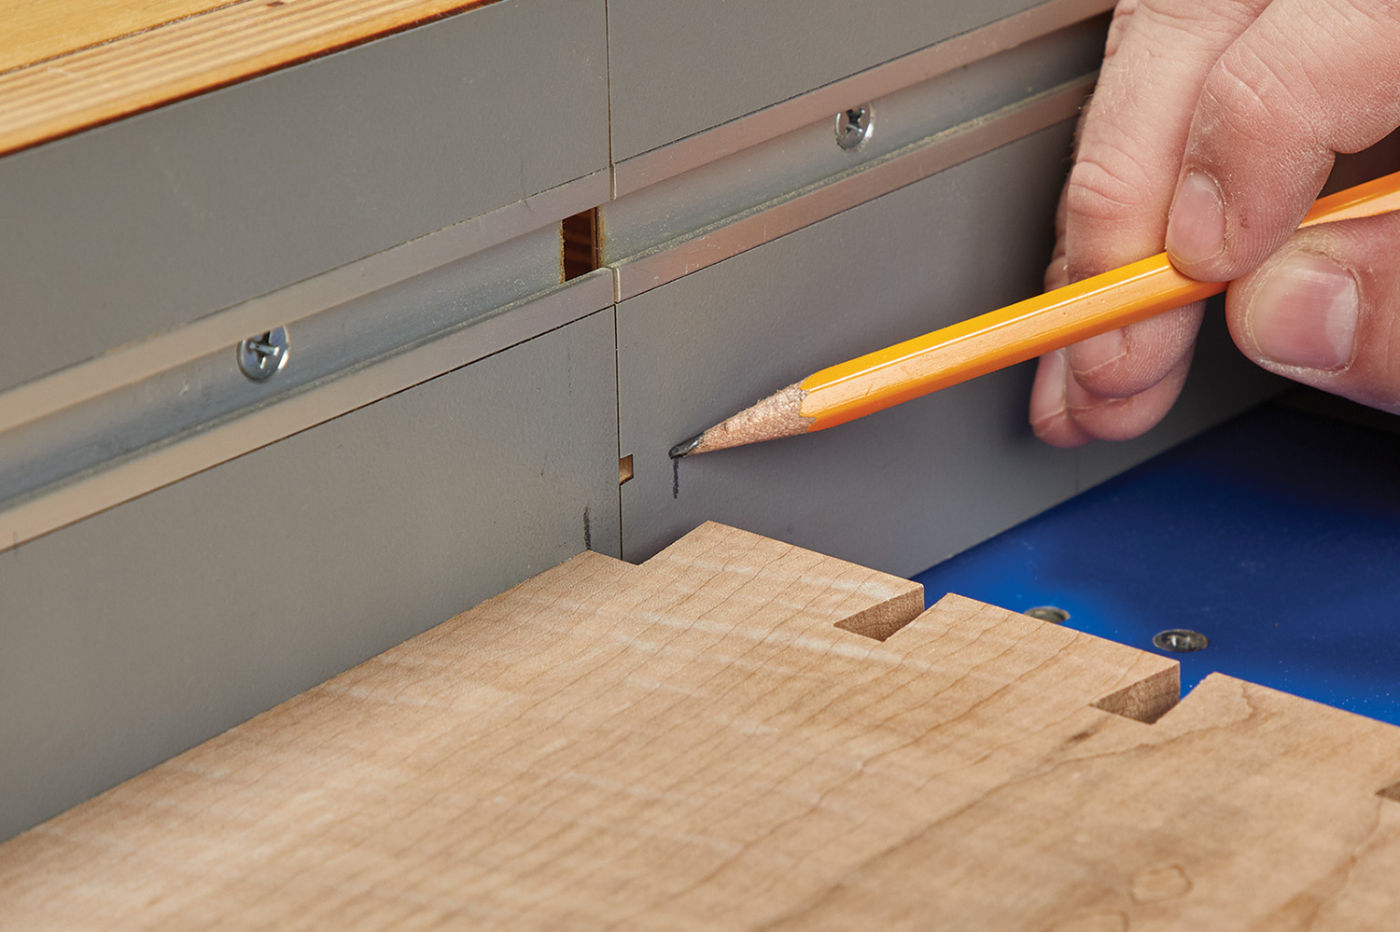
9 Mark the ending position of the workpiece on the fence.

10 Lower the workpiece onto the spinning bit and rout right to left.
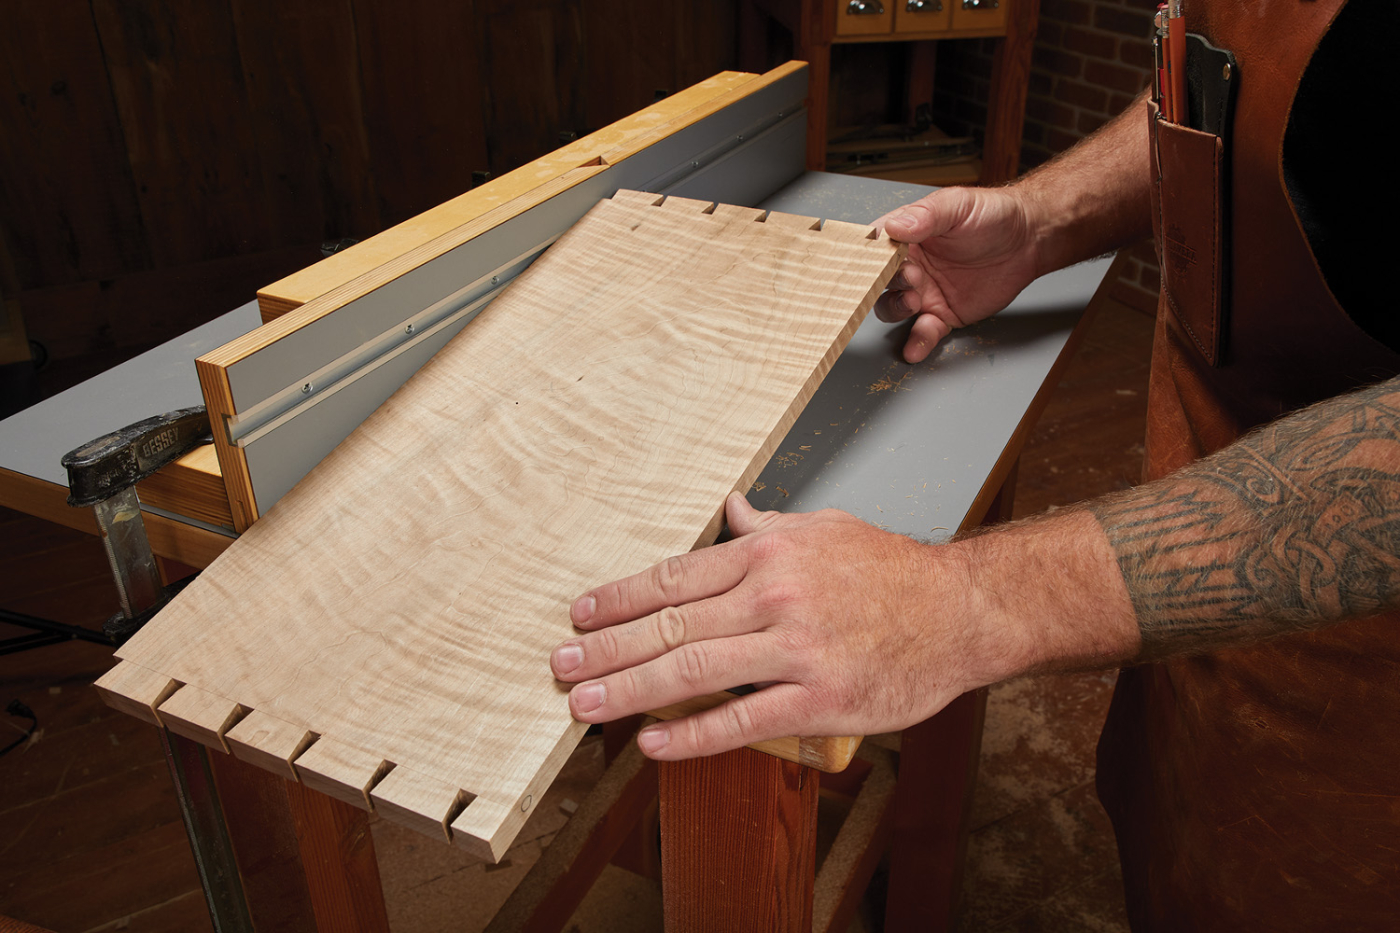
11 Then, as you reach your stop mark, raise the workpiece off the bit.
After gluing up a pair of panels, one for the top and one for the bottom of the chest, cut them to size. The top and bottom will get a rabbet cut along the four edges. This forms a tongue that will fit in the groove you just made inside the case. A rabbet plane can take care of this quickly, however, I already had a dado blade loaded up in my table saw, so I buried it in an auxiliary fence and cut the rabbet there (Photo 13). Any fine-tuning to get it to fit nicely into the groove in the case parts can be done with a rabbeting block plane.
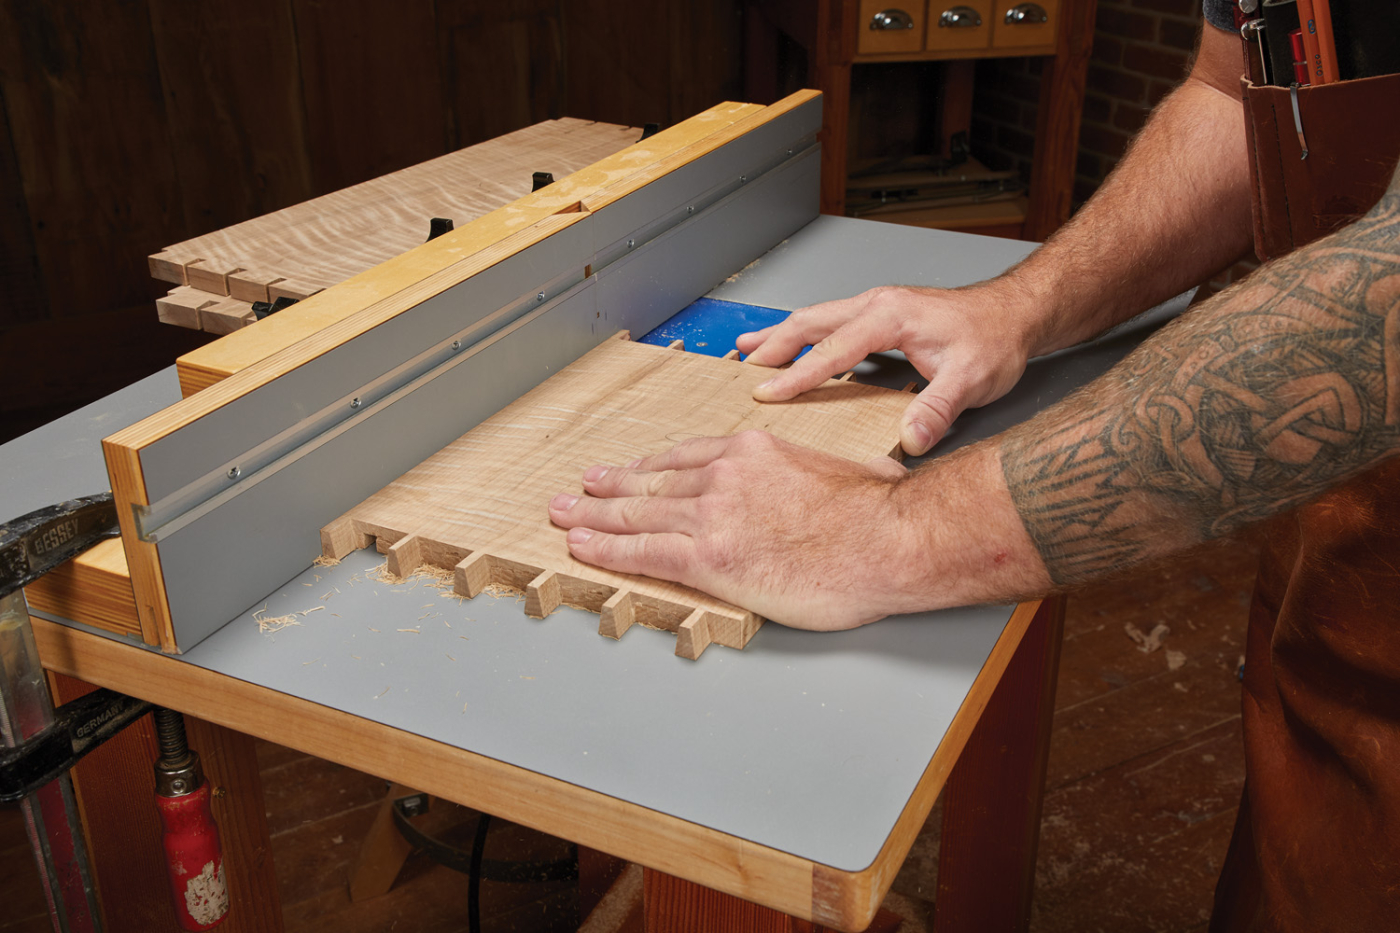
12 The groove in the sides is positioned between the pins, and can be routed straight through.
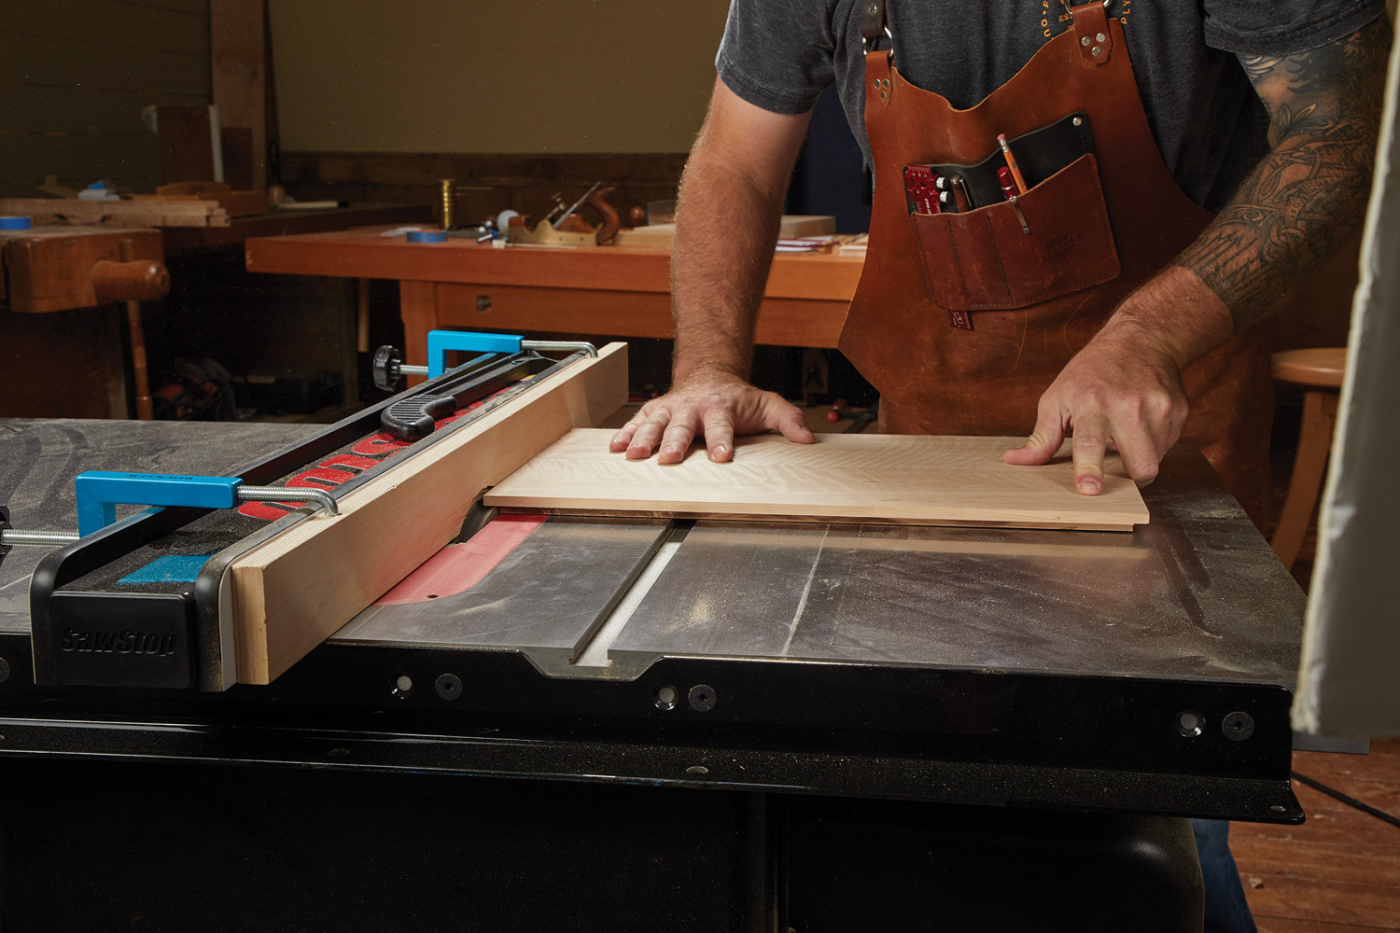
13 Cut a rabbet around the top and bottom panel.
Glue it Up
With the parts in hand, you can now assemble the carcass. When it comes to an assembly like this, slow and easy seems to work better for me. This means using a long open time glue, like epoxy or hide glue. I spread a little bit of glue on the inside of each tail and pin, as you see in photo 14, and get the front and sides assembled. Then, slip the bottom into place and drive the back home.
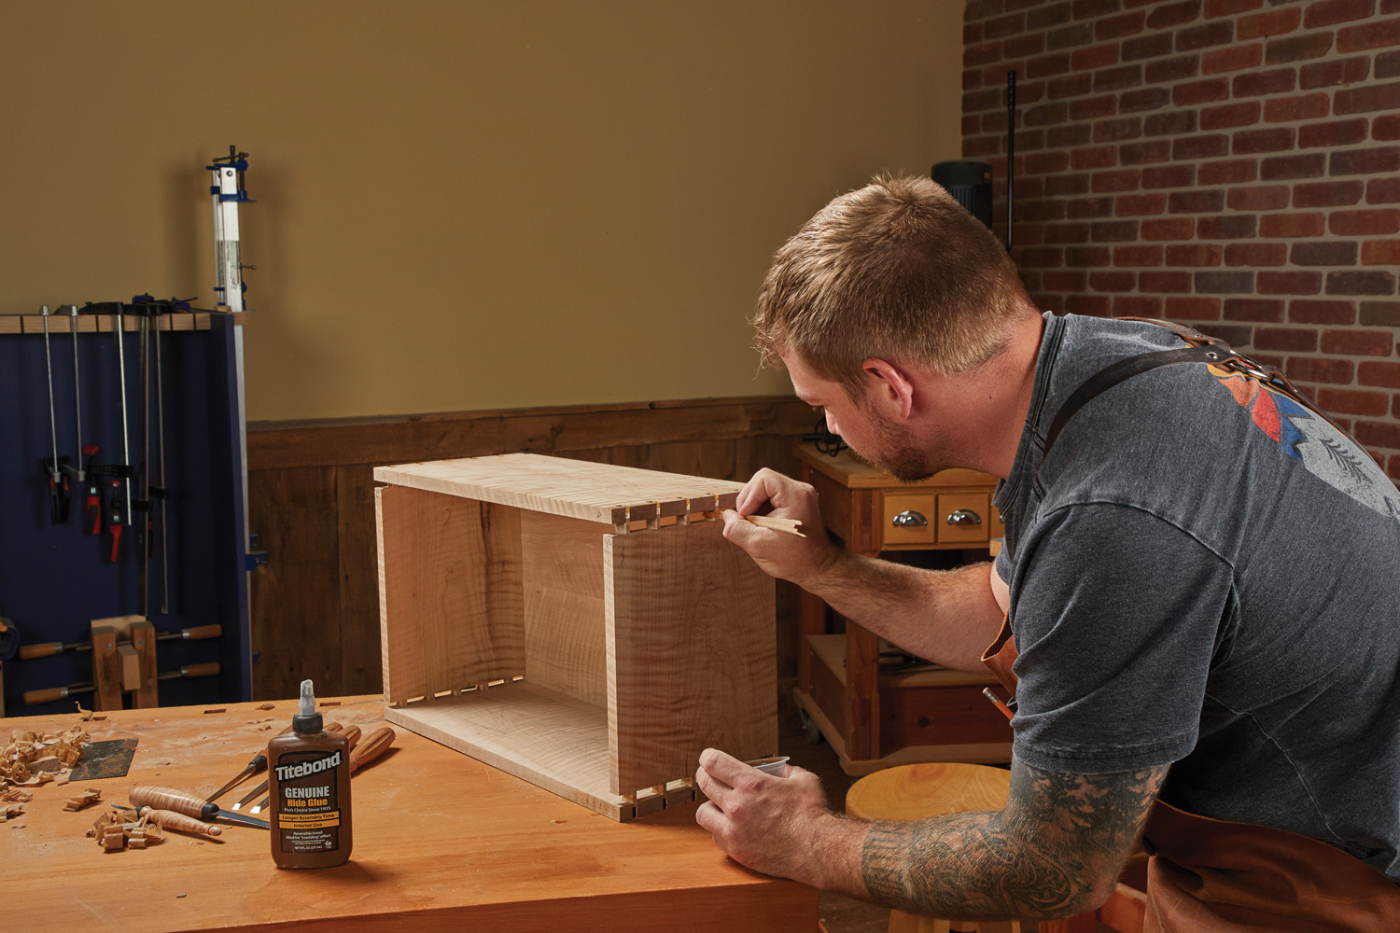
14 Start assembling the dovetail joints, then spread glue inside the tails and pins.
You can clamp the case together using specially made spacers to put pressure on each tail, but I’ll usually just grab medium F-style clamps and put one across every other tail or so. If you’ve laid everything out accurately, the case should be pretty self squaring, but I always check and make any adjustments with a clamp strung corner-to-corner.
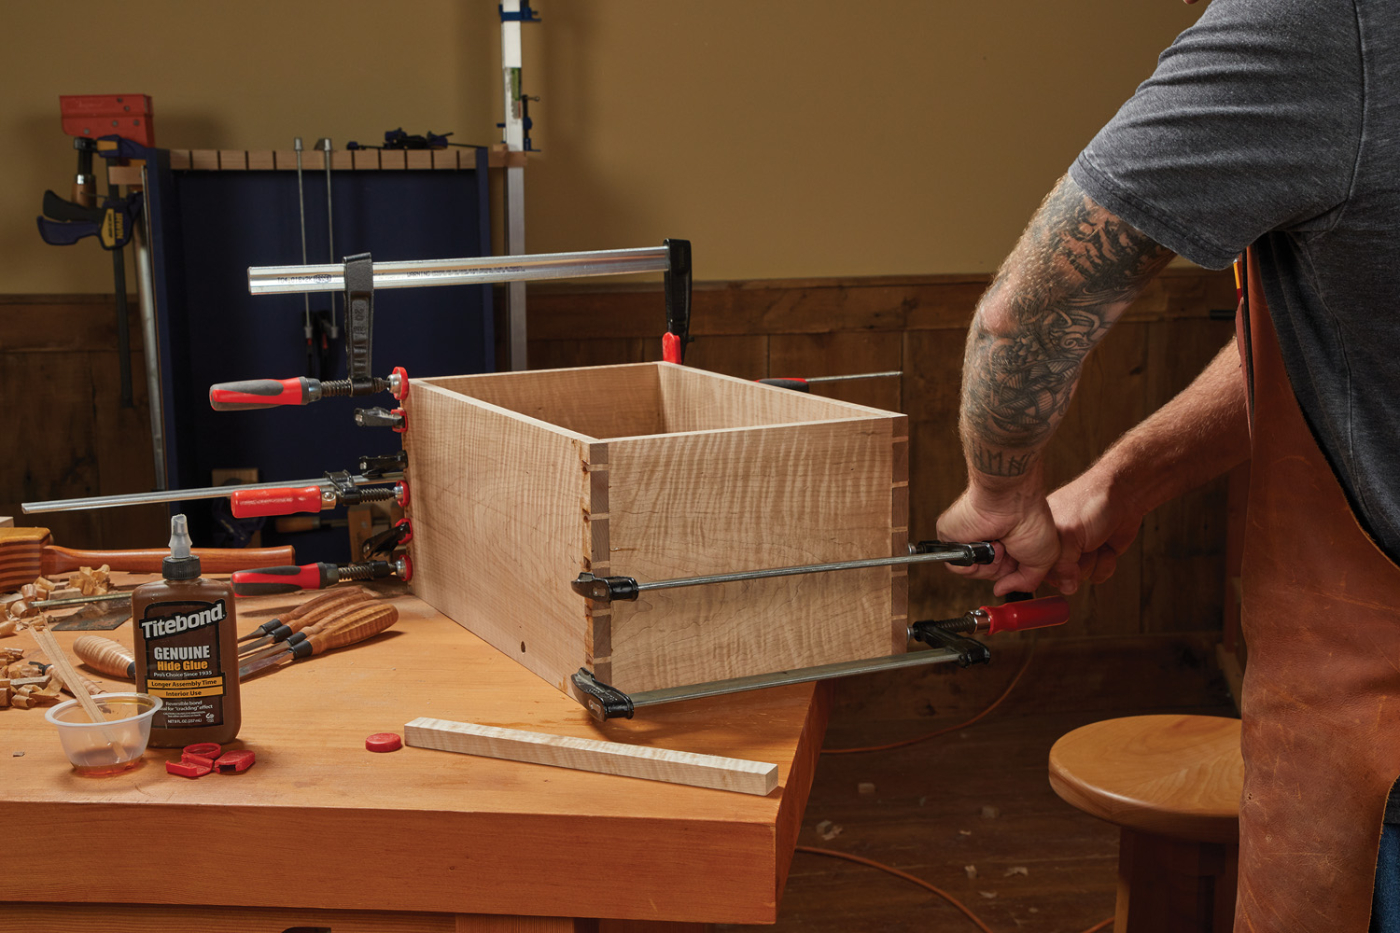
15 Remember to apply even clamping pressure against the joints.
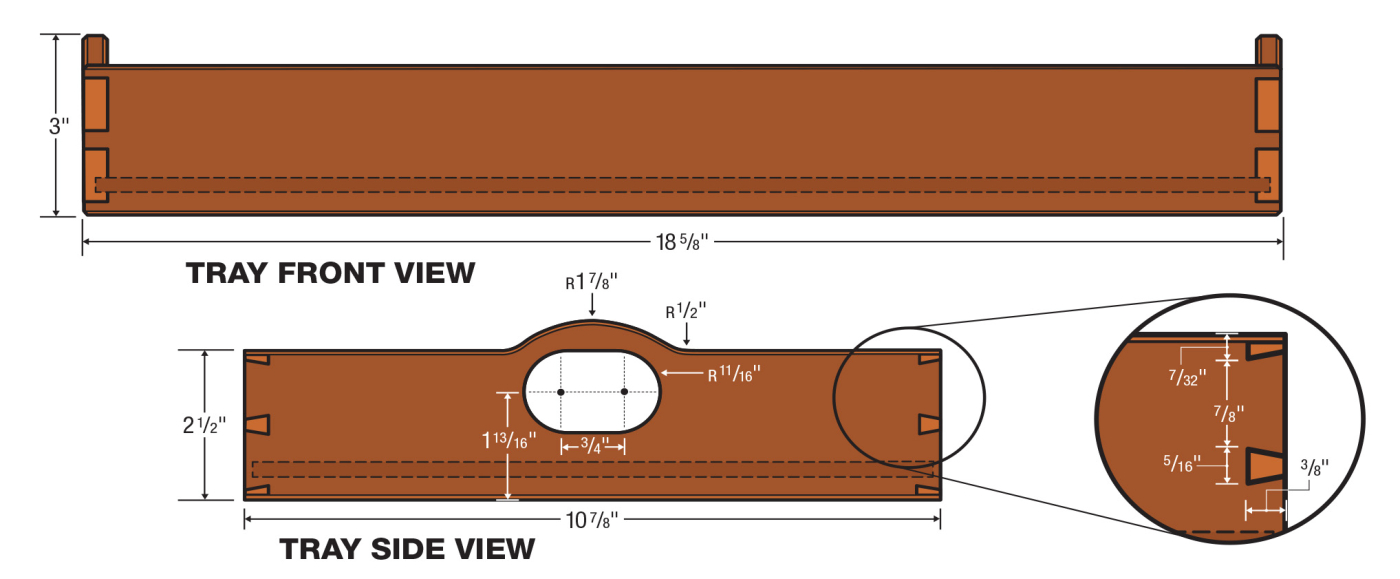
With the case drying, it’s a good time to get working on the tray if you’re including one. I made mine with some swooping handles on them—making a template out of hardboard then using it to flush-trim the handles to size seems to work the best. Before dovetailing, I shot all the parts so they just slipped into the case, and then I cut the joinery. During the clamp-up, I fit it inside the carcass to make sure they were both equally square. After a little sanding, the tray slipped into the carcass, slowly lowering on a small cushion of air. A perfect fit!
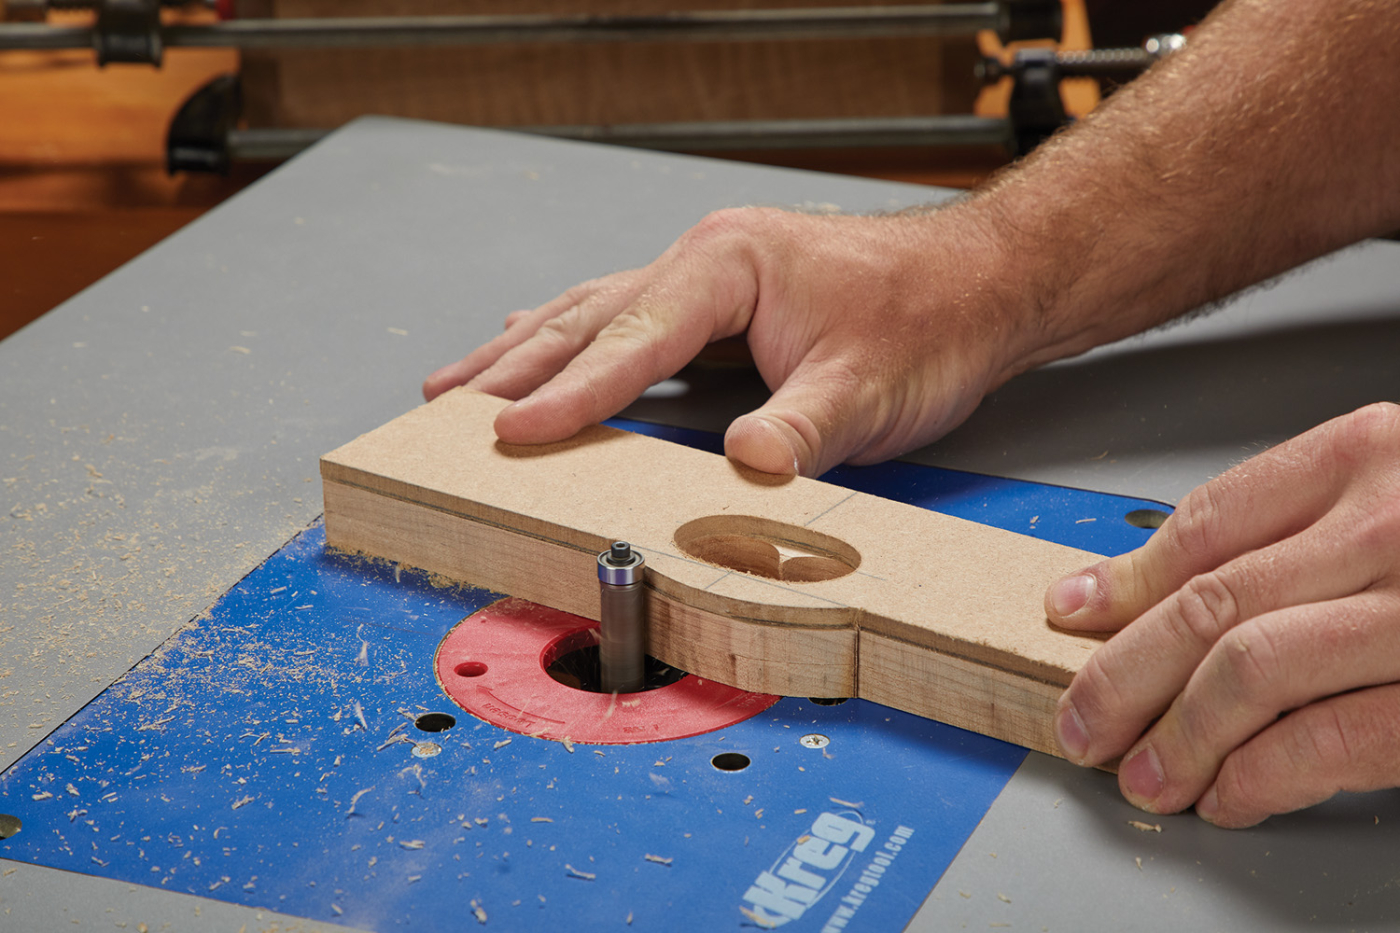
16 After cutting the parts at the band saw, use a pattern bit to flush trim them to a hardboard template.

17
The lid to the box follows the same steps as the base, just a shallower version. Once the lid is complete, I attached the two using some side rail hinges. The groove for the hinges can be routed easily at the router table. You could just as easily use butt hinges for the same effect. The final steps before adding tool storage are to add a pair of runners on the bottom to lift the chest off the bench, add some cleats to the inside for the tray to sit on, and to chamfer the top and bottom edges.
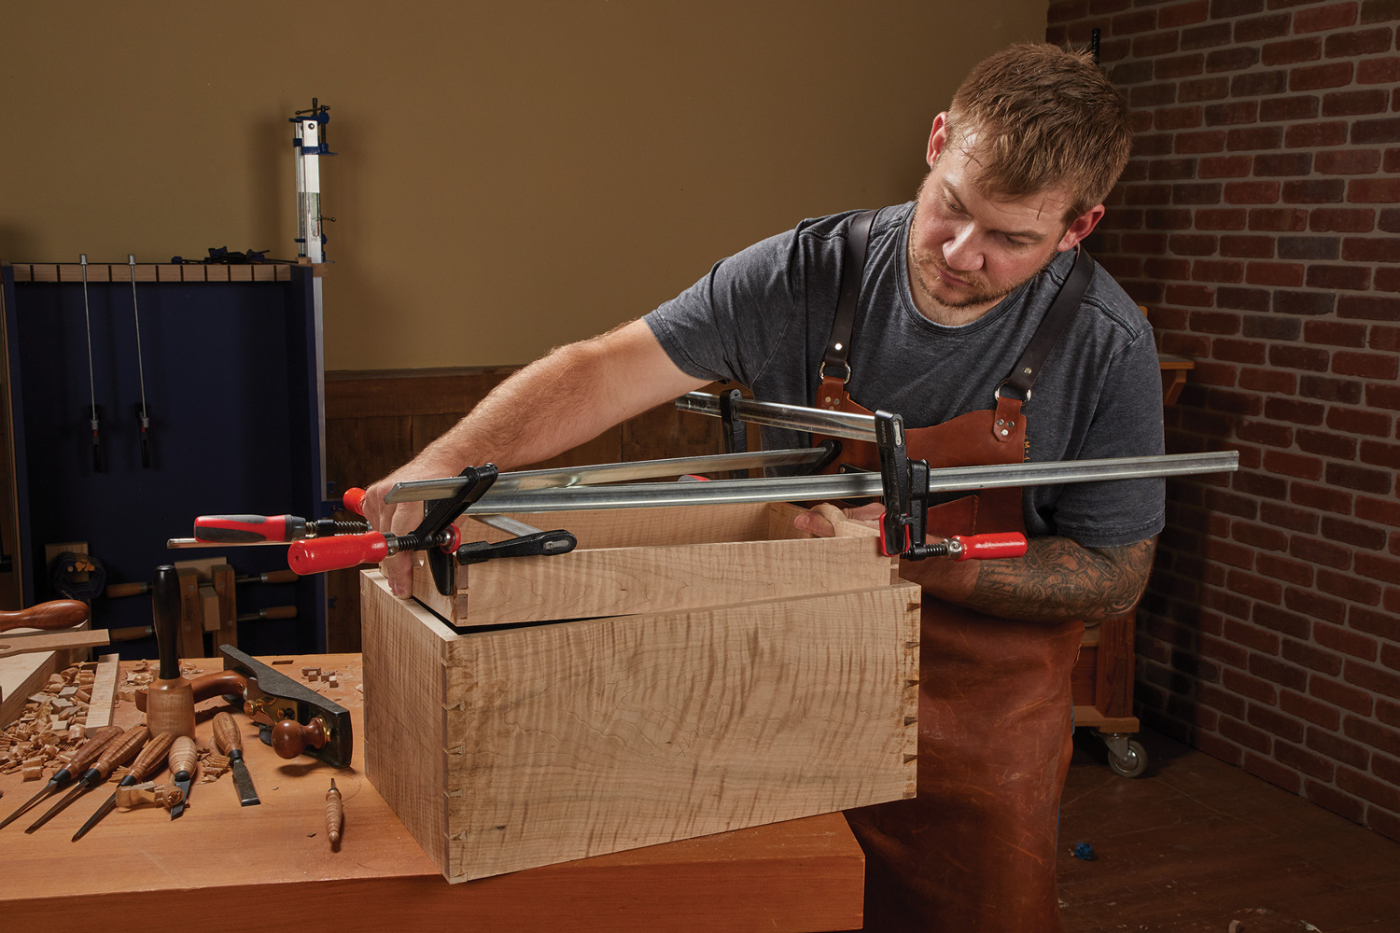
18 The best way to determine if the tray is square is to use the carcass.
Customization
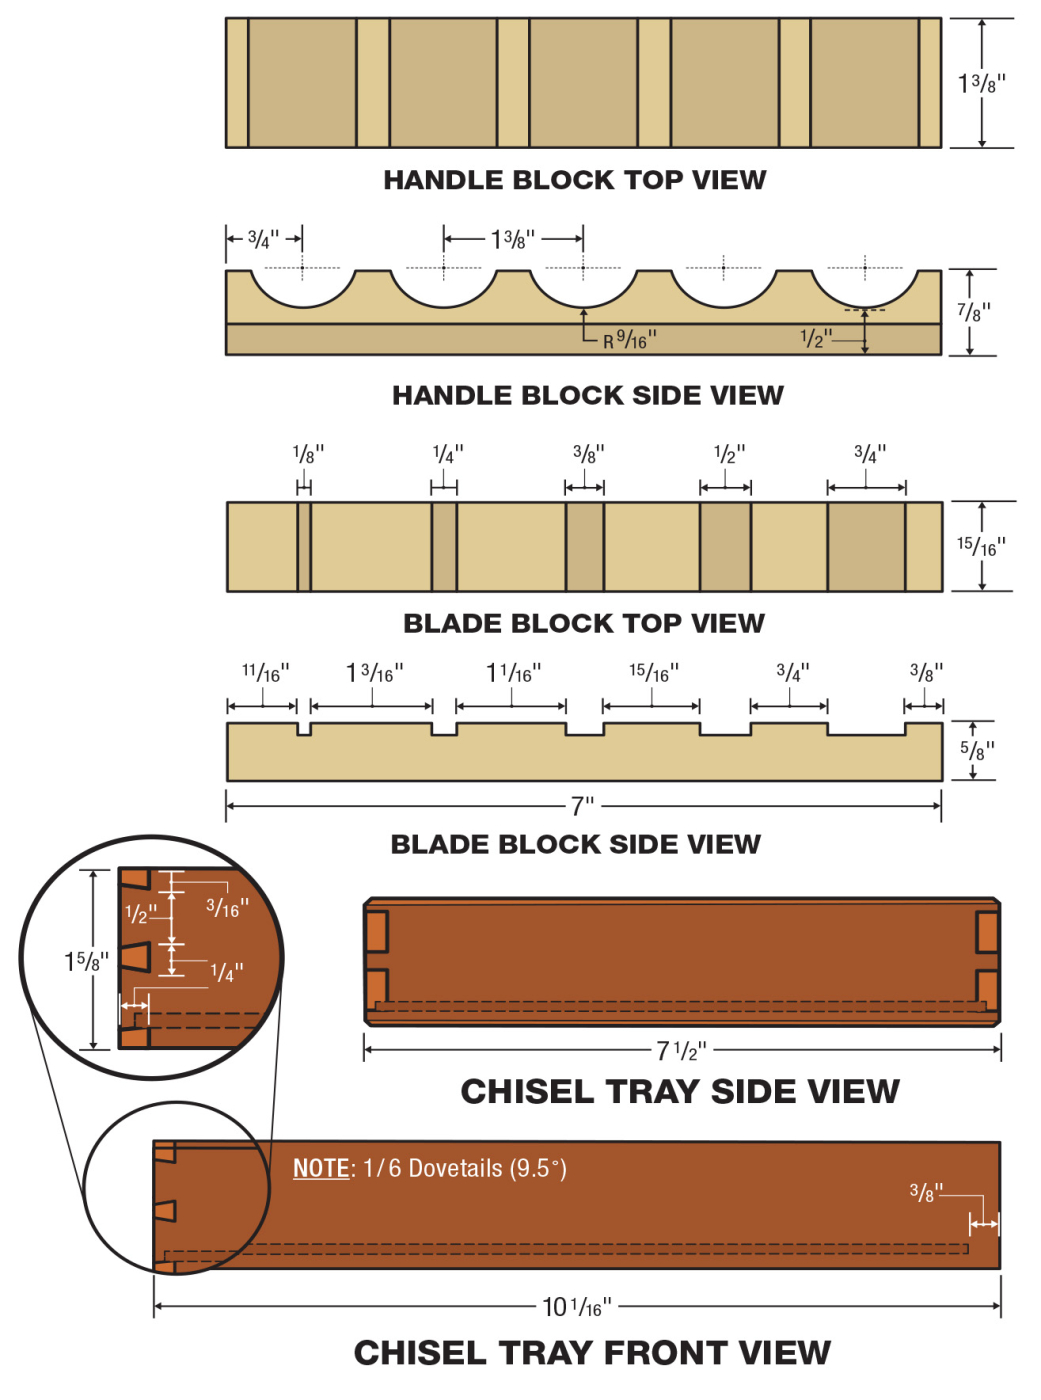
Now is where you can really tailor this tool chest to fit your needs. For mine, I divided the inside of the carcass with cleats. These keep my planes in place, and I even made a cleat for my router plane to sit on.
I know that my tray is going to be a catch-all, so the only storage I made on this was a small chisel holder. It’s just a three-sided box that cradles the chisels.
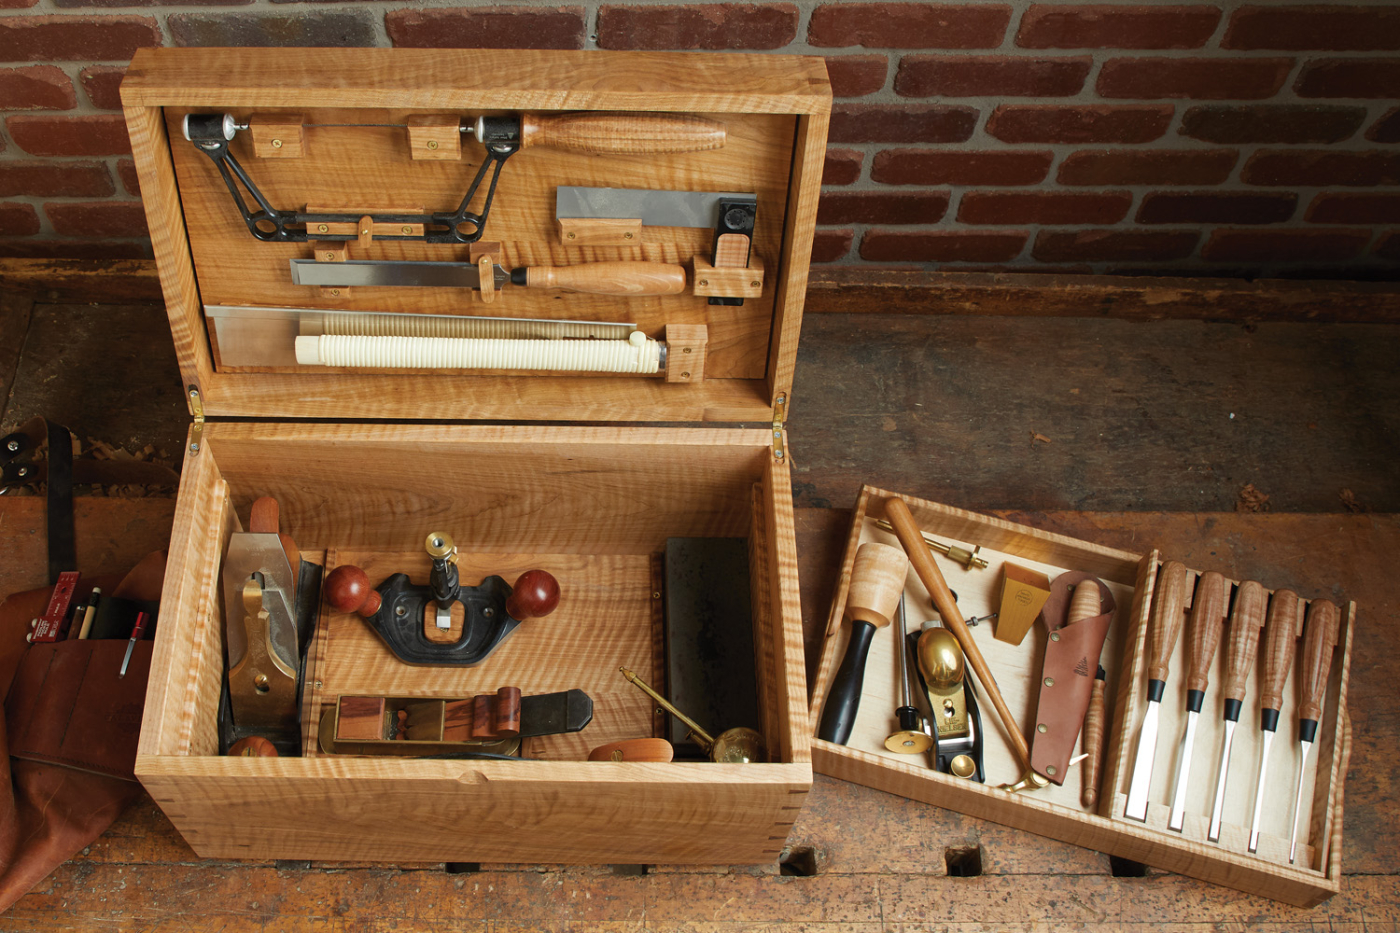
19 The finished box houses the tools that I most use while demonstrating, but has plenty of room to add extra tools, or change out cleats as necessary.
The lid was the trickiest storage of them all. Here, you’ll need to get creative with your tool holders. Mine uses a combination of cleats, magnets, and toggles to lock everything in place. The biggest thing is to keep the perimeter of the lid clear as the tray projects slightly into the lid.
A few things you might want to think about are hardware items. I chose not to put handles on the side of my chest. Instead, I plan to pick it up from the bottom of the box. However, you could easily install handles on the side.
For the lid, it’s easy to lift with the rabbet around the top, but I also added a small thumb notch to help lift it up. I cut this in with a carving gouge. A screw-on style handle would work as well.
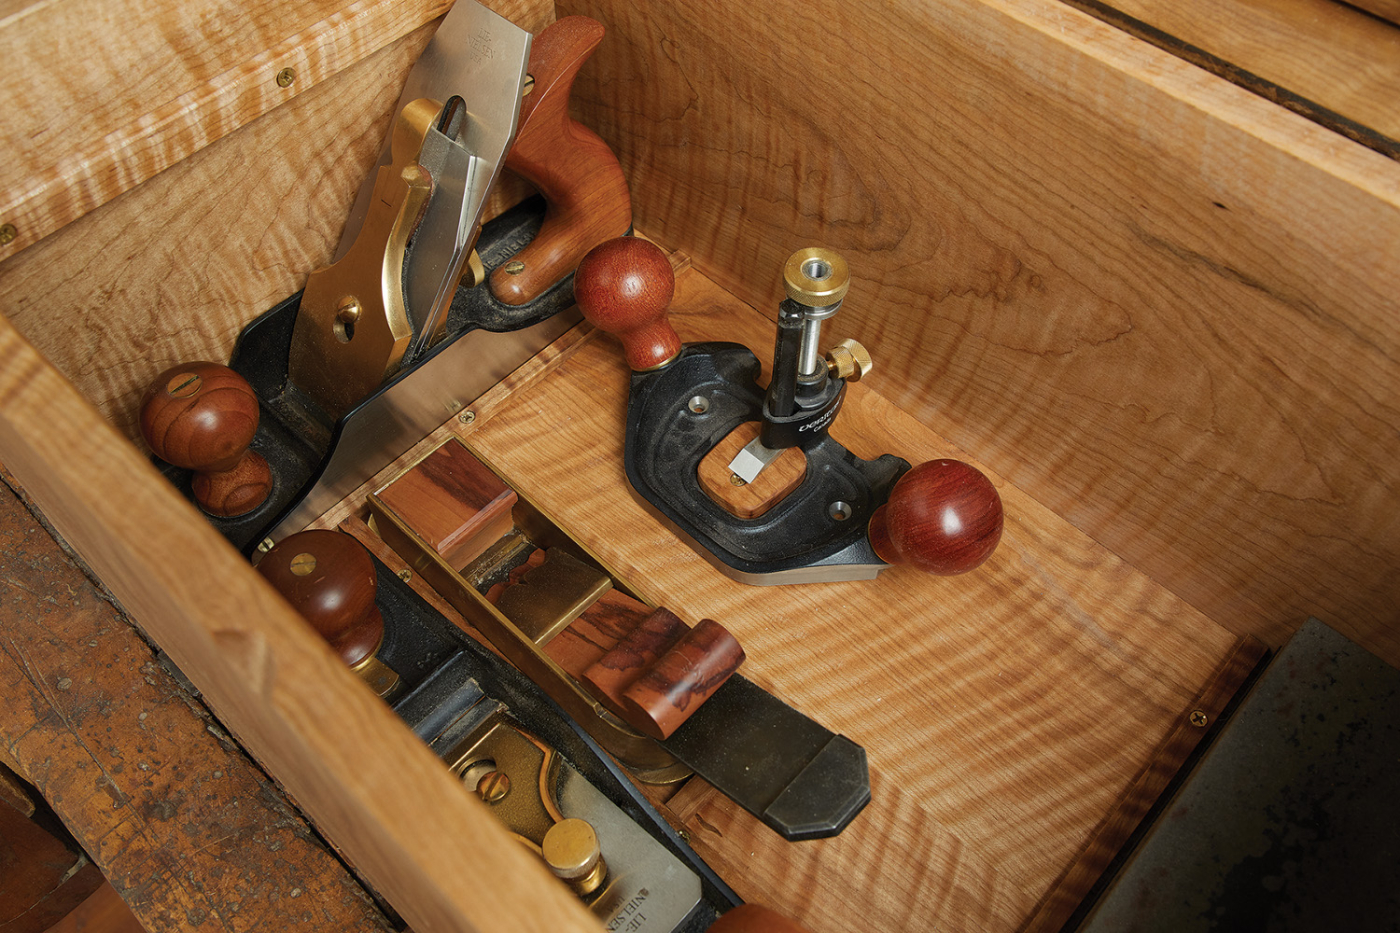
20 The inside of the case has cleats for the tray to sit on, as well as cleats screwed into the bottom to position planes. By using screws, the cleats can be removed and changed as tools change.
When it comes to finishing the tool chest, you can take your pick. Paint, varnish, polyurethane, etc. would all be great choices. For a fancy wood like this, I use a two-step finishing method involving tinted shellac and Danish oil. Once the finish is dry, a quick coat of paste wax allows the tray to slip into place, and then it’s ready to report for duty.
Here are some supplies and tools we find essential in our everyday work around the shop. We may receive a commission from sales referred by our links; however, we have carefully selected these products for their usefulness and quality.


 Build a tool chest that’s worthy of your tools. Customize it to fit exactly the tools you want.

 Case Construction


