We may receive a commission when you use our affiliate links. However, this does not impact our recommendations.
To change the blade on my tablesaw, I used to wedge the front end of my push stick between the saw table and the blade teeth, so I could loosen or re-tighten the arbor nut. It worked, but the teeth always mangled the end of the push stick.
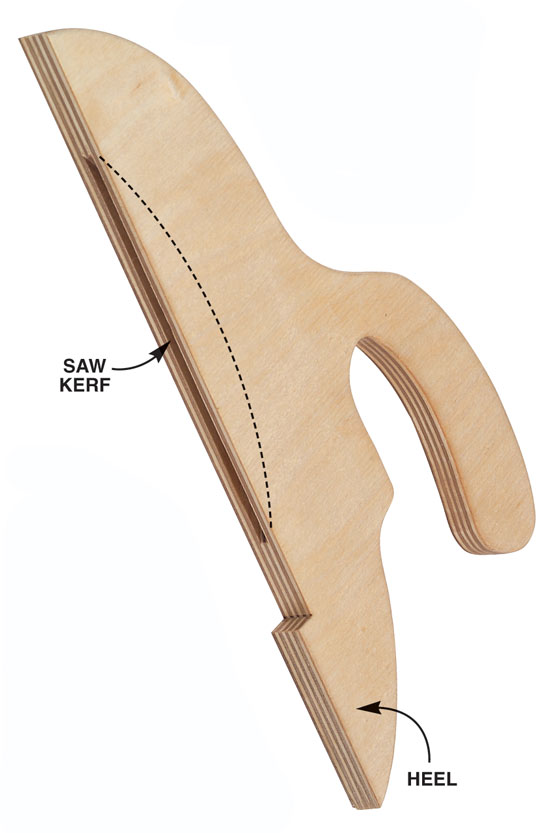
Then I realized that by cutting a saw kerf into the bottom edge of the push stick, I could capture the blade securely during blade changes.
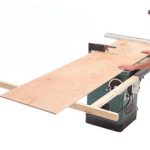
Adding the kerf is easy because I saw it while the bottom edge of the blank is still flat. First I trace the push stick profile on the blank, including the notch and heel at the bottom. Then I lower the blade below the saw table and set the rip fence to center the kerf in the blank. After making sure the kerf won’t extend into the heel, I clamp the blank to the fence, turn on the saw and raise the blade about 1-1/4 in.
Here are some supplies and tools we find essential in our everyday work around the shop. We may receive a commission from sales referred by our links; however, we have carefully selected these products for their usefulness and quality.