We may receive a commission when you use our affiliate links. However, this does not impact our recommendations.
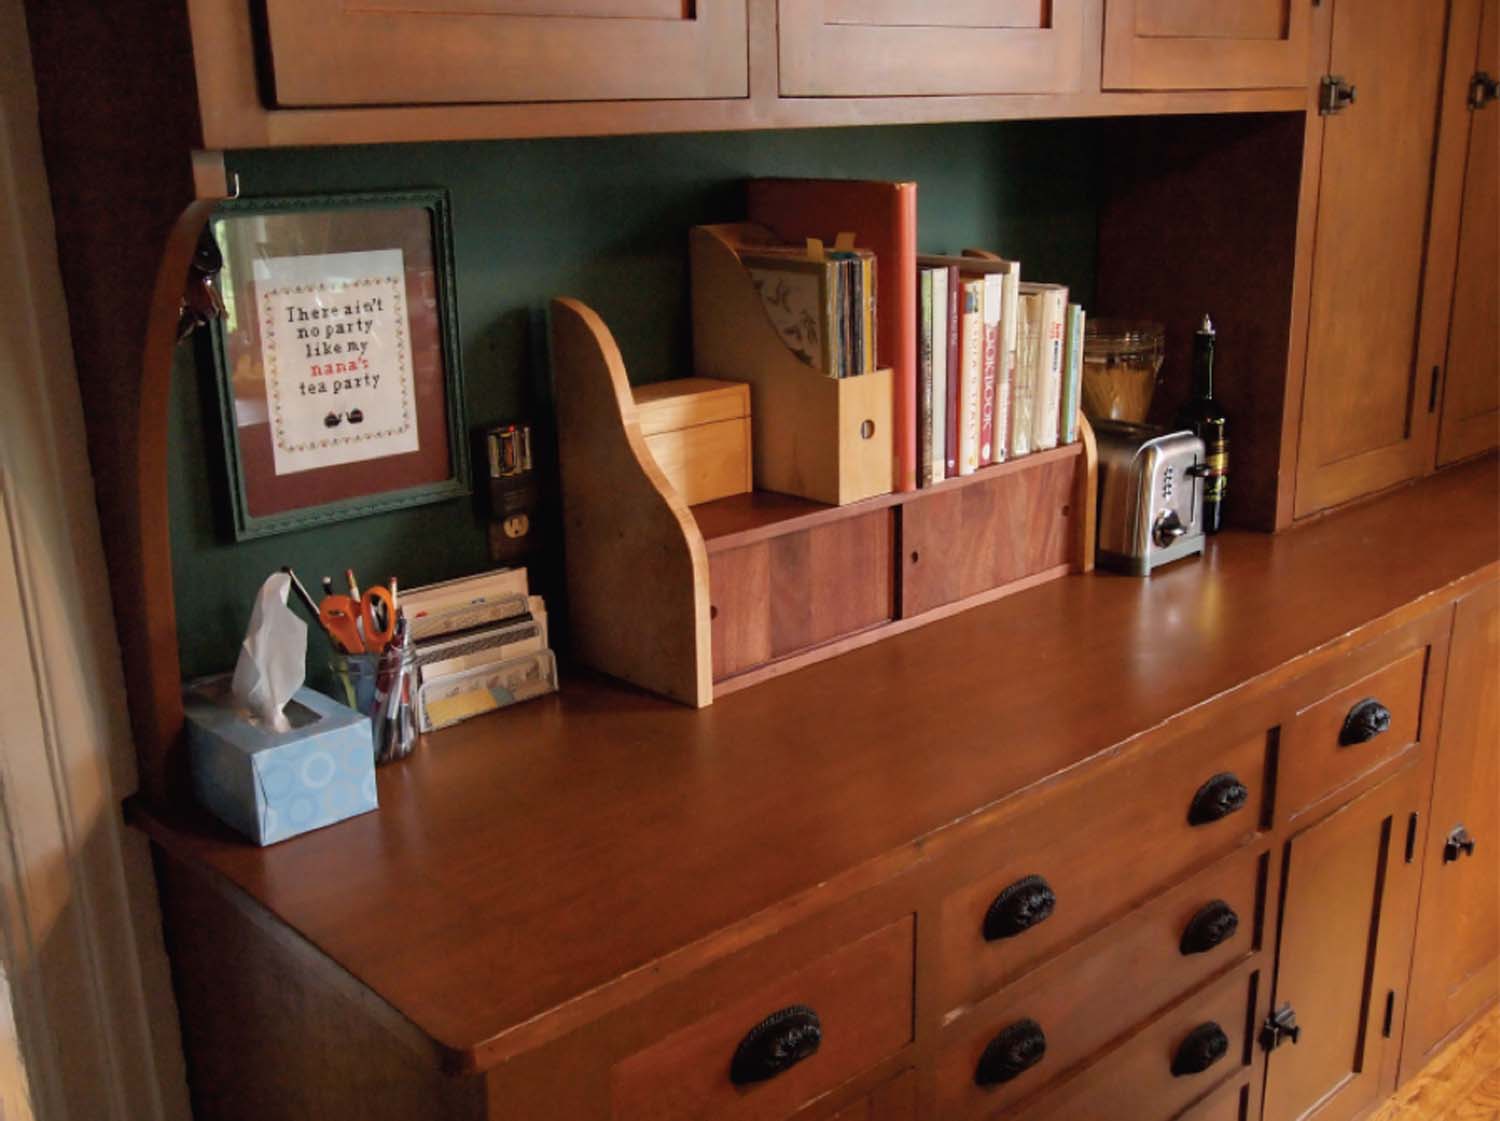
Sitting on a countertop or mounted on a wall, this little gem helps to organize your kitchen. In addition to keeping cookbooks handy, it holds two supermarket loaves of bread and a package of hamburger or hotdog buns, with room for a baguette laid across the top of them.
It’s easy to change the dimensions or reconfigure the design to suit your needs. I just measured the distance between the outlets the breadbox would sit between and how much room was required my tallest cookbooks to fit under the upper cabinets. You might decide to screw hooks into the bottom for coffee mugs or lengthen the sides and add a dowel underneath for kitchen towels.
You can start by heading to the board store, but figuring out how to use the wood you have on hand can also be fun. I used African mahogany offcuts from a paneling project and maple and cherry pieces culled from a garage sale. One thing’s for sure: If you build your bread box this weekend, next weekend’s dinner guests will want one.
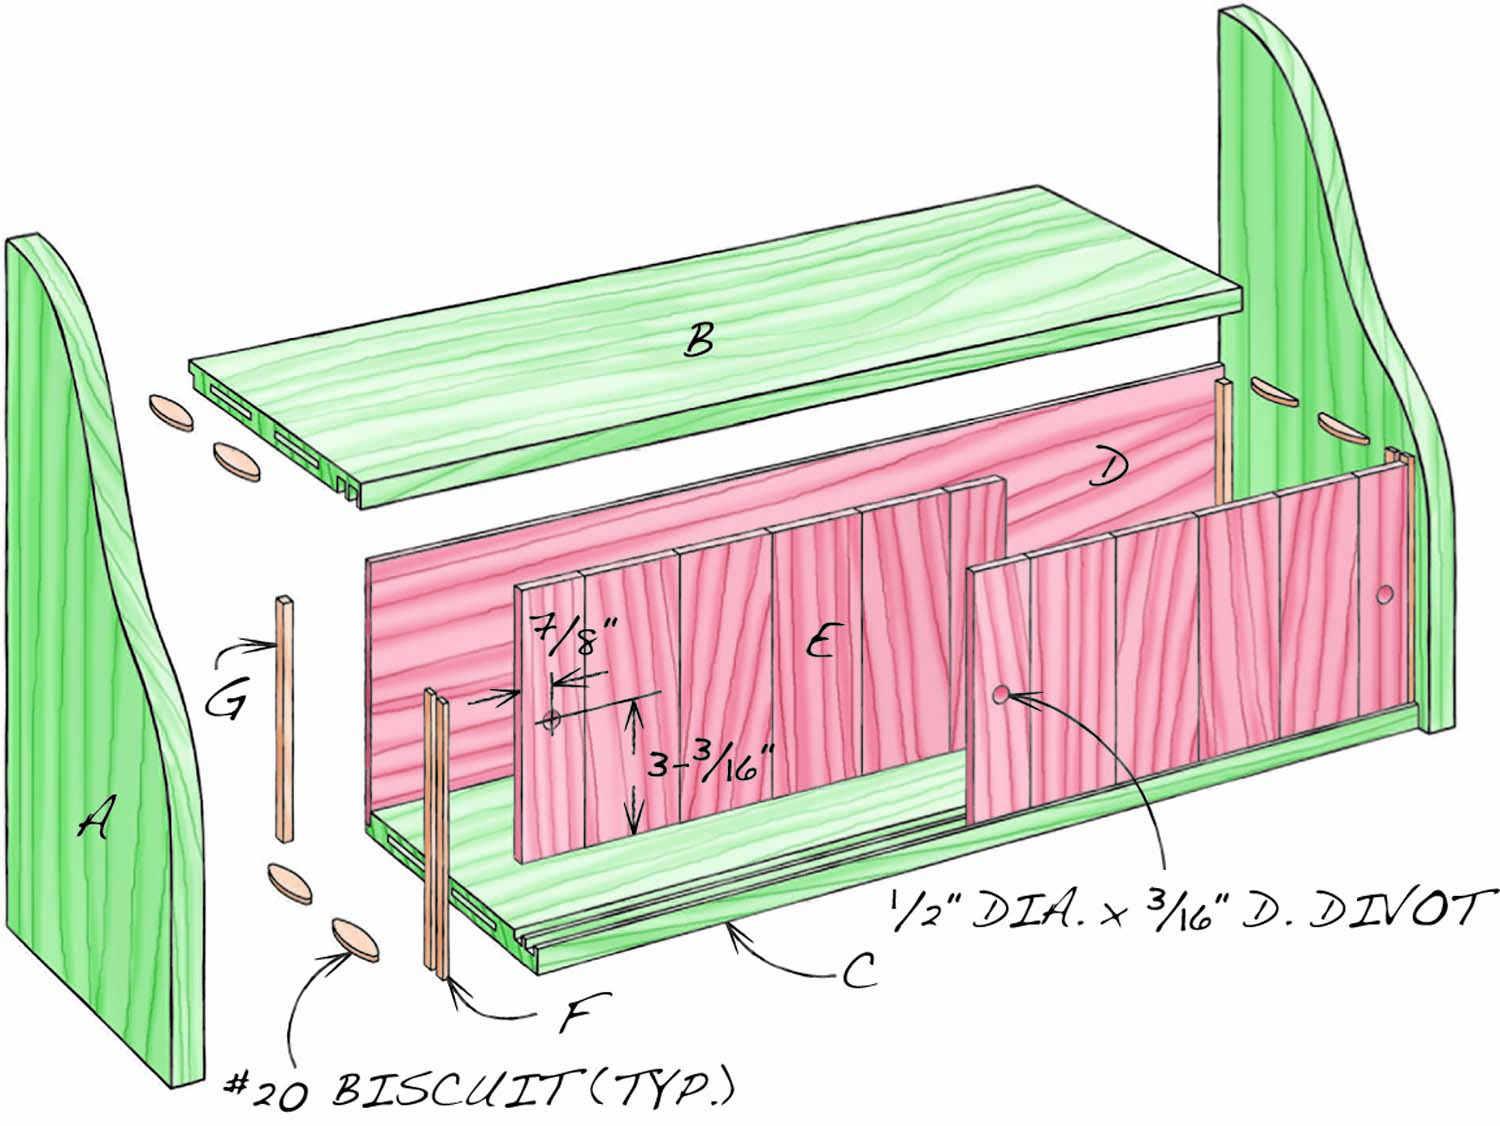
Fig. A. Exploded View
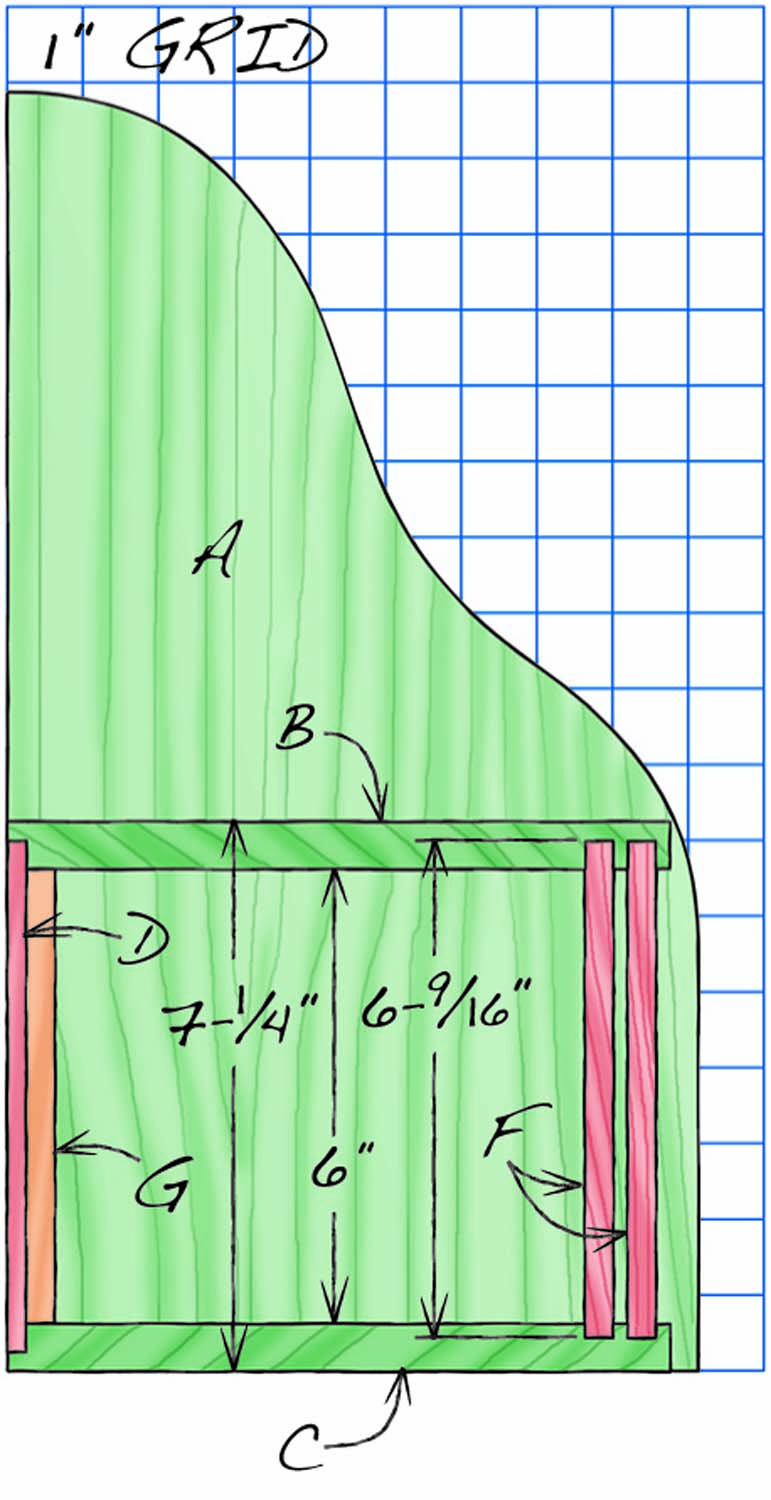
Fig. B. Side Elevation
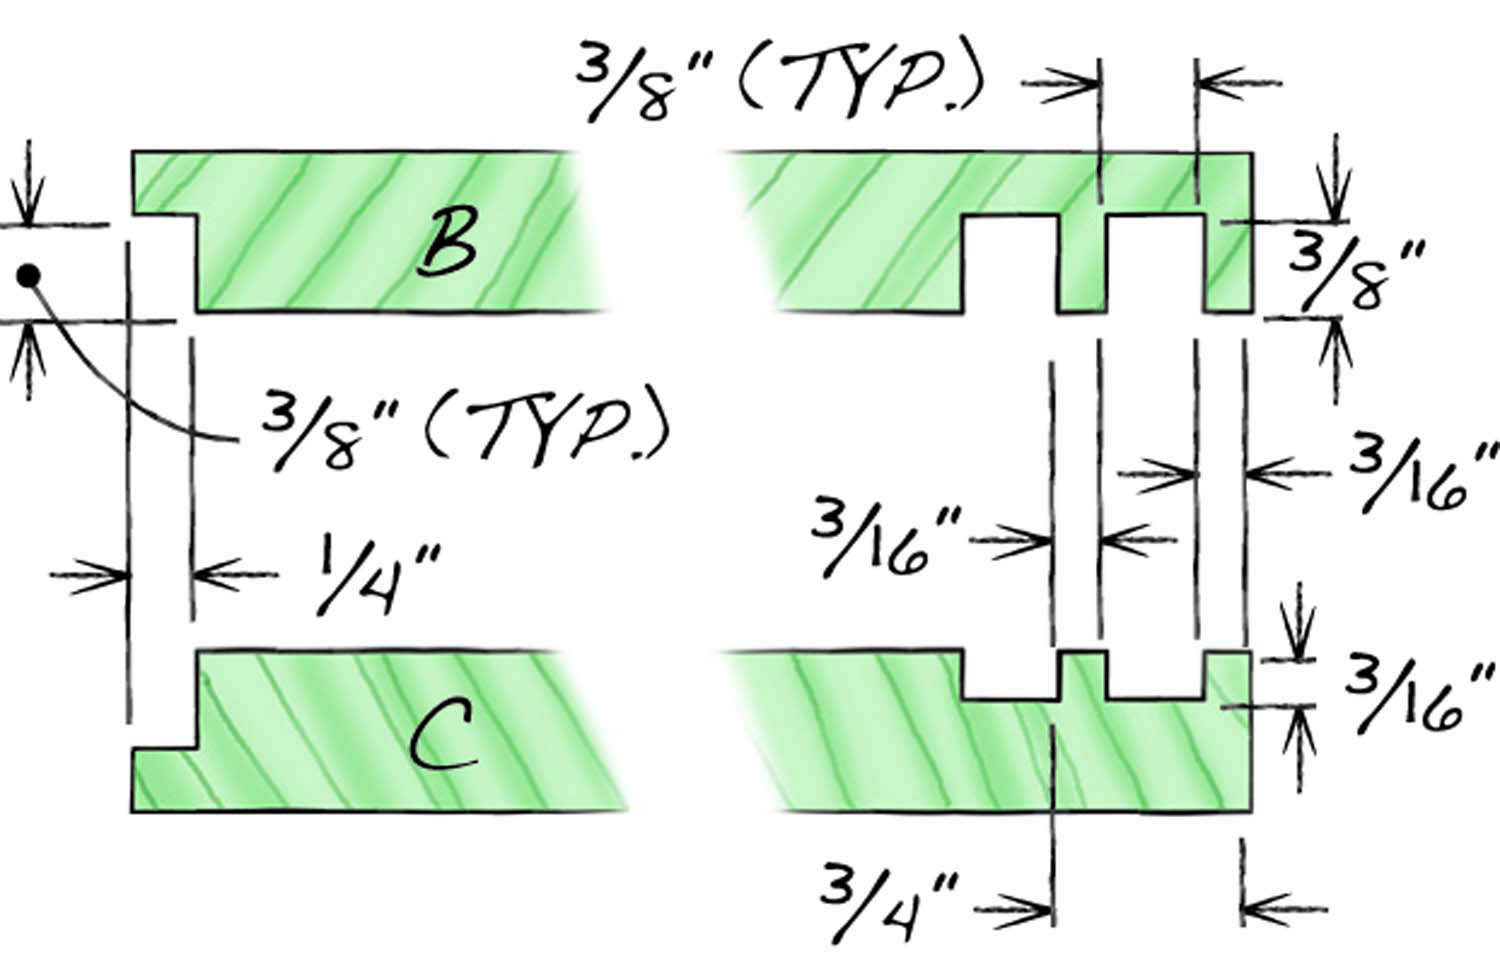
Fig. C. Dadoes and Rabbets
Cut List
|
Breadbox Overall Dimensions: 29″ L x 9-1/8″ W x 16-7/8″ H |
||||
|
Part |
Name |
Qty. |
Material |
Th x W x L |
|
A |
Side |
2 |
Maple |
7/8″ x 9-1/8″ x 16-7/8″ |
|
B |
Top |
1 |
Cherry |
5/8″ x 8-3/4″ x 27-1/4″ |
|
C |
Bottom |
1 |
Cherry |
5/8″ x 8-3/4″ x 27-1/4″ |
|
D |
Back |
1 |
Plywood |
1/4″ x 6-3/4″ x 27-1/4″ |
|
E |
Door |
6 |
African mahogany |
5/16″ x 6-3/8″ x 14-1/4″ (a) |
|
F |
Retainer |
2 |
Cherry |
3/8″ x 3/8″ x 6″ |
|
G |
Door stop |
4 |
Cherry |
3/16″ x 3/8″ x 6-9/16″ |
|
Notes (a) Cut both doors from a 1/2″ TH x 14-1/2″ W x 15″ L blank. Orient the doors’ grain to run vertically. |
||||
Build the Box
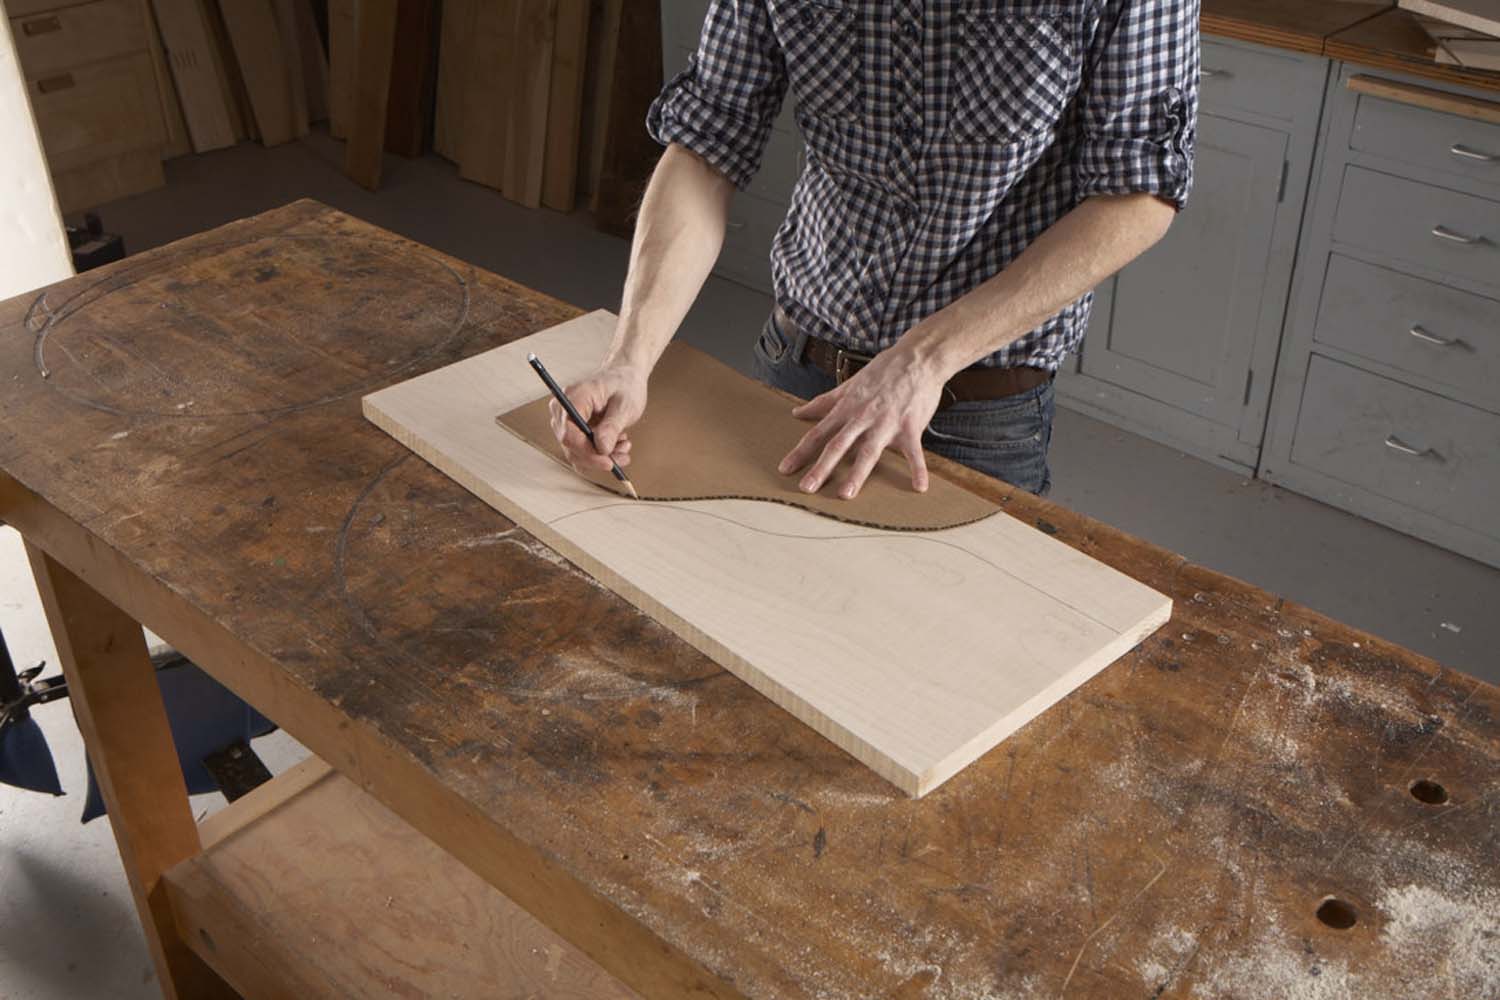
Photo 1. Lay out the sides of the box, using a template. The curved profile comes from a magazine-storage box.
Lay out the box sides (A, Fig. A, Fig. B, Cutting List and Photo 1). Their curved profiles function as bookends. Cut out each side piece using a bandsaw or a jigsaw and smooth the curves using a spindle sander or a sanding drum in a drill press. The curves don’t need to be identical.

Photo 2. Cut slots in both side pieces with the biscuit joiner held vertically and pressed against boards clamped to locate the bottom of each shelf.
Draw a line on each side piece to indicate the bottom of the top piece (B). Clamp a board onto this line and use it to locate the biscuit joiner when you cut the biscuit slots (Photo 2). Use a second board clamped against the side’s bottom to cut the slots for the bottom piece (C).
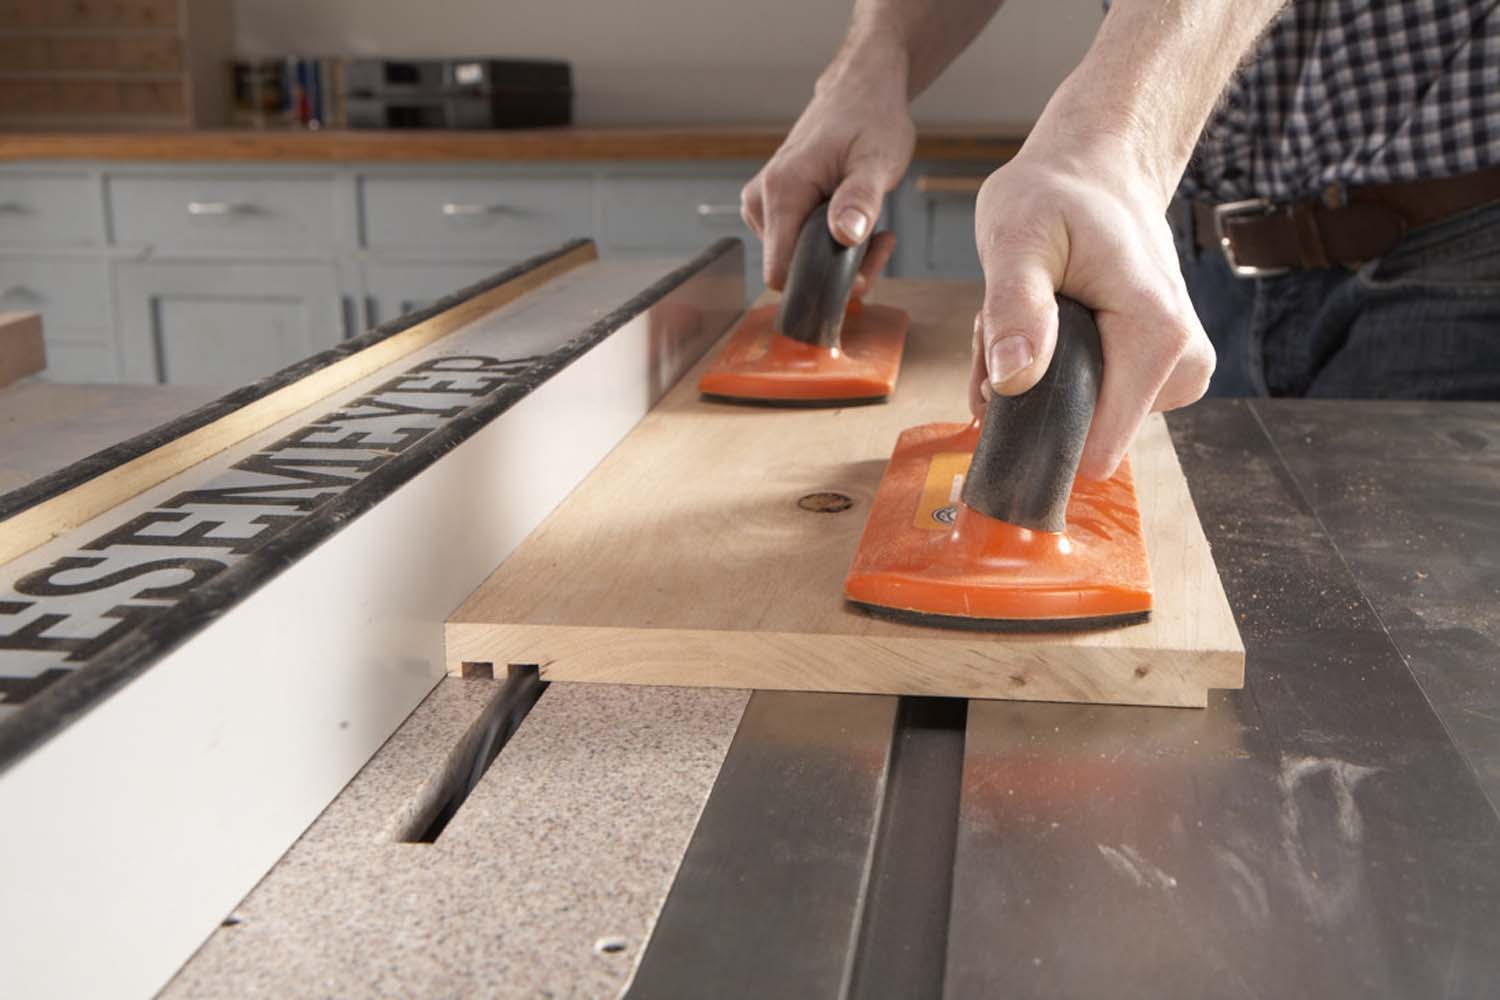
Photo 3. Cut grooves for the sliding doors in the top and bottom shelves. The grooves in the top shelf are deeper.
Cut rabbets for the plywood back (D) and grooves for the sliding doors (E) in the top and bottom pieces (Photo 3, Fig. C). Note: The grooves are sized for 5/16″ thick doors. If you decide to make plywood doors, you’ll have to adjust the grooves’ width. The grooves in the top piece are deeper to allow installing the doors.
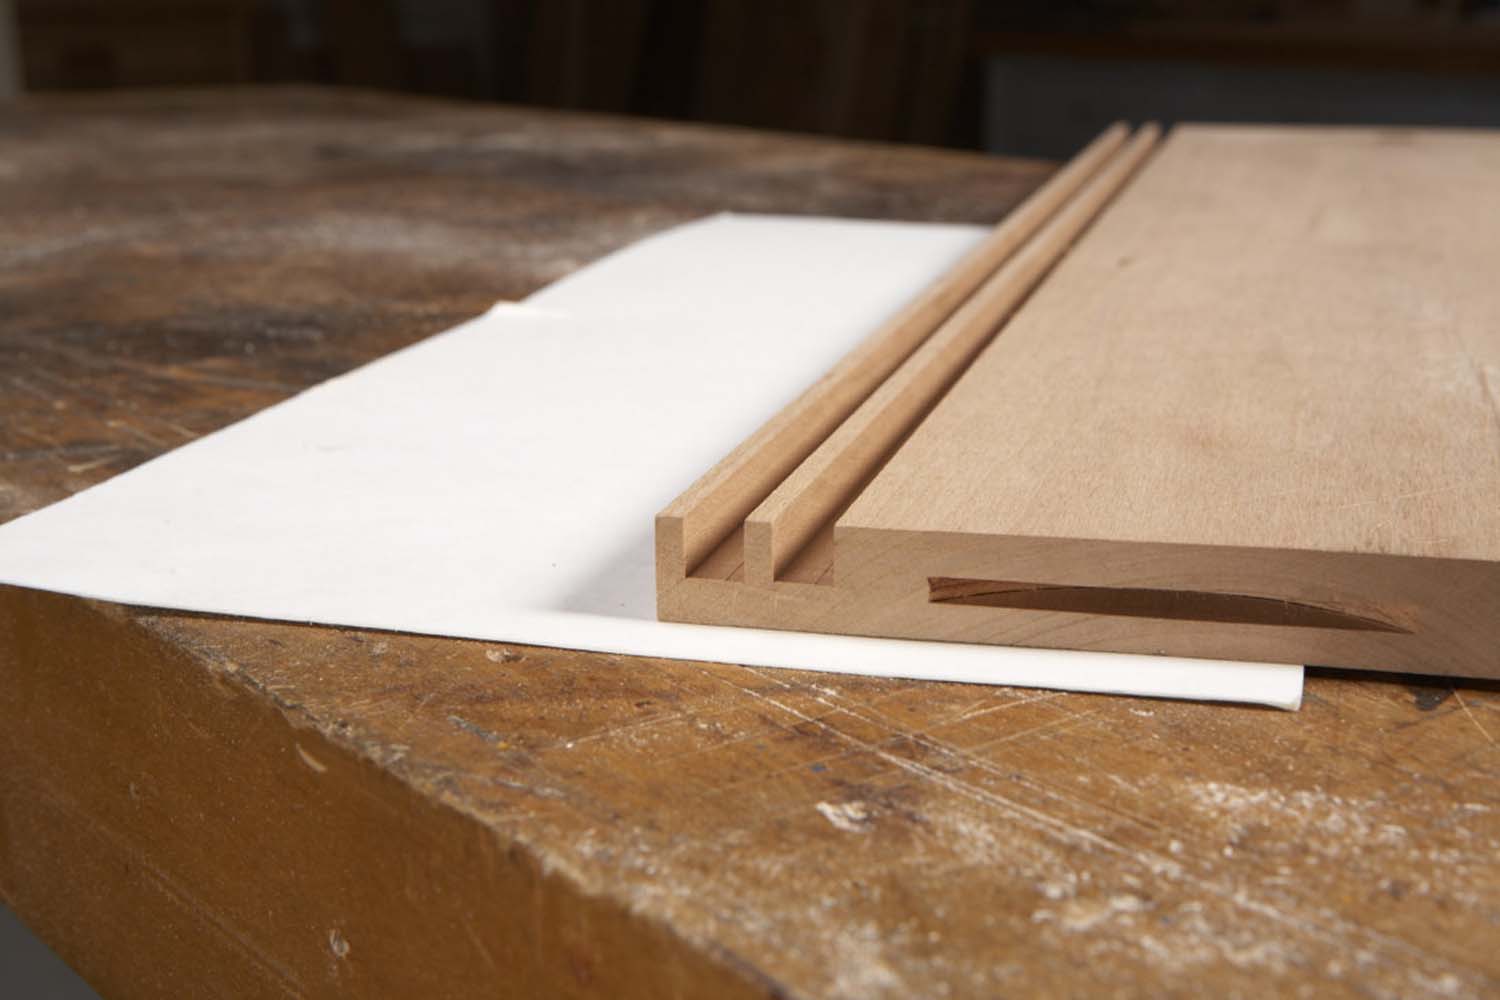
Cut both grooves in the bottom piece first, then raise the blade and cut the two in the top. It’s a good idea to cut test grooves in a scrap piece to dial in the blade heights and fence locations.
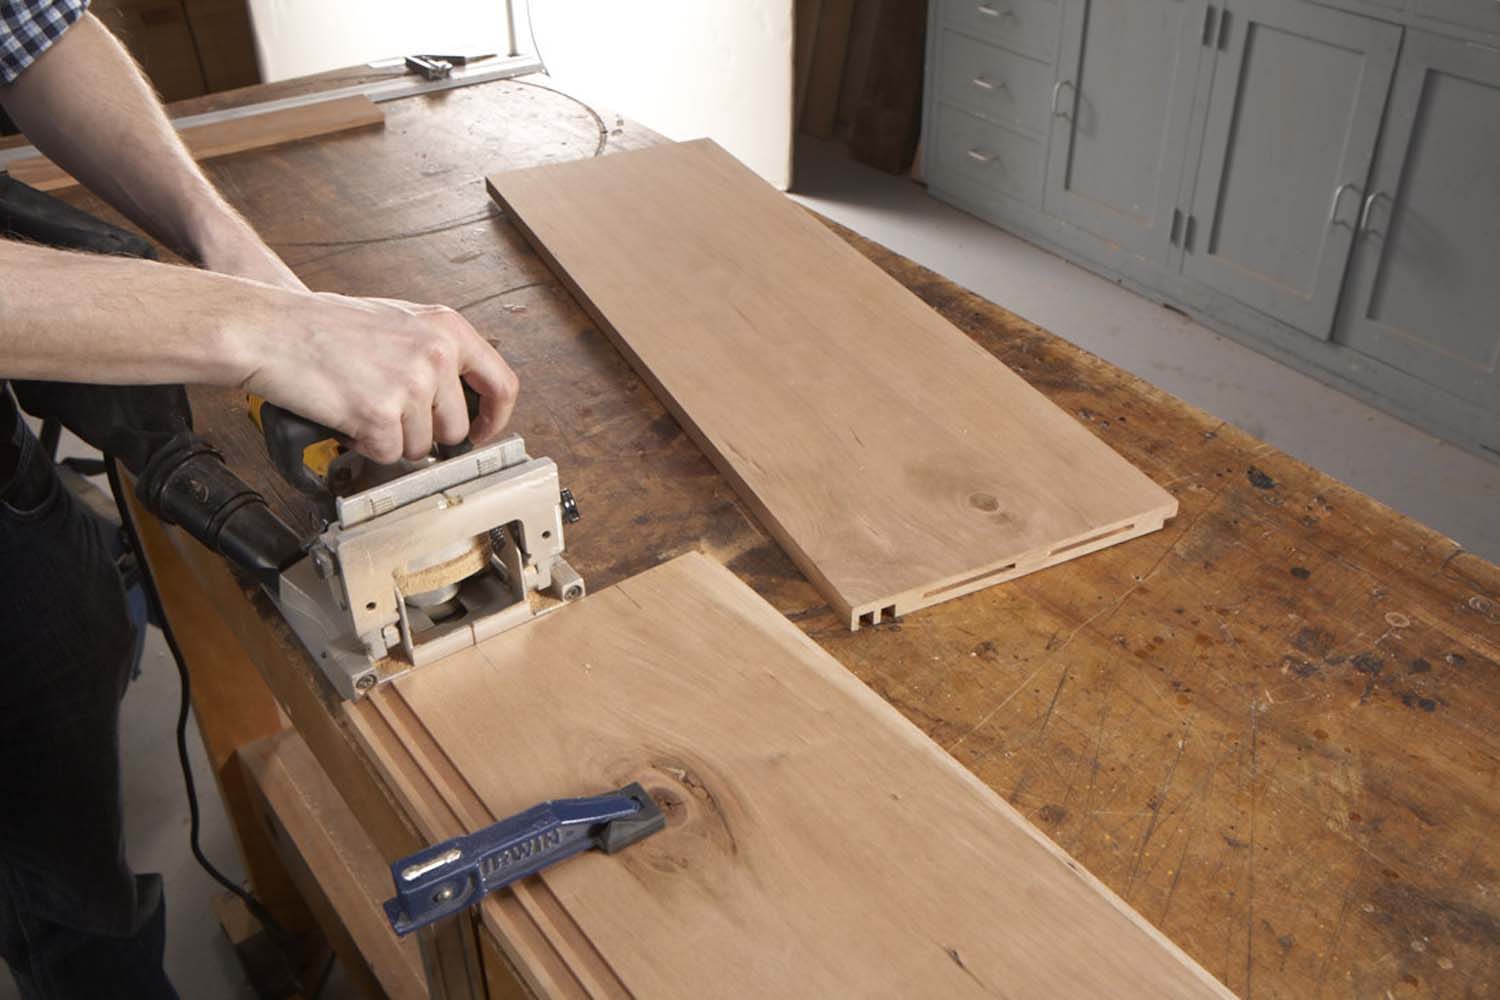
Photo 4. Cut slots in the top and bottom pieces on a flat surface, with the biscuit joiner held horizontally. Clamp the bottom grooves-up and the top grooves-down.
Clamp the top and bottom pieces to a flat surface to cut the biscuit slots (Photo 4). Make sure to correctly orient each piece: Clamp the bottom with its grooves facing up and the top with its grooves facing down. Rest the biscuit joiner on the flat surface to cut the slots.
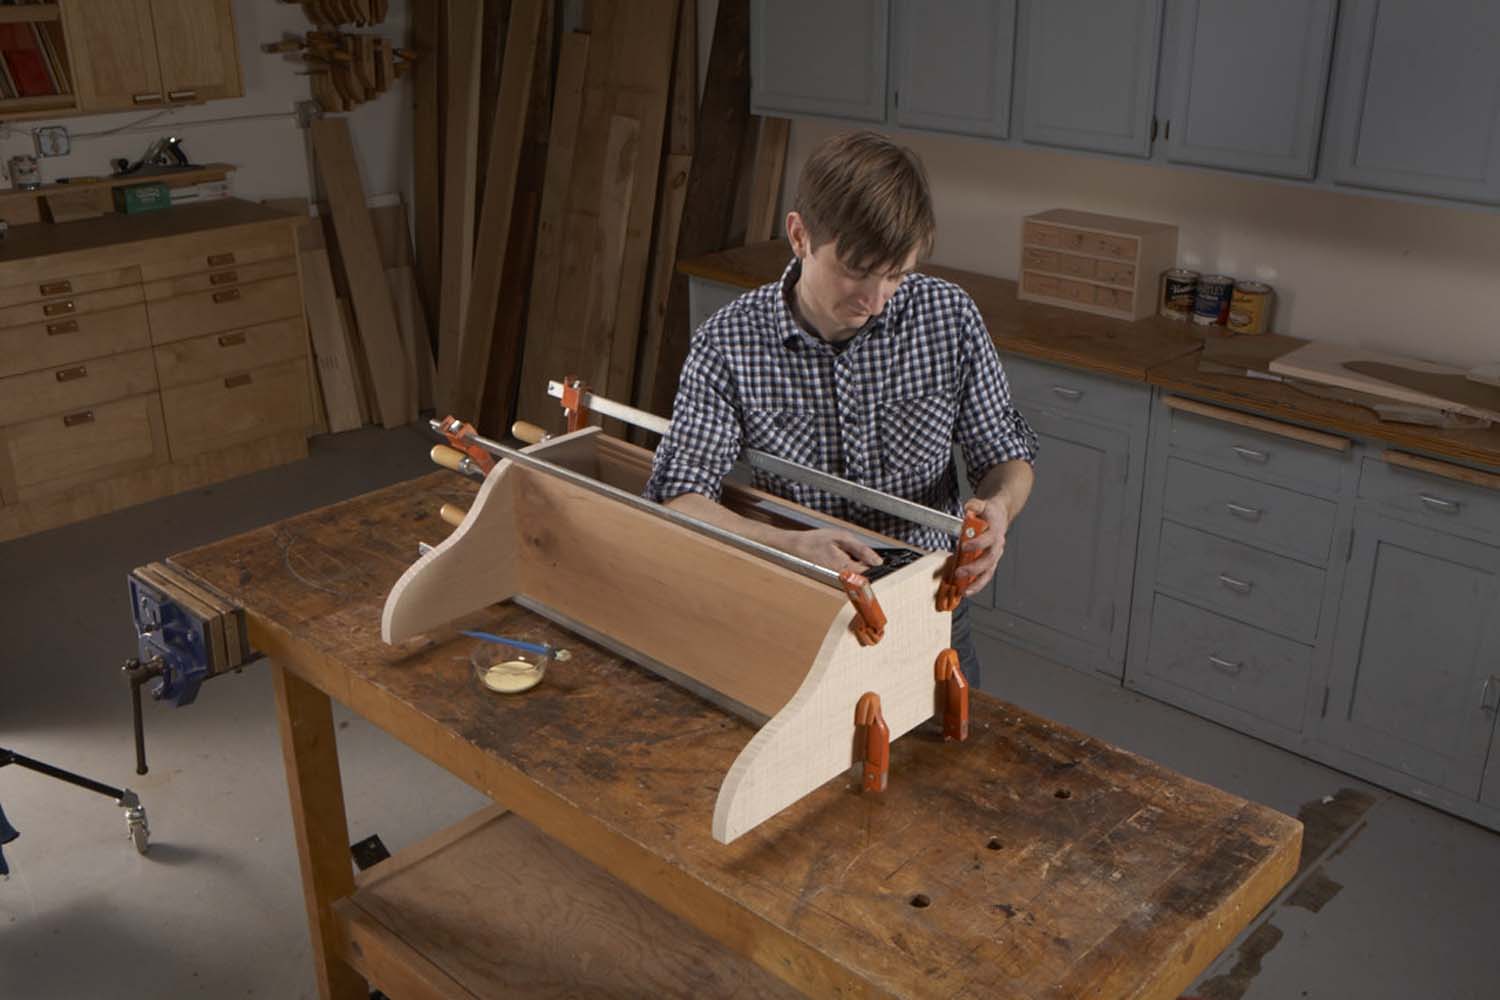
Photo 5. Make sure the door opening is square when you glue the box together.
Finish-sand the box pieces. Then glue the box together (Photo 5). Glue and pin retainers aligned with the edges of the rabbets in the top and bottom pieces. Cut the back to fit and install it with glue and pins.
Make the Sliding Doors
It’s easiest to glue up a single panel that’s large enough to contain both doors and then joint it flat and mill it to thickness. It’s OK to use scrap lumber here. In fact, gluing together a bunch of narrow pieces as shown here has a couple advantages. It allows using scrap stock and the results make interesting-looking doors. To avoid tearout, make sure orient all the pieces so the grain runs in the same direction. When you mill the panel to thickness, test it in the grooves in the scrap stock that you cut earlier to make sure the doors will slide freely.
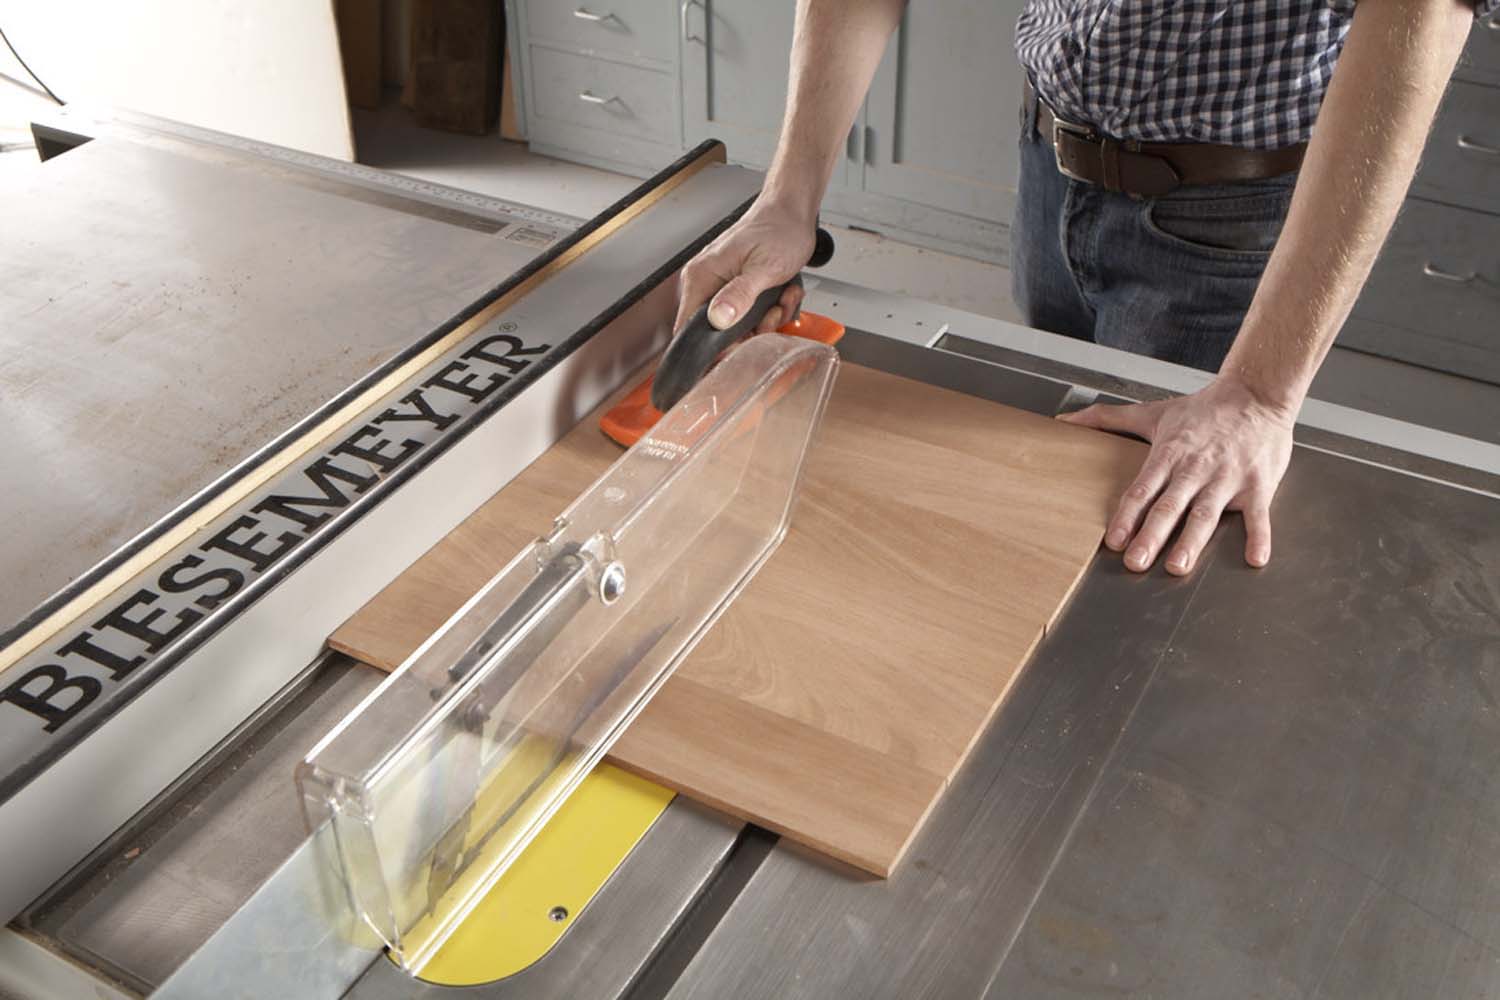
Photo 6. Cut both doors from a single glued up blank. Orient the grain vertically, so seasonal changes in humidity won’t affect the doors’ operation.
Joint one edge of the blank so it’s parallel to the glue lines. Then cut the doors from the blank with the grain oriented vertically (Photo 6). Square one end of the blank and then cut the doors to width (or height, in this case). Use a crosscut blade to minimize tearout. Create divots for finger pulls (Photo 7). Then cut small chamfers on the back of each door, at the top and bottom, to make them easier to install.

Photo 7. Shape the finger pulls with a core box bit. Drill a shallow starter hole first, to seat the router bit. Clamp the door in place before drilling each hole.
Test-fit each door by sliding it all the way into the top groove and then pushing its bottom edge into the bottom groove (Photo 8). It probably won’t fit on the first try, so cut a tiny amount off the top edge and try again. Keep shortening the top until the door just squeaks into place. The inside door may need a slightly more severe chamfer at the top to fit into the groove, but be careful not to run the chamfer too far down the back, or the door will end up fitting loosely at the top. Use a miter gauge or a miter saw to cut each door to length. Then sand or plane the edge by hand to remove the saw marks.
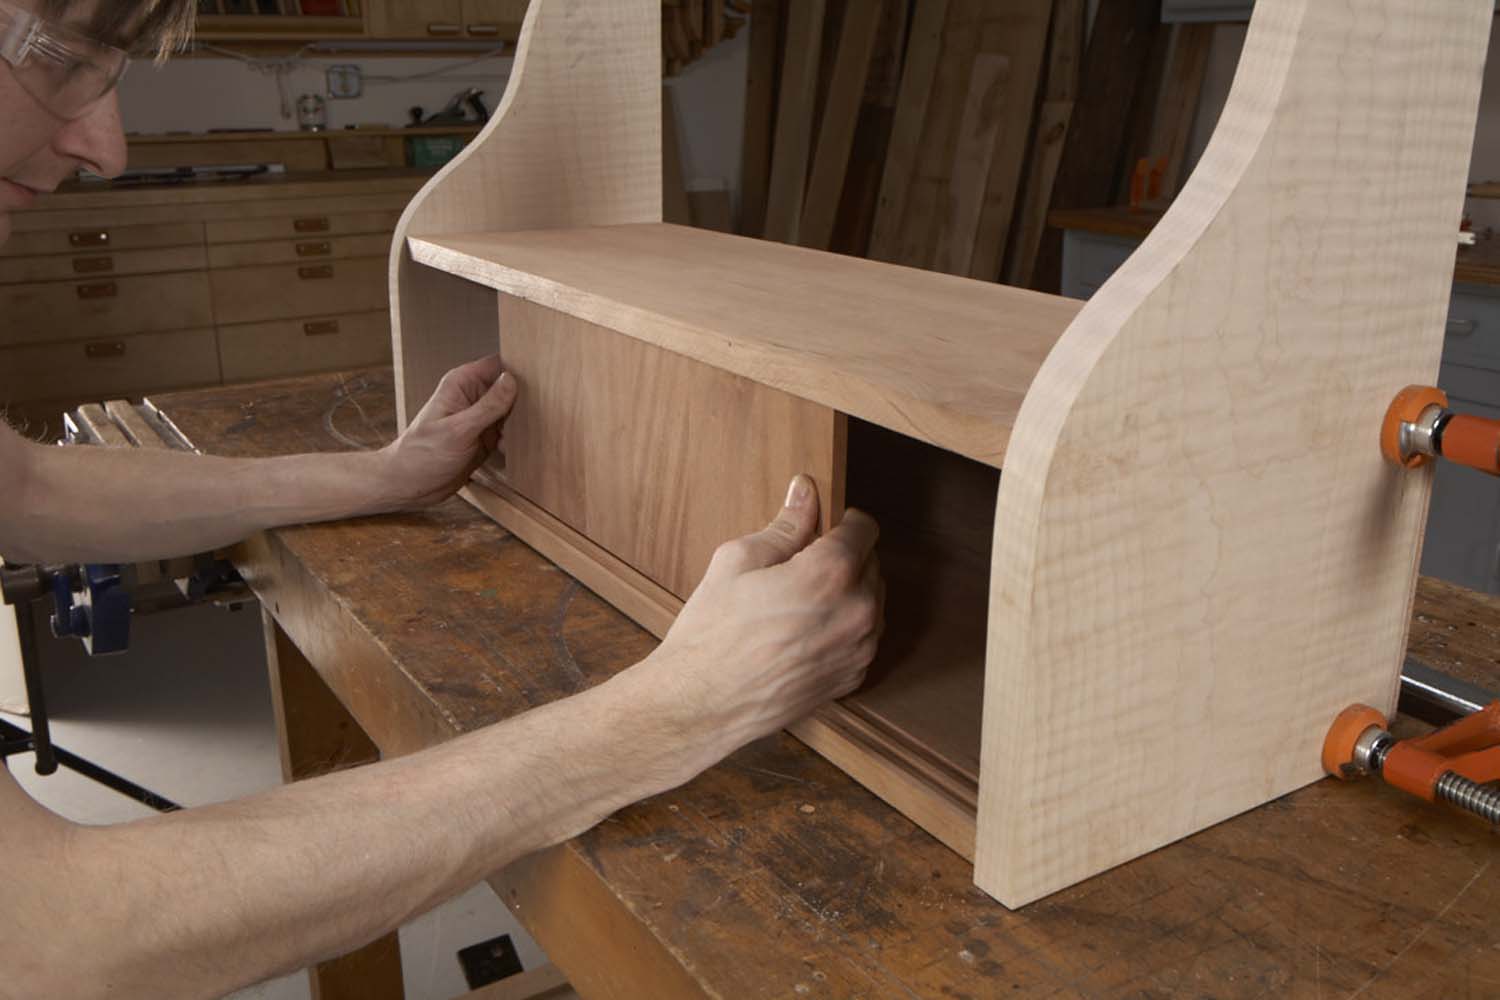
Photo 8. Fit each door by inserting it into the top groove and then sliding it back until it drops into the bottom groove. The door is easier to install if it’s slightly chamfered on the back.
A Food-Safe Finish
Most finishes are food-safe once they’ve fully cured, but the smell can linger for a long time in a closed box, and could permeate bread and other perishables that are stored inside. Mineral oil—often recommended for cutting boards—is a good alternative. Woodworking stores and home centers sell mineral oil as a wood finish, but you’ll find the same product for less a pharmacy, in the laxatives section. Unlike other oil finishes, mineral oil never cures and tends to fade over time, so you’ll probably need to refresh it every year or so, but it is a very pretty, natural-looking finish.
Bio
Garrett Glaser is a furniture maker who lives and works in St. Paul, Minnesota. To see more of Garrett’s work, visit:
www.garrettglaser.carbonmade.com.
Here are some supplies and tools we find essential in our everyday work around the shop. We may receive a commission from sales referred by our links; however, we have carefully selected these products for their usefulness and quality.