


We may receive a commission when you use our affiliate links. However, this does not impact our recommendations.
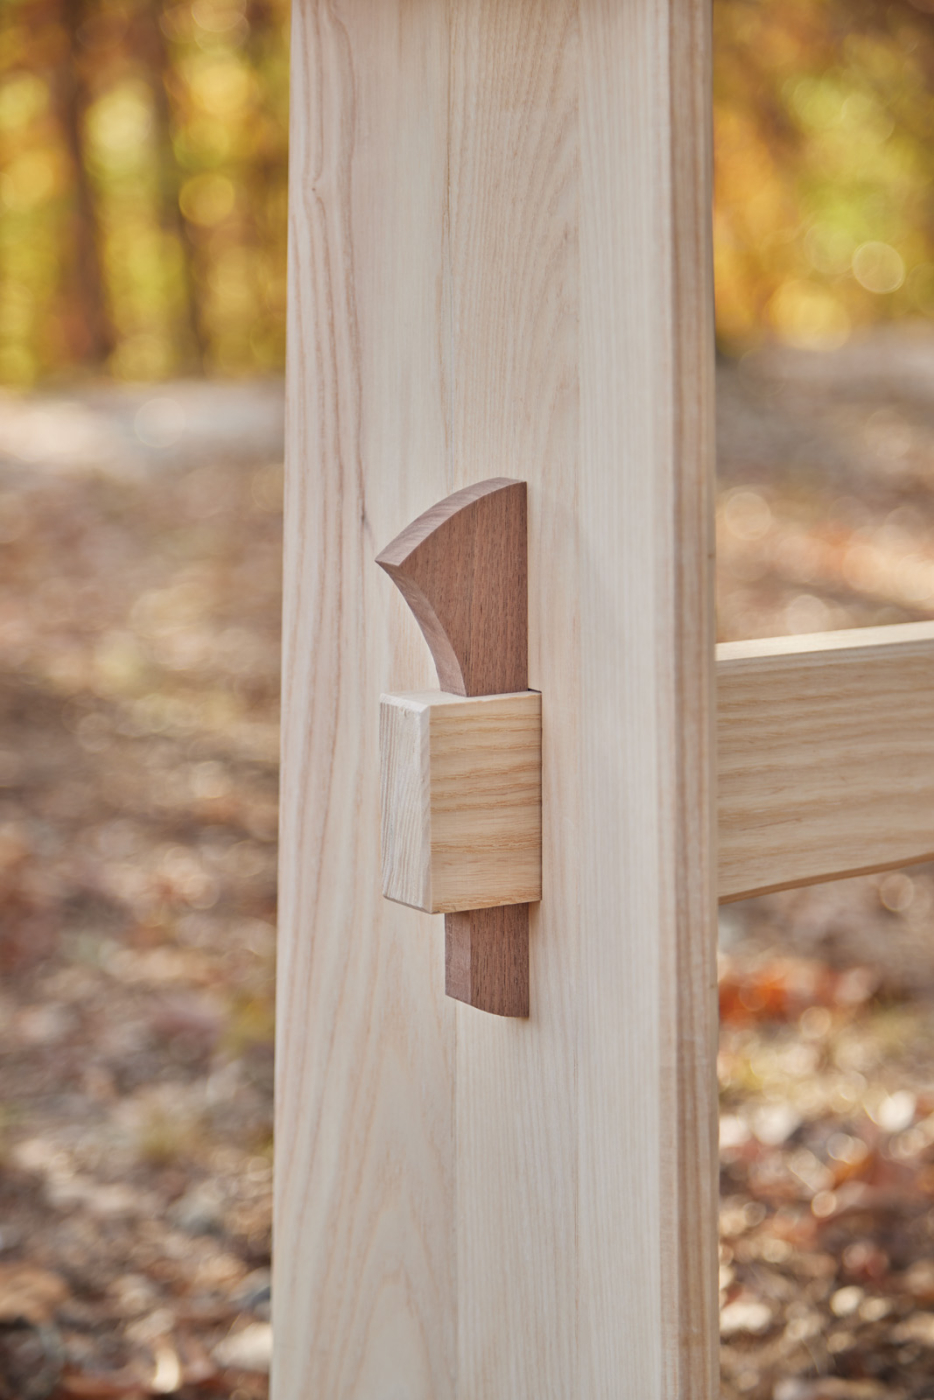
 Coopered legs and tusk tenons build the structure of this beautiful hall table.
 Coopered legs and tusk tenons build the structure of this beautiful hall table.
Project #2310 • Skill Level: Beginner • Time: 3 Days • Cost: $150
During the start of the Covid pandemic and as things were shutting down, my wife, Jean, gave me a list of things to do, one of which was a small bench for the bathroom to sit upon while getting dressed. I made one out of ash, with coopered legs that gave it a great deal of stability. I was impressed by my own success and realized that the simple design could be easily adapted and applied to making a hall table, which you see here, also made of ash. The stability of this table comes in part from the shape of the legs, that can stand alone, even without the trestle standing between the two. In addition, the trestle and tusk tenons give it amazing strength and the tapering of the legs as they rise, give a sense of lightness to the solid plank top, while also giving visual weight to the base.
Why use Ash?
For a time, ash lumber was on the market cheap as foresters attempted to save material from the steady advance of the emerald ash borer,
a beetle infestation ravaging American forests just as other deadly invasions had done to chestnuts and elms in generations past. I work with the firm belief that woodworkers have a responsibility to the environment that’s fulfilled in part by making people aware of the beauty of natural woods and our duty to protect our forests.
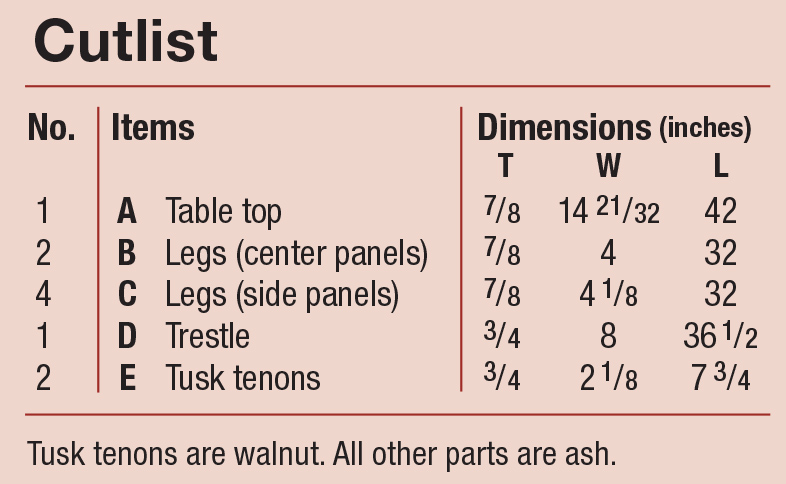
Cutlist and Diagrams
Form the Trestle Mortise
First form the mortise for the tusk tenons to fit the trestle. Take your trestle part and cut it in half. Next, use a dado blade on the table saw to hollow the half-mortise on both parts. Then glue the two halves of the trestle together, leaving the full mortises at each end. I chose to use hide glue giving me just a bit more open time to make adjustments as the parts were glued. Let dry.
1 Rip the trestle parts to width.
2 Set up a dado blade and position the first notch for the tenon mortise.
3 Remove the remainder of the waste from the mortise.

4 When complete, the pair of notches form a mortise.
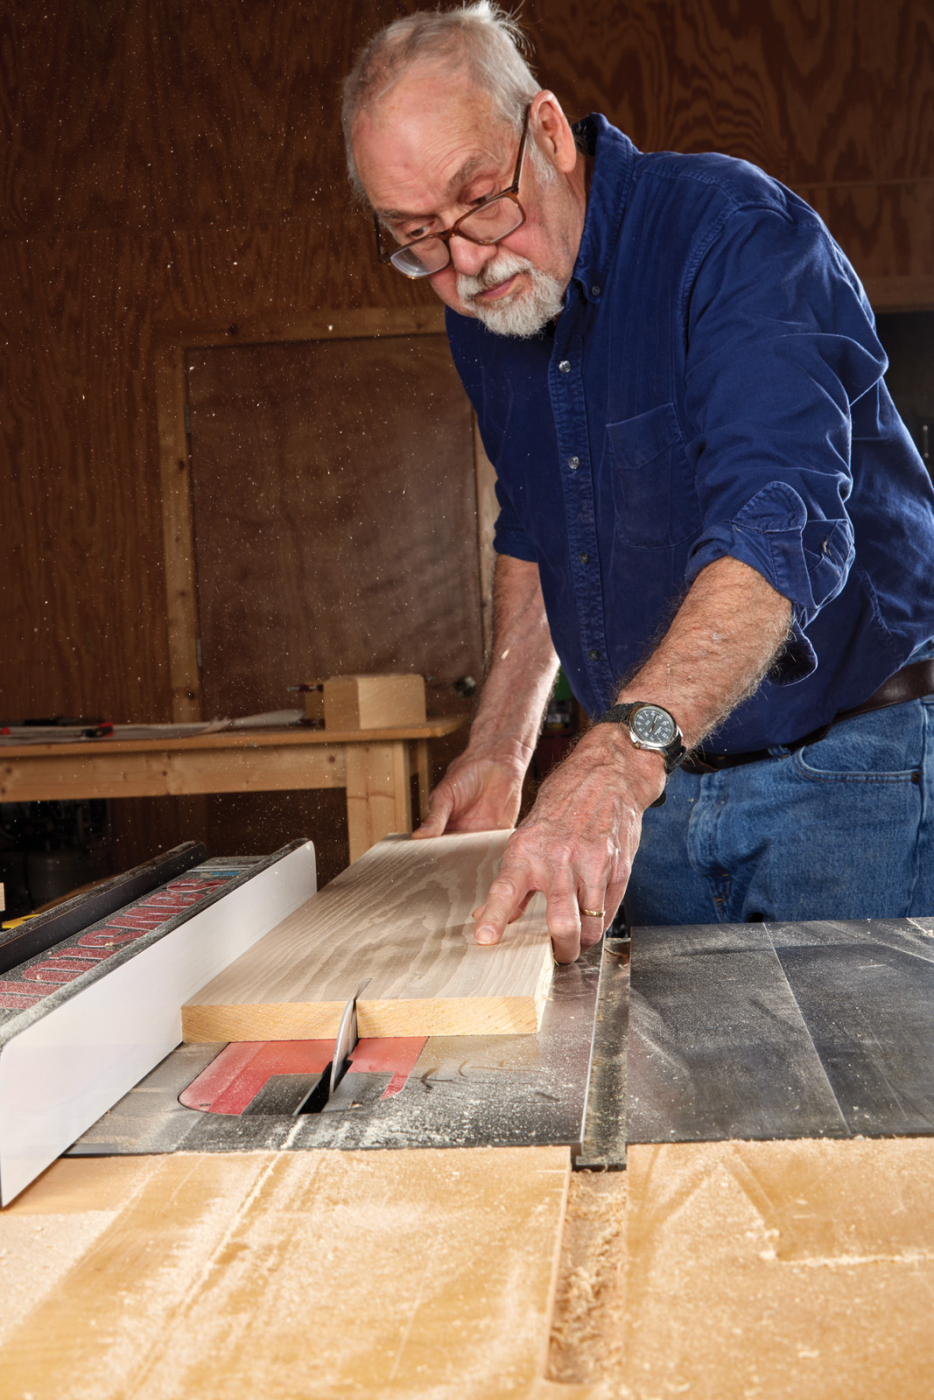
Coopered Legs
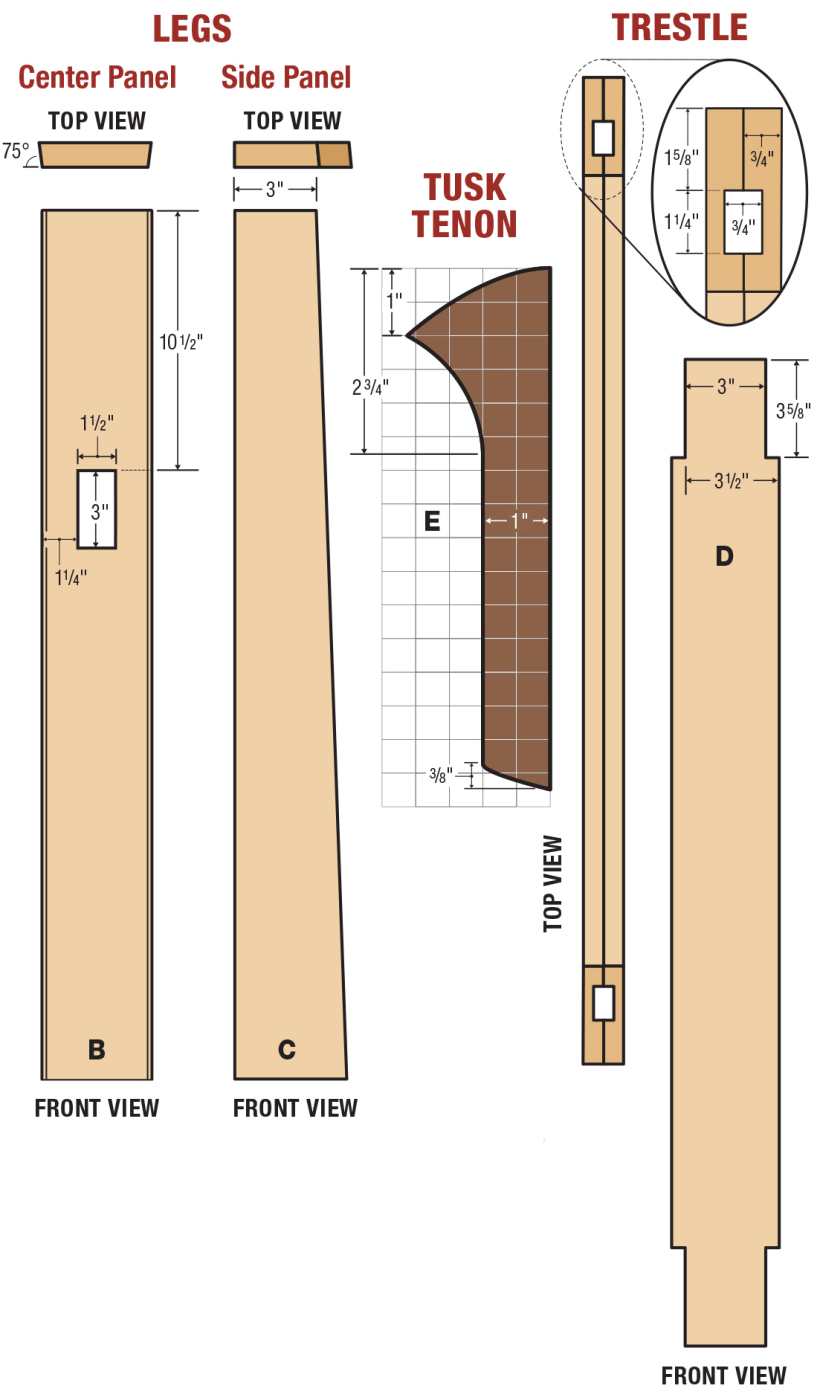
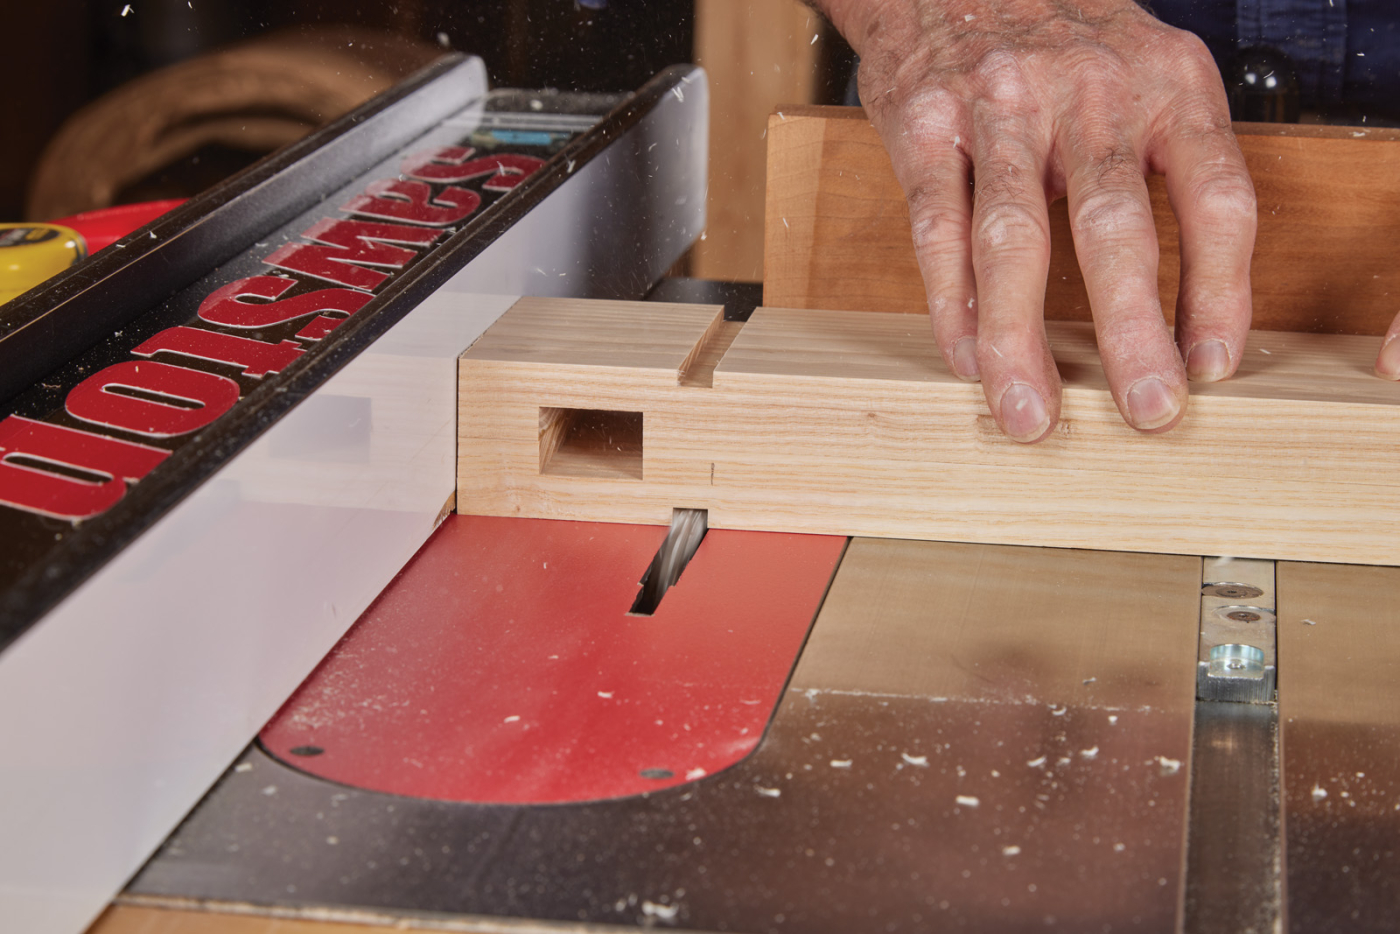
Begin by planing the parts for the legs to thickness and cut them to length. Lay them next to each other while taking into account the direction of the grain. Cut the center pieces in half so that the mortise for the tusk tenon can be formed. With a dado blade in the table saw, form one half of the mortise on each side of all four center leg sections. Then glue the sections together making certain that the mortise edges are aligned.
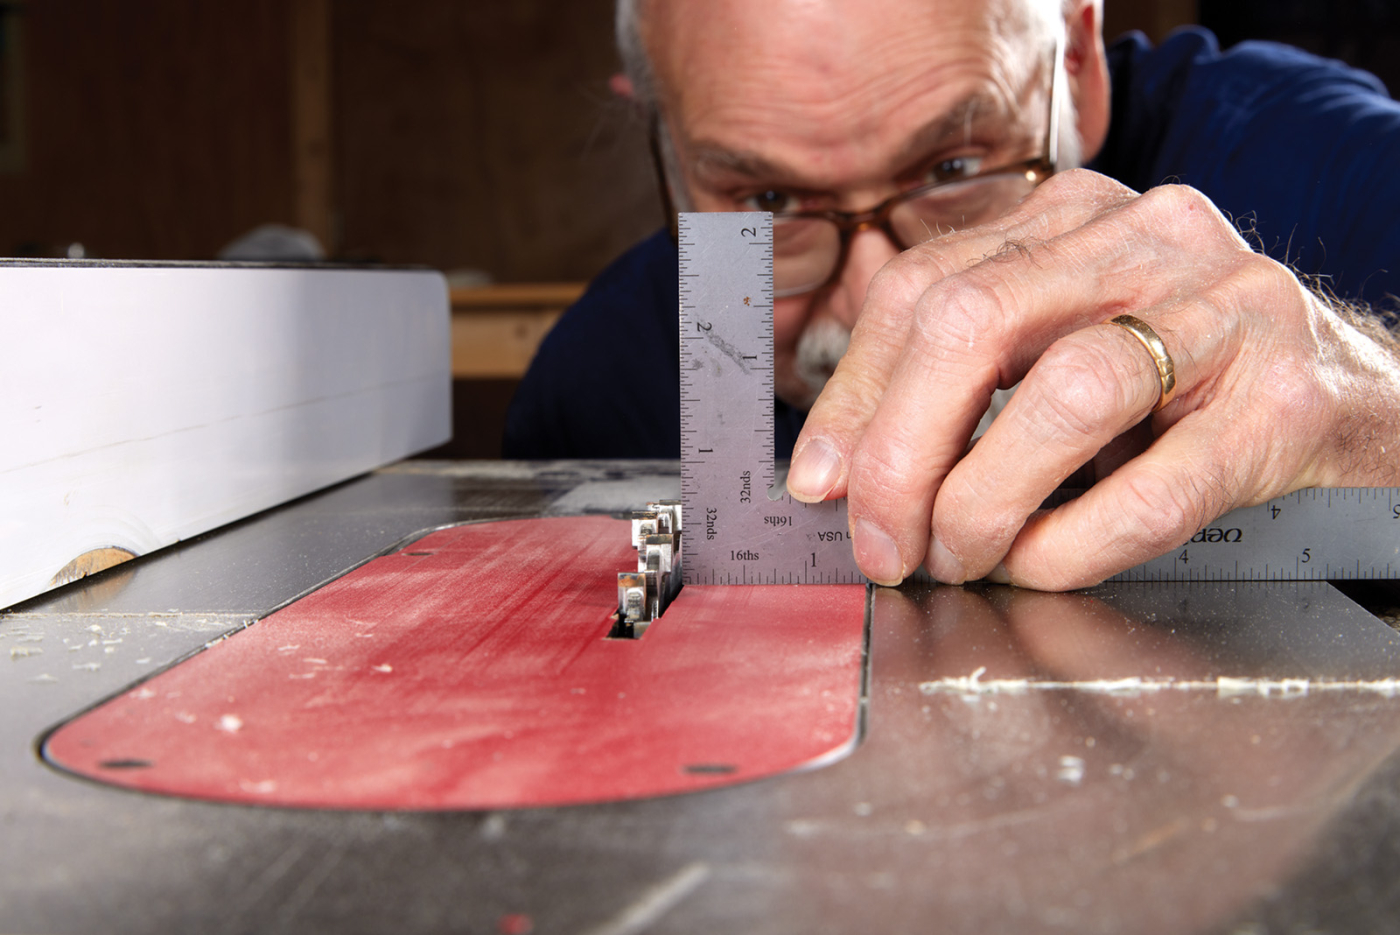
5 Carefully check the height of your dado blade.
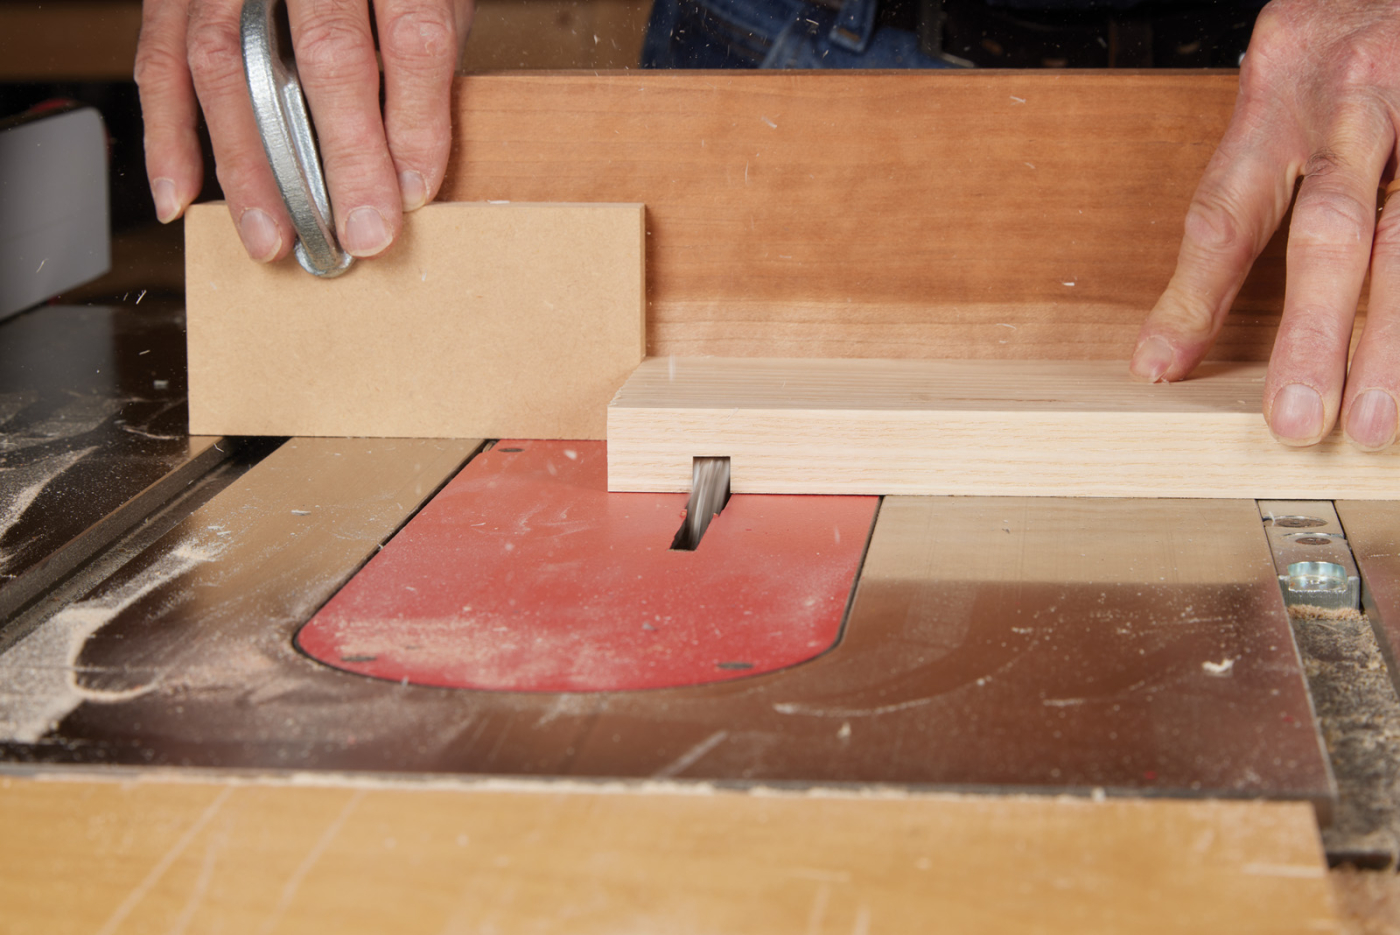
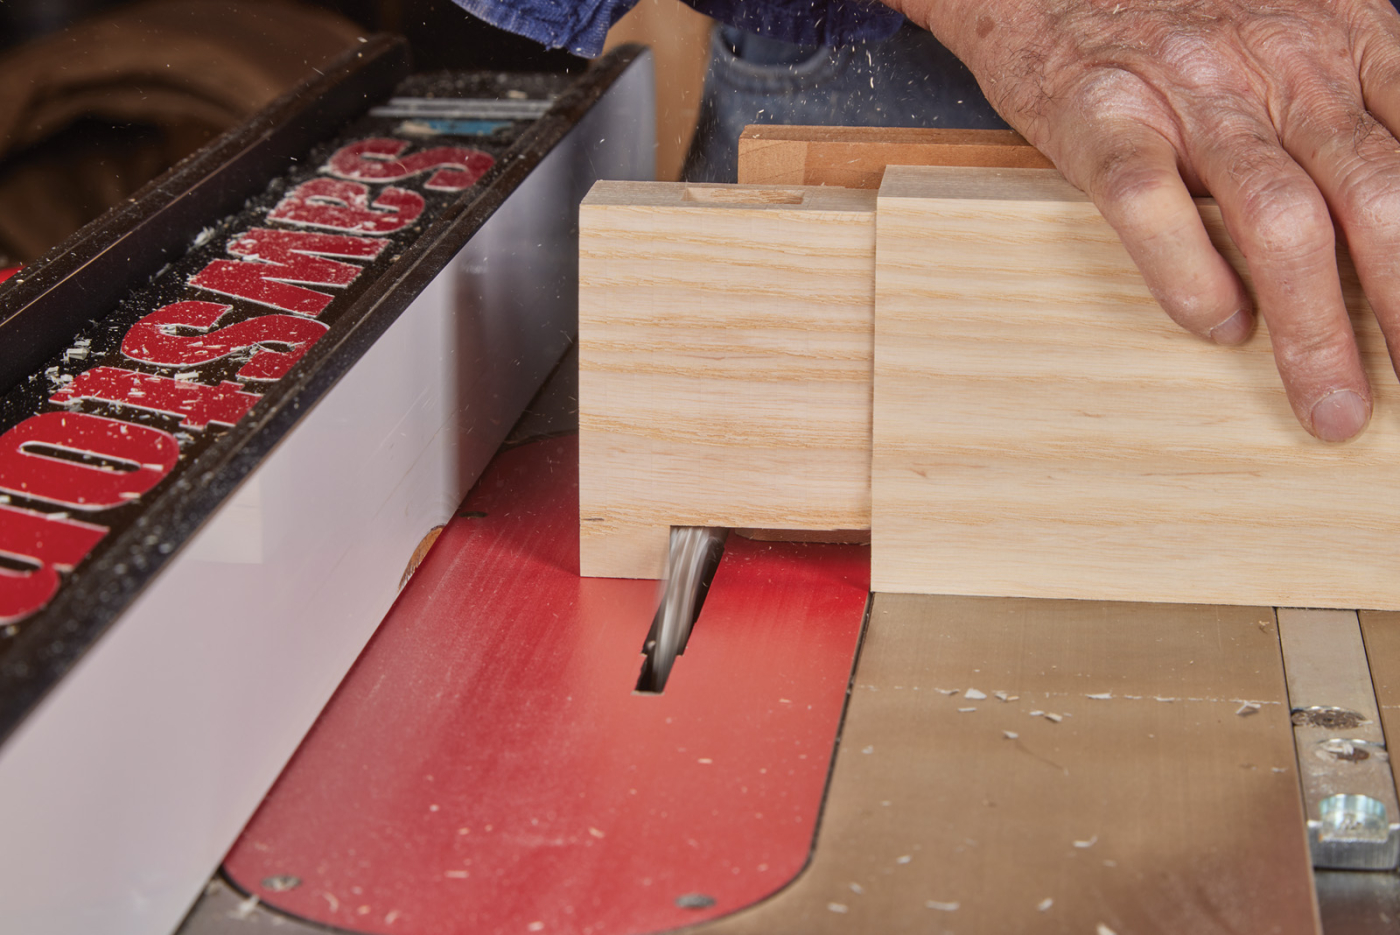
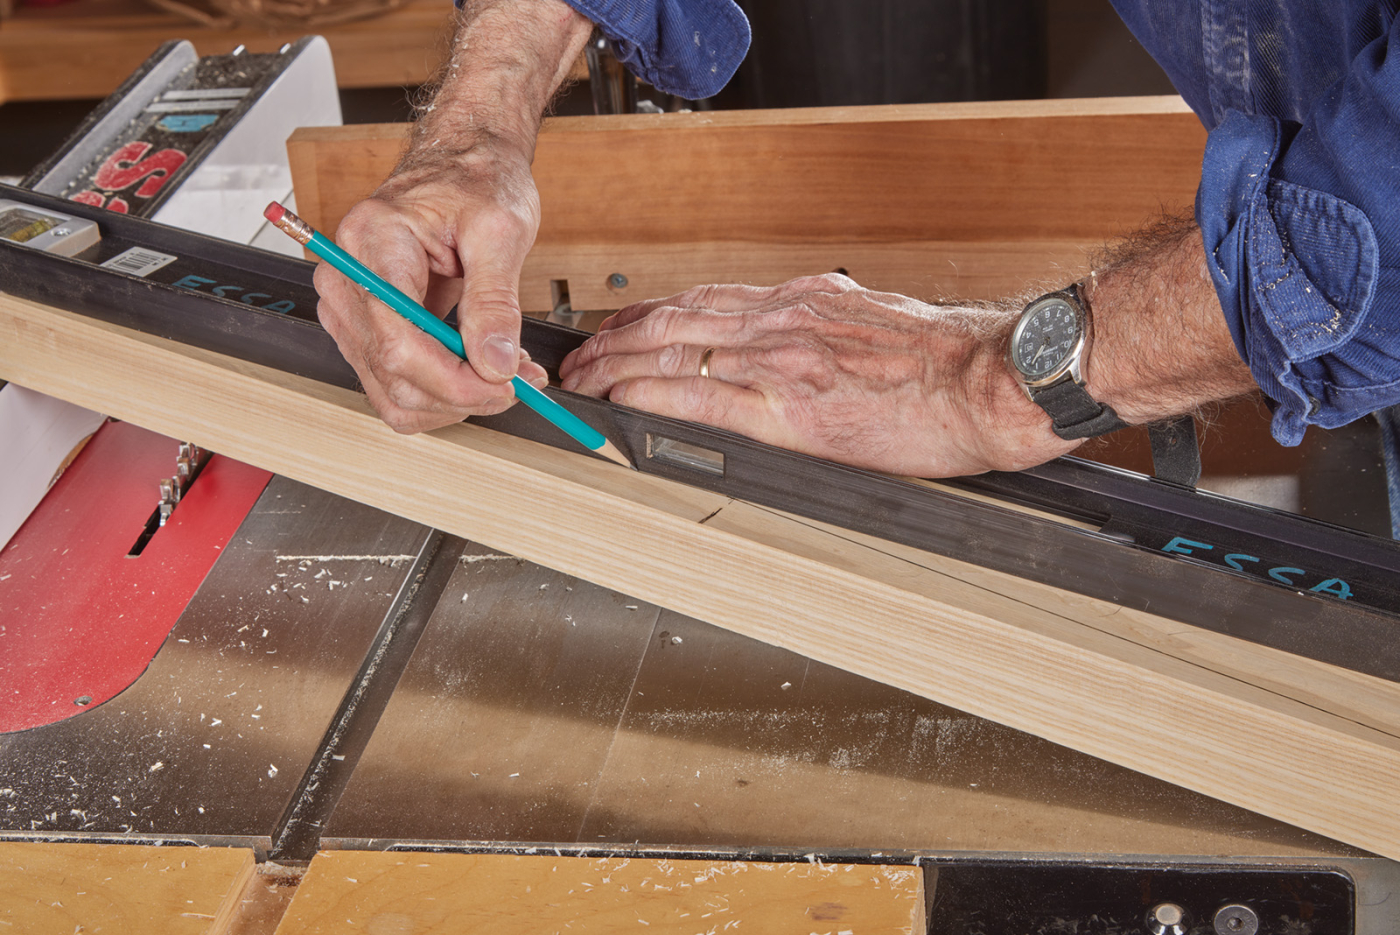
6 As with the tusk tenon mortise, form the mortise for the trestle by defining the initial position using a stop block.

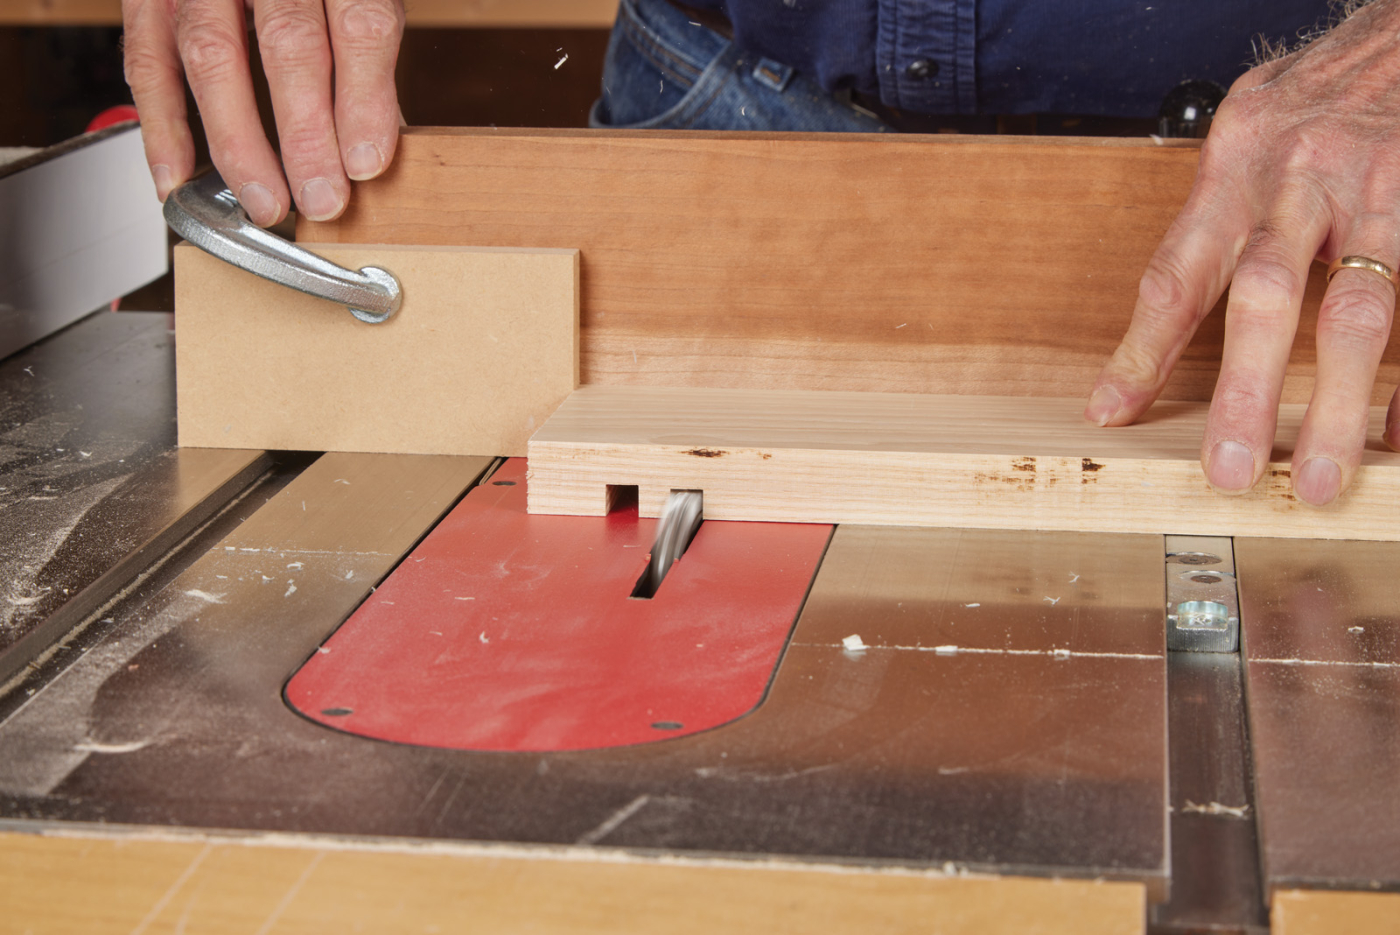
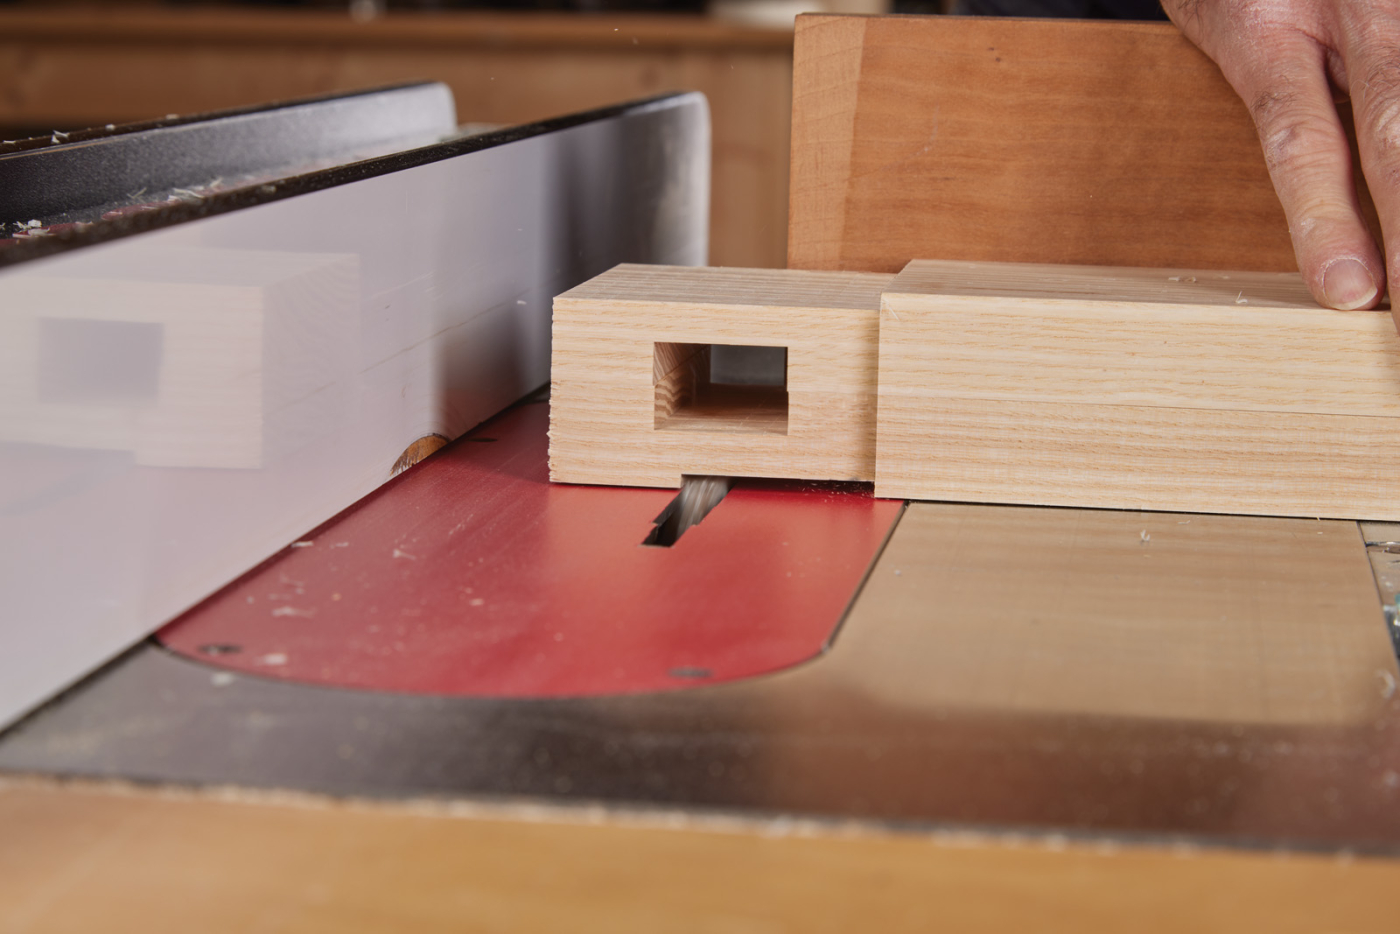
7 Carefully measure and move your stop block to define the over all length of the mortise, and nibble away the waste.
8 After forming the notch to make the mortise, you can glue the center leg section together.
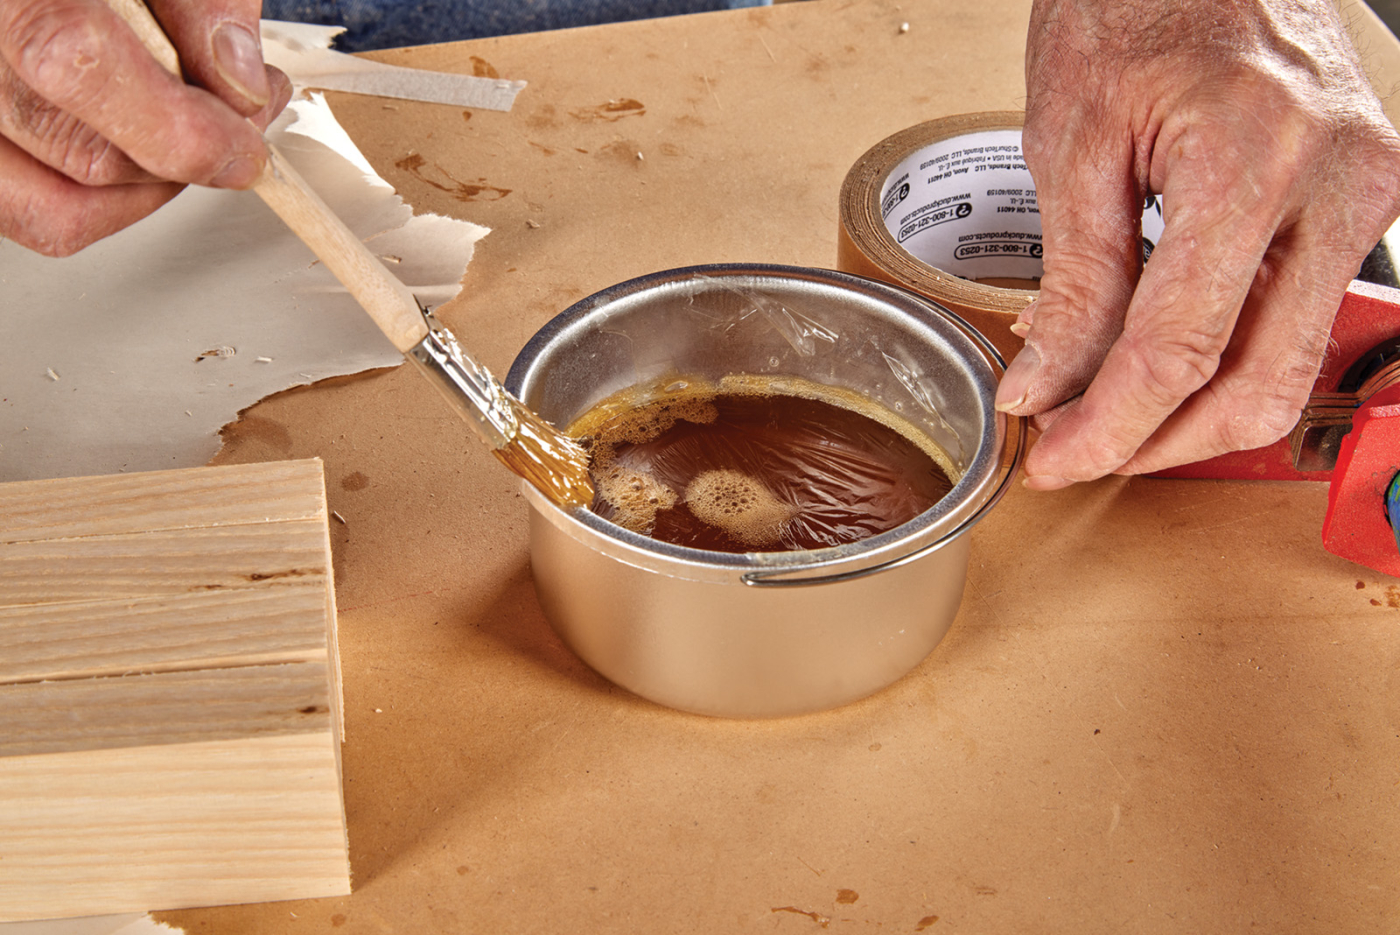
9 Hot hide glue will give a good open time and a subtle glue line.
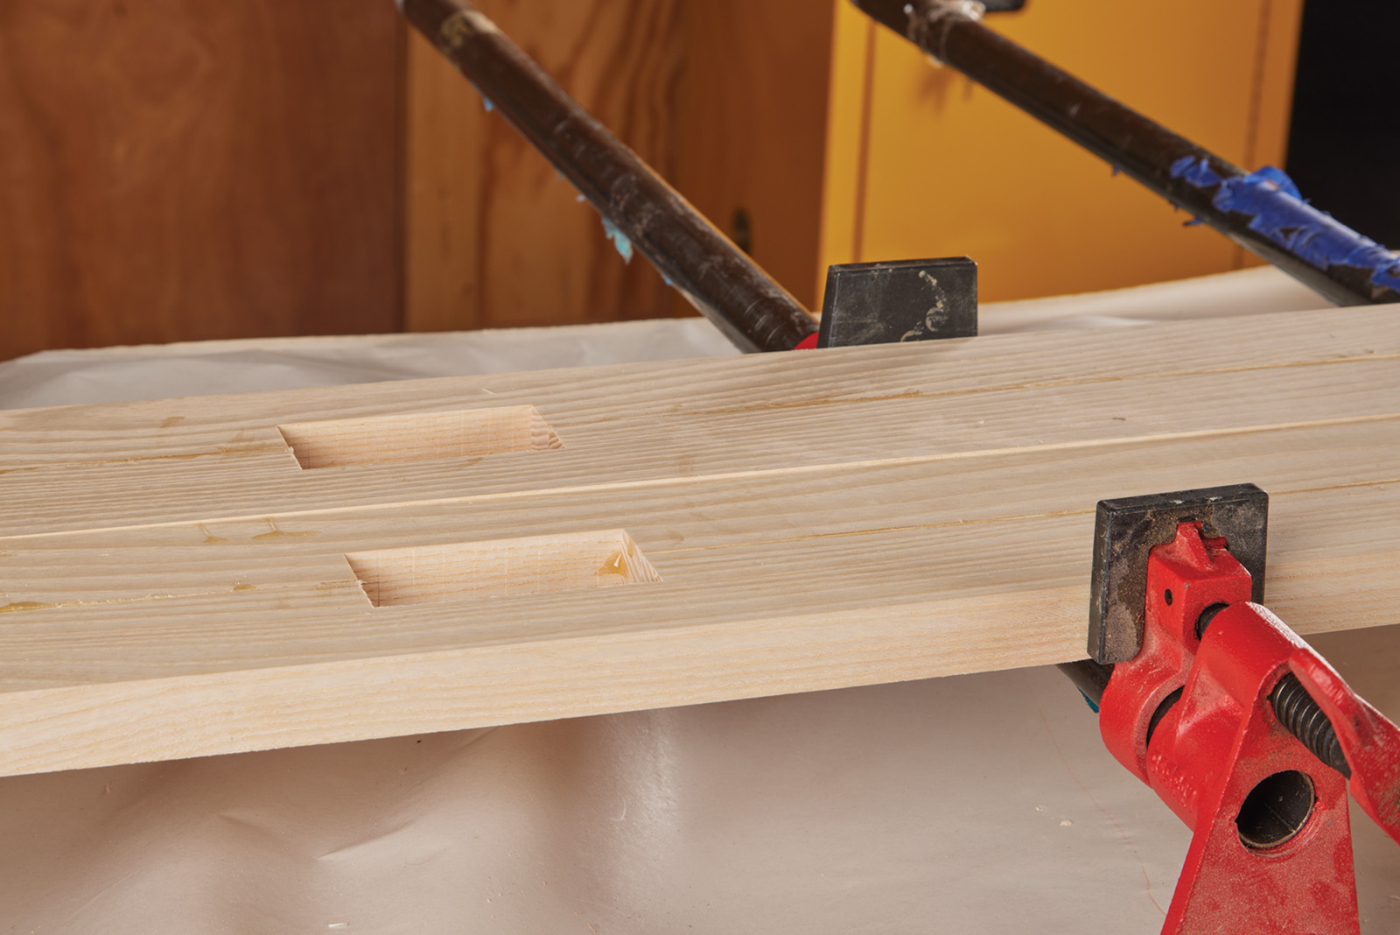
10 After clamping the center leg section together, make sure to double check the mortises to ensure that nothing slipped and they’re still aligned.
Next cut the angles on the coopered leg sections. I chose a 9° angle on each part so that the summary angle between the parts would be 18°. To prepare for cutting, apply masking tape along the edges of the stock, which will come in handy later in preventing glue being in all the wrong places. After making table saw cuts on each part, follow up on the jointer with the fence set at 9° to make certain the parts will come together with no space between them.
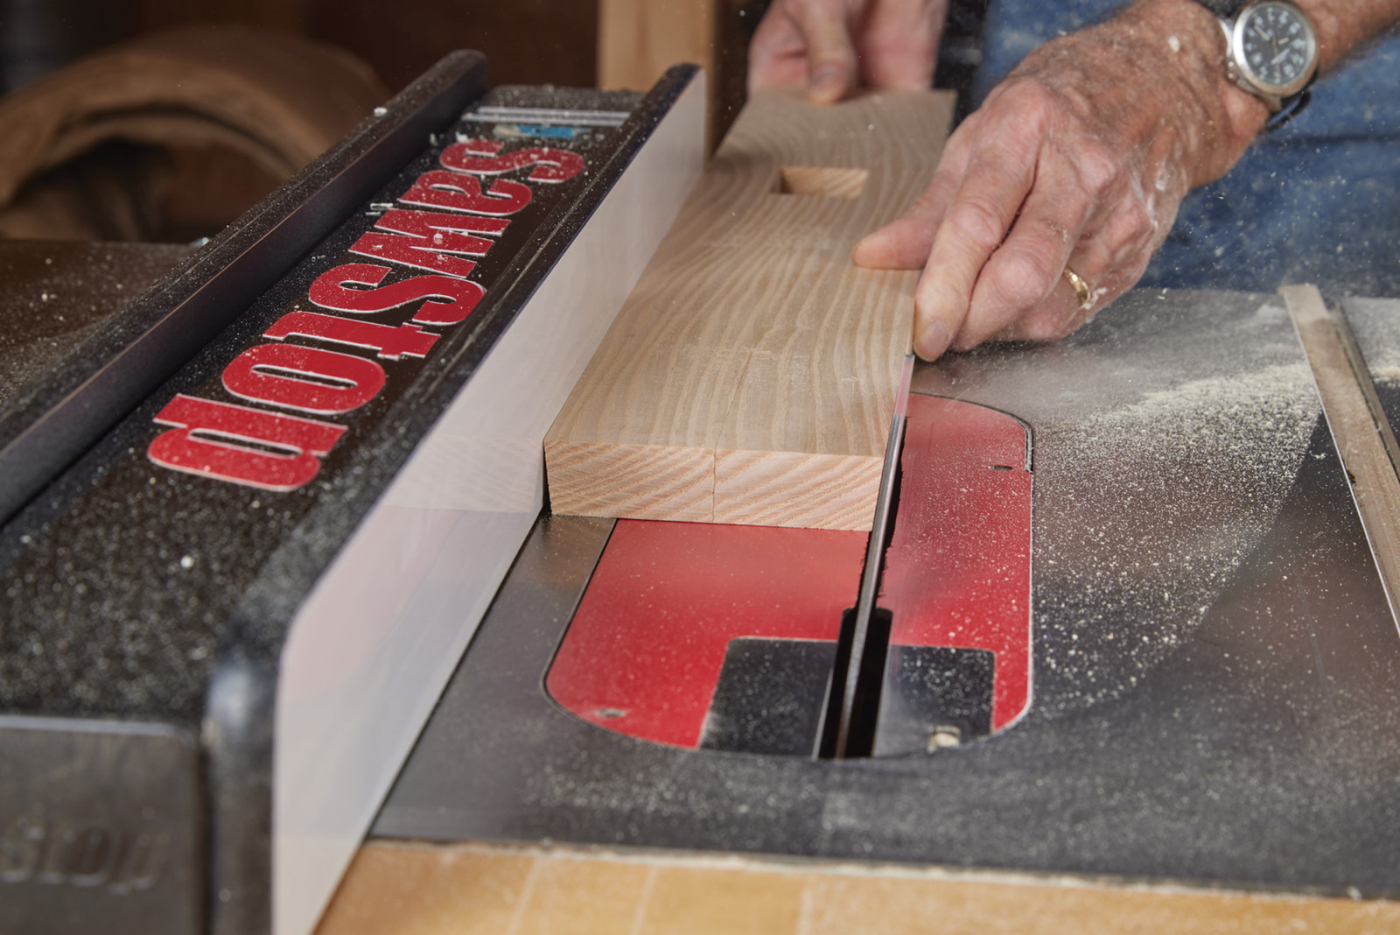
11 To create the coopered leg, bevel the edges of the leg parts at the table saw. The center piece is beveled on edges.

12 Joint the edges to clean them up and achieve a tight glue line.
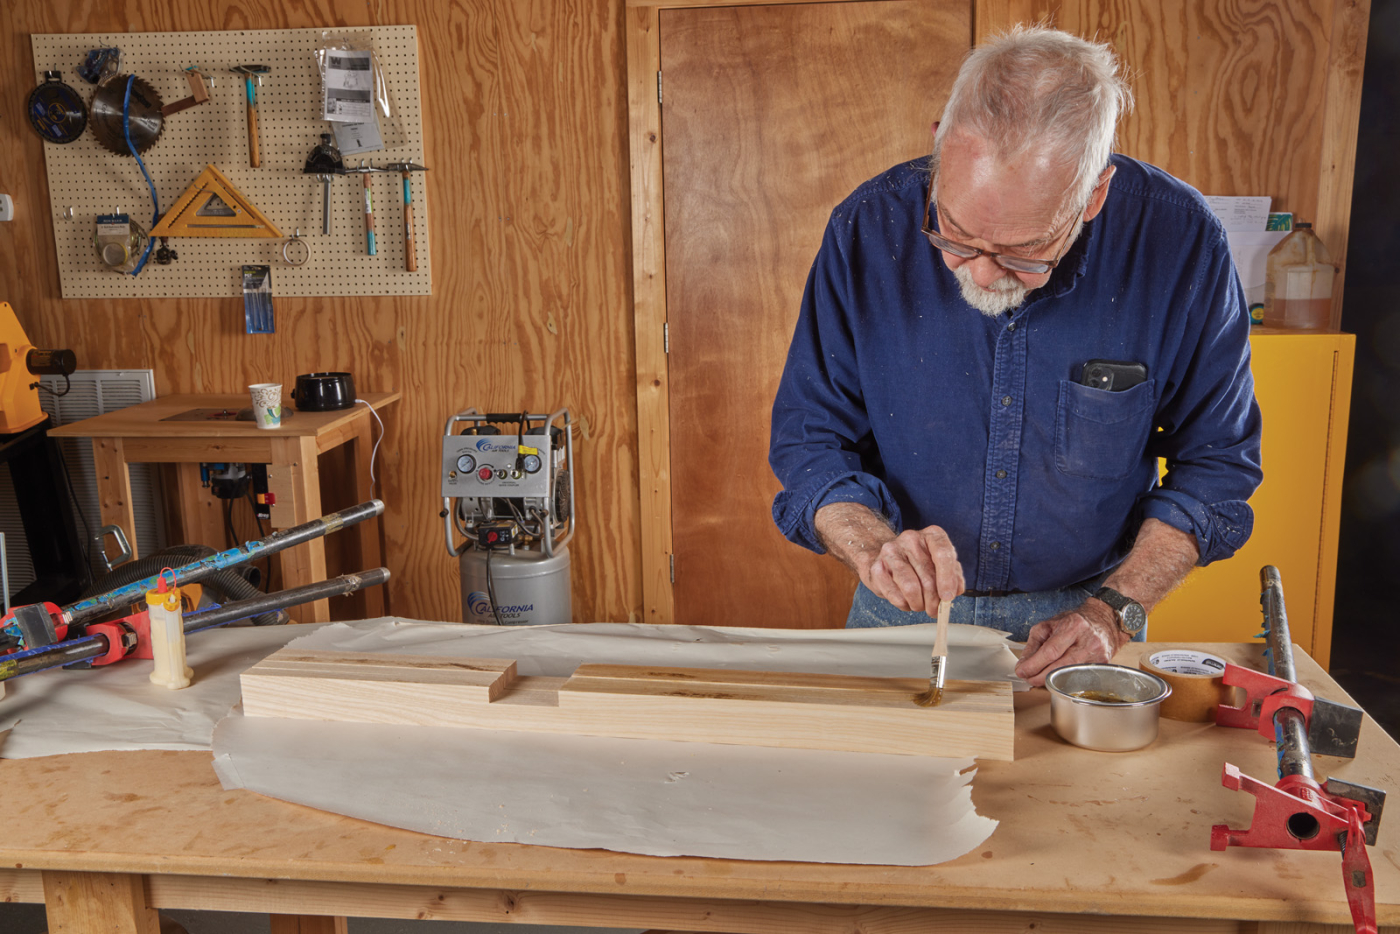
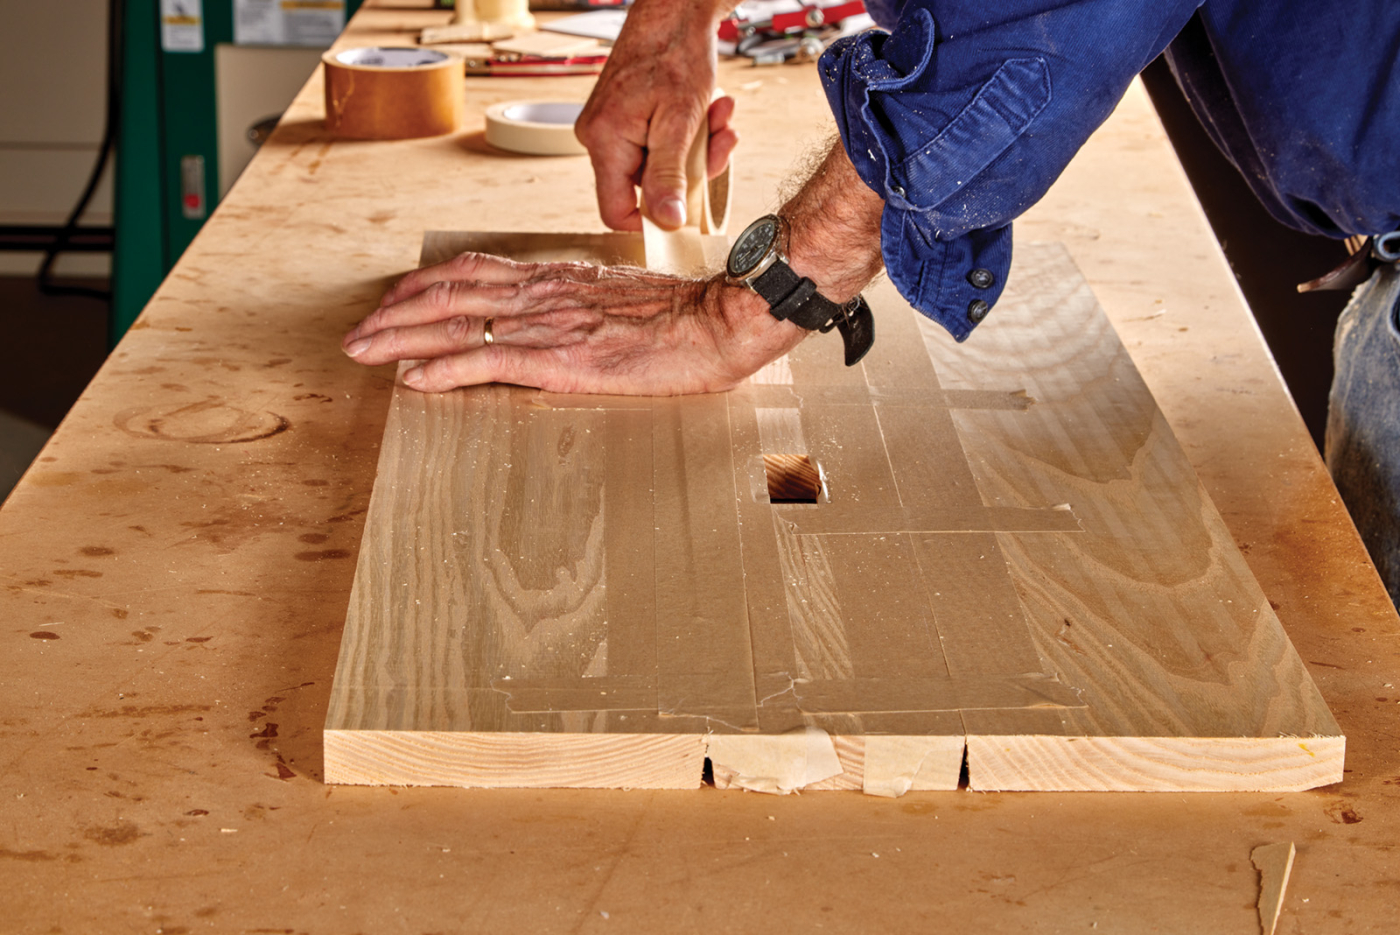
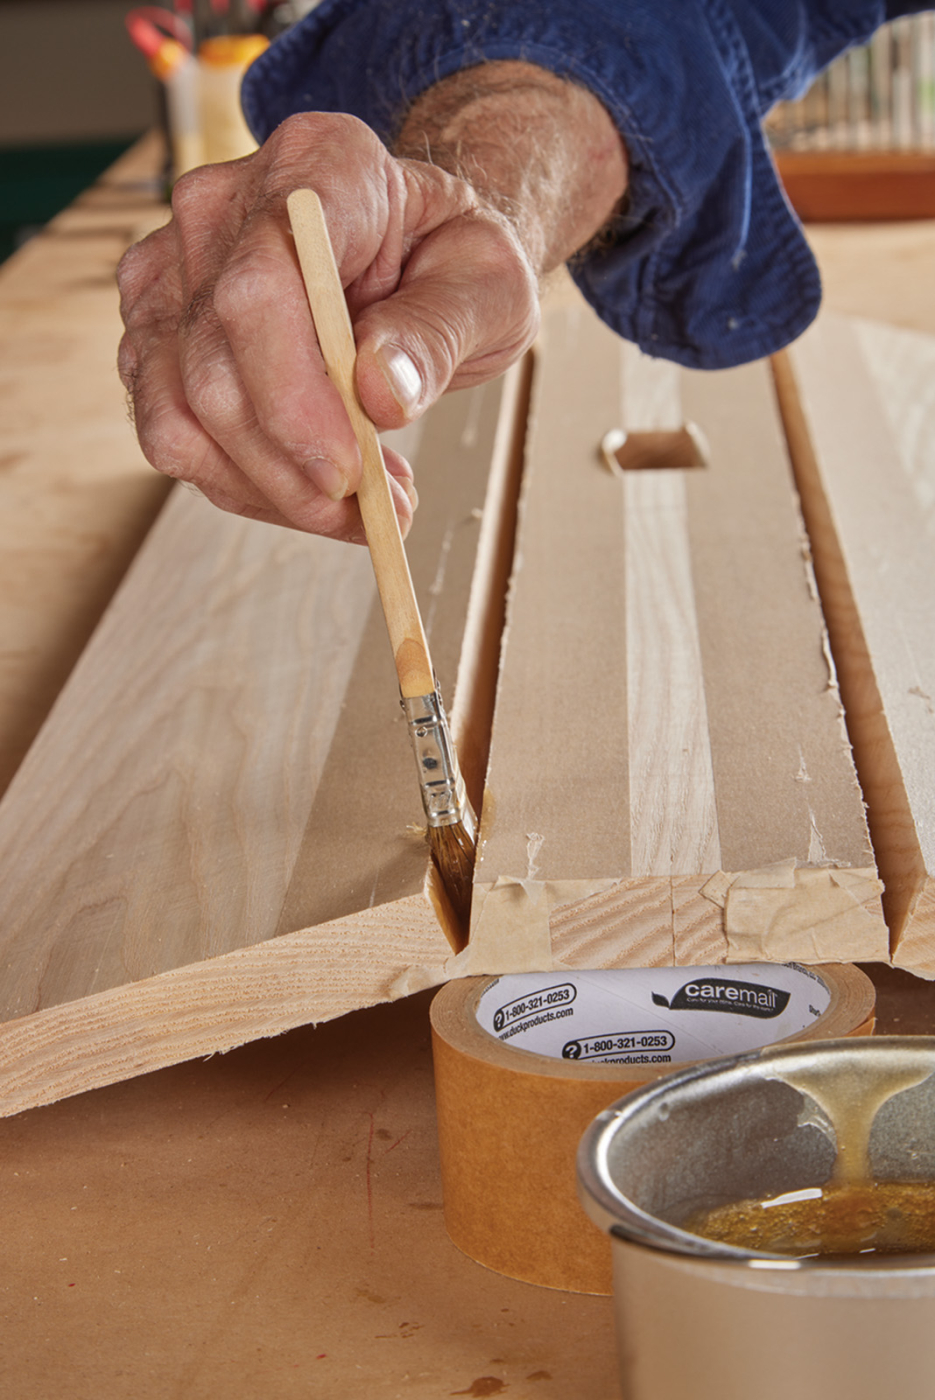
Tape the parts in relation to each other, holding them tight to each other on the convex side. Do not be stingy on the use of tape. A successful glue up is not a matter of how much pressure is applied, but is a matter of how well parts are held in relation to each other. With the concave side of the legs facing up, spread glue between the parts and then lift the edges to close the joints. Clamps can be used with great caution to apply very little force. Tape can also be used, but with care to not open the joints on the opposite side. Using hide glue can allow for second chances in case this operation doesn’t yield best results on the first attempt.
13
14
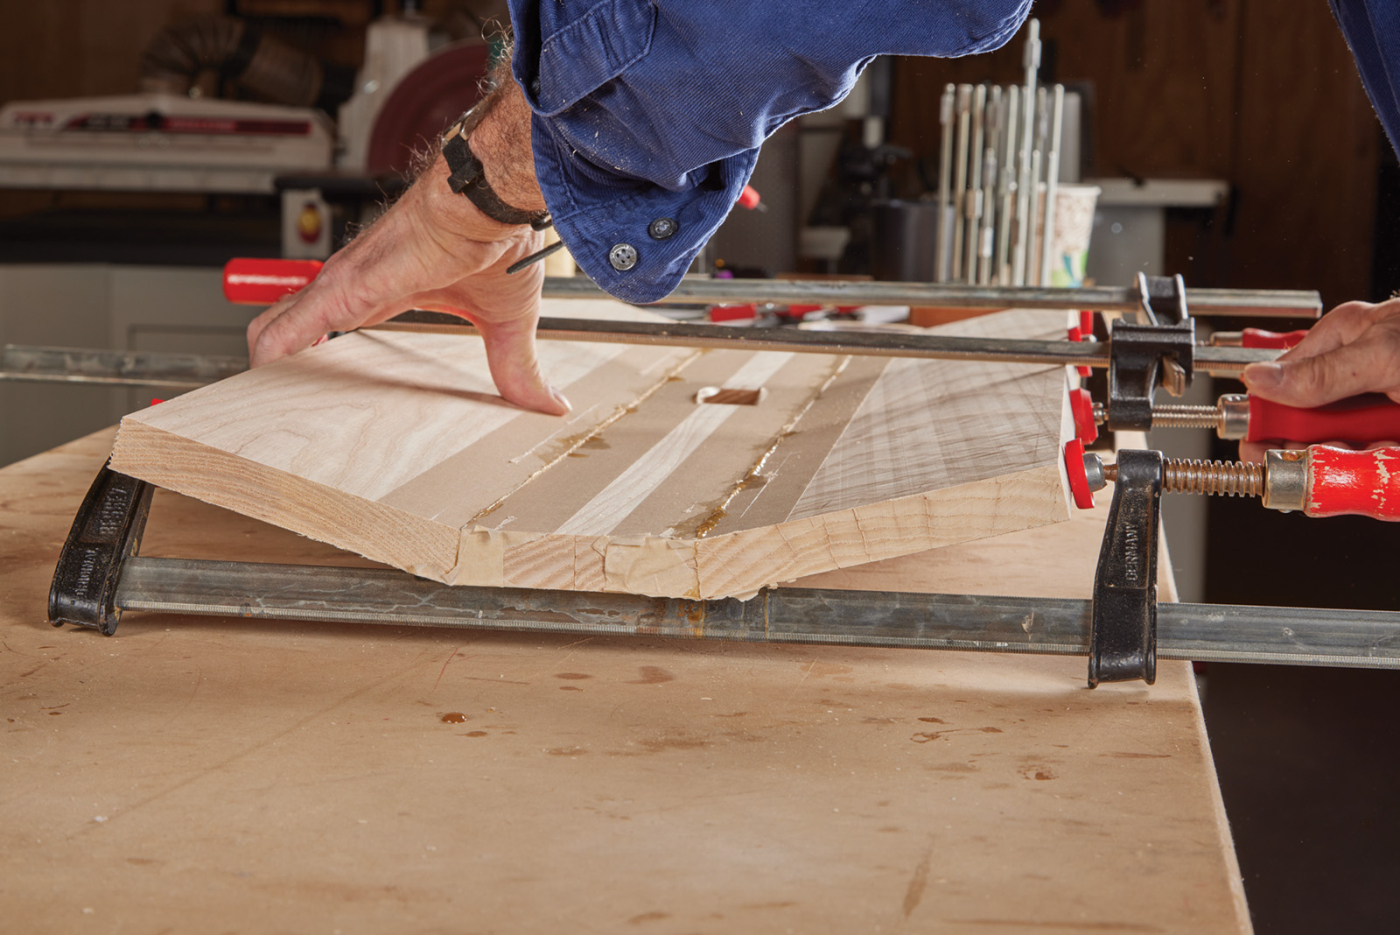
15 Use masking tape to contain squeeze out and hinge the joint.
Finish Trestle and Create Tusk Tenons
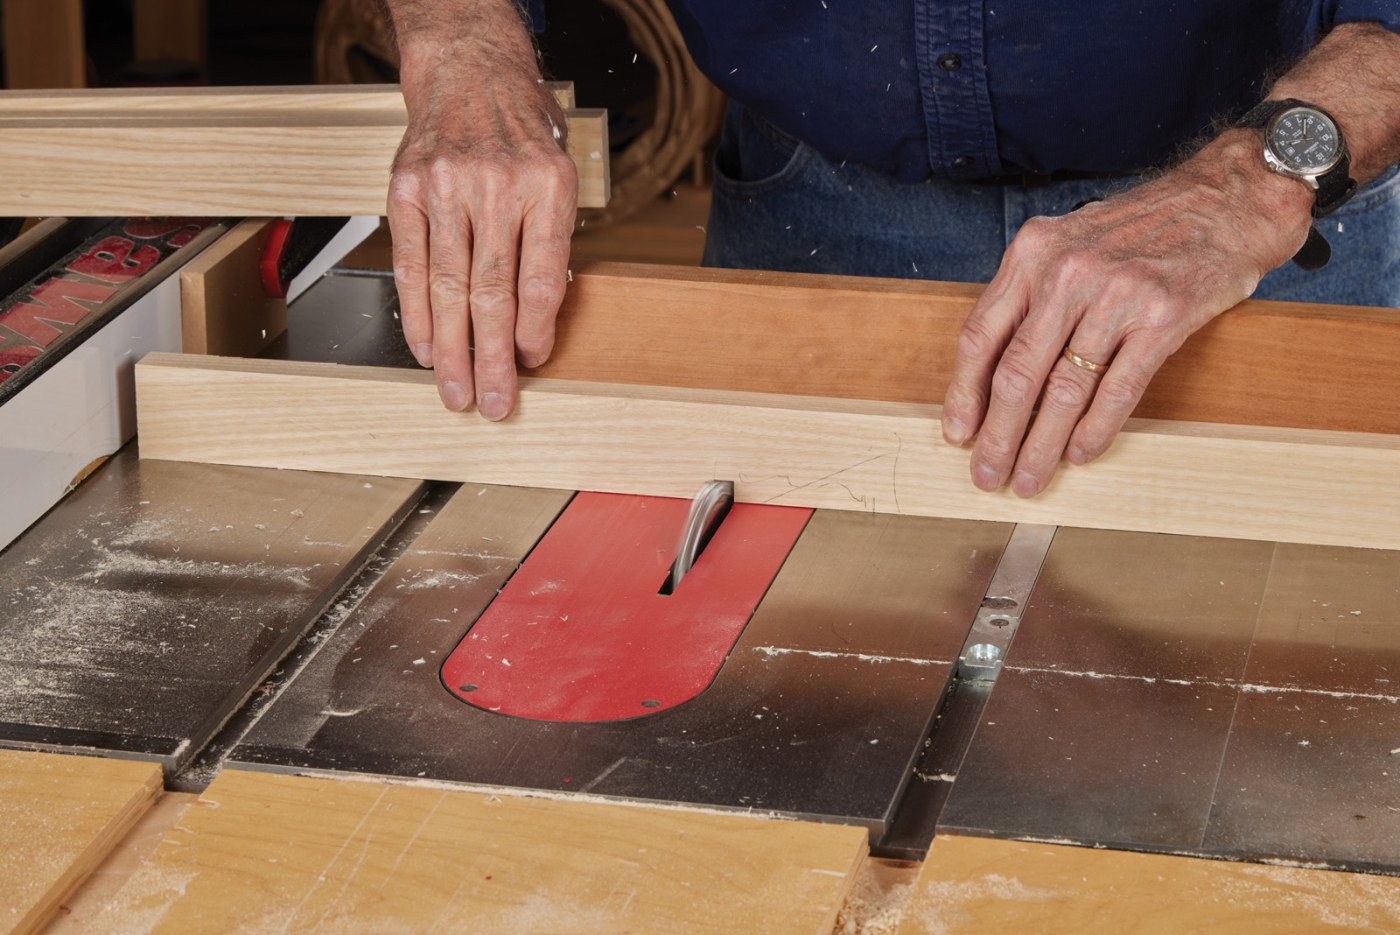
Once the glue has set, form the tenons at each end to fit the mortises formed earlier in the coopered leg unit. I, once again, use the dado blade on the table saw to form the tenons by moving the stock over for a series of cuts.
16 To form the trestle’s tenon, use a dado blade at the table saw.
17. Use the rip fence to position the length of the tenon and remove the waste, scotching the workpiece a little bit each pass.
Now, form the tusks to lock the trestle tenons into the leg units. I chose walnut for the tusks due to the walnut color tone of the pattern seen in the top.
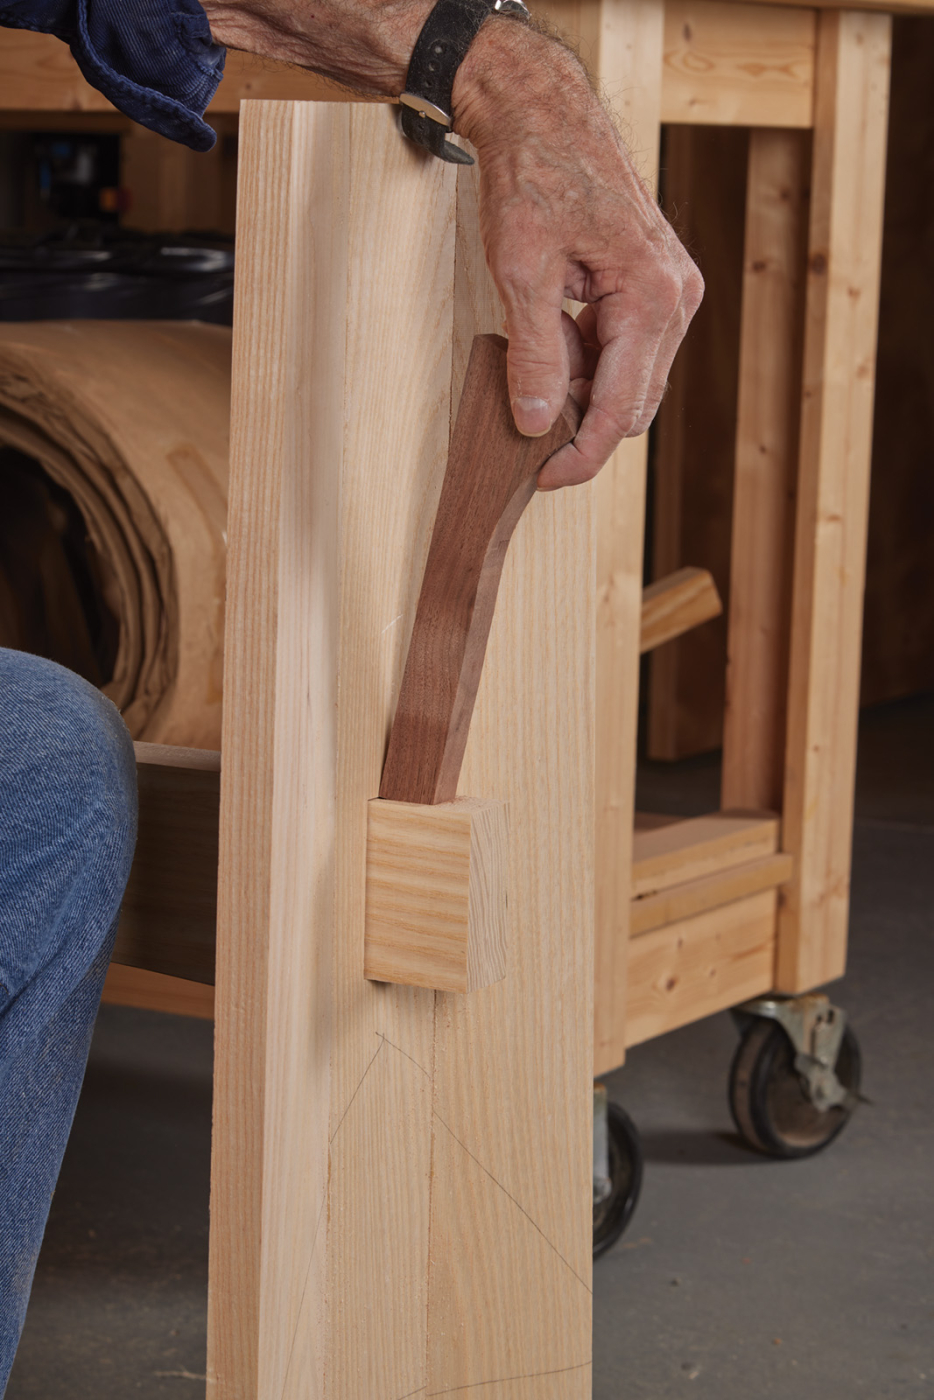
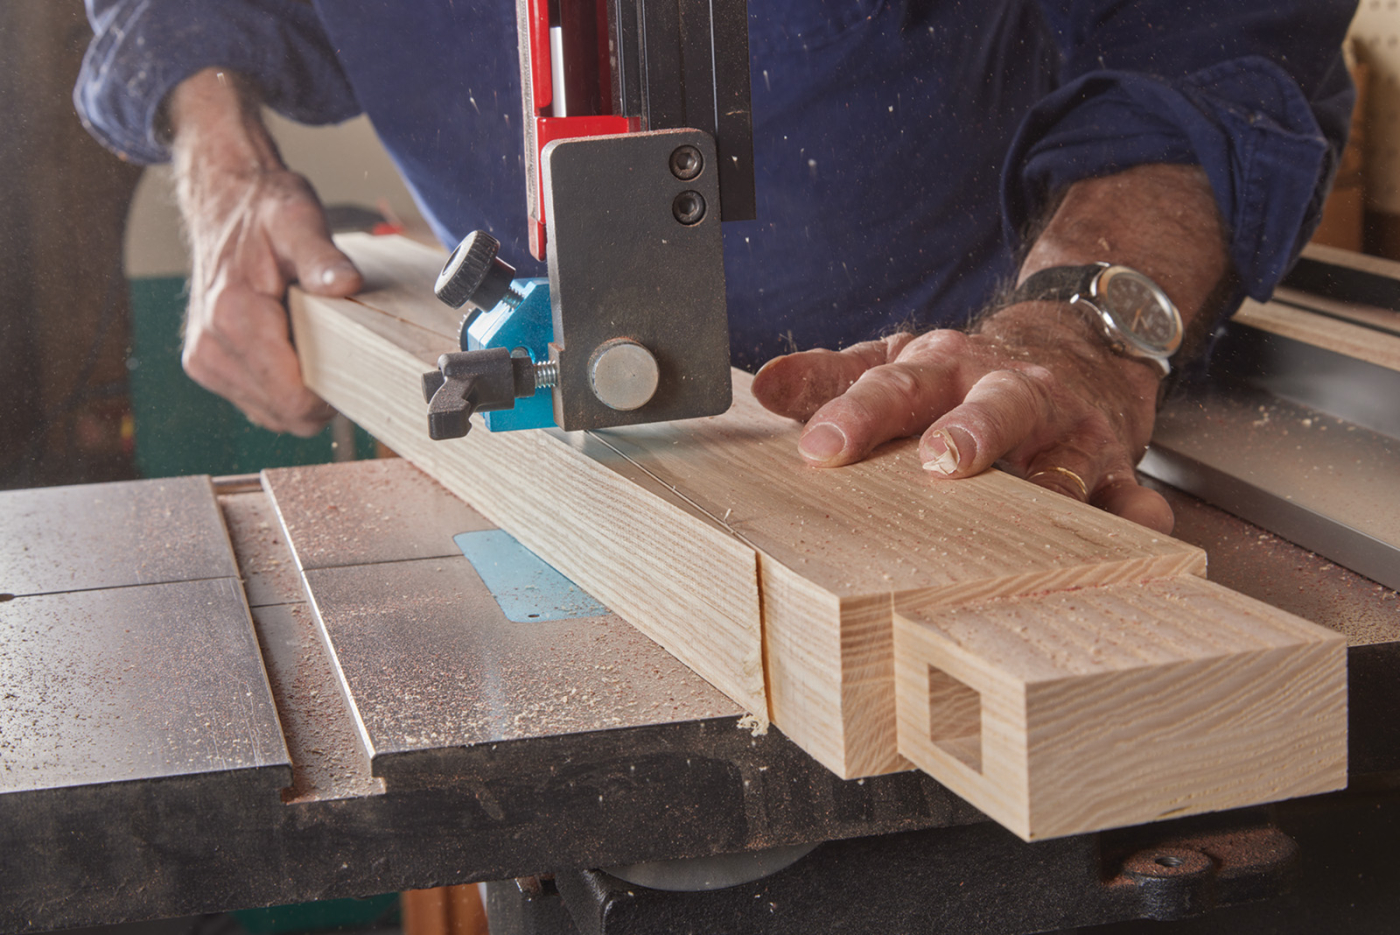
19 A tusk tenon is formed at the band saw and is driven home to fit.

20 You may need to adjust the fit with a spindle or drum sander.
Lastly, Shape the Parts
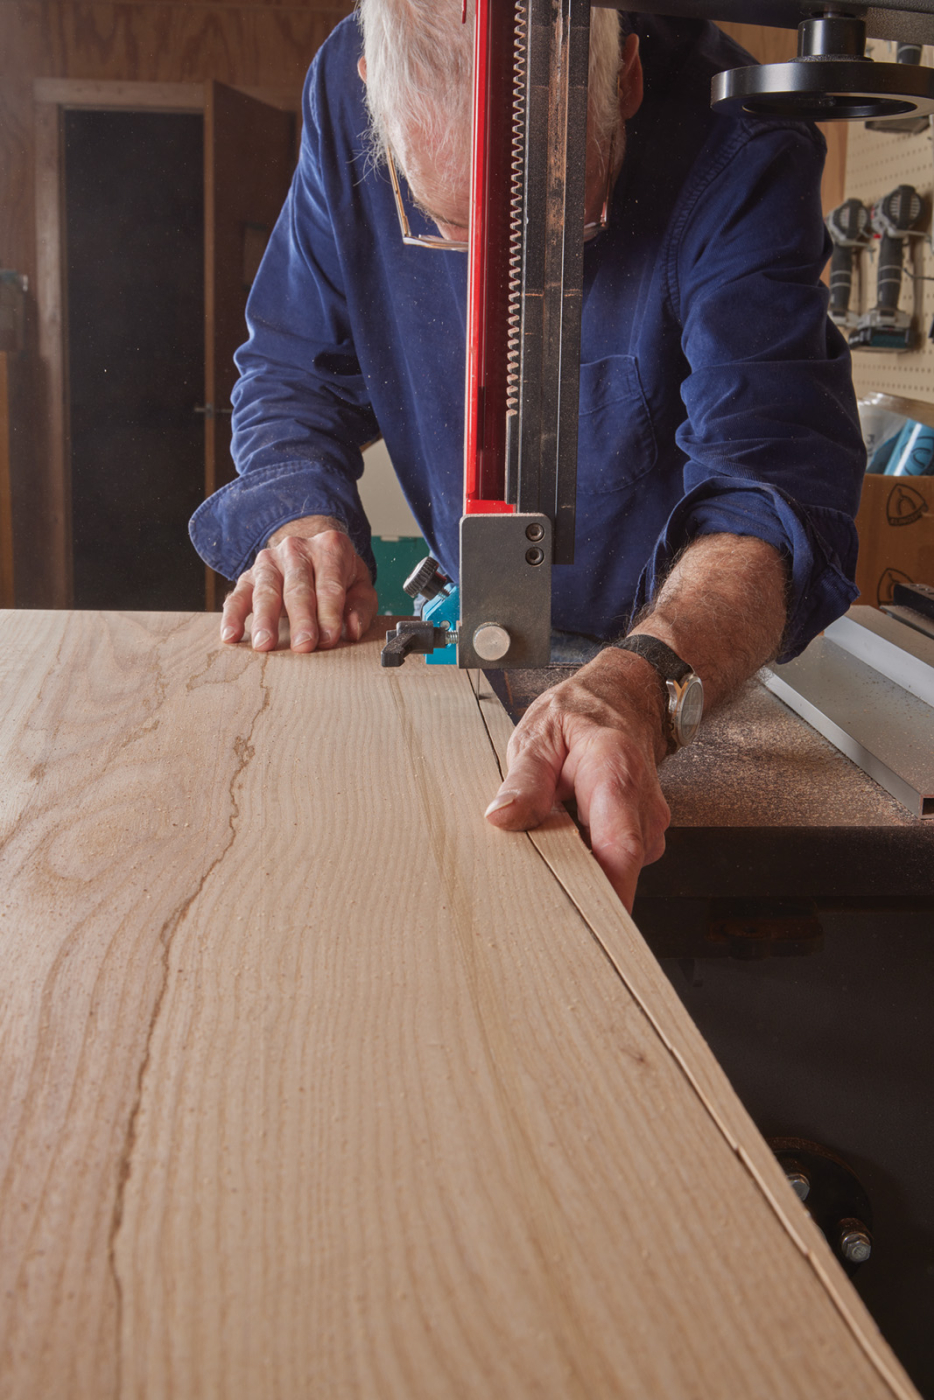
Once the glue on the trestle and coopered legs have cured, taper them using a band saw. The trestle is shaped on the underside while the legs are tapered on the sides.
21 Use a straight edge to draw guidelines on how you’ll shape the trestle.
22 Then, cut away the waste at the band saw.
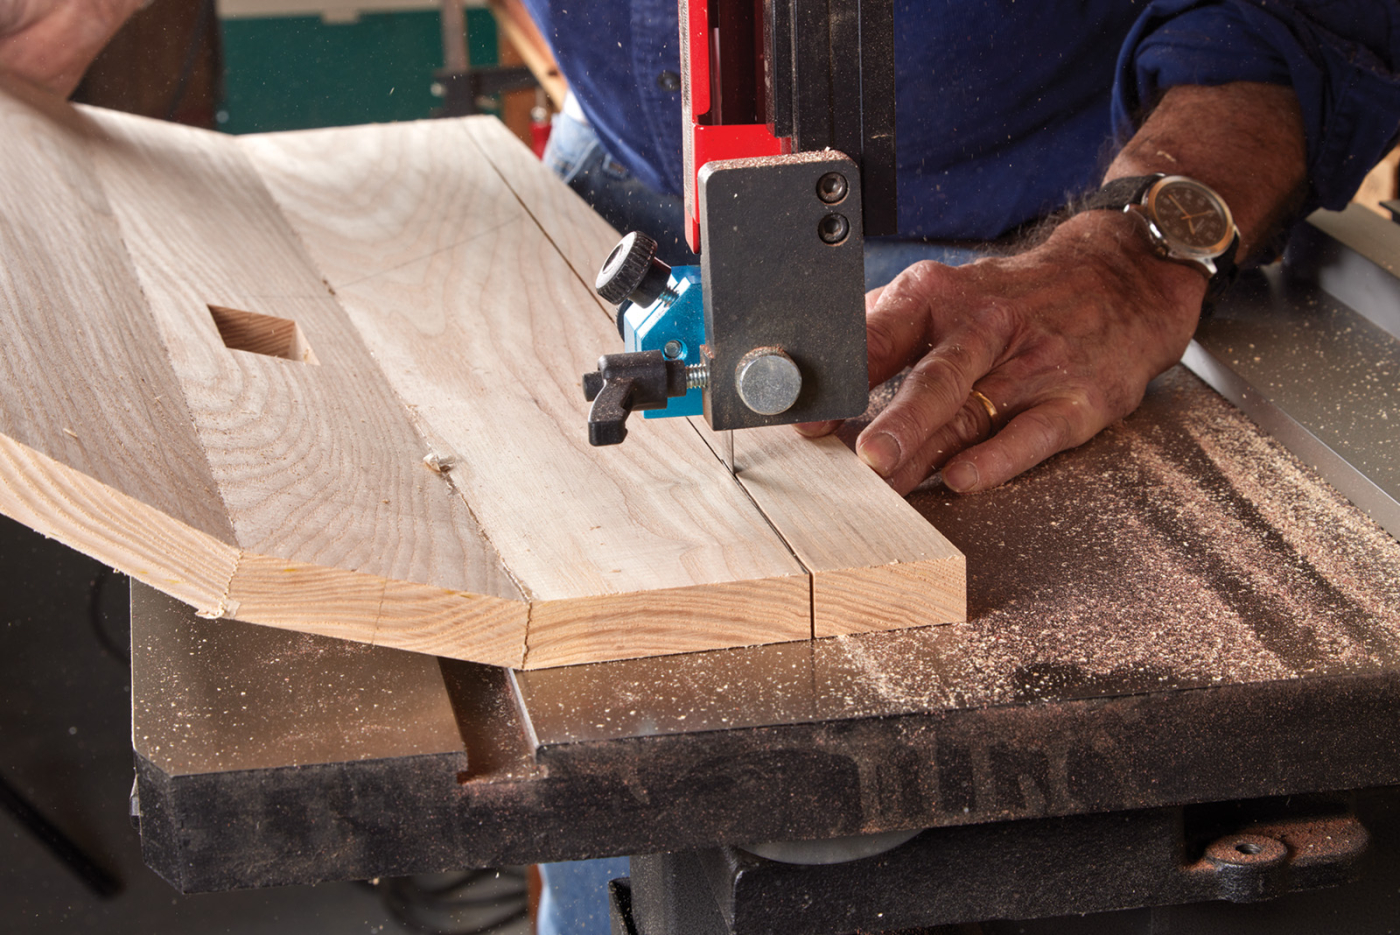
23 Taper the sides of the glued up legs. The band saw is easiest here, but you could probably get away with a taper jig at the table saw.
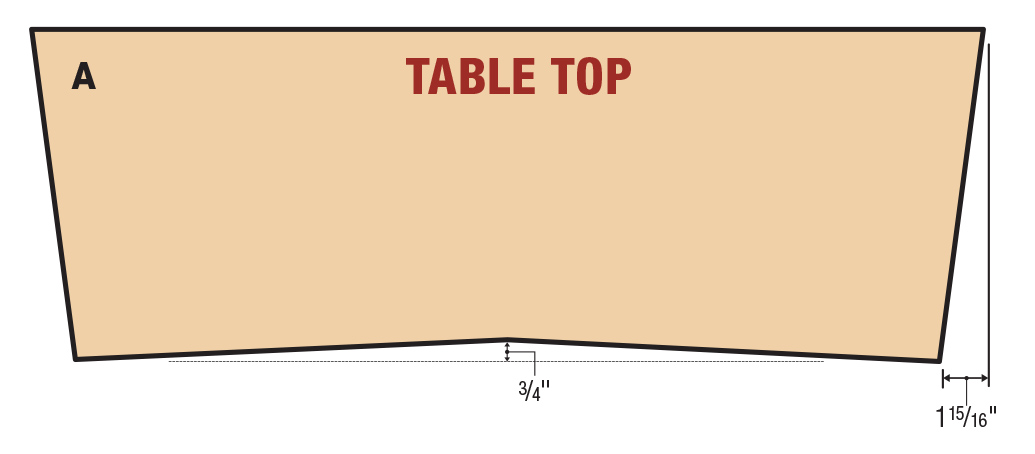
The last piece is shape is the tabletop, which is an exceptional wide piece of ash with a lovely brown heartwood pattern on the top side. While this could have been made with narrow boards, the use of wide materials can impart greater beauty and value. To continue to capture the angularity of the overall design, angles are cut on the ends of the tabletop and as well as a slight angle in the center of the top help to reflect the angular elements in the legs.
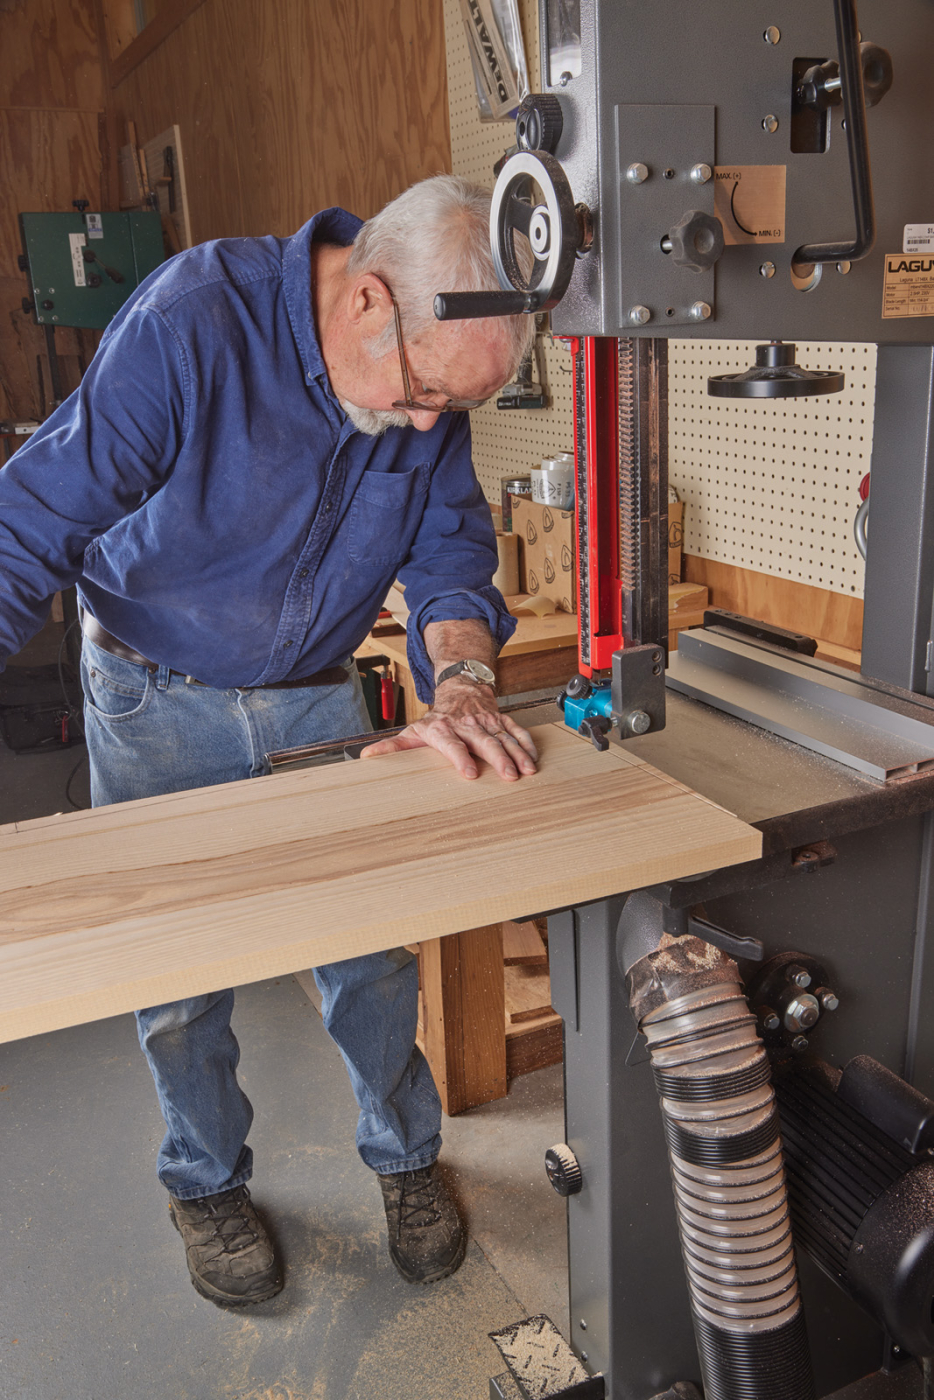
24 At this point, shape the top as you desire as well.
Here, I’ve rounded the ends slightly and added a shallow V-cut to the front edge of the table.
Assemble & Finish
To attach the tabletop, use dowels. An old Stanley doweling jig is perfect for these operations as it fits into the spaces between the coopered parts. The position of the dowels isn’t critical. What I’ve done here is to drill a pair of dowels in the center piece of the leg, and one on each side part. A block of wood stuck on the drill bit acts as a depth stop.

26 Mark location for dowels and drill them in the top of the leg.
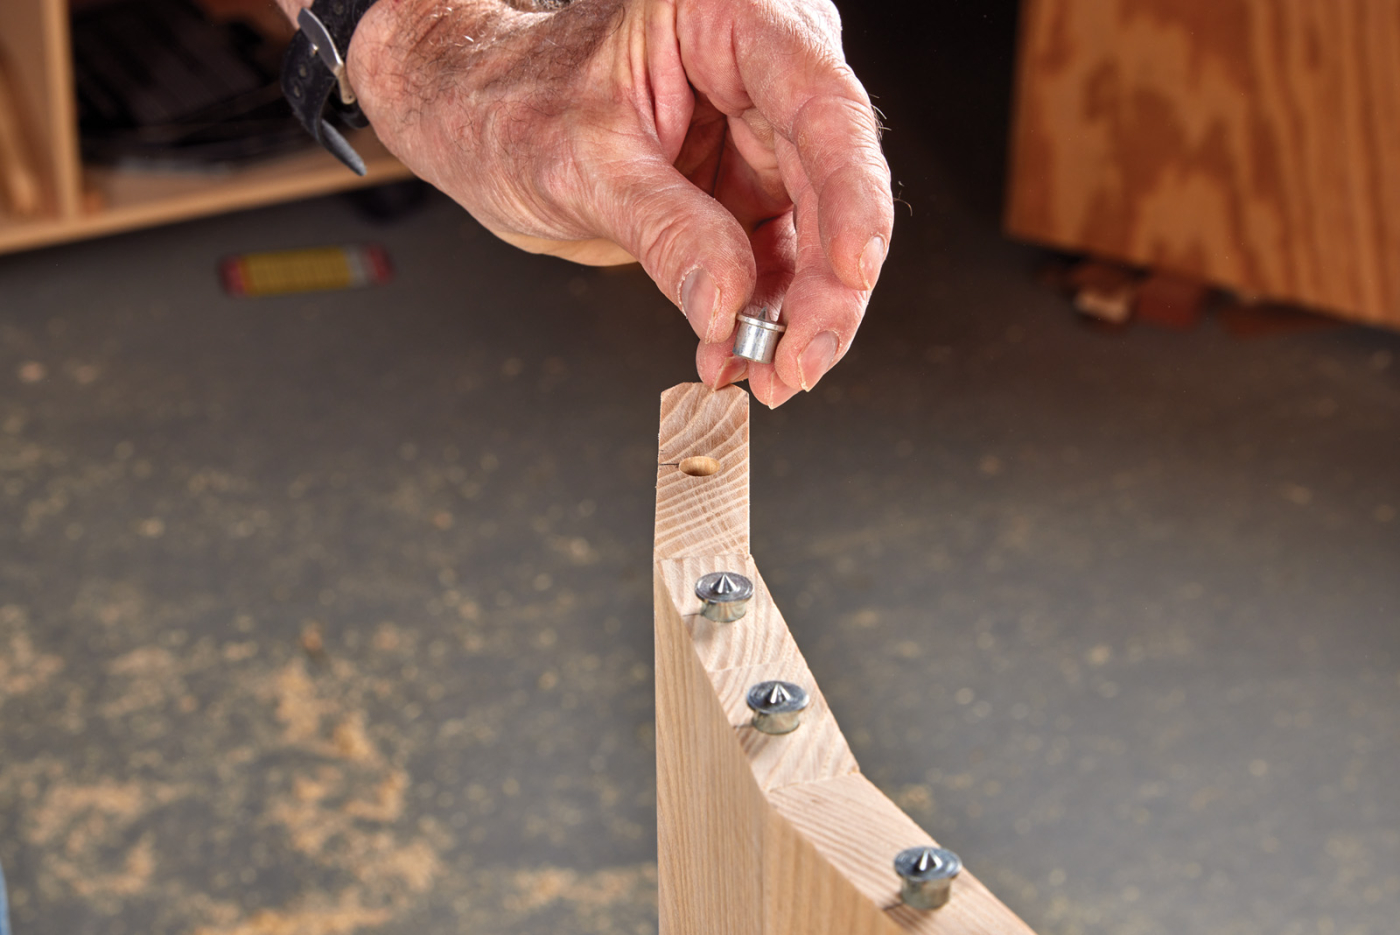
27 Position dowel centers in the holes—these will transfer the hole positions to the top.
With the dowel holes drilled into the leg units, use dowel center to mark the dowel hole locations on the underside of the top. The dowel centers fit tightly into the already-drilled holes and have a spike on the top side. When you position the leg unit on the top, you can smack the bottom of the leg, transferring divots to the underside of the top. It’s important to make one hard wack to avoid double-marking the top and then having to guess which holes are the right ones. Drill the dowel holes in the underside of the top but make certain not to drill too deep. Once again, I use a stop on the drill that prevents it.
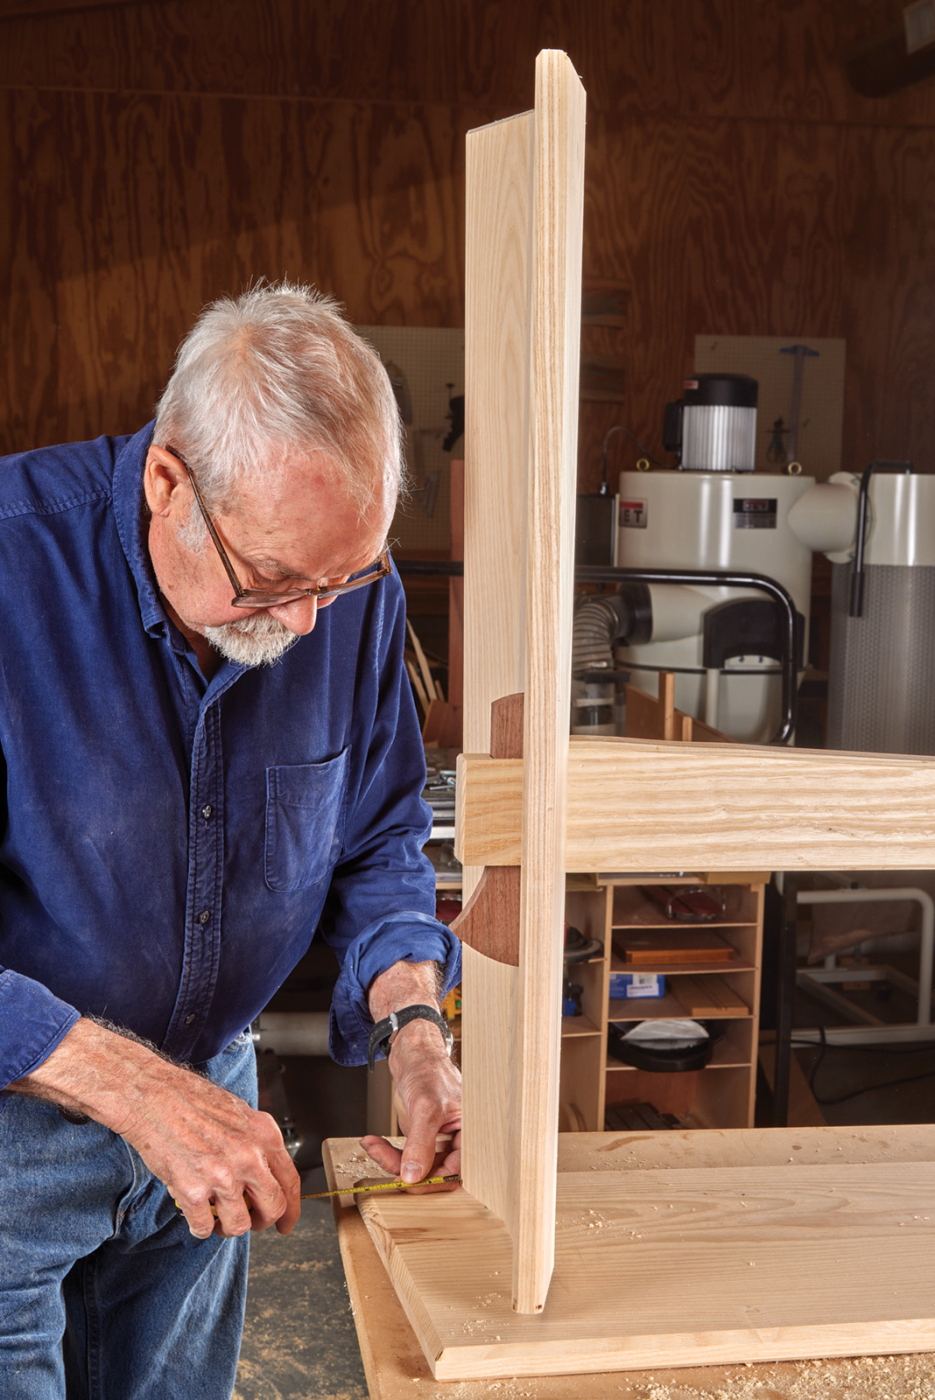
28 Carefully measure and position the assembled legs on the top.
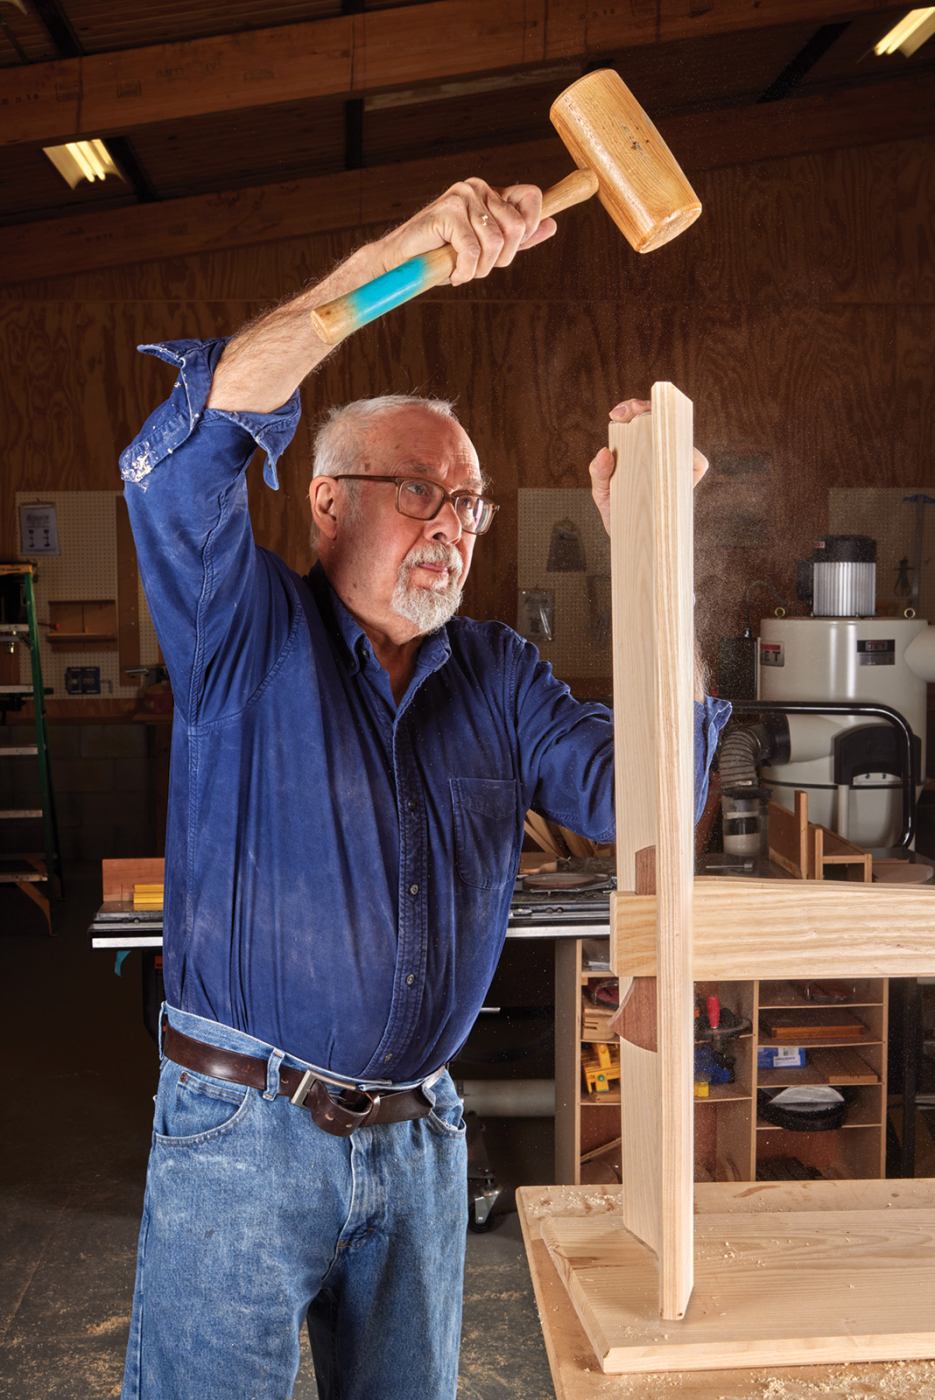
29 When you’re happy with the positioning, use a large wacker to smack the bottom the legs. This will transfer the dowel positions via the dowel centers so the top may be drilled.
Routing comes next. Rout all the edges of the leg units with a 45° chamfering bit, except those edges that met the top. The small footprint of a palm router works well for this, as you can fit it on the inside “curve” of the leg parts. Form a small chamfer along the edge of the top and then a large chamfer on the underside of the top.
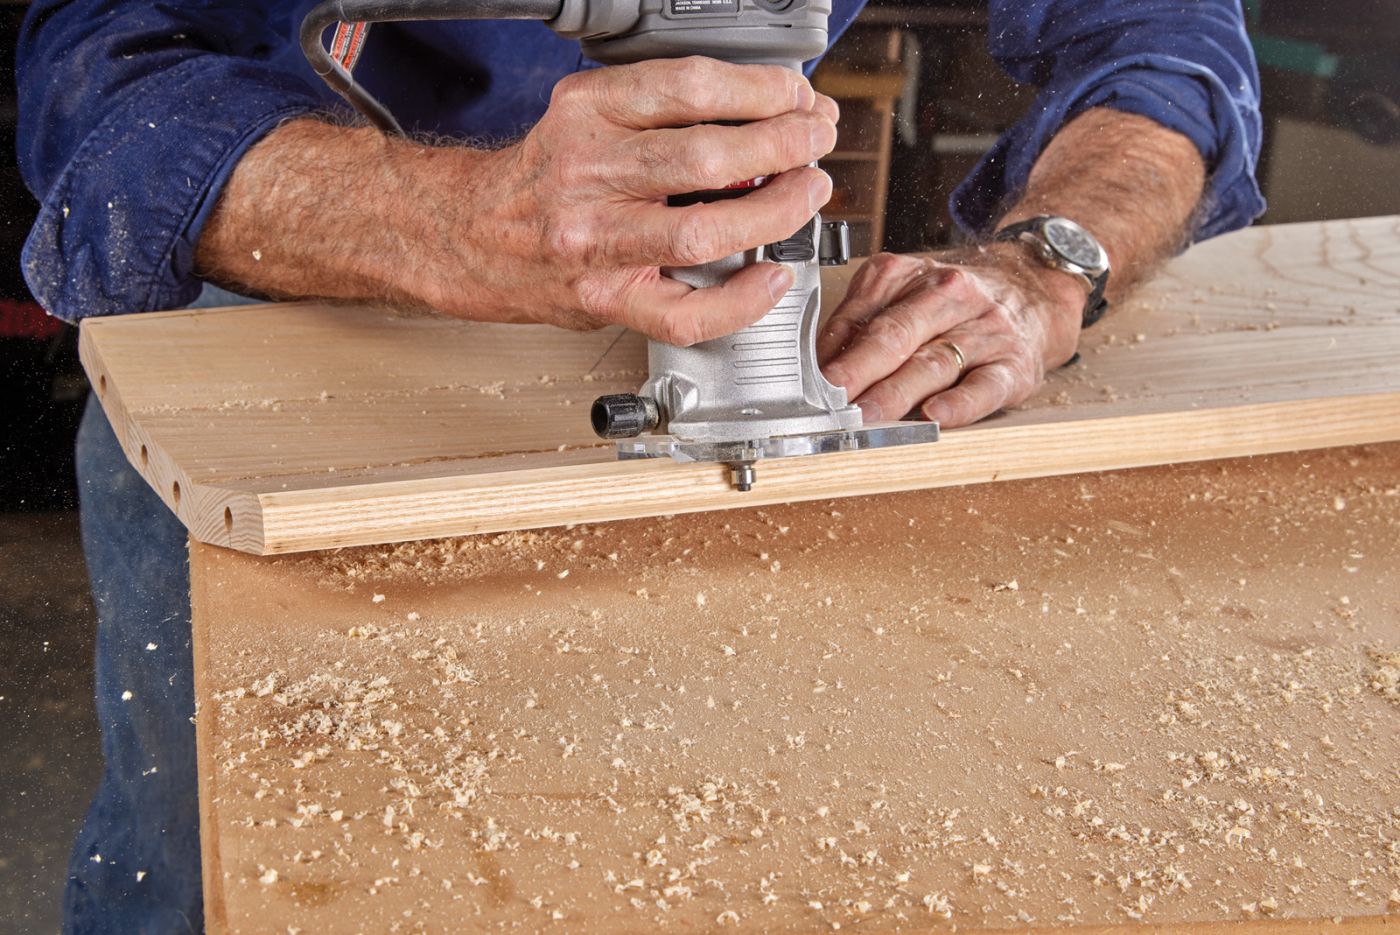
30 Finally, soften all of the edges of the legs and top with a 45° chamfer bit. A palm router allows you to get inside the curve of the leg parts.
With the routing complete, carefully sand all the parts. It makes sense to me to sand and apply finish to all the parts before assembly. I use a variation of Sam Maloof’s formula that I mix up in my own shop. After final assembly, I give additional protection to the top with a clear coat of satin urethane sprayed from a can. Once dry, place in the hallway for a beautiful asymmetrical touch for your home.
Here are some supplies and tools we find essential in our everyday work around the shop. We may receive a commission from sales referred by our links; however, we have carefully selected these products for their usefulness and quality.


