We may receive a commission when you use our affiliate links. However, this does not impact our recommendations.
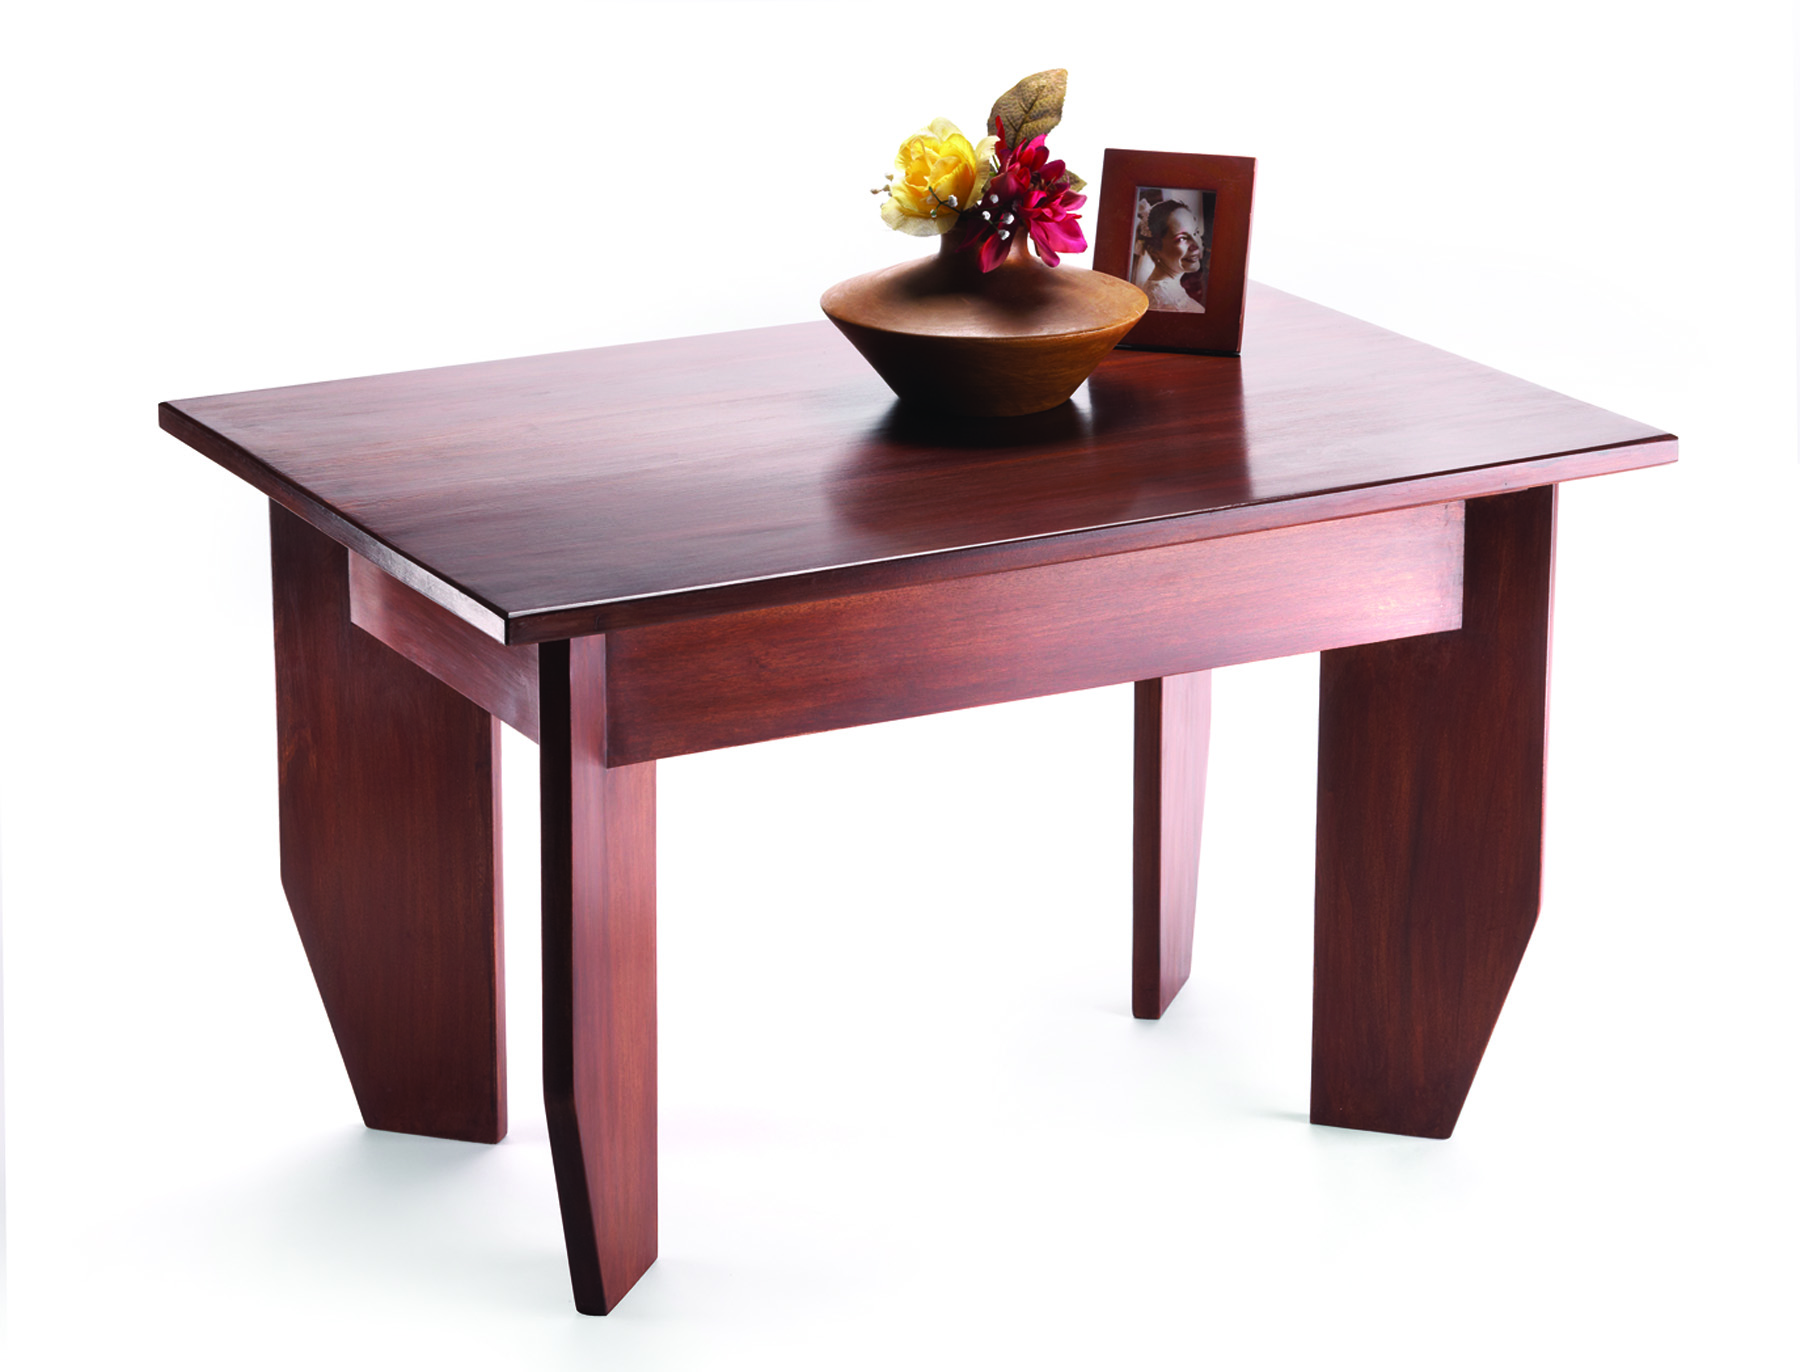
This small coffee table is a great introduction to building furniture. It doesn’t require much material and it’s an opportunity to develop your skills. This project is sturdy, attractive and easy to build. All of the parts come from standard widths of lumber. I used poplar from my local home center, and I made the table from one 6′-long piece of 1×8, one 8′ length of 1×6 and two 8′ lengths of 1×4.
Start by gluing the top from two pieces of 1×8 and one piece of 1×6. If you are cutting the parts from 6′- or 8′-long boards, leave them a couple of inches long, then trim them to the final length after the glue has dried.
The goal during glue-up is to keep the faces of the boards aligned. Use a couple straight strips of wood below for a level work surface and, if you need to, clamp straight pieces across the top and bottom to hold the edges in alignment while the glue dries.
Let the glue dry overnight, then trim the top to length. Clamp a straightedge across the top to guide your jigsaw or circular saw to make the cut. When the top is at its finished size, set the blade of your combination square at 2″ and draw lines in from each corner on the underside of the top.
Start From the Bottom
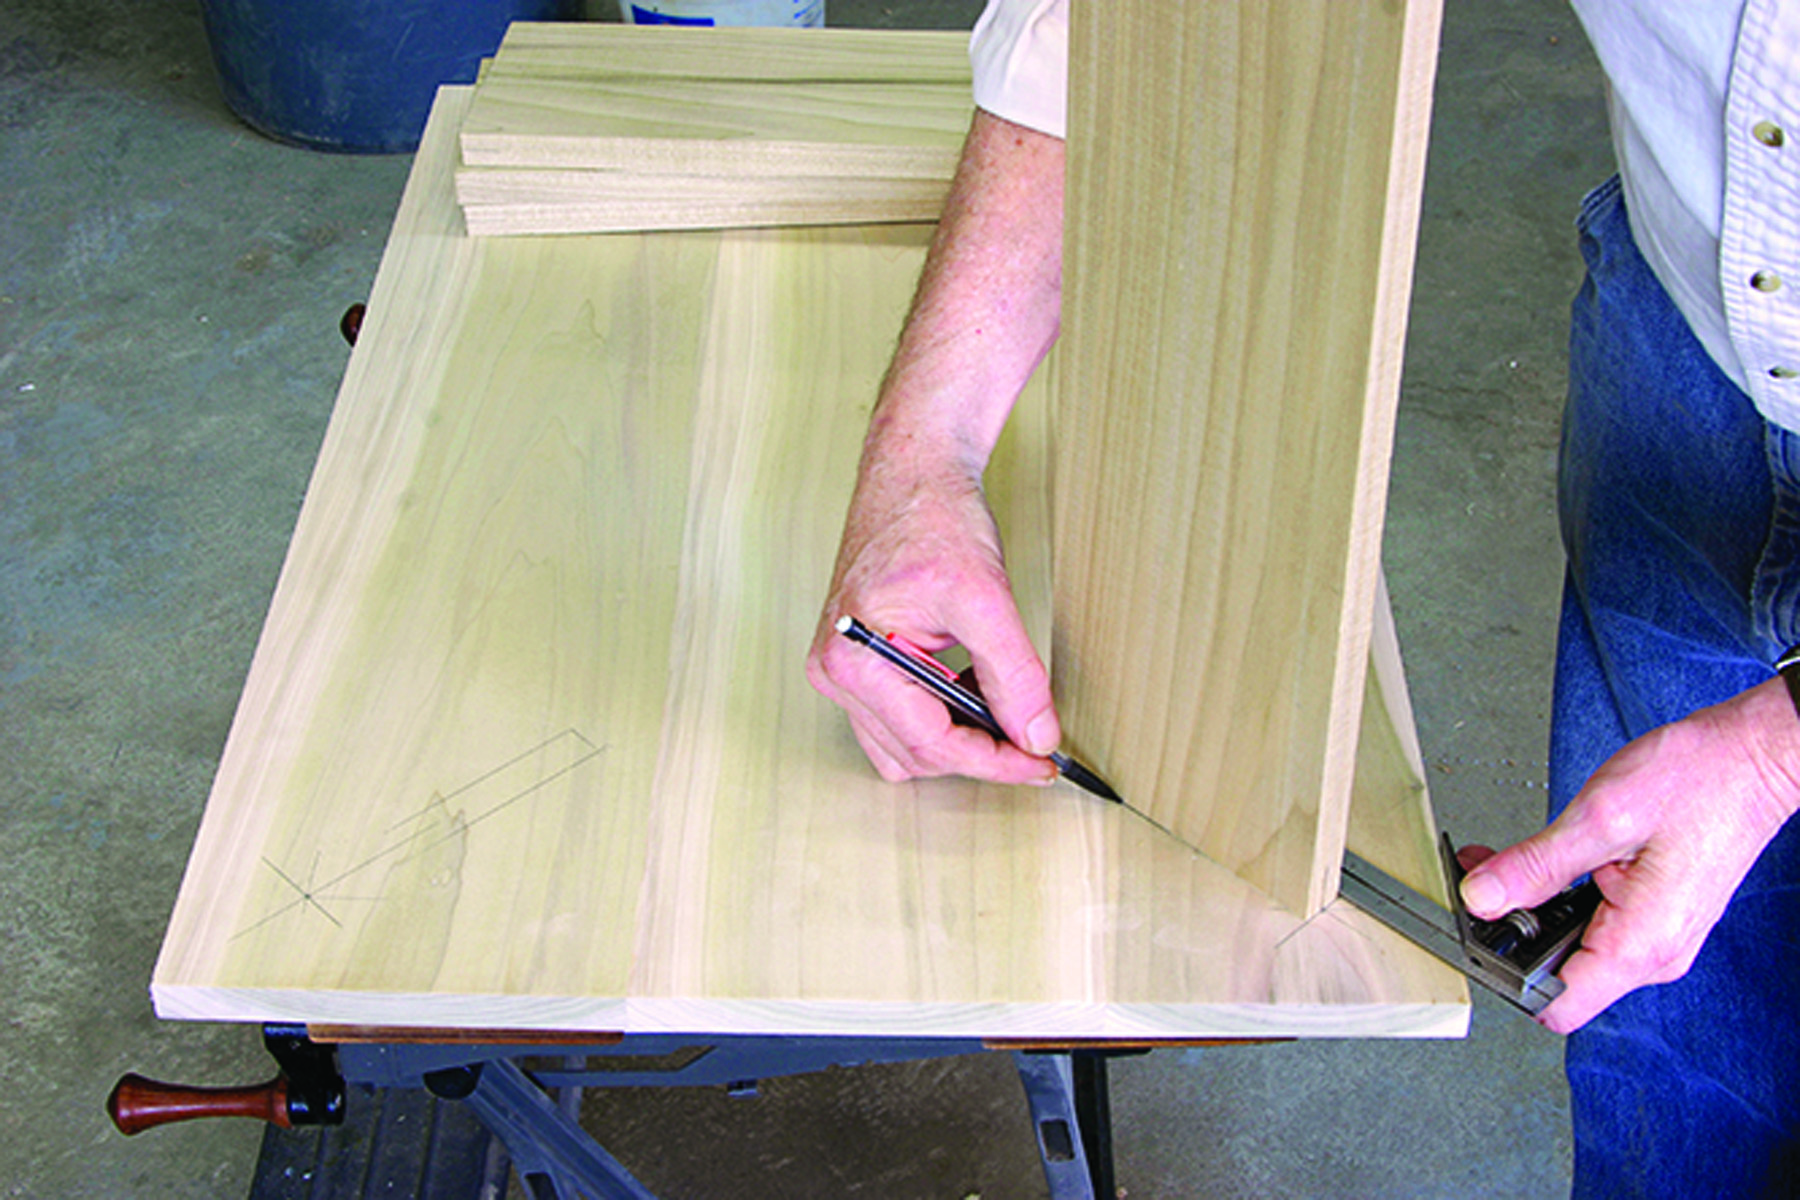
On your mark. Lay out all the pieces on the underside of the top. You won’t have to measure, and all the pieces will be the exact size you need.
Use the angled side of the combination square to draw a line at a 45˚ angle from the corner of the top to the intersection of your layout lines. Cut the legs to length. Then mark the center of one edge of each leg.
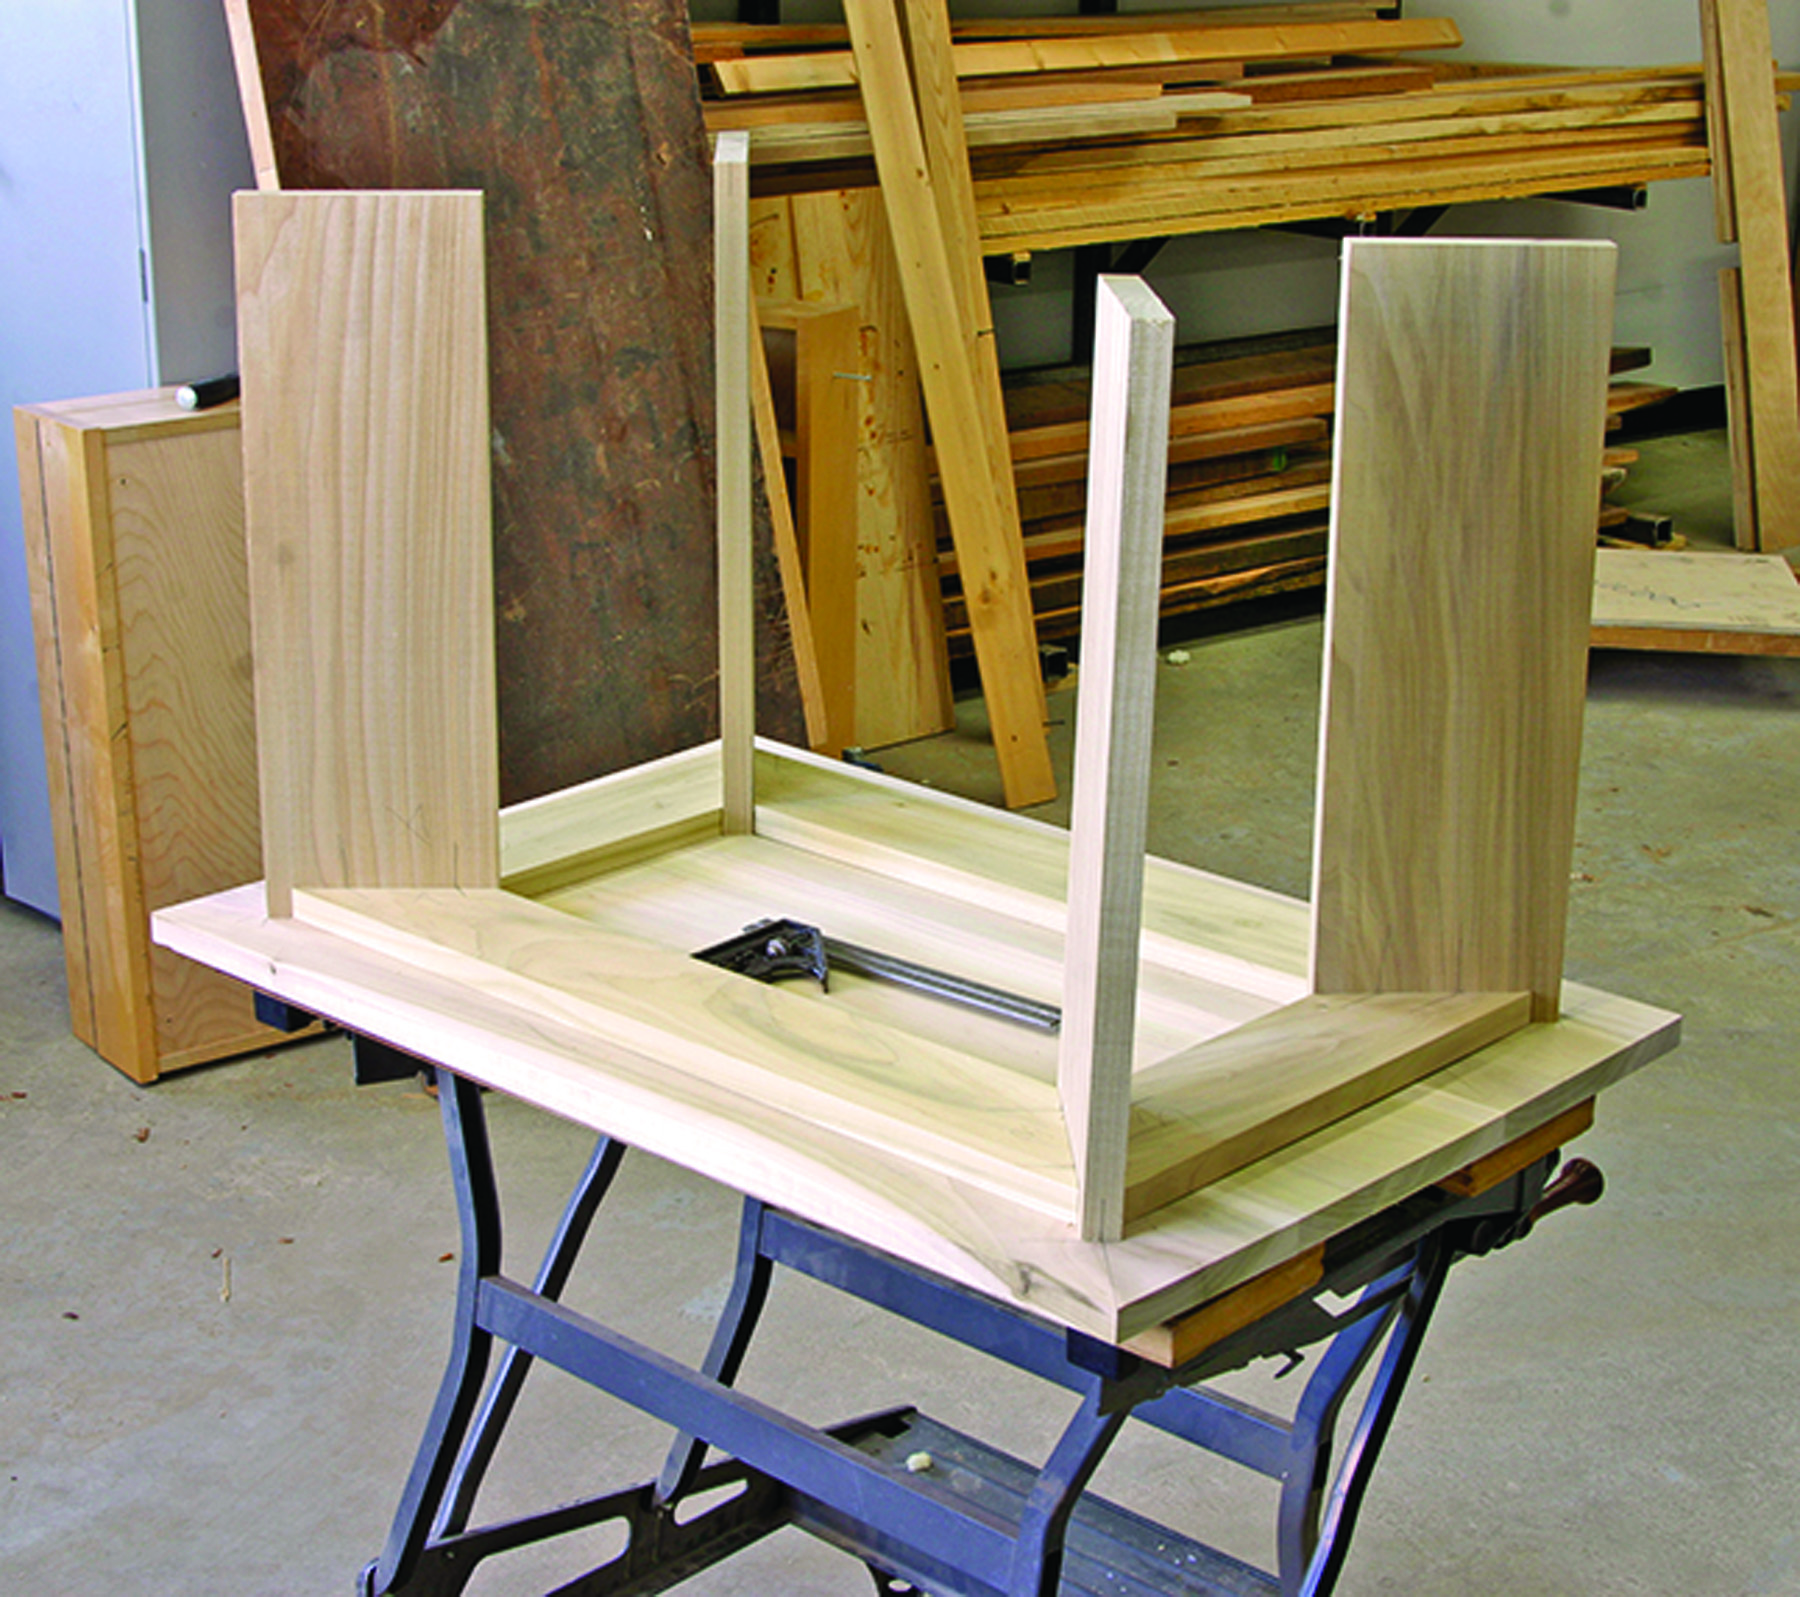
Stand the legs in the corners and line up the center marks with the angled lines on the top. Use your combination square to set each leg at a 45˚ angle to the edge, then trace around the ends of the legs.
When the leg locations are marked, use the lines to determine the exact lengths of the rails. Cut the rails a few inches longer than the dimensions in the cutlist, with a 45˚ angle on one end of each piece. Place the angled end against the line, with the back of the rail even with the back of the leg.
Draw a line up the edge of the rail from the layout marks drawn at the other end, then draw an angled line across the face. Cut the second end of each rail to the line.
After cutting the rails to length, draw a line 1″ in from the outer edges of the rails. This is the location for the outer face of the aprons, and you can put them in position to mark the lengths exactly without measuring. Cut the aprons to size at the miter saw with a 45˚ cut on each end, then mark and cut the angle at the bottom of each leg.
Check, Layout, Drill
Place the rails and the legs in position on the tabletop. The rails and legs join with two types of screw connections: countersunk screws through the legs into the long rails, and pocket screws through the short rails into the legs.
Mark the rough positions of the screws with the countersunk screws near the edges, and the pocket holes toward the center of the rails. Be sure to locate the screws so they won’t run into each other during assembly.
Drill through each leg into the ends of the long rails. A bit with an integral countersink makes this a one-step process. Use a pocket-hole jig to drill through the ends of the short rails. Sand all the parts before assembly.
Connect the legs to the long rails first. Apply some glue to the end grain of the rails and wait a few minutes (a.k.a. “sizing”). Apply a fresh bead of glue and screw the legs to the rails with #8 x 13/4″ screws.
When all four legs are attached to the long rails, connect the two subassemblies with the short rails. For stronger joints, size the end grain with glue. To keep the boards from shifting, clamp the subassembly down to your worksurface before driving the pocket screws.
Size the mitered ends of the aprons with glue before assembly and run a narrow bead of glue on the long edge of each apron to hold it to the rail. Drill pilot holes in the apron ends then fasten them to the legs with 4d finish nails. Set the nails below the surface and fill the holes.
Top It Off & Finish
Double-check. After cutting, put the parts in place and mark the locations for the screws.
The top is screwed to the base through the rails. The pan head screws used for the pocket holes work well. The solid-wood top will expand and contract as seasons change, so take that into account when drilling the screw holes.
At the center of the short rail, drill a clearance hole slightly larger than the diameter of the screw’s shank.
In the long rails, the holes should be larger to allow the top to move. Drill a 1/4″ hole and use a washer under the screw head, or drill two smaller holes and tilt the drill back and forth to connect the holes and make a slot.
Place the assembled base on the upside-down top and drill pilot holes for the screws. Use a bit the size of the unthreaded part of the screws, and be careful not to drill through the top.
When the top and base are assembled, give the entire table a finish sanding with #180- or #220-grit sandpaper. Round or bevel the sharp edges at the corners of the boards with coarser sandpaper, then go over it again with the finer grit.
I used a water-based stain, and after letting the stain dry overnight, I brushed on two coats of a water-based polyurethane finish. This is a durable coating, but it can show brush marks after the finish dries. I rubbed the dry surface with a non-woven abrasive pad to remove the brush marks and leave the surface with a satin sheen.
Download the PDF of this article for the drawing and cutlist: Contemporary Coffee Table
Video: Learn a quick and easy method for finding the center of an edge with a combination square.
Plan: Download a free SketchUp model for the “Contemporary Coffee Table.”
Here are some supplies and tools we find essential in our everyday work around the shop. We may receive a commission from sales referred by our links; however, we have carefully selected these products for their usefulness and quality.