


We may receive a commission when you use our affiliate links. However, this does not impact our recommendations.
 Wooden spoons can be as elaborate or utilitarian as you’d please. Either way, it’s a great way to spend time in the shop.

Project #2415 • Skill Level: Intermediate • Time: 1 Day • Cost: $5
I began woodworking in late 2015, and the more I learned about woodworking, the more I was intrigued by all of its different avenues of creativity. Spoon carving caught my attention because I love cooking and thought what better way to make the process more personal than to create my own custom utensils. I took my first spoon carving class in January of 2018, and discovered my intuition was correct. That first spoon carving class opened up a new passion of mine. I continued to take classes, including how to make your own spoon carving tools and how to improve your knife skills.
I was pleasantly surprised to find that there were other people who loved carving spoons almost as much as I did. In January 2019, I, along with a couple other people, started a spoon club that has since grown into a community that is eager to share projects, techniques, and show their work. It’s through this process of sharing and community that my spoon carving has really grown. I also find that any time I run into a problem with a project that needs some additional thinking, I turn to carving spoons to allow my hands to move and my mind to think.
This method of spoon carving combines techniques that I have picked up over the years in various classes, with the idea of carving for the long-term and keeping your body safe and healthy.
Tools Needed

Start with a blank approximately 2-1/4″ T x 11-3/4″ W x 1-3/4″ L
• Hook knife (Morakniv)
• Bent gouge (7L/20 or 8L/20)
• Straight knife (such as Morakniv 120 or 106)
• Burnisher
• Finishing oil (walnut oil)
Getting Started with Spoon Carving
First, we start with wood selection. I prefer to work with green wood as it is easier to carve than dry wood. Green wood is abundant where I live, the Pacific Northwest, however its availability can be limited elsewhere. If locating green wood is difficult, you can work with dry wood for this project using the same steps. The types of wood that I prefer to use for spoon carving are close grained hardwoods with straight grain. The straight grain makes following the grain with your carving tools easier. Woods such as maple, cherry, birch, beech, apple, and plum are among my favorites to work with. For this specific project, I am using a blank that was salvaged from a fallen maple tree.
This project will center around a cooking spoon as these are my favorite to carve. When I am teaching people to carve spoons for the first time, I like to start them off with an asymmetric shape. This takes the pressure off of getting everything perfectly aligned and allows them to focus on technique. I have a selection of templates that I carry around with me that are in the shape of some of my favorite spoons. I like to use 1/4“ plywood to create my templates, but any material that holds up well will work. These templates allow quick and easy transfer of patterns to the wood. If you need to locate a template, a quick internet search will pull up an ample selection of spoon templates. You can also check out the Rise Up and Carve website where they host monthly spoon challenges that center around different carving projects.
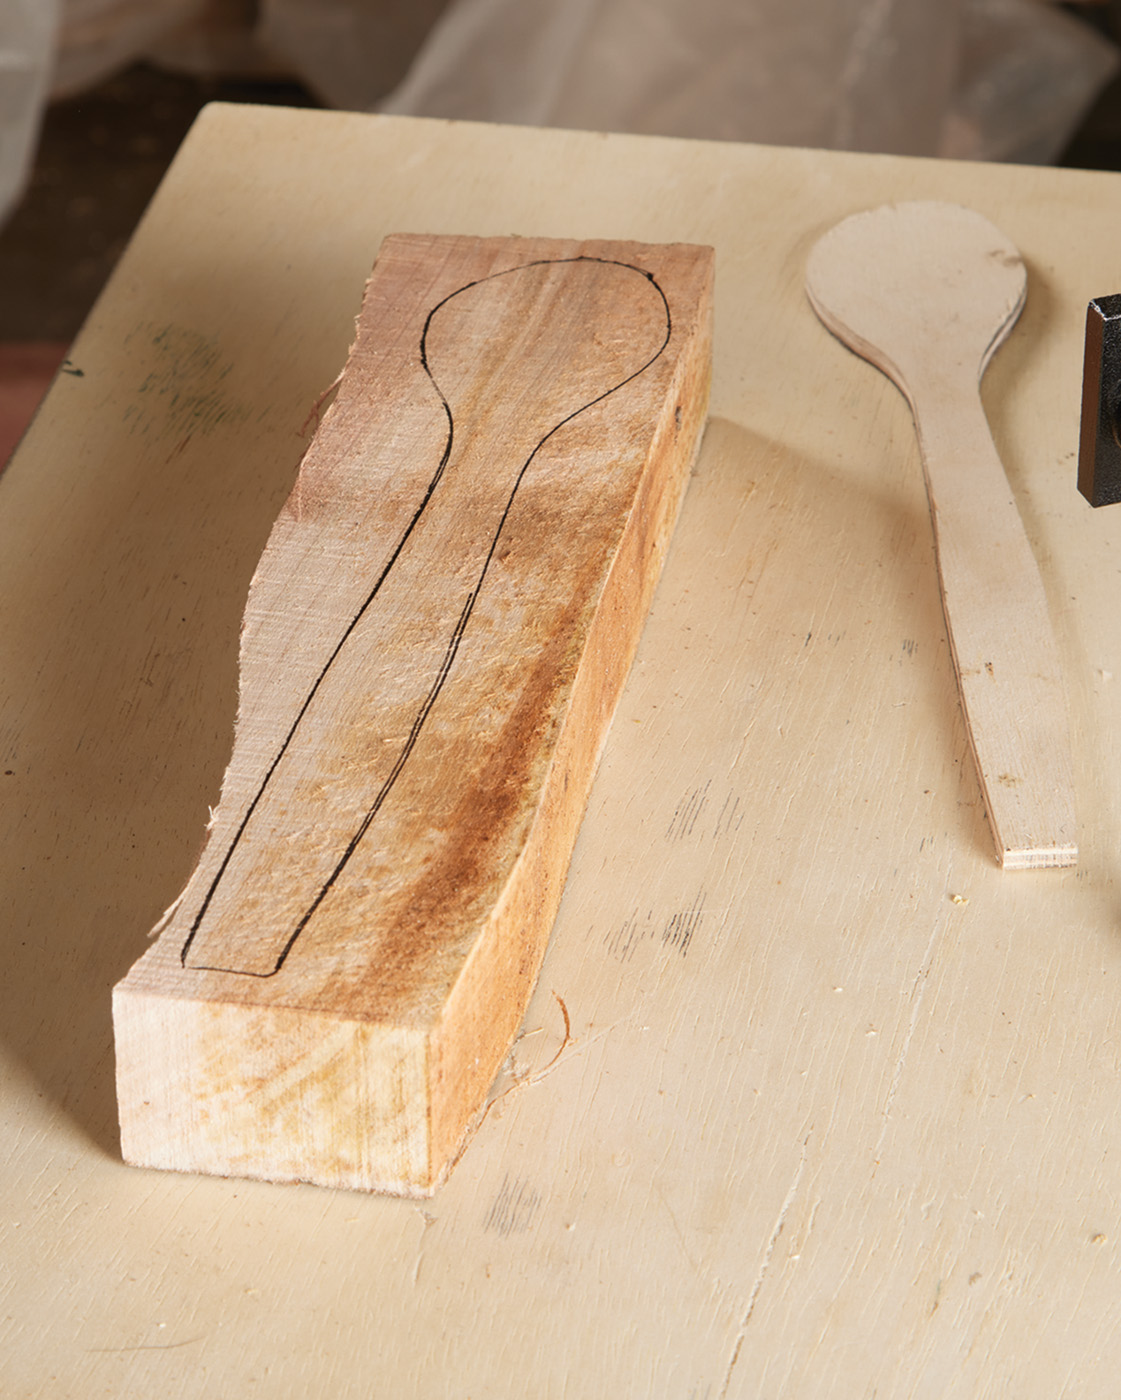
1 Use your template to trace out the shape of your spoon. Make sure that your outline comes across clearly.
Bandsawing Your Spoon Blank
Using one of my spoon templates, I trace the outline of the spoon onto the blank of wood I have selected for the project. A good pencil or a pen will work to trace out your spoon shape. You want to make sure that you can see the outlined area clearly before moving on to the next step. When cutting out the shape of the spoon blank, I always start with the top view of the spoon. I sometimes ax out my spoon blanks because it’s fun, but using a bandsaw saves time and wear and tear on my body, especially when I’m creating a lot of spoon blanks at once.
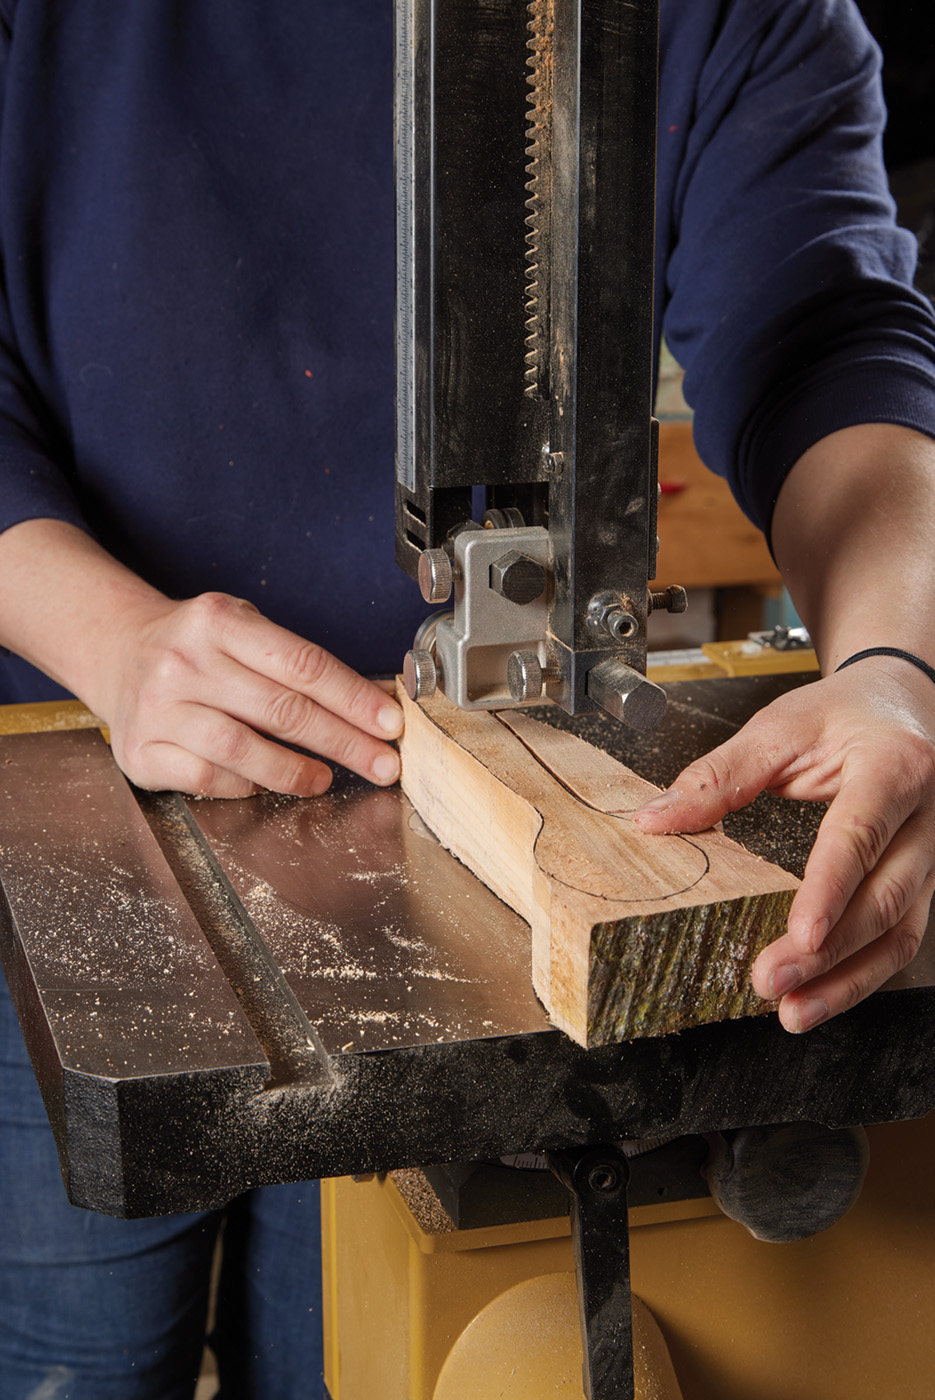
2 Cut out your blank on the bandsaw by starting with material removal along the sides. Keep your hands out of the line of your bandsaw blade.
Cut out the shape of your spoon blank very carefully on the bandsaw, staying just outside of the lines you have traced. Once the shape of the spoon is cut out, create the profile view of the spoon. Most of my spoons tend to have a crank in them, i.e., a slight curvature in the spoon that makes it easier to scoop something out of a pot. The straight-grained piece of wood will limit the amount of curve we can get with the crank but analyze the wood grain direction along the side of the spoon and use that to help determine how much of a crank you can put into the spoon. Outline the profile of the spoon using the same pencil/pen as before, then take the piece back to the bandsaw to cut out the profile view.
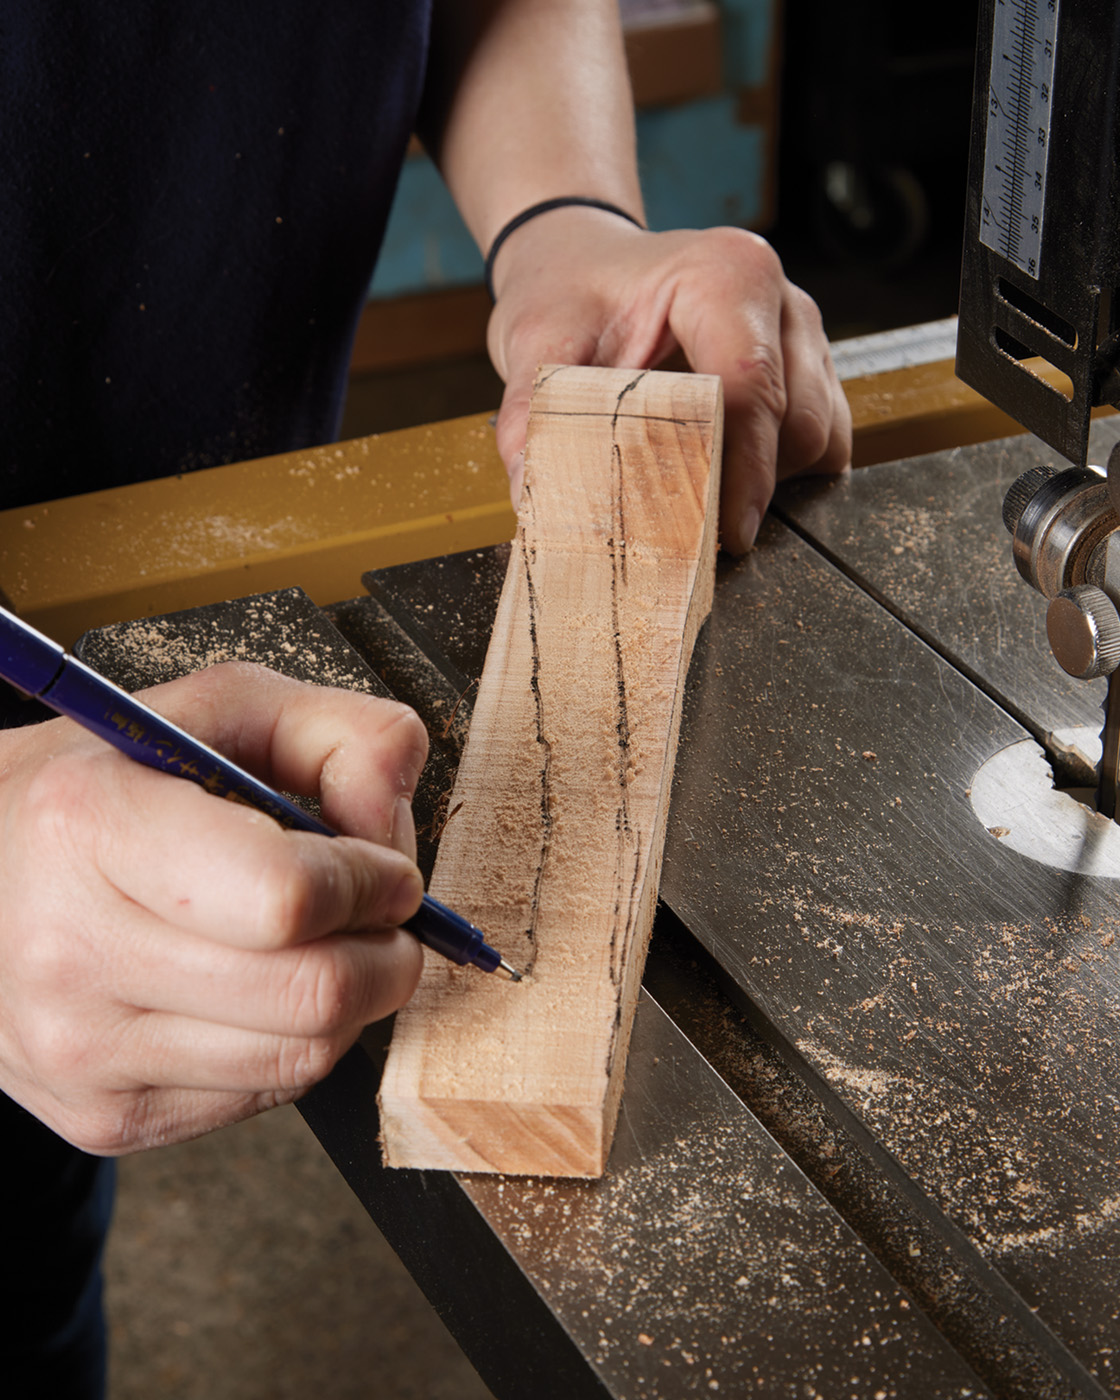
3 Outline the crank of your spoon, using the grain direction as your guide on how cranky your spoon can get. The more ornery the spoon, the better it is for scooping.

4 Cut out the profile on your spoon, cutting closely to the lines you drew.
Prepping for Carving the Spoon Blank
Now that you have bandsawed your spoon blank, all evidence of the template and crank lines have been eliminated. You still need these, so take your pencil or pen and draw in new lines that will define the final shape of the spoon. Once you have drawn a fresh spoon outline, mark a line about 1/8“ in from the rim of the spoon bowl to define the spoon’s bowl. Now the fun starts and we can get to carving!
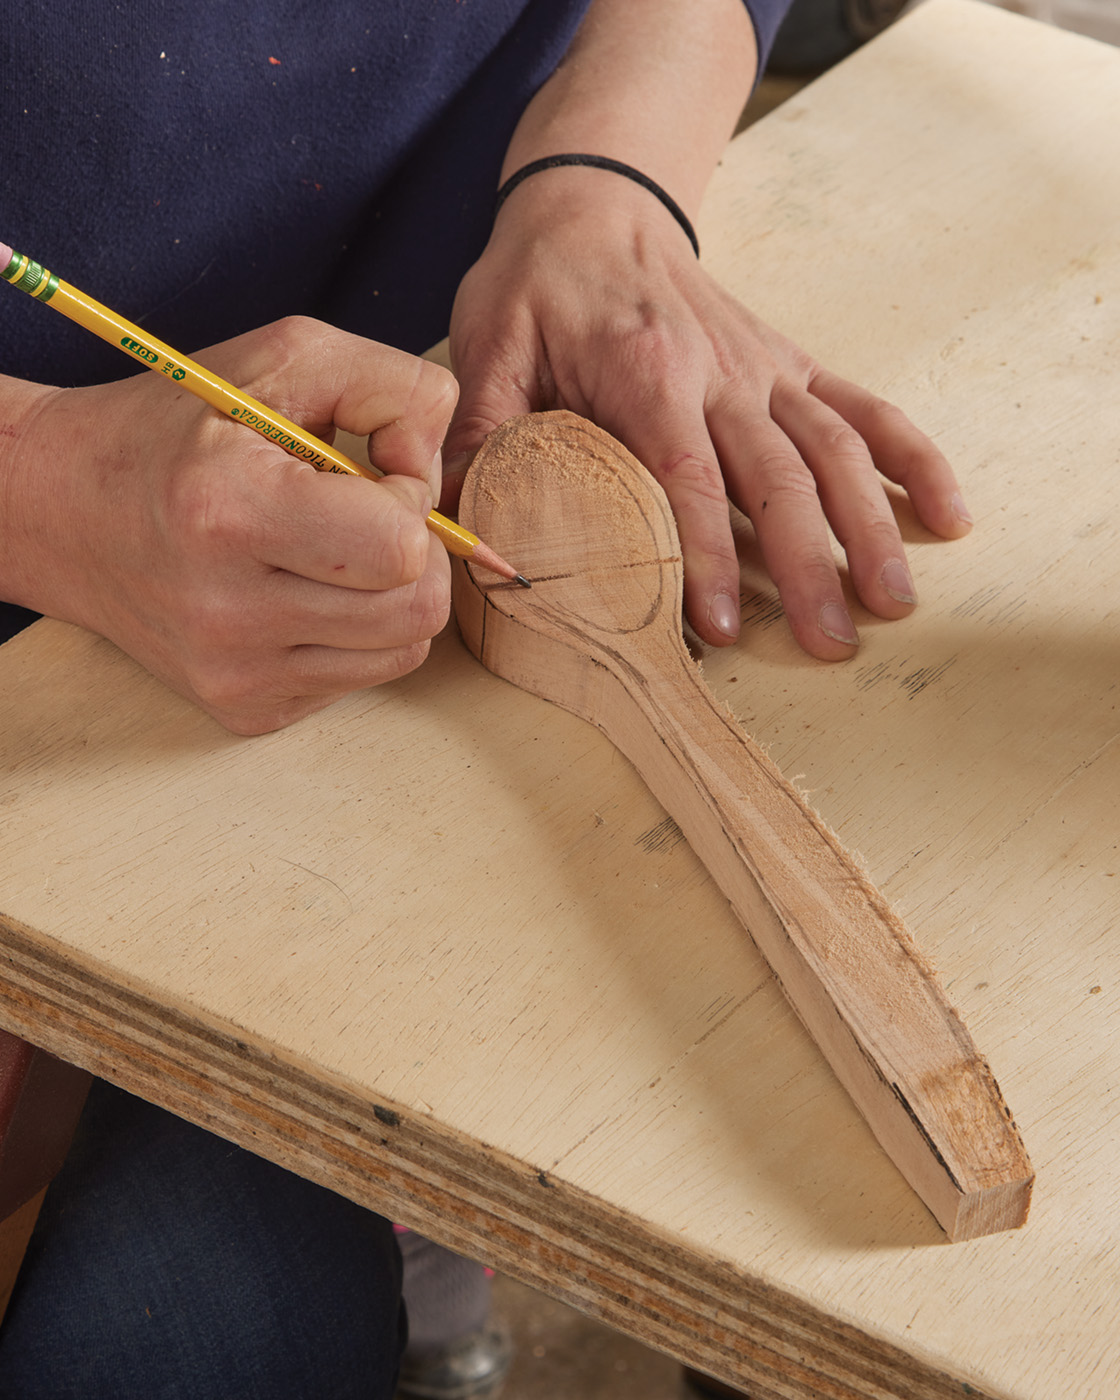
5 Redraw the outline of your spoon. Mark the spoon bowl by drawing 1/8″ away from the outline of the spoon bowl rim.
Carving the Spoon Bowl
Place your spoon blank in a vise. I prefer to use a pattern maker’s vise with rotating wooden paddles for this step, as this vise is good for holding oddly shaped pieces for carving. Using a carving gouge, such as a 7L/20 or 8L/20, and a mallet, hollow out the inside of the spoon bowl. I always start in the center of the blank and work my way out to the line removing a bulk of the material from the spoon bowl. Once a majority of the material has been removed, come back in with a hook knife to smooth up the surface of the spoon bowl.
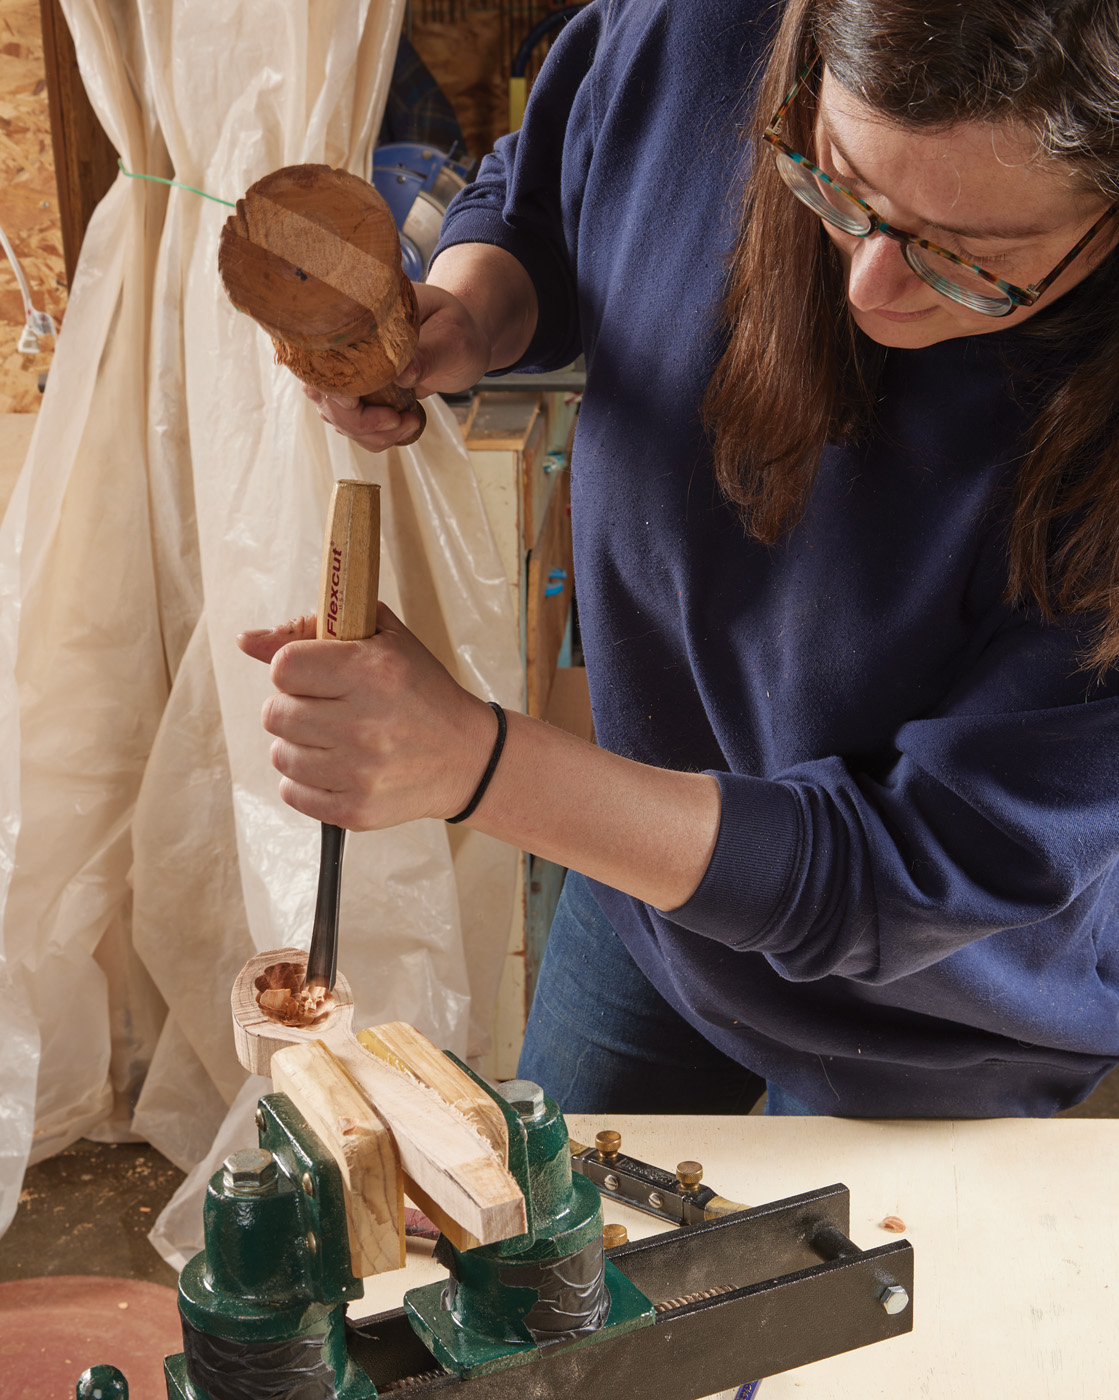
6 Mount your spoon blank into your vise. Using a bent gouge and mallet, and starting at the center of the spoon blank, start removing material.

7 Use a hook knife to come in and clean up the area you just carved.
Once you are happy with how it looks and feels, it’s time to move on to the back of the spoon bowl. For this, I use a spokeshave to remove material. Begin by easing down the corners of the spoon bowl and gradually work your way towards the center of the backside of the spoon bowl. Occasionally check the thickness of the spoon bowl. I use my fingers to make sure that it is consistent, and I’m not at risk of creating a strainer spoon. If you have a set of calipers, you can use those to gauge your progress. I usually aim for a thickness of approximately 1/8“.
8 Ease down the corners of the backside using a spokeshave. Work your way from the outside towards the center of the spoon bowl.
Carving the Rest of the Backside & Sides
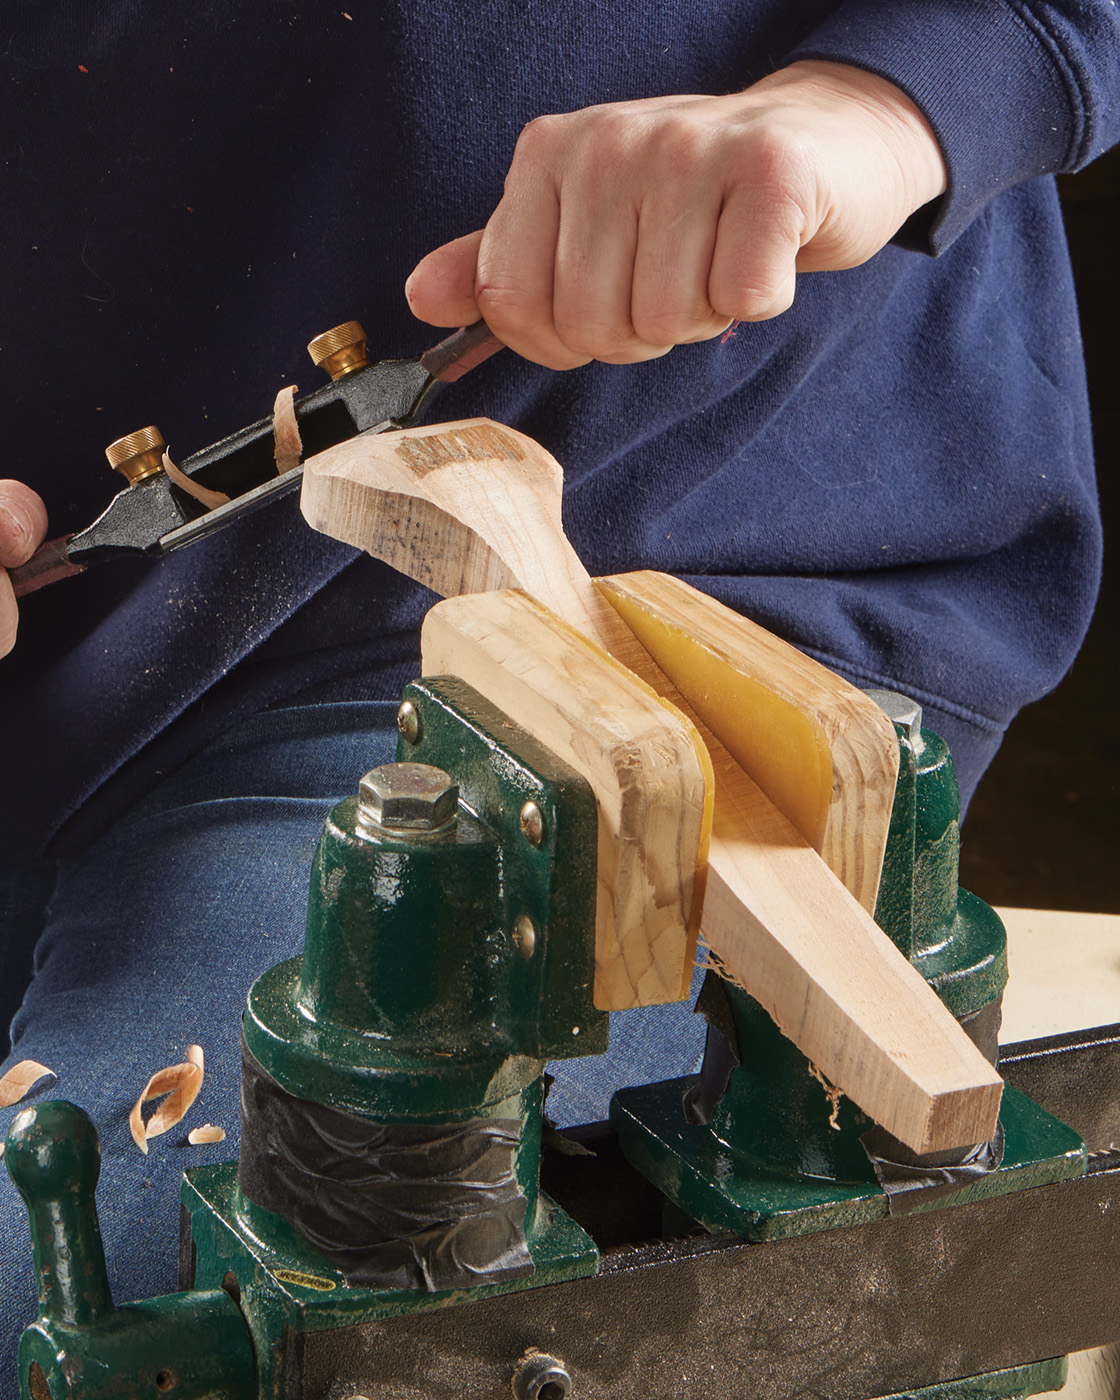
Still working on the backside of the spoon, move on to the handle. Use your spokeshave to remove a bulk of the material and rid the handle of any bandsaw marks. Remember to carve with the grain! This usually means carving in the downhill direction, but if you find that isn’t working for you, turn the spokeshave around and try in the other direction.

9 Then spokeshave the back of the handle of the spoon, making sure to move in the downhill direction. You want to knock down the edges of your handle, creating a nice long facet.
Once the back of the spoon has been refined, next ease down the edges along the handle. At this point, they are probably pretty sharp and well defined. While crisp, sharp edges might look nice, it doesn’t feel so nice to the touch. To fix this, use your spokeshave to create long facets along the edges. Not only does it feel much better to pick up, those long facets will impress a lot of people. You can angle the spoon in your vise so that both edges are easily accessible. How big you decide to make your facets is entirely up to you. Yay! Creative opportunity!

10 Work the handle and spoon bowl so that the transition blends together seamlessly.
The last step on the back of the spoon is to blend the handle and the spoon bowl so that the transition is seamless and the surfaces you leave are fairly smooth.
When the backside of the spoon is complete, flip the blank 90° so that one side of the handle is facing up. Use the spokeshave to remove the material along the sides down to the pencil lines that you drew in the previous steps. When one side is complete, flip the spoon 180° to the other side and work down to the line on the handle. Something to note here is that there is the transition where the spoon bowl meets the handle, i.e. the neck. It’s difficult to get into this area with a spokeshave, so I save that transitional area for knife work, which we will cover shortly.

11 With the top of the spoon facing upwards, smooth the outside of the spoon bowl.
Carving the Spoon’s Top
Now we are ready to work the top side of the spoon. The first step on the top side of the spoon is to smooth out the side of the rim of the spoon bowl by working to the lines that were drawn in the previous steps. Next smooth out the top of the handle of the spoon, much like we did with the backside of the spoon. Make sure that you are carving in the downhill direction and rid the blank of any evidence of bandsaw marks. At this point, I will pick up the spoon blank to see how the handle feels to hold. Continue to remove material along the top until the handle feels right. This may vary from person to person because no two hands are alike. Just as with the back of the spoon, ease the edges of the handle so that it has a nice feel in the hands when you pick it up.

12 Ease down the edges of the handle by creating long facets.

13 Using a pencil, draw out the neck of your spoon.
Carving the Neck
Now we are ready for knife work. Any evidence of the spoon’s outline has been carved away, so we need to draw the outline of the neck again. These lines serve as carving guides. The grain changes direction as you move away from the spoon bowl and into the handle of the spoon. To complete carving the area, do a combination of thumb pivot cuts and pull cuts. Depending on which side of the spoon bowl you are working on will determine how to combine the two cuts. Make sure you are carving in the downhill direction for the best results. Work the top side of the spoon, then flip it over and work the back. When the neck is established, come back and blend the area with the rest of the spoon using the straight knife to do either a pull cut or thumb pivot cut.

14 Use a pull cut to start working the neck area of the spoon.

15 Complete the same cut by doing a thumb pivot cut.

16 Use a pull cut to help complete the cut on the opposite side of the spoon.
The Final Touch-Ups
The top of the rim of the bowl needs to be finished. Use a combination of a thumb pivot cut and pull cut, to complete the rim. Remember to carve in the downhill direction as the rim is a very delicate part of the spoon. When the rim is finished you can do final clean up on the spoon. I have a small hand plane that I like to use to smooth out and blend any surfaces. I also touch up the bowl of my spoon with my hook knife one last time.

17 Use the pull cut to help blend the neck area in with the rest of the spoon handle.

18 A thumb pivot cut can be helpful in working the neck on the back of the spoon.
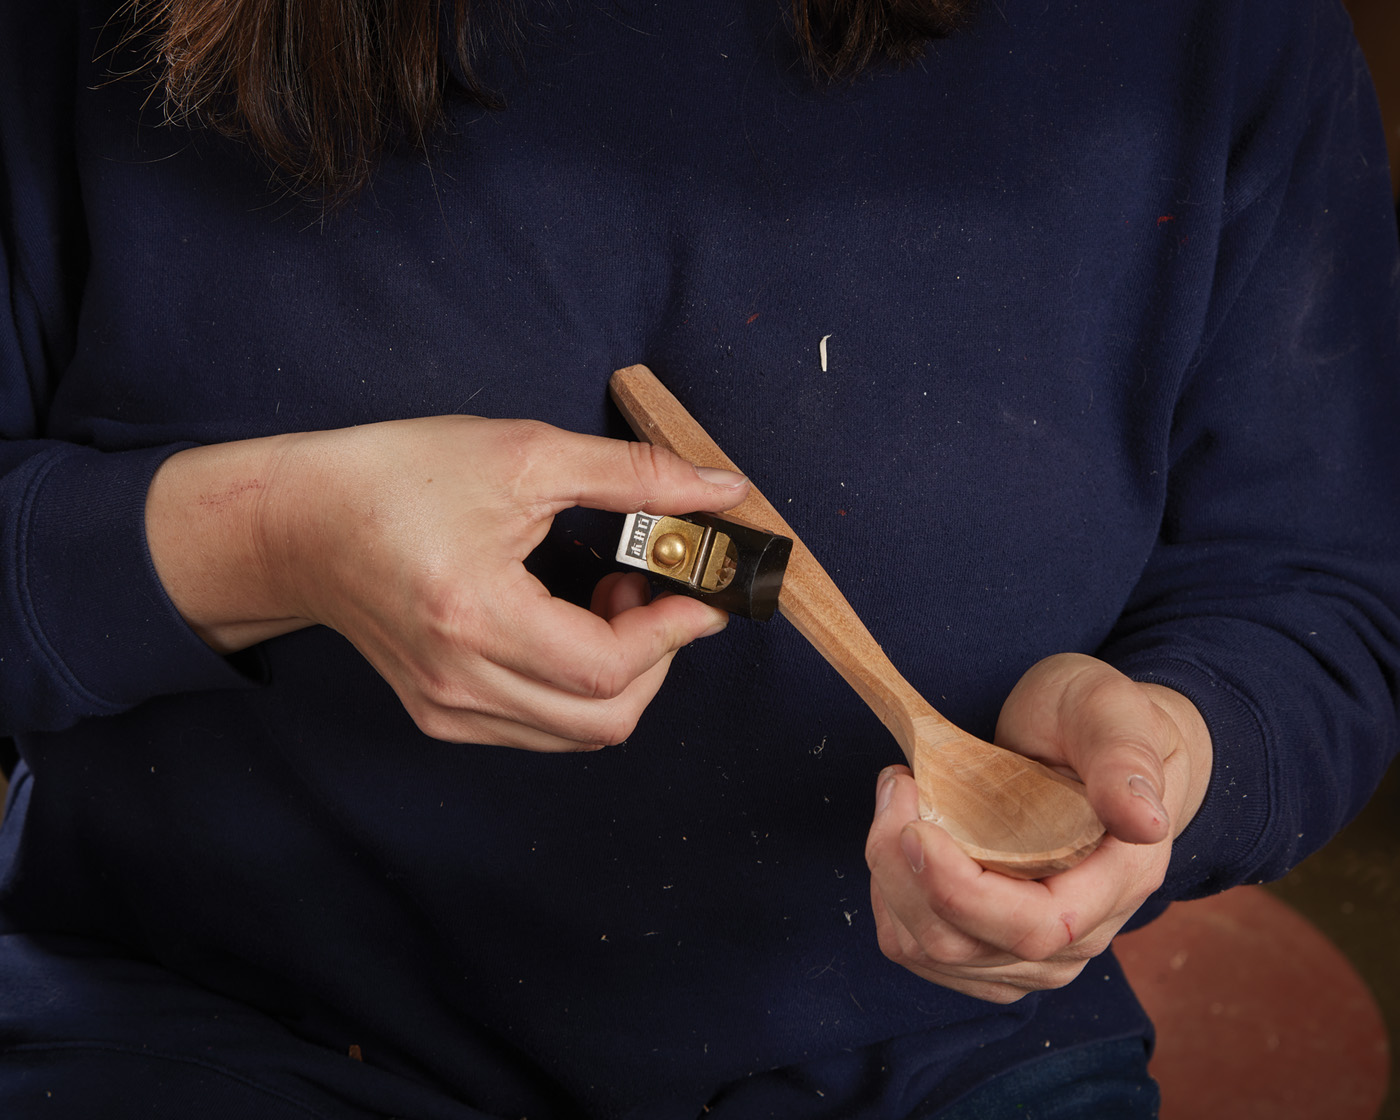
19 A small handplane is useful in cleaning up the final lines
of your spoon and smoothing out your surfaces.
I prefer to have a finish straight off the tool for my spoons, however, if you would like to sand the surface of your spoon, you are free to do so. I recommend raising the grain between grits so that when you go to wash your spoon for the first time, you’re not met with an unpleasant fuzzy feeling surface on your spoon.

20 A series of thumb pivot cuts and pull cuts can help refine the top of your spoon bowl. One last pass with the hook knife to clean up and smooth out the spoon bowl.
Before putting any finish on the spoon, I like to burnish the surface. You can burnish your spoon using a smooth stone, antler, or unglazed porcelain. Burnishing eases down the high points of your carving and leads to a smoother feeling surface. My finish of preference is walnut oil, but any food safe oil, such as linseed oil, tung oil, poppyseed oil, should work.

Check out my spoon. Yeehaw! Now you can make one too.
Additional Notes:
1. If you are working in green wood, leave your surfaces a little thick, and do your initial carving. Your spoon should dry in a couple of days, and you can come back and do some finishing cuts to complete the spoon.
2. Types of cuts:
Thumb Pivot Cut: This cut gives you a lot of control and is especially useful for getting into nooks and crannies. Position your left thumb against the back of your knife, and use your thumb to push through the cut with your wrist twisting to help rotate the blade about your thumb pivot. For more power and control, you can move your pivot point closer to the tip of the knife.

Thumb Pivot Cut
Pull Cut: You will place the end of your blank into your chest for support. You will have your wrist cocked such that the tip of the knife is always facing up towards the ceiling. This ensures that your wrist will hit your chest before the tip of the knife as you will then pull the knife towards yourself.

Pull Cut
Here are some supplies and tools we find essential in our everyday work around the shop. We may receive a commission from sales referred by our links; however, we have carefully selected these products for their usefulness and quality.


