We may receive a commission when you use our affiliate links. However, this does not impact our recommendations.

By Randy Johnson
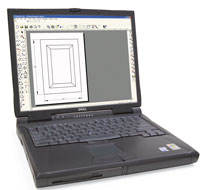
You don't have to spend much money to get a good computer-aided drafting (CAD) program for drawing woodworking projects. Fifty bucks will buy you a starter program that's easy to learn and use. For $150, you can get one with all the drawing power you're likely to ever need. A CAD program may not be on the top of your “tools to buy” list, but using CAD does provide some big benefits if you like to design your own projects or build projects that have lots of curves and angles in them. Dozens of CAD programs are on the market, ranging in price from a few dozen to thousands of dollars. It's a dizzying array. Some are made specifically for architects or engineers and are more specialized or advanced than most woodworkers need. Others are more general in nature and make a better choice for us. Thanks to the Internet, you can try before you buy. Most CAD programs are available as free trial downloads. Trial programs have some limitations but are complete enough to let you take the software for a good test drive. Our primary goal for this test was to find a CAD program that's easy to learn and use, yet powerful enough to create precise woodworking project drawings. In the end, all 15 programs we tested were capable of making precise drawings, but some were considerably easier to learn and use than others.
Precise Dimensioning
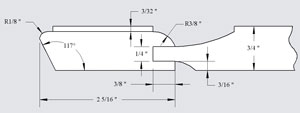
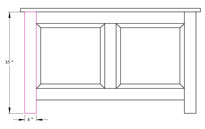
Measuring the parts of your project is fast and accurate because the computer does the math for you. With CAD, even arcs and angles are easy to measure. This is a huge advantage when you need to measure an unusual angle or the radius of an arc.
Design Development
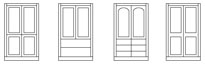
CAD is great for exploring design options and proportions. The first design may take you just as long to draw with CAD as with pencil and paper, but once you have a drawing, you can copy it as many times as you like in a matter of seconds. You can make changes to the copies much more quickly than you could using pencil and paper. And you'll never have to worry about wearing a hole in your paper with your eraser.
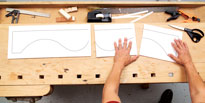
Full-size Paper Patterns
Full-size patterns are particularly helpful when your project has a large or complex shape. You don't need a special printer to make full-size patterns, because CAD programs can split a large drawing across several sheets of letter-size paper. This is called tiled printing. After you've printed the paper pattern, simply attach it to your workpiece with double-sided tape or spray adhesive and saw around it.
Drawing with CAD
A CAD program uses a variety of specialized tools to create drawings. Some tools draw lines, rectangles and curves, while others modify and combine these lines into new shapes. There are also tools for adding dimensions and even a rubber-stamp tool that will copy and paste a shape multiple times. To use a tool, you click on it with your computer mouse, then draw the shape on the screen's drawing area. CAD programs also have tools common to most computer software, including commands for opening and saving files, printing, copying, cutting, pasting and even spell-checking.
CAD Tools We Like
Most CAD programs have dozens of tools, and you will use many of them every time you make a drawing. There's not room in this article to discuss all of them, but several are worth describing because they are particularly useful or user-friendly. It's worth noting that tool names are not always the same among programs. To keep things simple, we'll use either the most commonly used name or one that best describes the tool's function.
Easy-to-Use Resizing Tool
Individual shapes that are drawn with CAD are called objects. After you've drawn an object, you often need to make it larger or smaller. We found the easiest way to do this is by directly entering the new sizes into the boxes of a tool called the resizing palette or inspection bar. After entering the new dimensions, you simply press the return key and the shape automatically takes on the new size. This tool can also be used to check the size of any part in your drawing. Surprisingly, only a couple of the programs we tested have this extremely useful tool.

Grid Tool
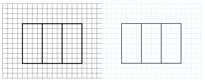
This feature is like drawing on graph paper. When the grid tool is turned on, it will cause the lines and shapes you draw to match up with the grid lines. You can set the grid to almost any spacing you want. It's a useful tool and makes it easy to draw objects based on the grid's increments. For example, setting the grid to 1/4-in. spacing is helpful when you're drawing a project that uses materials and parts whose measurements are multiples of 1/4 in. You can turn off the grid tool when you want to draw a line between the grid lines. All programs have this tool, but some use dots rather than lines. We found the lines easier to follow.
|
|
|
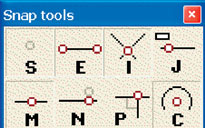
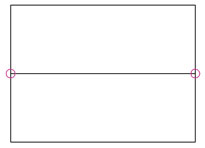
Snap Tools
A snap tool adds magnetic points to a drawn object. Snap points provide a precise way to start and stop a line. Snap points can be added to the end or middle of a line, at the intersection of two lines or at the center of an arc or circle. The beauty of a snap tool is that you only need to get close to the point where you want to start or end the line; the program will pull the end of the line to the point and lock it there. Snap tools are standard in most CAD programs and you will come to love them.
|
|
|
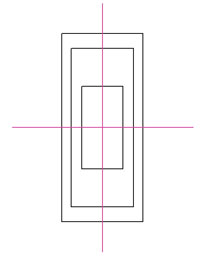
Alignment Tools
The alignment tool allows you to align objects along their bottoms, tops, sides or middles. It's a useful tool when you want to center a piece of hardware on a drawer front or line up a set of doors on a cabinet. More than half of the programs we tested have this tool.
|
|
|
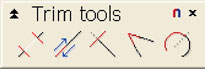
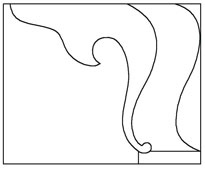
Trim Tools
CAD trim tools act as electronic erasers. They remove unwanted sections of lines. One type of trim tool will remove the end of a line, while another will divide a line into two parts. There's also one for dividing a circle into even sections. Our favorite trim tool creates a perfect corner from two overlapping lines with just a couple mouse clicks (shown at right). Too bad cutting plywood isn't this simple.
|
|
|

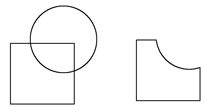
Boolean Tools
These are a special kind of trim tool. The term Boolean comes from the world of algebra, but simply put, a Boolean tool adds or subtracts one object from another. It's a very powerful and fun tool to use. There are three basic types of Boolean tools: One joins two shapes together; the second subtracts one shape from another (shown at right); the third type subtracts everything except the space where shapes overlap.
|
|
|

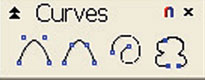
Easy-to-Modify Curves
All programs have curve-drawing tools. The one we liked best is called a spline curve. We like it because it is the easiest to modify in most programs. This is important, because let's face it, if there's one shape that requires finessing after it's drawn, it's a curve. It takes a little practice to master the spline curve tool, but when you learn how to use it, you'll be able to quickly produce smooth, flowing curves.
|
|
|
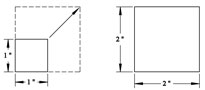
Associative Dimensioning
Associative dimensioning is a feature that links the dimension to the object. If you resize the object, the dimension will change with it, and the new size will automatically display. Only a few programs have this useful feature.
|
|
|
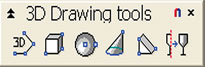
3D Drawing Tools
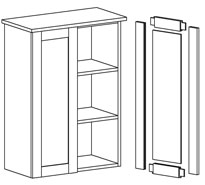
You can do a lot of useful drafting with only 2D tools, but 3D drafting tools are pretty amazing. With them you can build your project complete with joints that can be taken apart. The 3D tools also let you rotate your project and view it from any angle. You can even open the doors and look inside if you want. Using 3D tools has a lot in common with real building, because the 3D shapes can be cut, mitered or dadoed using Boolean tools. Several of the more expensive programs in our test include 3D drawing tools. You don't have to use them, but they are there if you want to try them.
|
|
|
Tools that Stay Selected
To use a CAD tool, you click on it, just as you do with most computer program tools. For example, clicking on the rectangular drawing tool allows you to draw a rectangle. It's particularly helpful if the drawing tool stays selected, allowing you to continue using it, eliminating the need to click on it every time you want to draw another rectangular or similar shape. Snap, trim and dimensioning tools are also more convenient to use if they stay selected.
Is CAD Right for You?
You should consider several things before you jump into CAD, because to take full advantage of it, you need drafting skills, computer skills, computer power and a commitment to go through the learning curve. CAD programs will aid you in your drafting, but you still need to know how to do basic drafting. If you remember your drafting lessons from junior high school, you know enough to get started in CAD. If not, check out a basic drafting book from your library or buy one and study up. Understanding the principles of drafting enables you to arrange your drawings in a way that communicates the information about your project in a standard and clear method. Don't expect the manual that comes with your CAD program to teach you drafting. It will help you learn how to use the program, but not how to draft a woodworking project.
To use CAD, you don't need to be a computer genius, but you should be comfortable around computers and familiar with how they operate. If you know how to use Microsoft Word or similar programs that have pull-down menus and tool bars, you probably have enough computer skills to begin learning a CAD program. A CAD program will present you with many new tools, but such functions as saving files and printing pages are very similar to those in other commonly used computer programs. It's also important that your computer have enough memory and disk space before you load a CAD program. Many are quite power-hungry. Without sufficient power, the program will operate very slowly and may even stall your computer. Power requirements vary among programs (see Chart, page 84), but most require a Pentium processor with a Windows 98 or newer operating system or a Macintosh G3 or later model running OS X. Working through the learning curve is the biggest barrier for most people, and there's no simple way around it. You may spend 10 to 30 hours to learn a CAD program's basics and up to twice that long to reach a high level of comfort with them. The good news is that the help files and tutorial training that come with many programs do a great job in helping you learn the program.
Recommendations
If you have some computer experience and a newer Pentium-powered computer, either our Best Buy or Editors' Choice will work for you. If you have limited computer experience or an older computer with less power, DeltaCAD is a good choice. It lacks a few of the features we like, but it's an easy program to learn and requires very little computer power to run. If you own a Macintosh, you don't have many choices. Of the two programs we tested, MacDraft PE ($130) was easier to learn and use. It lacks a few features we like and it's only 2D, but it does have a very easy-to-use resizing palette. (Update 1/1/09 TurboCad also offers a Macintosh version)
IMSI TurboCAD Deluxe v10, $150
TurboCAD?Deluxe is an amazingly powerful program for the money. It has many user-friendly features and tools including associative dimensioning and an inspection bar for resizing objects. The 3D drawing tools that come with this program are a real bonus. TurboCAD takes longer to learn than QuickCAD because TurboCAD has more tools. IMSI offers training CDs for sale ($50), which are very thorough.
AutoDesk QuickCAD 8, $50
QuickCAD was one of the easiest programs to learn, because it can be run at three different levels: beginner, intermediate or expert. The beginner level has the fewest drawing tools, but that makes it simpler to master. It also has many of the user-friendly features we like. It lacks a resizing palette, but the snap and grid tools work very well. QuickCAD is only a 2D program, but for 50 bucks it's hard to beat.
Tips for Learning CAD
1. Use the tutorial. This is the best way to get started with a CAD program because the tutorial will guide you through a couple practice projects and help you master CAD basics. Not all CAD programs come with tutorials, but they should.
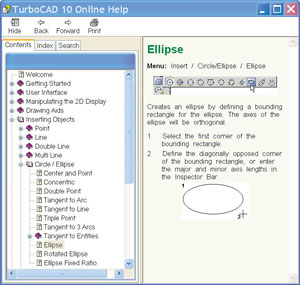
2. Use the online help file. An online help file is included with many of the CAD programs we tested. Most online help files are a gold mine of information and provide a quick source of help-yourself assistance. The file allows you to look for help in three ways: by a table of contents, topic index or key-word search.
3. Click on the help tool. This tool is great! It adds a question mark to the on-screen cursor's arrow. When you click on an unfamiliar tool or menu item, you get an instant explanation of its function.
4. Read the manual. Some programs in-clude printed or PDF-file manuals. These manuals in-clude explanations of how to use the various CAD tools. Manuals are a good reference but are not generally as user-friendly as an online help file.
5. Other help options. Some companies provide free phone support for the first 30 days or more; others charge for it. Phone support is a great way to get questions answered when you're stumped and can't find help through the manual or online file. Most companies also provide e-mail support. It may take a day or two to get a response, but it's an easy way to get an answer to a specific question.
After you've gained some experience with CAD, you may want to check out some of the Internet-based CAD discussion groups. They are moderated by other CAD users and can provide a wealth of tips and hints on using CAD.
Here are some supplies and tools we find essential in our everyday work around the shop. We may receive a commission from sales referred by our links; however, we have carefully selected these products for their usefulness and quality.