We may receive a commission when you use our affiliate links. However, this does not impact our recommendations.
In my last post, I used Rhino3D CAD software to create a 3D ripple for one of the BARN Workbench vise chops. 3D drawing tools were used to take a simple squiggly line and revolve it around a point to make a surface. For the design in this post, I’ll demonstrate the power of simple shapes and patterns.
My design goal for this vise chop was to give it a classic diamond tuck upholstery look in walnut. I’m imitating work that is done in leather with buttons between the diamond patterns that intersect in lines at the folds. Making diamond tuck patterns in CAD is easier than you might think. It’s simple geometry.
I start by creating a very flat ellipsoid. Since it’s even in two dimensions, it’s basically just a flattened sphere. Around the core shape, I drew 4 small cylinders to represent buttons.

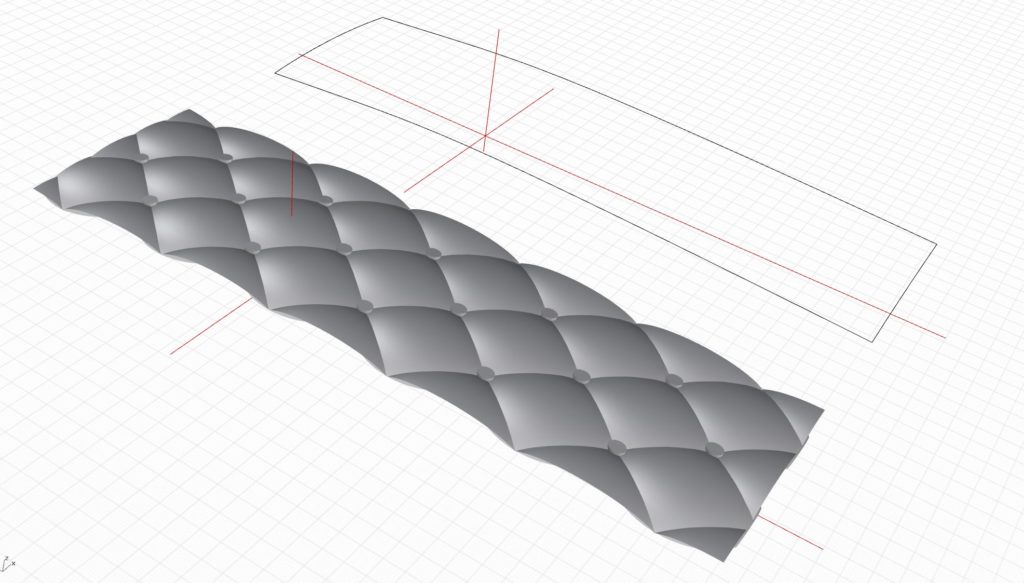
I created an array with this shape. An array is just a method to space out copies in a defined way. Note that where the ellipsoids intersect there’s a nice clean line. There’s the tucked upholstery look we’re after.

More copies are needed until I have enough to fill the size of the 36″ x 10″ blank vise space shown on the right.

Remember that gently warped shape I created earlier to soften the look of the vise? Time to put it to work. Next, I aligned the new surface to my base layout, then warped it onto my primary curved surface and finally, trimmed the collection of ellipsoids and cylinders to the outer surface edge.
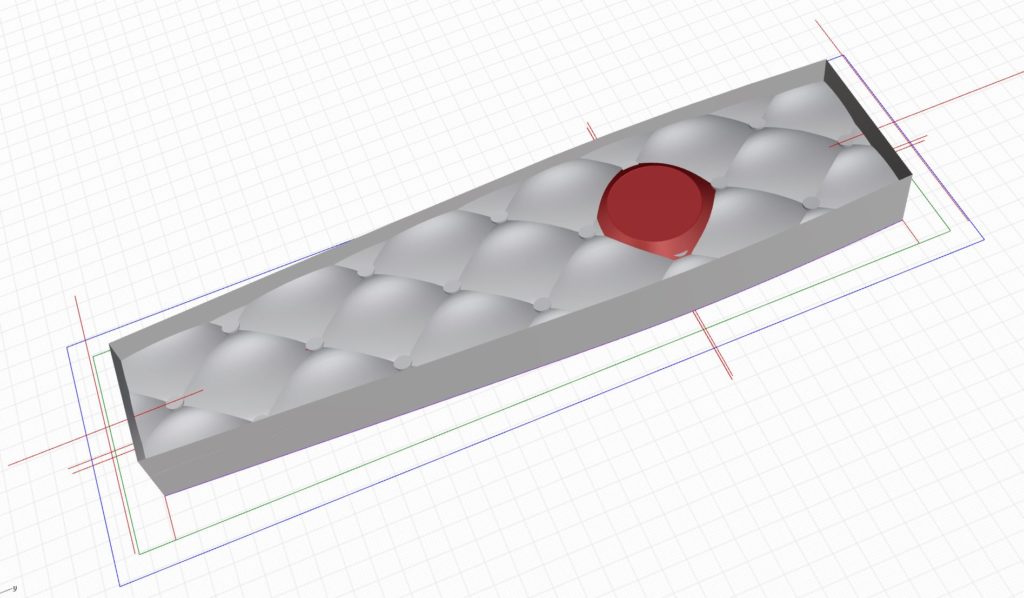
Now I’ll drop in the red round area that I reserved for a base for the Benchcrafted Classic vise hub and screw. Once everything is trimmed to the outside vise shape and cleaned up, we’re all done.
After a little CAM programming, a handful of machine operations, and about 5 hours on my CNC, here’s the freshly machined vise chop in walnut. A little light sanding and it’s ready for a final finish.

In the next couple of installments, I’ll show you the 10 different designs and the final results. Later, I’ll explain how the vise chops were programmed and machined on a CNC.
Additional Resources
- All posts on the BARN workbench click here.
- Photos of the BARN workbench chops click here.
- A video about how the chops were made click here
- Additional Digital Woodworking videos click here.
Here are some supplies and tools we find essential in our everyday work around the shop. We may receive a commission from sales referred by our links; however, we have carefully selected these products for their usefulness and quality.