We may receive a commission when you use our affiliate links. However, this does not impact our recommendations.
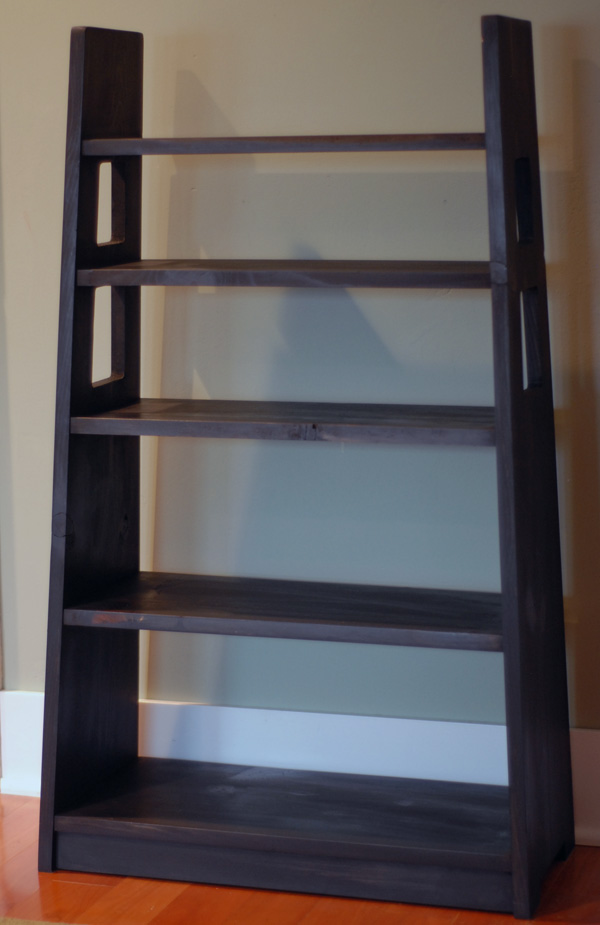
Limbert’s No. 346 Magazine Stand in pine, finished with black milk paint and boiled linseed oil.
Note: If you missed my first post on this magazine stand, you might like to begin here.
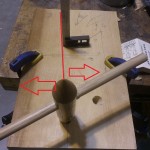
I may be overly fond of pattern routing, because any time I have more than one identical part, I immediately begin contemplating a new pattern. And that’s the approach I took when building this magazine stand: My first step was making a pattern for the cutouts in the sides, ripping and crosscutting a piece of scrap, then gluing it back together.

I ripped and crosscut a scrap board to make the pattern for the cutout.
With the pattern in clamps, I turned my attention to the sides. Using the measured drawings, I laid out the taper, feet and cutouts. I then crosscut them to final length with a 3° bevel at both ends. The bevel runs in the same direction on both ends so the top and bottom are parallel to the floor once the stand is assembled. A sliding compound miter saw makes short work of these bevels, but you can use a circular saw as well.
To rough out the cutouts, I drilled out the corners and used a jigsaw to cut close the lines, leaving between 1/8” and 1/16” over my layout lines.
When the pattern was ready, I fixed it to the sides with double-sided tape and trimmed the cutouts to final shape with the flush-cutting bit, being sure to move the router in a clockwise direction around the cutouts. Then I cut the tapers with a straightedge guiding my circular saw. A jigsaw made quick work of the notches for the feet.
Once the sides were done, I turned my attention to the sides and kick. After cutting the shelves to approximate length, I ripped them to final width. I then trimmed them to length, giving them a 3° bevel on either end.
Unlike those on the sides, these bevels face opposite directions, tapering each shelf to a trapezoid. The kick receives the 3° bevels as well, although it is the face that gets tapered.
Pocket-hole screws join the shelves and kicks to the sides. Taking care to clamp my pocket hole jig to the bottoms of the shelves – it’s easy to overlook the subtle taper and drill in the tops – I drilled the pocket holes and sanded everything to #220 grit.
I like to pre-finish my projects when I can, and that approach works well here. Most of Limbert’s pieces were of fumed quartersawn white oak, but I because I was working with undistinguished common pine, I chose to use black milk paint. I applied a couple of coats using a 4″ foam roller, gave things a quick pass with sanding block loaded with #220 grit, and rolled on another coat. After the paint dried, I wiped on a coat of boiled linseed oil. The oil darkens the paint and helps even the color.
Once the oil dried, the stand was ready for assembly.
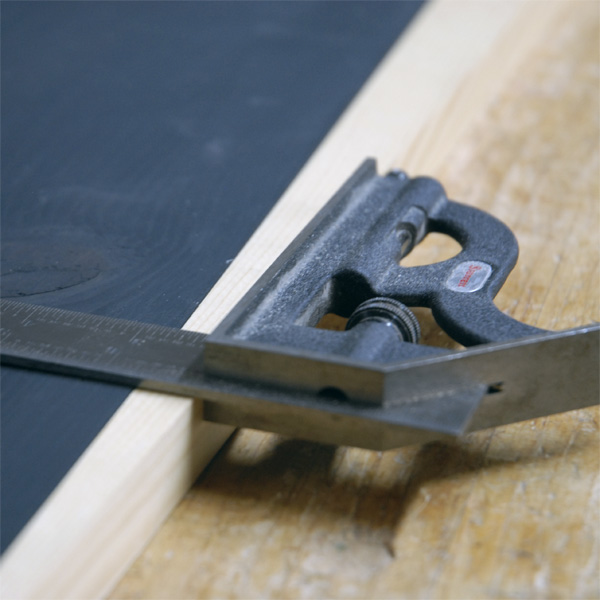
I used an offcut from one of the sides to make my square perpendicular to the side and scribed a line to position the shelf.
I scribed a light line at each shelf location in both sides and screwed the shelves to one side. I then flipped the assembly onto the other side and screwed the shelves to it. After screwing the kick in place, I applied a coat of dark paste wax and buffed it out.
Rendered in black, the stand’s distinctive form is emphasized, reiterating the solidity of the trapezoidal shape and the skilful use of negative and positive space.
That distinction comes with a cost – the slope of the sides makes storing books a bit problematic, and you lose shelf space compared to a straight-sided stand. Nor can you line multiple stands neatly along a wall. Still, for a small collection of books or as a display stand, it’s hard to find a nicer piece.
—Michael Crow
 The above is from the author of “Building Classic Arts & Crafts Furniture: Shop Drawings for 33 Traditional Charles Limbert Projects” (available in both print and digital at ShopWoodworking.com); the piece is a simplified version of the one that he presents in the book.
Here are some supplies and tools we find essential in our everyday work around the shop. We may receive a commission from sales referred by our links; however, we have carefully selected these products for their usefulness and quality.