We may receive a commission when you use our affiliate links. However, this does not impact our recommendations.
Strong, simple joinery provides lasting beauty.
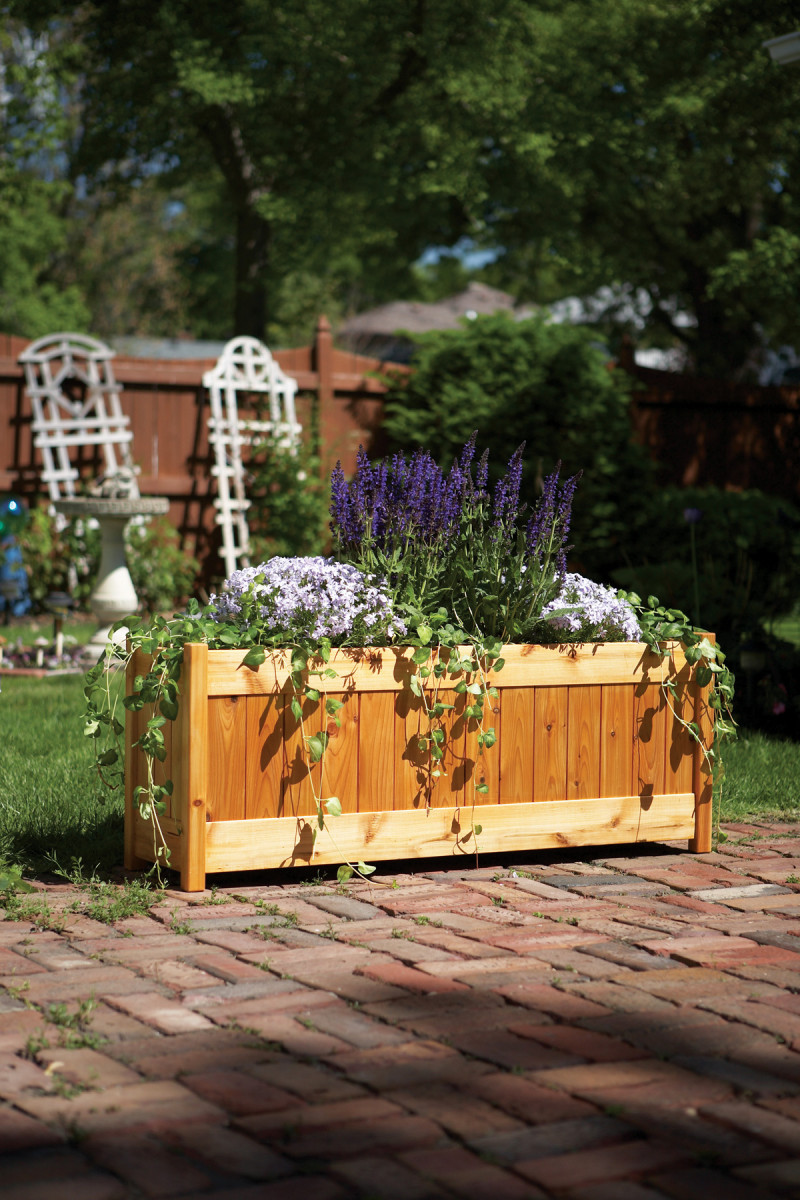
If you’ve been thinking about beautifying your patio, and you want to do it in a weekend, I’ve got just the thing. This sturdy planter is made from readily available materials with simple joinery, waterproof glue, and exterior stain for maximum durability.
You’ll need two 12′ cedar 5/4 x 6 deck boards for the rails, one 8′ cedar 2×4 for the legs, and six 10′ cedar 1x4s for the slats and bottom boards. When you’re at the home center, dig through the lumber piles to find the straightest boards with the fewest knots.
Not sure what to grow in your planter? Start here: Meet 12 of The Best Container Plants
Patio Planter Cut List

 Build the slatted panels
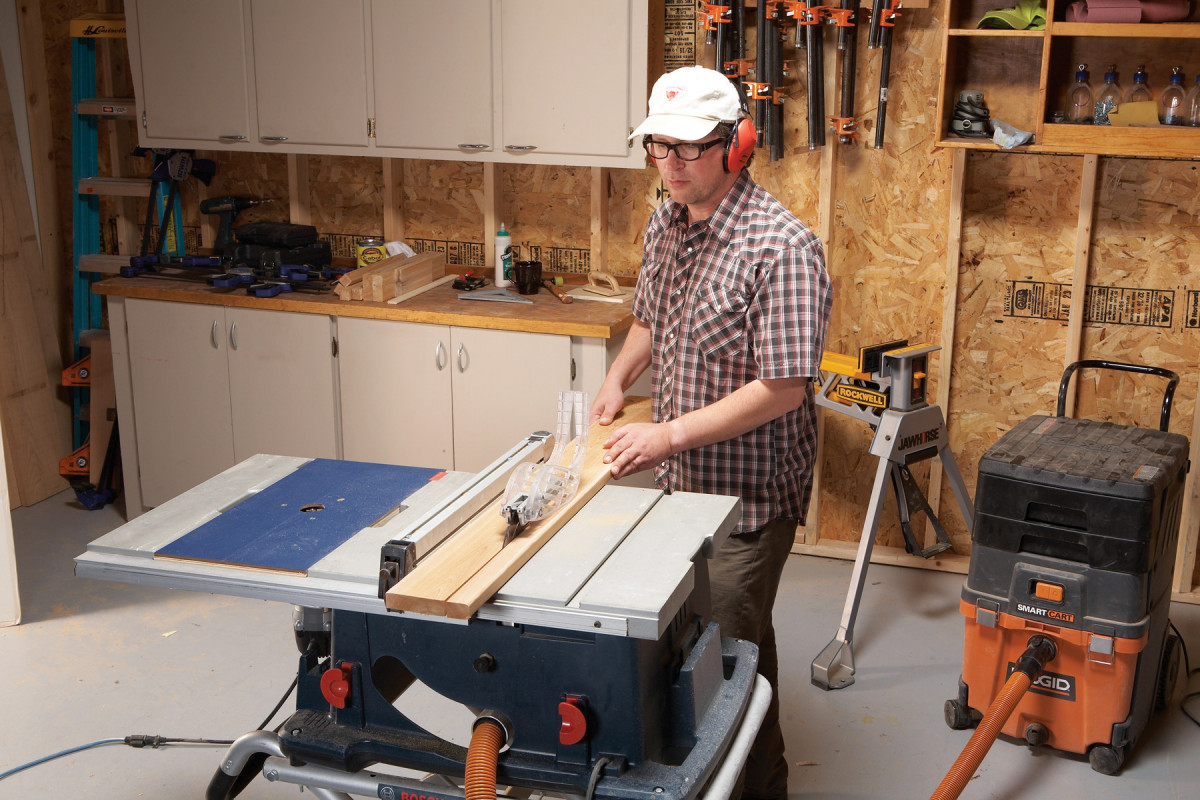
1. Start by ripping the rails to width from 5/4 cedar boards. This project is made with materials from the home center.
Start by cutting the rails to length (Parts A–D, See Fig. A and Cutting List). Joint and square one edge, and then rip the rails to final width (Photo 1). Where possible, rip off any loose knots.
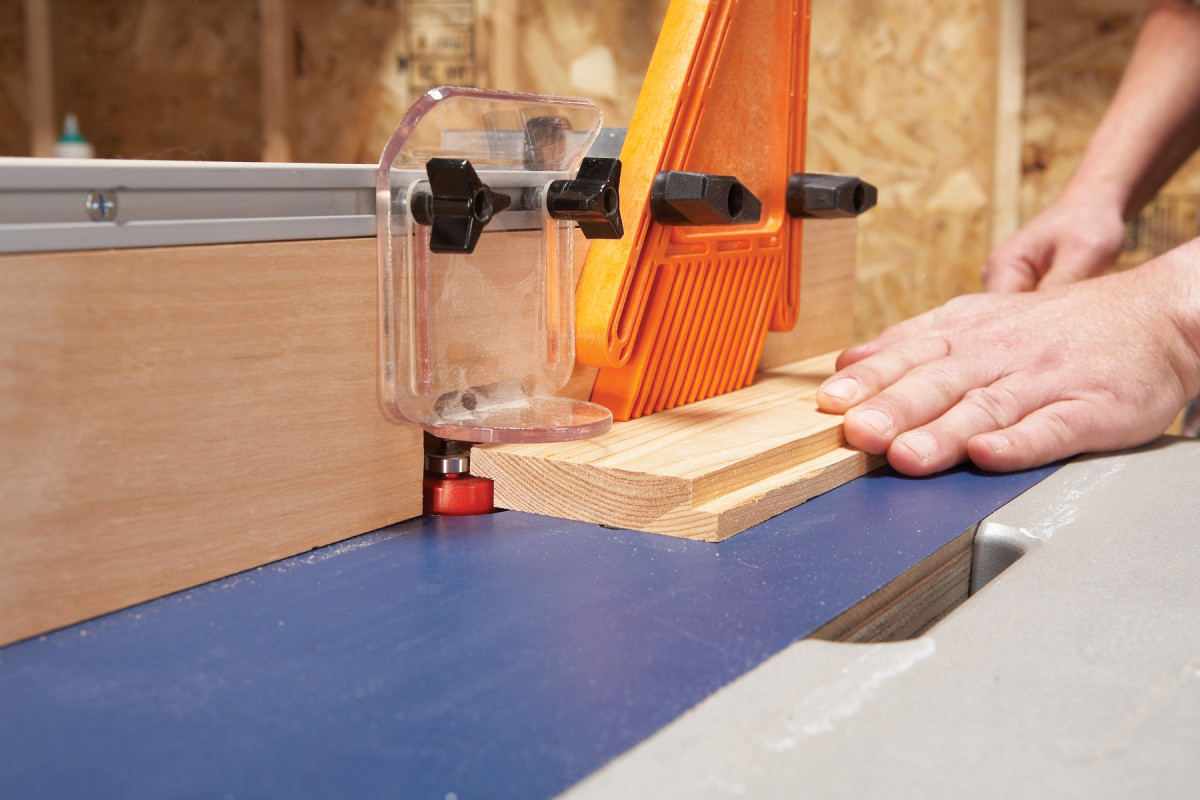
2. Rout a centered groove in one edge of each rail, to house the slats.
Rout a centered groove, 5/16“ wide x 3/8“ deep, on one edge of all the rails (Photo 2). Slightly chamfer the top edges of the bottom rails (but not the ends), to promote water runoff.
To make the slats, plane the 1x4s to 5/8“ thickness and crosscut them into workable lengths. Joint one edge and then rip each length 3-5/16“ wide.
3. Rout rabbets on both edges of the inside slats, but on opposite faces, so the ends look like a “Z.” The end slats are rabbeted on only one edge.
Rout 5/16“ x 5/16“ rabbets on both edges to make the inside slats (E and Photo 3). Leave about 8 lineal feet with only one rabbeted edge, to make the end slats (F). The outer edge of each end slat is square. Because these slats go on opposite ends of the panel, the rabbets are on the front face on half of them and on the back face of the other half. Often, the 1x4s will have one good face and one not-so-good face. So, when you cut the end slats to final length, make sure that half of them are rabbeted on the “good” face and half are rabbeted on the “bad” face. This ensures that only the “good” faces will show on the completed planter. Cut all of the slats to final 9-7/8″ length.
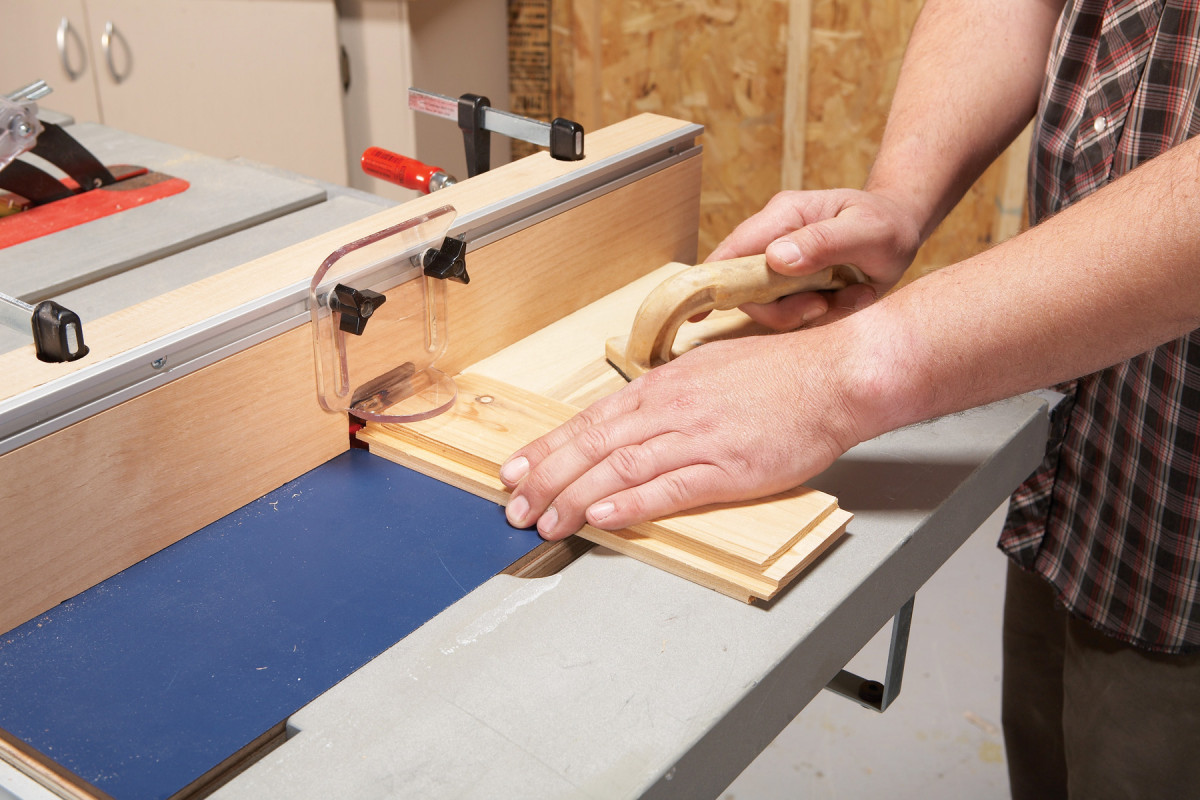
4. Rout tenons on the ends of each slat, using a rabbeting bit. Make one pass on each face. Use a backer board to guide the workpiece and prevent blowout.
Use a rabbeting bit to rout centered 5/16“ x 5/16″ tenons on both ends of each slat (Photo 4). Adjust the bit’s height and make test cuts on scrap stock to dial in the thickness; use the fence to set the length. Use a squarely-cut backer board with a screwed-on handle to support the workpiece and prevent blowing out the back edge.
Assemble each panel inside-face up. But before you start, mill a pile of 1/8“ x 1“ x 2“ spacers. Lay the rails on a flat work surface. Then, starting with an end slat, slide each slat into position in the rails’ grooves. Slip spacers between the slats at the top and the bottom. Install the remaining end slat to finish the job. Make sure both end slats are flush with the ends of the rails, that the assembly is square, and that the inside faces of all the pieces are oriented correctly.
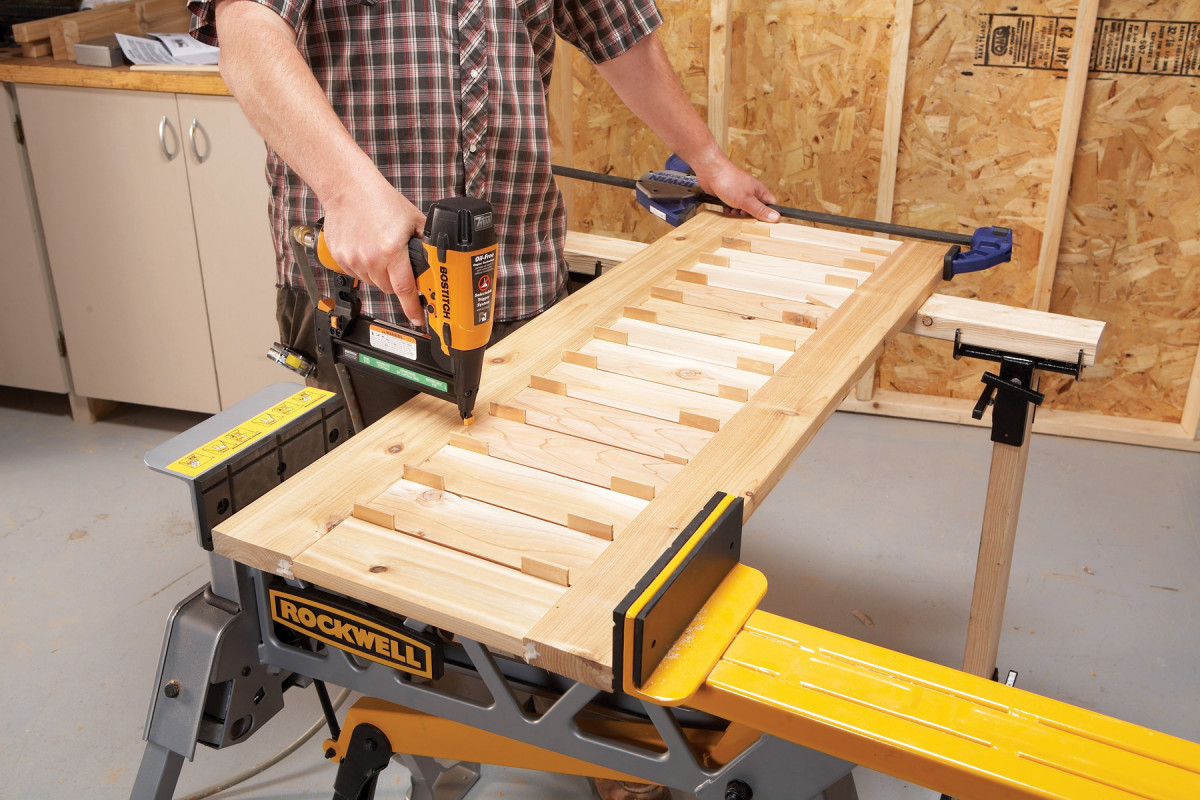
5. Assemble the panels. Spacers between the slats create uniform gaps. Glue the end slats flush with the ends of the rails. Nail the rest at the top and bottom.
Remove the end slats, apply waterproof glue, such as Titebond III, and then glue them into the rails, flush with the ends. Make sure all of the internal slats are evenly spaced. Then nail them to the rails (Photo 5).

6. Create mortises for loose tenons in the rails, using a BeadLOCK jig or other mortising tool. BeadLOCK tenon stock fits the unique mortises shown here.
I used a BeadLOCK jig (older version pictured) to drill the centered 7/8″ deep mortises (Photo 6 and Sources). Layout is simple. Just mark the midpoint of each mortise on each rail, 1-1/4“ from the top edge on the top rails and 1-3/4“ from the bottom edge on the bottom rails. The jig comes with shims that allow centering the mortises in stock of different thicknesses.
Use the offcuts from the 5/4 x 6 rails to make 1“ x 1“ ledgers (G) to support the planter’s bottom boards (H). Glue and nail a ledger to the inside of both side panels, positioned at the height you want. You can mount the ledgers on the bottom rail and stack bricks to position the pots, or you can let the height of the pots or the amount of soil that you plan to use determine the ledgers’ location.
Make the legs
Make the legs (J) by ripping a 40“ length of 2×4 into two pieces that are 1-9/16“ wide. Plane the sawn faces to square the stock. Then cut the legs to final length and round over all the edges.
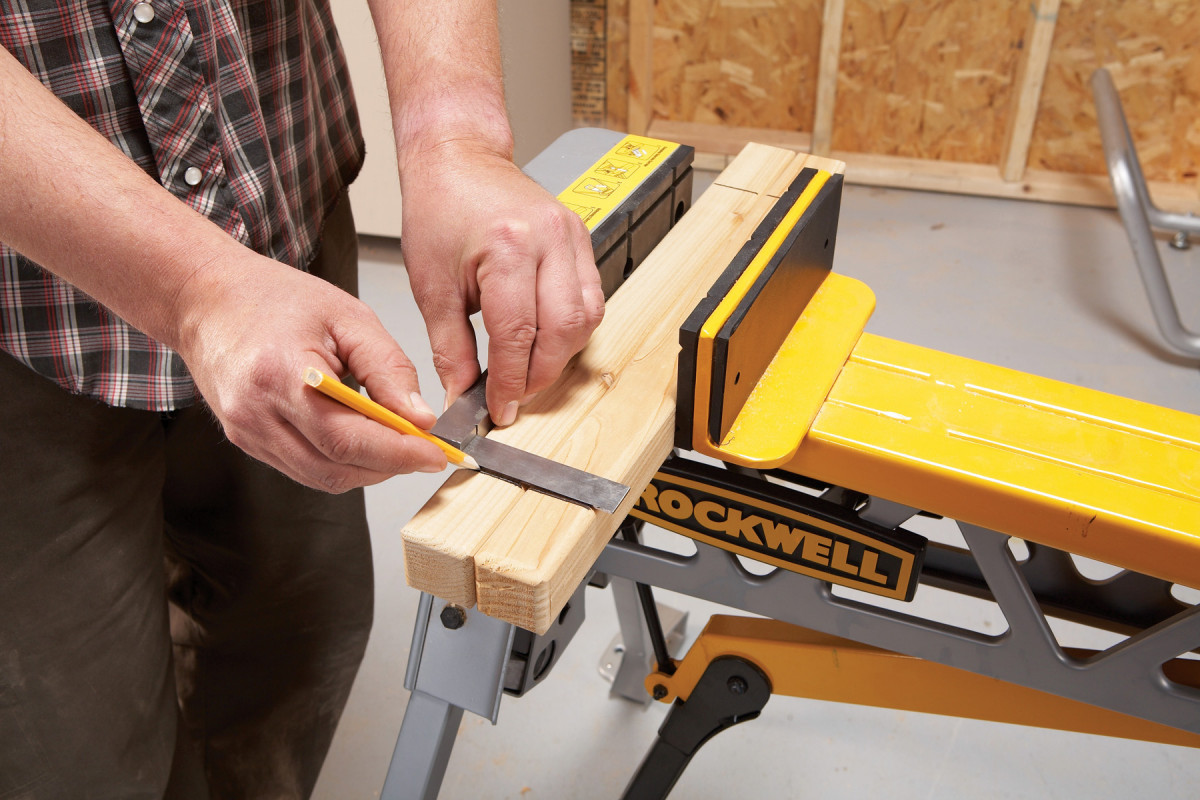
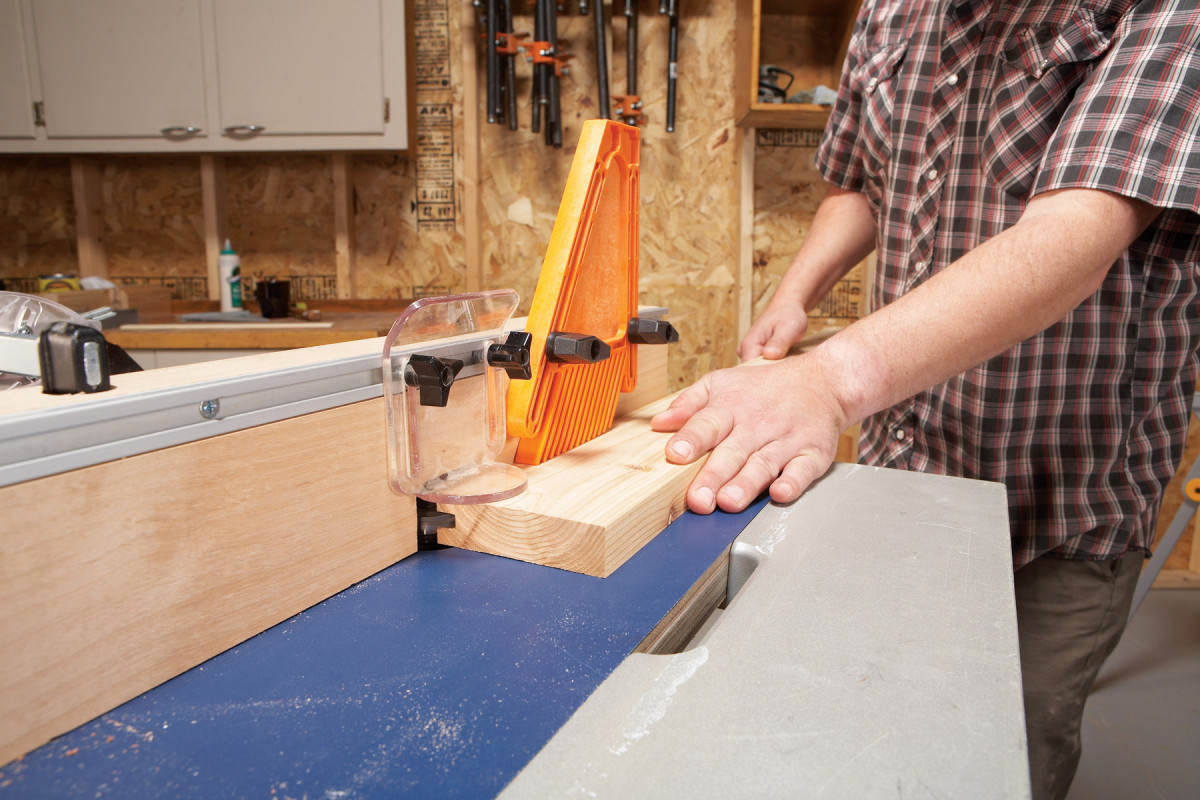
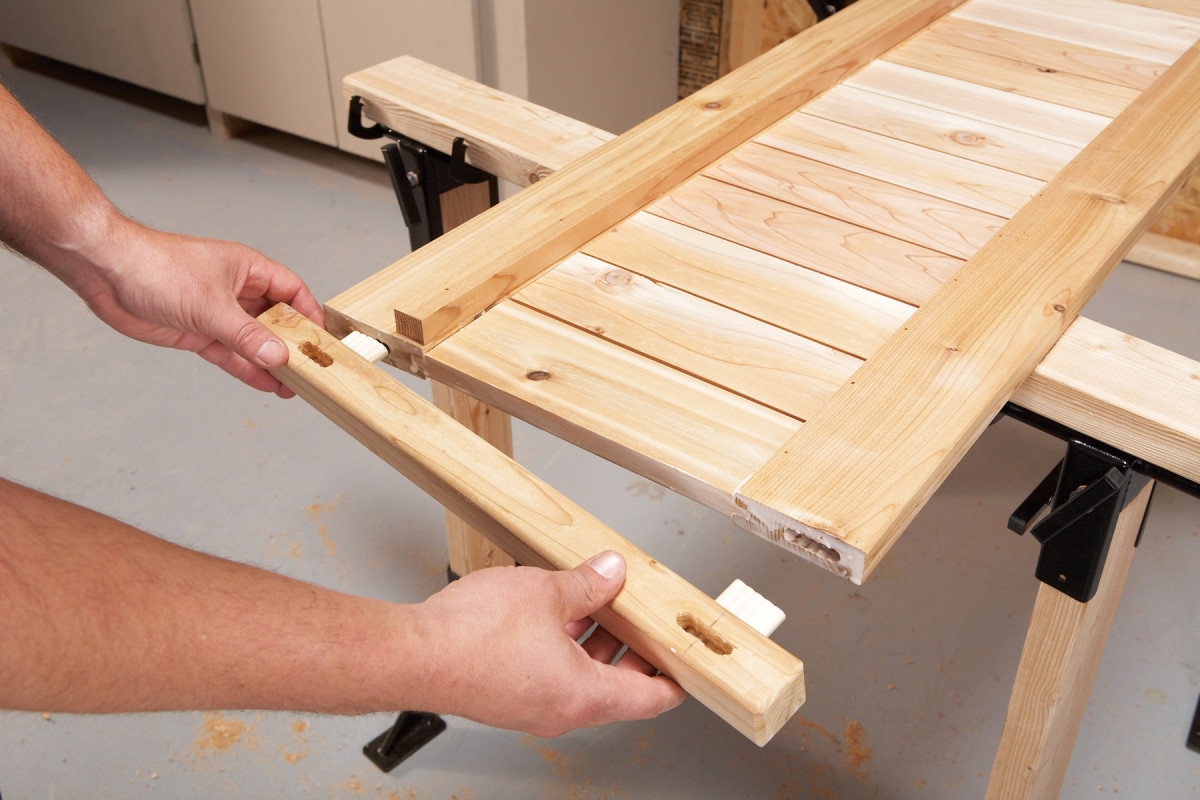
7. Mark the legs for mortising by transferring the layout lines from the panels. Each leg will have mortises on two adjacent faces.
Lay one of the panels on a flat surface and position one leg so it protrudes 3/4“ at the panel’s top and 1-1/8″ at the bottom. Transfer the mortise layout marks from the panel to the leg. Then use the marked leg to transfer the layout lines to the other legs (Photo 7). Be sure to locate the mortises so that the legs’ good sides will face out. Install the appropriate shims in the BeadLOCK jig to center the mortises, and then drill.
Assemble and finish
8. Glue and clamp the legs to the side panels. Swab glue in the mortises and on the ends of each panel. Install the BeadLOCK tenons; then install the legs.
BeadLOCK supplies tenon stock that you simply cut to length to create the 1-3/4“ long loose tenons (K). Miter one end of each tenon—the end that goes in the leg. Install the loose tenons when you glue and clamp the legs to the side panels (Photo 8). After the glue has set, repeat the process to glue and clamp the end panels between the side panels (Photo 9).
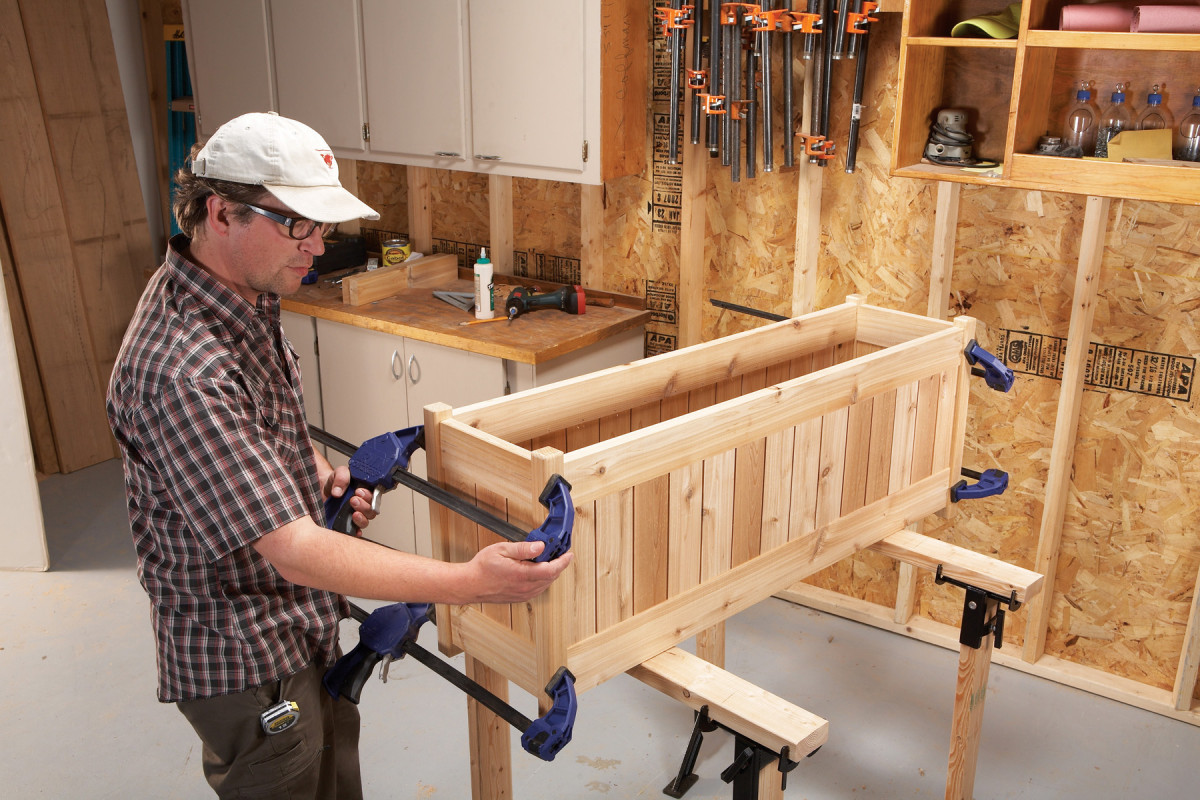
9. Complete the planter by gluing the end panels between the assembled sides.
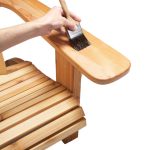
Apply the finish (Photo 10). I used a lightly pigmented exterior oil-based stain (see Sources). The pigment provides a measure of UV protection, so the finish lasts longer.
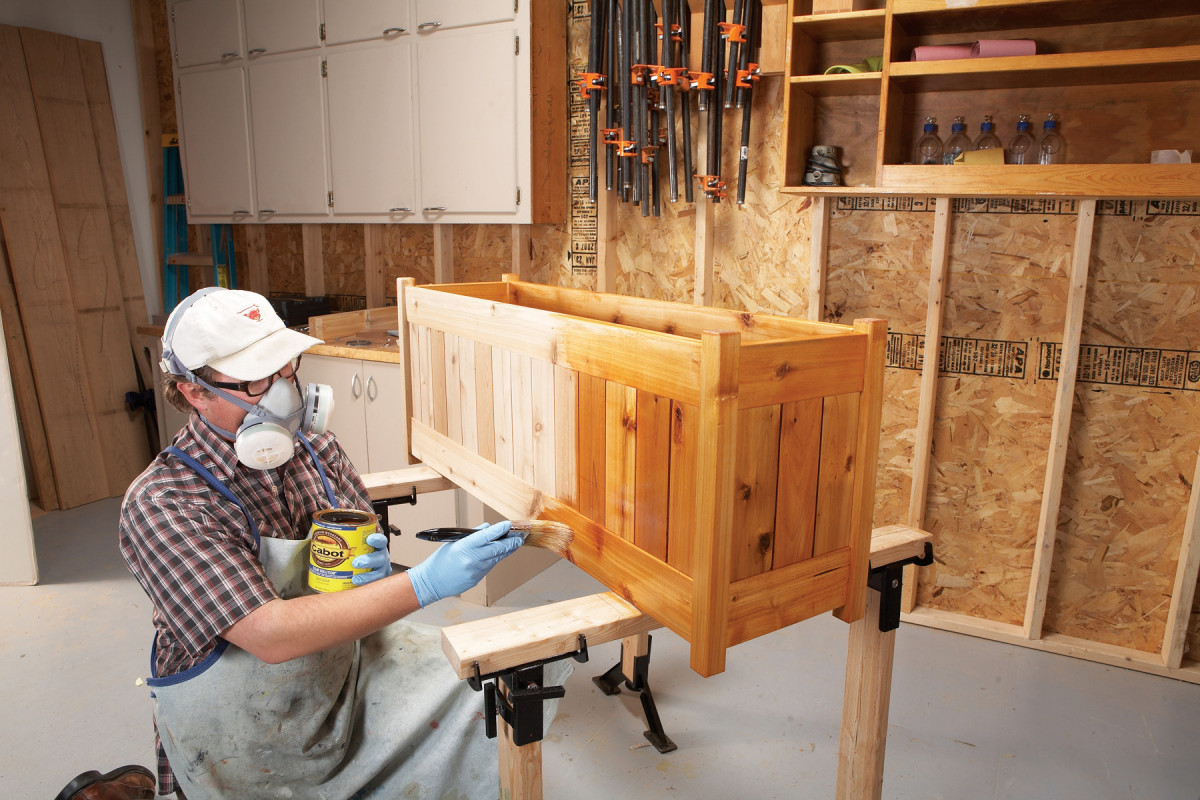
10. Apply an exterior stain to add color and protection from the rain and sun. Periodically reapply the stain to maintain the finish.
Place the bottom boards on the ledgers, leaving 1/4“ to 1/2“ between them for drainage.
Line the planter with heavy-duty plastic, poke some drainage holes, and fill it with soil; this is the perfect setup for a miniature herb garden. Or skip the soil and create instant color by filling the planter with potted flowers.
SOURCES
Cabot Clear Solution Translucent Oil Finish, #3002 Cedar
Titebond III Ultimate Wood Glue
Here are some supplies and tools we find essential in our everyday work around the shop. We may receive a commission from sales referred by our links; however, we have carefully selected these products for their usefulness and quality.