We may receive a commission when you use our affiliate links. However, this does not impact our recommendations.
 Practice your hand-tool skills and make a pair of strong, collapsible workshop companions.
 Practice your hand-tool skills and make a pair of strong, collapsible workshop companions.
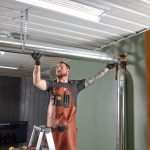
About a year and a half ago my wife took a job in eastern North Carolina. My work is still on the western end of the state, so most weeks I travel back and forth from one end of The Old North State to the other. To help deal with the 4-1⁄2” hour trips up and down I-40, I spend my time thinking about something constructive. It was on one of these trips that I first started thinking about these sawhorses.
There are many designs out there for different styles of knockdown or fold-up sawhorses; a lot of them are very good and would serve the purpose perfectly. The biggest problems with most designs I have seen, is that their construction tends to get complicated and heavy. It is just a lowly sawhorse; should it really take a month to make two of them?
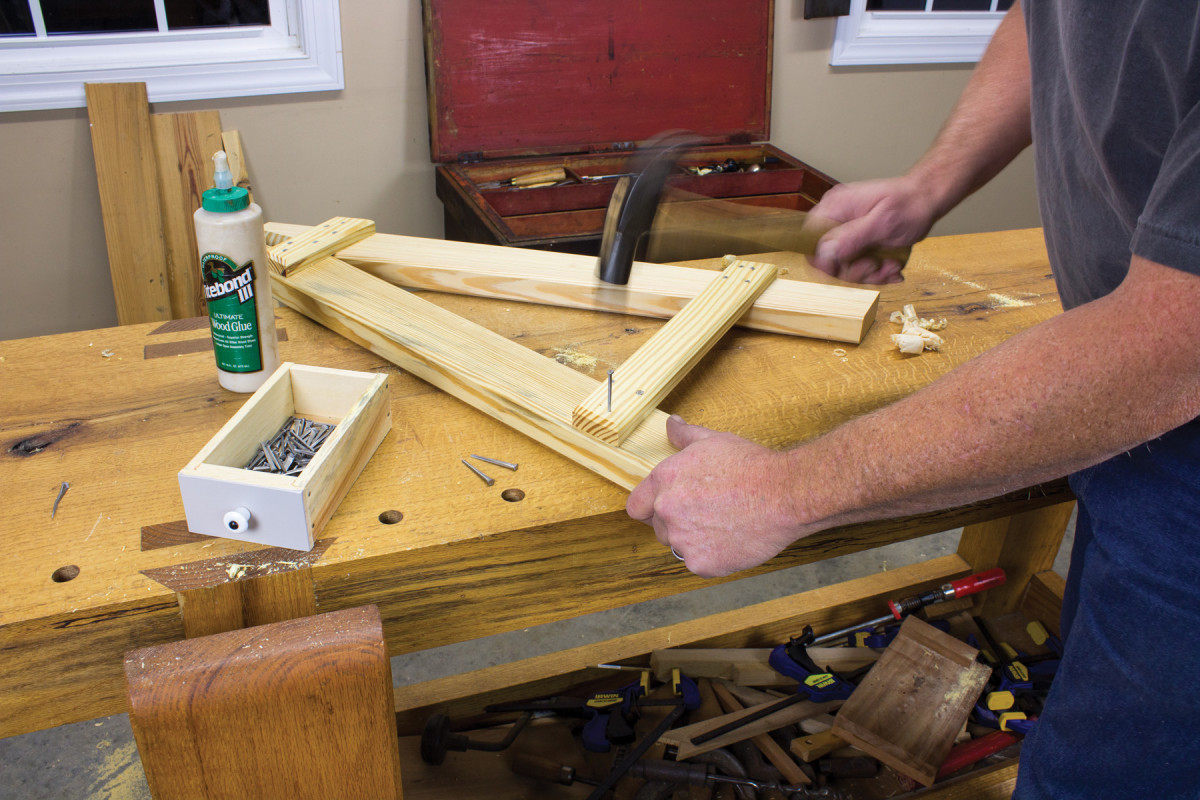
This design is the culmination of things my previous sawhorses lacked. I wanted a sawhorse that was relatively lightweight (could be moved one handed), could be broken down or assembled simply and quickly, to lie flat for storage or transport, no tools needed other than a hammer or mallet and most of all, strong with no wiggle.
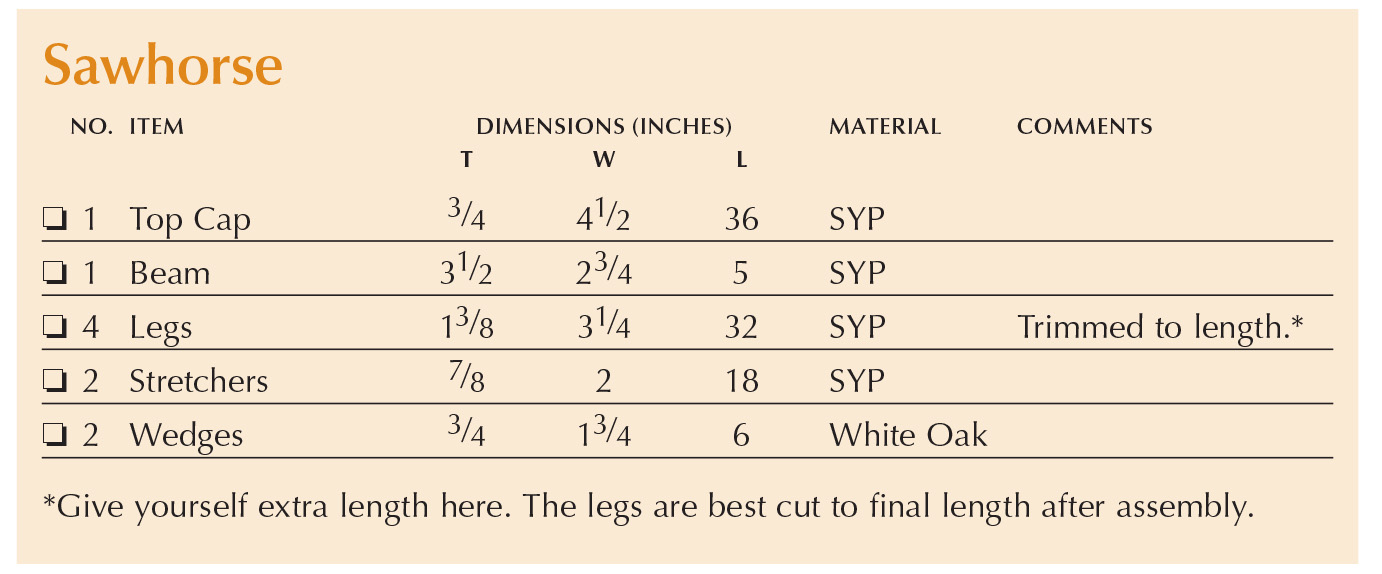
Cutlist and Diagram

 Materials
 Materials
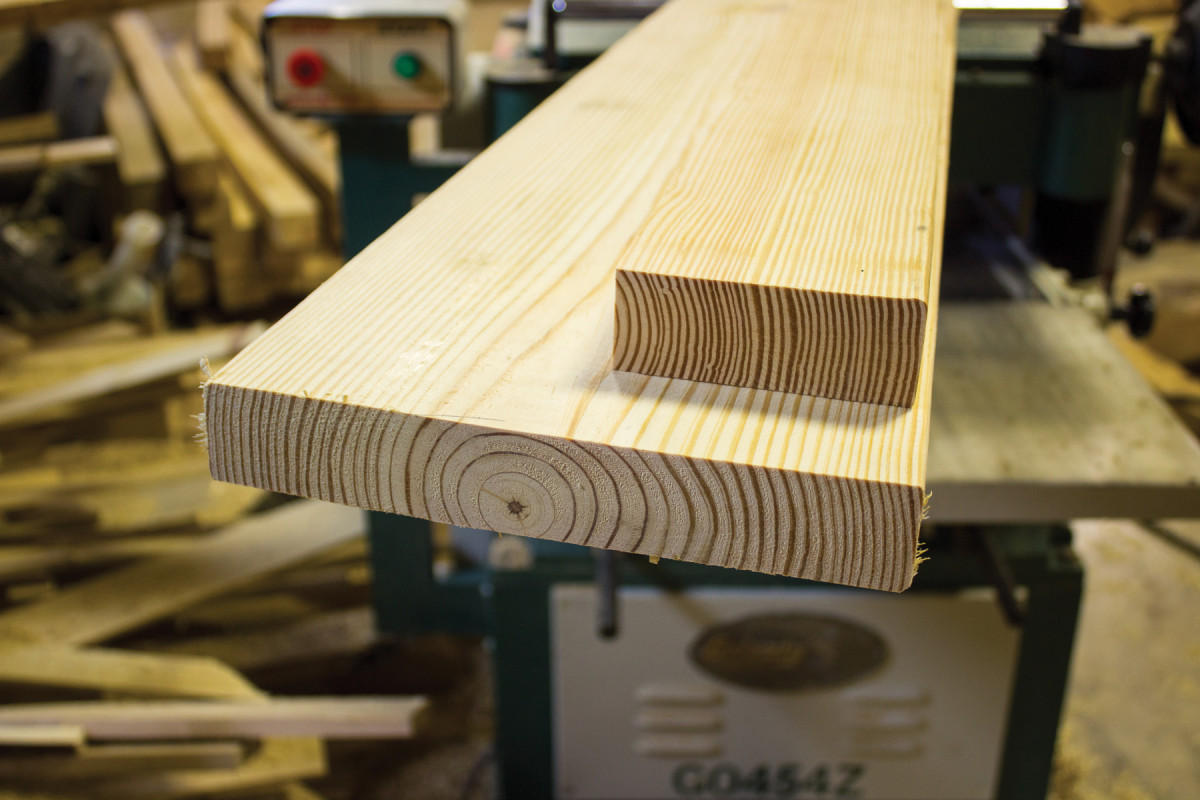
Choose lumber wisely. It’s worth digging to find quartersawn yellow pine – it’s a perfect material for sawhorses.
These sawhorses are made from 2x yellow pine construction lumber. I find it worthwhile to pick through the pile to find quartersawn stock, but flat-sawn stock will do just fine. If yellow pine is unavailable, use whatever cheap and relatively strong species you can get your hands on. I picked up two 16′ 2x10s to build these two sawhorses
and had a good bit of stock left over.
One more thing to consider is moisture content of construction lumber. Straight from the home center, it tends to be a bit on the wet side. Let it acclimate for a little while and dry out before you start to mill it.
Beam Glue-Up
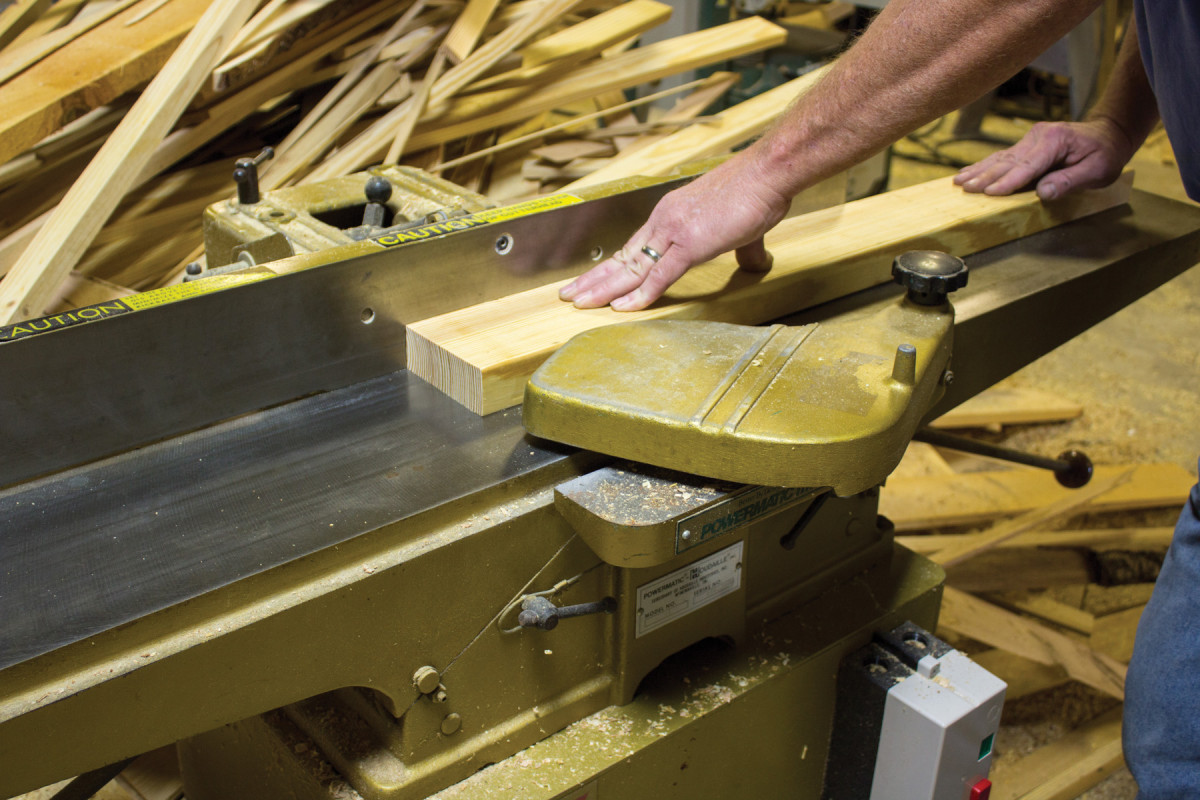
Square your stock. A powered jointer makes for fast work flattening stock.
I usually build these in pairs; one saw- horse is about as useful as a water hose with no spigot. Mill out the stock for the beams first; you will need four pieces about 33⁄4” x 36″. This is slightly larger than final size and will be milled to final specs after glue-up.
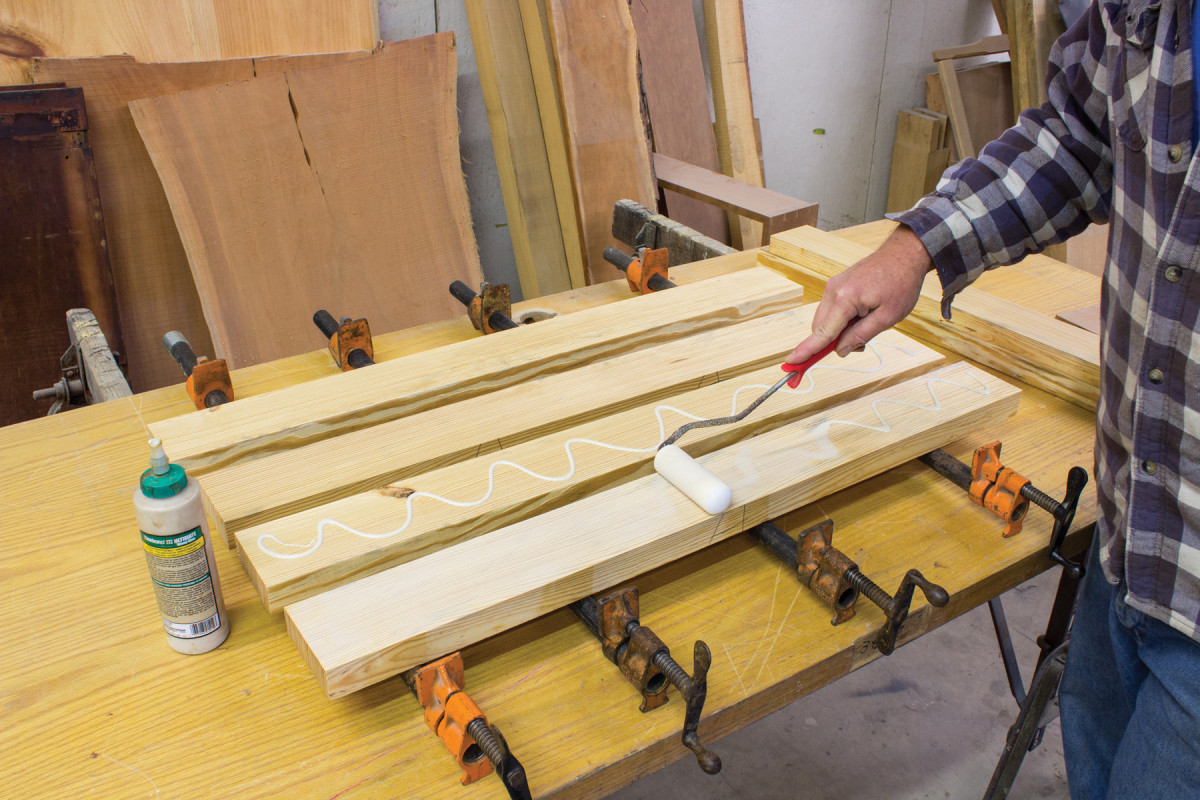
Glue it up. A small foam roller works well for spreading the glue evenly and quickly.
We want to keep the beams as thick as possible. Because we are starting with 11⁄2“-thick stock, joint just one face of each of the four pieces that will meet when glued, taking just enough material off to get a flat surface. Align the pieces and draw a triangle on one pair and two triangles on the second, so as you are gluing you will know which pieces go together. Apply glue to the meeting faces of each pair, assemble and clamp the two beam assemblies as one. While the glue sets, you can get the legs started.
Legs Assemblies
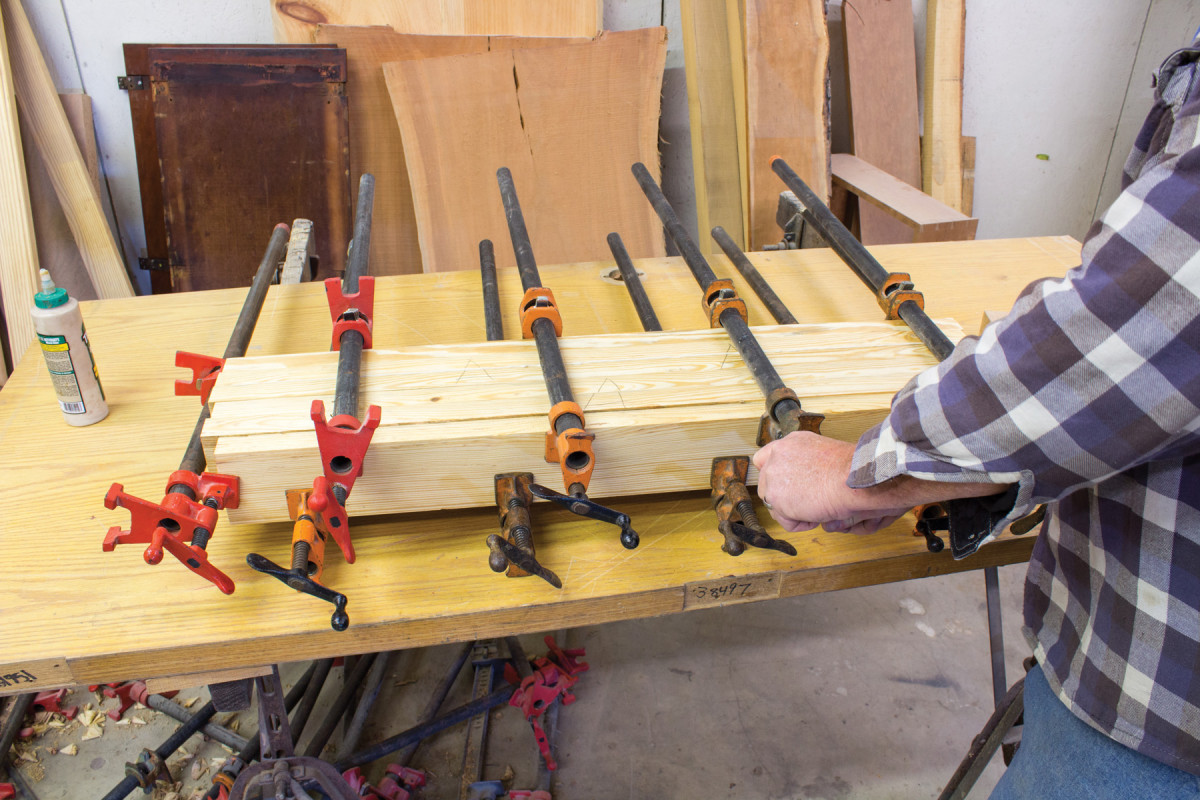
Clamp the beams together. Clamp both beams at once. I also have a scrap piece on the outside of the stack to prevent the clamps from damaging the beam surfaces.
The plans for these sawhorses call for a total height of 30″ – you can, of course, make them taller or shorter to suit your needs. You will need eight legs for two sawhorses. These are jointed and planed to 13⁄8” x 31⁄4” x 32″. (The 32″ length is slightly over long – you’ll cut them to size later). Arrange the legs in pairs and mark the faces, it is a good idea to number the pairs as well. Start by cutting the tops of the legs at a 15-degree angle.
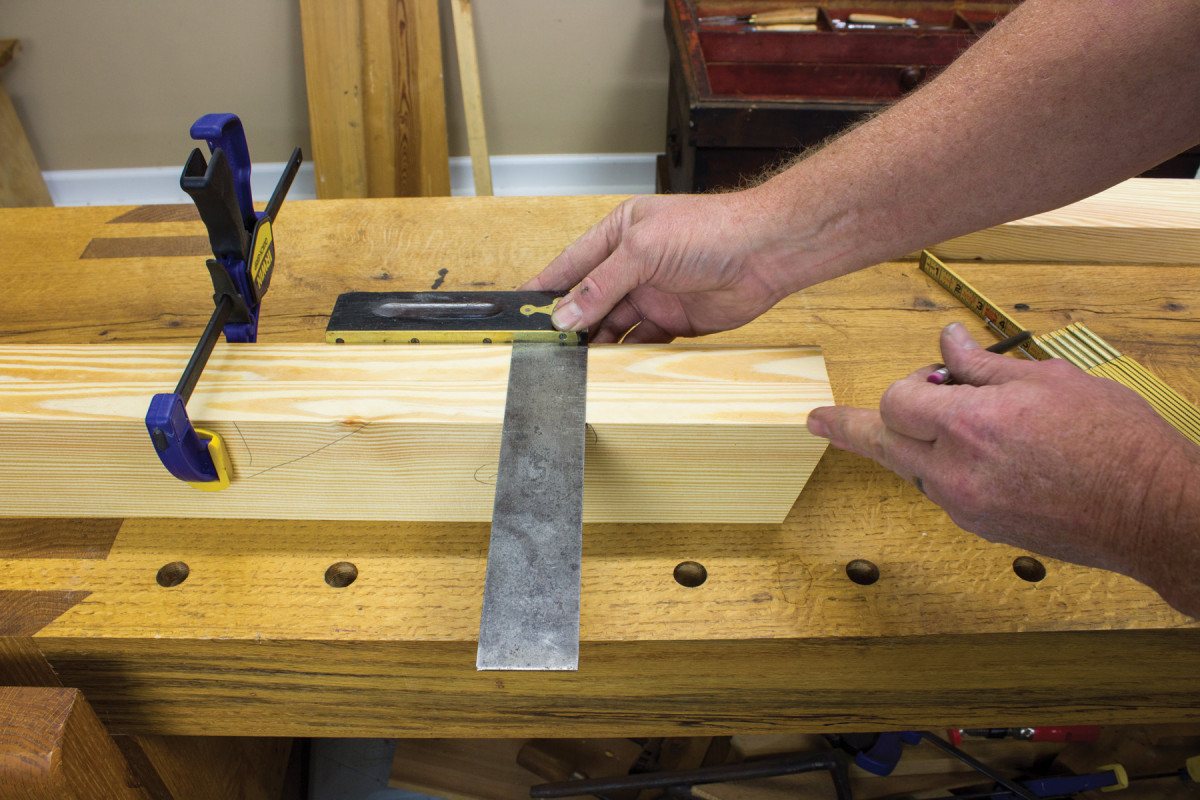
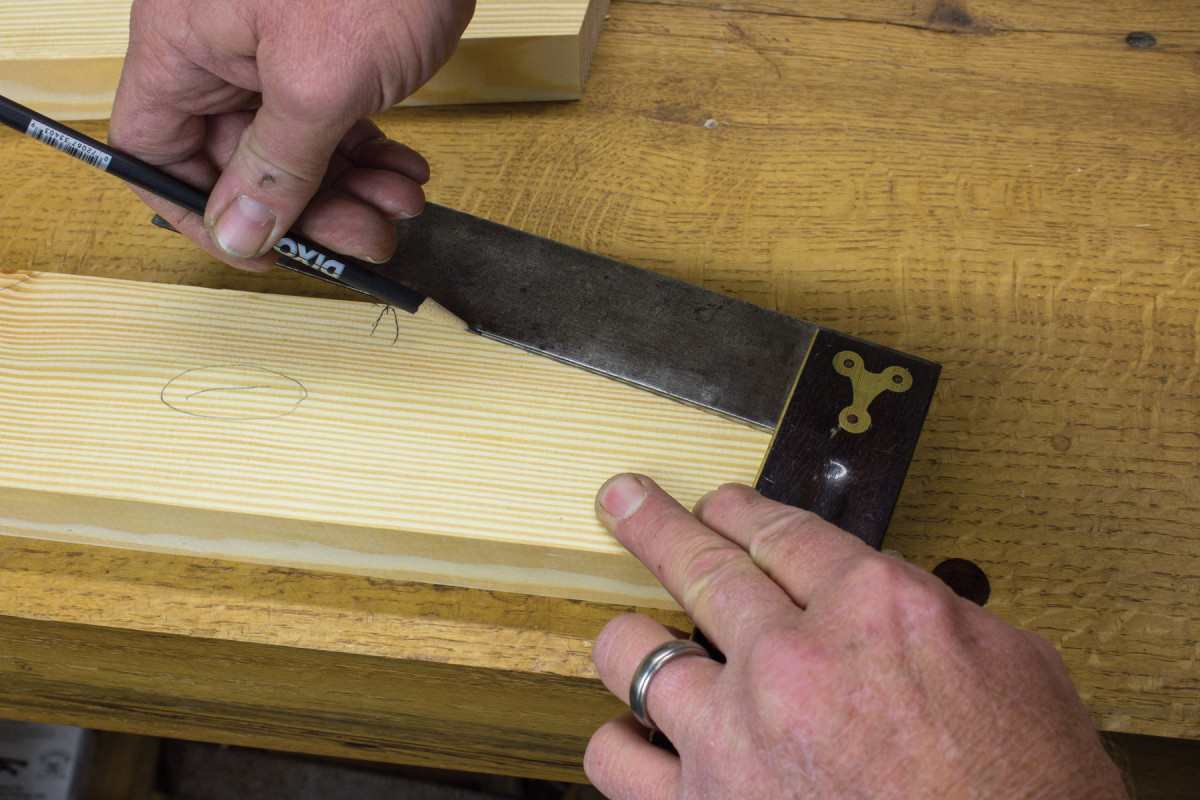
Clamp a pair of legs together with the inside edges up then measure down from the top 51⁄2” and square a line across both legs.
Unclamp the legs, on the face side of the leg place a try square on the angled top of the leg, line up the beam of the square to the line you just made on the side and pencil a mark to the top of the leg. This will be the meeting face between the legs.
Now, measure over from the line on the face 3⁄4” toward the outside of the leg and make a tick mark. Use a machinist square with the rule set to project 31⁄2” from the fence. Line the square up to the tick mark, pencil a mark down the rule and around the end. This notch will become the saddle that the top beam will rest in.
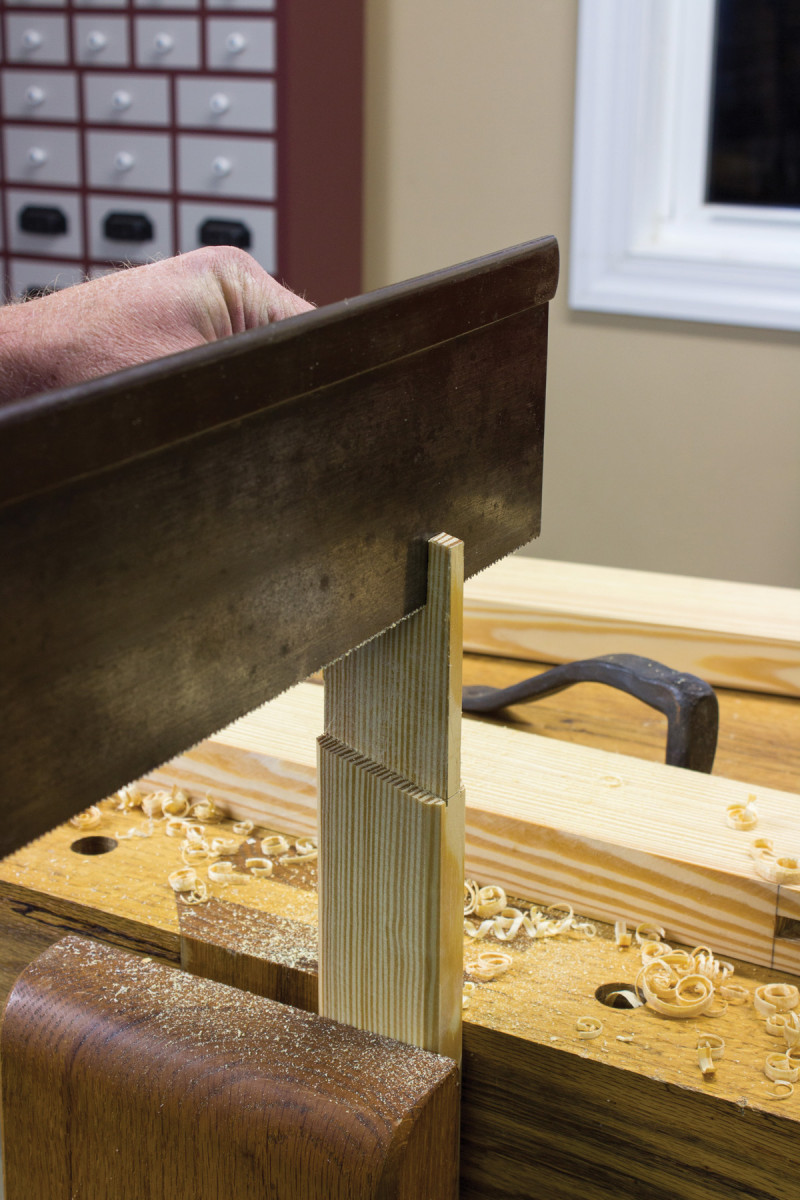
With the layout on the ends of the legs complete it’s time to rip! Start by ripping the 31⁄2” line first down to the baseline then make a crosscut at the baseline of the saddle to remove the waste.
With the saw cuts complete check for square. If the notch needs any tuning a chisel will make quick work of it. The lower angle needs to be flat and square; a block plane works well here.
Stretcher Mortise and Tenons
Lay out both legs together. Laying out the legs in pairs ensures perfect alignment.
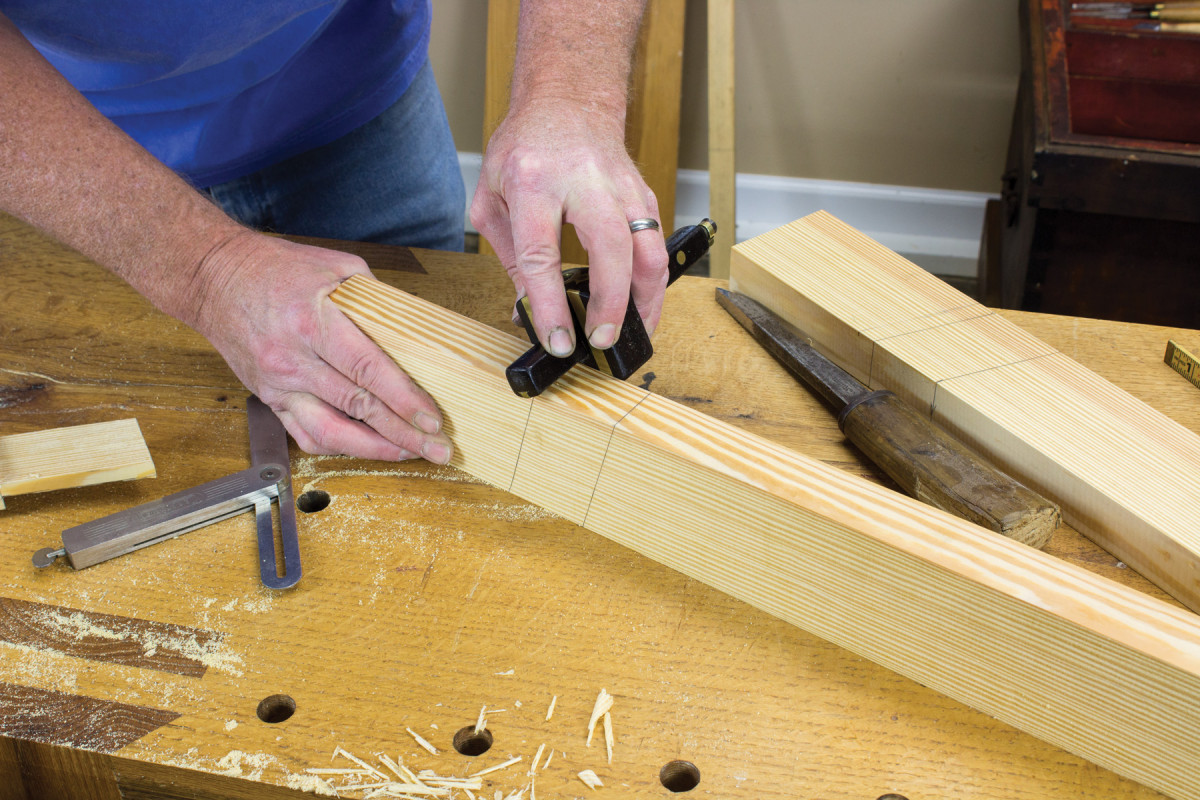
For the stretchers that run between the legs you will need four 7⁄8” x 2″ x 18″ pieces of stock. These keep the bottoms of the legs from spreading when under heavy load. To lay out the mortise and tenons, start by clamping the pair of legs to be joined in the vise with the outside edge up and the top angles aligned with one another. Measure down 221⁄2” from the top of the leg and square a line across the two. Remove the legs from the vise and lay them out flat on the bench with the face side up. Align the top meeting surfaces of the legs and use a clamp to hold them in alignment.
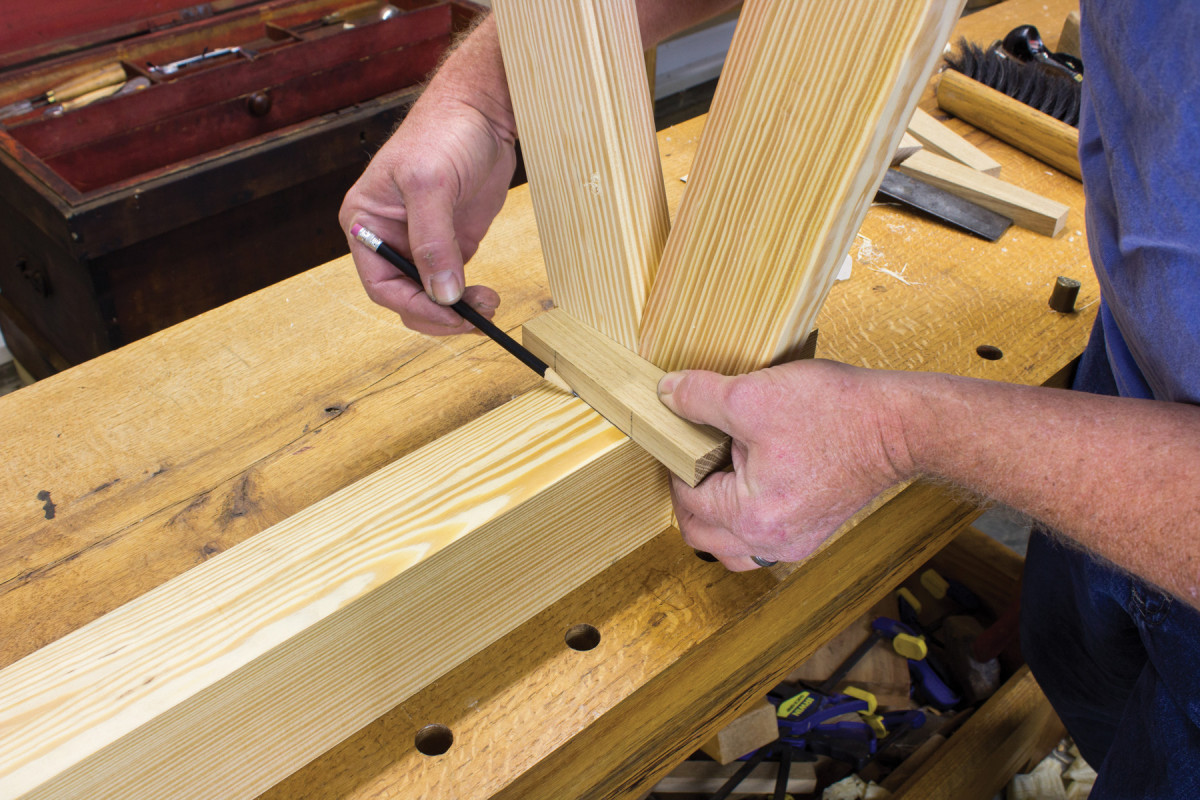
Lay the stretcher on top of the legs with the line you just made aligned with the top edge. Hold the stretcher in place and trace with a pencil around the upper and lower sides of the stretcher onto the faces of the legs. Before removing the stretcher also trace from the inside of the legs to the underside of the stretcher for the tenon shoulder location. Laying out the joints this way assures perfect alignment even though both elements of the joints are angled.
Add the angle. Square off of the 15° cut at the top of the leg.
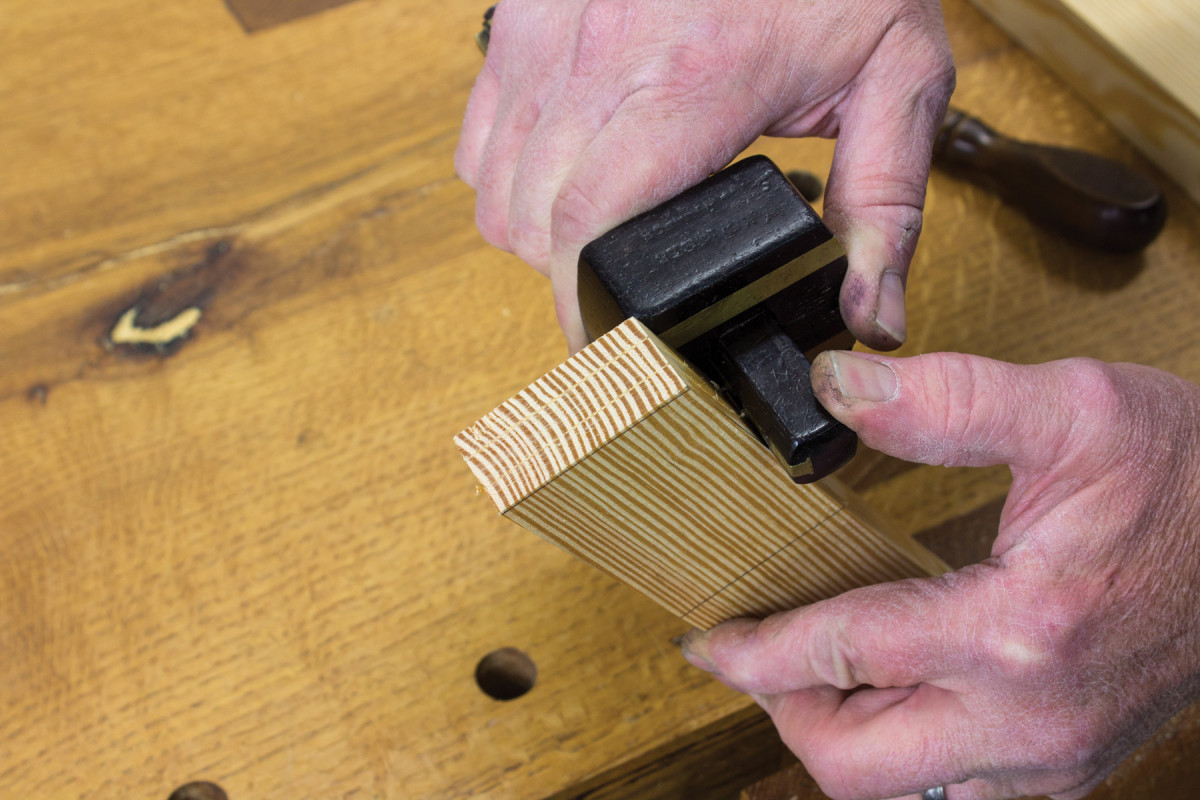
I usually cut the tenons first. Line up a bevel to the trace mark on the face of the stretcher and knife the shoulder line in. Use a square to knife the line across the edges, and finish by knifing the shoulder on the opposite face with the bevel. To lay out the thickness of the tenon use a mortise gauge set to 3⁄8“.
Center the gauge teeth to the thickness of the stretcher, with fence to the face side, gauge around the sides and end of the tenon. Then, saw a kerf for tenon wedges 1⁄4” from the top and bottom edges of the tenons.
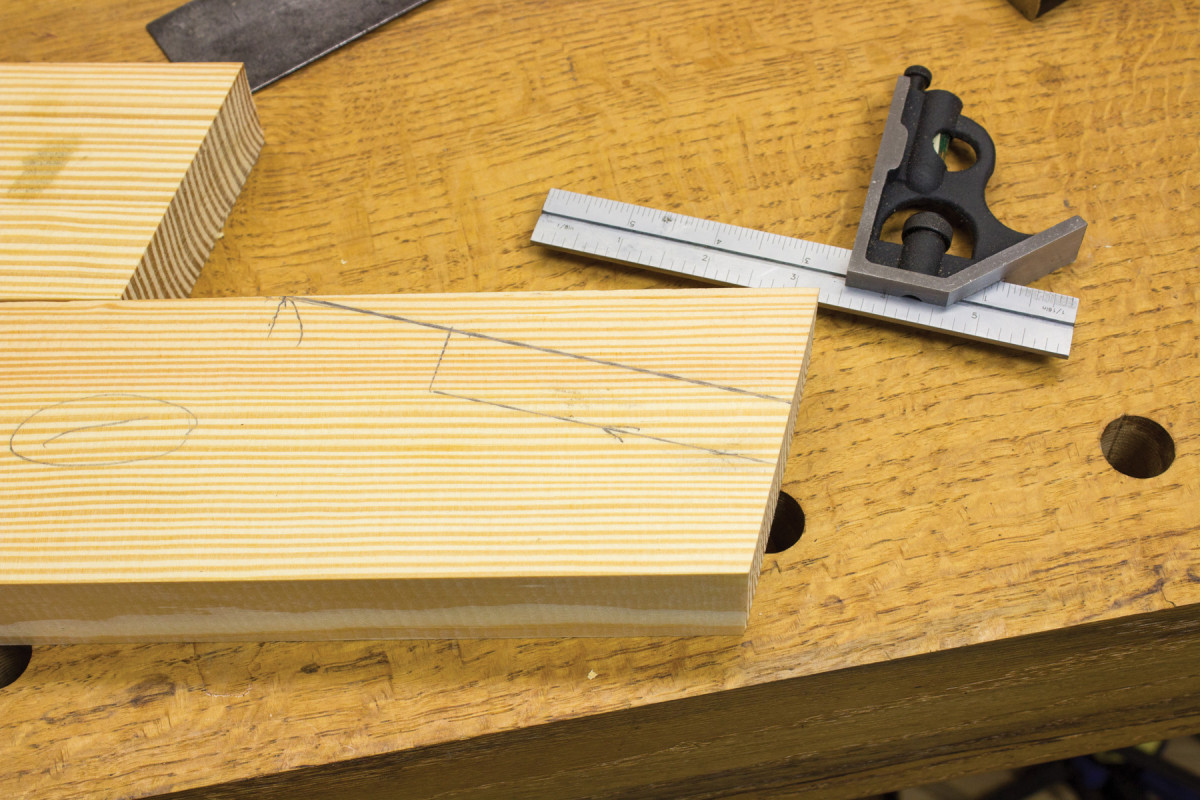
Two-part layout. You can lay out the side and bottom of the saddle notch at once.
For the mortise layout, transfer the marks made earlier across the edges of the legs with a square. The leg is thicker than the stretcher so you will need to readjust the fence on the gauge to center the teeth on the leg stock. Gauge the mortise width between the pencil marks on the inside and outside edges of the legs.
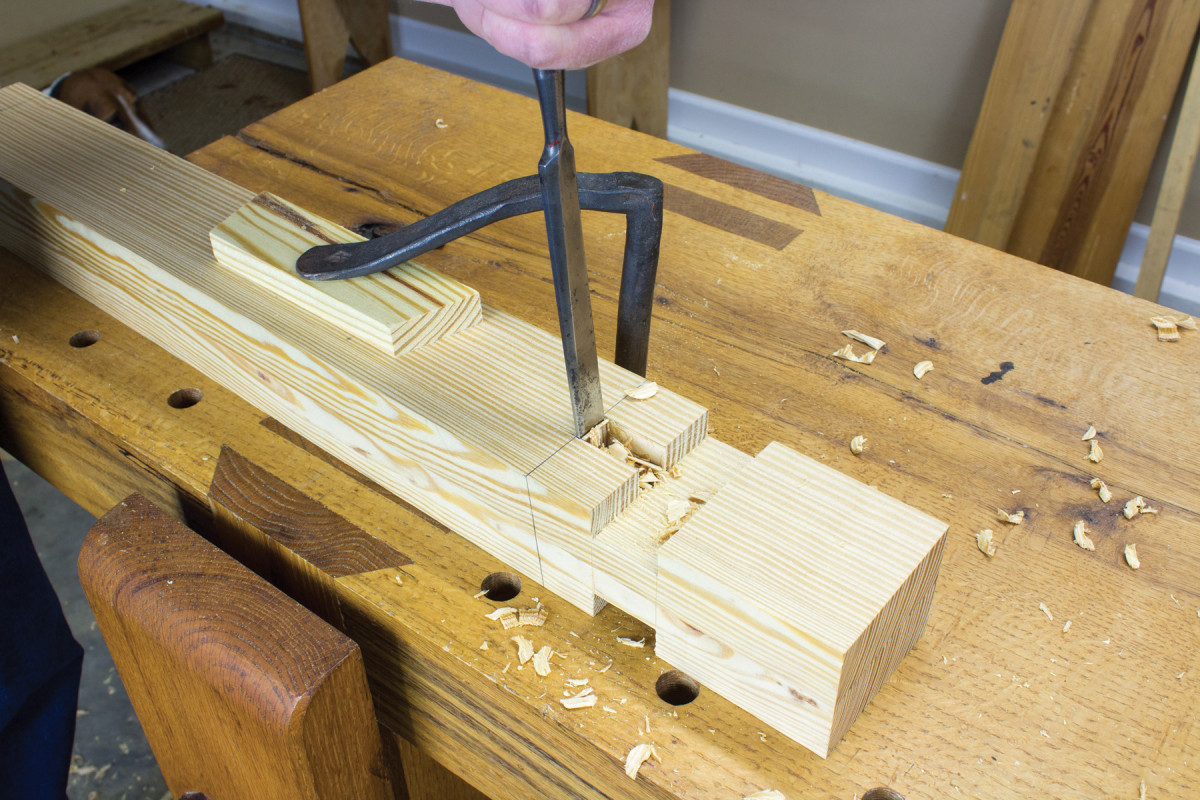
Chop out the waste, working halfway from either side, meeting in the middle. The ends of the mortise are at an angle, as you are chopping you can eyeball down the back of the chisel to the layout lines down the side of the legs to help get an accurate angle through the mortise.
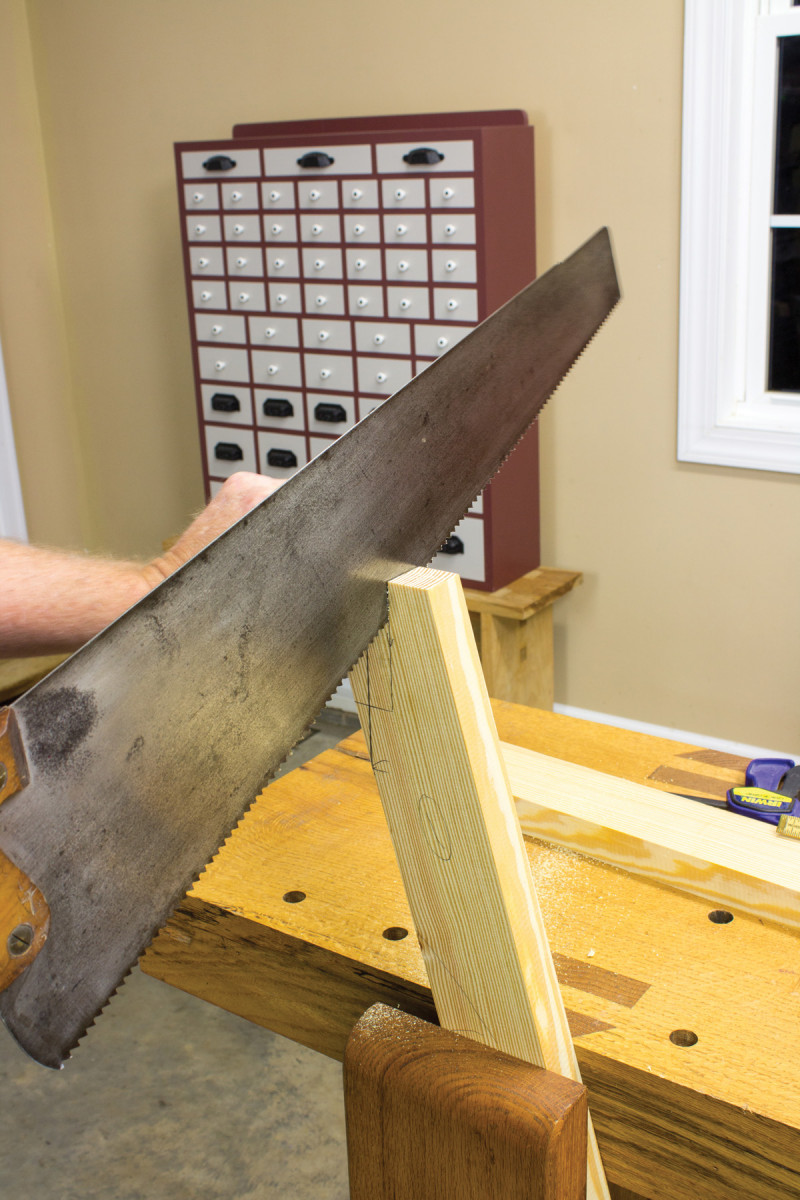
Cut the angle. A full-size ripsaw makes quick work of cutting these angles.
With the mortises complete, dry fit the assembly. Check the tenon shoulders fit to the insides of the legs, use a chisel or shoulder plane to pare away any offending material. The tenons will need to be cut to length so while assembled trace the length from the side of the legs onto the tenon. Also check the tops of the legs where they meet one another, this area can be tuned with a block plane or sawing between the legs while assembled with a tenon saw to close up the joint.
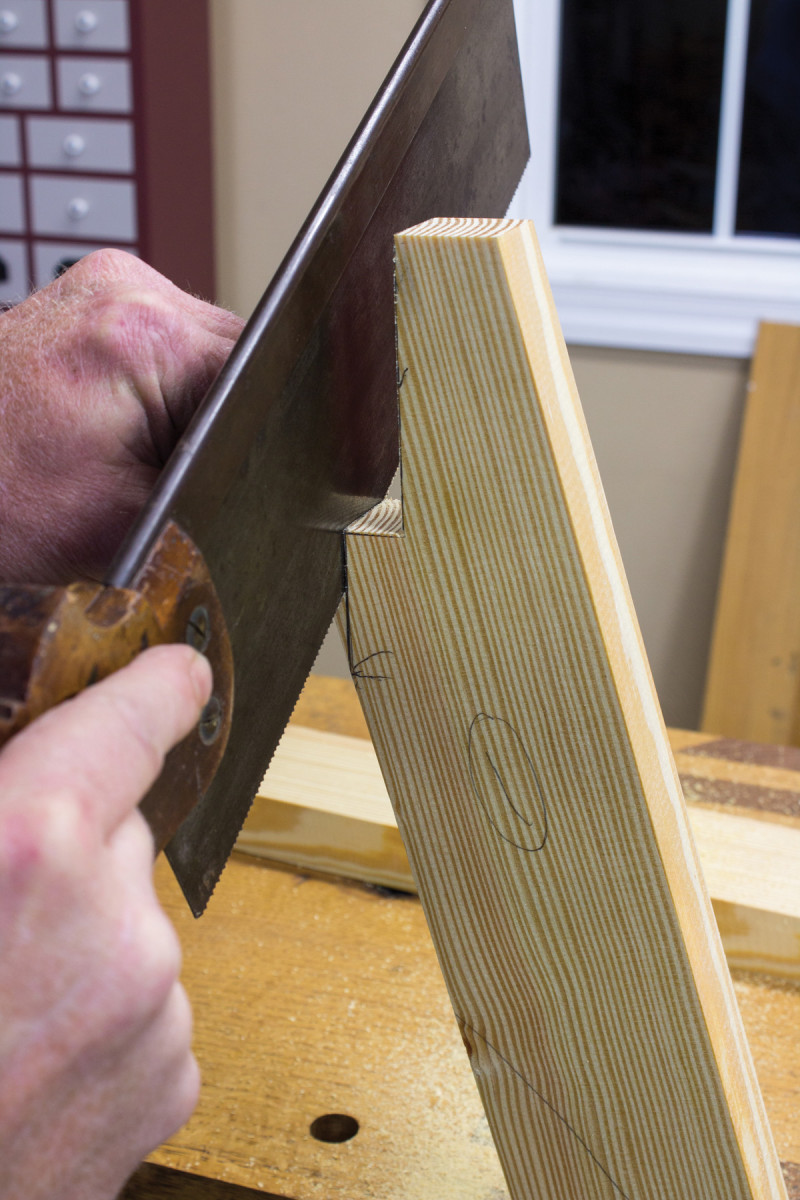
A crucial cut. This short rip cut needs to be accurate; the top of the legs attach to one another here.
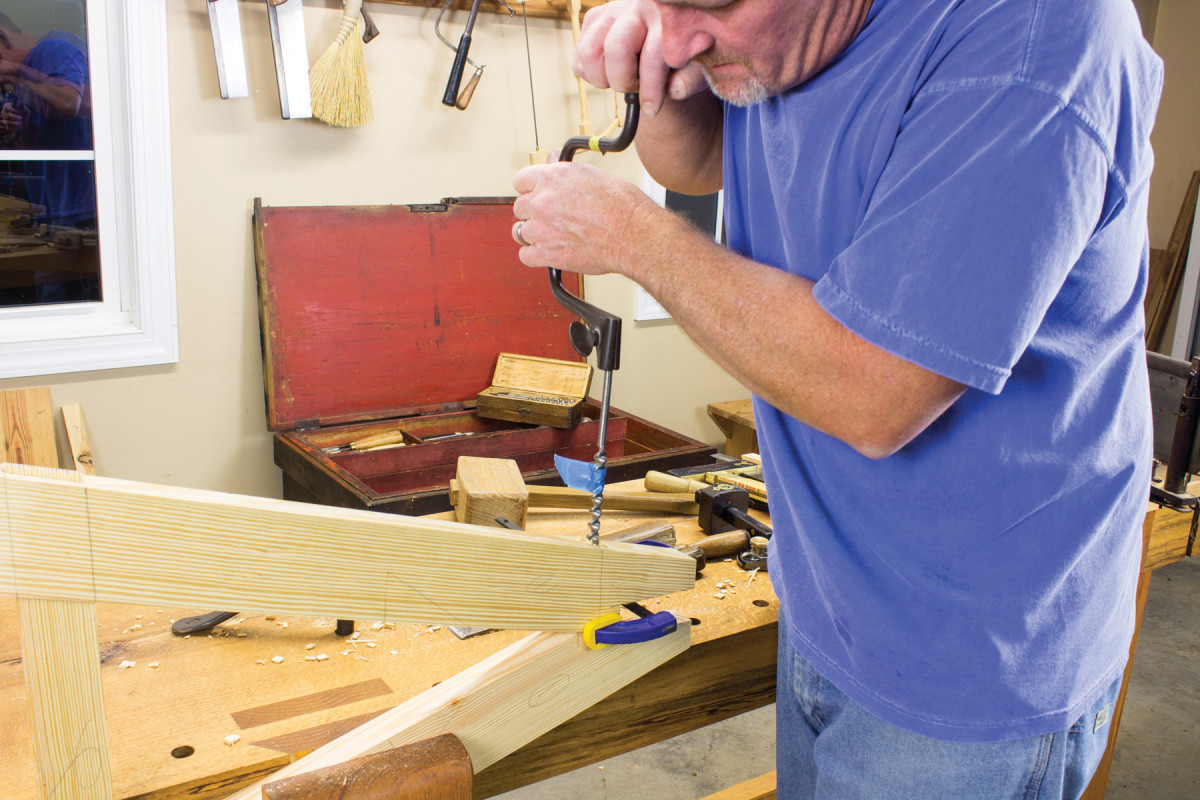
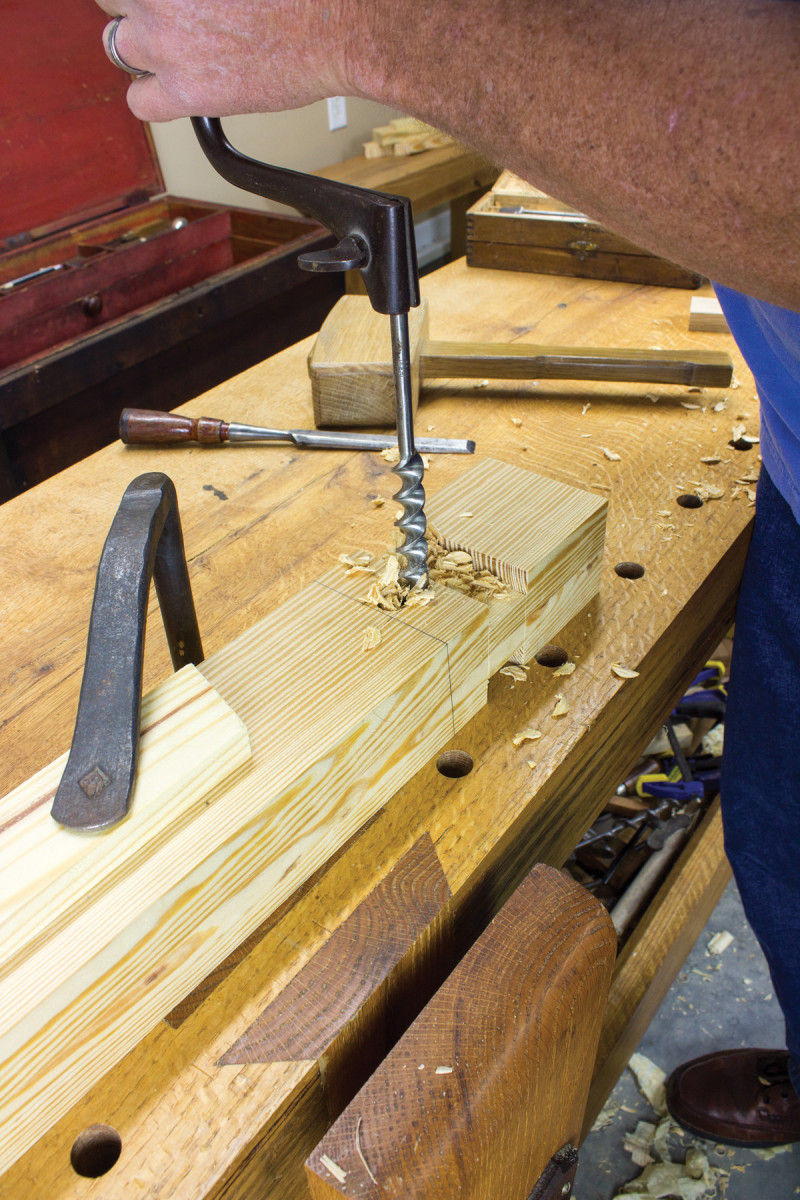
The area at the top of the legs where they meet will be secured by a single #14 x 4″ wood screw (a hex head lag bolt could be substituted here). While dry fitted, use a bevel set at 15° and make a reference line through the middle of the pad on the face of the legs where they meet and then square the line around the side of the leg. Clamp the legs together to hold them in alignment.
With a 1⁄2” auger centered on the leg, bore in to a depth of about 11⁄4” using the bevel line to sight the angle. Next use a 1⁄4” drill to bore thru the center of the auger hole until it just starts into the adjoining leg.
Disassemble and finish by pre-boring the adjoining leg for the threaded portion of the screw with a 3⁄16” drill bit.

Direct layout. Transferring the stretcher mortise locations to the legs using the stretcher itself is the most accurate method.
Before final assembly of the legs there are a couple of tasks that are better done now than later. Finish plane all four sides of the stretcher. These sawhorses are meant to be used and not fine furniture so I cut the chamfered edges with a jack plane eyeballing a 45° angle. If the bevel is rough, make a final pass or two with the block plane. I also hit the inside edges of the legs that cannot be reached once assembled with a smoothing plane and chamfer these edges as well.
The legs also need to be cut to final length by measuring down from the top 30″ then use the bevel to lay out the same 15° angle as the top. Saw the line; the legs will look like a parallelogram when laid out correctly. If it looks like a trapezoid it won’t work!
Optional Leg Assembly Method
Another version of leg assembly I have used that has worked well involves nails instead of mortise and tenons. In this version the legs are made the same as described above, the difference being there is a short upper stretcher attached with nails and glue to the side of the legs at the top, replacing the screw.
The lower stretcher is also just nailed in place eliminating the mortise and tenons. While the nailed leg assemblies are not as elegant a solution to joining the legs together as the mortise-and-tenoned version, it is much faster to build and plenty strong.
Assembly of the Legs
Tenon width. Set your gauge teeth to the width of your mortise chisel.
Spread a good coat of glue on the tenons, mortises and the area at the top of the legs where they meet as well. Assemble the tenons to their respective mortises.
Wedged tenons. A saw kerf a ¼” or so from the top and bottom edges of the tenons will make starting the wedges easy.
Align the tops of the legs, place a clamp across to hold the faces flush with one another and install the screw.
 Last, drive the wedges into the stretcher tenons. As you drive the wedges in be sure the leg stays tight against the stretcher shoulders.
Finish the Beams
Gauge the mortise. Gauge the mortise width between the pencil marks on the insides and outsides off the legs.
Once the glue is dry on the beams, joint and plane them to their final dimensions of 31⁄2” x 35″ x 23⁄4“. There are four short dados that need to be cut into the beam that capture the legs. Measure in from both ends 4” and knife a line around all four sides.
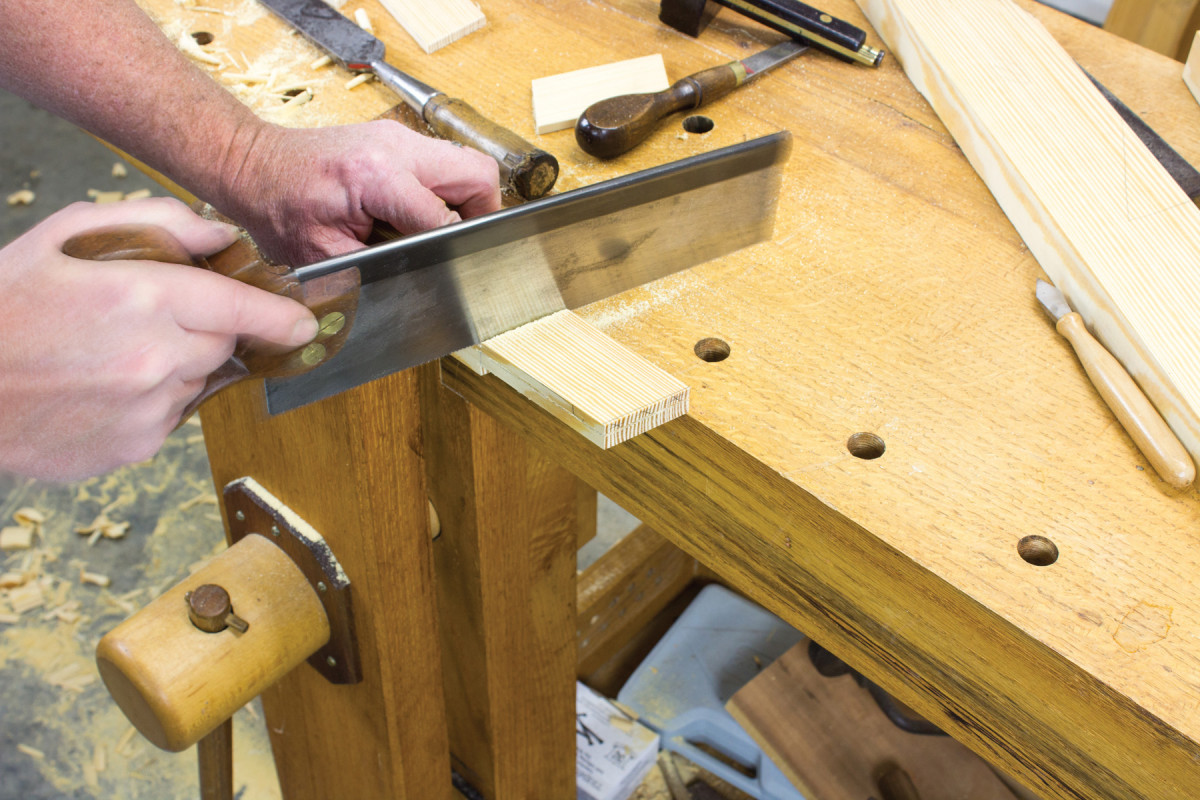
Lay out the shoulders. A crosscut-filed backsaw takes care of the shoulder cuts.
Now measure in 13⁄8” from the first line and square it around all four sides as well. Set a single pin gauge to 5⁄8” and on the top and bottom of the beam gauge a line between the two knife marks for the depth of the dados.
Check the fit and insert the leg assemblies in the dados. They should just slide in; a little loose is better than too tight.
Wedges
Join the legs. Use a ¼” drill centered in the auger hole; stop drilling when it just starts in the opposite leg. Just the one screw is all that is needed to secure the tops of the legs together.
Use as hard a wood as you can get your hands on for the wedges; I am using white oak for these shown. To make the wedges, start with a piece of wood 6″ x 3⁄4” x 13⁄4“. The wedges are a little long at 6”, this gives some leeway for fitting, and they will be shortened later. Measure down 5⁄8” on the face of the wedge stock on one end and make a tick mark. Use a straightedge, align it with the tick mark and the arias at the opposite end and mark down the length with a pencil.
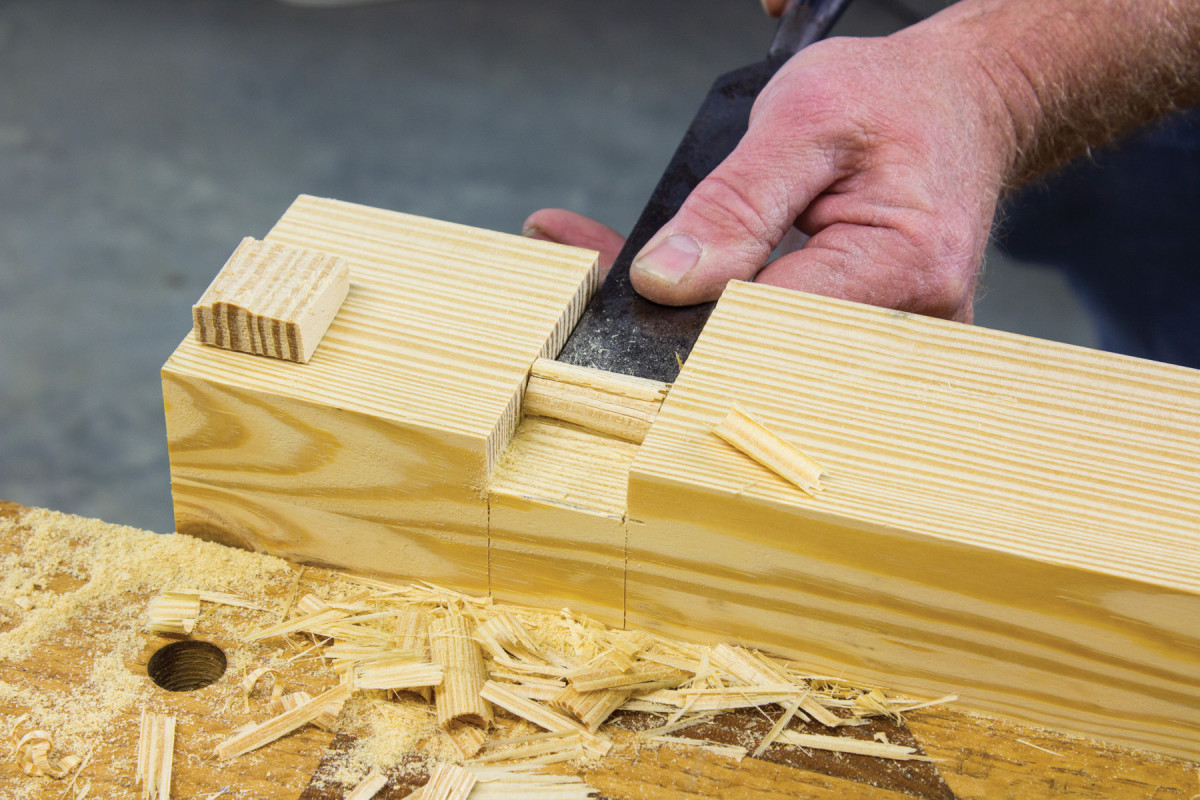
Cut the dado. Saw the sides of the dado first, down to the depth mark, then chop out the waste. Finish by paring down to the baseline.
It is a good idea that the wedges be identical to one another so that they will seat up the same in any mortise in which they’re placed. To accomplish this, make the final passes with the jointer plane while all four wedges are aligned to one another, clamped up in the vise.
Define the angle. Use the wedge to transfer the angle.
To layout the mortises for the wedges, assemble the legs to the beam while upside down on the bench. Lay the wedge against the underside of the beam, straight side against the inside face of the legs. Make a pencil mark down the angled side of the wedge onto the beam. Disassemble and, using a square, bring the line up both sides. Gauge with the fence to the bottom side and mark from the pencil line to the dado. Using an auger slightly smaller than the width of the mortise bore halfway through from both sides and then chop out the remaining waste with a 3⁄4” chisel.
Mortise for the wedge. Lay out your angled mortise and then auger out most of the waste.
Finishing Up
Finish plane the sides and bottom of the beam. You can also chamfer the lower edges and end to match the legs if you like. Assemble the legs to the base and drive the wedges up tight. The wedges will also be extending past the legs a bit; mark where they meet the legs and saw off the extra length.
A little extra room. Chop an extra 3⁄16″ into the dado. The wedge should push against the leg and not bottom out in the mortise.
Chamfering the ends of the wedges will help keep them from mushrooming as they are driven in and out. If the legs are projecting above the top of the beam plane them flush or a shade below. Last but not least, I nail (no glue) a 3⁄4” x 4-1⁄4” x 36″ board to the top of the beam.
I wiped a coat of oil on these for a finish, but no finish at all is just fine too.
Here are some supplies and tools we find essential in our everyday work around the shop. We may receive a commission from sales referred by our links; however, we have carefully selected these products for their usefulness and quality.