We may receive a commission when you use our affiliate links. However, this does not impact our recommendations.

After my students finished flattening enough surface at the back of their branches (read the first part of the story here) we designed and worked on augmenting the branch’s parts. I showed them the different inspirational design ideas for the finials and terminus, but I also encouraged them to think about ideas of their own. With regards to the surface of the branch, some students like to leave the bark on their branches while others prefer to shave or rasp it away.

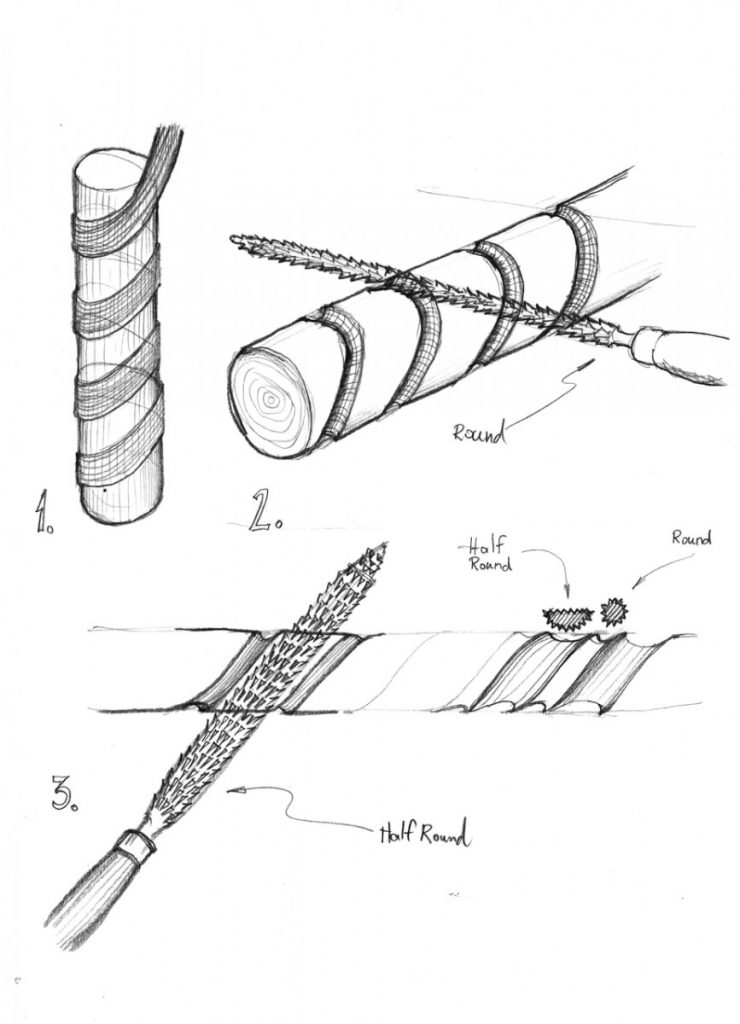
What I find fascinating is that many of my students gravitate towards forming a helix or spiral carving that coils up on the branch.
To make a helix we draw a helical guideline on the branch which the students then rasp using a round rasp. Then I propose to them to carve a second helix between the coils of the first helix. To do it we use a half-round rasp with the curved face turned down to plow the helix. Once the two helixes are completed the branch looks amazing.

You can stick a masking tape coiled around the branch and then trace its track with a sharpy if you feel that you, or the child you are teaching, are having difficulties with the freehand technique.


Finials and terminuses
The best finials and terminuses are those that the students invent themselves. Snakeheads, fruits, and flowers are just some of the ideas I help them realize. Sometimes it is easier to draw the design outline on the back of the branch and then use the rasps to form it.


After the students finish working with rasps or knives they take some sandpaper and smooth the surfaces. We then drill two holes for the hanging fasteners and apply a coat of wax or flaxseed oil on the wood to finish the work.

Making a branch hook is fun and fast. Try it yourself or teach it to the children in your life. I am sure that they will love it.
P.s. Branch hooks are great for hanging stockings as long as Old Saint Nick is careful not to overload them.
Here are some supplies and tools we find essential in our everyday work around the shop. We may receive a commission from sales referred by our links; however, we have carefully selected these products for their usefulness and quality.


