


We may receive a commission when you use our affiliate links. However, this does not impact our recommendations.

Bow-Front Bookcase
Sleek, gentle curves make it easy to look at. “Sandwich” construction and simple joinery make it easy to build.
By Randy Johnson
| This bookcase combines straightforward joinery and materials in a design that won’t overwhelm your budget or your room. Yet its deep shelves provide plenty of room for oversize books or a place to display your collectibles. The thick, solid look of the center and end panels is achieved with a laminated plywood approach we call “sandwich” construction. This bookcase is fun to build, so let’s get started. | 
You may also like… |
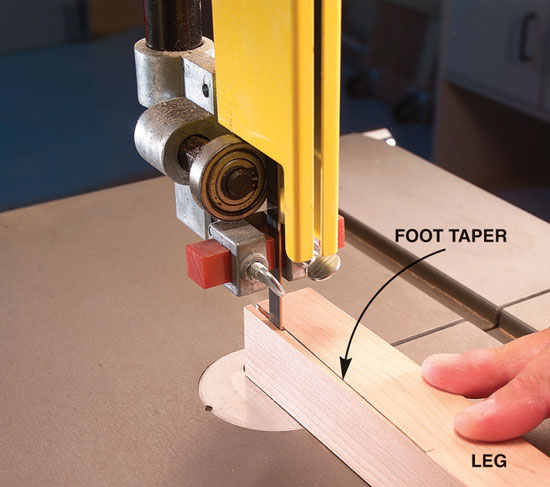
| Start by making the legs, because the center sandwiched panel will be made to match them in thickness. After band-sawing the tapered foot at the bottom of the legs, sand the taper smooth. | Click any image to view a larger version.
|
| Saw the plywood parts for the sandwiched end and center panels. These parts should be cut oversize at this point. They will be trimmed to final size after they are sandwiched together. | 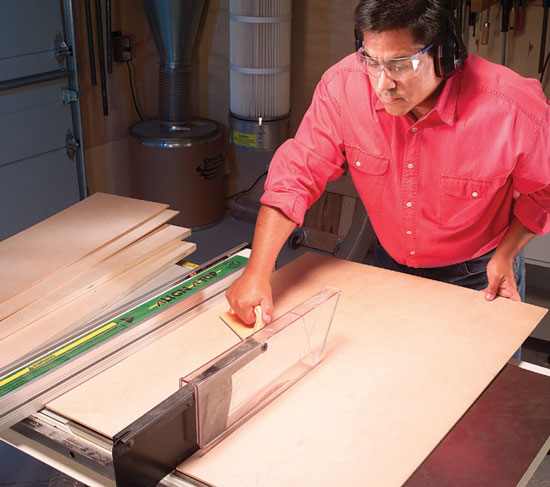 |
| Test the center panel to make sure it is flush on either side of the leg. Adjust the thickness of the filler boards as needed. | 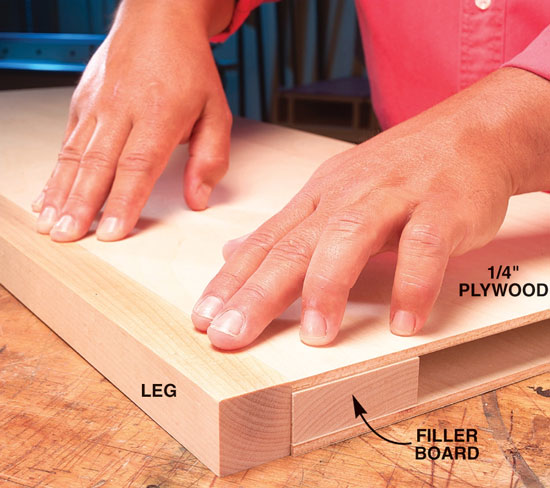 |
| Glue and clamp together the sandwiched panels. The center panel (shown here) uses filler boards. The end panels are just two pieces of plywood sandwiched together. | 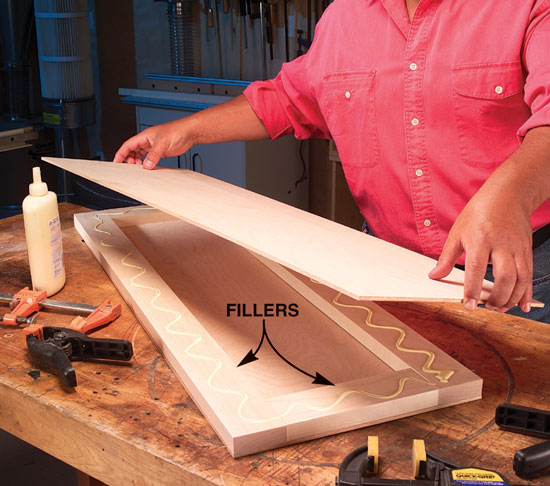 |
| Trim the glued-up sandwiched panels to final width. Cut a little off each edge so both edges are straight and parallel to each other. | 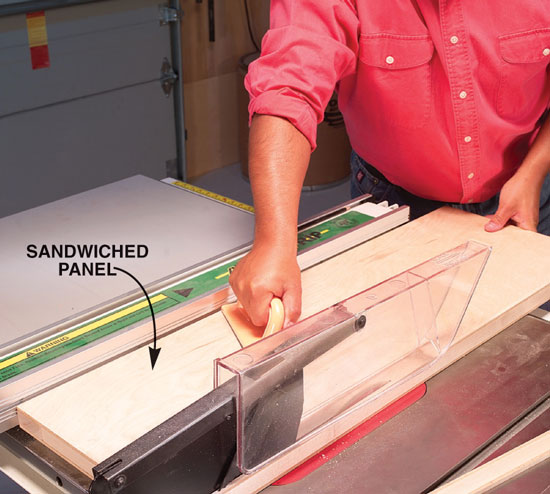 |
| Saw the sandwiched panels to final length. This is easy to accomplish with the help of a tablesaw sled. Cut a little off both ends so they are parallel to each other and square to the edges of the panels. | 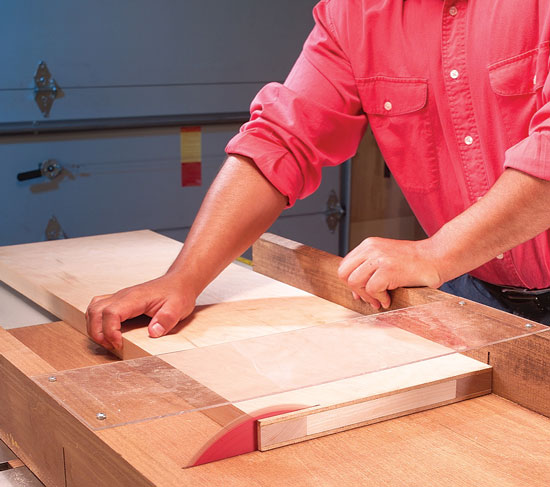 |
| Cut slots for biscuits in the edges of the panels and the corresponding sides of the legs. The biscuits help keep the legs and panels aligned when they are glued together. | 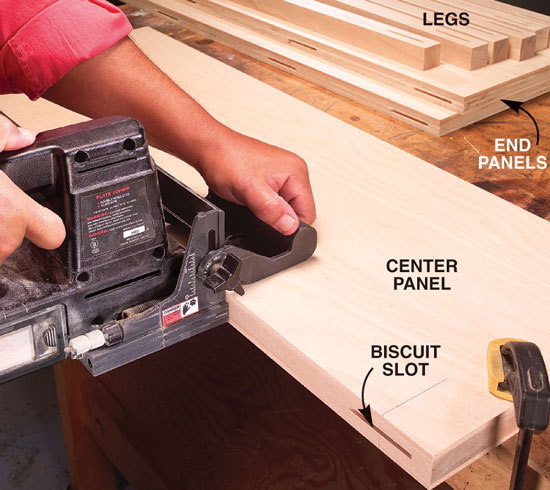 |
| Glue and clamp the legs to the panels. The center panel is flush on both sides of the legs but the end panels are flush only to the inside of the legs. It’s not necessary to put glue on the biscuits since they are mainly for alignment. | 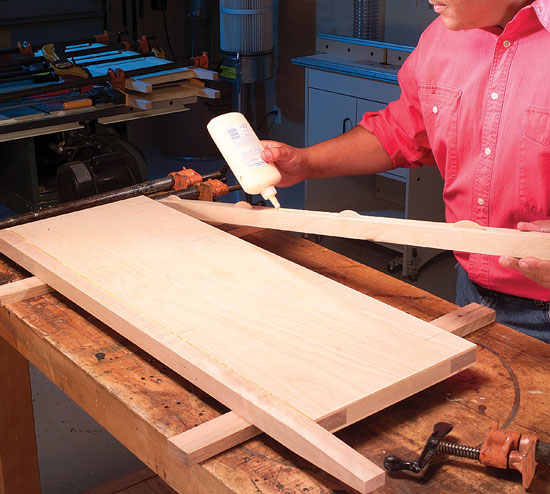 |
| Rout the rabbets in the back of the rear legs. The plywood back fits into this rabbet once the case is assembled. The center leg gets two rabbets and the side legs get only one rabbet. | 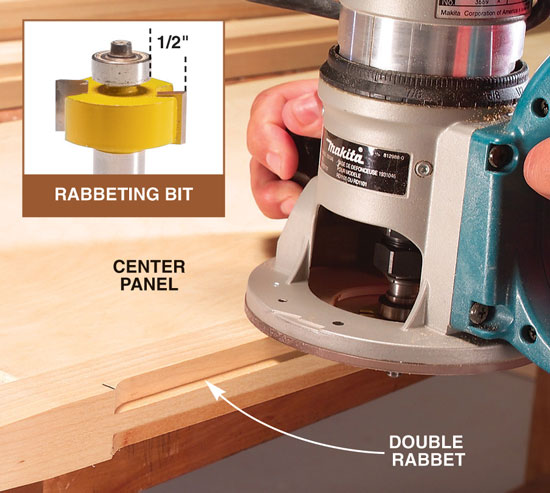 |
| Taper the front edge on the shelves using a tablesaw tapering sled. This is necessary because the bowed front of the bookcase makes the shelves wider at one end than the other. | 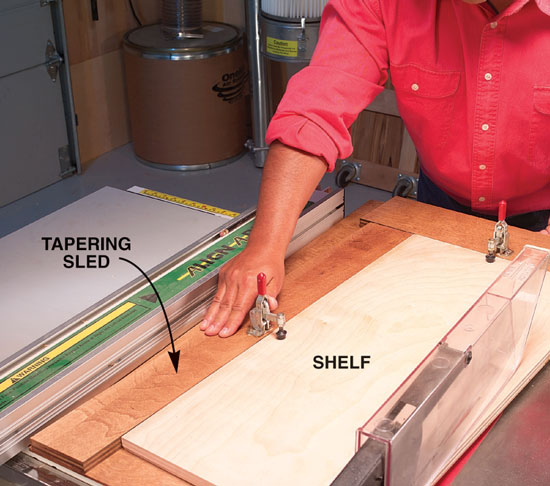 |
| Attach the solid-wood edge to the shelves and subtops. Let the ends of the wood edging run a little long. After the glue is dry, use a handsaw to trim the overhanging ends flush with the ends of the shelves. | 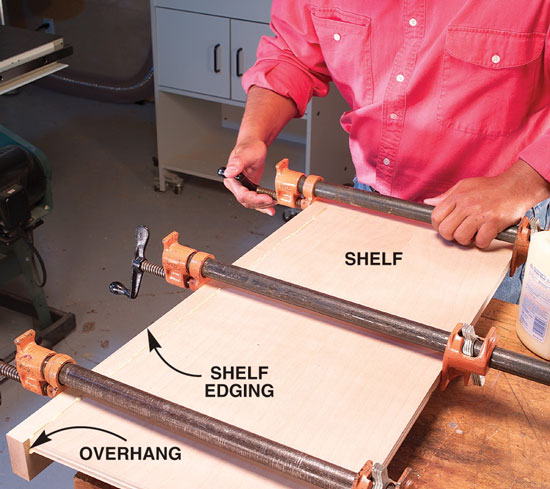 |
| Use a tracing jig to draw a curved line on the bottom side of the shelf edging. Drawing it on the bottom side makes band-sawing easier. Use a spacer board to support the tracing jig while drawing. |  |
| Use a bandsaw to cut the curve into the shelf edging with the lip of the edging pointing up. | 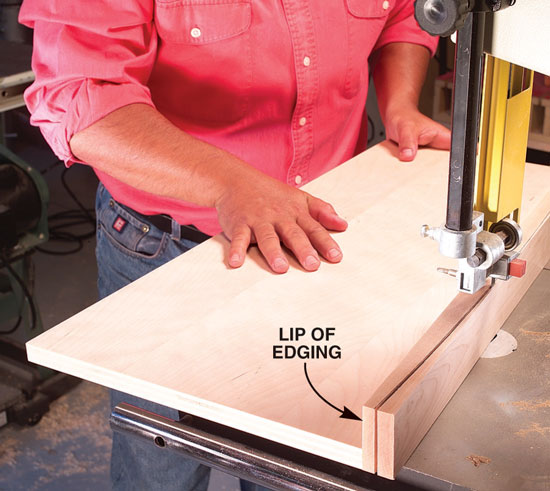 |
| Sand the curved edging smooth. Start with a belt sander and finish up with an orbital sander or by hand. |  |
| Glue and clamp together one half of the bookcase first. It’s a good idea to test-assemble these parts before you use glue. Propping up the cabinet on a couple of 2x4s makes it easy to check that the parts are correctly aligned on the back edges. | 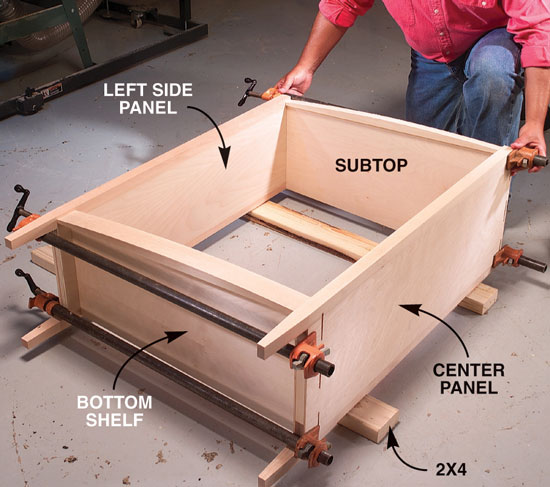 |
| Add the second section of the bookcase once the glue in the first section is completely dry. Again, check that everything is square before leaving it to dry. | 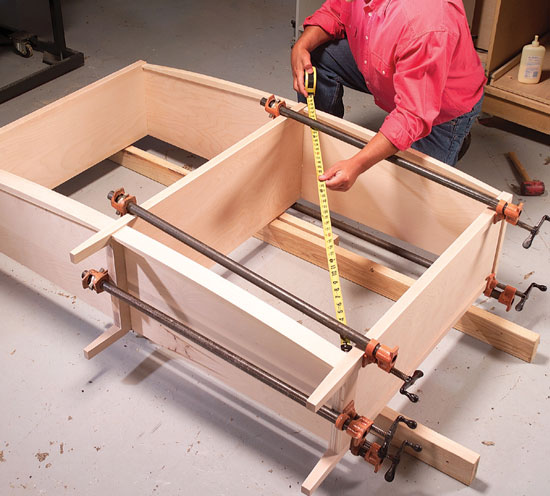 |
| Flip over the bookcase and add glue blocks to the bottom. They add an extra measure of rigidity and strength to the legs and case. | 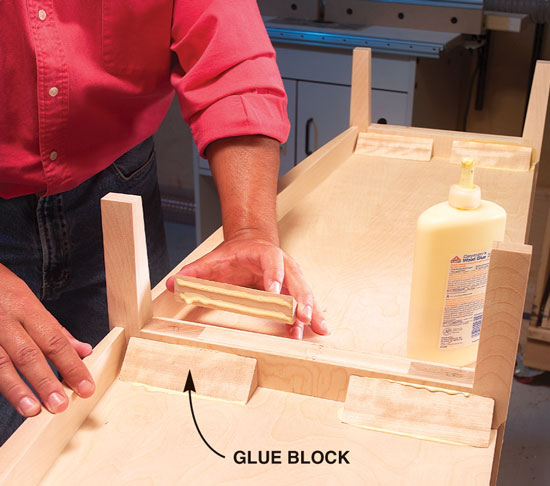 |
| Drill 5mm holes for the shelf pins using a self-centering bit and a drilling template. Align the template flush with the front legs and the rabbets at the rear. |  |
| Attach the back with pan head screws. Drilling pilot holes first makes driving the screws a lot easier. The back is now removable, which makes finishing easier later on. | 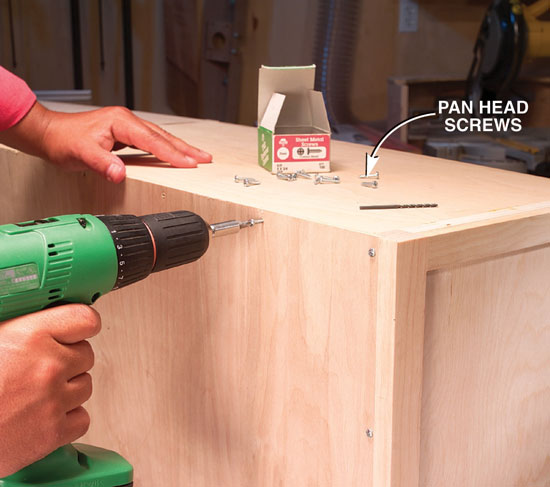 |
| Draw the curve on the top of the bookcase using the same tracing jig you used for the shelves. Draw one side of the curve first and then the other. | 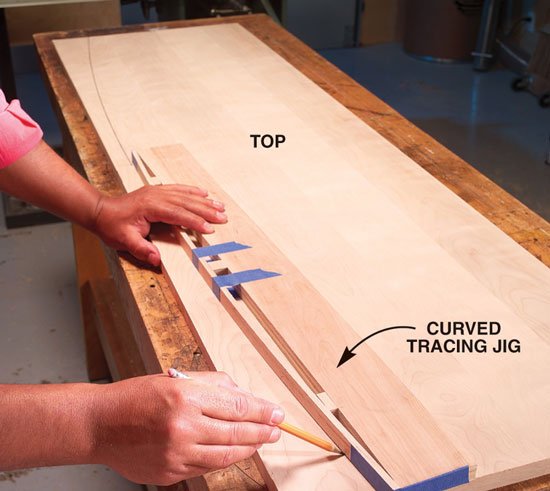 |
| Attach the top using washer head screws. The holes in the subtop are oversize to allow for seasonal movement of the solid-wood top. | 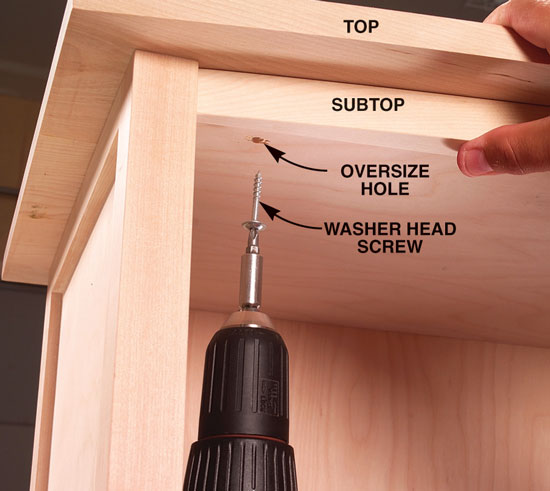 |
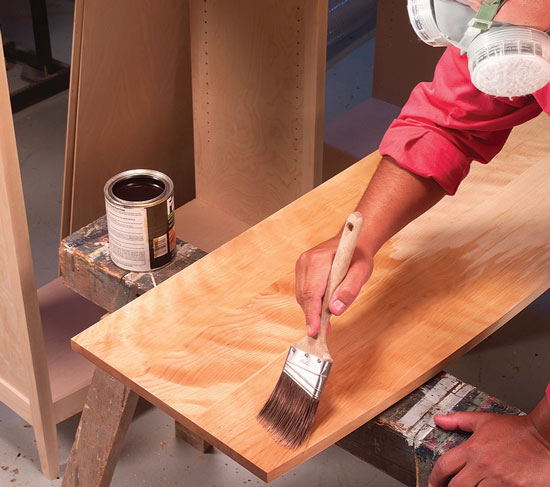
| Disassemble the bookcase and finish it with your favorite finish. A clear satin vanish looks great on white birch.
This story originally appeared in American Woodworker October 2003, issue #103.
|
|

Product Recommendations
Here are some supplies and tools we find essential in our everyday work around the shop. We may receive a commission from sales referred by our links; however, we have carefully selected these products for their usefulness and quality.


Recommended Posts

