We may receive a commission when you use our affiliate links. However, this does not impact our recommendations.
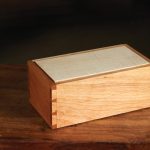
 With its quartersawn oak, and Arts & Crafts finish, this desk is sure to serve generations to come.
 With its quartersawn oak, and Arts & Crafts finish, this desk is sure to serve generations to come.
Project #2417 • Skill Level: Intermediate • Time: 5 Days • Cost: $450
The best thing about being a woodworker is the ability to make custom furniture for a particular spot in the home. Need a desk that perfectly nestles into a nook or alcove? Once you have the basic skills, you can build fine furniture to suit the available space. This large desk provides ample work surface, along with two pencil drawers and integral desktop organizers for corralling letters. Some advanced woodworking techniques are included to challenge you and keep woodworking fun, including inlays, locking miter joints, and side-hung center guided drawers.
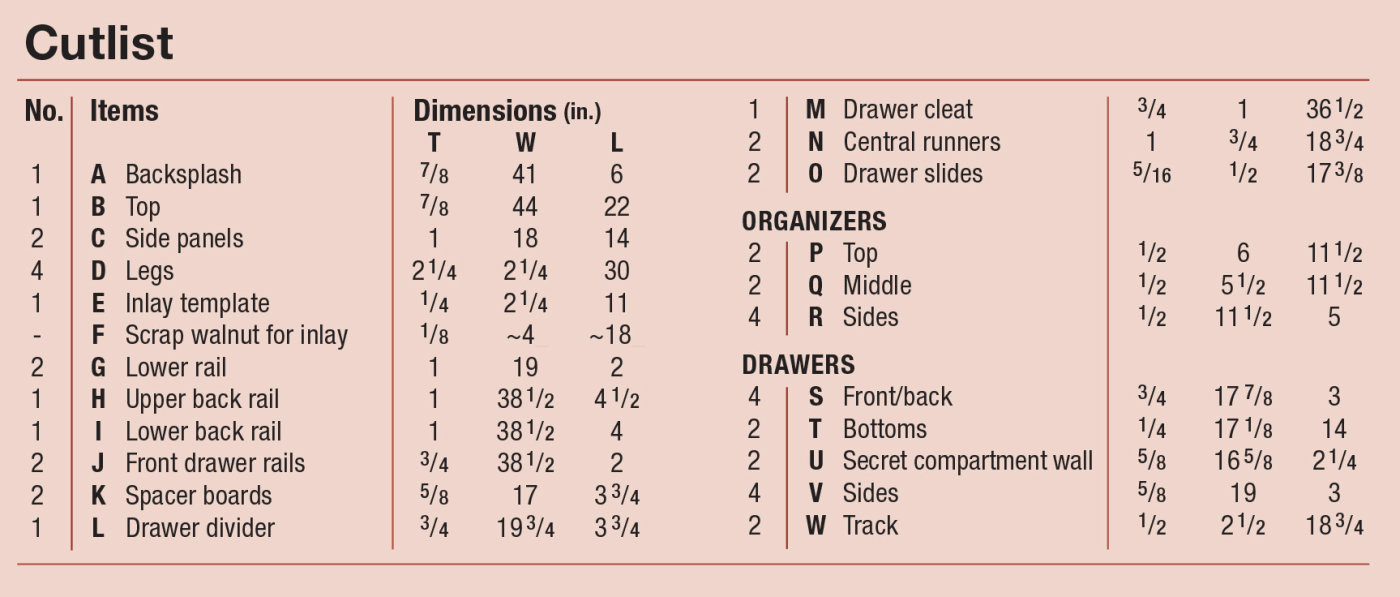
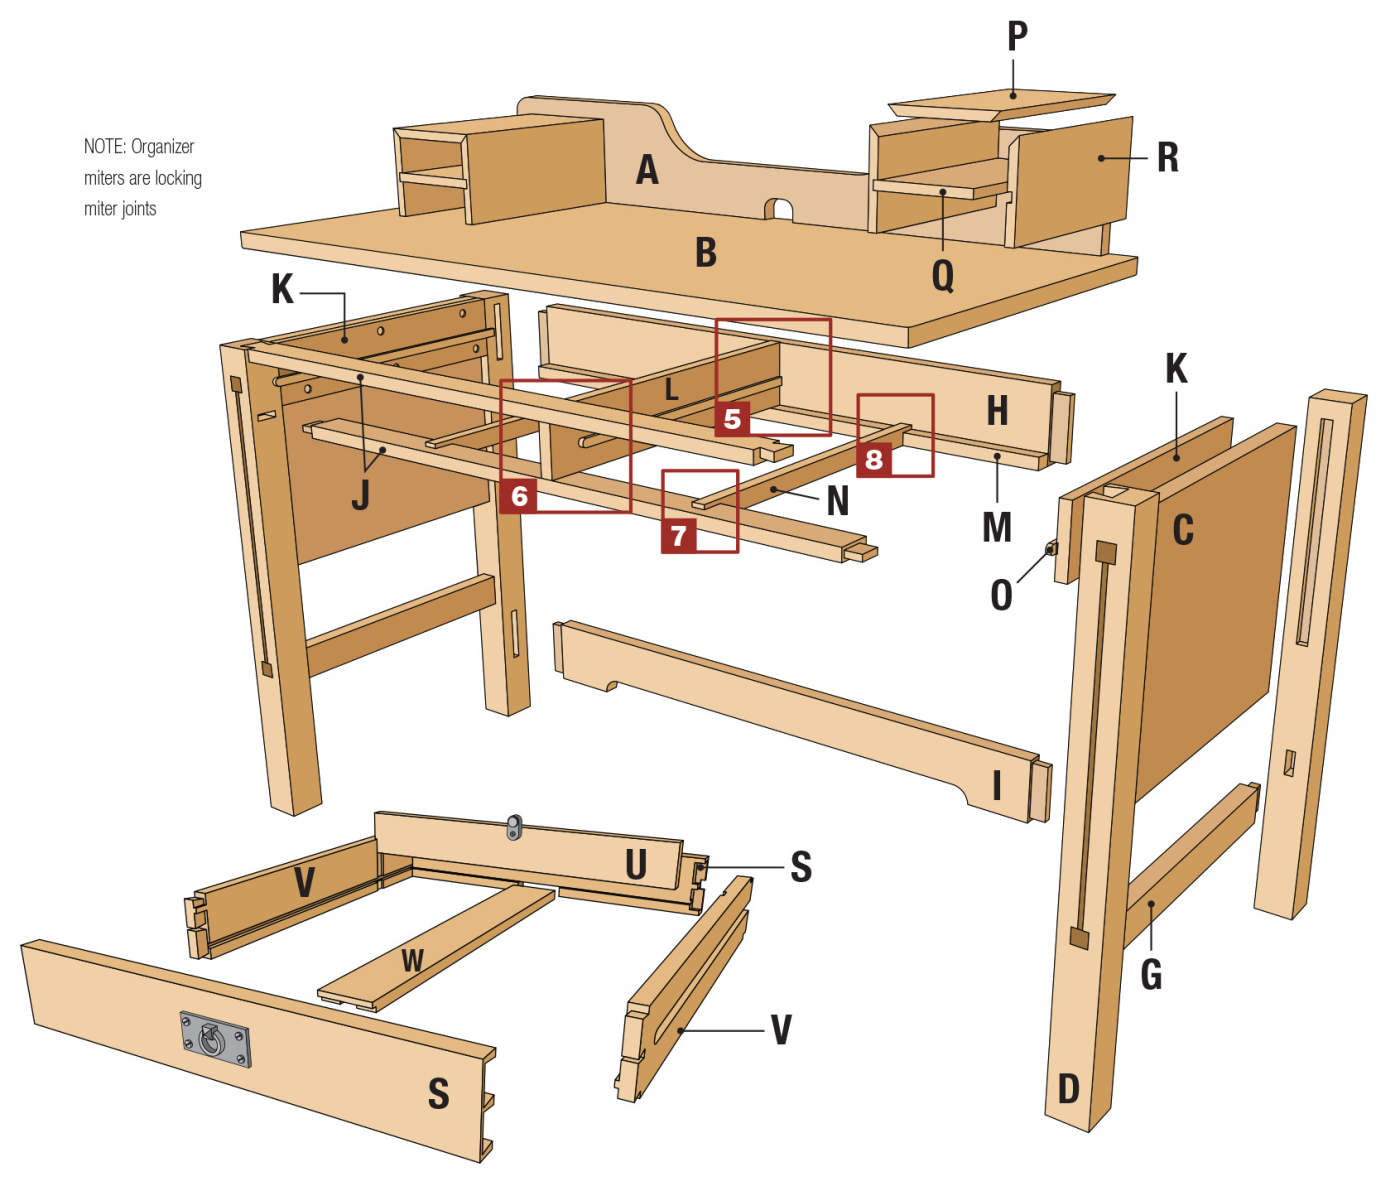
Cutlist and Diagrams


 Four Good Legs to Stand On

 Four Good Legs t
This project requires 2-1/4“ square legs that are 30“ long. 10/4 solid white oak is hard to come by, but luckily there are a couple good ways to build your own posts from 3/4“ stock. Laminating three strips of lumber together is one way to go and if you carefully plan the dimensions, you can add thin veneers to cover the joint lines. Another option is to make hollow legs using a locking bit at the router table. For more details on the locking miter technique, check out this article.
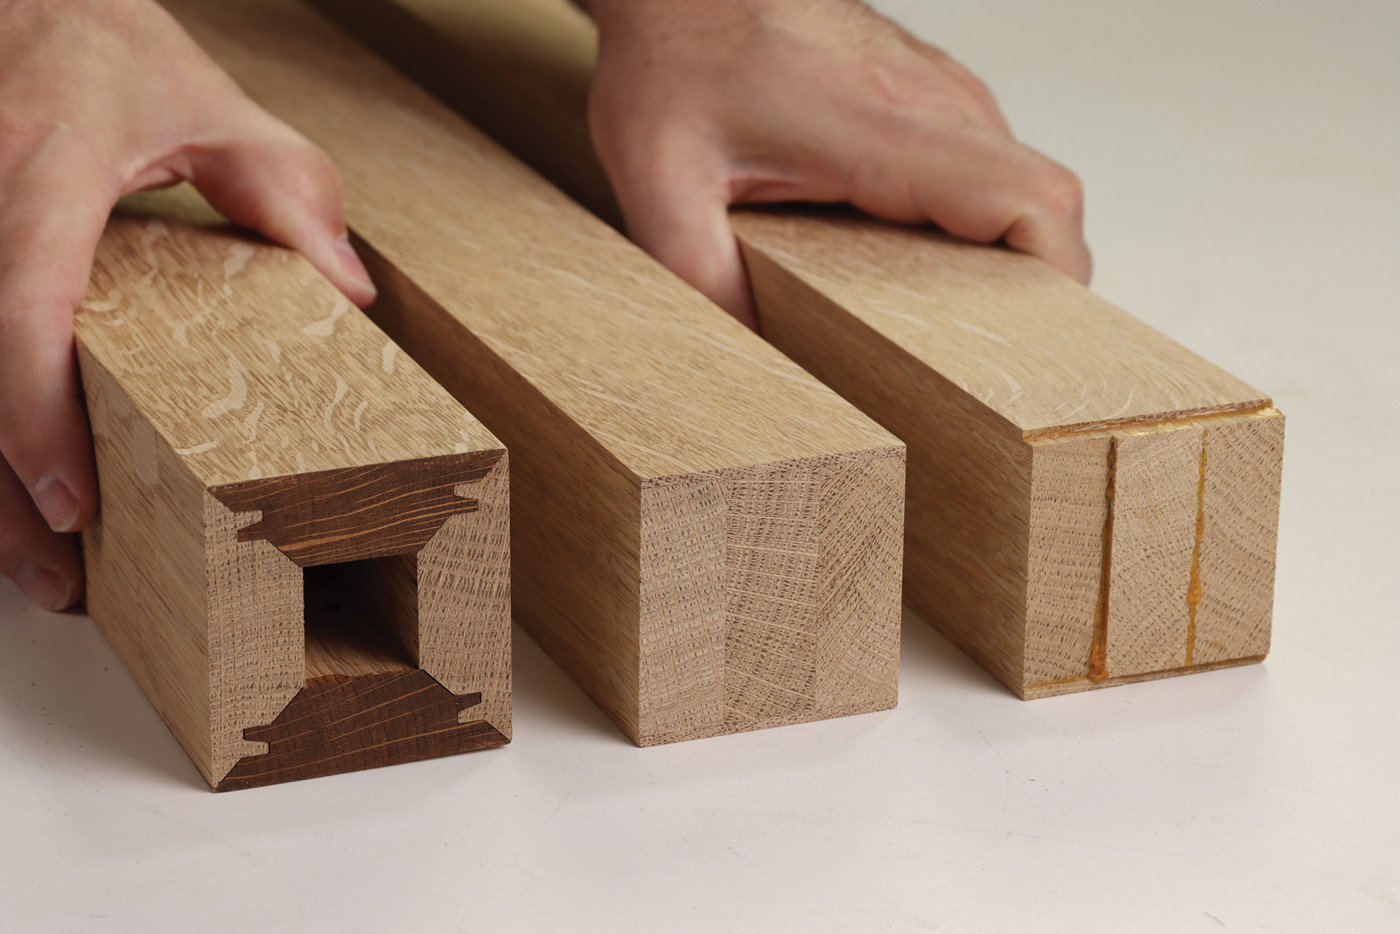
1 If you don’t have lumber thick enough to make the legs, simply build them with thinner stock. Laminating strips together with thin veneers to hide the joints or lock miter joints are two great options.
Inlay Technique
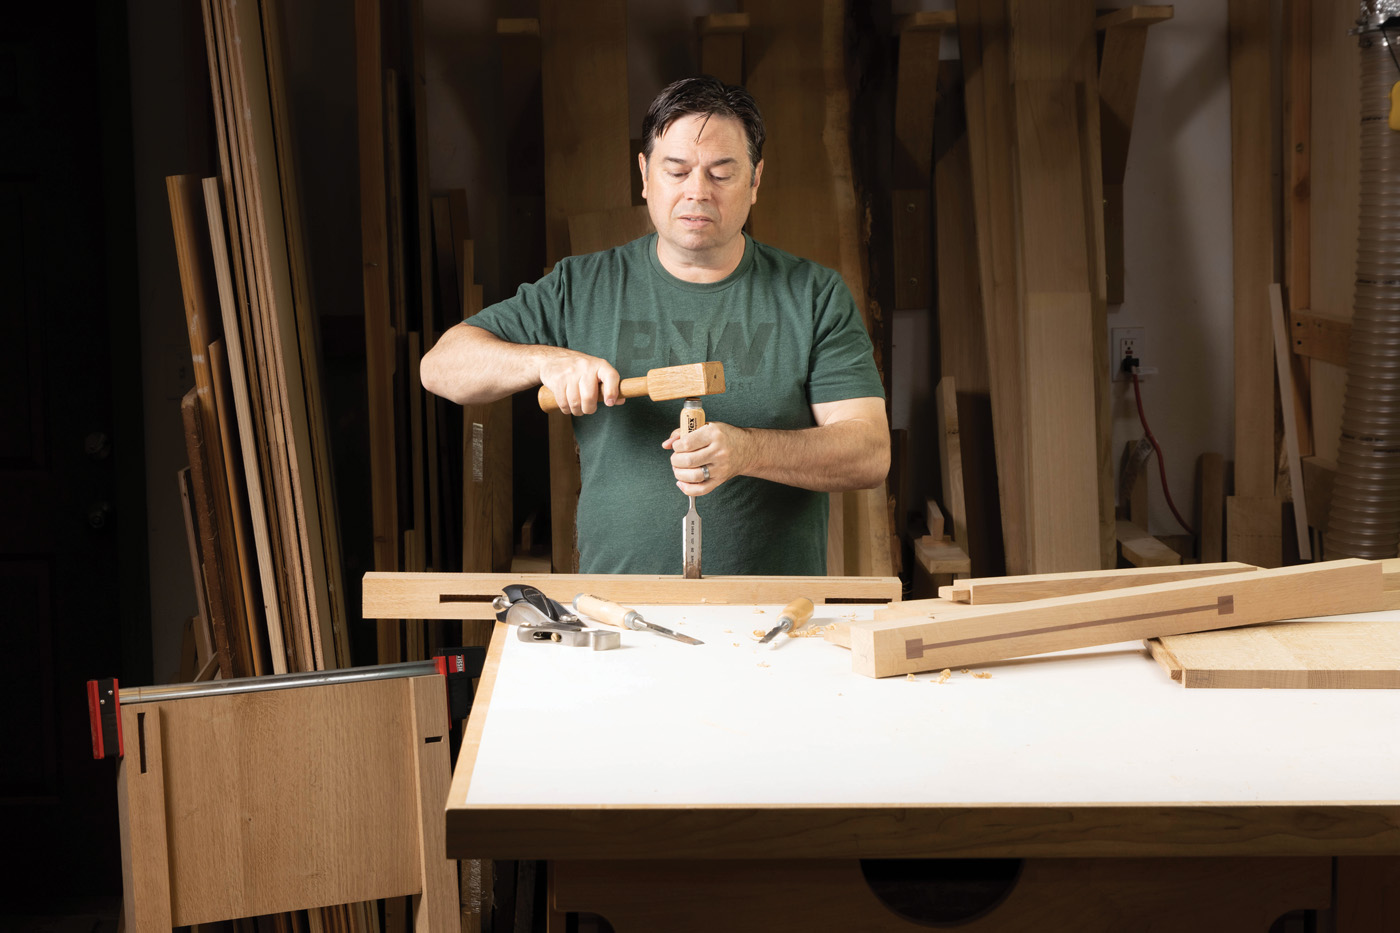
The square inlays come next and are inspired by the notable work of Charles P. Limbert. “Ebon-Oak” furniture, as it was dubbed in a 1915 catalog featured ebony (or often walnut) inlays in Limbert’s furniture line. The inlays consisted of squares connected by a thin strip of wood. It’s a simple adornment that isn’t too fancy and seems fitting for Arts & Crafts pieces. When I first started using this type of inlay, I created the squares with a large hollow chisel mortising bit. The problem with that approach is you’re limited to the size of hollow chisels you have available. I’ve since switched to a router inlay approach using a square template and a special guide bushing. While this does require you to square the corners with a chisel, the finished product is extra clean and it’s an easy technique to master.
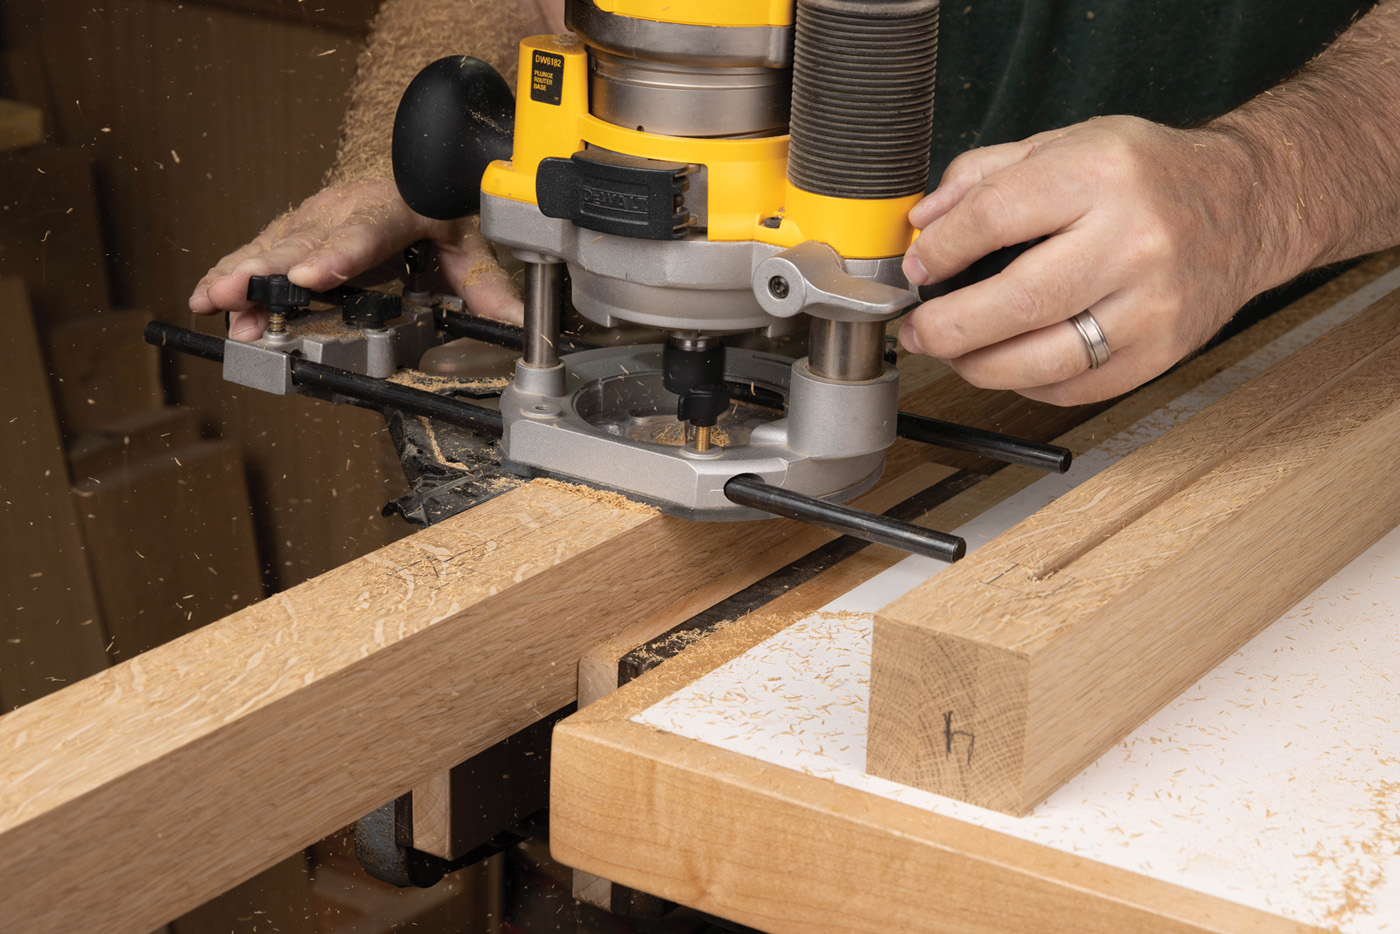
2 Rout a 1/4″ wide groove in the two front legs with a plunge router and edge guide.
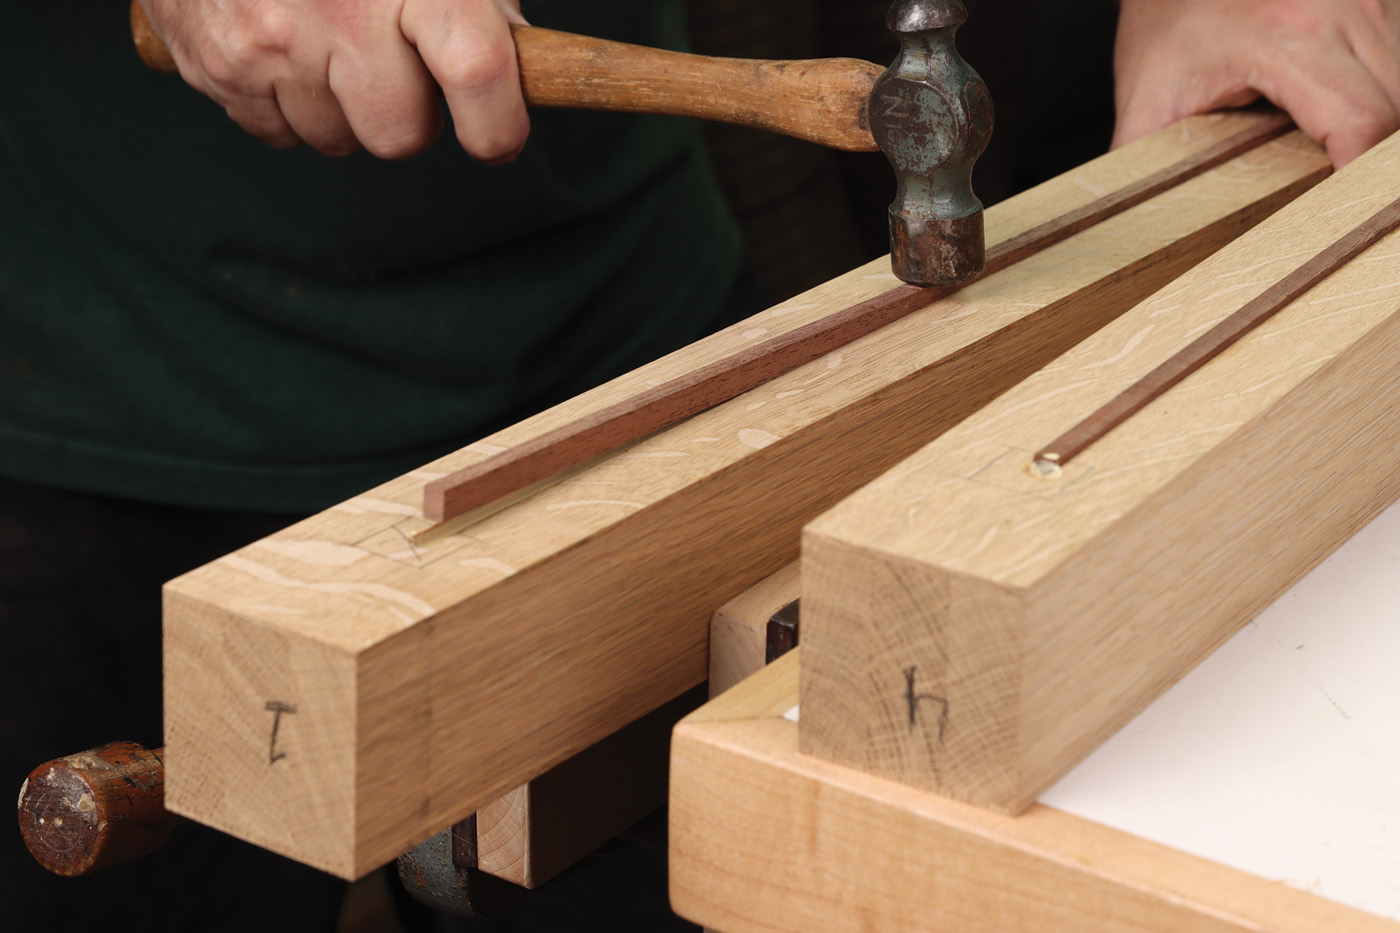
3 Glue strips of walnut into the grooves so they stand slightly proud of the leg.
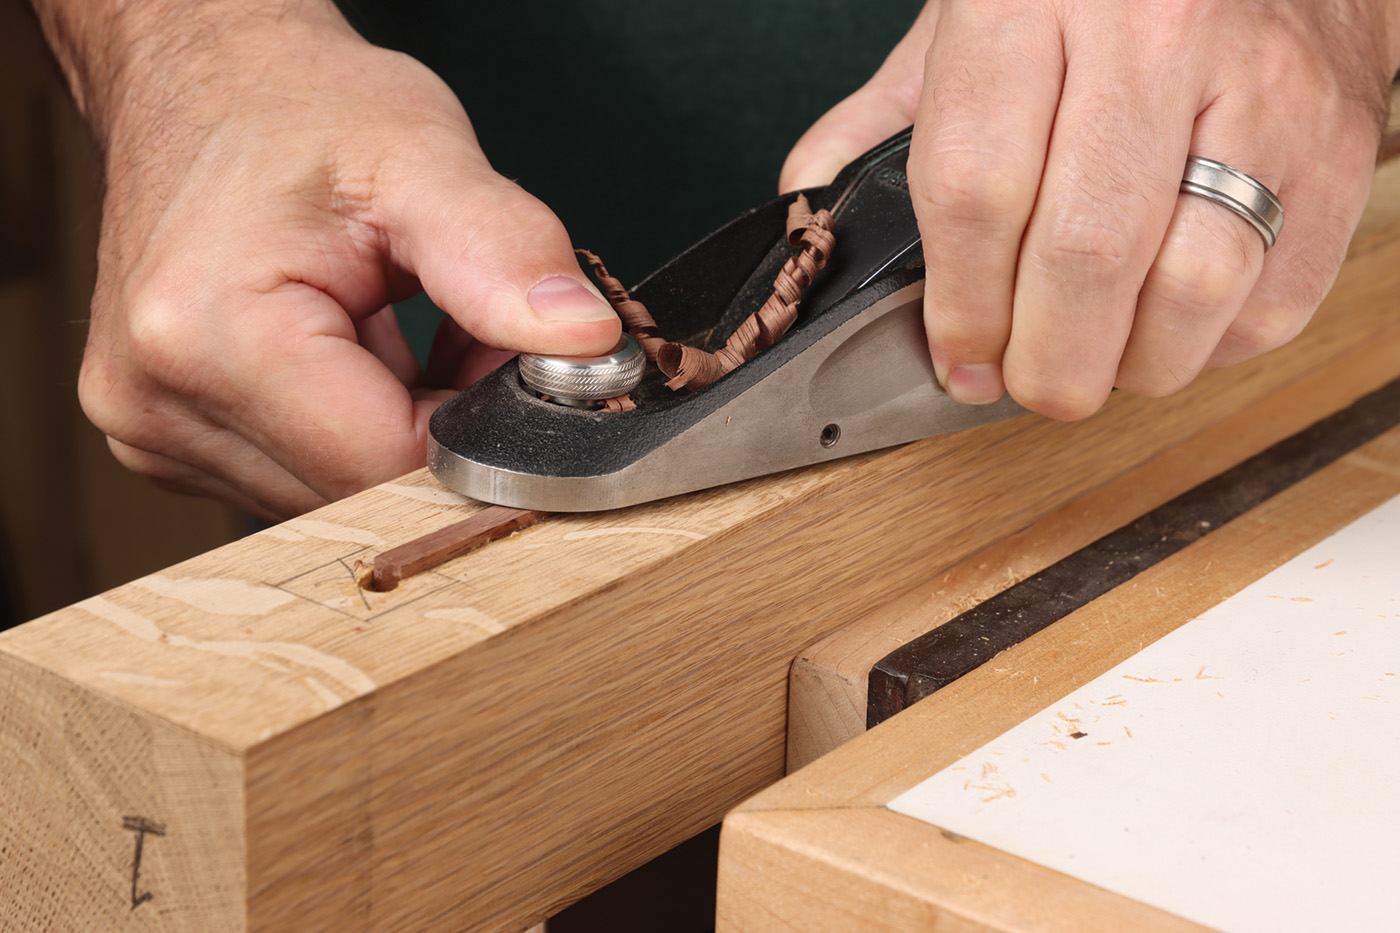
4 Plane the strip inlay flush with the leg’s surface.
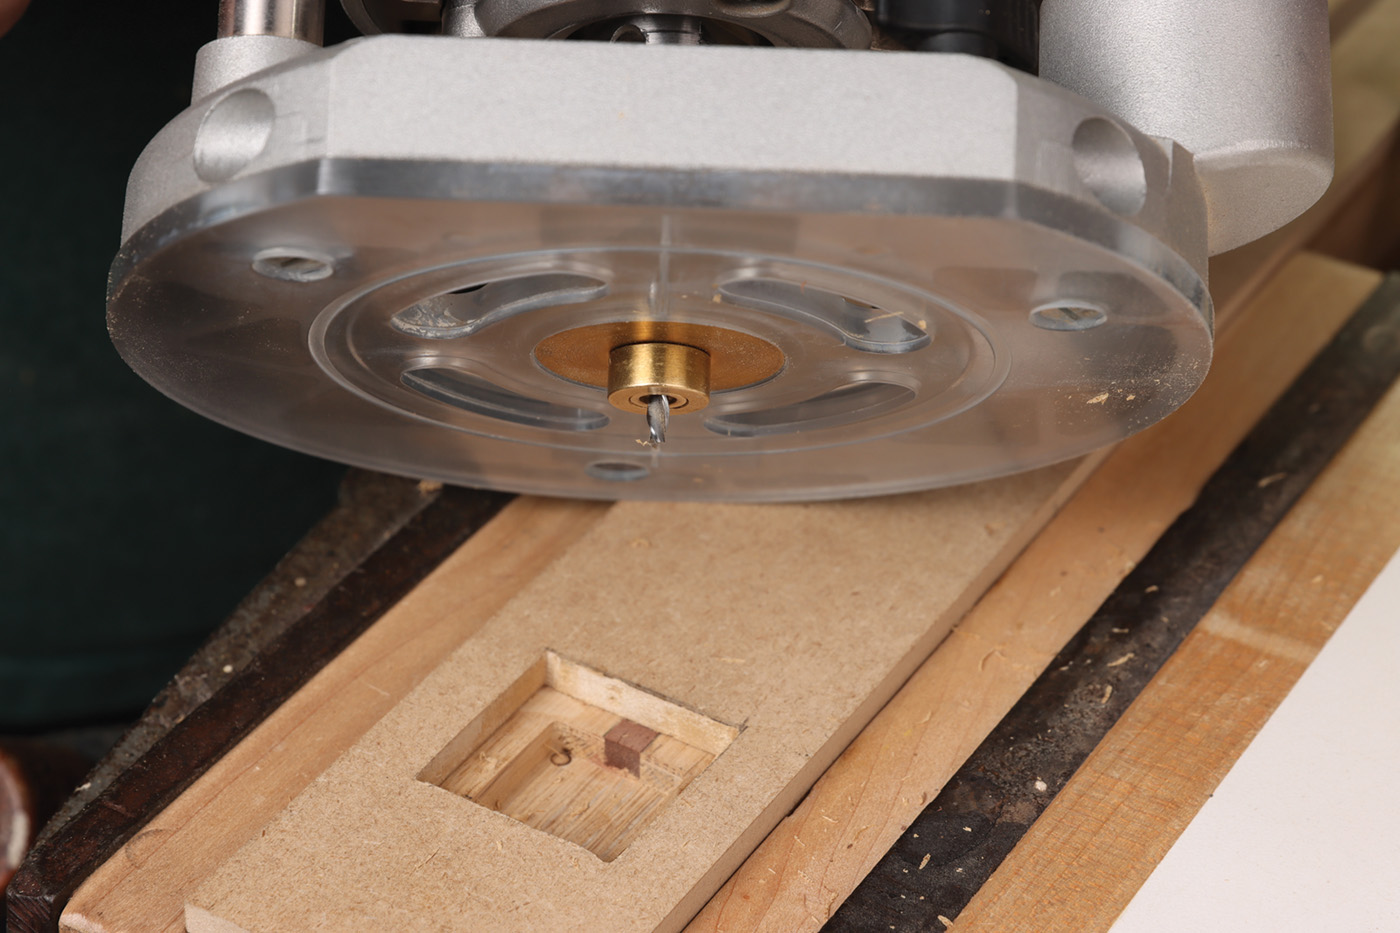
5 With an inlay bushing kit installed on a plunge router, remove the waste from the recess. Note how the strip inlay is trimmed to length automatically.
Start by routing a 1/4“ wide groove using a plunge router and edge guide. I’ve found a spiral downcut bit works best for this 3/16“ deep groove. Glue a strip of walnut into the groove and plane it flush with the surface of the leg. Then make a template as shown to rout the square inlay. As you rout the square recess, you’ll note the walnut strip is conveniently trimmed to length as well. Then remove the brass spacer ring on the inlay guide bushing to rout some walnut squares. Set your bit depth to 1/4“ for this step, which will make the walnut inlays stand slightly proud after they’re installed. Finish the inlay by sanding or planing the squares flush with the surface of the leg.
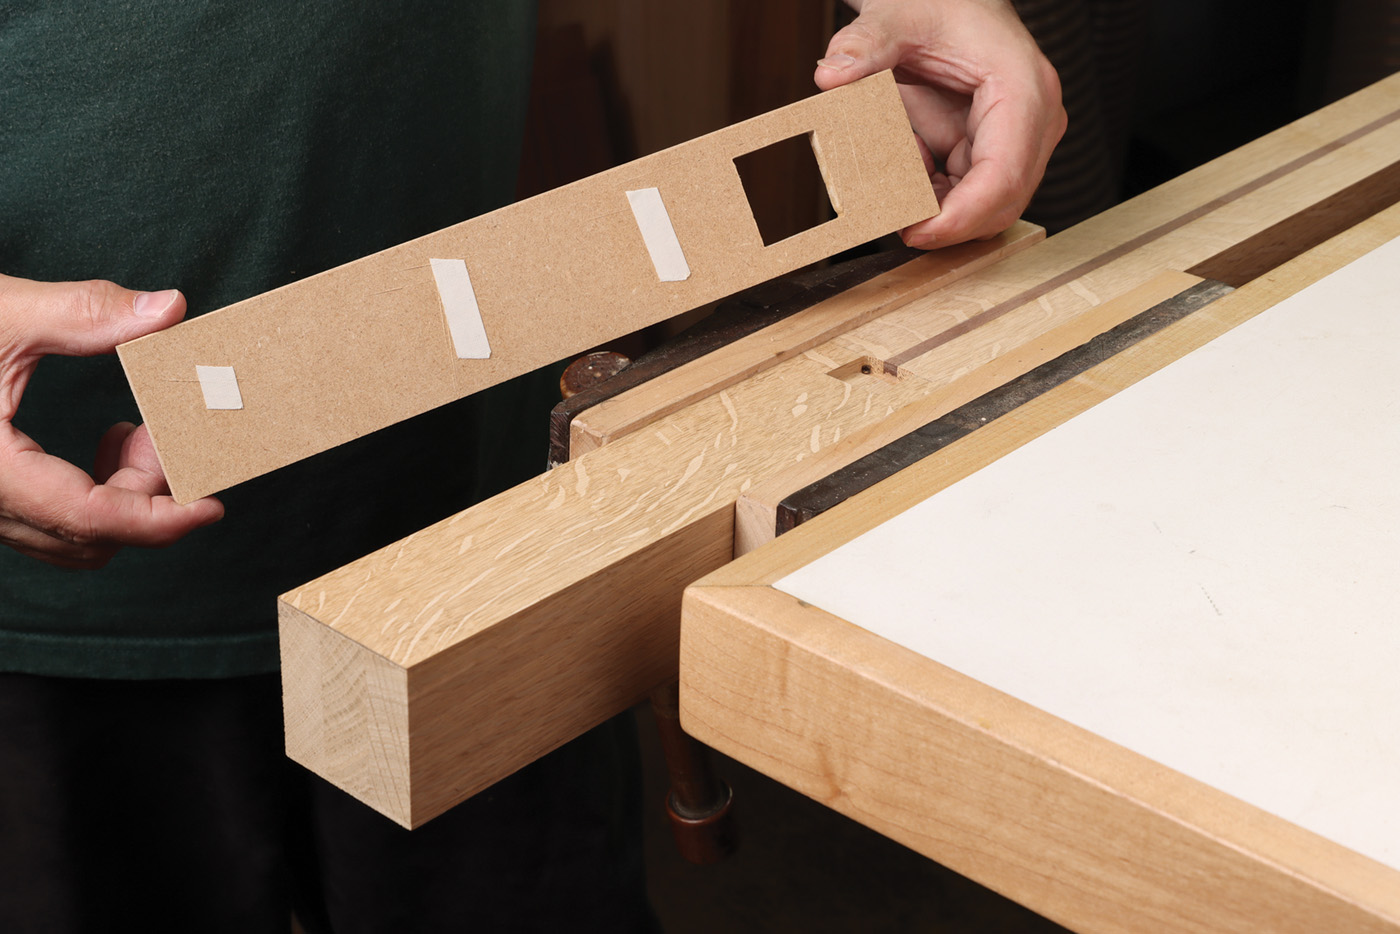
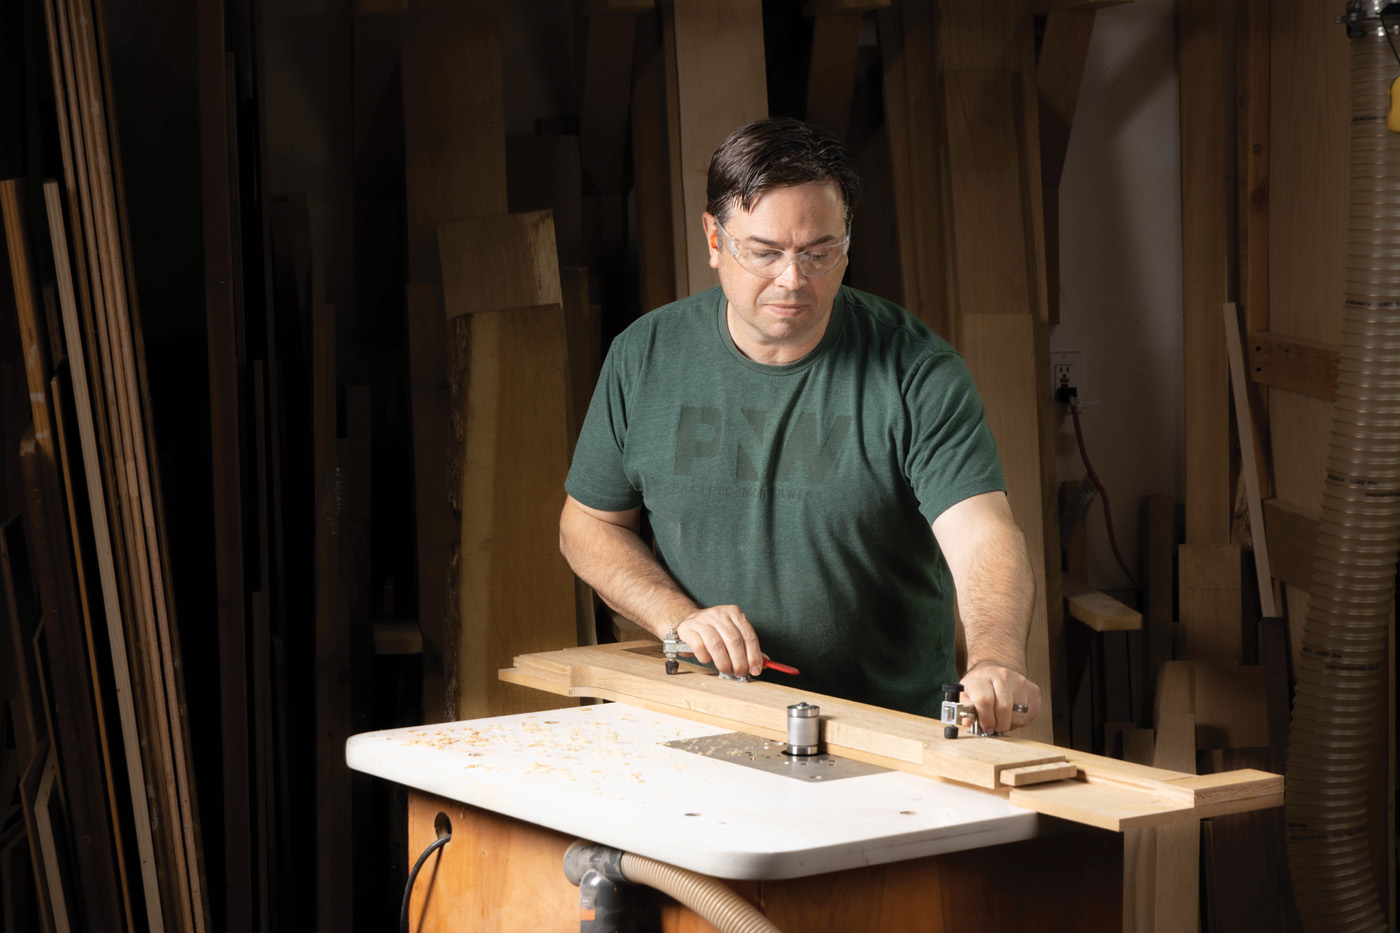
6 The inlay is built to align with both the top or bottom of the leg, depending on which it’s oriented. It’s secured with double-sided carpet tape and a bench vise.
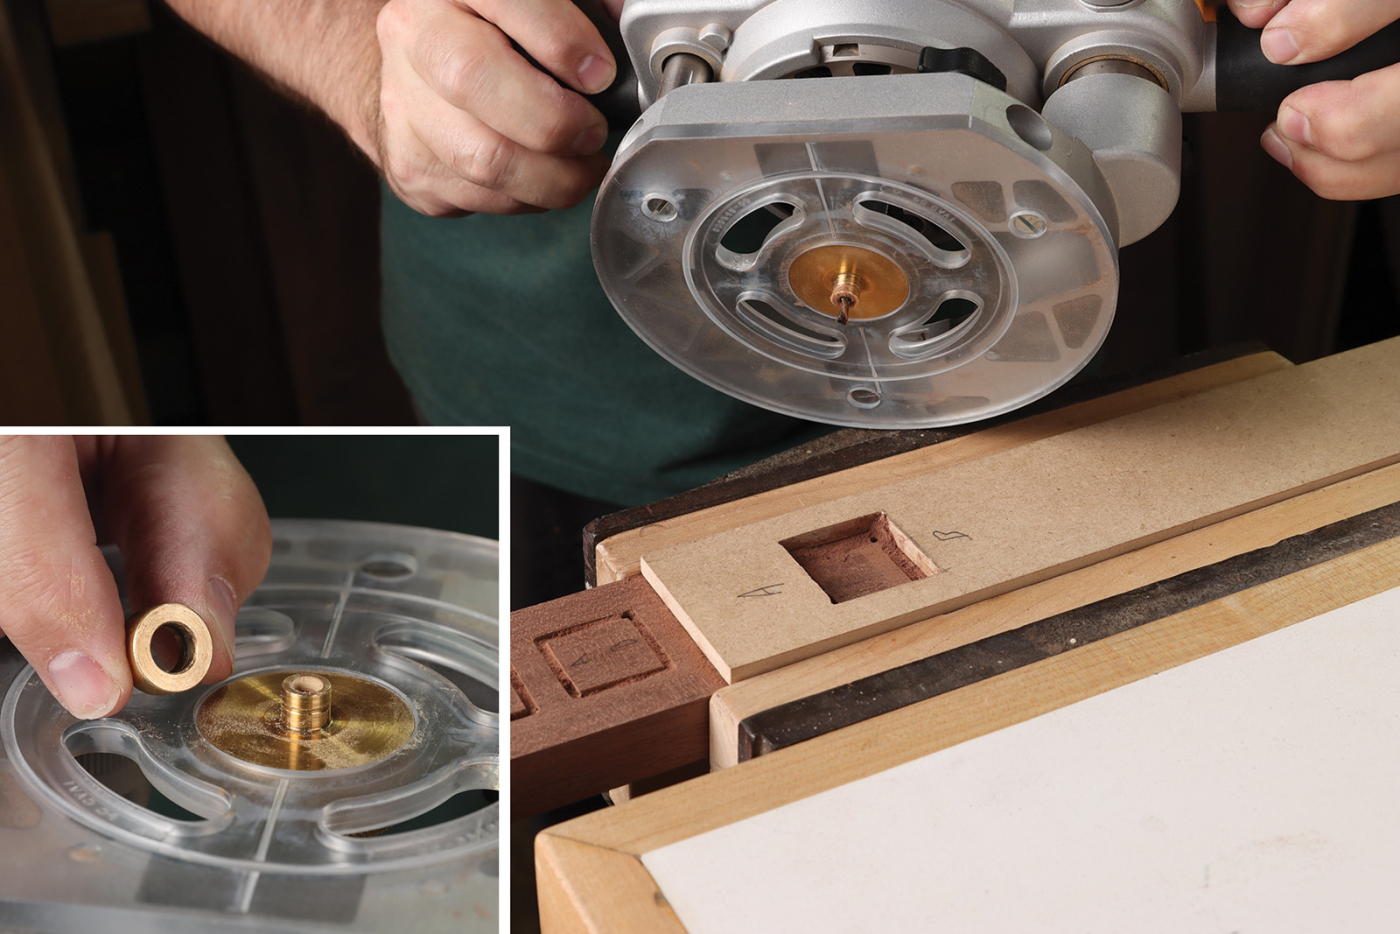
7 Now remove the brass spacer ring from the inlay bushing and use the same template to rout walnut squares. Move the router in a clockwise direction, maintaining contact with the perimeter of the template.
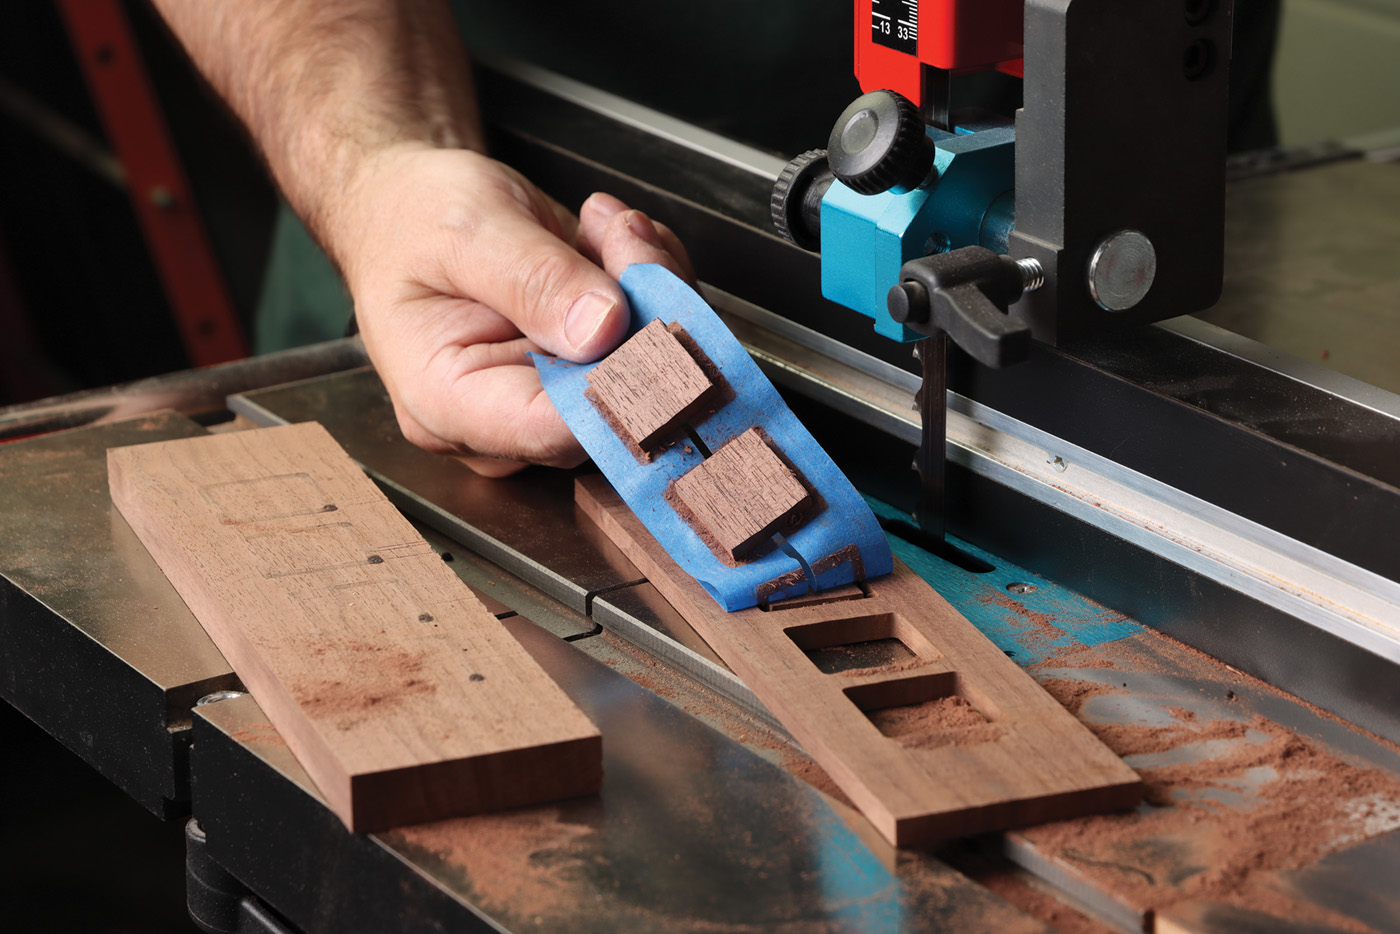
8 Next resaw the squares free at the bandsaw. Tape holds the pieces in temporarily.

9 Glue the squares in place. Note they stand proud by design and will be sanded smooth after the glue dries.
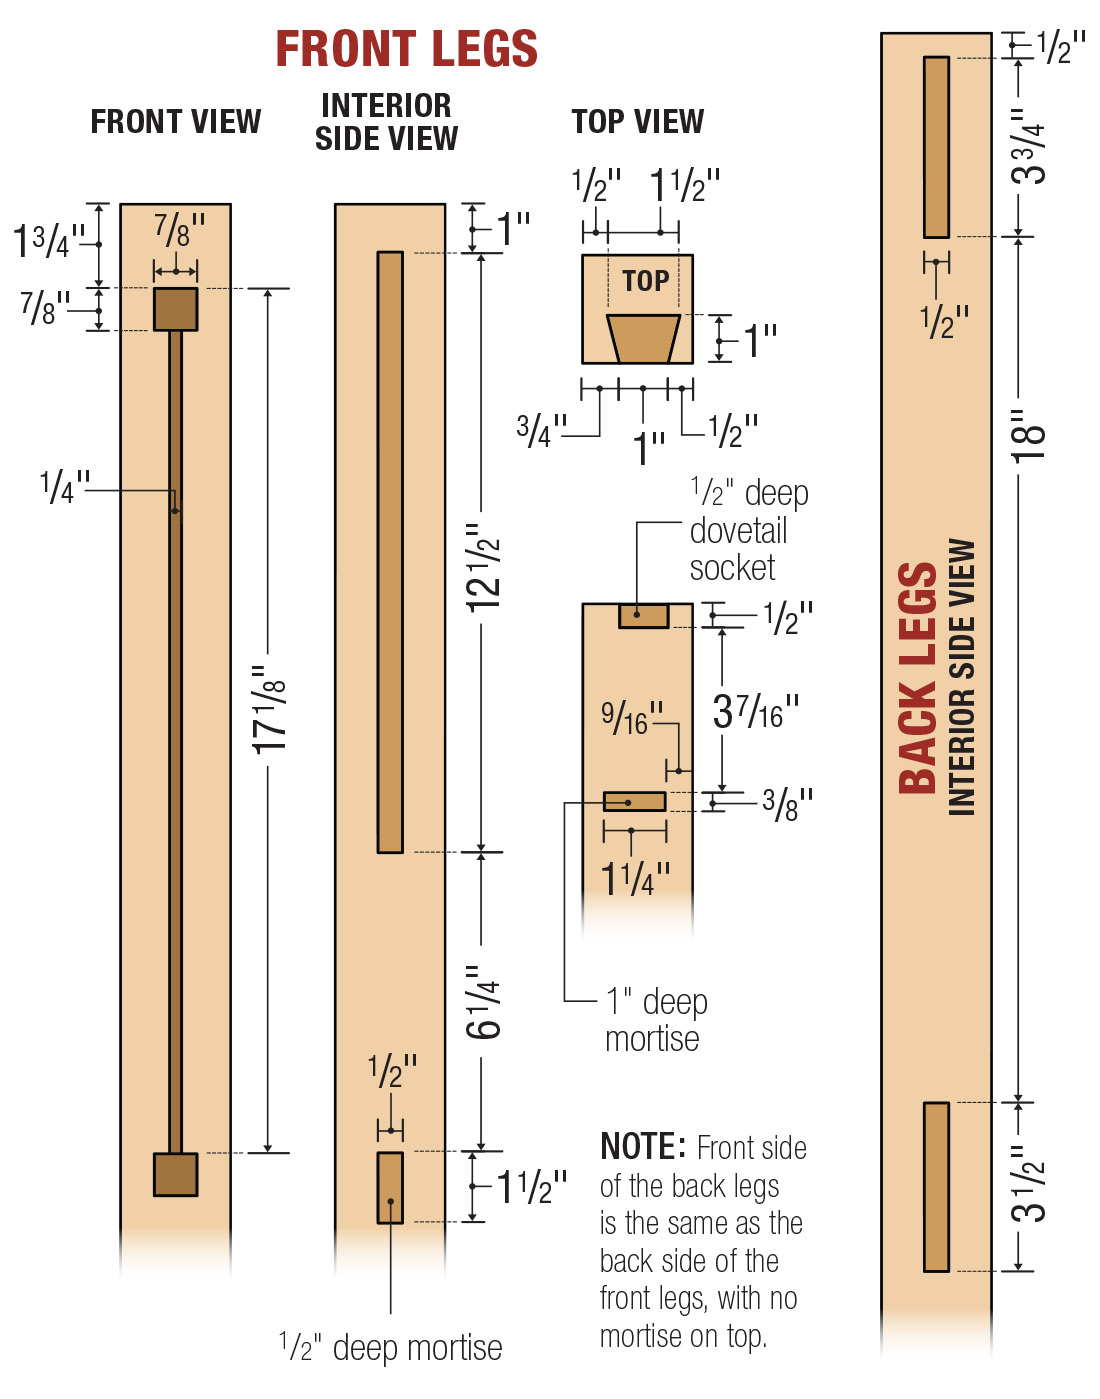
Mortises Please
Once the inlays are done, go ahead and layout the mortise locations. All of the mortises for this project are 1/2“ wide, except the horizontal mortise for the lower drawer rail, which is a 3/8“ mortise. Mortise depth is 1“ with only one exception: the mortises for the side panel stub tenons are only 1/2“ deep. It’s helpful to have a system to keep track of the legs as you lay out and chop these mortises. My system is simple, yet it tells me which leg I’m working on and its position in the project. Simply number the legs 1–4 starting with the left front leg and proceeding in a clockwise direction.
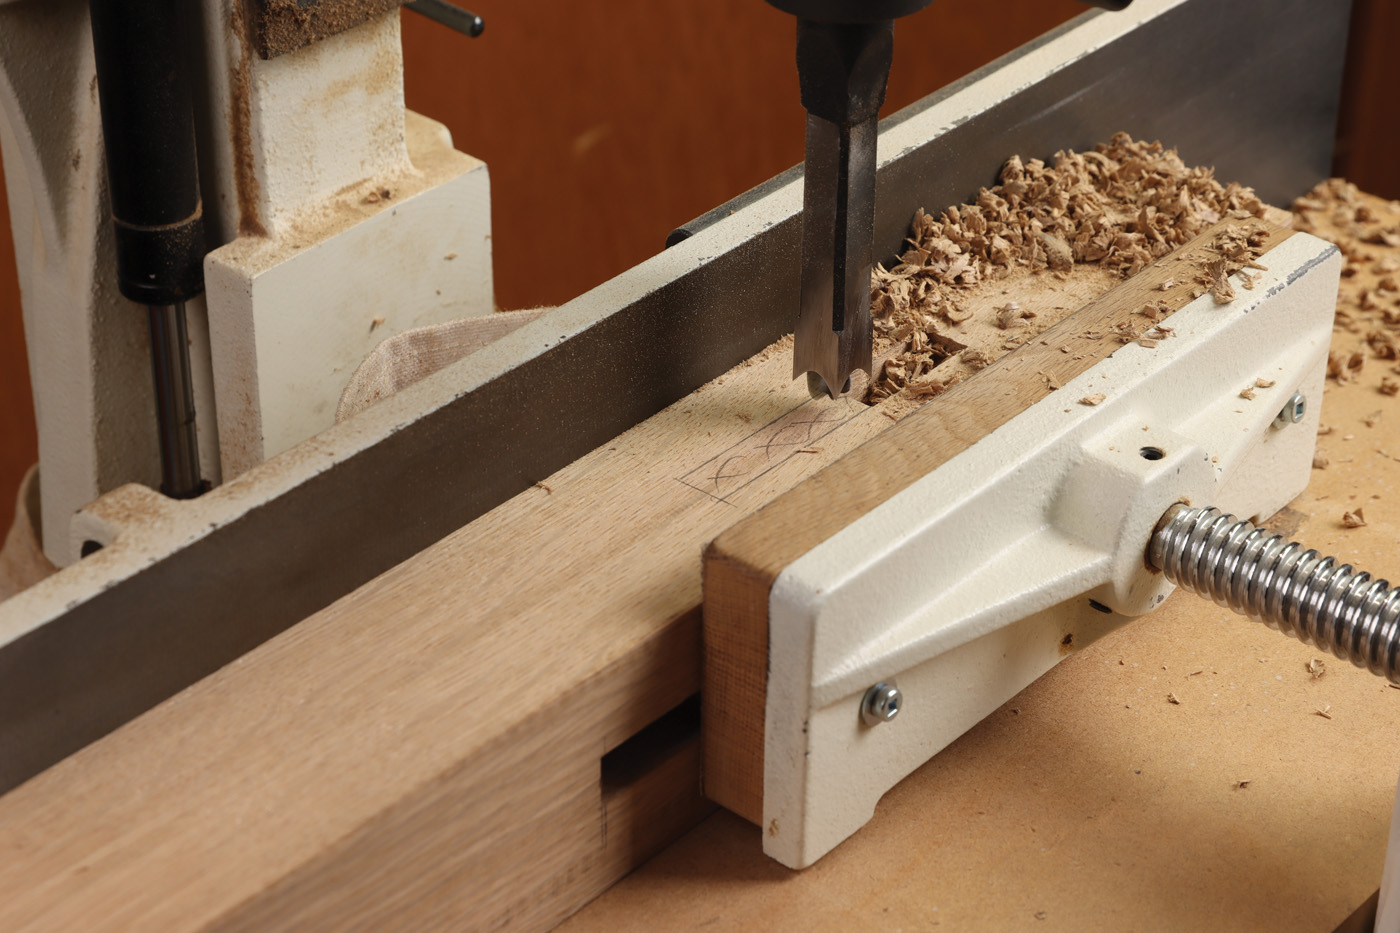
10 Chop out the mortises, which are mostly 1/2″ wide x 1″ deep.
Tenons to Match
Next, form tenons on the rails and side panels to fit the mortises. The top shoulder of the side panels is 1“ long, so the stub tenon doesn’t interfere with the dovetail socket on the two front legs. The drawer rail tenon is offset, so the inside edge aligns with the leg. Follow the detail renderings for the tenons, so the front reveal comes out right. Clean out the mortises with a chisel and mallet and think about your best method for shaping the rear lower rail. I used a bandsaw to cut close to the line, then pattern routed the shape with a template and large diameter bearing guide bit. You could certainly just sand to the line if you prefer. Sand all the parts you’ve made for this desk project and ease the edges as appropriate.
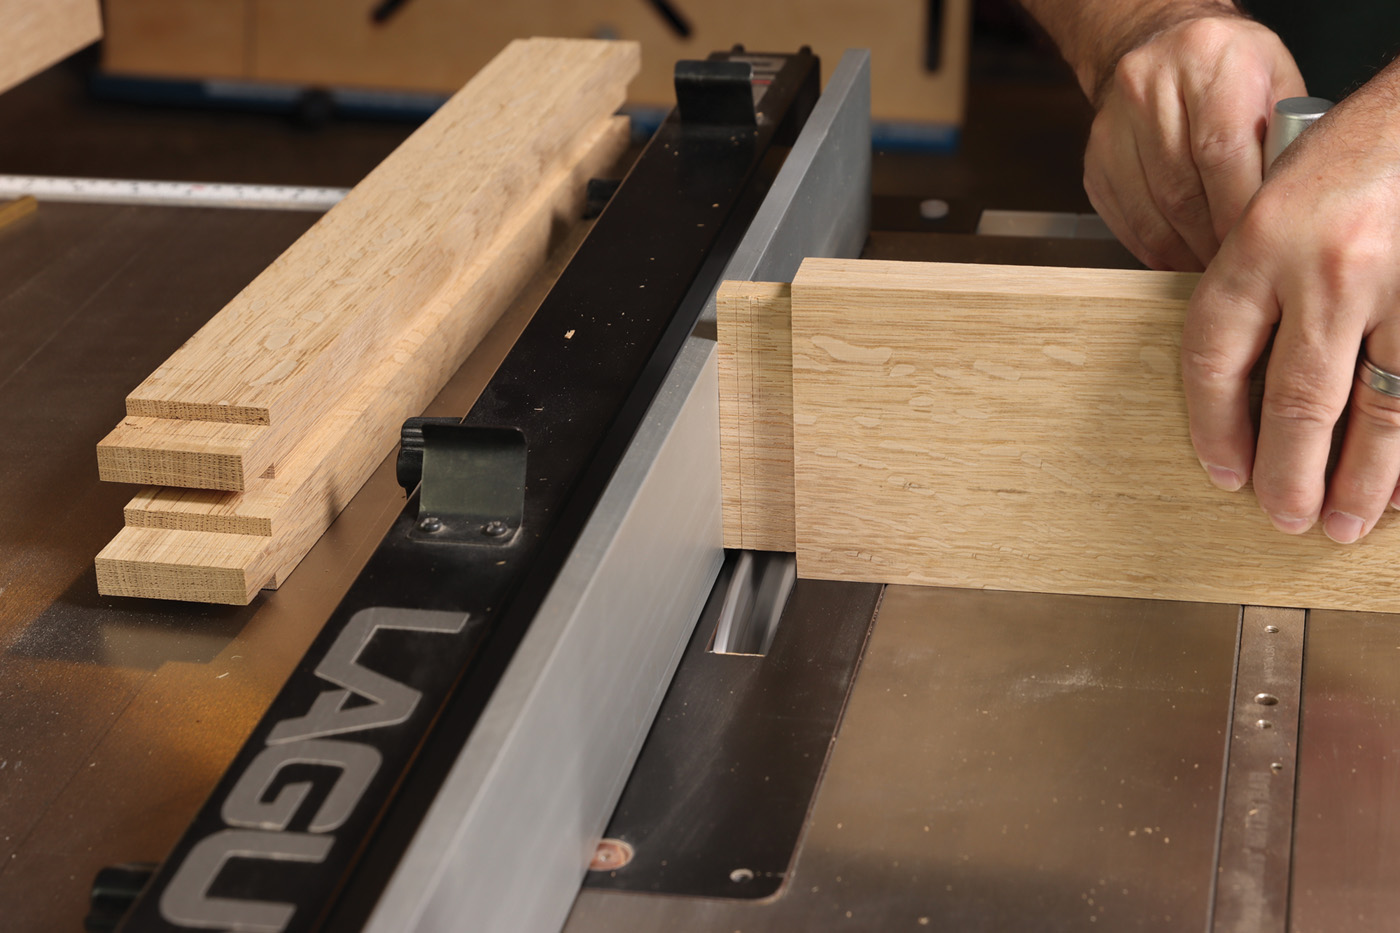
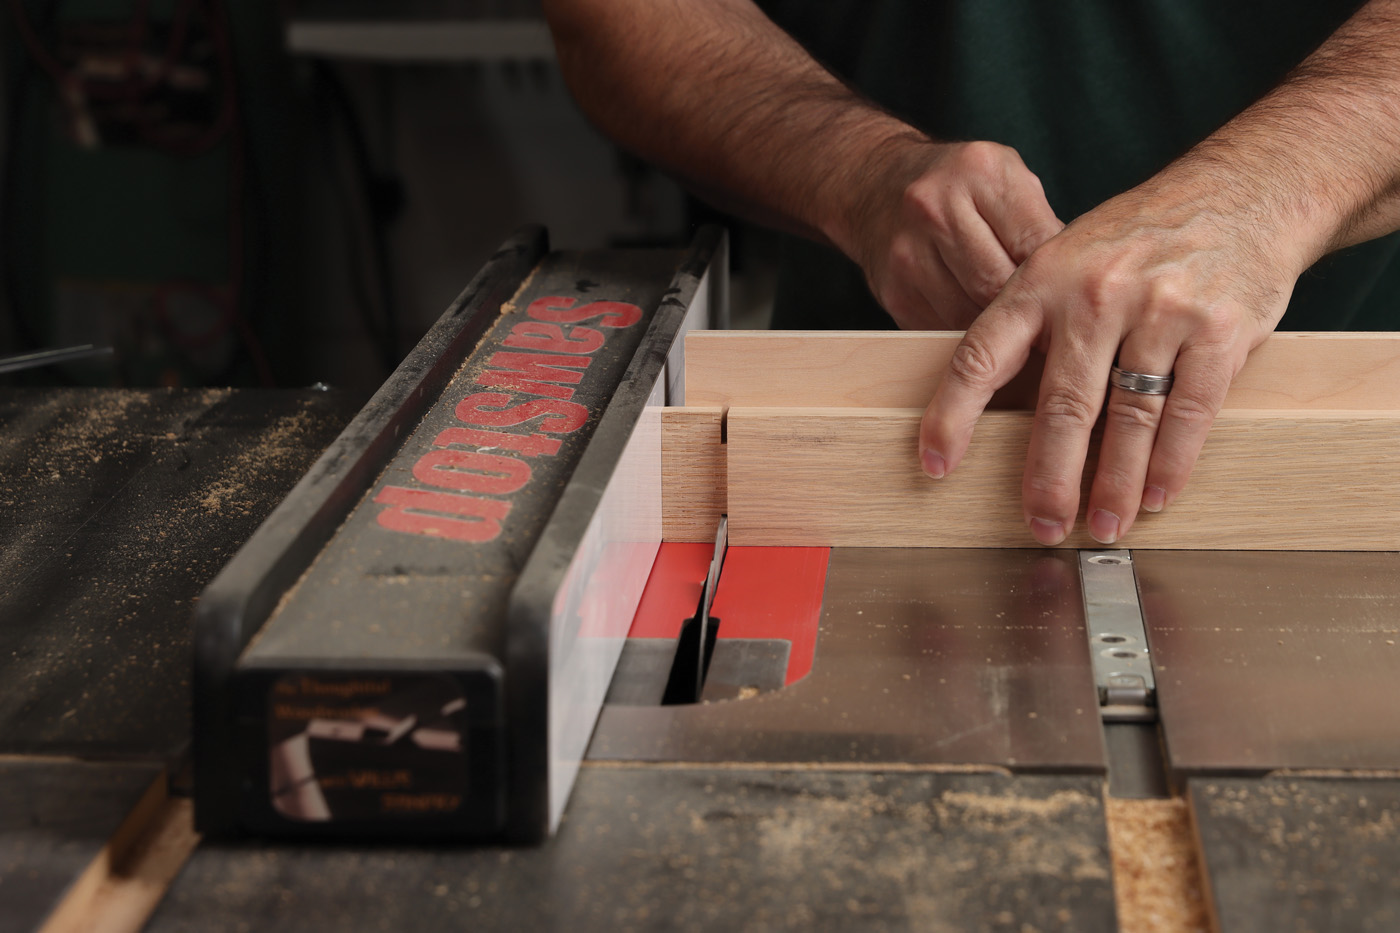
11 With a dado blade and miter gauge, tenon the rails to fit the mortises.
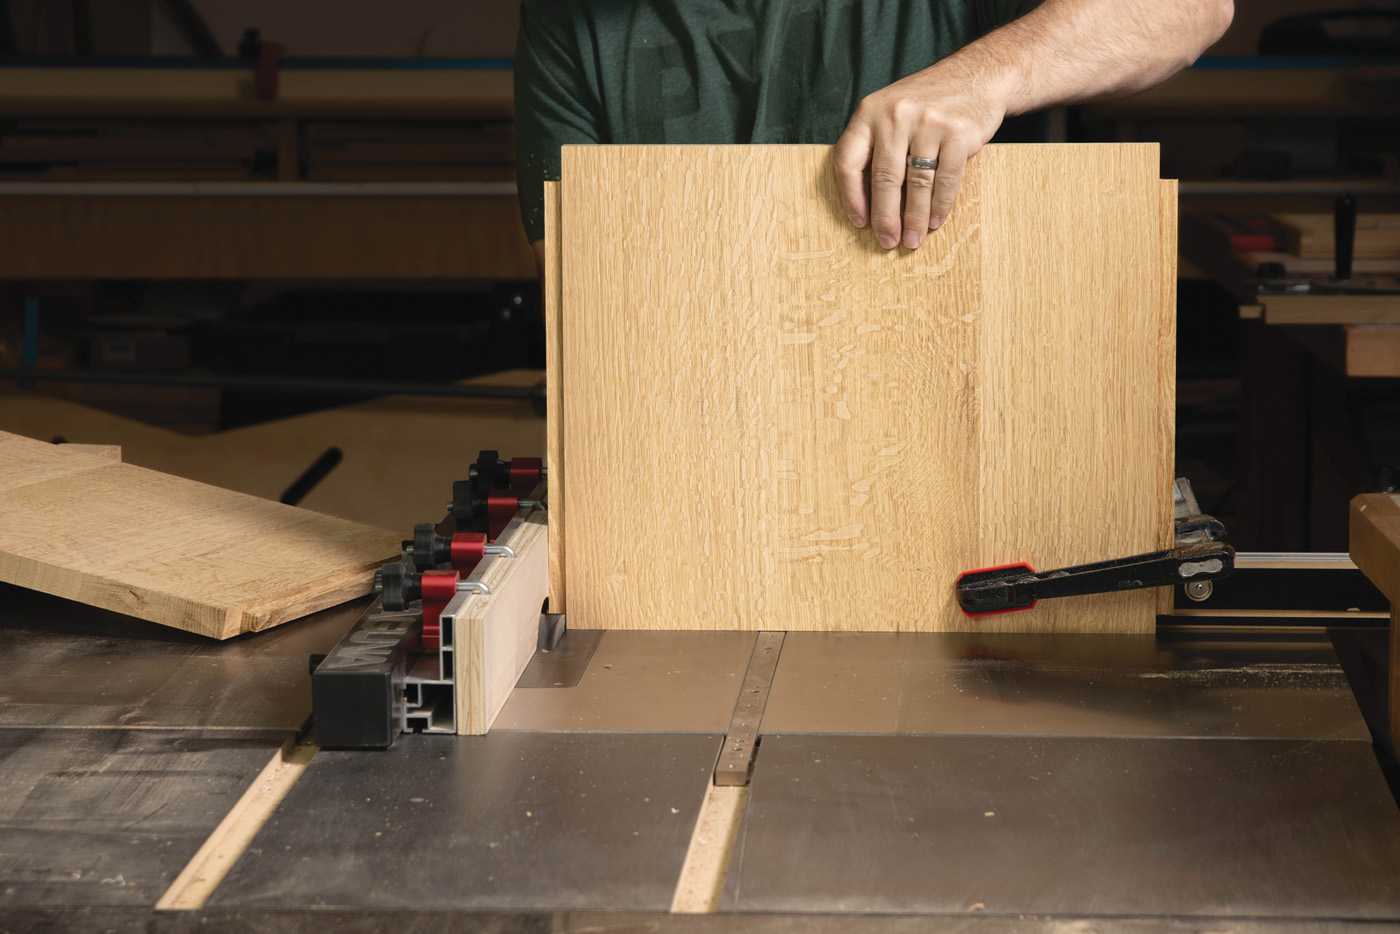
12 Raise 1/2″ long x 1/2″ thick stub tenons on the side panels. Then turn the panel on end to trim 1″ off the top and 1/2″ off the bottom of the tenon. A deep-reach clamp secures the panel to a sturdy miter gauge.
13. Chisel any detritus from the mortises. Dry assemble the desk frame.
14 Mark a cutline and remove most of the waste with a bandsaw or jigsaw. Mount the lower rail in a routing jig. Trim it flush at the router table.
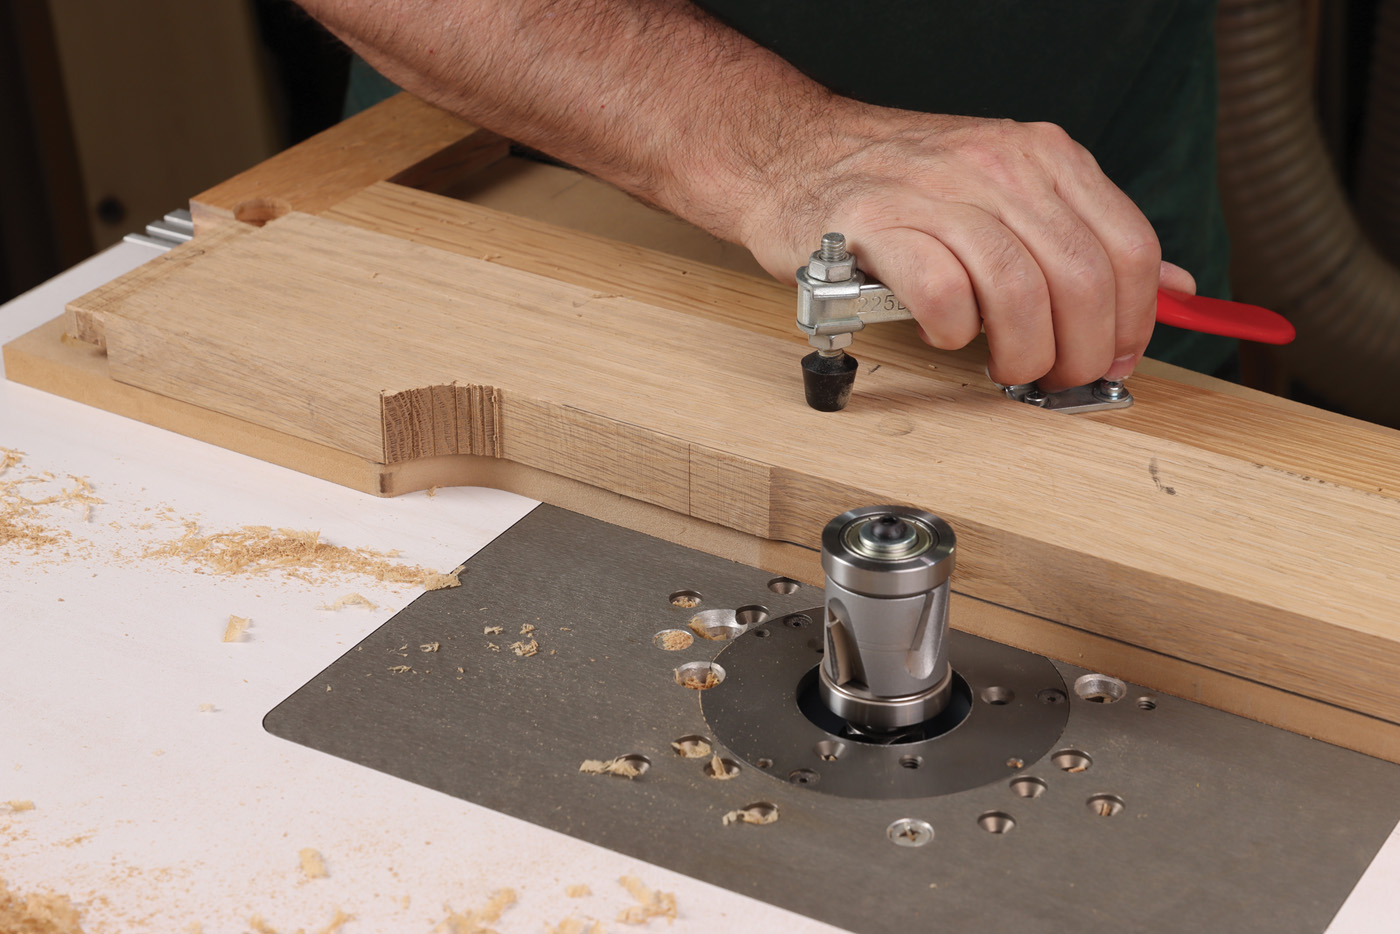
15 A large diameter flush trimming bit features compression geometry for smooth cuts on top and bottom. Infinity #06-694 Mega Flush Trim bit shown.
Dovetail Rail
While there are certainly easier ways to join the top drawer rail (pocket hole screws come to mind), a lapped dovetail joint is a historically accurate approach that’s rock solid. I recommend you try it, because there’s something quite satisfying about a perfectly fitting dovetail that no one will ever see. Install a combination blade with at least some flat raker teeth and set the blade height to 1/4“. With the fence set for a 1“ shoulder, nibble away the waste. It’s advisable to sneak up on the right fence setting, until the “shoulder-to-shoulder” length matches that of the drawer rail you tenoned previously. Then raise the blade to 1/2“ and turn the rail on edge, to make a single kerf on either side. Finally, draw the dovetail shape and trim away the waste freehand at the bandsaw. Now take the completed dovetail rail to the dry-assembled desk and lay it in position to make the dovetail sockets. Just like the tenoned drawer rail, the 2“ wide dovetailed rail is positioned flush with the inside of the front legs.
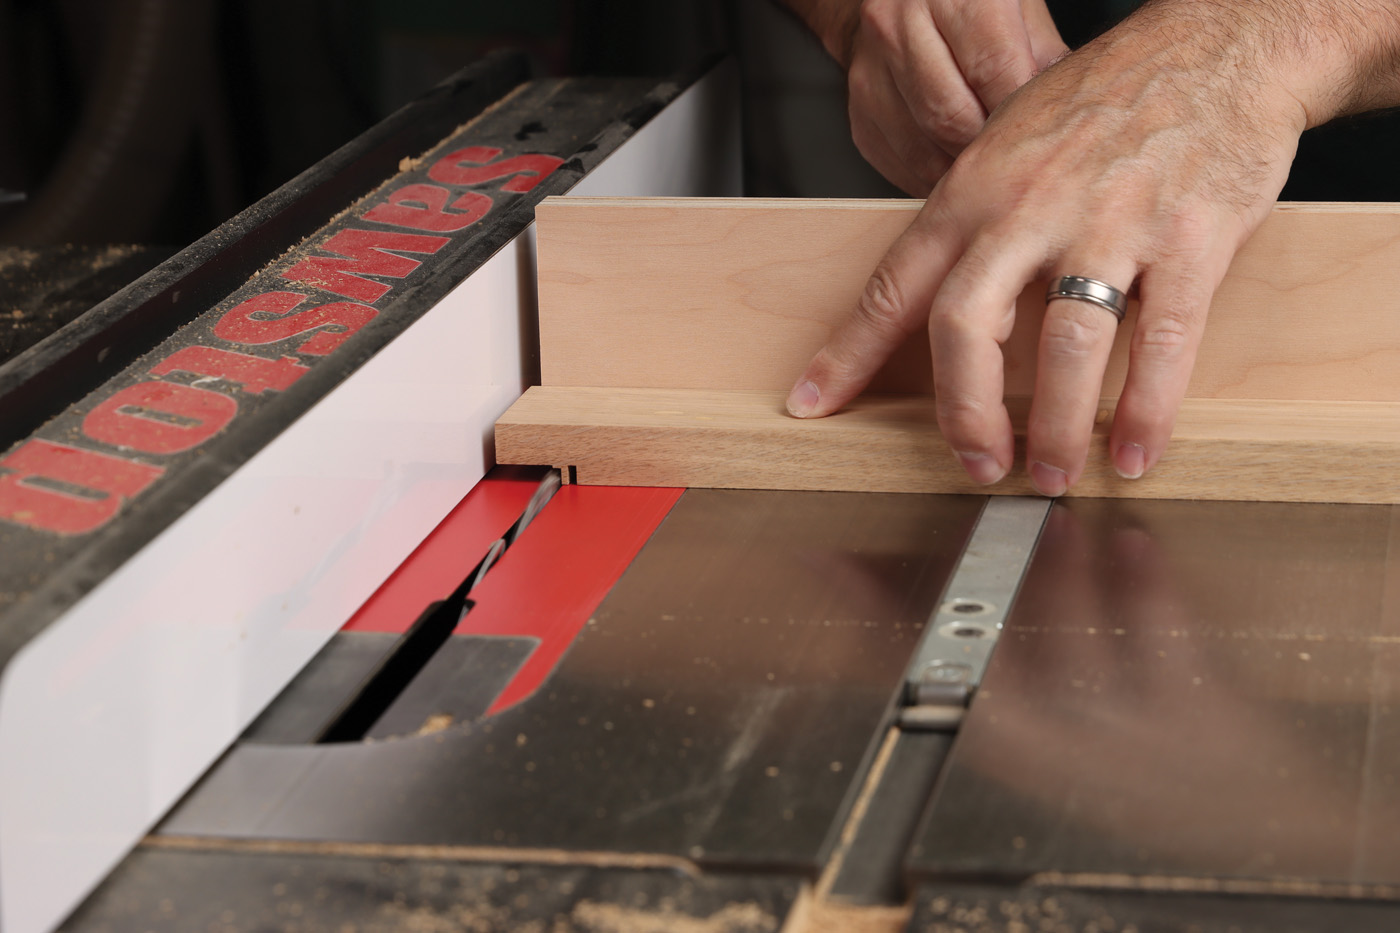
16 Notch the dovetail rail until the shoulder-to-shoulder dimension matches the lower drawer rail. Blade height is 1/4″ for this step.
17 Maintaining the same fence position from the previous step, raise the blade height to 1/2″ and extend the shoulders of the dovetail rail.
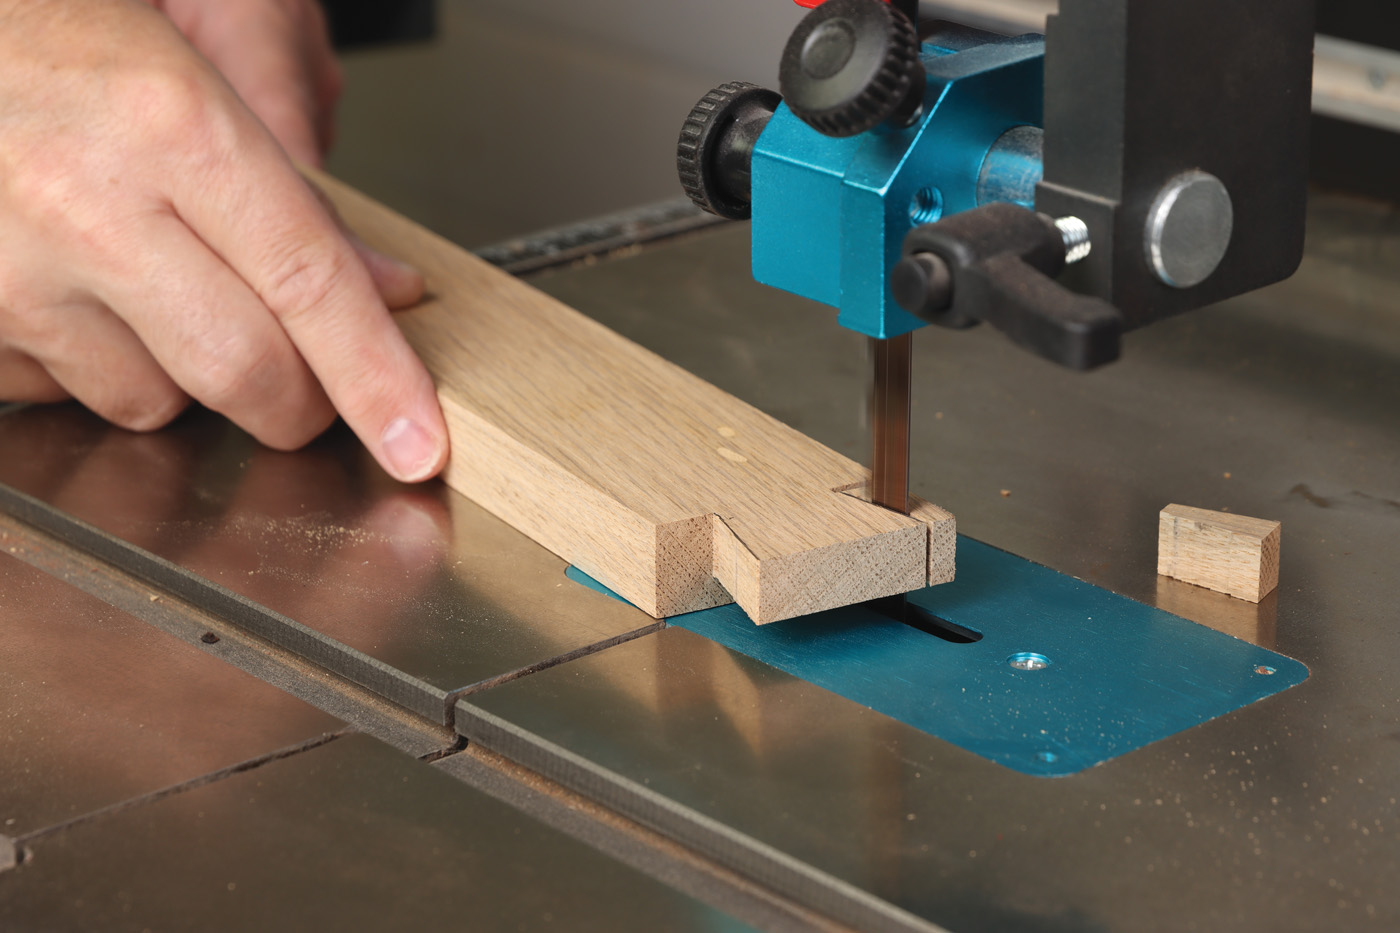
18 Draw the dovetail shape and cut it freehand at the bandsaw.
Secure the rail with a clamp and use a marking knife to transfer the location to the top of each front leg. While you might think a dovetail bit is required, that’s not true in this case. Chuck a 1/4“ spiral bit in a plunge router and excavate the bulk of the waste from the socket. A couple taps with a chisel and mallet complete the dovetail sockets. Leave the dovetail rail loose for now, to allow access for the next couple steps.
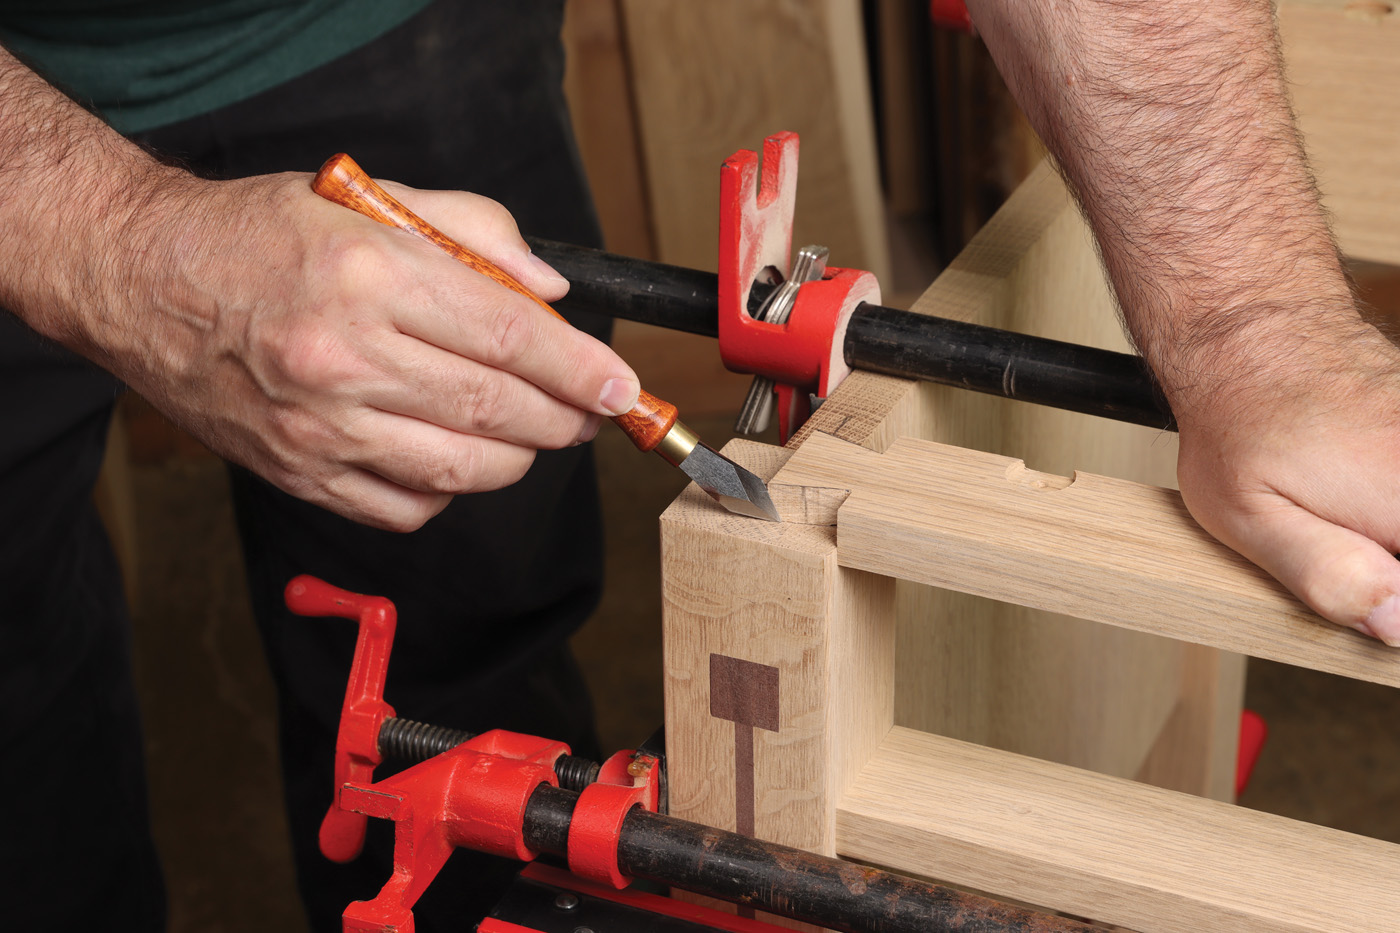
19 Take the completed rail to the desk and clamp it in position. Deeply score around the perimeter of the dovetail shape with a marking knife.
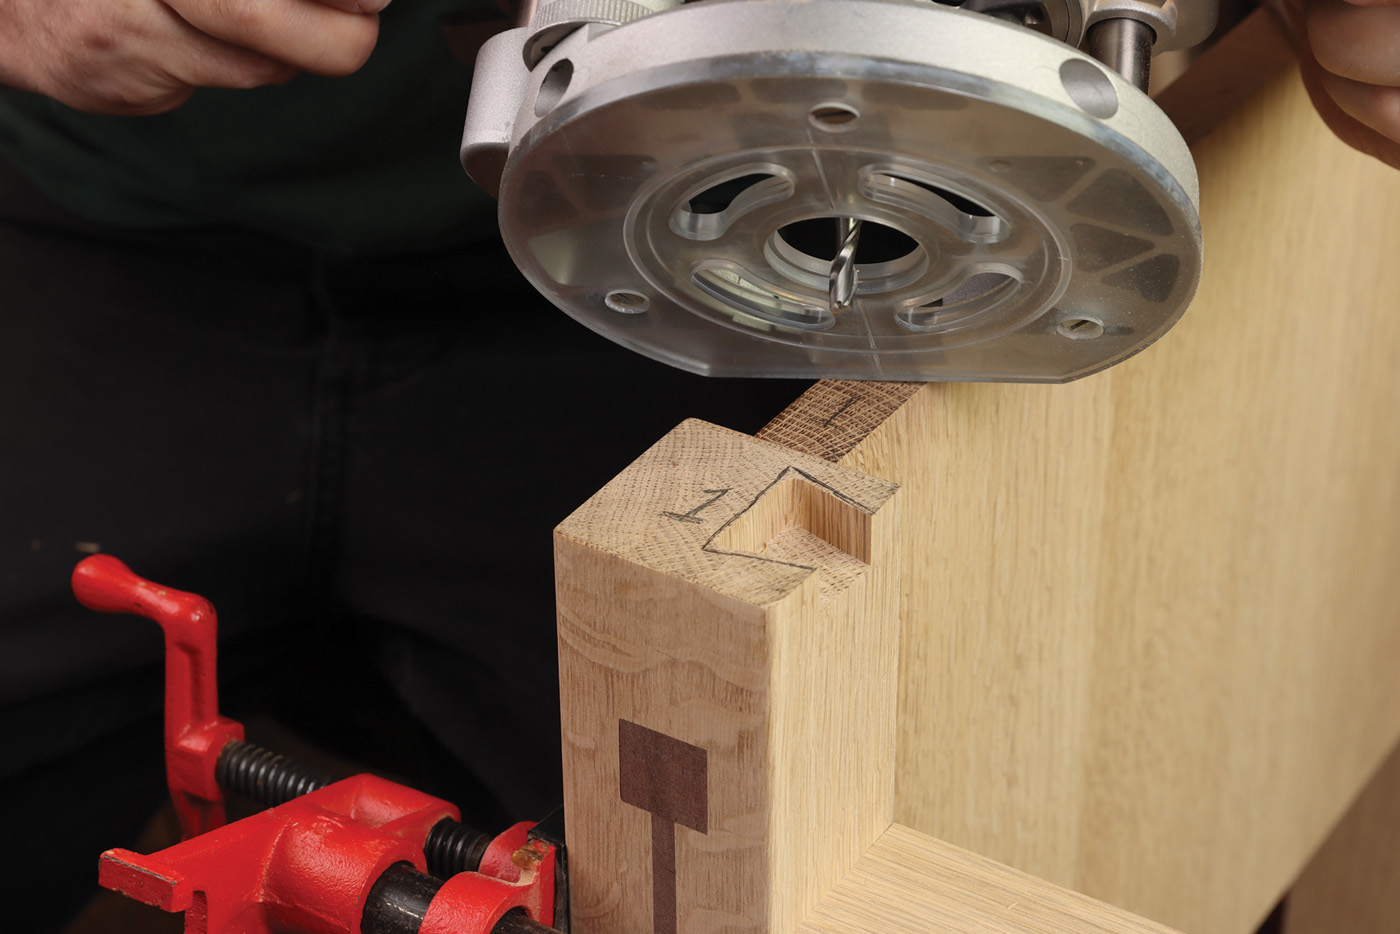
20 Darken the knife mark with a pencil and carve out the dovetail socket with a plunge router and a 1/4″ spiral bit. Use the dovetail rail itself to set router bit depth. Complete the socket with a chisel and mallet.
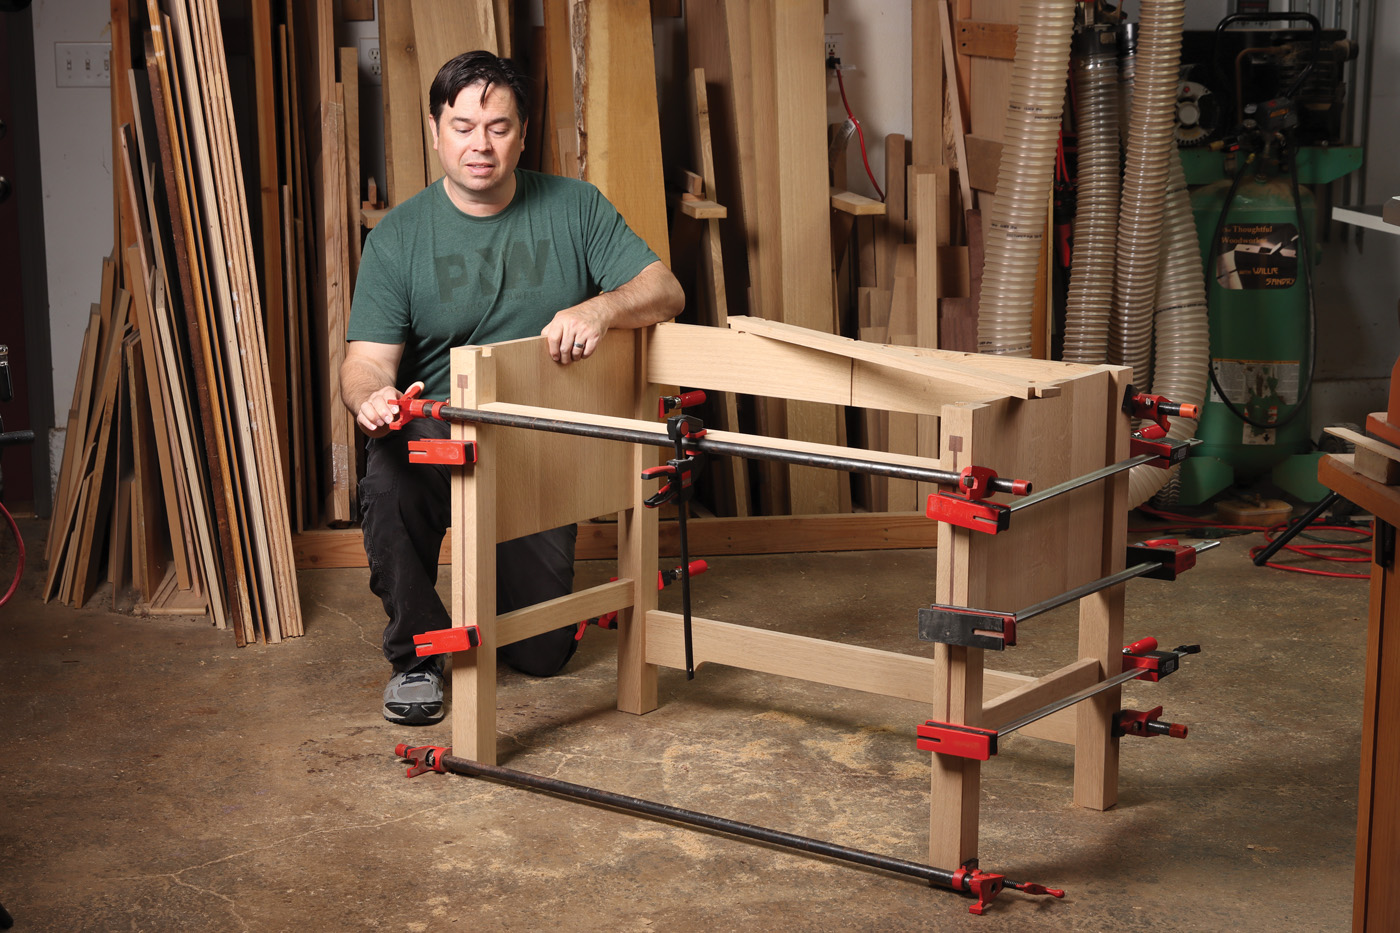
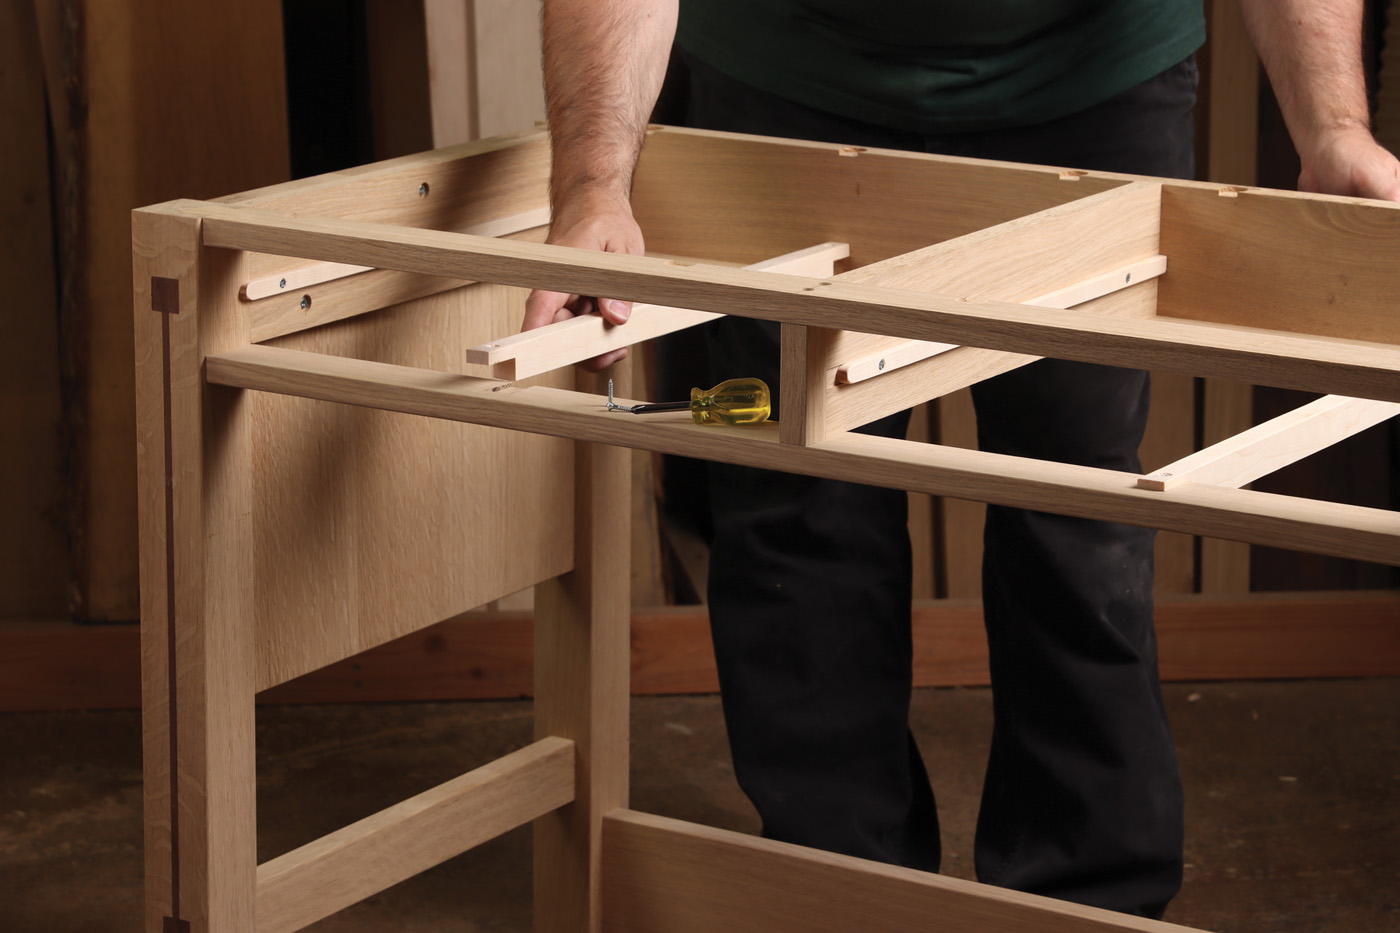
21 Permanently assemble the desk frame, but leave the dovetail rail loose for now.
Side-Hung, Center Guided Drawers
This style of drawer hangs on wooden slides and is guided by a central runner underneath. This system takes a note from the Stickley playbook and results in smoothly operating drawers that won’t rack side-to-side. Make the cleat component, which will support the central runners at the rear of the desk. Temporarily clamp the cleat along the back edge of the lower drawer rail and rout 1/8“ deep dado notches in both parts. Stop the notch 3/4“ from the front of the rail. Next, permanently install the cleat with screws through counterbored and predrilled holes, so that it’s flush with the bottom of the rear rail. The cleat also forms a nice ledge for the drawer divider, which we’ll install later.
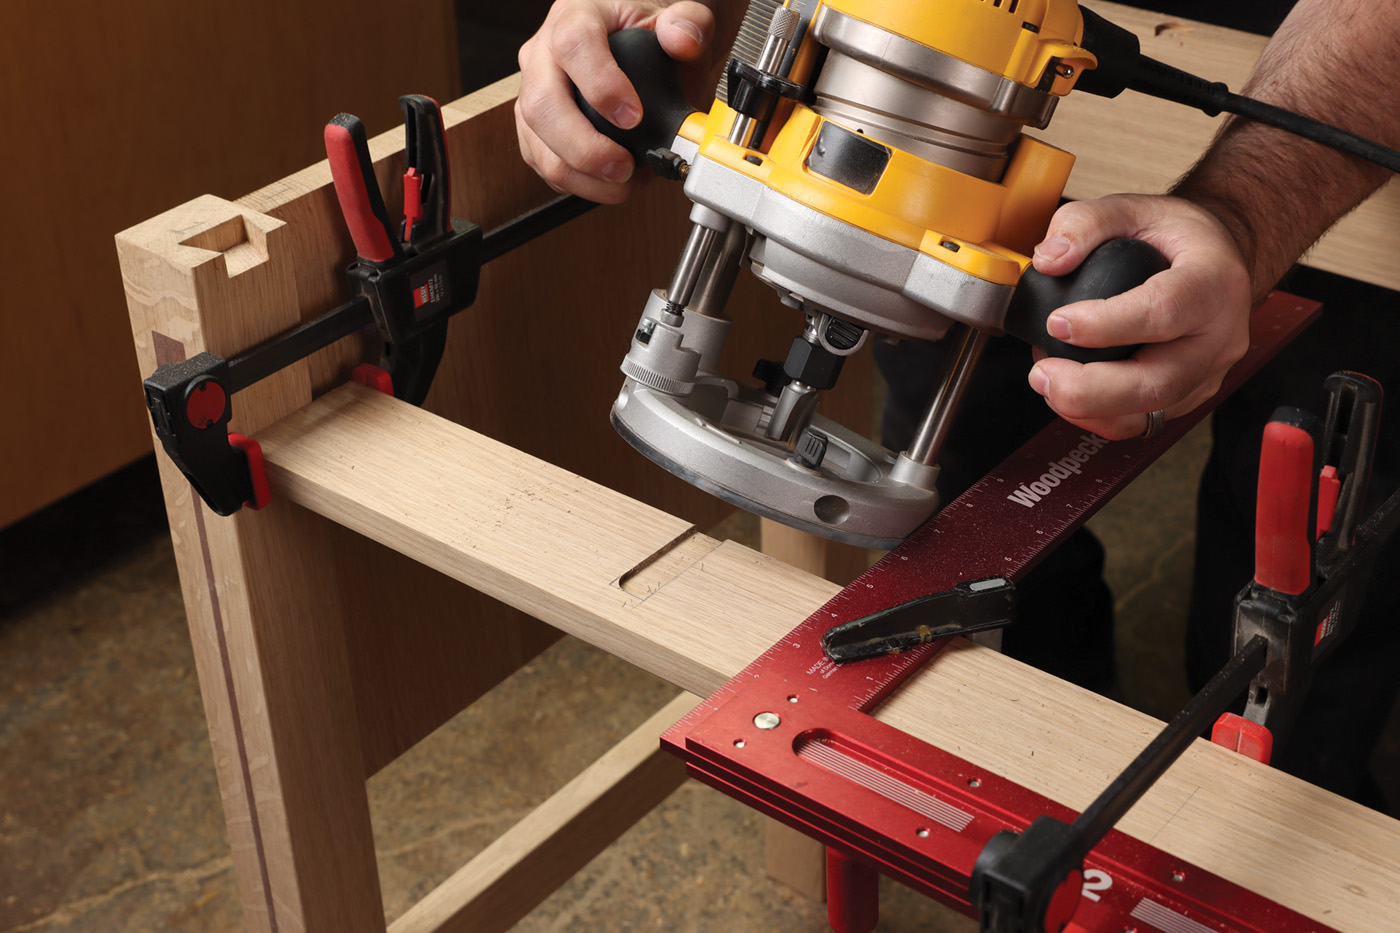
22 With the cleat clamped behind the lower drawer rail, rout notches centered in each drawer opening. This ensures the notches in both parts will be perfectly aligned. Stop the notch 3/4″ from the front.
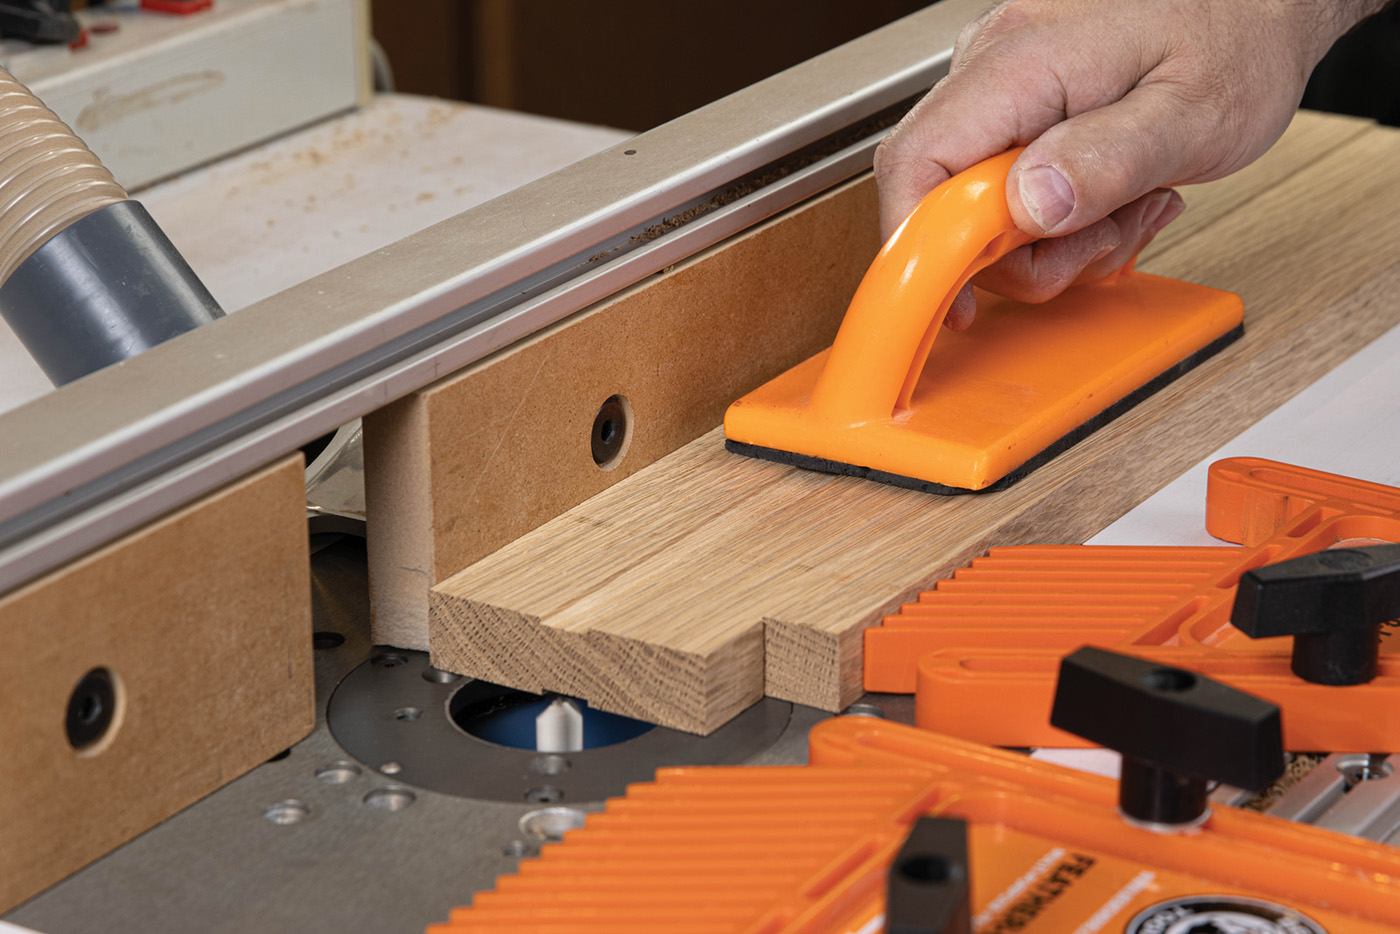
Build the drawer boxes with your preferred method. I used half blind dovetails made with a router-based jig. Make sure to leave 1/2“ space below the drawer bottom for the track component. Then rout centered grooves in the drawer sides at the router table. This requires a router bit capable of making a plunge cut. Use a 1/2“ diameter bit and make two passes to achieve the finished groove depth of 1/4“. With the same router table setup, lower the bit height to 1/16“ and mill through grooves in the spacer boards and drawer divider as well. You’ll register the bottom of the workpiece against the router fence for all grooves. Here’s the part where order of operation is important… be sure to mill these grooves before gluing on the vertical trim strip on the drawer divider. I used a single #20 biscuit to align these parts and reinforce the end-grain joint.
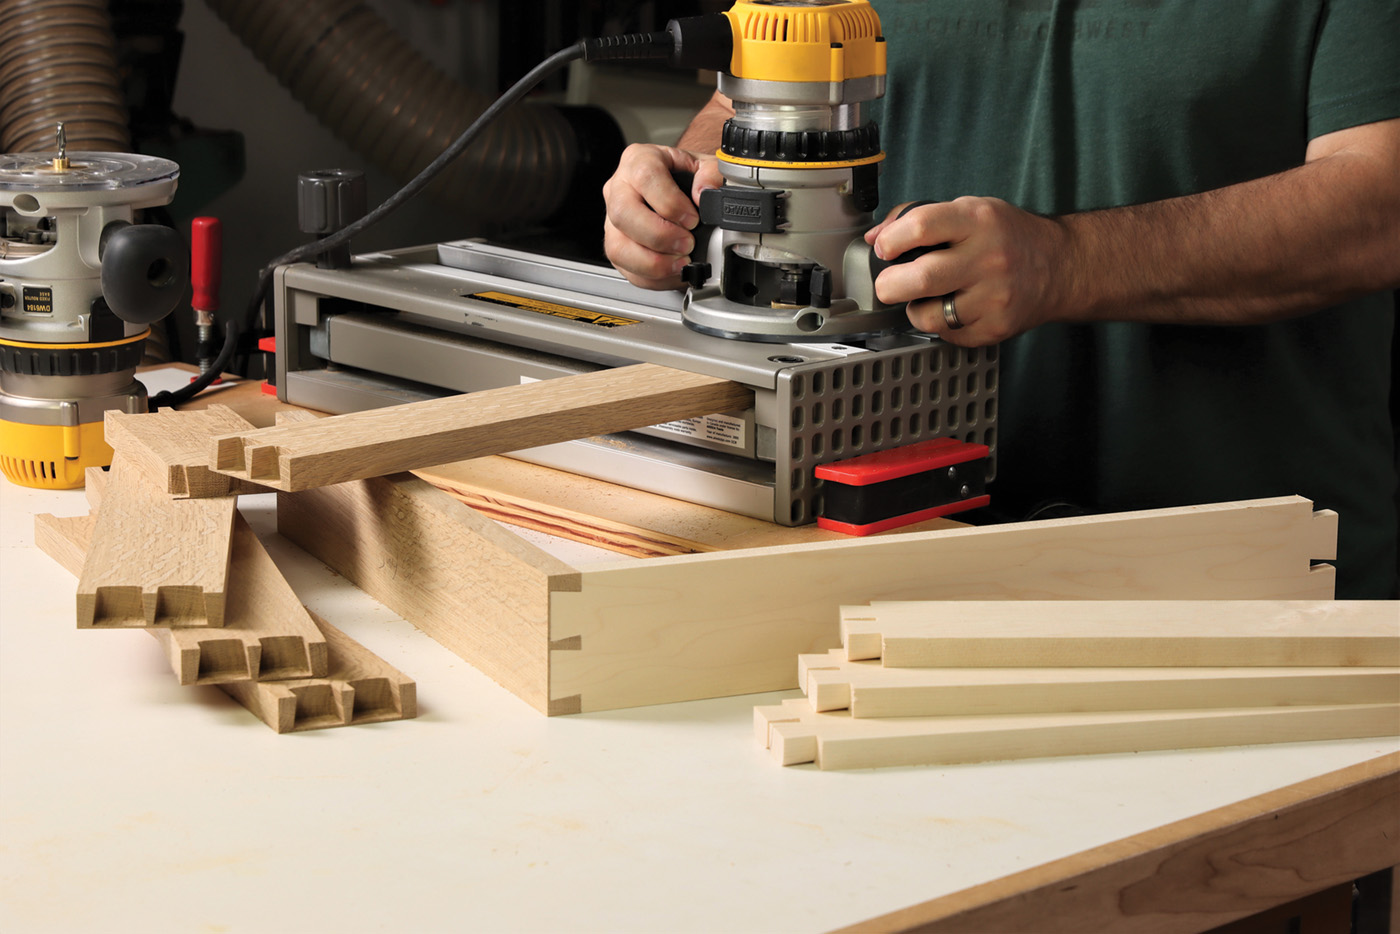
23 Form dovetail joints with a jig or by hand.
24 Rout 1/4″ deep centered grooves in the drawer sides with a 1/2″ diameter plunge-tip bit.
Make the central runners from hard maple and notch them to fit. The central runners register into their notches and are secured with a screw at front and back. Mill strips of maple roughly 1/2“ wide x 5/16“ thick for drawer slides. Plane the slides until they easily glide in the drawer grooves, without any excess slop. Round over the front end of each slide to match the radius of the drawer grooves. Drawer slide length doesn’t need to be precise because the central runner acts as a drawer stop, instead of the drawer slides.
25 With the same fence position, lower the bit height to 1/16″ and rout through grooves in the spacer blocks and both sides of the drawer divider. Make sure to reference the bottom of the workpieces against the fence for all the cuts.
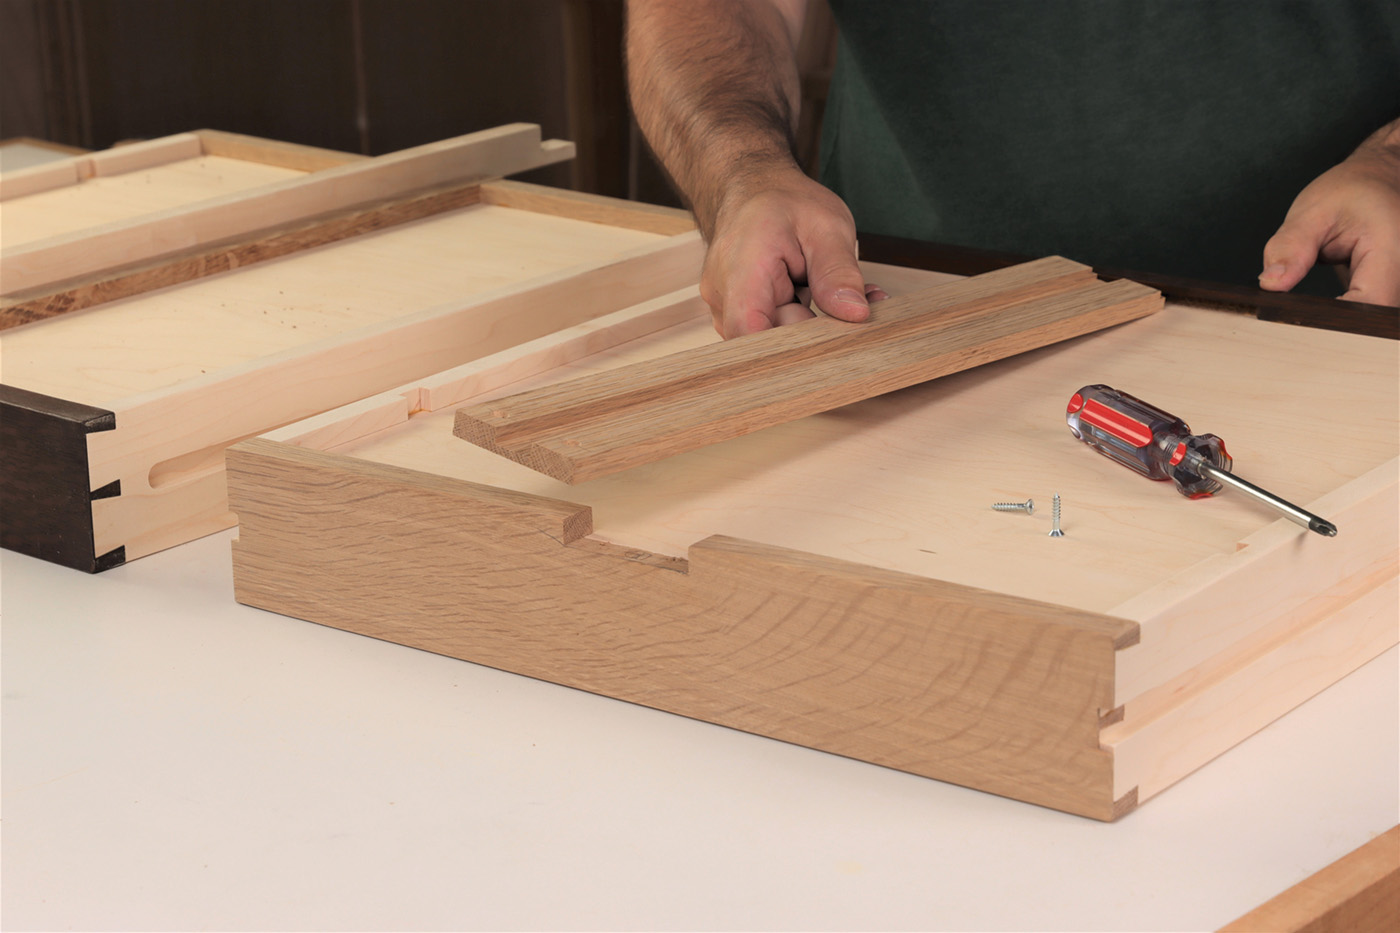
Finally, install the dovetail rail with glue and add the drawer divider component. I made a 1/8“ deep dado in the rear rail before assembly, to quickly register the divider in position. Secure the front of the drawer divider with screws driven through the drawer rails.
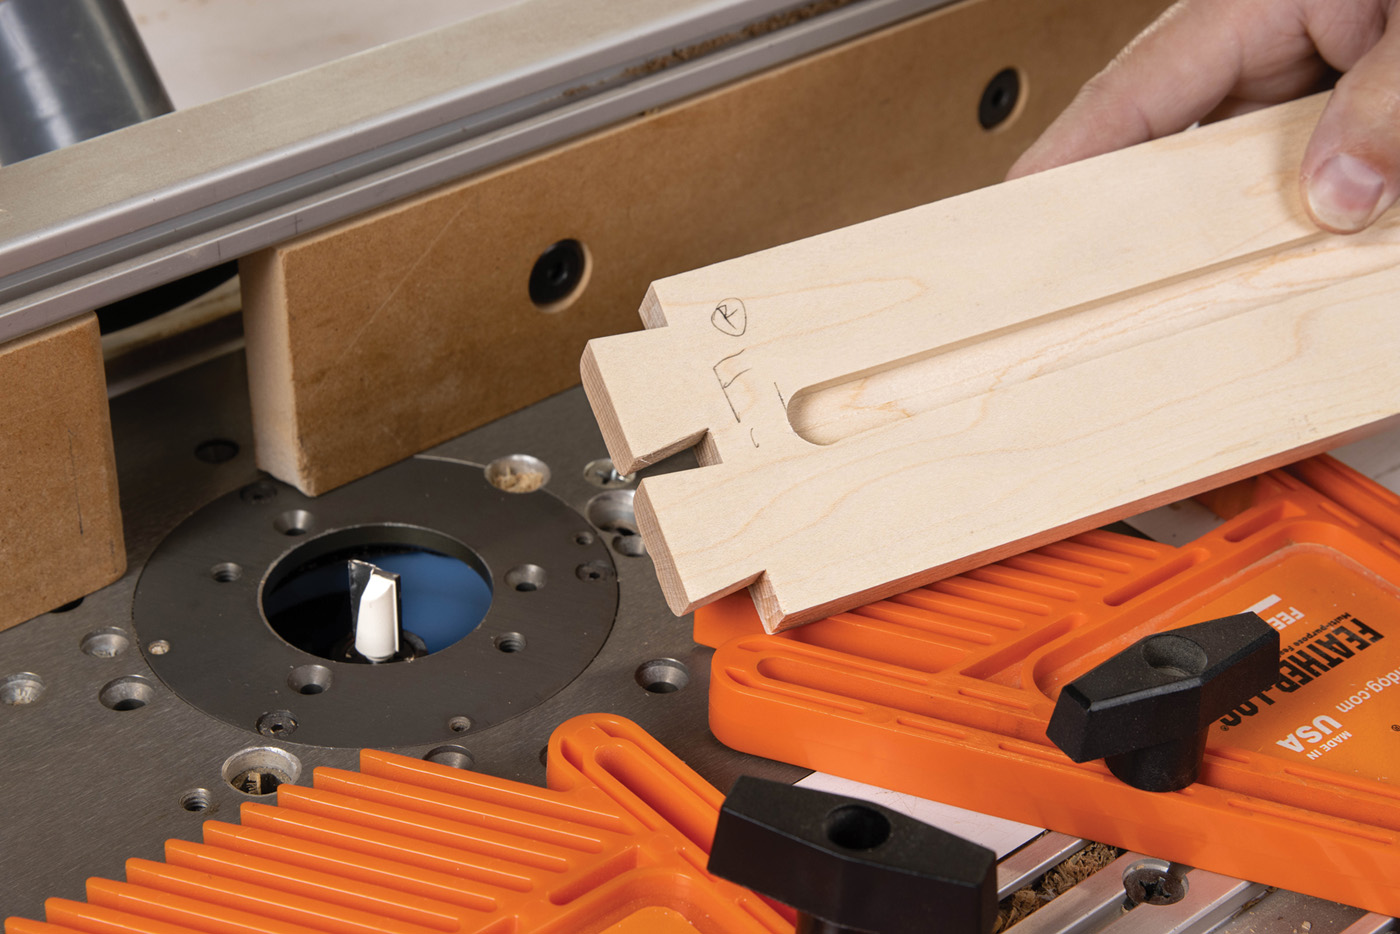
26 Notch the drawer back to receive a central track component. It’s 21/2″ wide x 1/2″ thick and has a tongue on the front end that fits into a mortise in the drawer front.
A Couple Special Drawer Box Features
The back of the drawer is notched for a 2-1/2“ wide x 1/2“ deep central track. The track installs with a tongue that fits into a shallow mortise in the drawer front. Make sure to cut this mortise before you assemble the drawer. There’s also a 5/8“ wide dado in the drawer sides, located about 4“ from the back. The dado receives a false drawer back and makes a perfect mounting location for a turning stop. This setup stops the drawer before full extension and creates an interesting secret compartment at the rear of each drawer. To access the secret compartment, twist the turn-stop and remove the drawer. Before final drawer assembly, complete the 2 remaining steps. Trim 1/16“ width off the drawer parts at both top and bottom. This creates a perfect drawer reveal automatically. Lastly, pre-finish the drawer front to add some contrast to the dovetail joints. While turn of the century factories didn’t bother with this detail, small-batch custom furniture makers can add these extra touches.
27 Make central runners from hard maple and install them in their dado notches. Spacer blocks are installed with oversized holes and screws and receive the drawer runners.
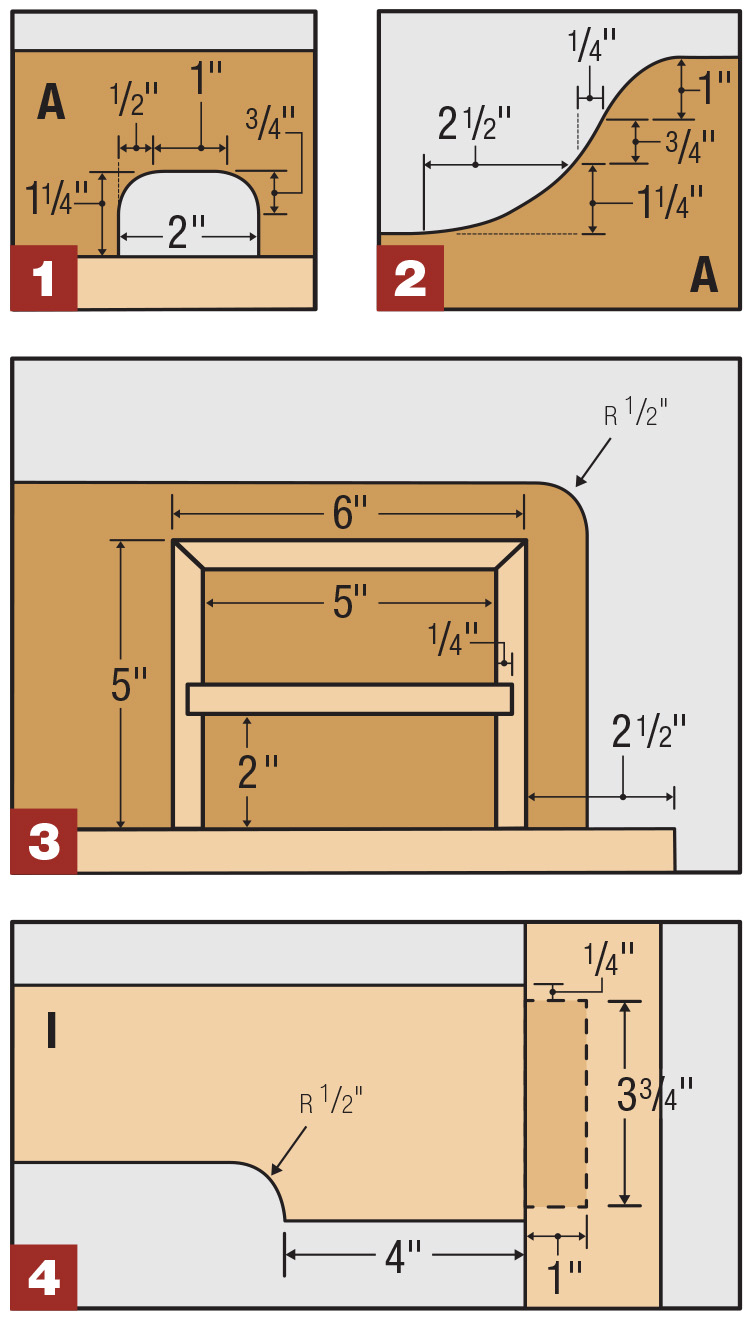
Backsplash & Organizer
Shape the backsplash as indicated in the rendering and cut a “mouse hole” for cord management as desired. I prefer biscuits for attaching the backsplash, but dowels or loose tenons would work just fine. The backsplash mounts flush with the back of the desk top, so be sure to keep the back edges crisp for now.
The letter organizers are built with locking miter joints and dados, using 1/2“ thick stock. For more information on using a locking miter bit, check out this article. Once these subassemblies are built, they’re mounted to the desk with 1/4“ dowels. Drill four holes in the bottom edge of each organizer, then use dowel centers to transfer marks to the desktop. Drill the mating holes in the desk top freehand. I very slightly drawbored the holes to ensure the organizers would pull flush with the backspash.
Hardware and Finish
The finishing schedule is a stain-over-dye technique starting with TransTint Golden Brown dye, mixed one ounce per quart of NGR thinner. The thinner I mix myself and it’s just a 50/50 ratio of lacquer thinner and denatured alcohol. I also add 4 tbsp. of lacquer retarder per quart of dye to slow drying time and minimize streaking. Next seal the dye with shellac, which must be sprayed if you use an alcohol-based dye. Complete the coloring step with General Finishes Antique Walnut gel stain and wait at least 24 hours before topcoating with lacquer. I find a satin sheen most fitting for Arts & Crafts style furniture.
Attach the organizers with a dab of glue in each dowel hole and secure them with a pair of deep reach clamps. Once the glue dries, attach the top to the desk with figure 8 fasteners. The crowning touch is period-appropriate brass ring pulls with slotted screws. It might look like an instant antique, but it’s a functional desk with plenty of workspace. Plus—a project like this can easily be adapted to fit your particular space.
Here are some supplies and tools we find essential in our everyday work around the shop. We may receive a commission from sales referred by our links; however, we have carefully selected these products for their usefulness and quality.