We may receive a commission when you use our affiliate links. However, this does not impact our recommendations.

We may receive a commission when you use our affiliate links. However, this does not impact our recommendations.
Cut logs into lumber, make thin boards from thick and cut your own veneer.
Perhaps you want to cut 3/4-in.-thick material down to 3/8 in., or make veneer from that one precious figured board. Or maybe you want to get useful lumber from a gorgeous piece of wood in your firewood pile. The technique that makes this possible is resawing. Although it just plain baffles some woodworkers, once you get the hang of it, you’ll be surprised at what you can do, even on a small bandsaw. Here’s what you need to make it all happen: blade selection, shop-made jigs, setup and cutting tips.
Why resaw?
One big reason: money. If you want thin stock for small boxes or drawers, it’s a lot cheaper to make your own than to buy it. Some wood dealers actually make thin stock by planing down 4/4 material, so it ends up being more expensive to buy less wood!
With wood prices going through the roof, making veneer can stretch your woodworking dollars. Slicing veneer on your bandsaw can change one bd. ft. of precious, expensive wood into six sq. ft. of veneer.
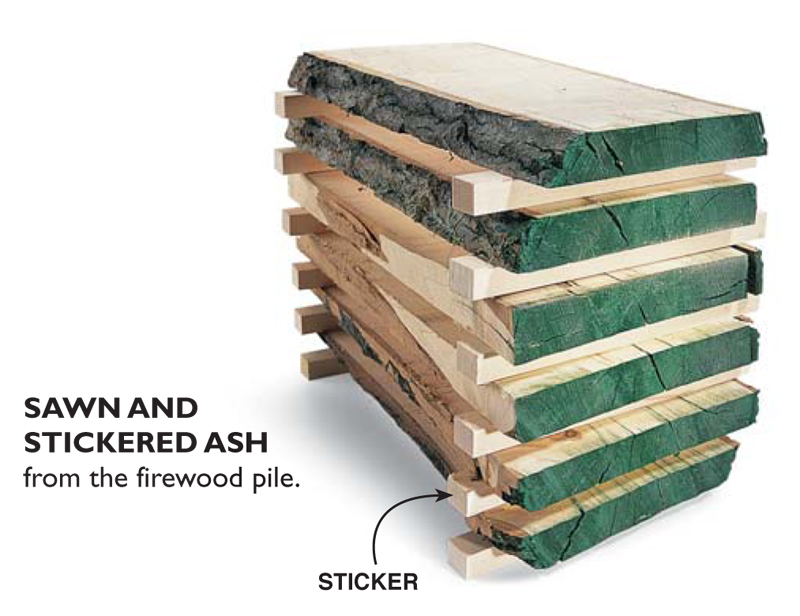
You can also transform those dusty chunks of apple or crotch wood out in your garage into free lumber by resawing. You could make a project entirely from a tree felled in your own yard. Resawing gives you access to the marvelous possibilities of free or cheap local logs.
Tool up: Blade selection and more
Just about any bandsaw will do acceptable resawing. For example, all the cuts made in this story were done on an inexpensive, 14-in. bandsaw with a 3/4-hp motor. All we did to the saw was add a riser block to increase its capacity. Granted, pushing a saw too hard can bog it down, or even pop a circuit breaker. So take it easy. If you plan to do lots of resawing, see below for more on larger and souped-up machines.
Use the widest blade your saw can handle: 1/2 in. or 3/4 in. for most saws. Wide blades make it easier to cut a straight line. Look for a blade with four teeth per inch and a hook tooth pattern. The hooked teeth give you big gullets (the valleys between the teeth) to clear the sawdust from the cut and help the blade run cool. Heat is a blade’s biggest enemy. Resawing pushes your saw’s motor to the max, so make it easier on your saw by always using a sharp blade.
I’ve had perfectly acceptable results resawing with bimetal blades and great results resawing with silicone-carbide, low-tension blades (see Sources, below). These blades leave an excellent surface finish and, due to their thin kerf and low tension, don’t take as much power to drive. These blades make it easier to resaw thick stock on any saw.
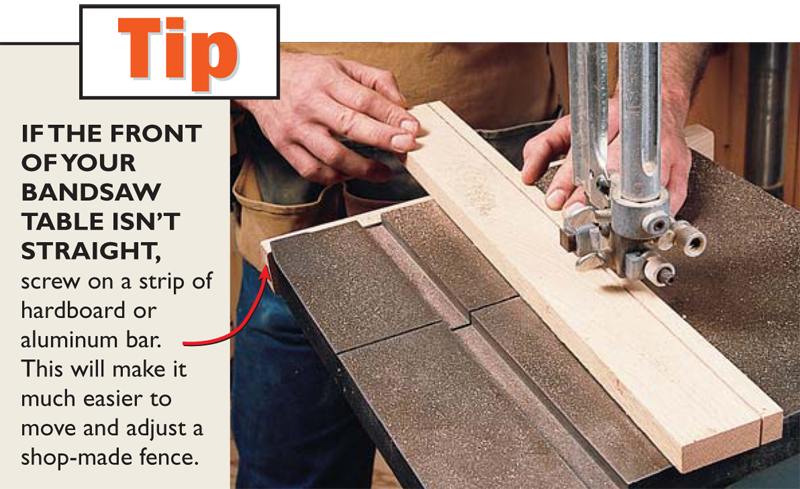
An auxiliary table helps and is a must for cutting logs. Resawing also requires a fence. Some bandsaw manufacturers have fences available for their saws ($75 to $100), or you can make one. The fence should be high enough to support the material you’re cutting and adjustable to compensate for blade drift.
Don’t forget dust collection. Resawing produces lots of dust and it’s typically pretty fine. Admittedly, dust collection attachments on most bandsaws aren’t great, but whatever you have is better than nothing. If you find lots of dust buildup on your tires, unplug the saw and clean the tires with a rag moistened with mineral spirits. Clean tires help your saw perform better.
Get the drift: Setup tips
If you’ve tried cutting a straight line on your bandsaw, you probably noticed that your material has to be fed at an angle to the blade. This is called “blade drift.” Any resaw technique that uses a fence requires finding and working with this drift angle. Drift varies from blade to blade, so follow this simple setup procedure (Photos 1 through 4) every time you change blades.
Logs to lumber: Cutting tips
If your firewood pile puts visions of potential projects into your head, use resawing to turn those logs into planks.
You can cut logs when they’re wet or dry, but they’ll be easier to cut when wet. Either way, you’ll have to dry the lumber all the way before you use it for a project.
The diameter of the logs you cut is limited by the capacity of your saw: 6 in. on most 14-in. saws. If you want to cut bigger stuff, see if the manufacturer of your saw makes a riser kit. It can increase the capacity of your saw by another 6 in.
A bigger table on your saw is almost a must when handling logs. It’s nearly impossible to cut a straight line without one. You’ll also need a sled to hold onto the log and prevent it from rolling while you cut (Fig. A). Once you use the sled, you’ll love the stability it gives you for these difficult cuts. Green logs measuring 11 in. in diameter and 36-in. long are about at the top end of what you can safely handle.
When good cuts go bad
So you’ve mastered the setup, but you’re still having problems? Here are some tips:
- Look for these symptoms when you make your test cut: If the board pulls away from the fence on the outfeed side (Photo 4), the outfeed end of the fence is angled too far away from the blade. If the board you’re cutting binds as you’re slicing it, the outfeed end of the fence is angled too close to the blade. Make an adjustment and try another test cut.
- Always use a sharp blade.
- Keep your feed rate slow. Listen to your saw and slow down if it’s bogging down.
- Use a blade with the right tooth count. Too many teeth make it hard for the blade to clear the sawdust.
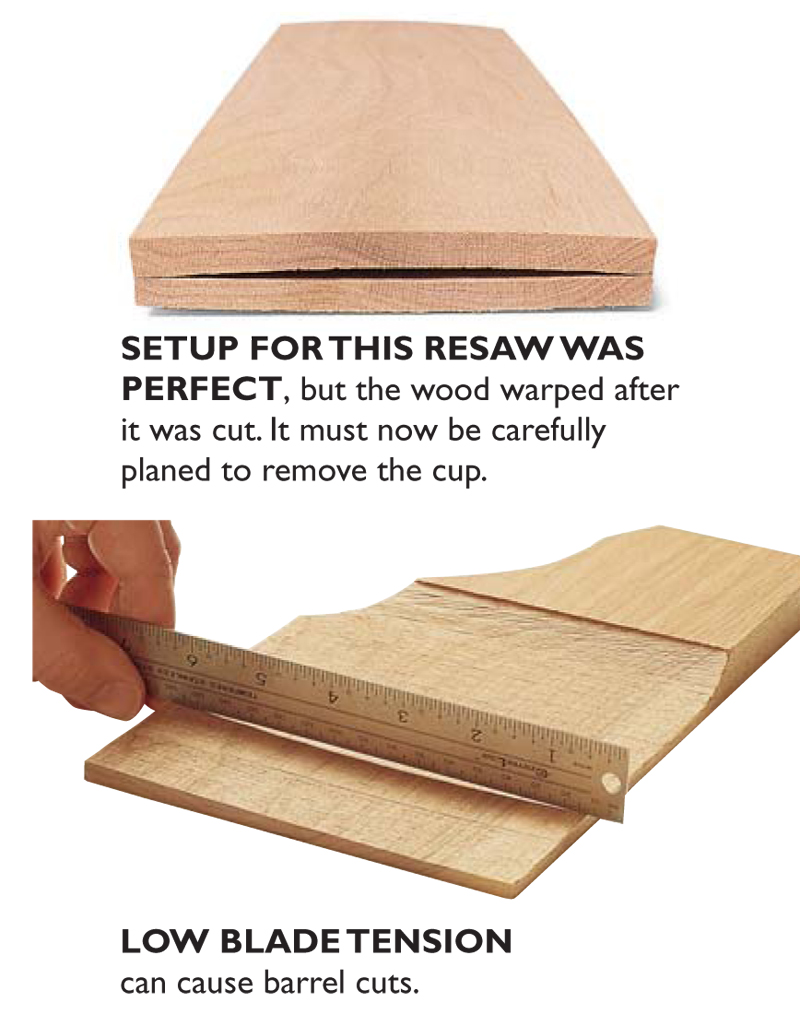
- Even with everything correctly set, your wood may not cooperate. Wood can sometimes be imperfectly dried, and react after it’s been cut. The only solution is cutting your stock thick enough to plane out the cup after resawing.
- Tension your blade. Too little tension can lead to barrel cuts. Check the tension by unplugging the saw, raising the upper guide and pushing on the side of the blade. The blade shouldn’t deflect more than 1/4 in.
Drying wood
Remember one thing: When it comes to drying, slower is better.
- Before cutting the log, paint the end grain. This seals it and slows down the drying process so you don’t get lots of cracking. I use whatever extra paint I have around the house, though for green wood, latex is best.
- If the bark stays on the planks you cut, leave it on. Like painting the ends, the bark slows down drying.
- Stack the planks where air can flow over them, but not in direct sun. Place a couple stickers (1x2s) between each plank so the air can move freely around the wood.
- Be patient. Air drying can take as long as one year per inch of thickness. Follow initial drying with a year of storage indoors so the boards equilibrate to indoor moisture levels.
- With small planks, use the weighing technique to monitor drying. Weigh the planks after you cut them and use chalk or a marker to record the weight on the wood. Weigh them again every few months. When the weight stops changing, moisture is gone from the wood. Moisture meters are, of course, the most accurate way to gauge the moisture content (see Sources, below).
Veneer
Resawing lets you cut your own veneer. This home-sawn veneer has many advantages. It lets you stretch your material by getting lots of sq. ft. out of a single board. Veneering a panel with shop-sawn veneer gives the stability and design options of commercial veneer, but with the appearance of solid wood. And because this veneer is thicker than commercial veneer, you can gently round over the edges without cutting into the substrate. You can make veneer from any unusual wood you find, including crotch, spalted and burled woods—stuff you may not be able to buy from the best veneer supplier. When cutting veneer, always be sure the wood is completely dry before you begin.
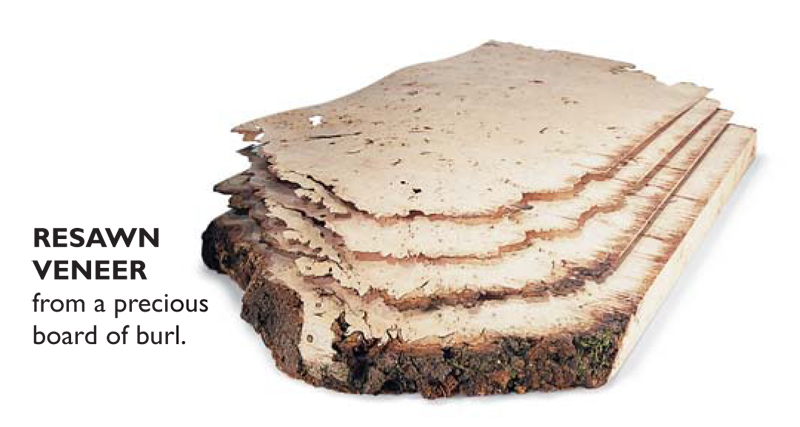
A good thickness for your shop-made veneer is 3/32 in. It’s thick enough to work with, but thin enough to be stable. When sawing, use a fence that’s as tall as your material is wide so you have good support, and make sure your fence and blade are perfectly set up. Bandsawn veneer can be edge glued with light clamp pressure.
Bandsaw upgrades
For frequent resawing, consider getting a larger saw or souping-up the one you have.
You can upgrade to a 1-1/2-hp motor for about $200. At that price, a motor upgrade only makes sense if a slow feed rate is absolutely killing you, or you have to replace the motor for other reasons. Be sure to maintain the same shaft diameter, rpm and rotation direction as your original motor.
Changing your guide blocks to bearing-style guides (Photo 9) means investing about $150. The bearings on these guides are designed to run in contact with the blade, eliminating the friction you get from guide blocks. Less friction means less heat and longer blade life. Most of the heat in resawing, however, comes from the blade’s contact with the wood. Because bearings can be used in contact with the blade, they can help the blade run straighter, resulting in less drift.
Similarly, nonmetal Cool Blocks ($15) can be run directly against the side of your bandsaw blade. While they won’t help the blade run straighter like bearings can, they do make set-up easier. You don’t have to worry about spacing the blocks away from the blade.
For increased capacity, look for a riser block ($110) for your saw. These blocks aren’t available for all saws, but if you can get one you can increase the saw’s capacity by 6 in. They’re available for some saws from Delta, Grizzly, Jet and Ridgid. Riser blocks are saw-specific, so be sure you get the one designed for your saw’s specific make and model.
Before dropping too much dough on your bandsaw, remember that $1,000 to $1,800 gets you a brand new saw with big capacity, a monster motor, and guide bearings. These big boys are the ultimate resaw machines.

1. Find the drift angle by drawing a line parallel to one edge of a 16-in.-long scrap piece. Saw the line freehand. Notice how much you have to angle the wood in order to follow a straight line. This is the drift angle.
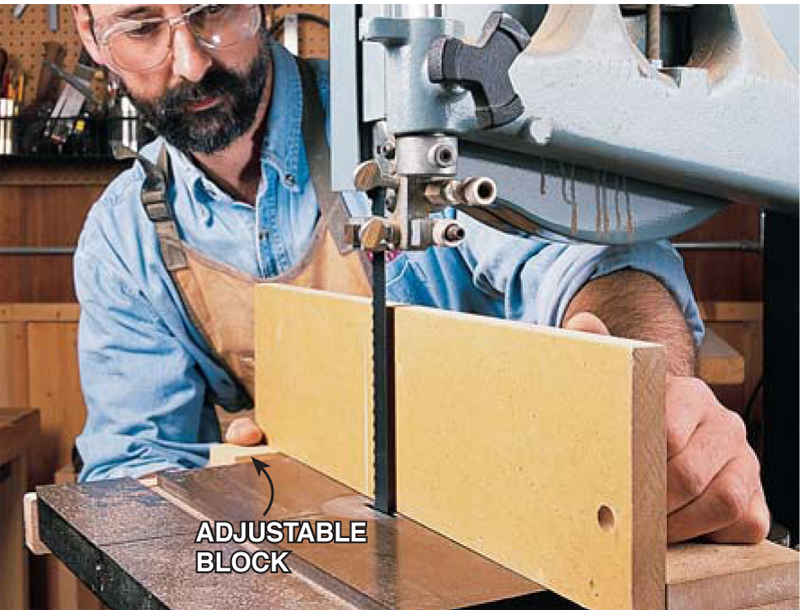
2. Stop about halfway through the cut, hold the wood in place and shut off the saw.Trace the angle of the wood onto the bandsaw table.
3. Set your fence parallel to the line on the table. An adjustable block at the end of the fence allows you to hold this angle as you move the fence laterally. Make sure your table is square to the blade and your fence is square to the table.

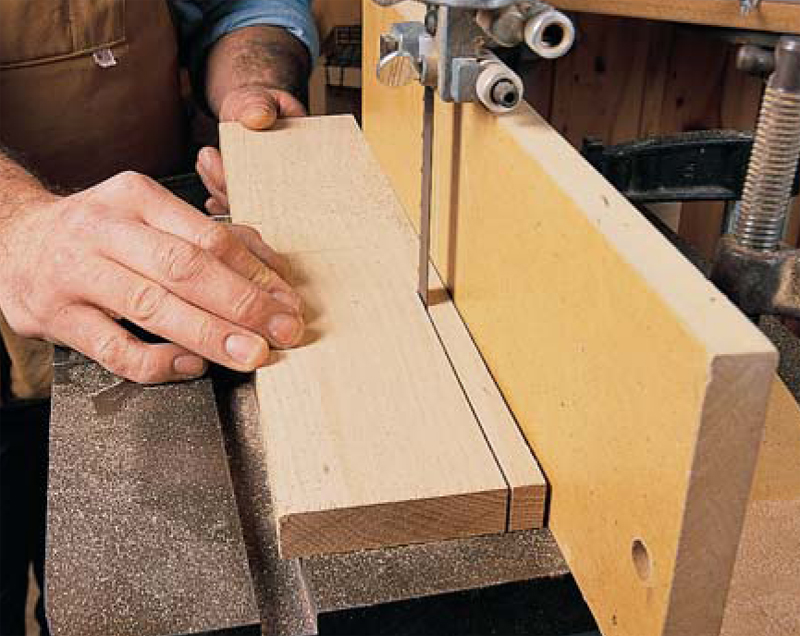
4. Clamp the fence and make a test cut.Watch for the wood pulling away from the outfeed side of the fence or binding. It can take a couple tries to get the drift angle perfect. Once the drift angle is correctly set, move the fence laterally to make the cuts you need.
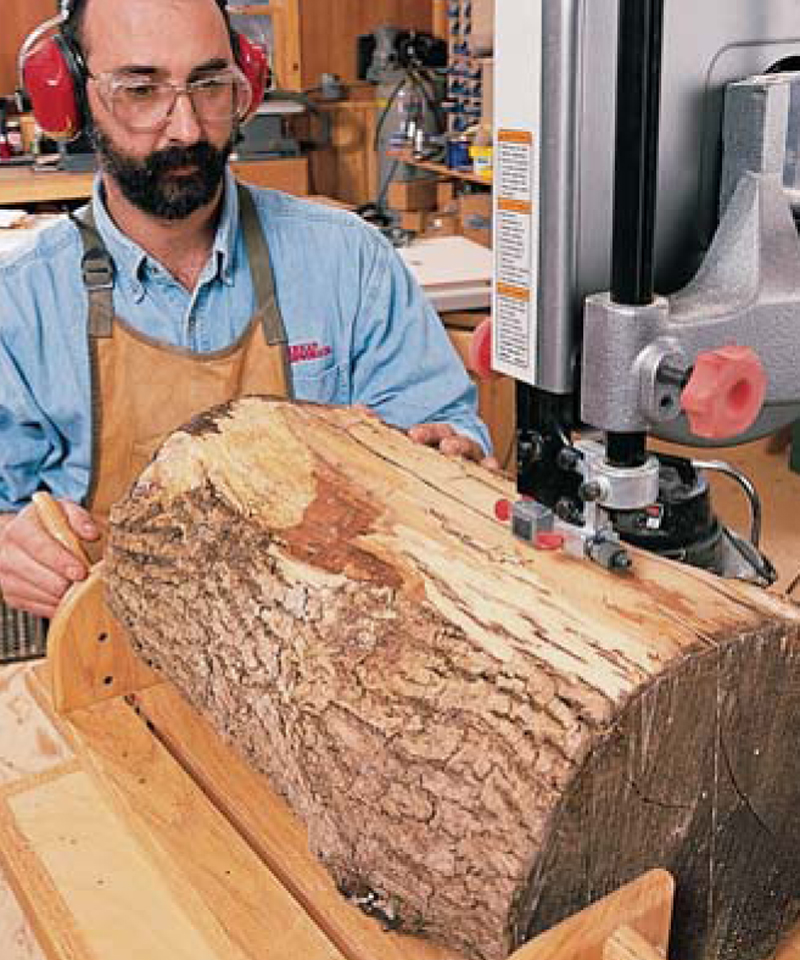
6. Draw a line down the middle of the log using a pencil and straightedge, or snap a chalk line. With the log secured into the sled, saw the log in half.
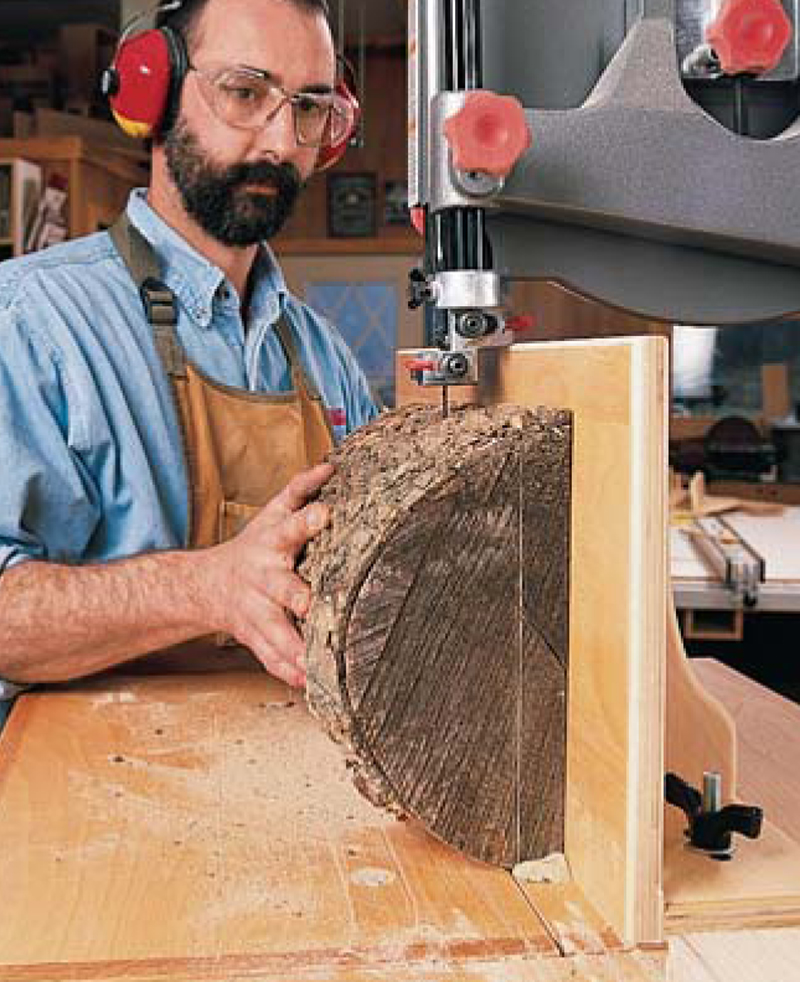
7. Set up a fence to resaw the boards. Run one face of your halved log against the fence, and keep going until you’ve cut the entire log.

8. Position the fence so the veneer is being cut from the side of the board away from the fence. Although this means moving your fence for each cut, it gives the best results. Use a push block and keep an eye open for the blade blowing out through the face of the veneer. After your first cut, smooth the face of the board with a planer or jointer, and re-position the fence. Repeat until the piece is down to 1/2-in. thickness. This is about as far as you can safely go.

9. Guide bearings instead of guide blocks (shown here without the guard) can help bandsaw blades run straighter. They cost about $150, and are available for virtually any saw (see Sources).
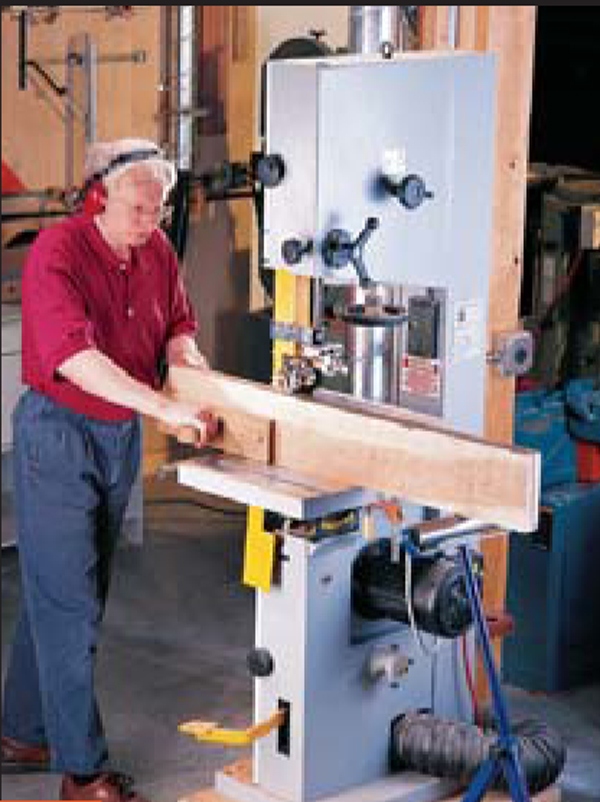
10. Medium-sized bandsaws (16 in. and 18 in.) are excellent for resawing, with larger motors, wider blades and larger tables. Prices are generally $1,000 to $1,800.
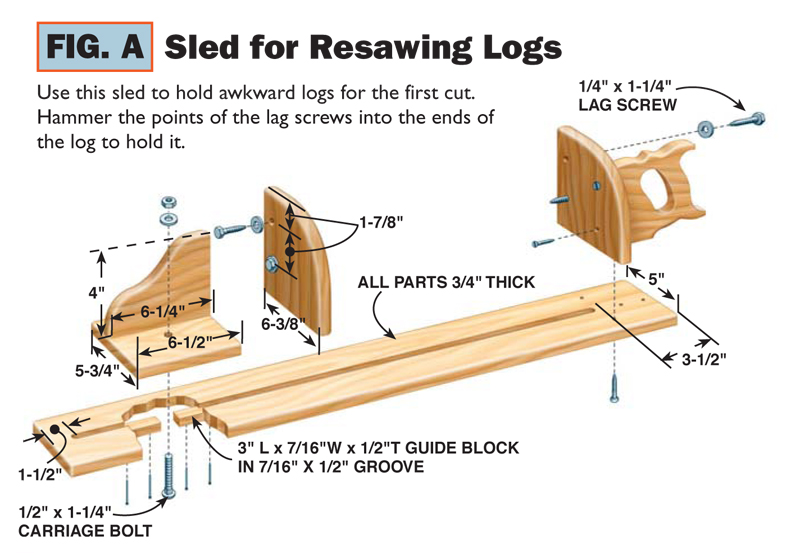
Fig. A: Sled for Resawing Logs
Sources
(Note: Product availability and costs are subject to change since original publication date.)
Low-tension blades, approx. $25,
depending on length; PS Wood
Machines, 800-939-4414.
Motors; $200; Grizzly, 800-523-4777.
Guide bearings; $150, Carter Products, 888-622-7837.
Moisture meters; $150,
Electrophysics, 800-244-9908;
Protimeter, 800-321-4878; Wagner, 800-944-7078.
Here are some supplies and tools we find essential in our everyday work around the shop. We may receive a commission from sales referred by our links; however, we have carefully selected these products for their usefulness and quality.