We may receive a commission when you use our affiliate links. However, this does not impact our recommendations.

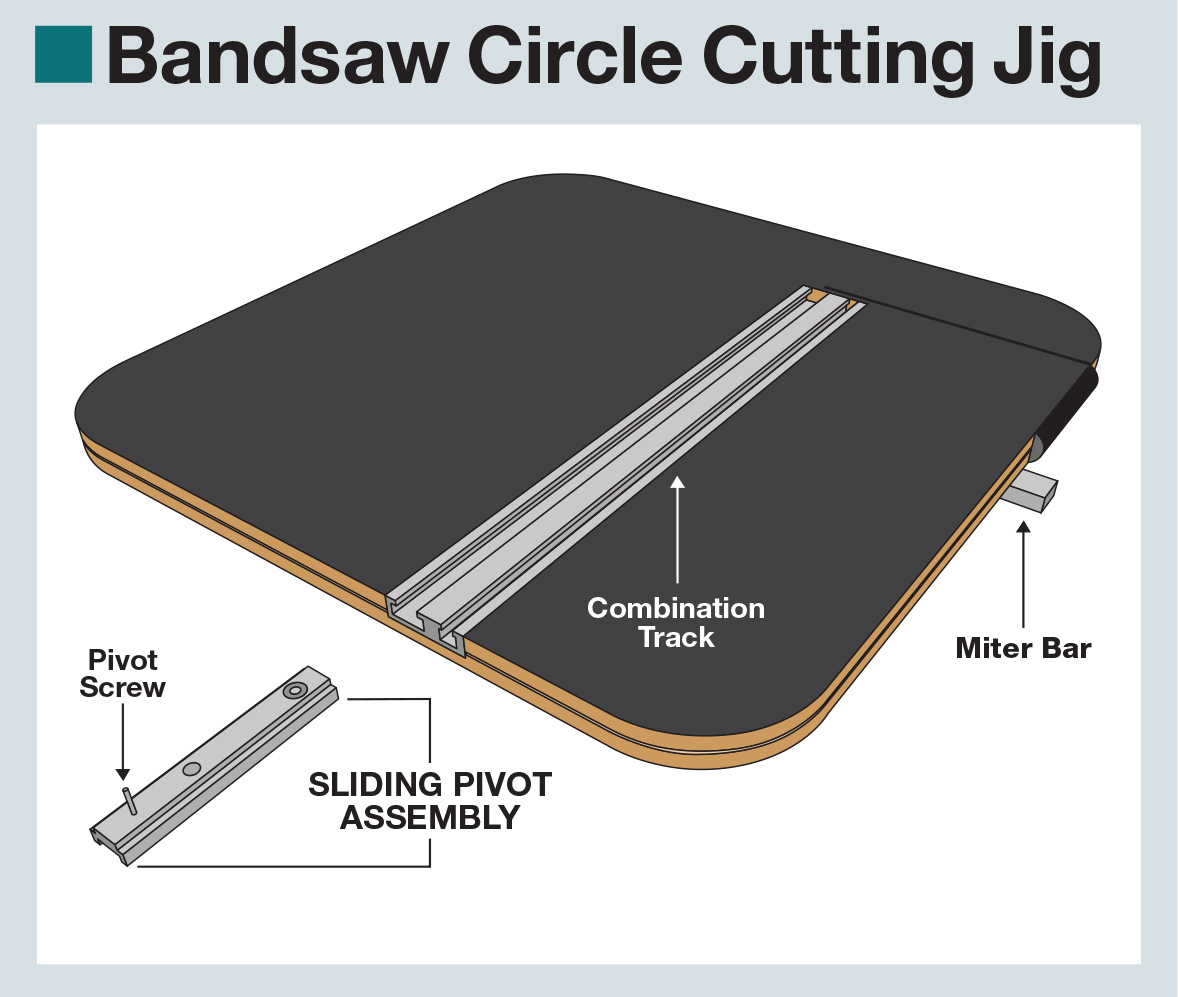
Make this sturdy circle cutting jig in a day, with readily available hardware, and you’ll be cutting perfect circles at the bandsaw.
I delayed, stalled, and put off a circle cutting jig for the bandsaw. After all, I had a small trammel for cutting circles with a router, so I was not sure how much I would use it. Now that I made one, it’s surprising how often it comes in handy. Plus, there are added benefits of cutting circles on the bandsaw… dust is well controlled, and delicate plywood veneers are preserved on the top side. With this jig, you will get accurate results which are comparable to a router jig. I built this circle cutting jig for my Laguna 1412 bandsaw, but it can be easily modified to work on any steel frame bandsaw.
Diagram and Supplies
- 3/4” x 18″ square piece of plywood
- Scrap piece of maple sized to bandsaw (other suitable hardwoods would do)
- Three #8 square drive screws to mount fence (Length varies based on your bandsaw)
- 3/4” T-molding, 7′ long
- Slot cutting bit for your T-molding (I needed a 1/16” thick bit.)
- Rockler® Bench Dog® dual track
- Measuring tape scale for dual track
- Woodcraft® WoodRiver® miter mounting track
- Sliding stop hardware: #6 x 1/2” screw, 1/4” shortened bolt, T-track threaded nut • 18″ standard miter bar and mounting hardware
- Quick set epoxy
- Two 1/2“diameter rare earth magnets
- Mounting cups for magnets (optional)
- 1/8“thick steel bracket and mounting screws (various size brackets will work)
Start with Plywood Base
1 Size your plywood and mark a radius on each corner.
Size a 3/4“ thick by 18“ square piece of plywood and mark a radius on each corner. Trim the corners to your line at the bandsaw and sand them smooth.
2 Trim the corners at the bandsaw and sand smooth.
Laminate the Jig Surface
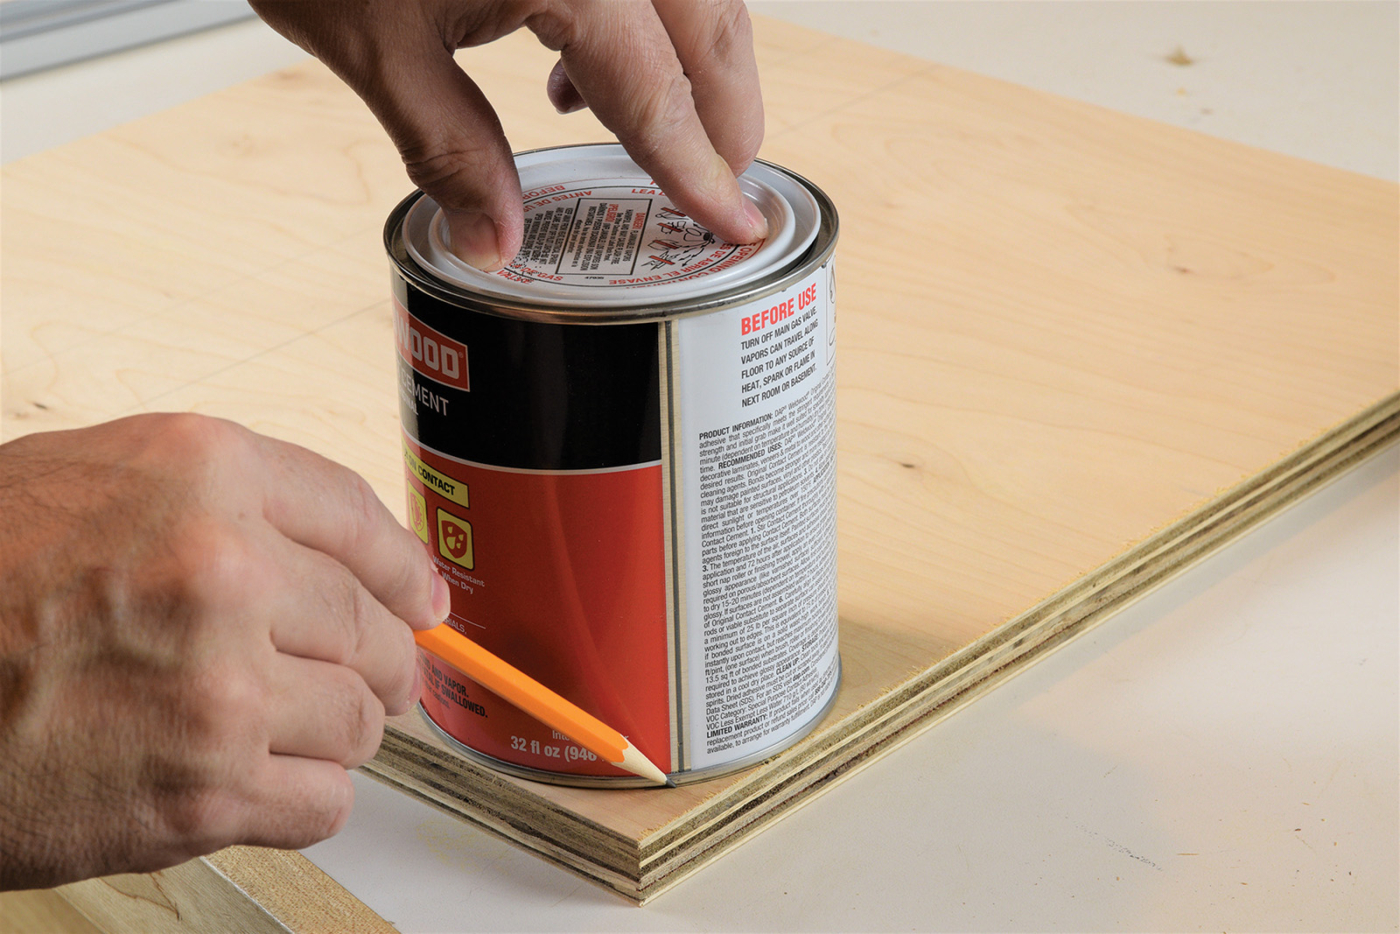
I like jigs that are rugged and durable, so I laminated the top surface and add T-molding to protect the edges. Plastic laminate can be cut right on the table saw, but make sure the thin material can’t slip under your fence.
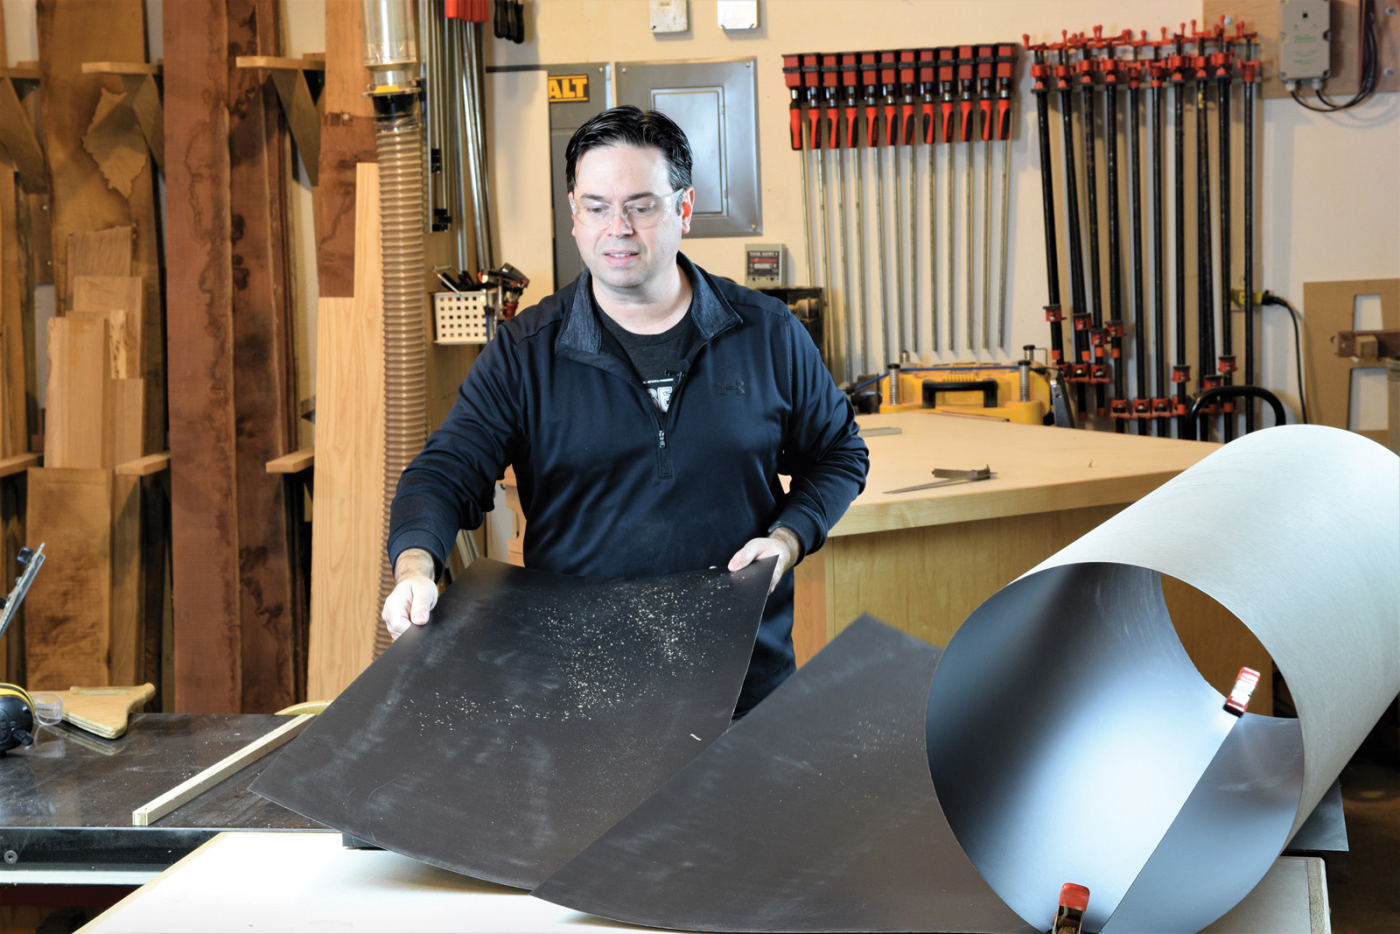
3 Cut plastic laminate slightly oversized at the tablesaw.
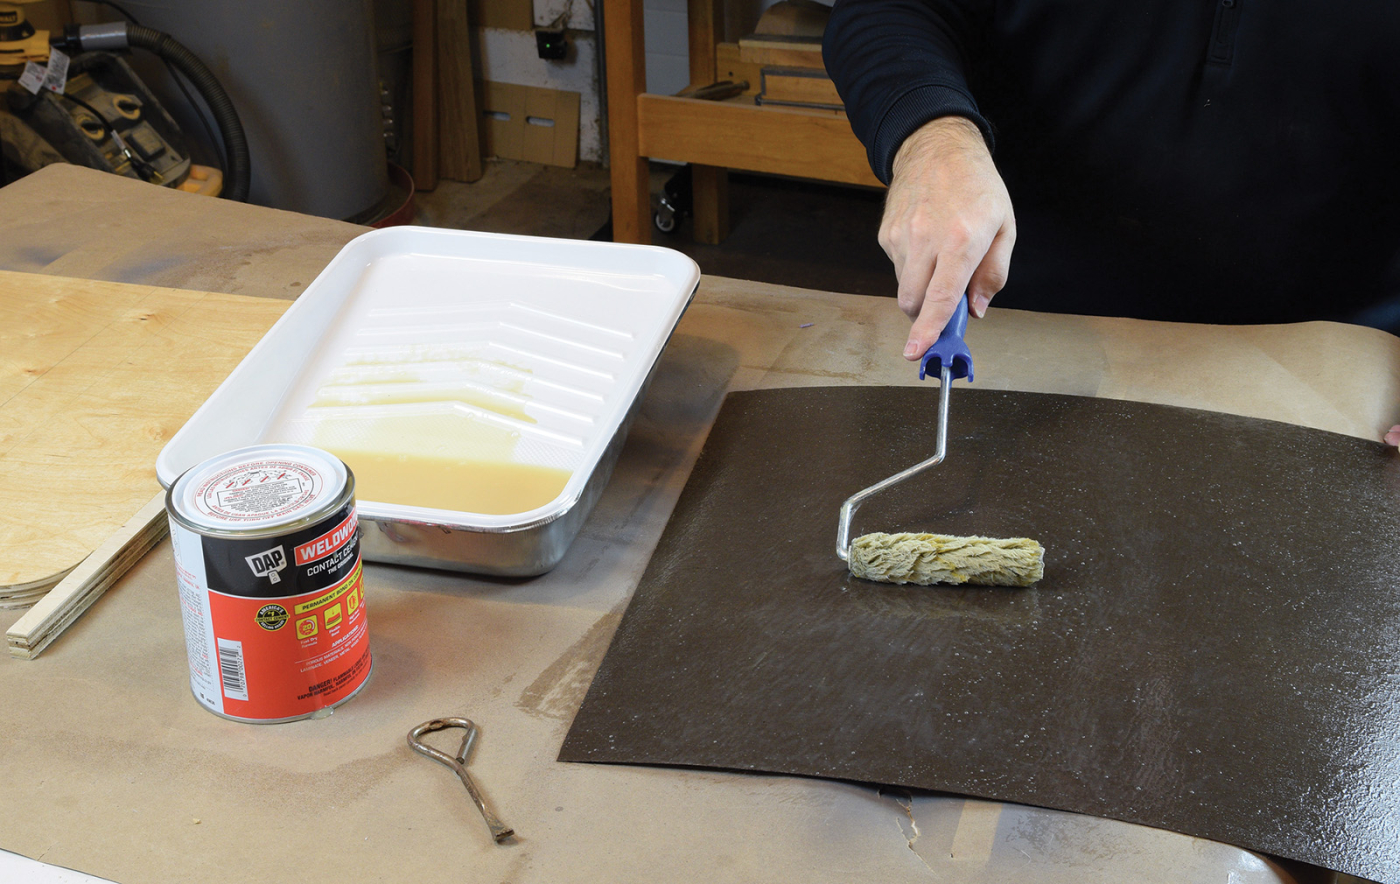
4 Apply a thin coat of contact cement to both the laminate and substrate. Be sure to wait until the cement tacks over before applying the laminate to the jig base.
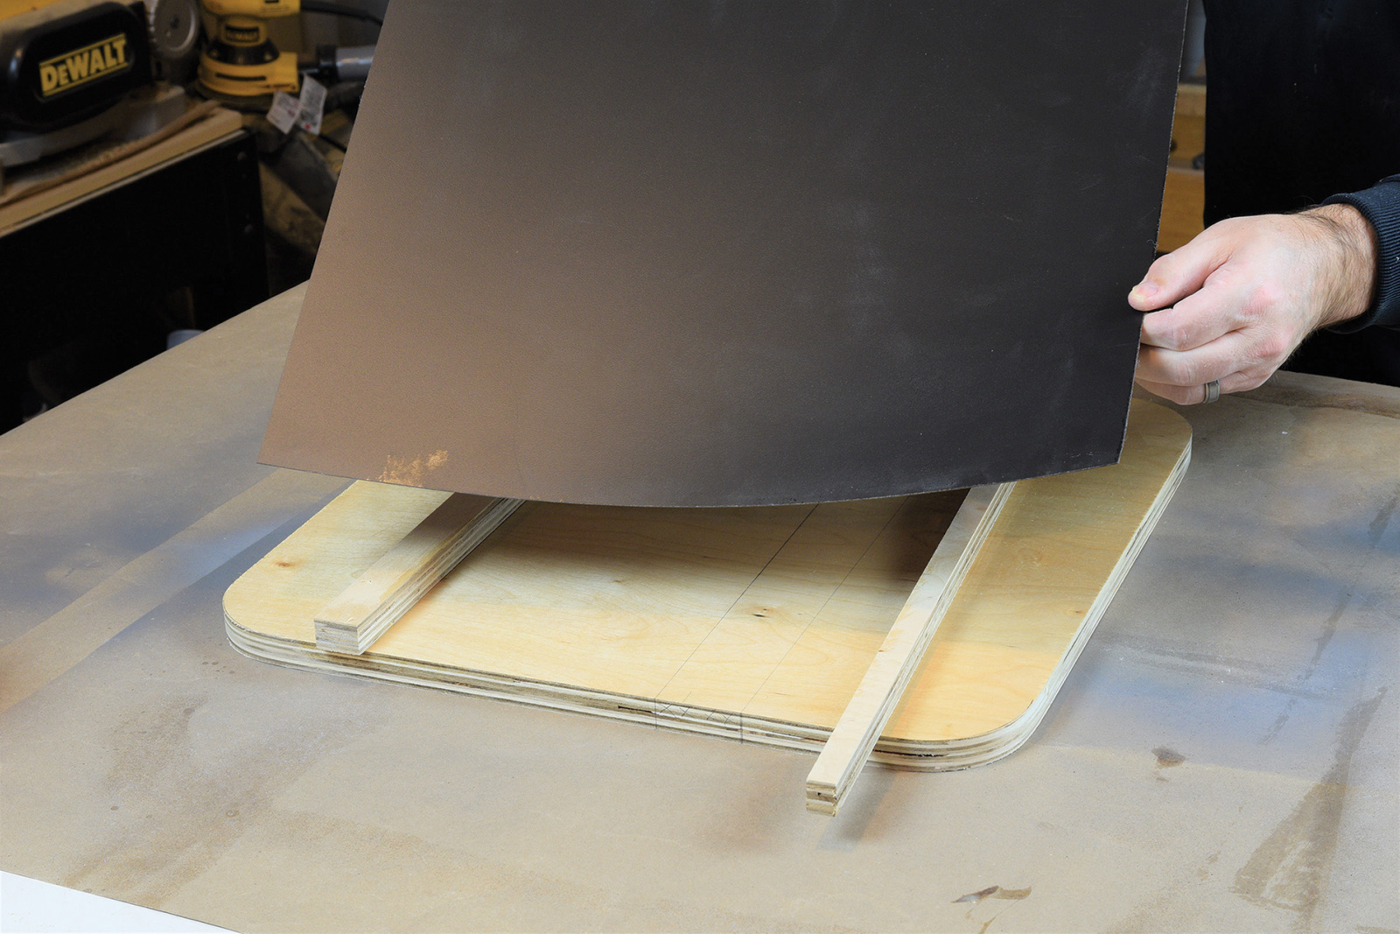
5 Use scrap wood strips to temporarily position the laminate over the plywood.
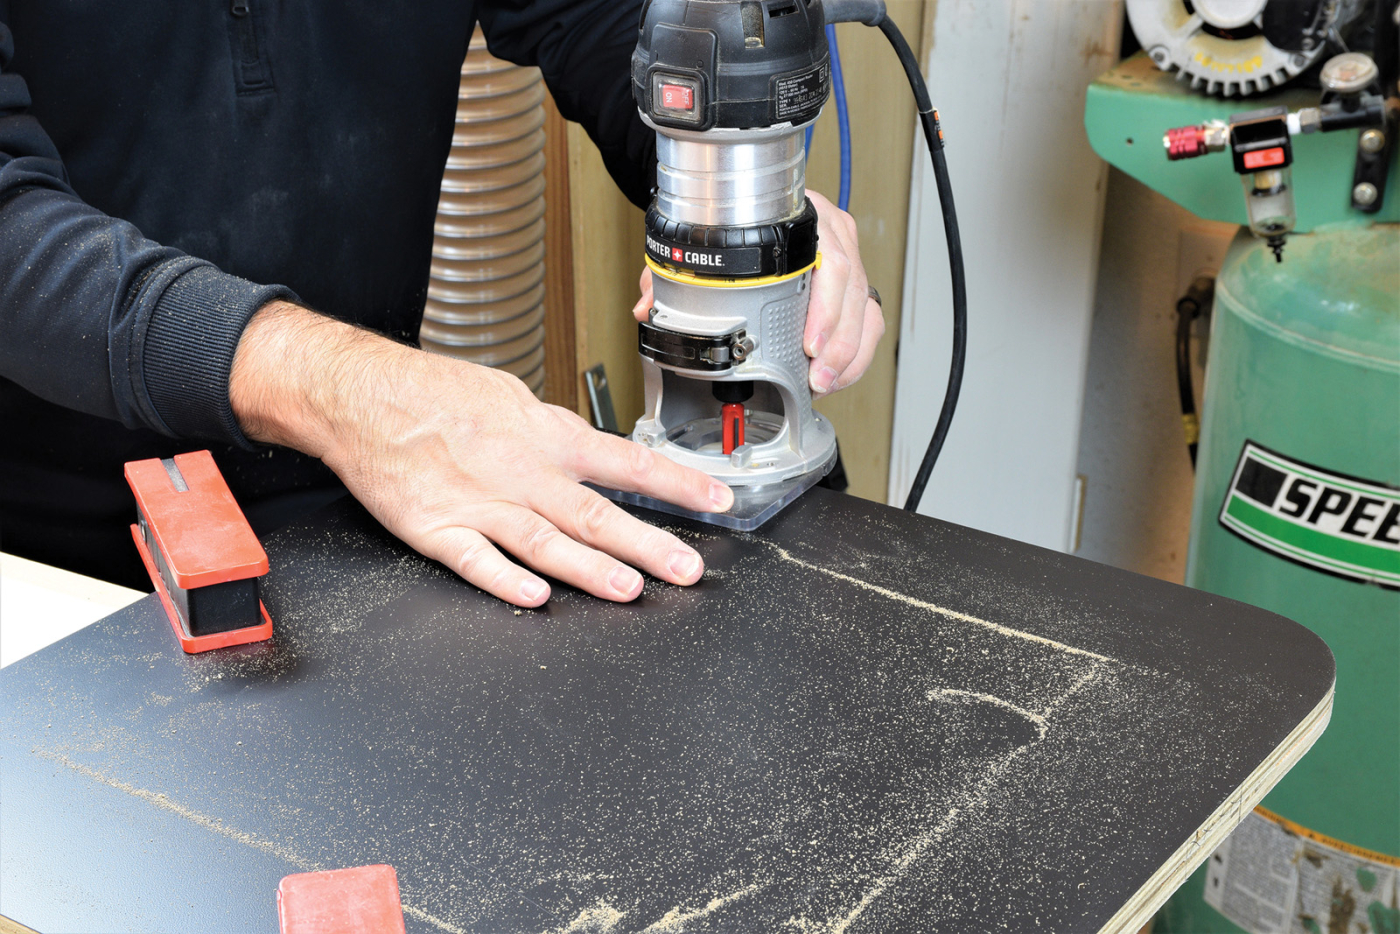
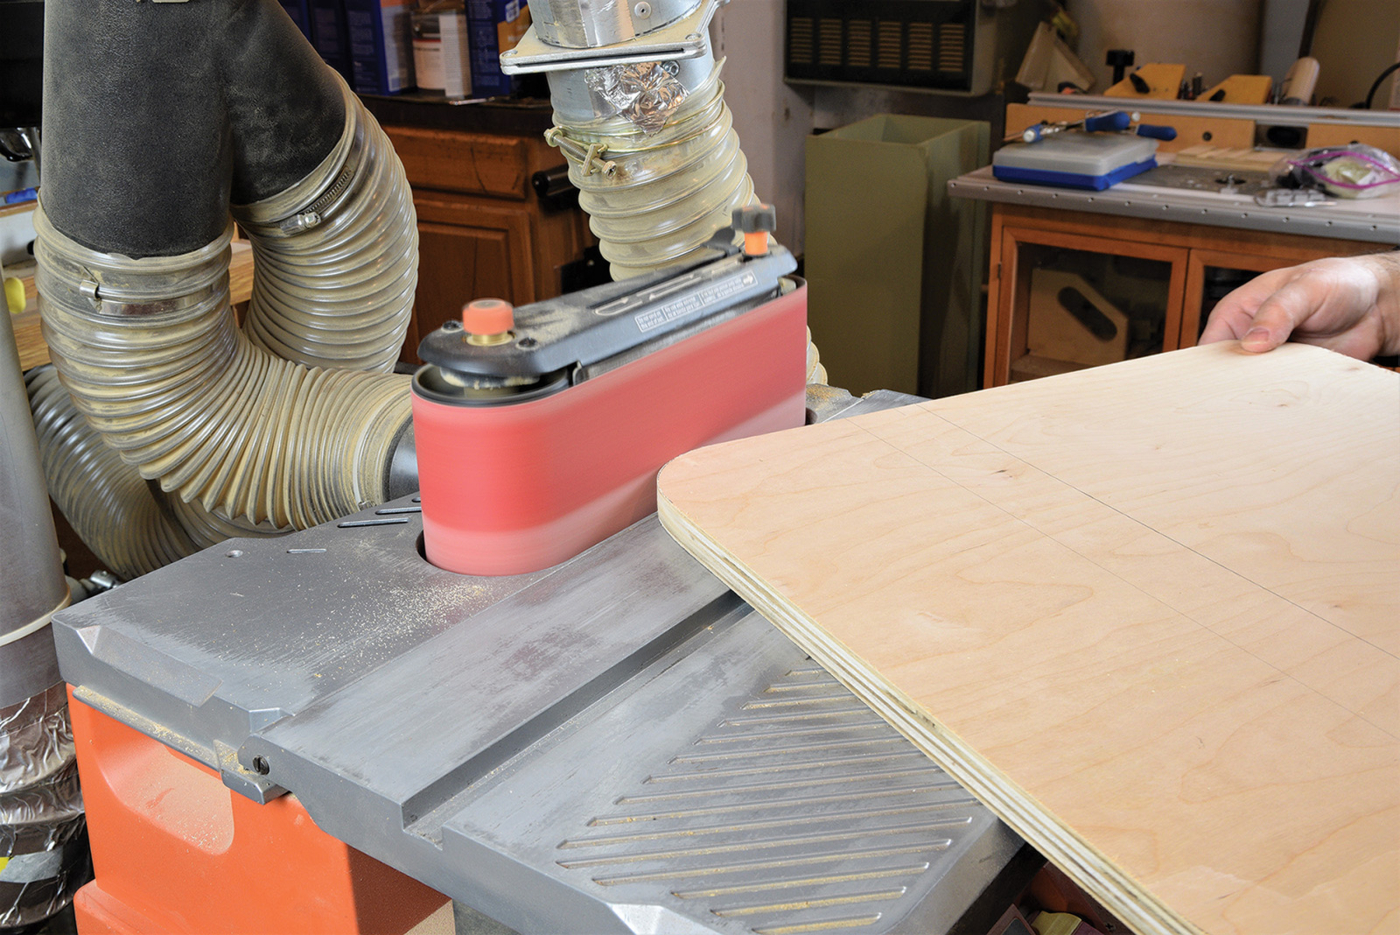
6 Then, trim the laminate flush with a bearing-guided laminate trimming bit.
Magnets and Hardware
The heart of the jig is an aluminum combination track, so you’ll need a groove to accept the track. Rout in two passes until the track sits flush with the laminate surface.

7 Rout a slot for the hardware.

8
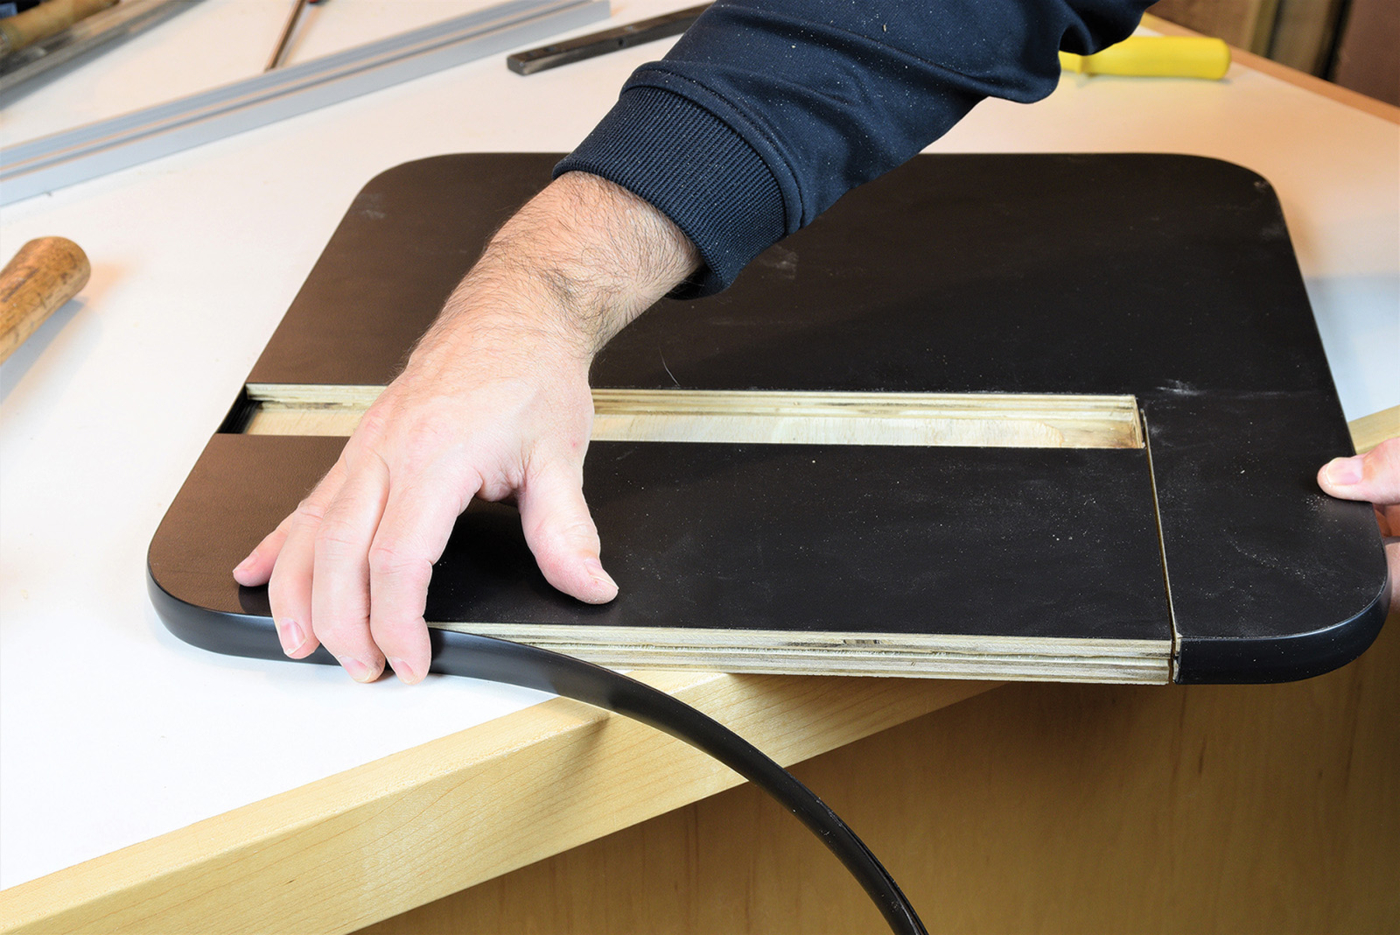
Now add a fence to one edge of the jig. Drill recesses for a pair of rare earth magnets in the fence and secure them with magnet cups or epoxy. Then screw the fence to the jig with three screws. Two more pieces of hardware are needed on the bottom of the jig — a miter bar and a heavy steel bracket. I sourced the bracket from a farm-type hardware store, but any flat stock or plate metal would work.
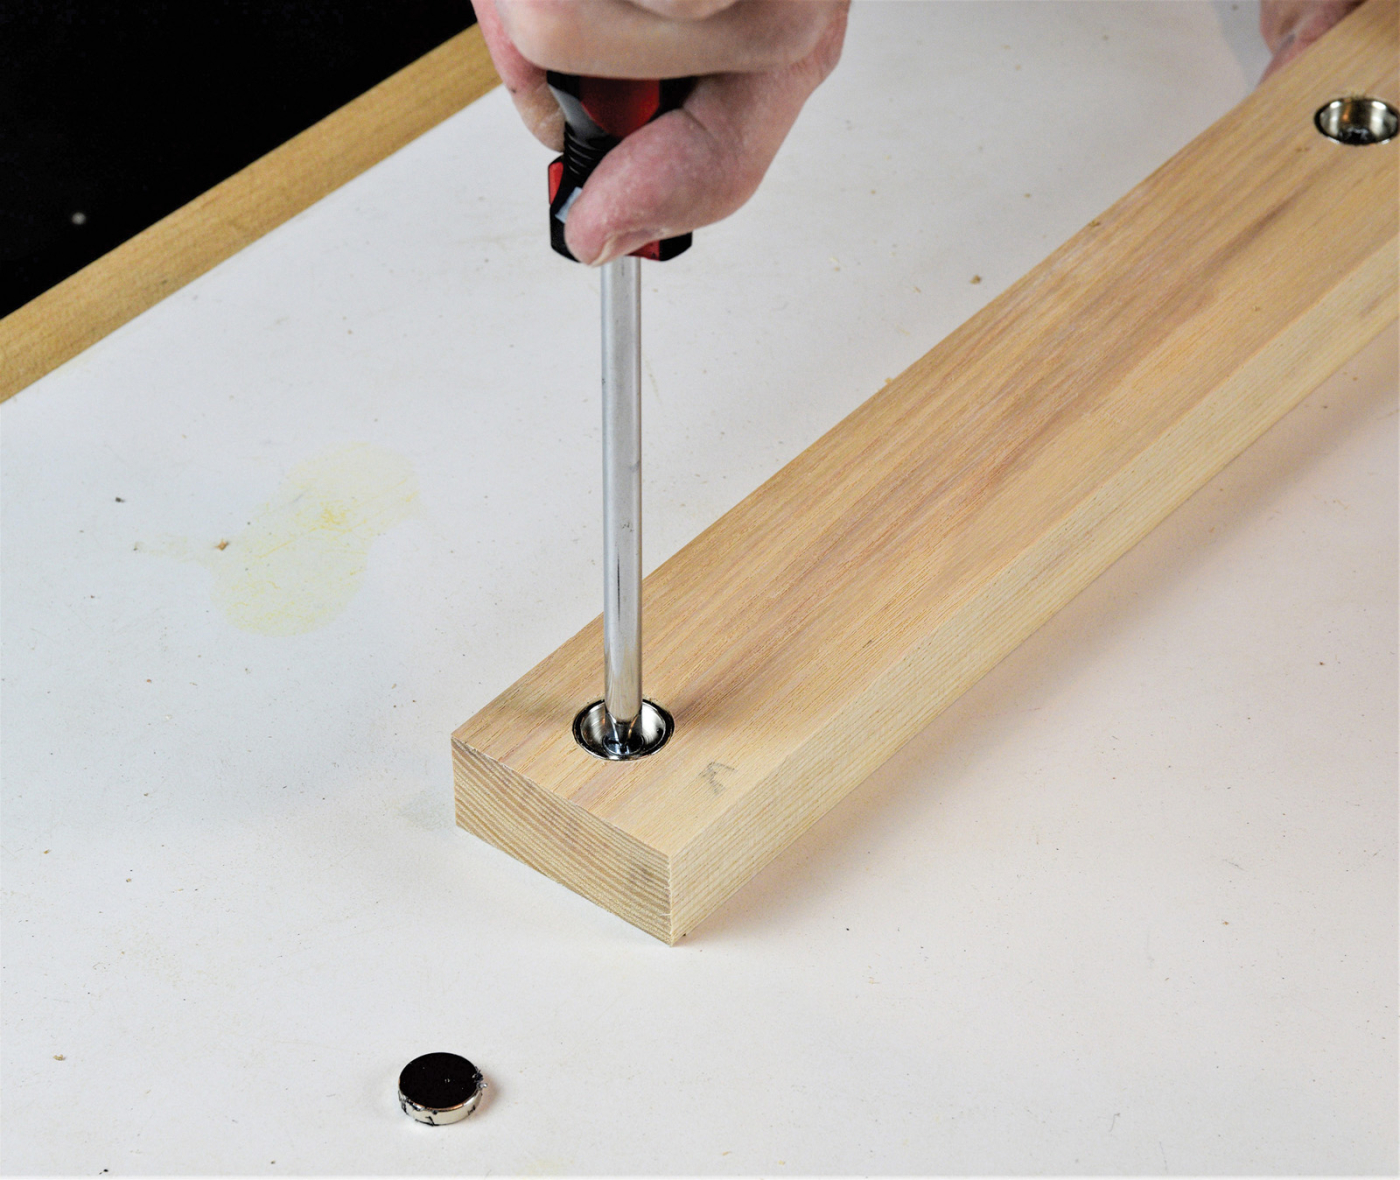
9 A good circle cutting jig should slide forward and stop at a predetermined location and stay put while in use. To that end, first mount steel cups for magnets in a hardwood fence.
10 Now, screw the hardwood fence to the jig.
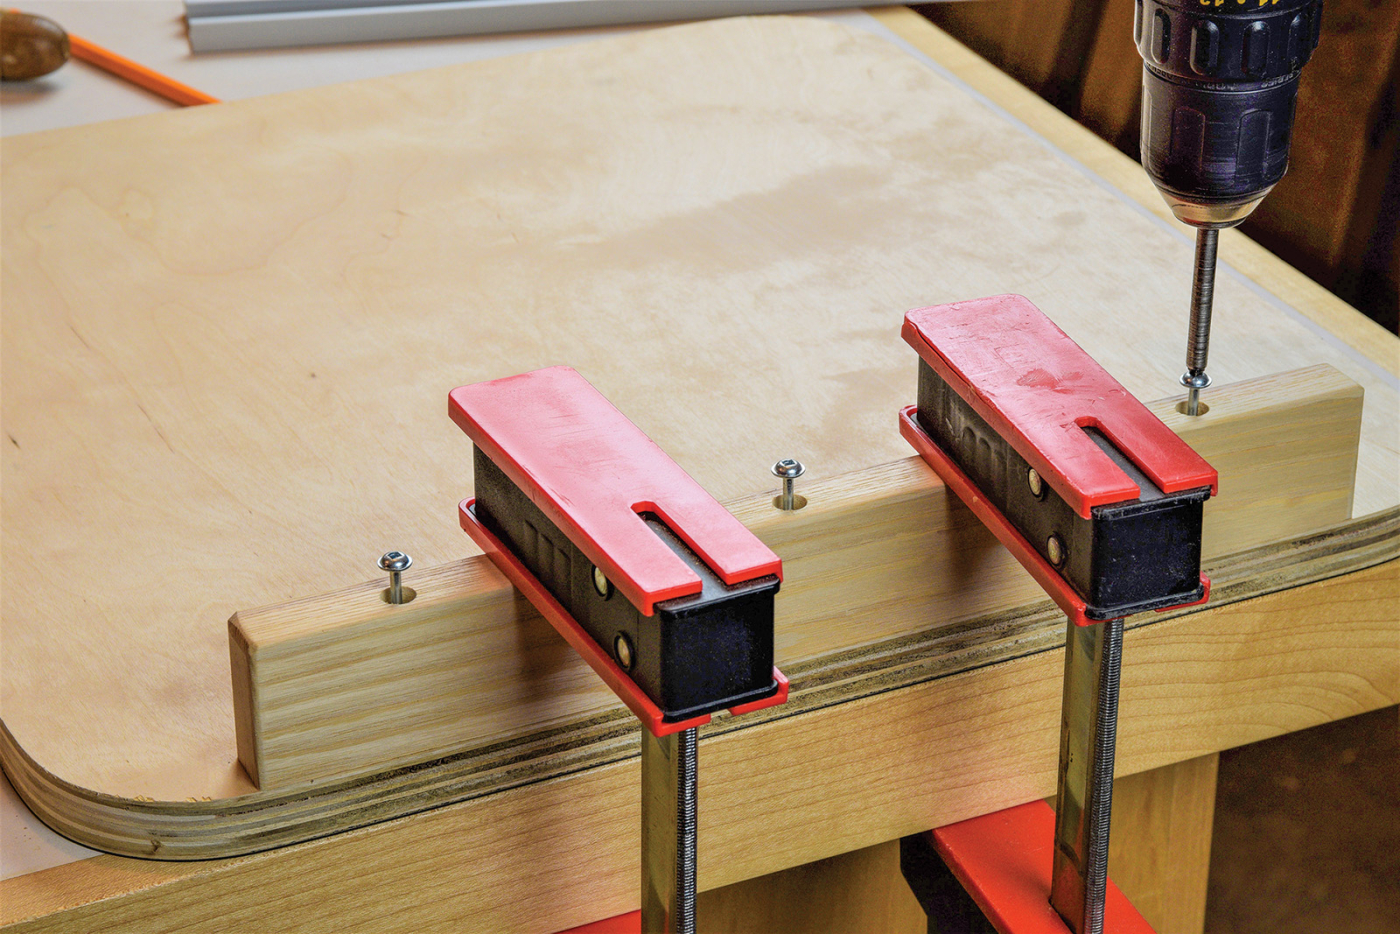
11 Lastly, mount a miter bar under the jig to ride in the bandsaw miter slot.
Once the underside of the jig is more or less complete, rout a slot for the T-molding. Most products will specify what size router bit to use, but typically it will be 0.080“ or 1/16“ thick slot-cutting bit. Cut the groove around the entire perimeter of the jig and use a mallet to tap the T-molding in place.
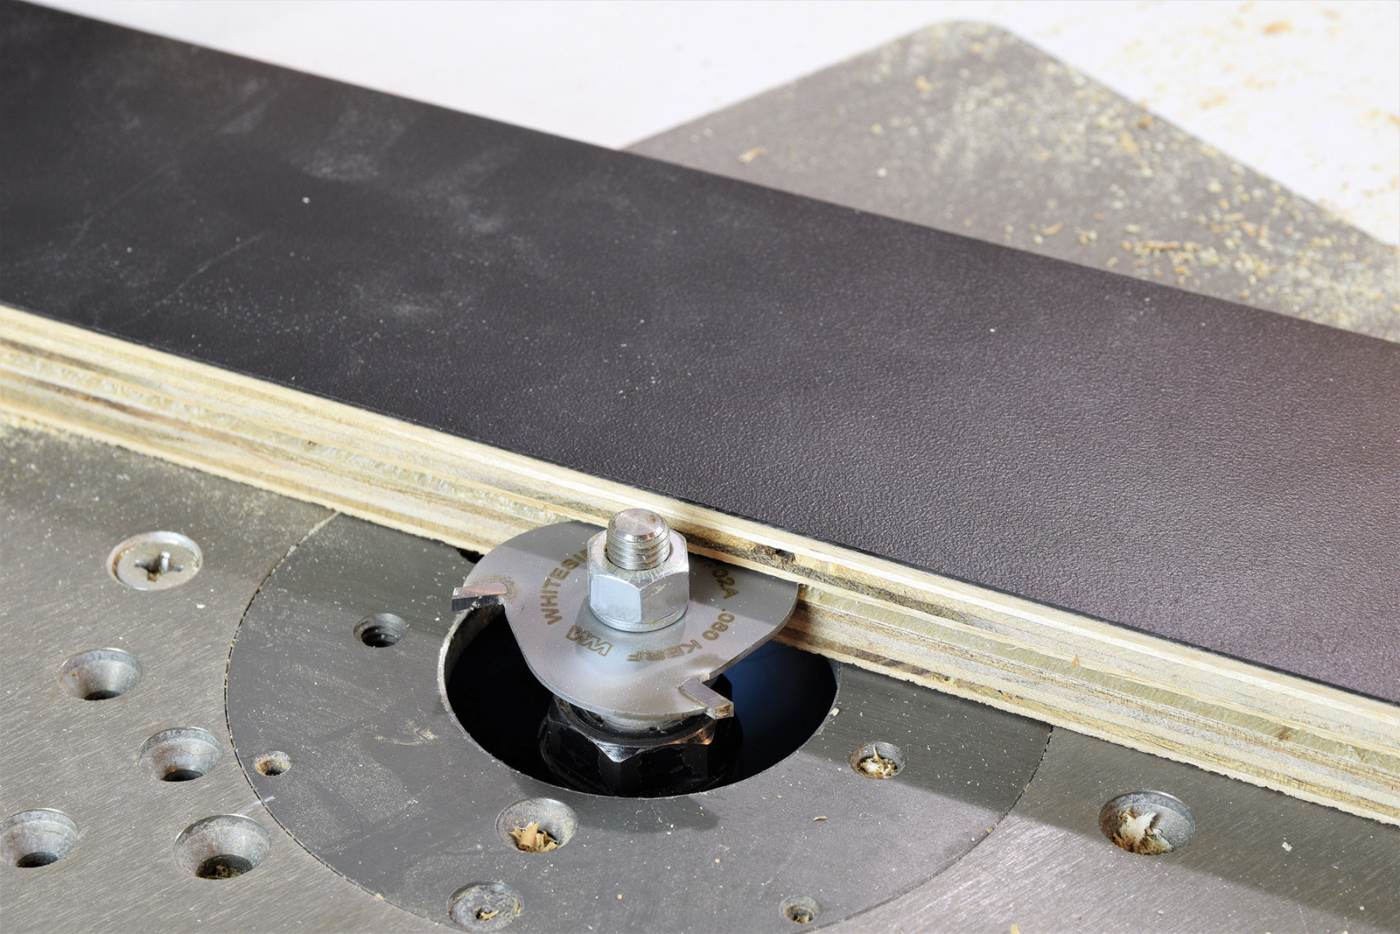
12 Rout a groove for the T-molding around the entire perimeter of the jig.
13 Use a mallet to tap the T-molding in place.
Build a Sliding Pivot
Most circle jigs rely on a simple series of holes to set the radius. I wanted a jig with infinitely variable spacing, so a sliding stop was required. Since there isn’t one on the market installed flush with the surface, I made my own by slotting a 4“ length of mounting track and installing a bolt and screw. Now, the stop can be positioned anywhere along the track. The stop is also reversible, which allows the pivot screw to be positioned where needed for circles ranging from 1“ to 30“ in diameter. Just tighten the screw to expand the stop and lock it in place.
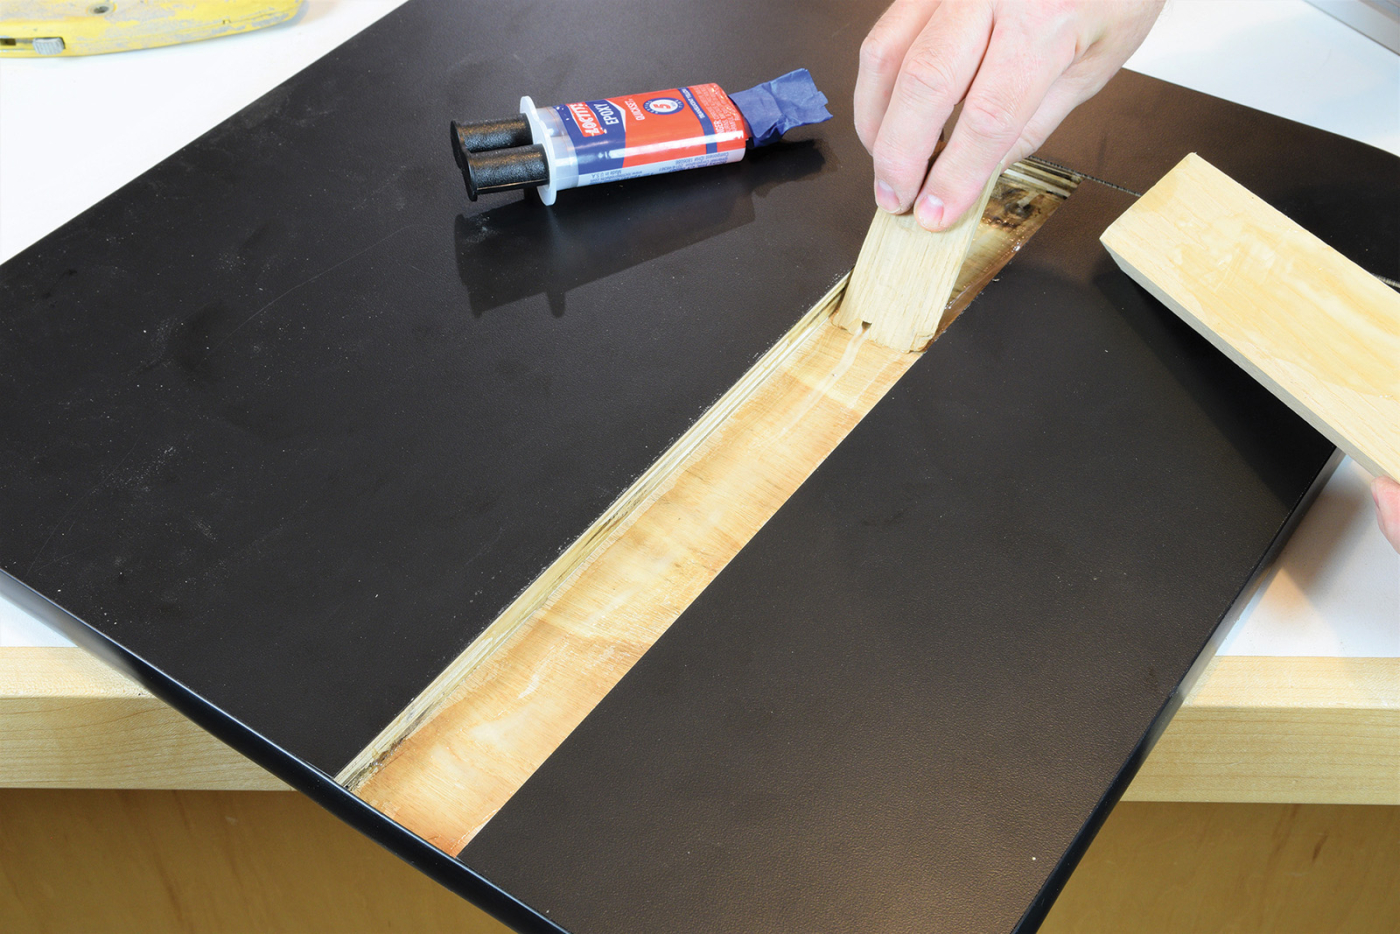
14 Quick-set epoxy works great to attach the combination track to the jig. Install the track and clamp it in place. You’ll also need to trim the T-molding away from the entrance to the track.
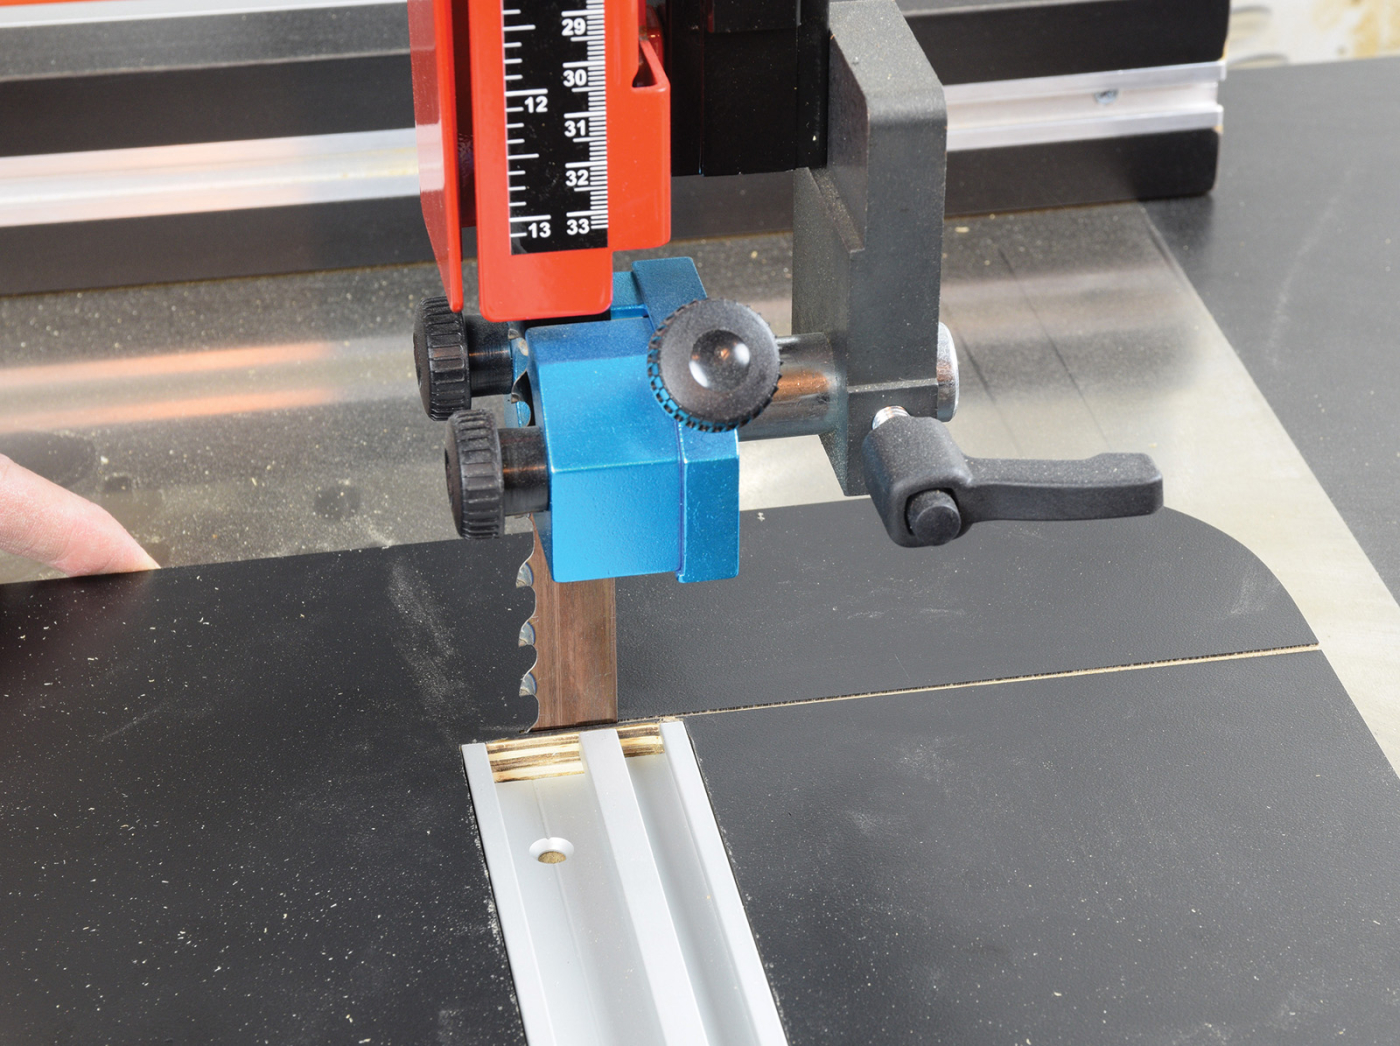
15 With the combination track in place, advance the jig into the blade and create a kerf slot.

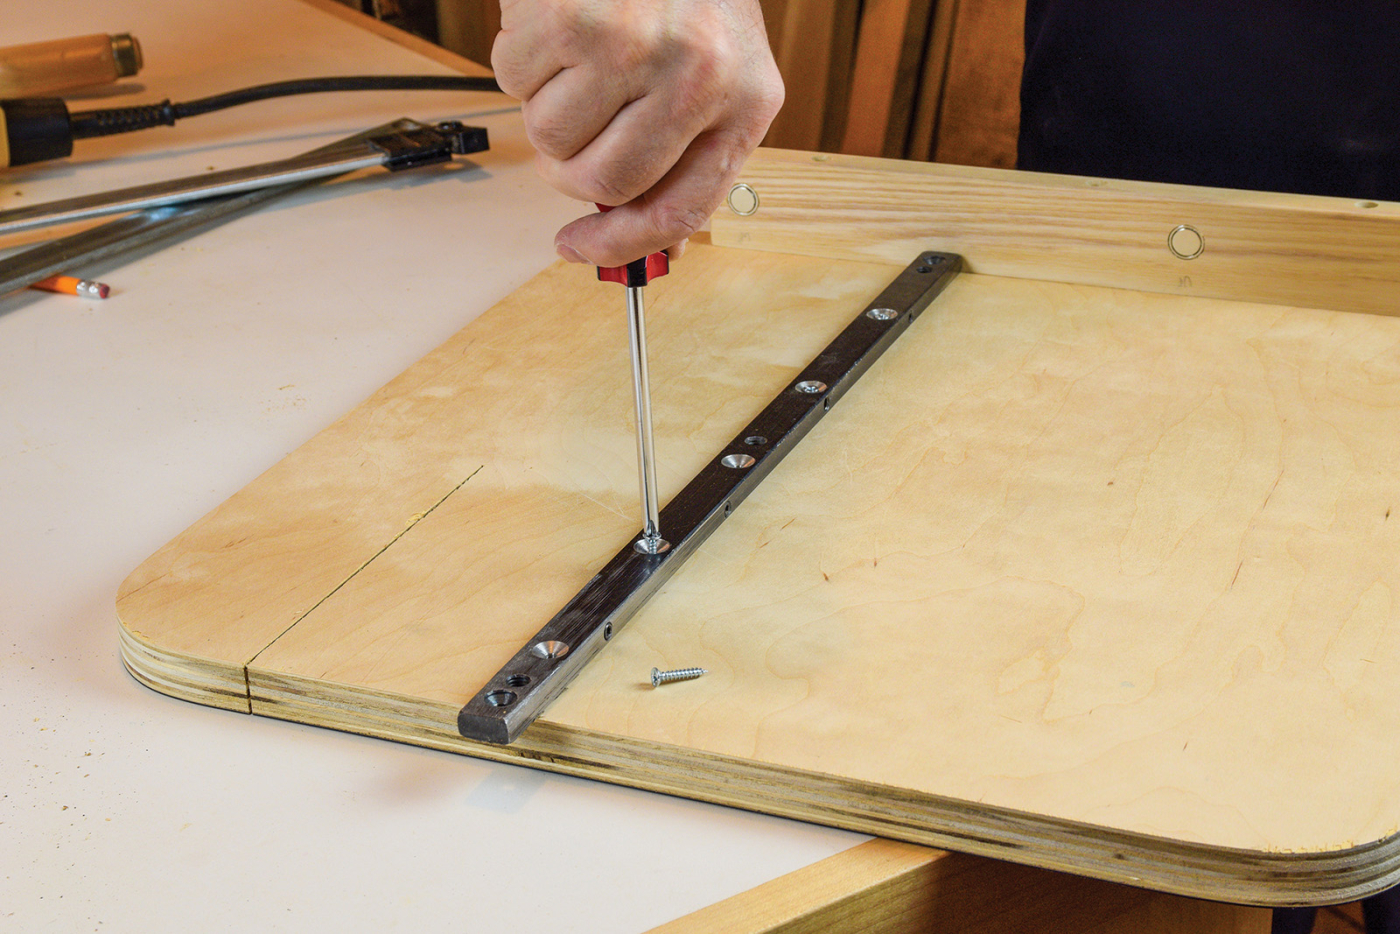
16 Start with a length of miter mounting track (item no. 172006 at Woodcraft) and drill a pair of 1/4″ holes, spaced 2″ apart. Then slot between the holes at the bandsaw.
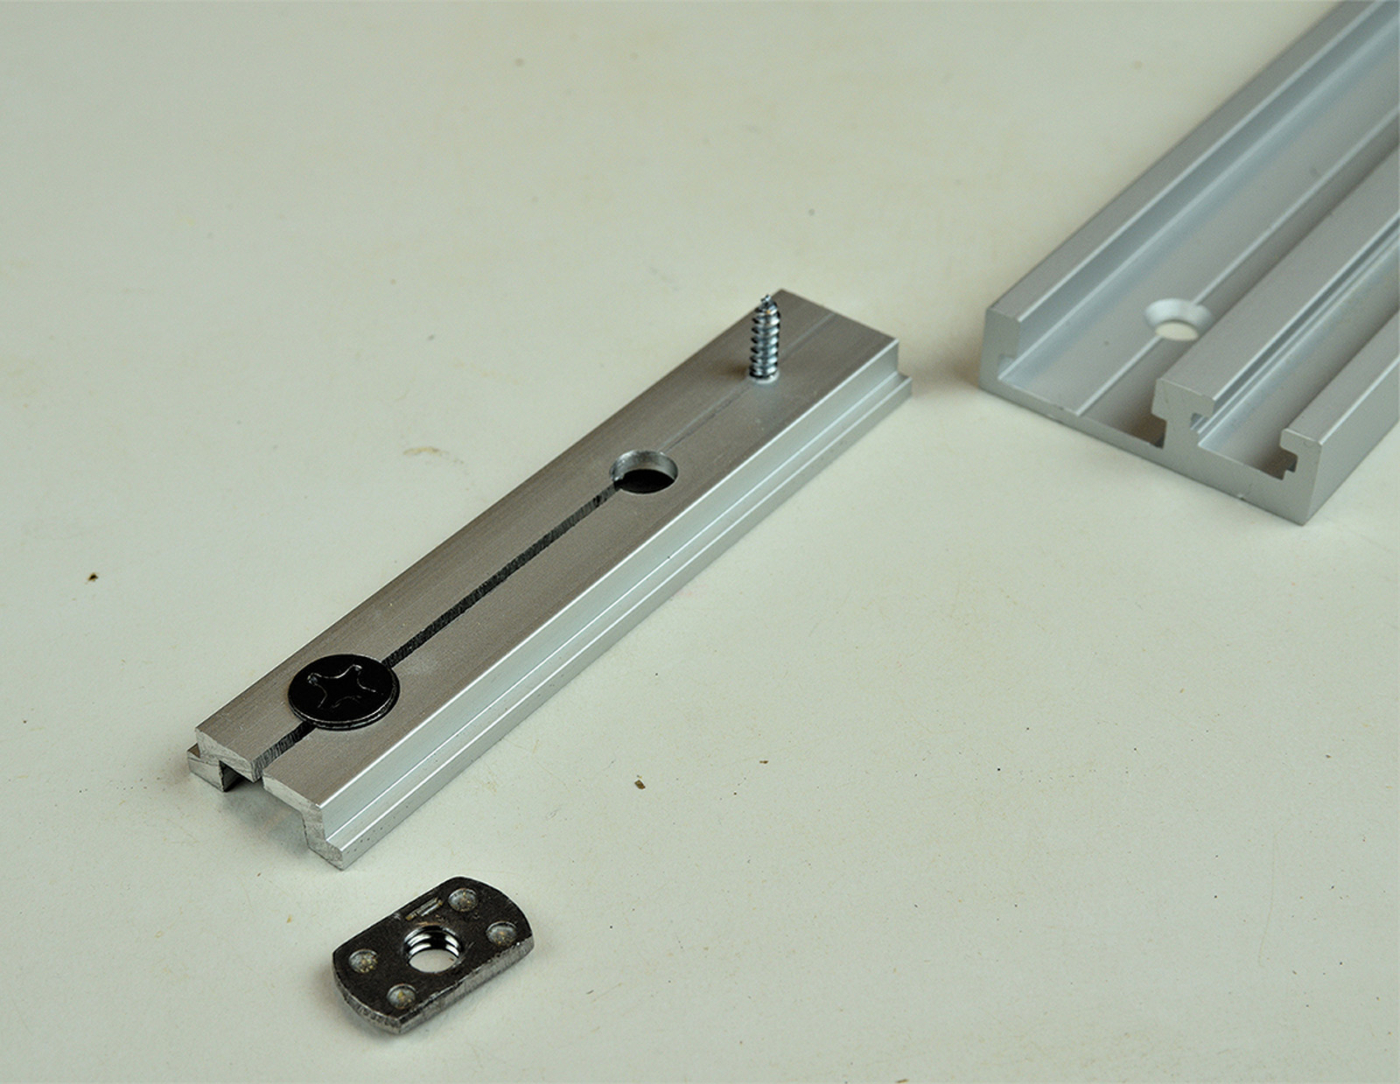
17 To finish the assembly, add a shortened 1/4″ bolt and T-track nut. Also add a #6 x 1/2″ screw and epoxy the head in place.
Adding Final Touches
Only a few bits of hardware remain to complete the jig: a scale and a heavy metal bracket. Let’s start by adding a scale. The beauty of using a combination track is the ability to add a measuring tape to the jig. Plastic inserts and self-adhesive tapes are widely available and make the jig even easier to use.
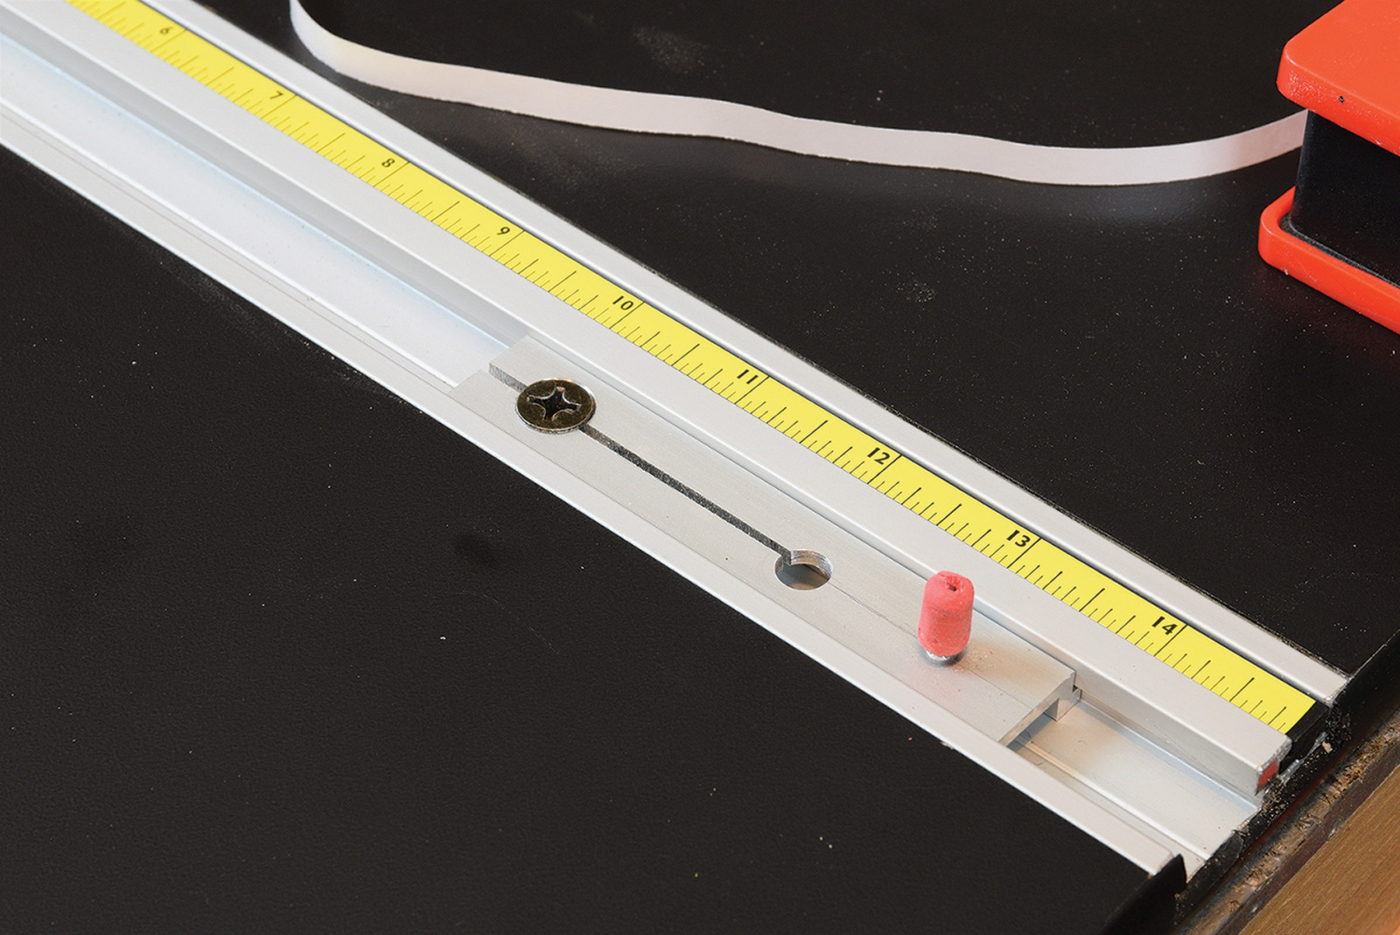
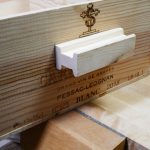
18 Add a scale using plastic inserts and self-adhesive tapes, which are widely available. Lastly, place a pencil eraser over the pivot screw to cover the sharp point and prevent injuries.
Lastly, attach a steel plate under the jig, screwed to the fence. This bracket is 91/2“ long and 3“ wide plate steel and keeps the jig from tipping after it’s fully pushed into the bandsaw. The plate could be different dimensions and still work well. I used 1/8“ thick steel plate, but 1/4“ thick aluminum plate would work fine as well. Do not use a 1/8“ aluminum plate because the bracket needs to be sturdy enough to prevent the jig from tipping in normal operation.
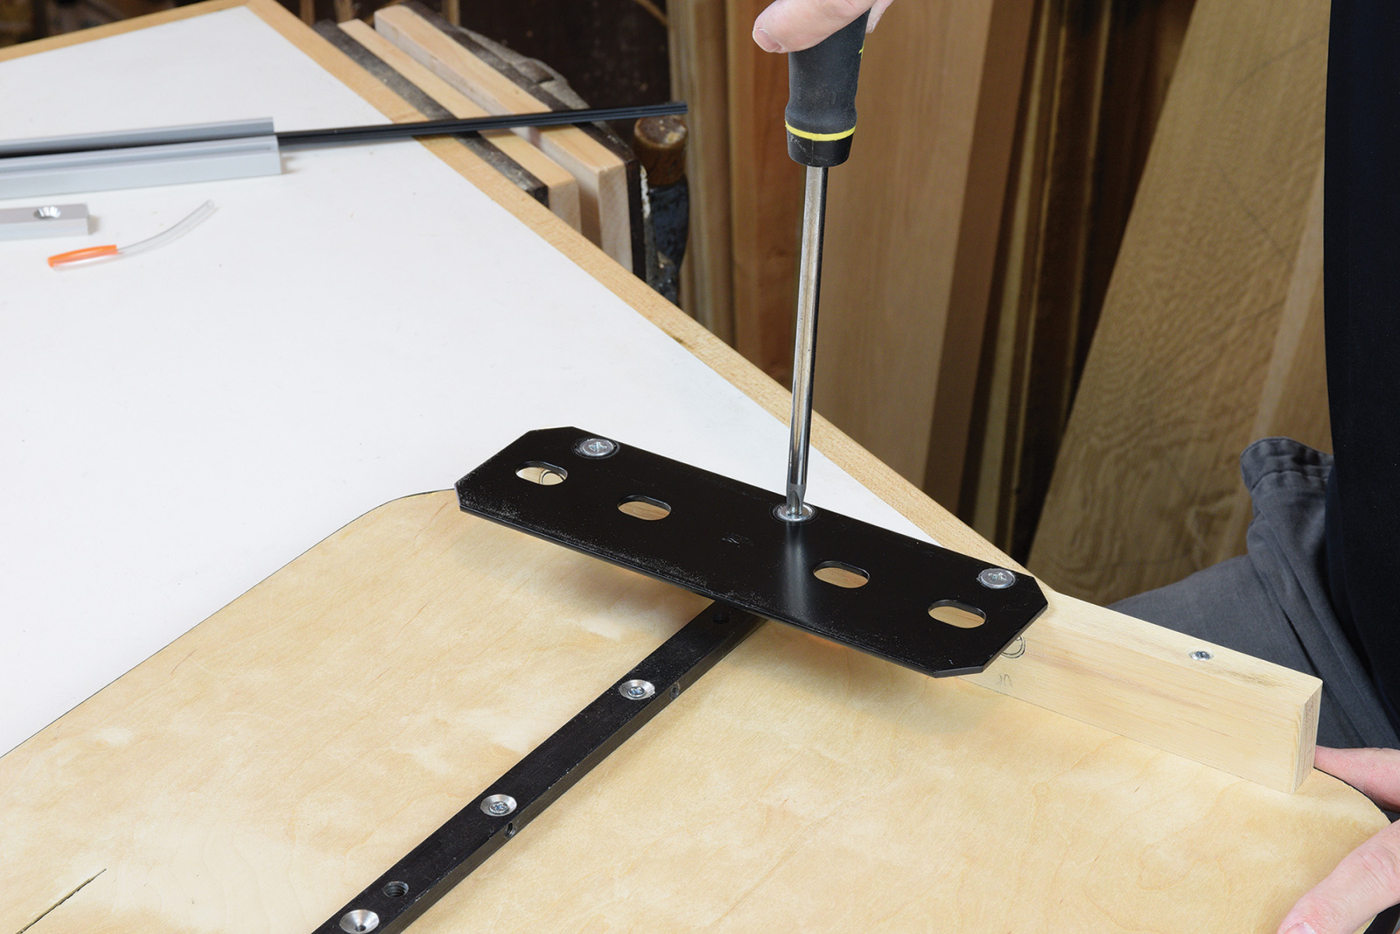
19 Screw a heavy metal bracket to the fence located under the jig.
20 Time to put your jig to work!
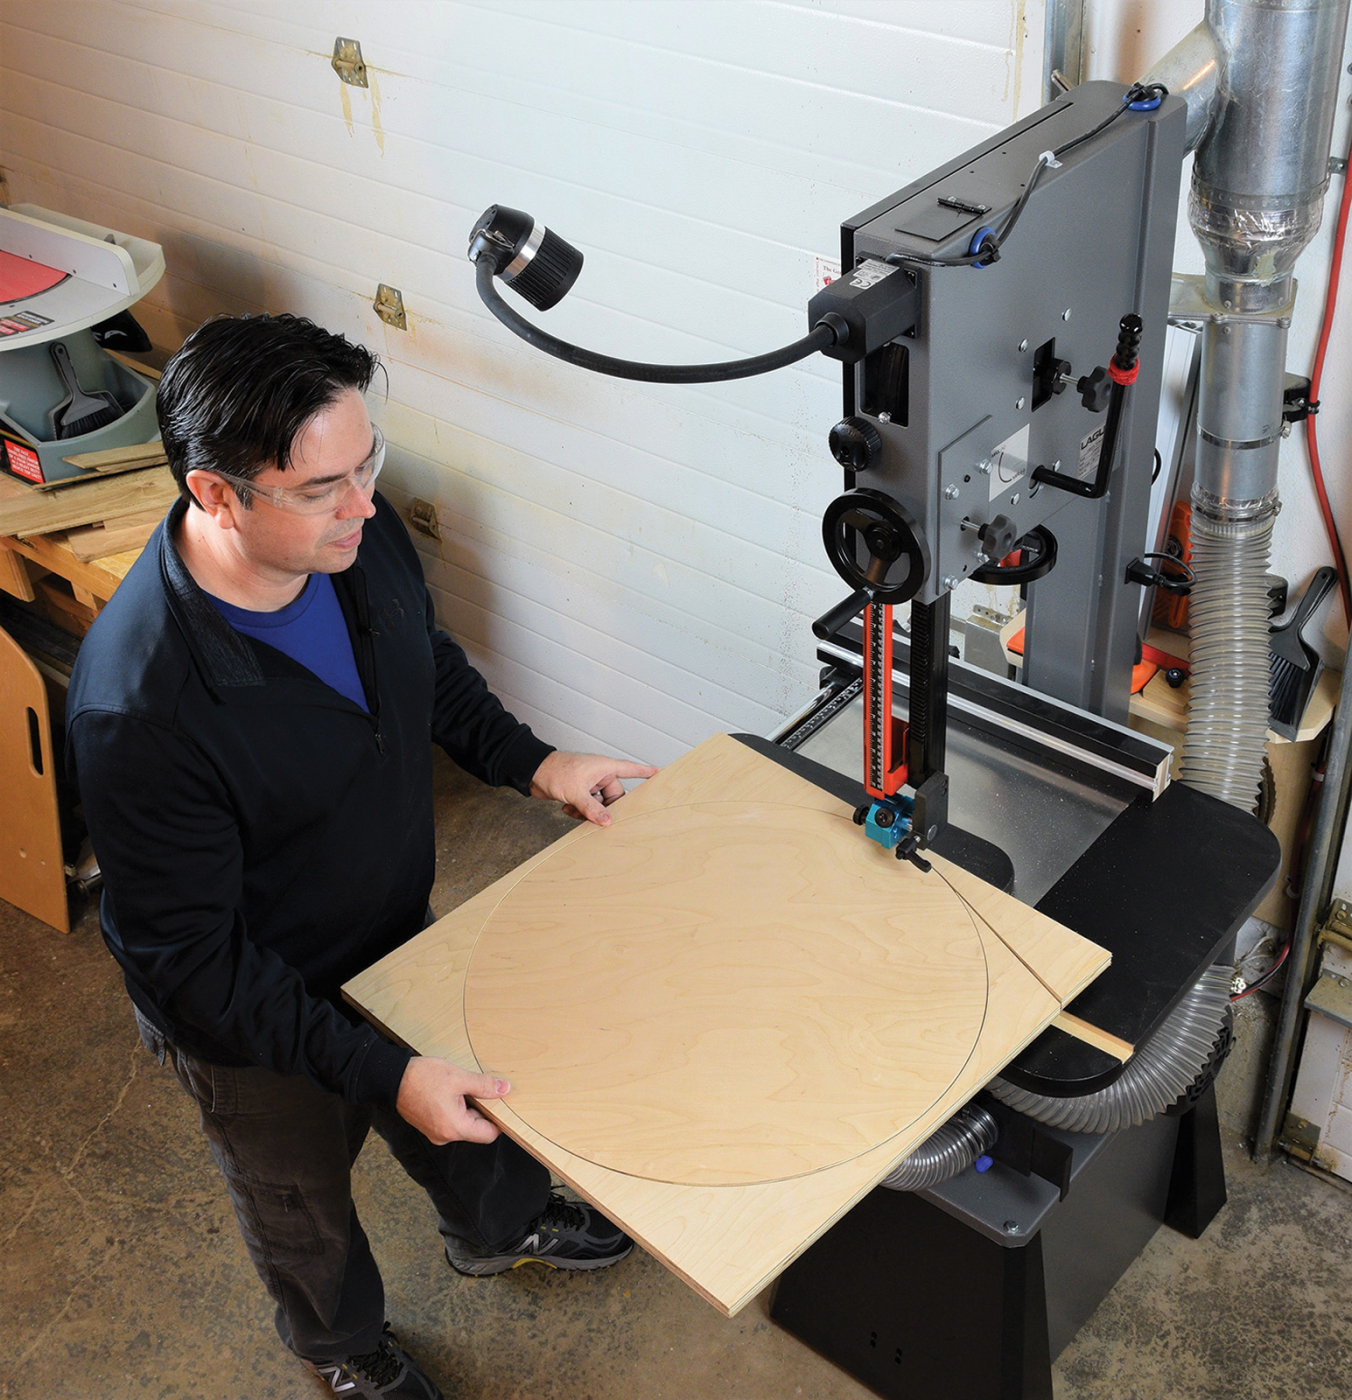
Put Your New Jig to Work
Now it’s time to test out your newly finished circle cutting jig. You’ll be surprised how simple it is to use! Just drill a small hole in the underside of your workpiece and set it in place over the pivot screw. Slide the jig forward until the magnets contact the saw and click into place. Once the magnets catch, you can focus on turning the workpiece steadily into the blade for perfect circles time after time. The sliding pivot point and scale allow for fine adjustment of circle size.
Video: See the Jig in Action
Here are some supplies and tools we find essential in our everyday work around the shop. We may receive a commission from sales referred by our links; however, we have carefully selected these products for their usefulness and quality.