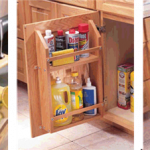
Pull-Out Trash
Drawer
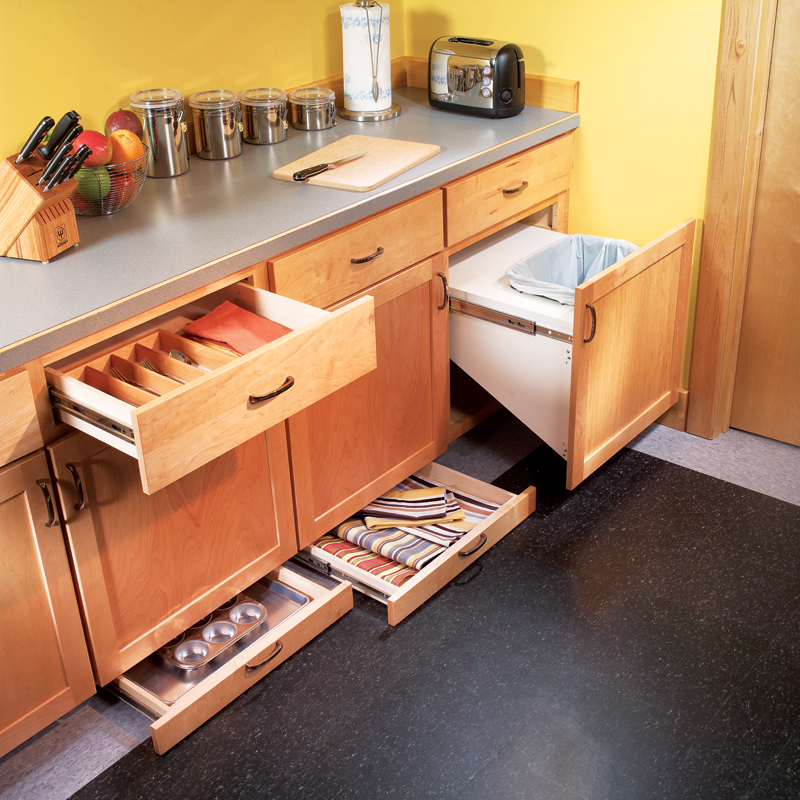
Whoever decreed that the trash can goes under the
sink got it wrong.With plumbing in the way,there’s
no space for a good-size can. Plus who likes to bend
over and reach into the cabinet?
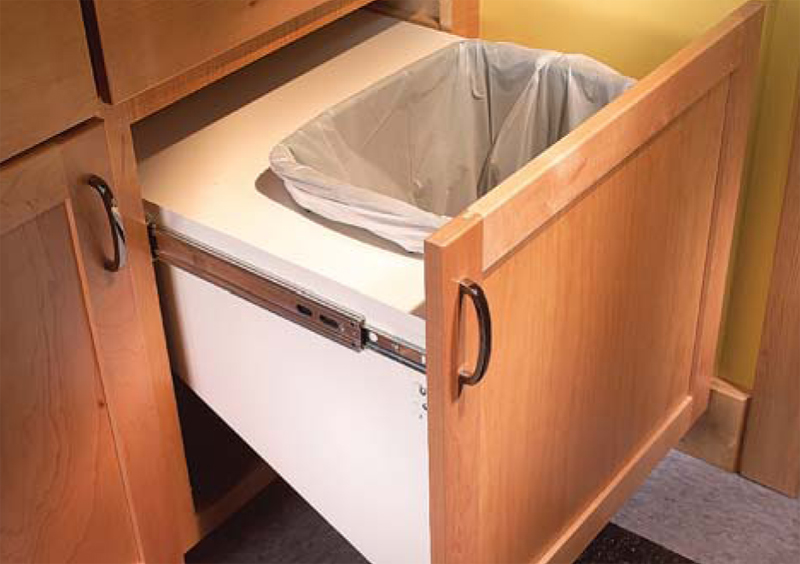
Here’s a great alternative: In one cabinet,replace
the shelves with a simple trash can holder mounted
on drawer slides.By attaching the existing cabinet
door to the front of the pull-out unit,you create a
convenient trash drawer. Fig.C and the photos at
right show how to build the unit.
Melamine board—particleboard with a tough
plastic coating—is a good material for this project
because it’s easy to clean.A 4×8 sheet costs about
$25 at home centers.The melamine coating,however,
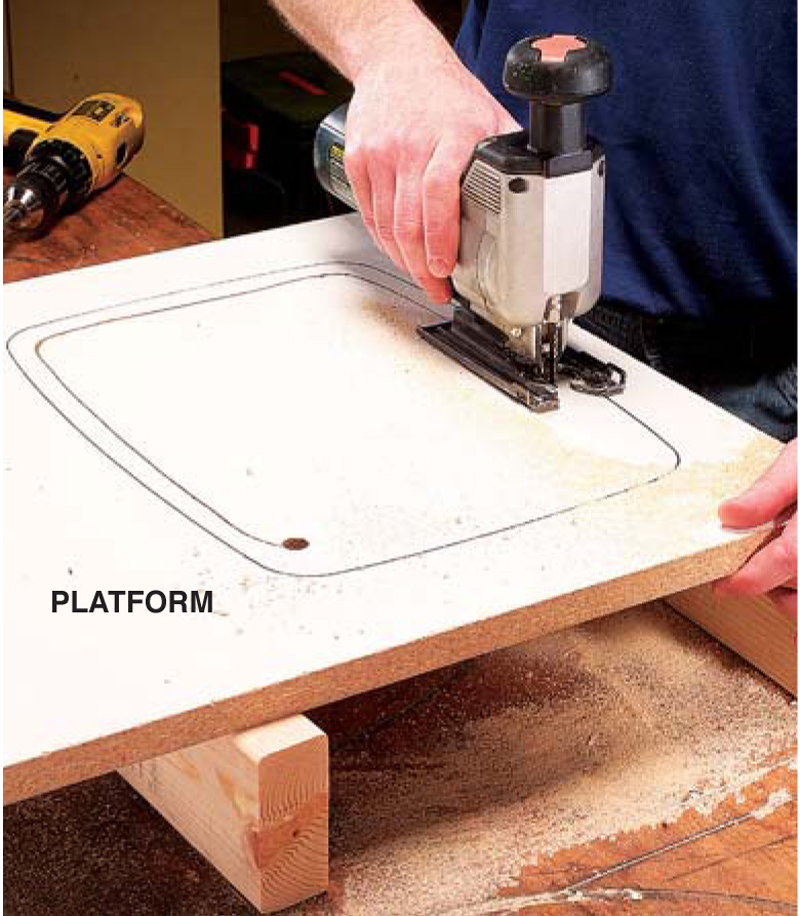
tends to chip during cutting.This chipping is
worst where the saw teeth exit the material. So
with a jigsaw, for example, the face-up side of the
sheet will chip.Plan ahead so the chipped edges are
out of view.
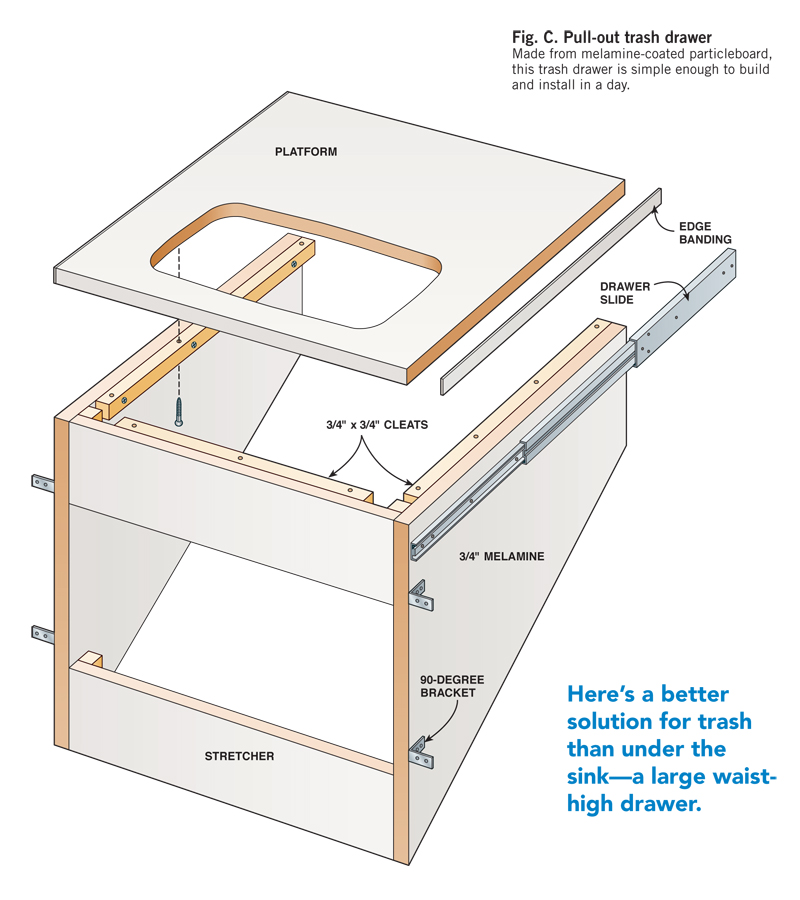
You’ll also need iron-on edge banding ($6 at
home centers) to cover the exposed edges (Photo
2). When cutting the platform to width, subtract
1/16-in. to allow for the width of the edge banding.
Use the same drawer slides you used for the drawers. Their 100-lb. capacity should be sufficient, unless you plan to fill the trash bin with gravel or sand!
If the back of your cabinet door is a flat surface,
you can run strips of double-faced tape across
the front, stick the door in place and fasten it with
four small “L” brackets. The back of the door
shown here has a recessed panel,so getting it positioned
right was a trial-and-error process.Before
removing the door,I cut blocks that fit between the
door and the floor. Then I extended the unit,
rested the door on the blocks, and attached two
brackets.The resulting fit wasn’t quite perfect,so I
moved the brackets slightly, checked again and
added the remaining brackets.
Sources
(Note: Source information may have changed since the original publication date.)
The Best Things, thebestthings.com, 800-884-1373,
Crown Brad Pusher, #110XW, $19.95.
Woodworker’s Hardware, wwhardware.com, 800-383-0130.
These are the ball-bearing slides used for our projects. Be sure to measure your own cabinets before buying slides:
22" Full-Extension Slides for Cabinet Drawers and Trash Drawer, KV8400 B22, $13.46 ea.;
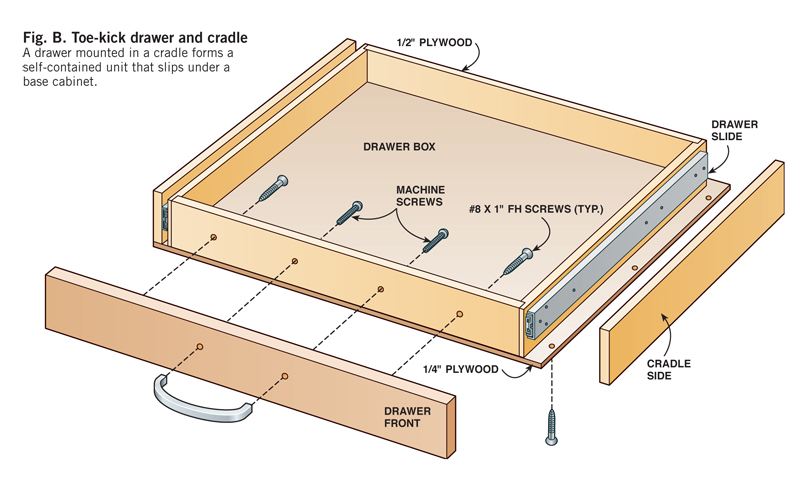
20" Overtravel Slides for Toe-Kick Drawers, KV8405 B20 ANO, $13.84;
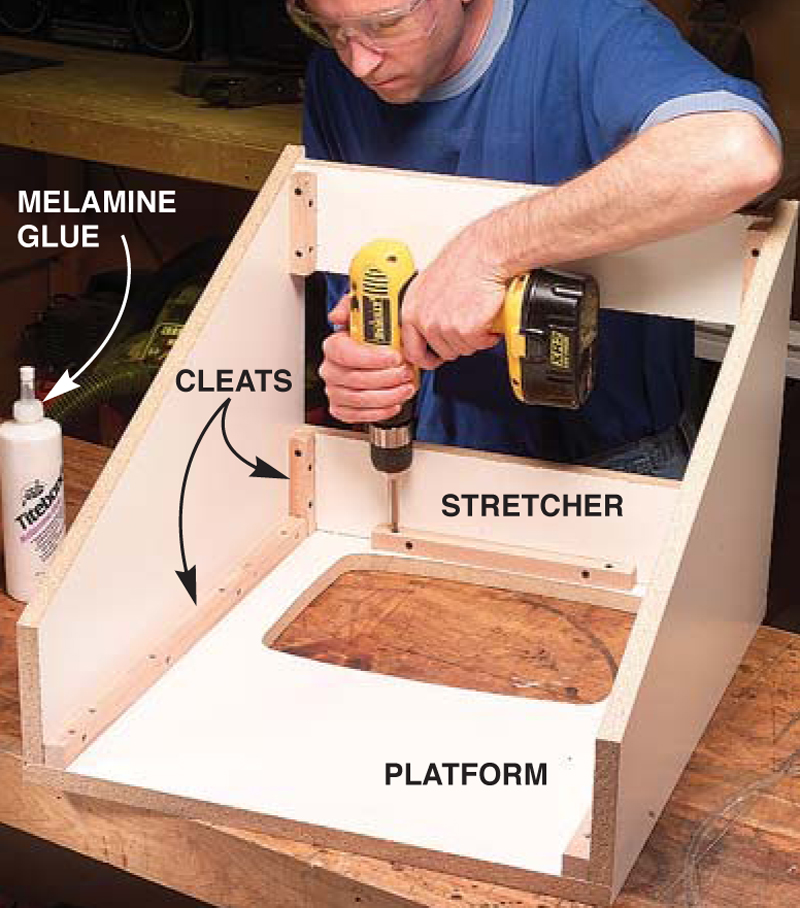
Titebond Melamine Glue, F4014, $5.96 per pt.;
Preglued PVC Iron-On Edge Banding, White, ET901 1316 25, $6.05 for a 25' roll.
Fig. C: Pull-out trash drawer

This story originally appeared in American Woodworker September 2003, Issue #102.
September 2003, Issue #102
Purchase this issue.
|
|
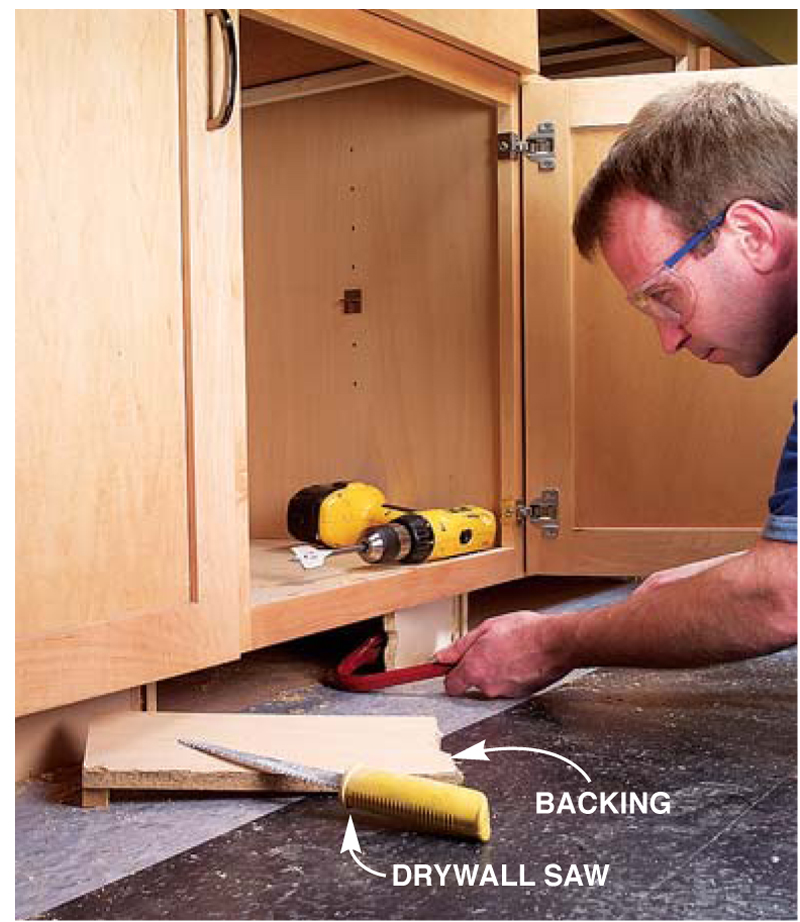
1. Cut out an
opening for the
trash bin after
placing the bin upside
down and tracing
around the rim.To
allow for the rim, cut
about 1/2-in. inside the
outline, then check the
fit and enlarge the
opening as needed.
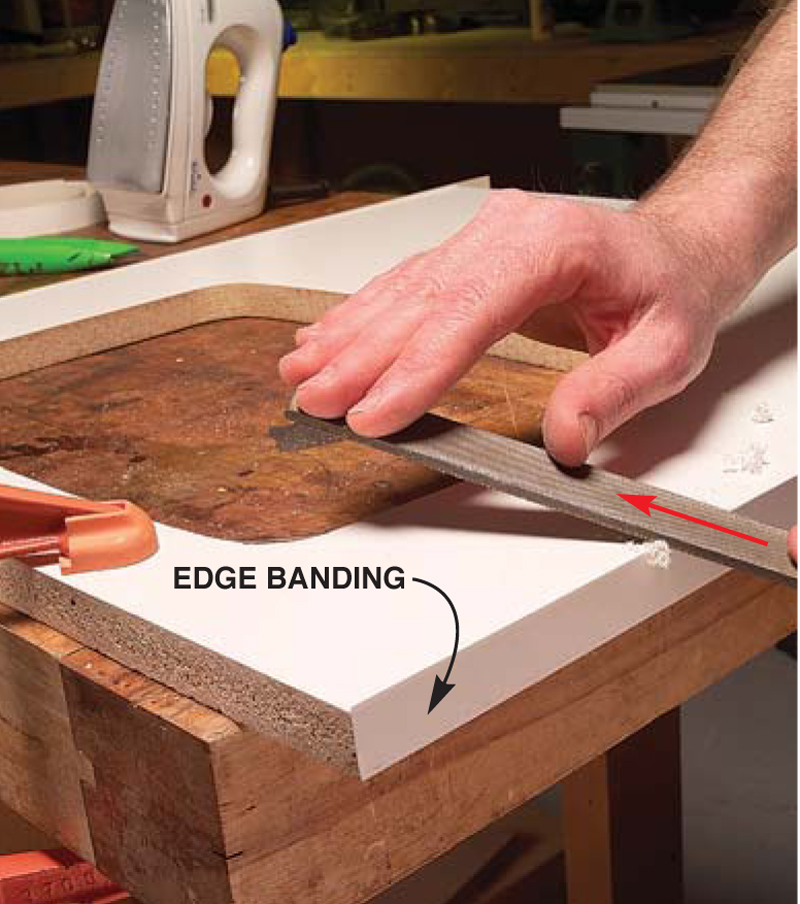
2. Edge band the
melamine and
file away the
excess edge banding.
To avoid loosening the
banding, cut only as
you push the file
forward, not as you
pull back. If you do
loosen the edge
banding, just reapply
with the iron.
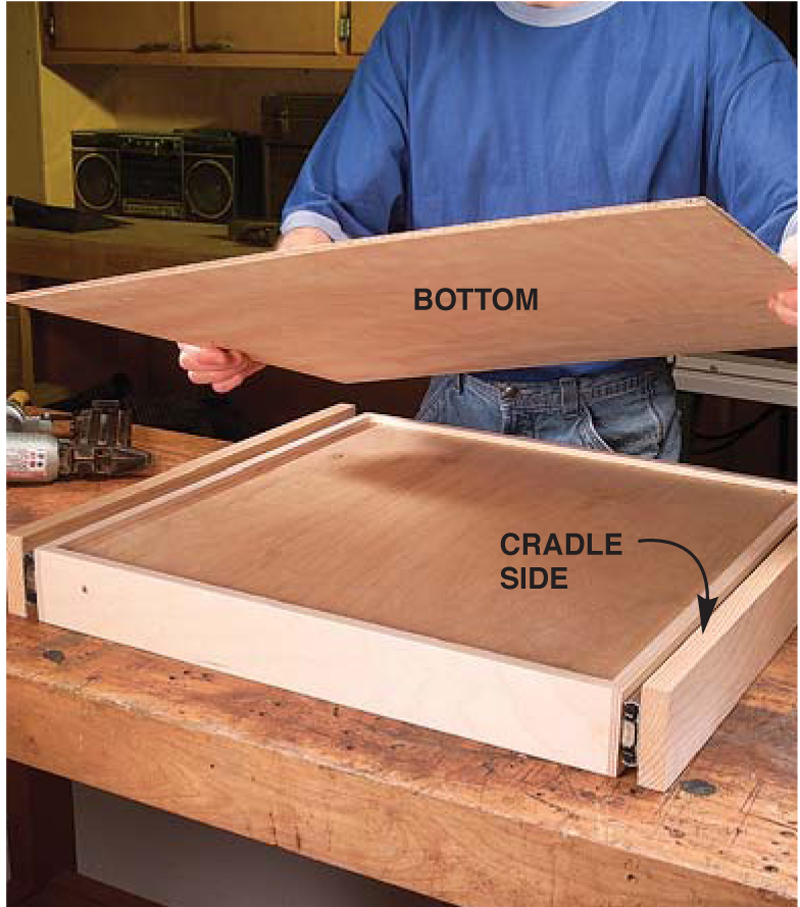
3. Assemble the
unit with screws
and 3/4-in. x 3/4-
in. cleats. Be sure to
use coarse-threaded
screws; fine threads
won’t hold in
particleboard. For
extra strength, you can
use glue that’s made
especially for
melamine’s slick
surface (see Sources).
|