


We may receive a commission when you use our affiliate links. However, this does not impact our recommendations.
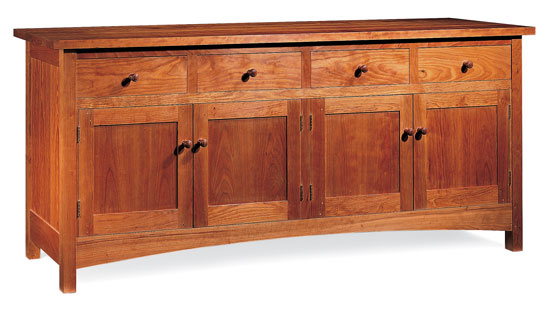
Slot & Spline Paneled Door
Hands down, the easiest way to make a frame-and-panel door.
by Tom Caspar
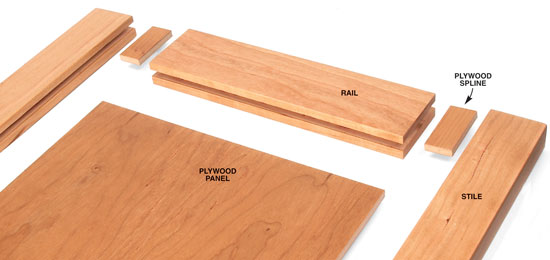
A good-looking frame-and-panel door is really quite easy to make, if you keep it simple. The doors in this cabinet are held together by splines made from 1/4-in. plywood. The panels are 1/4-in. plywood, too. The splines and panel fit into the same size slots in the stiles and rails.
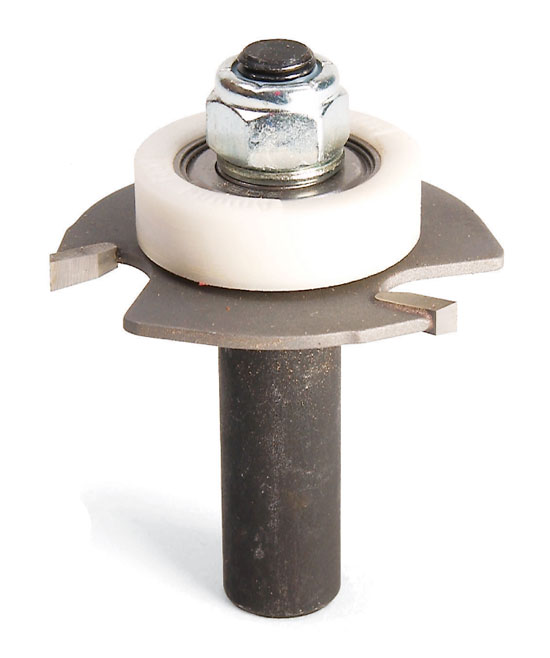
All you need to make a slot-and-spline style door is a router table and a 1/8-in. slotting cutter (see photo, right). Plywood is usually undersized, so a 1/4-in. cutter would be too big. Instead, you’ll make two slightly overlapping passes using the 1/8-in. cutter. That way, you can adjust the slot’s width to perfectly fit your plywood, whatever its actual thickness.
Tools and Materials
You’ll need a tablesaw, small handsaw, router table and 1/8-in. slot cutter with a bearing that makes a 3/8-in.-deep slot, though a 1/2-in.-deep slot is OK, too. Slot cutters and bearings are widely available. I used a set from Amana tools, a 1/8-in. three-wing slotting cutter assembly (#53406-1, $30) with bearings for 3/8-in. and 1/4-in. deep slots (#47729, $20).
If you’re making lots of doors, I recommend using an adjustable cutter. You’ll only have to make one pass per slot, rather than the two passes shown in Photo 6. Most adjustable cutters use shims, but I found one that can be dialed to various widths, the Amana E-Z Dial slot cutter (#55500, $104). It makes 1/8- to 1/4-in.-wide slots that are 1/2-in. deep. I made my door from 3/4-in.-thick solid wood and 1/4-in. MDF-core plywood, but you can use this technique with any type of plywood or material of any thickness.
Mill the Stiles and Rails
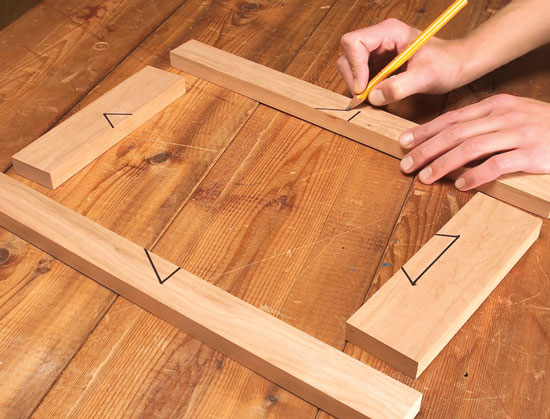
Rip and crosscut the stiles and rails so they have square sides and ends. Note that the rails butt up to the stiles. Make an extra stile or rail for testing the router setup. Mark the stiles and rails (Photo 1).
Rout Slots, First Pass
Install the slot cutter in the router table. To approximately center the slots on
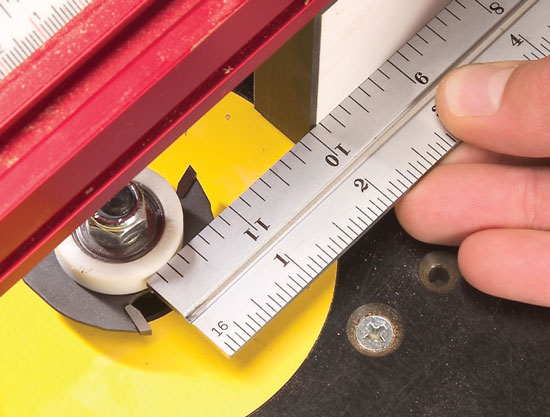
3/4-in. material, raise the cutter 1/4-in. above the table. Exactly centering the slots isn’t important. Align the fence so it’s flush with the bearing (Photo 2). If your router table is equipped with sliding subfences, push them within 1/16 in. of the cutter. This makes routing end grain safer and more accurate.
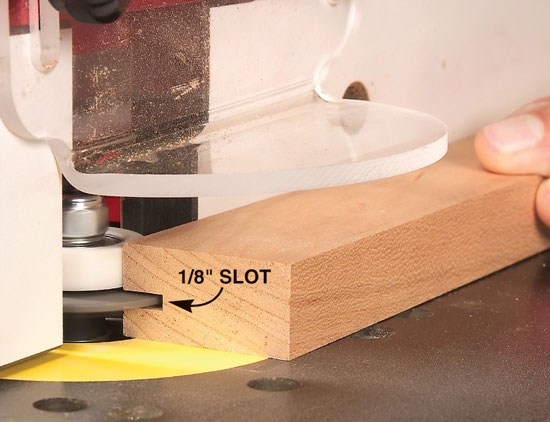
Rout 3/8-in.-deep slots in each stile and rail, face sides down (Photo 3). Rout slots in the end of each rail, face side down (Photo 4). Push the rails with an 8-in.-square backer board.
Rout Slots, Second Pass
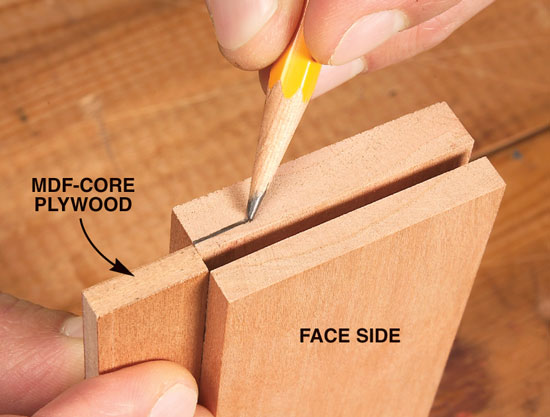
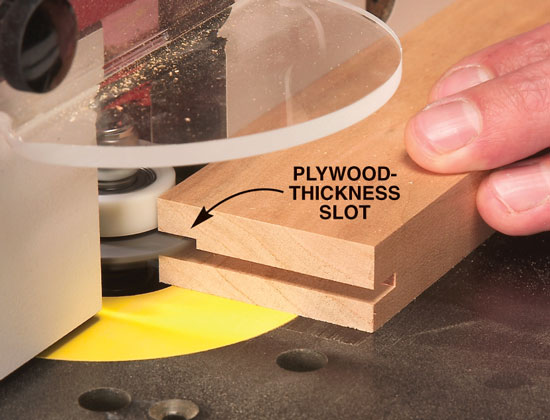
Figure out exactly how much wider the slots must be to fit the plywood. Hold a small piece of plywood next to a test piece’s slot and mark the plywood’s thickness (Photo 5).
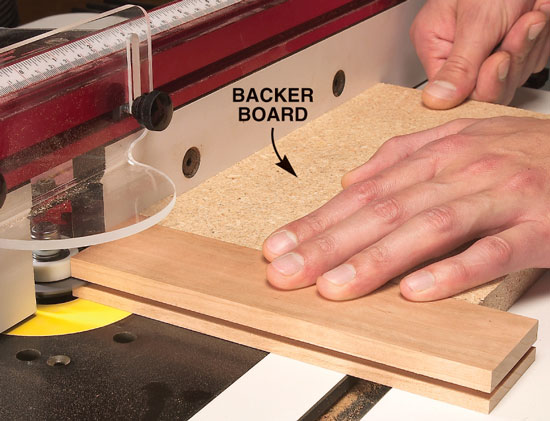
Place the test piece on the router table, face side down. Raise the cutter to just below the pencil line. Turn on the router and make a short second pass (Photo 6). Test the plywood’s fit in the slot. If you have to use force to push in the plywood, the slot is too narrow. If you can fit two pieces of paper between the spline and the slot’s wall, the slot is too wide. When you’ve got the right fit, make a second pass on all the rails and stiles.
Cut the Spline
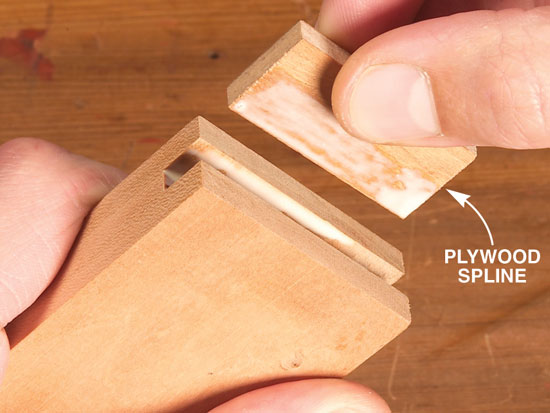
Rip a long, narrow strip from the plywood. Cut the strip 1/32 in. narrower than the combined depth of two slots.
Measure the rails to determine the spline’s length. The splines run from the outside edge of a rail to the bottom of the slot. Cut the splines to length. The safest way to cut these small pieces is with a bandsaw or with a backsaw and miter box. Put the splines in the rails’ ends, without glue, and assemble the door.
Cut The Panel
Measure the panel opening. Add 11/16 in. to the opening’s length and width and cut the panel to this size.
Glue the Door
Sand the panel and the inside edges of the stiles and rails. Glue the splines into the rail’s ends (Photo 7). Put glue on both sides of the splines’ slots and on the rails’ end grain. Position the splines so they extend 1/32 in. beyond each rail’s outside edge. Apply glue to both sides of the splines protruding from the rails.
To make the door as strong as possible, glue the panel, too. You can’t do this with a solid-wood panel, because it must be free to expand and contract, but plywood won’t move. Run a bead of glue on the back side of the long slots in the stiles and rails.
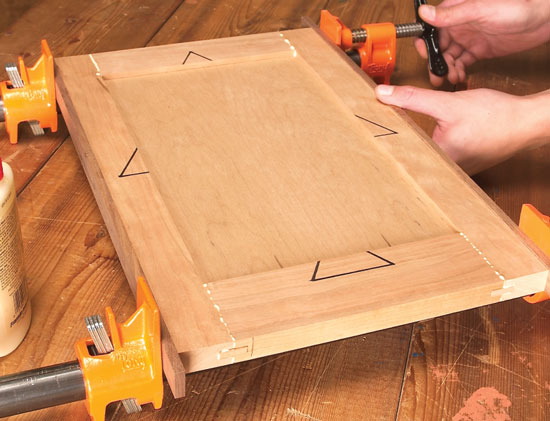
To assemble the door, insert one rail into a stile. Slide in the panel, then the second rail. Make sure the rails align with the stile’s ends. Push the second stile into place and clamp (Photo 8). Sand flush the protruding spline after the glue has dried.
|
A 1/8-in. slotting cutter is the only bit you need to make this door.
Photo 1: Mark the door’s parts using the cabinetmaker’s triangle. It identifies the top and bottom rails, and the left and right stiles.
Photo 2: All the joints for this door are cut on the router table. Set up a 1/8-in. slot cutter so its bearing is flush with the fence.
Photo 3: Rout 1/8-in.-thick slots the full length of each stile and rail. Refer to your marks to be sure each face side is down and the inside edge is against the fence.
Photo 4: Rout slots in the rails’ ends. Push each rail with a backer board. This steadies the rail and prevents tear-out on its back side.
Photo 5: Mark the plywood’s thickness on the end of a test piece. Raise the slot cutter to just below the pencil mark.
Photo 6: Make a second pass on the test piece to widen the slot. Adjust the slot’s width by raising or lowering the cutter until the plywood fits perfectly. Then make a second pass on all the stiles and rails.
Photo 7: Glue splines into the rails’ ends. Apply a bead of glue to the panel slots, too, but only on the slot’s back edge, so glue won’t leak out the front.
Photo 8: Clamp the door. There’s no messy squeeze-out around the panel’s front, just in the back. Gluing the panel isn’t required, but it makes the door extremely strong. |
Here are some supplies and tools we find essential in our everyday work around the shop. We may receive a commission from sales referred by our links; however, we have carefully selected these products for their usefulness and quality.


