|
If you want to make a woodworker gnash his teeth, ask him to make new
cherry look like cherry that has aged
naturally to a rich, brownish hue.
Why is this challenge so agonizing?
Because staining cherry, even with
stain that's the perfect color, doesn't do
the trick.
Here's why: Cherry’s surface is covered
with legions of tiny pores that are
almost impossible to see—until you
apply stain. Stain turns these pores
dark, so they stand out. Naturally aged
cherry doesn't show dark pores; so it's
impossible to create an authentic look
with stain alone.
Production shops solve the problem
by spraying on toned lacquer finishes;
old masters pad on shellac and handmixed
glaze. Here's a no-fuss method
that uses off-the-shelf products and
produces great results.
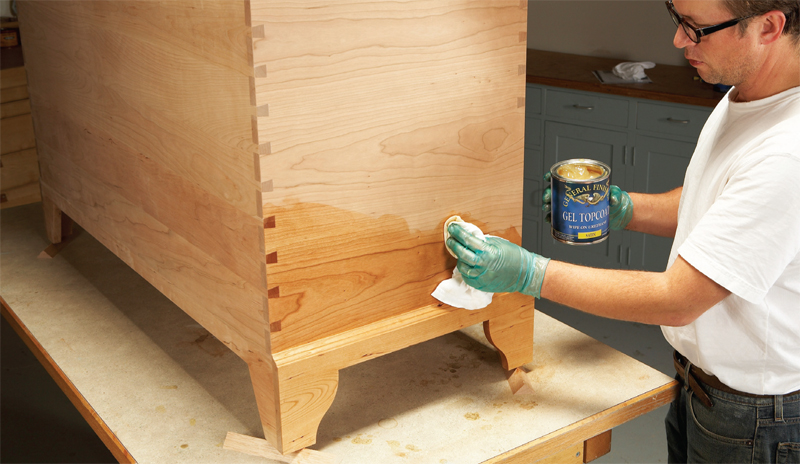
1. Wipe on a coat of General
Finishes’ Gel Topcoat clear urethane finish
(Photo 1, at right and Source, below). Apply
the finish generously, using an overlapping
a circular motion to work the finish
into the pores. Remove the excess
finish by wiping across the grain, followed
by wiping with the grain. After
the finish is thoroughly dry (6 to 8
hours in good conditions), lightly scuff
the surface with 320 grit sandpaper or
0000 steel wool.
2. Wipe on a second coat of Gel
Topcoat. Let it dry and lightly scuff the
surface as before.
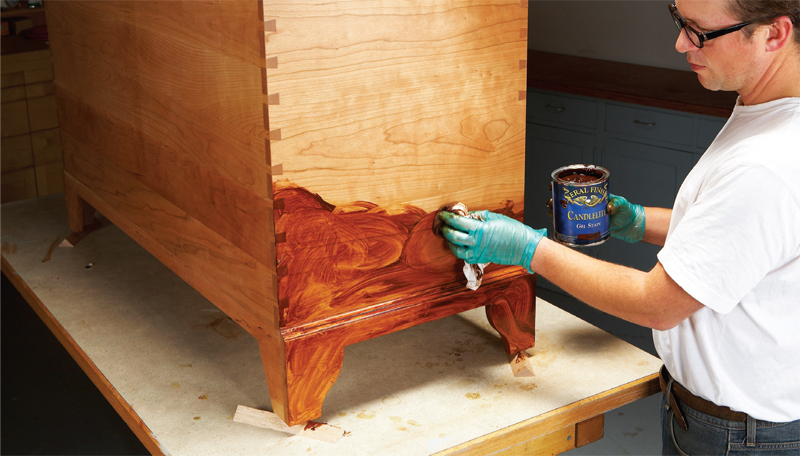
3. Wipe on a coat of General
Finishes’ Candlelite gel stain (Photo 2). I
think it's the perfect color for aging
cherry. As this stain sets up pretty
quickly, divide the work into manageable
sections. Apply the stain liberally,
then wipe with the grain to remove the
excess. The trick is to remove all the
streaks, blotches and rag marks while
leaving as much color on the surface as
you can. A rag that's partially loaded
with stain works best. I like to use two
rags: one more heavily loaded than the
other, so that I can add color and
remove marks as needed. When you're
done, take a careful look in good light
to make sure the color is uniform and
goof-free. Let the finish dry thoroughly.
4. Wipe on a second coat of
Candlelite gel stain to deepen the tone.
5. Protect the color layer by wiping
on additional coats of Gel Topcoat. For
wear surfaces, such as table tops, you
could opt to build a more durable finish
by brushing or spraying on coats of
polyurethane.
Usually you can't apply stain over a
finish. But the process works with these
gel stains because they're actually colored
gel varnish. Applying Candlelite
gel stain over Gel Topcoat is similar to
applying a layer of toned finish, and
because the wood's surface has already
been sealed, the stain doesn't darken
the pores. This method reduces blotching,
for the same reason. Another benefit
of sealing the wood before staining
is that if you don't like the color the
stain imparts, you can wipe it off with
mineral spirits (as long as the stain is
still wet), without harming the Gel
Topcoat underneath.
Each additional layer of gel stain
deepens the wood's tone. Another way
to achieve a deeper tone is to skip Step
2 and apply stain over one coat of clear
Topcoat. But as the wood's surface isn't
as thoroughly sealed , you'll end up
with some dark pores and a little more
blotching. A third method is to simply
wait, as the cherry will slowly darken
naturally under the stain.
You can alter the wood's tone by
using a different gel stain color for the
second coat (Step 4). Stains with names
such as "brown mahogany," "walnut" or
"mission" usually make cherry more
brown; "mahogany" and "cherry" stains
usually make cherry more red. Always
choose gel stain by its color, however,
not by its name.
Source
General Finishes, generalfinishes.
com, 800-783-6050, Gel
Topcoat, $13.99 per pt., $19.99 per qt.; Candlelite Gel Stain, $13.99 per pt., $19.99 per qt.
This story originally appeared in American Woodworker February/March 2009, issue #140.

February/March 2009, issue #140
Purchase this back issue.
|
|
Click on any of the images to view a larger version
1. Wipe on two
coats of General
Finishes' Gel
Topcoat, after
finish-sanding
to 180 grit. Let
each coat dry
thoroughly. This
step seals the
wood's pores.
2. Wipe on one or
more coats of
General Finishes'
Candlelite gel
stain. Because the
wood's surface is
sealed, the gel
stain adds an
even layer of color
that makes cherry
look like it has
aged naturally.
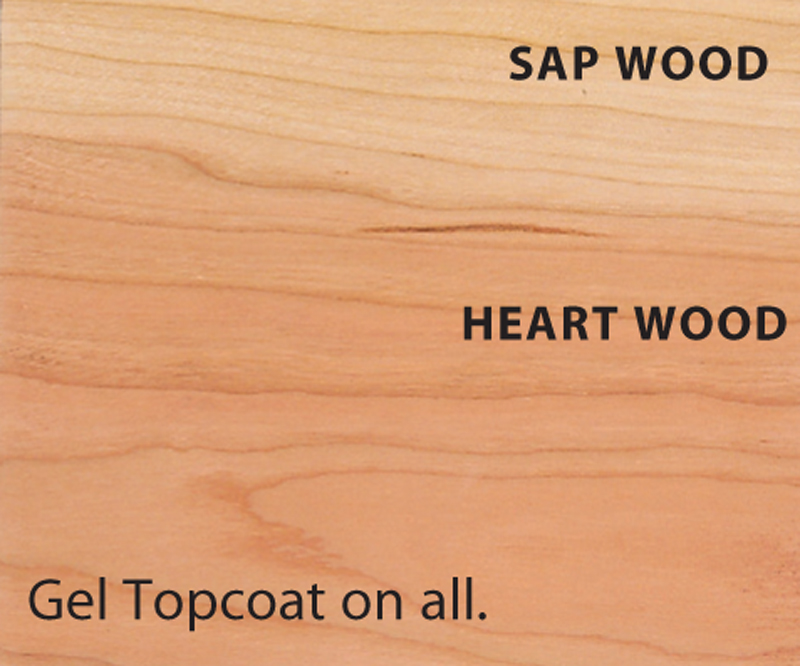
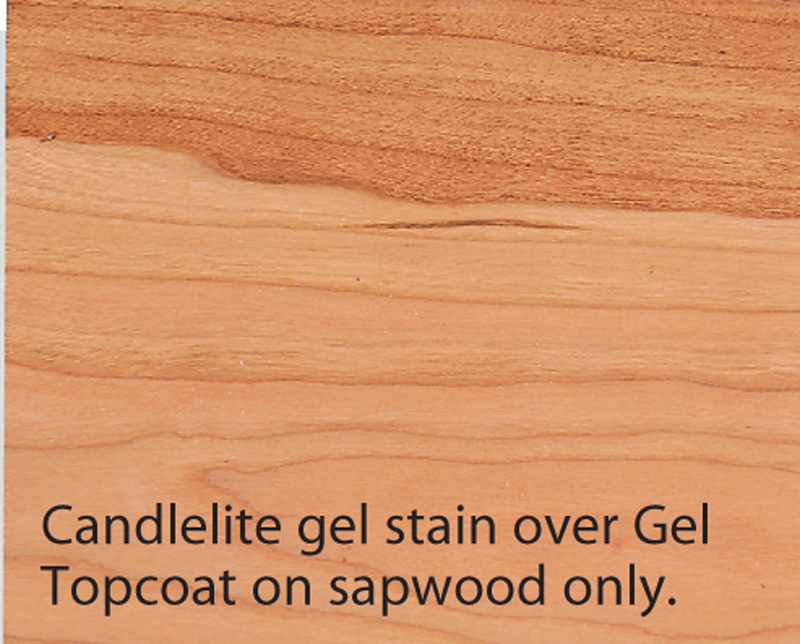
Blend Color Mismatches
Use the same method to blend cherry
sapwood and heartwood, plywood and
solid wood, and even color variations
between boards. Begin by sealing the
entire surface with one or two coats of
Gel Topcoat. This step also shows the wood’s natural color, so you can choose
the most complementary stain color:
Candlelite gel stain is a great place to
start. When the Topcoat has dried,
apply Candlelite gel stain to the lightcolored
sapwood only. Gel stain is perfect
for this job, because its thick, nodrip
consistency makes it easy to control.
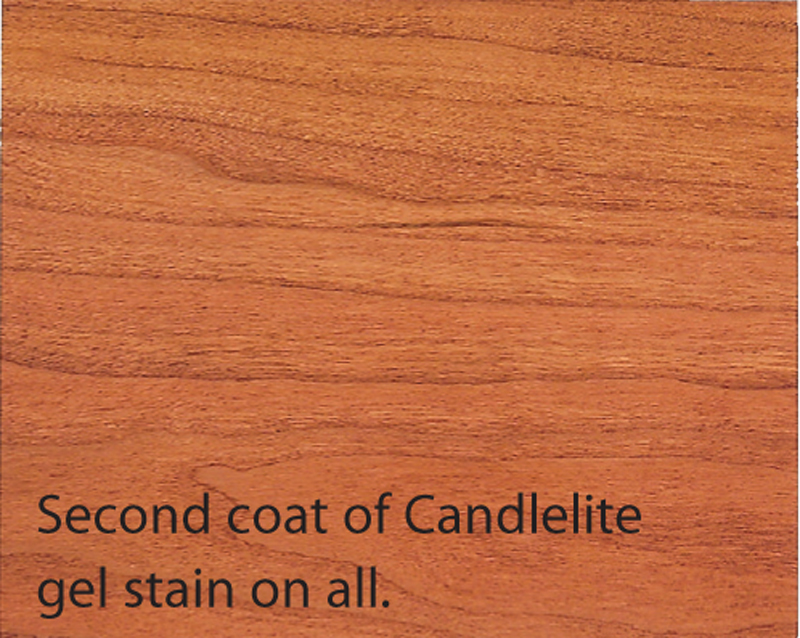
When this first coat of stain has
dried, apply a second coat of Candlelite
gel stain over the entire surface.
|