|
One of the best buys you can
make for your tablemounted
router is a set of
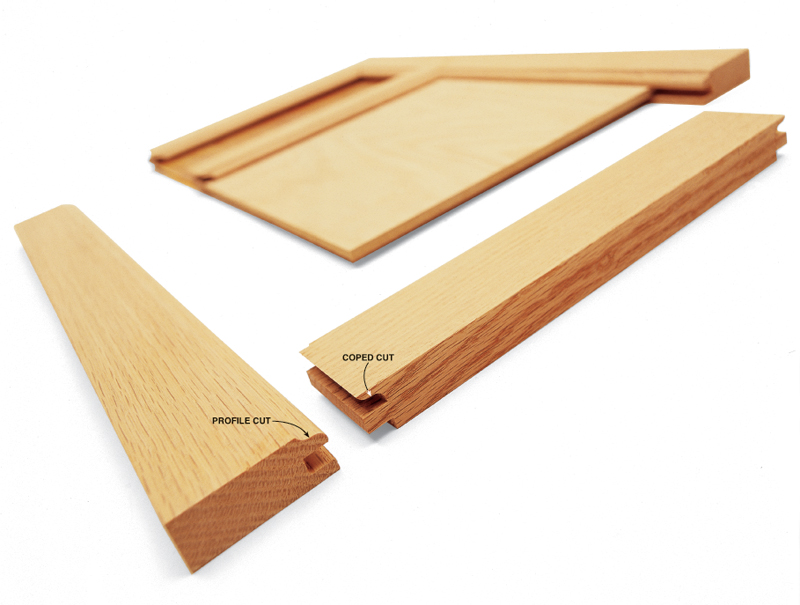
stile and rail cutters. These cutters
allow you to join frame pieces
together at right angles by making
a decorative version of the tongue
and groove joint. It’s sometimes
called a “cope and stick” joint
because the rail is coped to fit
around the profile that’s “stuck”
onto the stile. When assembled,
two stiles and two rails form a
frame with a groove around its
inside edge, perfect for holding a
panel.
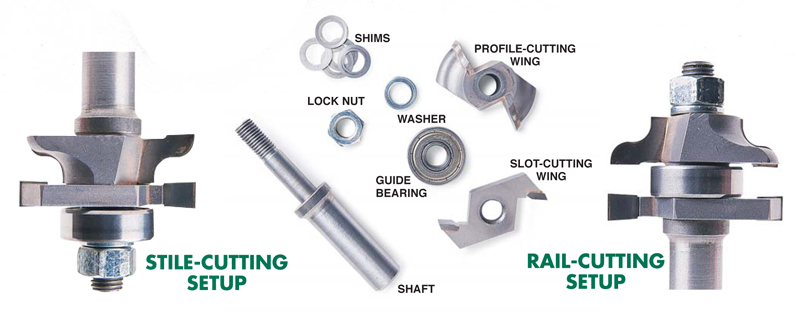
Stile and rail cutters come in a
variety of profiles (Fig. A) and are
great for making kitchen cabinet
doors and other frame and panel
structures. Most manufacturers
offer them either as dedicated two bit
sets or as a single “reversible”
bit. With the two-bit set you get
one bit to make a “profile” cut on
long grain (the stile cutter) and
another to make a matching
“coped” cut on the end-grain (the
rail cutter). With the single,
reversible-bit sets you get removable
parts that can be configured to
make both cuts (photos at right).
Dedicated sets are best in production shops, but reversible sets are
a good choice for anyone working with a budget because they’re
cheaper to buy and still offer great performance. Using the reversible set
is a piece of cake (Photos 1 – 6), as long as you remember to make
the cope cuts face-side up and profile cuts face-side down. Making
the changeover from profile to cope cutting (or back) takes only a few
minutes. You’ll be impressed with the quality of the fit and the
speed with which you can make a quantity of doors or frames.
Sources
(Note: Product availability and costs are subject to change since original publication date.)
Reversible cutters and toggle clamps available at:
Eagle America, eagle-america.com, 800-872-2511.
Highland Hardware, highland-hardware.com
800-241-6748.
MLCS, mlcswoodworking.com,
800-533-9298.
Sears, sears.comcraftsman, 800-377-7414.
Sommerfeld’s, sommerfeldtools.com, 888-228-9268.
Woodcraft, woodcraft.com,
800-225-1153.
The Woodworker’s Choice, 1-800-twc-4tools.com, 800-892-4866.
Fig. A: Stile and rail
cutters come
in a variety of
decorative
profiles.

This story originally appeared in American Woodworker February 2000, issue #78.

|
|
Click any image to view a larger version.
Reversible cutters have
removable profile- and slot-cutting wings
along with shims and a guide bearing mounted
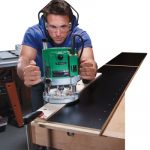
on a single shaft. Changing from profile to cope
cutting (see photo above) means disassembling the
cutter, rearranging the wings and reassembling—a two minute
process. Depending on its orientation, the profile
cutter either makes the profile or its coped negative. Make
sure the flat sides of the carbide cutters face into the cut.
Shims are included to adjust the fit if it’s too loose.
Phase 1: Make Coped End-Grain Cuts
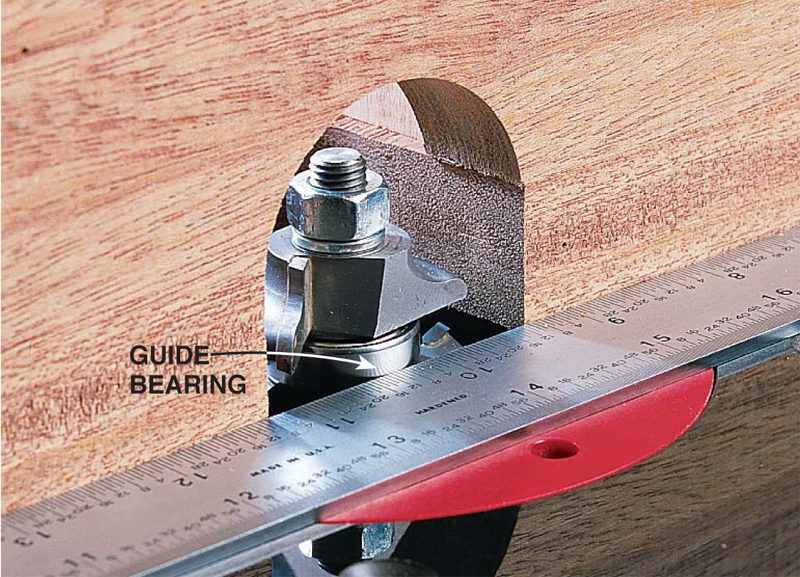
1. Set the fence flush with the bearing on the rail cutter, using a
straightedge to assure a smooth pass.
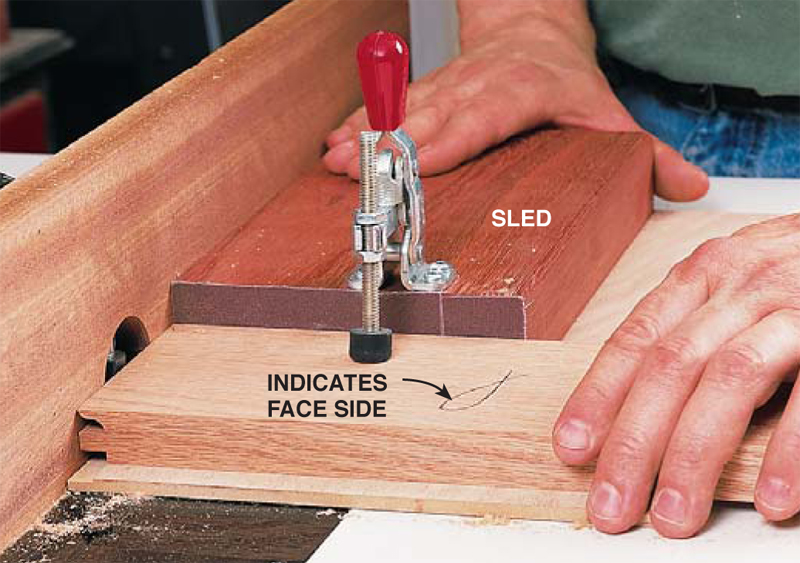
2. Make test end-grain cuts. You’ll need a sled to hold the
rail safely and ensure a square cut. Simply glue a block of wood with
one squarely cut end onto a larger piece of 1⁄4-in. plywood, aligned on one
edge.Then attach a toggle clamp.Clamp the rails in the sled face-side up
for all end-grain cuts.
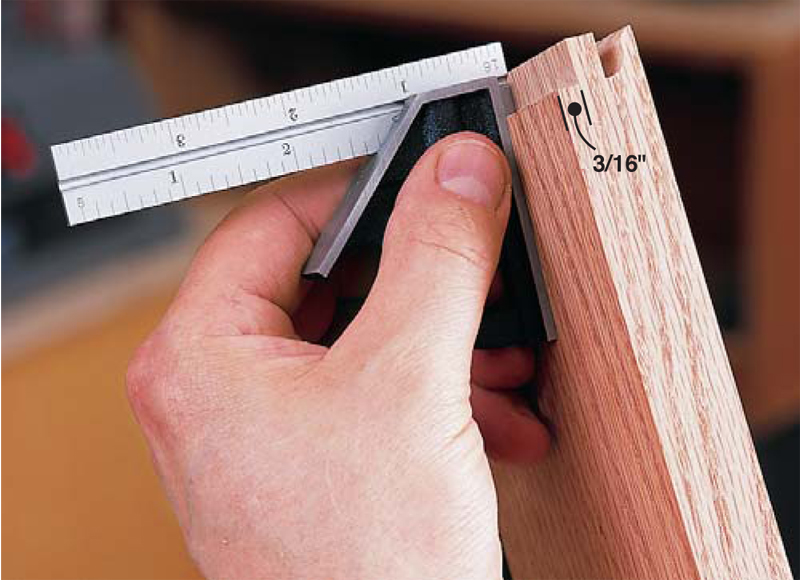
3. Set the height of the cutter by making cuts
so the rabbet on the bottom of the rail is at least
3⁄16-in. deep. Otherwise the corresponding bottom
shoulder on the stile will be too thin and may break.
Once you’ve got the height set, use the sled and make
all of the coped end-grain cuts in the rails.
Phase 2: Cut Profiles on Long Grain
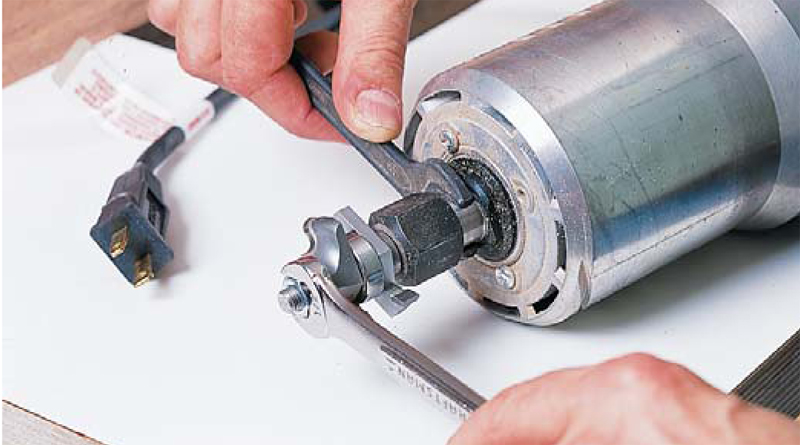
4. Disassemble the cutter to rearrange the pieces for
making profile cuts. Leave it mounted in the router when loosening
the locking nut—it’s a handy way to hold onto the shaft. After
rearranging, don’t over-tighten the nut or you’ll damage the shims.
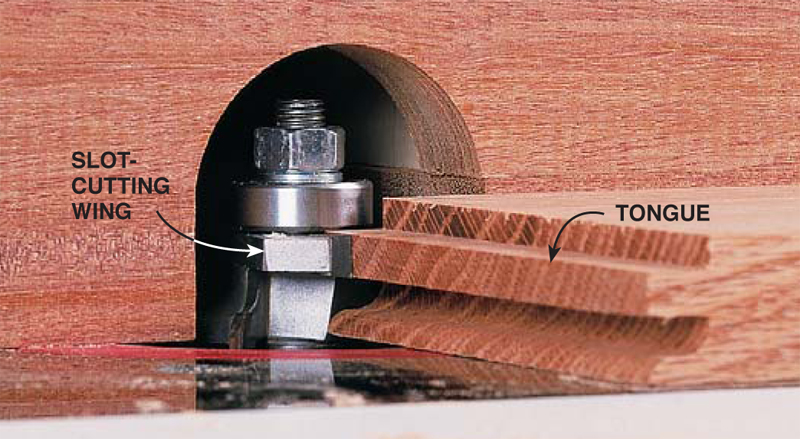
5. Set the height of the stile cutter by aligning its slot-cutting
wing with the tongue on one of the rails.These cuts don’t require
a sled. Use scrap stock to make a test cut, check its fit with the rails and
make adjustments, if necessary.
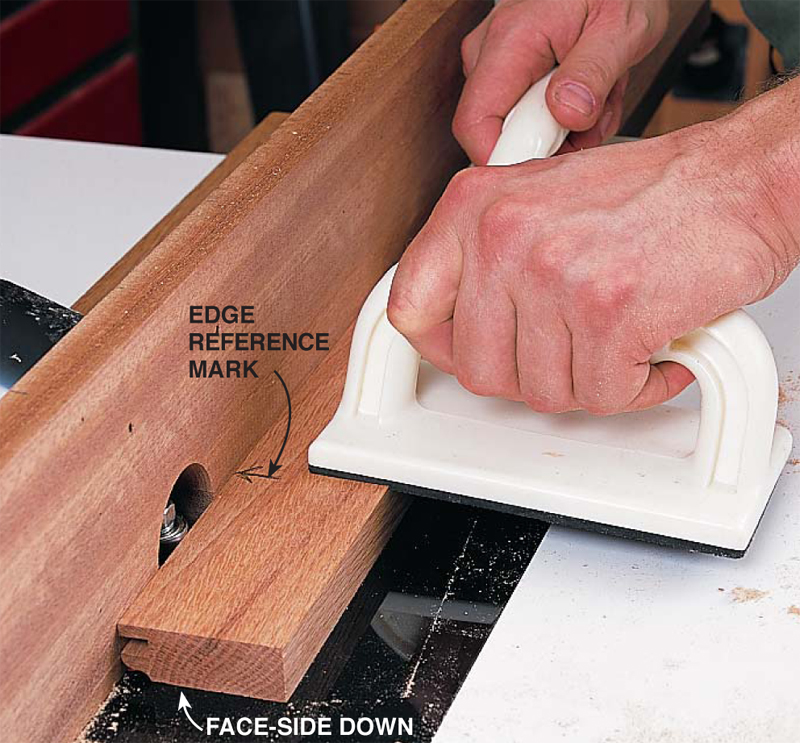
6. Make profile cuts on the stiles and inside
edges of the rails with the stile cutter. (Yes, use the
stile cutter for this profile cut on the rails!) Orient the
pieces face-side down and mark the edge to be
routed. Use push blocks to hold the stile against the
fence and the table when you guide it past the bit.
|