We may receive a commission when you use our affiliate links. However, this does not impact our recommendations.

Bandsawn Tapered Legs
Tips and tricks to make
your legs look better
and the job go faster
By Tom Caspar
1. Cut riftsawn legs
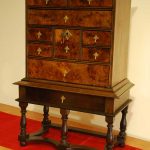
The riftsawn section of a board makes the best-looking legs. Here, the growth rings run about 45 degrees to the surface. This makes all the leg’s faces look pleasingly similar, with straight grain lines on all sides. By contrast, legs from the board’s plainsawn section have very different faces. Two are plainsawn and two are quartersawn.
Mill the leg blanks square and cut them to final length. Lay out and cut the joints in the legs before you cut the tapers. This prevents you from mixing up inside and outside faces later on. |
|
Click on any of the images to view a larger version.
|
2. Lay out the tapers
Draw tapers on both outside faces of each leg. I mark
the outside faces on the top of the leg, where they won’t be removed by
sawing or sanding.
Begin the taper 1/2 in. to 1 in. below the spot where the rail joins the
leg. A short flat spot above the taper is barely noticeable. You need a
small cushion here to make sure that after all the sawing, jointing and
sanding is done the taper doesn’t accidentally run too far up the leg.
If it does, you may get an unsightly gap between the leg and the rail’s
end. |
|
 |
3. Use a red medium-tip marker
Use a marker and a wooden straightedge to
draw the tapers. When you’re sawing, red is much easier to see than a
pencil line, particularly on dark woods. This marker draws a line that’s
about 1/16 in. wide, which serves as a guide for both sawing and
jointing. You’ll saw along the line’s outside edge, then joint down to
the line’s inside edge. This is easier than trying to saw a straight
line 1/16 in. away from a thin pencil line. |
|
 |
4. Follow the grain
When you draw the tapers, follow the grain’s slope on
both outside faces, if possible. This makes not only a better-looking
leg but a stronger one, too. If this taper slanted the opposite way,
cutting across the sloping grain, the leg would be weak. |
|
 |
5. Bandsaw the first taper
Saw the first taper, staying on the outside edge
of the line. Begin at the thin end of the wedge, at the top of the leg.
You’ll get a smoother cut here than if you start at the leg’s bottom
and exit at the top. If you were to cut in that direction, going from
bottom to top, the blade could prematurely slide out of the cut as it
approaches the thin edge of the wedge, leaving a bump that’s awkward to
remove. |
|
 |
6. Stop short, flip, cut again
On the first cut, stop before you reach the
leg’s end; then back out. Leave a 1/8- to 1/4-in.-long portion of the
leg uncut. The waste piece will remain attached to the leg and help
support it during the next cut. Rotate the leg so the second taper’s
layout line faces up; then make the second cut. Saw all the way through
without stopping. Discard the second waste piece. |
|
 |
7. Snap off the waste
Snap off the waste piece from the first cut. It comes
off quite easily, leaving a very small, rough ridge at the leg’s end.
Remove the ridge with a file or chisel. This production-shop method of
leaving the first waste piece attached is very fast—faster than cutting
the piece off and reattaching it with tape or hot-melt glue. This
strategy also works well with cabriole legs. |
|
 |
8. Joint the bandsawn surfaces
Joint the leg. Set the jointer to take a
very light cut, about 1/32 in. Use a narrow push stick with a hook cut
on the end to keep your fingers out of harm’s way. Take two passes to
joint down to the inside edge of your layout line. You may need an
additional pass to remove all the bandsaw marks, but that’s OK. There’s a
built-in safety margin in the taper’s layout. |
|
 |
Product Recommendations
Here are some supplies and tools we find essential in our everyday work around the shop. We may receive a commission from sales referred by our links; however, we have carefully selected these products for their usefulness and quality.