|
Finishing is a challenge—right?
It’s one thing to get a nice finish on a
small, flat sample board, but good luck
with those inside corners, vertical surfaces,
curved areas, thin edges, and
framed panels. I don’t care for spraying,
which comes with its own set of problems,
so I’ve developed a technique to
apply a finish by hand, using only a
brush and some rags.
The general sequence of steps
goes like this: First, I apply a coat or
two of thinned-out polyurethane.
Then I scuff sand the finish. Finally, I
apply a coat of gel varnish to remove
the sanding haze. The goal is a finish
that appears level and clear, shows
the pores and texture of the wood,
and feels very smooth.
Applying a finish by hand has
many attributes in common with
using hand tools. The process is quiet,
meditative, and benefits from a
methodical approach.
Materials
• Brush. I use a 3" foam brush with a
wood handle. I cut about 1" off the
end of the handle so the brush can
be stored in a quart can of finish. This
eliminates the use of solvents to
clean the brush.
• Polyurethane. I use semi-gloss
Minwax Fast Drying Polyurethane for
the interior of a cabinet and gloss for
the outside.
• Thinner. I use naphtha rather than
paint thinner because it evaporates
faster. The goal is to thin the poly so
that it will stay wet and flow out better
without extending the drying
period too much.
• Gel varnish. I like Bartley
Gel Varnish.
• Sandpaper. I use 3M 216U Fre-Cut
Gold stearated sandpaper in P400,
P600 and P800 grits.
• Felt block. This is for backing the
sandpaper.
• Cotton rags or paper wipes. I use
Brawny medium weight Taskmate
Wipers, avaliable at the grocery store.
• Japan drier. This helps speed the
drying process. It’s available at most
paint stores.
Technique
I completely pre-finish all the interior
surfaces and partially finish the exterior
surfaces of a cabinet before assembly.
Pre-finishing lets you work on surfaces
without having to brush into an inside
corner. Pre-finishing also allows you to
place all your parts in a horizontal position
to prevent drips and runs (Photo 1).
You’ll finish one surface at a time, letting
it dry completely before turning it
over to finish the opposite side. Before
finishing, tape off mortises, tenons and
all glue surfaces with standard masking
tape. Trim the tape after it is applied
using a utility knife.
Start by sanding everything to 180
grit. Wet the sanded surfaces with a
damp rag or sponge. After the wood
dries, scuff sand the raised grain using a
felt block and 220-grit paper. Wipe off or
vacuum the dust. The surface doesn’t
have to be absolutely dust-free because
scuff sanding between coats will smooth
out any vagrant dust in the finish. You
won’t have to bother with a tack rag.
Next, prepare the finish. Stir 1/3
capful of Japan drier into one quart of
poly. Thin the poly with naphtha until
it is more like water than syrup (usually
about 40% naphtha by volume).
The exact amount of thinner is not
that important. What you want is a
coat that flows out and stays wet
while you brush.
Apply the poly using a disposable
foam brush. After you’re done with each
coat, store the brush in a partial can of
varnish. One brush will last for all the
coats you’ll apply.
Working with a foam brush requires
some getting used to. The main issues
are that it unloads quickly and pushes a
small puddle of finish in front of itself.
With practice, you will get a sense for
the right amount of finish to load into
the brush. As for the puddle, let me
show you how I finish a large panel.
Start by applying a perimeter of finish
roughly 1" from the edge (Photo 2).
Then, work the finish back and forth to
fill in the middle (Photo 3). To avoid
pushing the puddle over the edge of a
panel, be sure to keep shy of the edges.
Next, work the dry border with a brush
that’s loaded just enough to wet the
wood but not enough to drip over the
edge (Photo 4). Go back over the entire
surface, in any direction, to move the
finish around and create a thin even
film with no puddles or dry patches.
Finally, brush with the grain using very
light strokes at a low angle, like a plane
landing (Photo 5). Start the strokes just
in from the edge and continue all the
way off the opposite end. The only
downward pressure should be from the
weight of the brush; you are just lightly
smoothing the finish in the direction of
the grain and don’t want to push finish
over the edge.
When you’re done, examine the
panel in a raking light. You should see a
wet and even coat of finish. The brush
marks should start to flow out and disappear,
while the perimeter begins to
look drier. If you see puddles or dry
spots, move the finish around with the
brush. Follow this up with light strokes
that go with the grain. Check for drips
on the edges and wipe them off.
Next, tackle the edges. Brush on the
poly and wipe it off right away with a
cloth (Photo 6). This leaves a thin film
of varnish that won’t sag or drip. It’s
enough protection for edges that won’t
be handled very often. Use a raking
light to check for a ridge of finish that
may have been pushed onto the top. If
you see one, smooth it out with a light
brush stroke following the grain.
If you want to have more finish on
an edge, wait until the faces are dry,
then stand the part up on edge for
brushing. Don’t forget to wipe off any
drips after brushing the edges.
If you’re finishing a curved part, use
a much drier brush (Photo 7). Dip the
brush’s tip in the finish and stroke lightly
with the brush held in a vertical position.
Limit your working area to one
face and brush out a thin, even coat.
Wipe off the adjacent faces to remove
any drips.
When you’re done brushing, clean
the can’s rim, drop in the brush, hold a
deep breath for a minute, and exhale
into the can. Quickly put on the lid.
This helps to replace the oxygen in the
can with carbon dioxide, which minimizes
the skin that may develop on
the finish’s surface.
Lightly scuff sand every surface after
it has dried for one day (Photo 8). Be
careful near the edges, where the finish
can be extra-thin. The edges that you
wiped off should already be smooth, but
if you need to sand out a little fuzz, use a
very light touch with 800-grit paper.
Once you’re done sanding, use a
new foam brush to apply 2-3 coats of
gel varnish to the interior surfaces only
(Photo 9). Working one part at a time,
brush the gel on most of the surface,
then smear it around and begin to
remove it with a wipe in each hand.
Switch to a new set of wipes to remove
all the excess gel varnish (Photo 10).
Any remaining gel will dry to a sticky
mess, so get it off now. Use a clean,
folded wipe on the edges. Remove any
vagrant gel from the underside of the
part and clean off smudges from your
hands on the top.
Now you can remove the tape and
glue your project together. Apply two
coats of thin gloss poly on the outside
surfaces (Photo 11). Sand with 400
grit in between coats. If you’re finishing
a cabinet, brush one side at a time,
rotating the case to bring a new side
horizontal after the previous side has
dried. You should be able to finish two
or three sides in one day. Blankets and
padding are important to protect the
sides from damage as you rotate the
cabinet. Wipe off any drips that may
form on the edges (Photo 12).
Note: The used wipes should be
spread out to dry when you are done.
Wait at least two days for the second
coat to dry. Then lightly scuff sand
with 600-grit paper to dull the glossy
surface by about one-third (Photo 13).
Repeat with 800-grit paper wrapped
around the felt block. This time, push
down harder to level the surface
(Photo 14). Look for a 90% sanded surface
with an even pattern of small, shiny pores after you wipe off the dust.
Finally, use a gel varnish to reduce
the sanding haze, just as you did with
the interior surfaces (Photo 15). I usually
apply two to five coats of gel on
top of the poly to get the finish I am
looking for. For my really special pieces
and on dark finishes, I polish with 3M’s
Imperial Hand Glaze #5990 between
the last coats of gel. I rarely use wax
except on thin or satin finishes.
This finishing process can be used
over dyes and stains, but you must be
very careful near the edges, especially
with dyes. Dark colors require
more coats of gel and Hand
Glaze polishing to remove the
sanding haze.
|
|
Click any image to view a larger version.

1. Brushing a finish is much easier before assembly. For the best results, thin the finish,
tape the joints, and lay all the pieces flat on your bench.

2. Brushing technique really matters. On a
panel, start by brushing a perimeter. Leave a
dry border to prevent drips.

3. Fill in the perimeter. Lay out an even, wet
coat of polyurethane over the whole surface,
except the border.

4. Brush the dry border, moving parallel to
the edge. Hold the brush lightly, barely overhanging
the edge.

5. Make the final strokes with an unloaded
brush, following the grain.

6. Finish the edges next. Brush on the finish,
then wipe it off immediately.

7. Curved surfaces test your skills. Use a less
saturated brush with a light touch and
check repeatedly for drips or sags.

8. Scuff sand with 400-grit sandpaper after
the first coat has dried overnight. Wrap the
paper around a felt block.

9. Apply gel varnish to all the interior parts
with a foam brush. Gel varnish helps remove
the sanding haze.
10. Wipe off all the gel with two rags and two
hands. Remove the tape from the joints,
then glue and assemble your project.

11. Apply a second coat of poly to the outside
of the project.

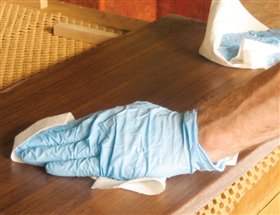
12. Wipe up any drips that form on the edges
with a folded towel.

13. Sand the exterior surfaces with 600-grit
paper. Sand to within 1/8" of an edge, then
make very light passes in this zone.

14. Repeat the process using 800-grit paper
to level the surface. Again, sand much less
near the edges.

15. Apply gel varnish until you get the look
you’re after.
|