We may receive a commission when you use our affiliate links. However, this does not impact our recommendations.
Foolproof Tenons
Two blades and
a rock-solid jig guarantee success.
By Tom Caspar
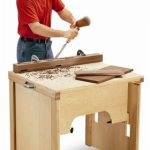
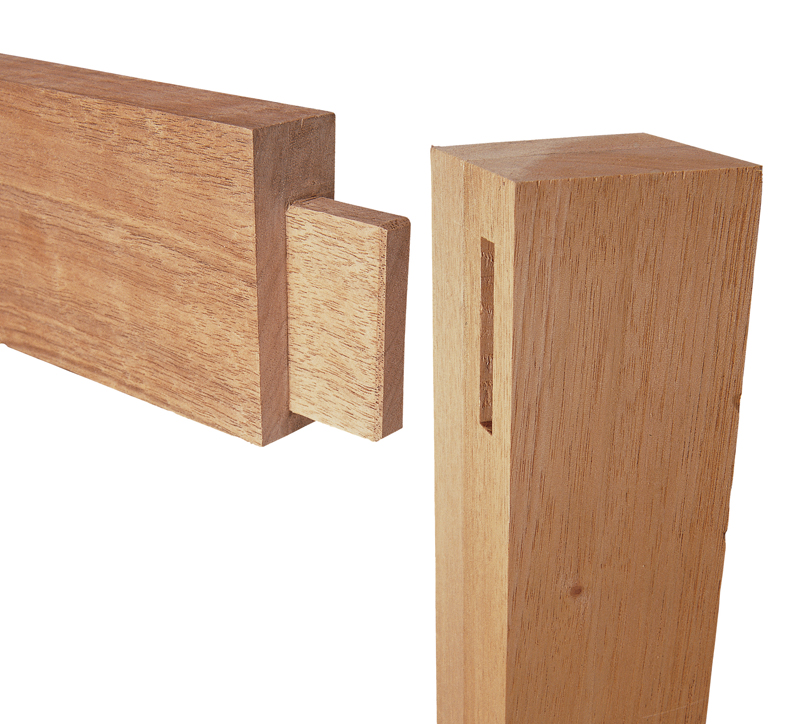
Mortise and tenon joinery is the
heart of many classic furniture
projects. It’s an incredibly strong,
time-tested method of connecting
boards. Making these precisely fit
joints can be fussy and demanding
work. But it doesn’t have to be.
There are at least a dozen ways
to cut tenons.We’ve chosen a
technique that delivers the goods
every time, whether you’re a
beginner or seasoned pro. It’s
simple, safe and economical. Best
of all, this technique will save you
a lot of set-up time. Rather than
fit tenons by trial and error for
each project, you can easily
reproduce the same size tenons,
time after time.
What you’ll need:
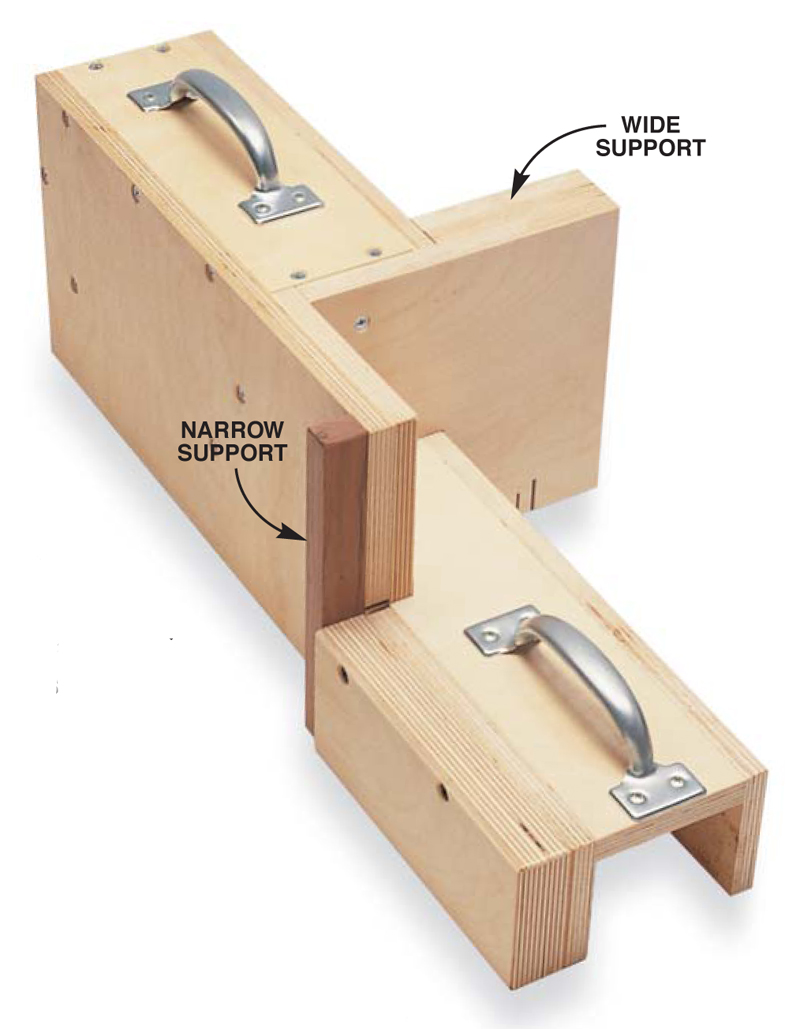
A Tenoning JigYou can buy a commercial jig or make a better one Features: – Large capacity.The 8-in.-tall sides are high – Dedicated sides. No commercial jig offers this – No tear-out. None.A backer board prevents annoying – Safe operation. Generous handles keep your hands out of |
Click on any image to view a larger version.
|
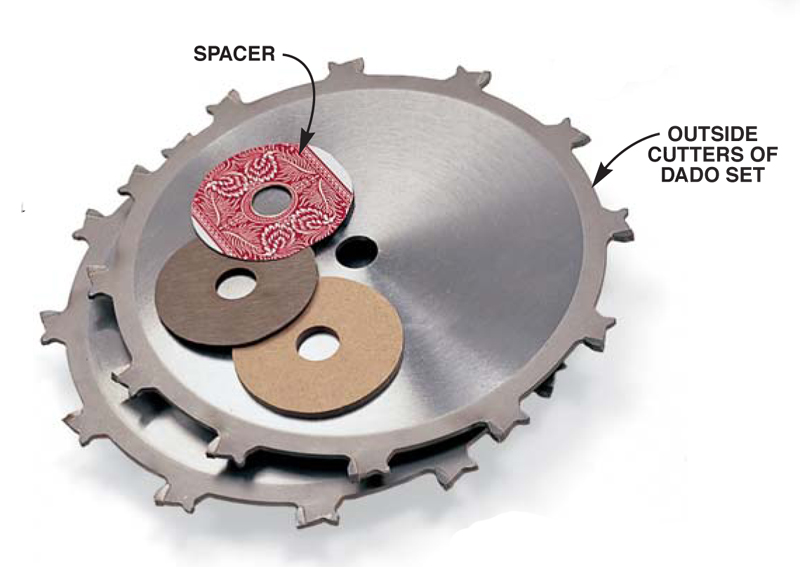
Two Saw BladesMake smooth-sided tenons with a |
 |
A Zero-Clearance
|
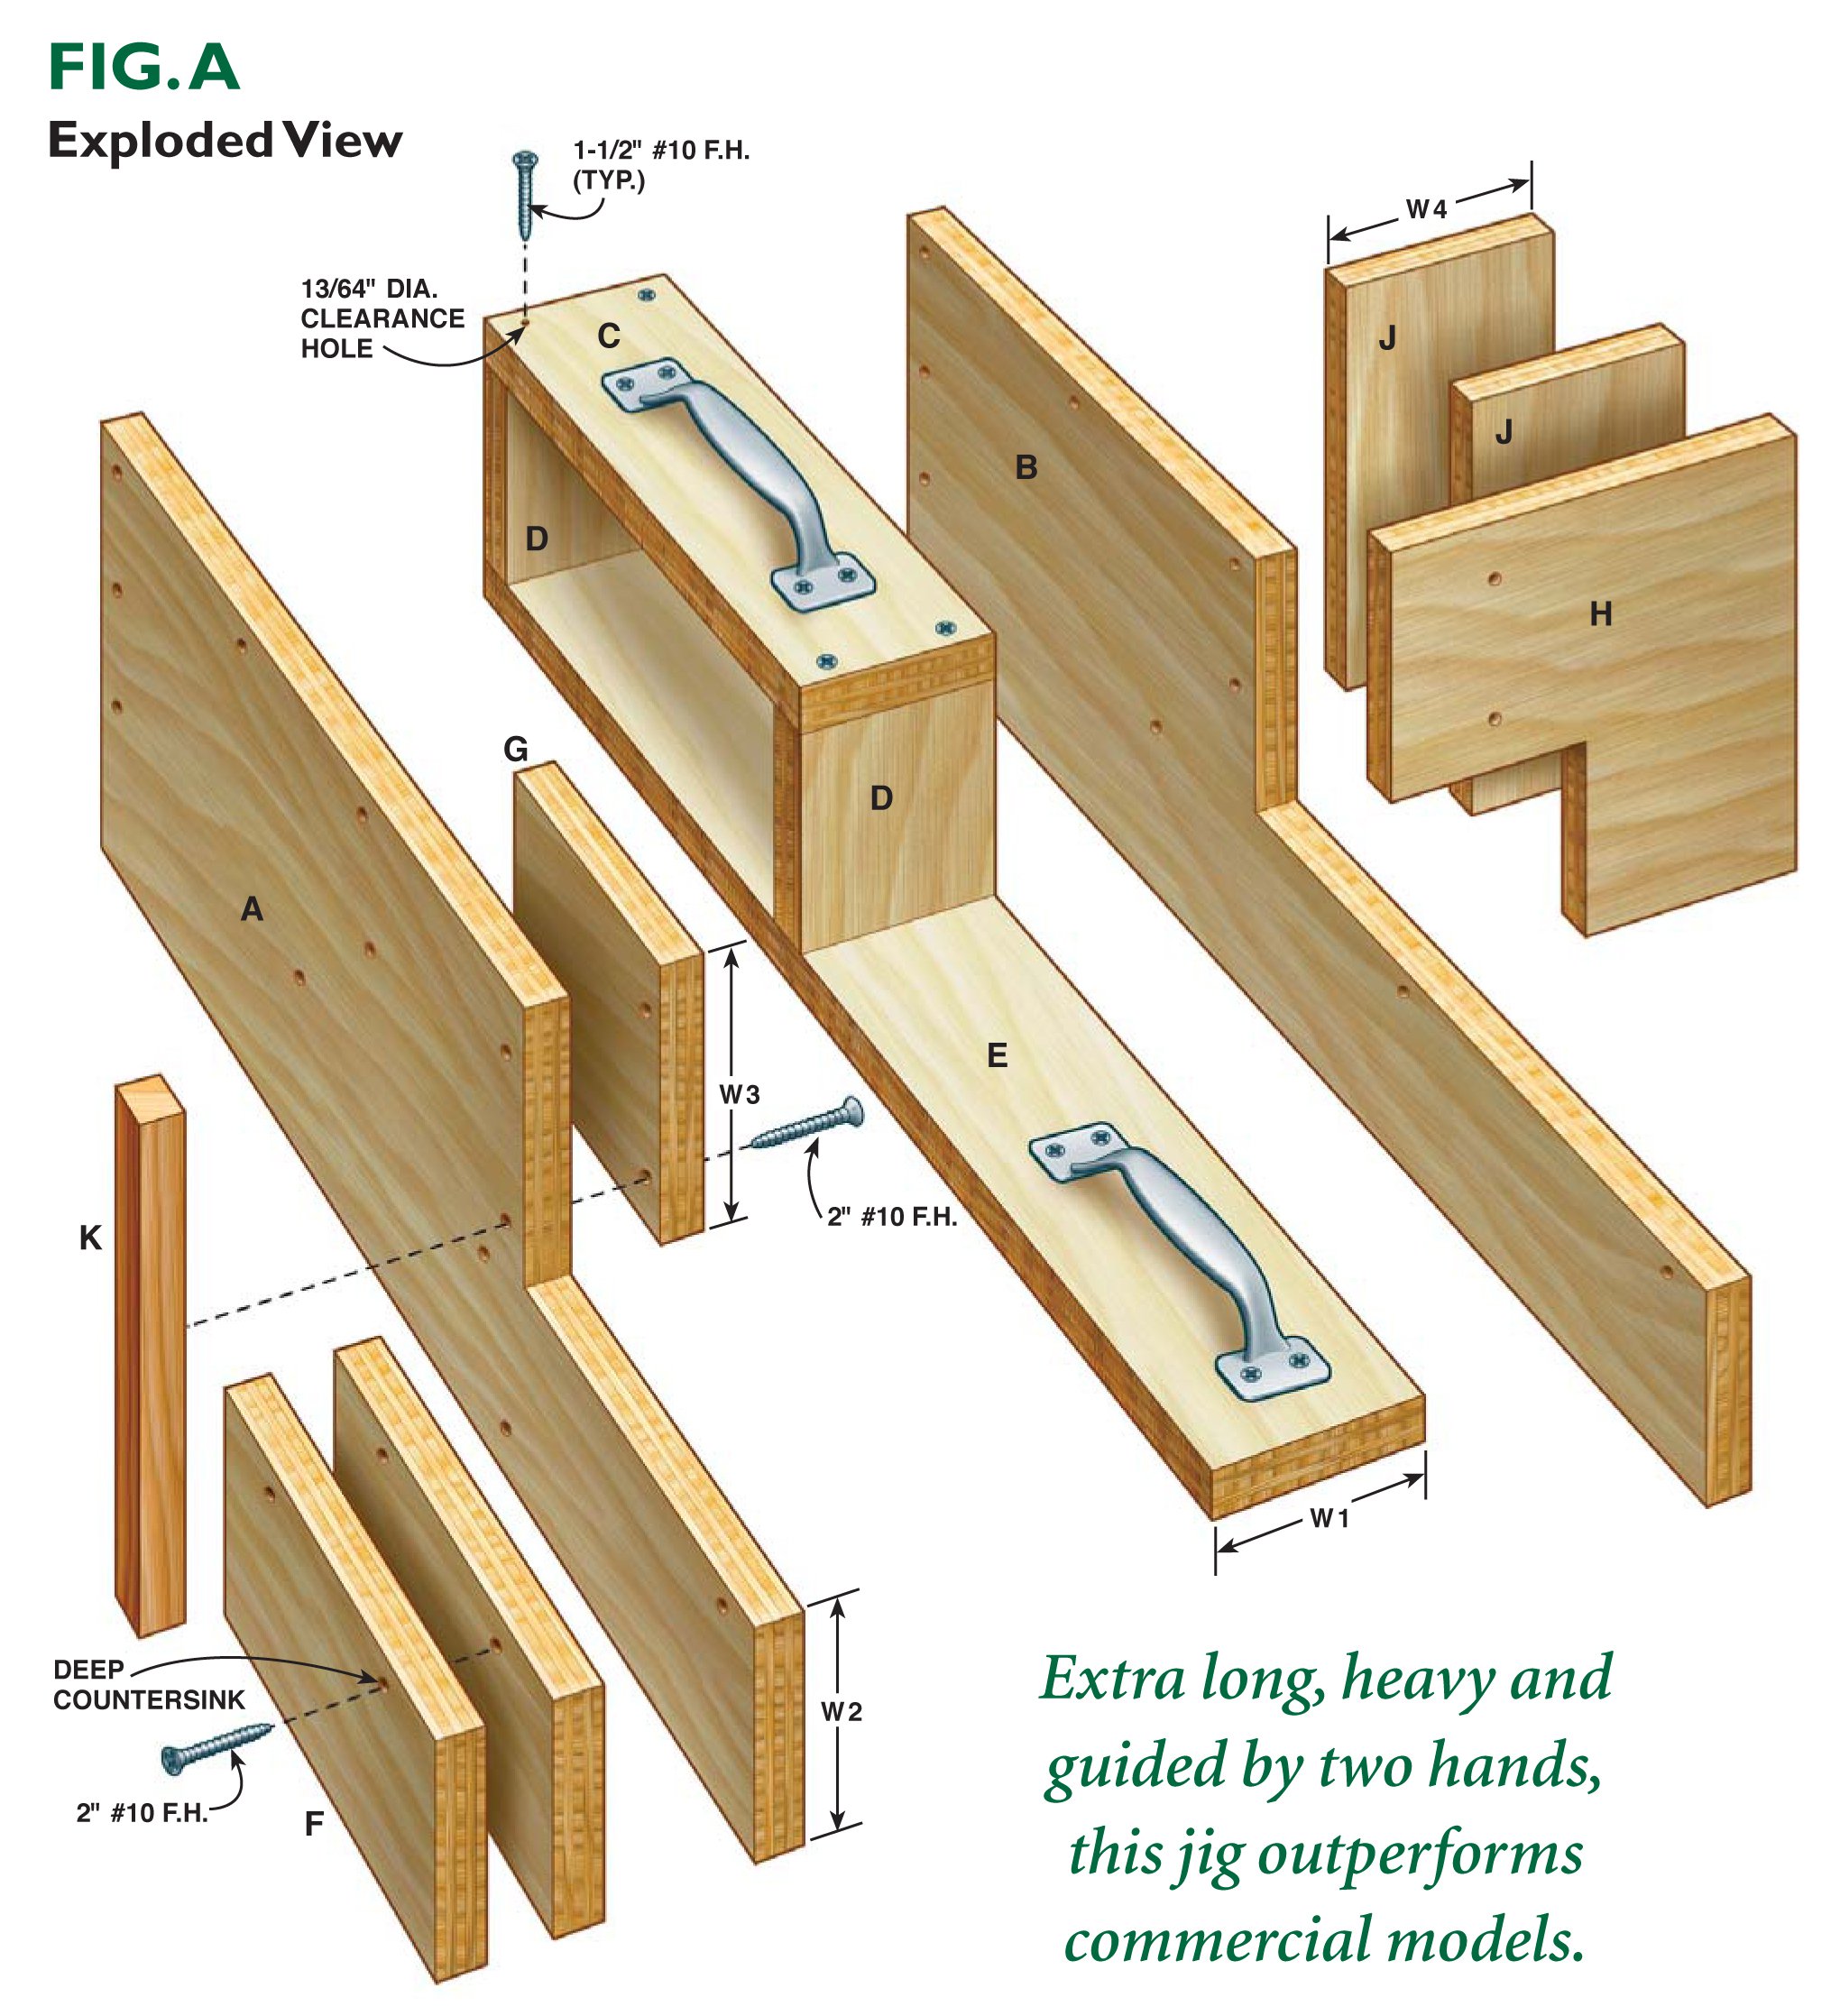
Build the JigOur jig rides on top of your tablesaw and is guided by the – Drill all the 13/64-in.-dia. clearance holes in the jig with – Creep up on the width of boards C, D, and E. For your – If your jig is too tight, shim the edges of boards C, D and – Clamp the jig together and make sure it’s square to the |
Cut the corners of the jig on the tablesaw (Detail 2). |
Getting Started
Mill all your stock straight and square, and boldly mark the face and edge of each piece.
Usually the face side is the outside of a rail and the reference edge is the top of a rail.
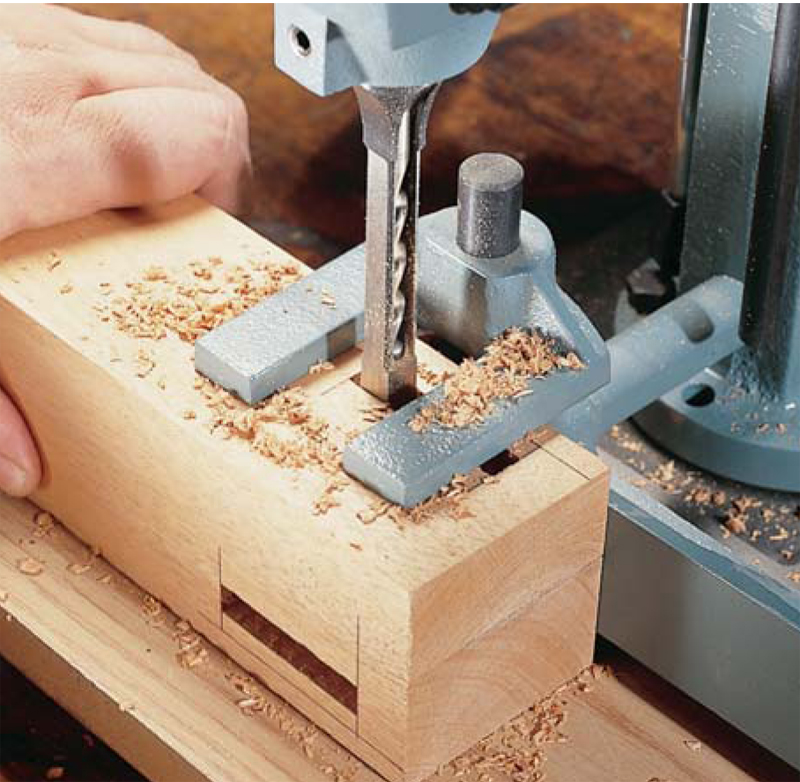
| 1. Make the mortises first. It doesn’t matter whether you use a mortising machine, a router or a drill press. It’s far easier to fit a tenon into a mortise than it is to customize a mortise to fit a tenon. |
 |
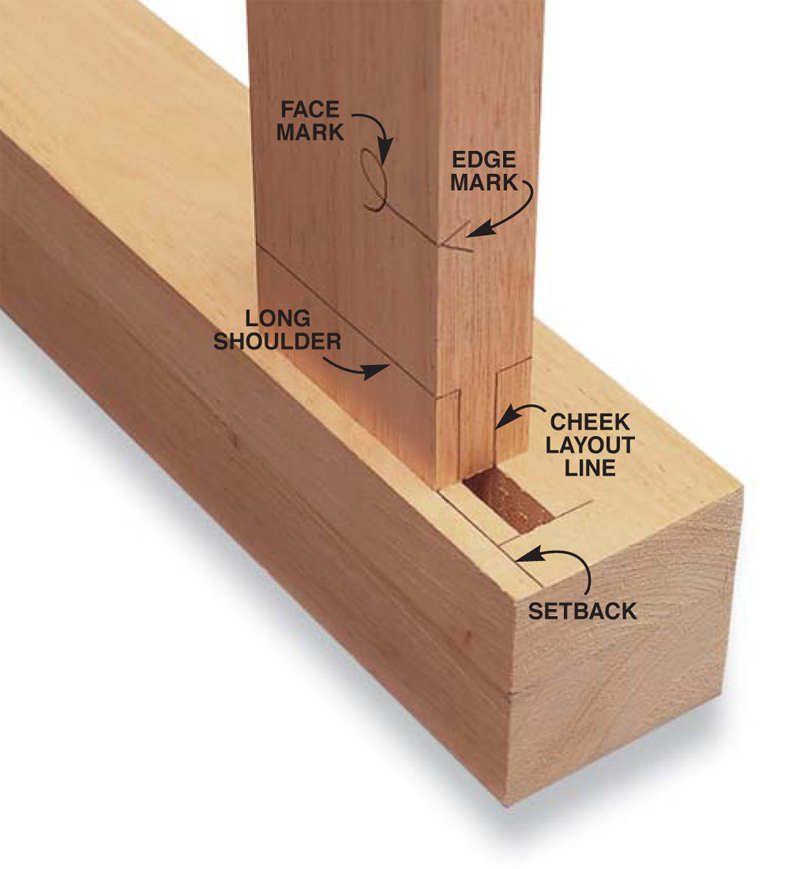
| 2. Lay out the tenon’s cheeks directly from the mortise.This joint won’t be flush, so first you must draw a line representing the setback of the rail from the front of a leg or a stile. Draw lines across the face and edge of the rail |
 |
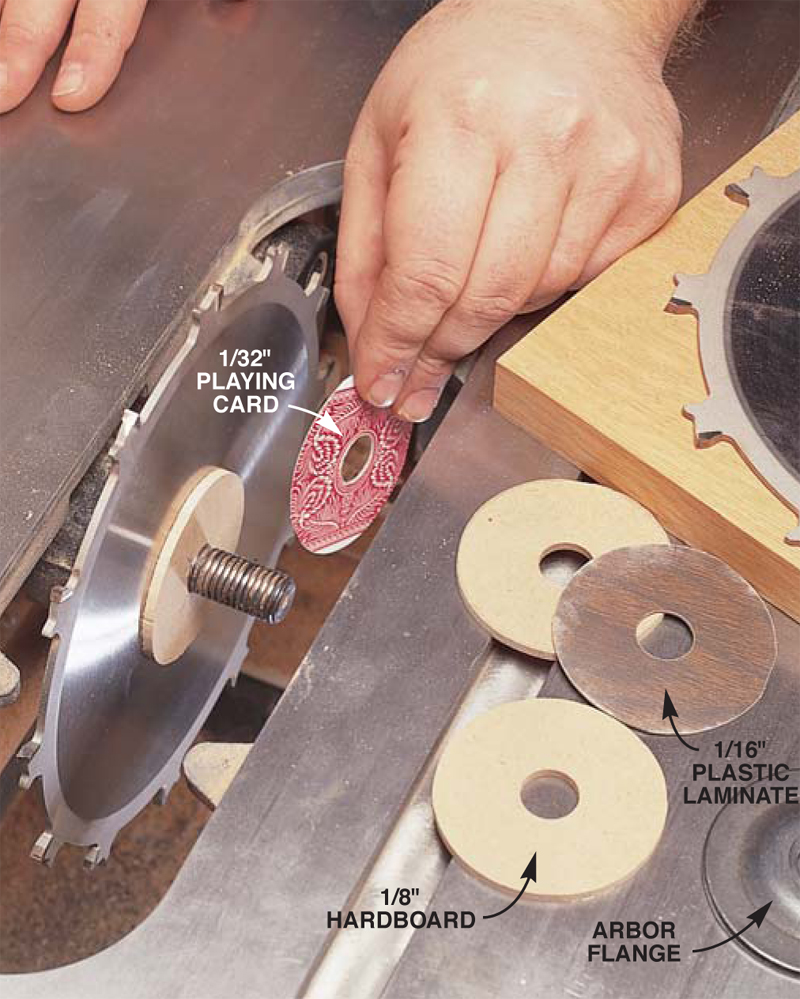
| 3. Install homemade spacers between the saw blades.You’ll need three different kinds of spacers to fit every size tenon (approximately 1/8 in., 1/16 in. and 1/32 in. thick). Make them the same diameter as the flange on your saw’s arbor.The best way to figure out the right mix of spacers is by trial and error, making tenons in scrap wood. Fortunately, if you save and label the spacers you should only have to go through this process once. |
 |
Cut the Cheeks
One pass through your ganged-up saw blades and you’ve cut both sides of the tenon.
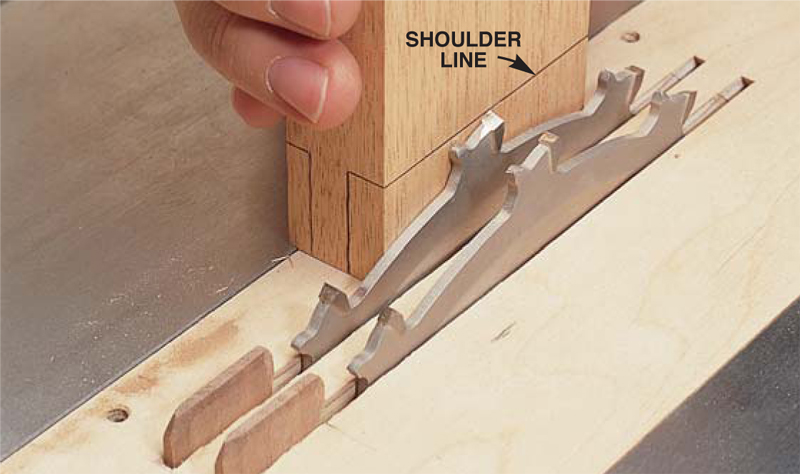
| 4. Raise the blades to match the shoulder line on your rail. |
 |
| 5. Clamp the rail to the tenoning jig, face side in, and adjust the tablesaw’s fence so the layout marks line up with the two saw blades. |
 |
| 6. Rip the cheeks. Slide the jig through the cut, then pull the jig back and unclamp the rail. Rip all your tenons. Make sure the marked face of each of your rails is the face you clamp against the jig. When you’re done, remove the double blades from the tablesaw and install a crosscut saw blade. |
 |
Cut the Long Shoulders
Make perfect, tight-fitting shoulders with a crosscut saw blade.
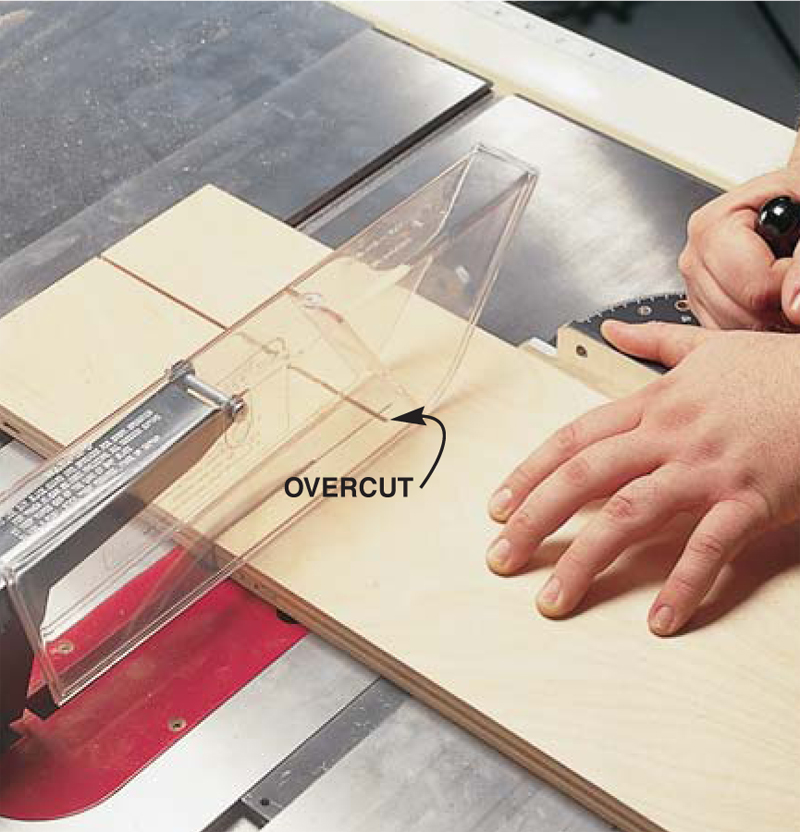
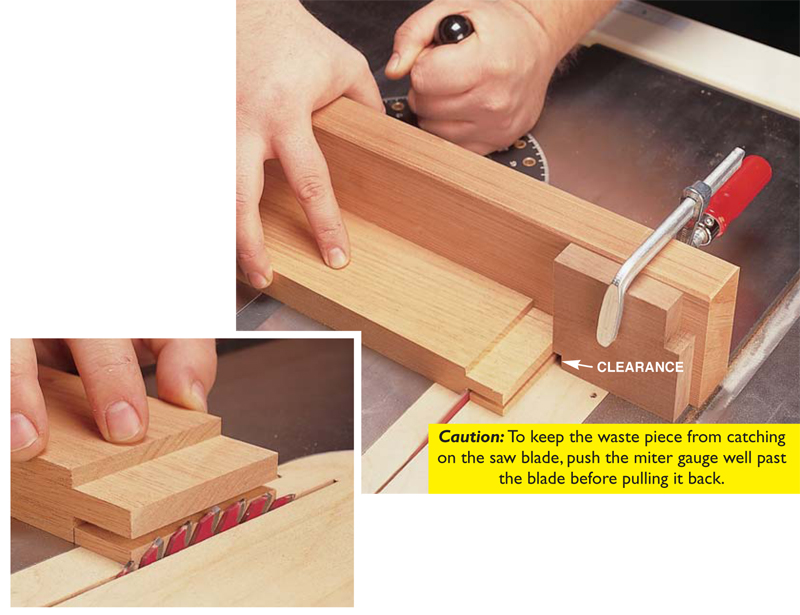
| 7. Cut the long shoulders. Set up your miter gauge with a fence, and clamp a stop block to it. Raise the stop block above the waste piece so the waste won’t get trapped. Cut all the shoulders on Raise the blade |
 |
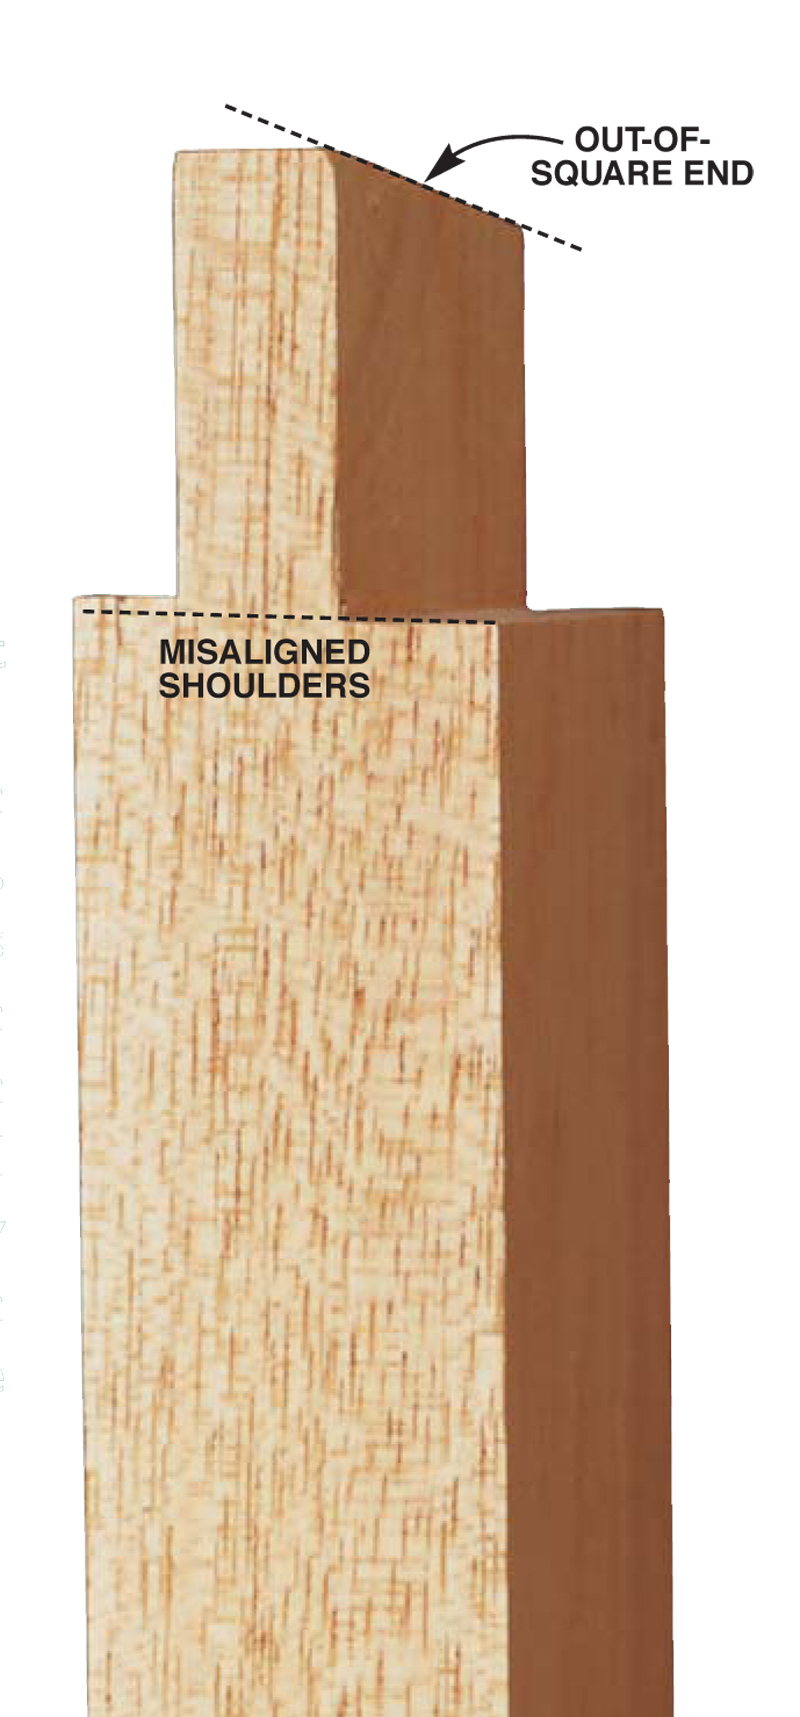
Oops!My shoulders are drooping! The fix? I bought a premium |
 |
Cut the Tenon’s Width
Make two rip cuts on the right side of the tenoning jig.
They establish the tenon width.
| 8. Mark the width of the tenon directly from the mortise. |
 |
| 9. Rip the tenon to width. First, move the fence to the left side of the saw blade. Clamp the rail to the right side of the tenoning jig and adjust the fence until the blade lines up with the marks. Raise the |
 |
Cut the Short Shoulders
Sawing all four shoulders flush isn’t realistic. Don’t push your luck! Finish them with a sharp chisel.
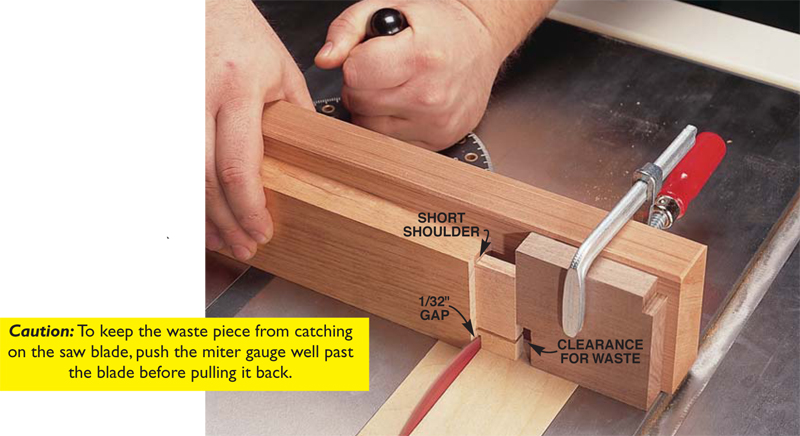
| 10. Rough cut the waste pieces on the tablesaw. Position the stop block so the short shoulders are proud by 1/32-in. or so. In theory, it’s possible to make this cut precisely flush, but in practice it’s darned hard. Don’t risk messing up your crisp shoulders! |
 |
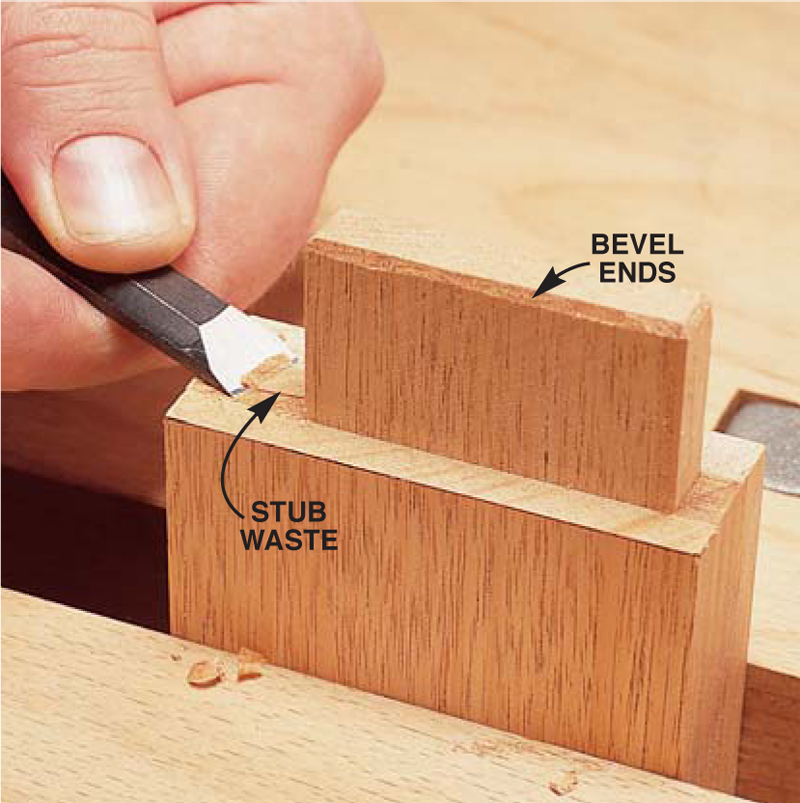
| 11. Remove the stub waste with a chisel.This paring requires a keen edge, but if you cut too deep, it won’t show. Bevel the ends of the tenon with a file so it will easily fit in the mortise. |
 |
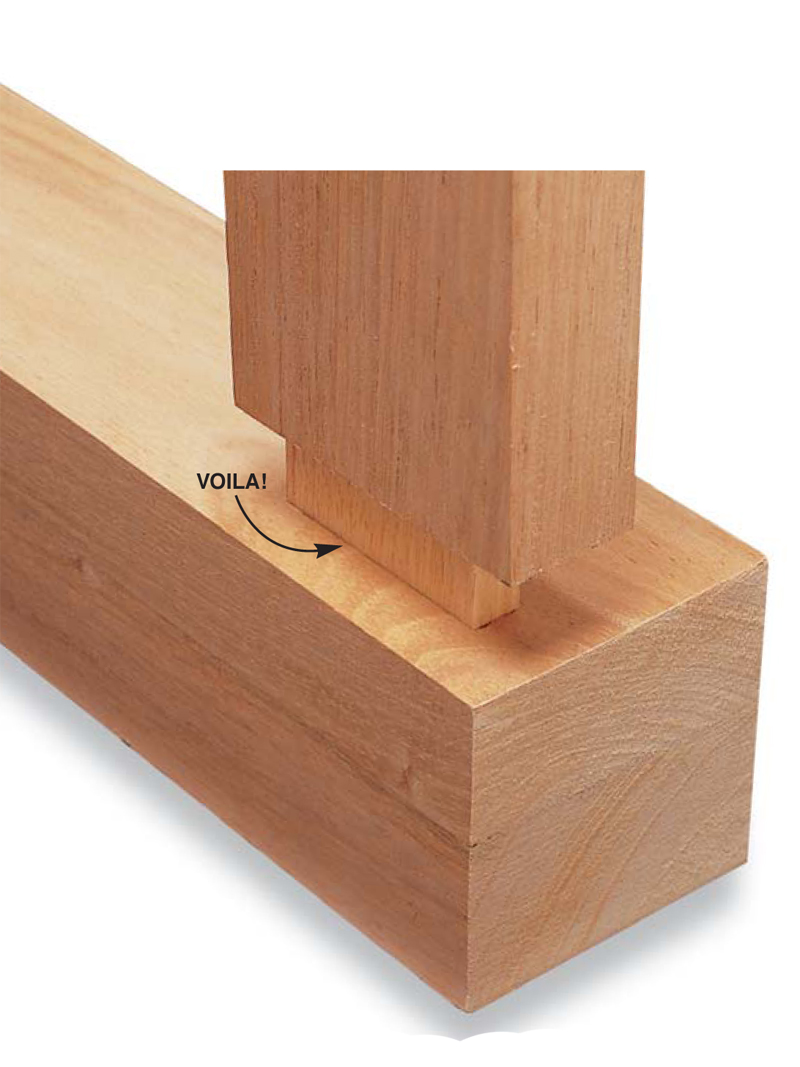
| 12. Test the fit. If your tenon is too wide to fit into the mortise, it’s easy to go back and trim off one side with the tenoning jig. If it’s too loose, glue the waste pieces back on and cut again. |
 |
Cutting List
This story originally appeared in American Woodworker August 2001, Issue #88.
|
Fig. A: Exploded View
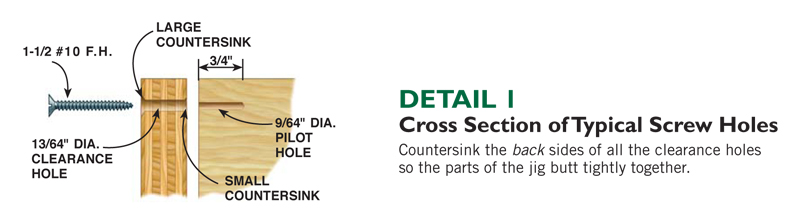
Detail 1: Cross Section of Typical Screw Holes
Detail 2: Side Views of Pieces A and B
|


Here are some supplies and tools we find essential in our everyday work around the shop. We may receive a commission from sales referred by our links; however, we have carefully selected these products for their usefulness and quality.