


We may receive a commission when you use our affiliate links. However, this does not impact our recommendations.
Precision 3-Wall Scribes
A simple template guarantees a perfect fit.
By Brad Holden
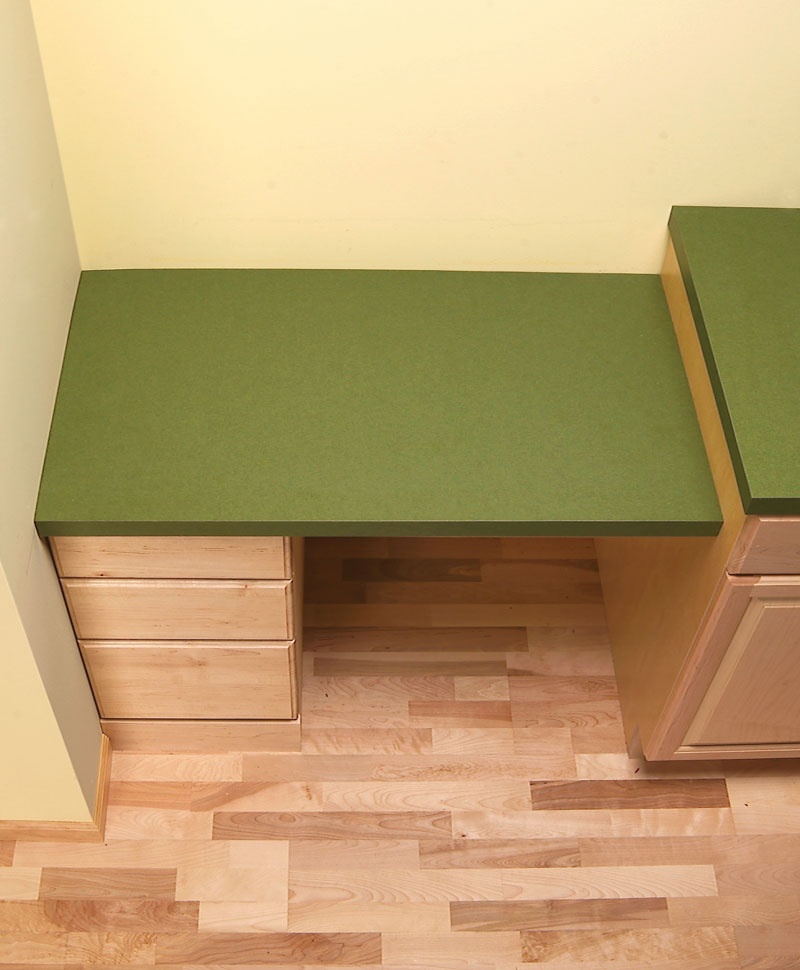
Fitting a countertop between two side walls and a back wall is one of the most challenging installations you will ever face. Experienced cabinetmakers can do this with ease by marking and scribing straight to the countertop, but they have years of experience. I take a more roundabout approach, but it’s virtually goof-proof.
I prefer to make a template of the opening and rout my top to match. This prevents trimming too much from any side, which would create a gap that can’t easily be repaired. I’ll show you a simple method for making this template using a kitchen desktop that butts against a cabinet, a side wall and a back wall as an example. I installed this desktop with no backsplash. If you intend to install a backsplash, you don’t need a precise scribe on the back edge.
Materials
You’ll need a piece of plywood or MDF slightly smaller than the countertop opening—about 1/4 in. less at each side and the back is sufficient. This board will be your template’s base and will rest on top of the base cabinets or wall cleats. You’ll also need three guide boards of any 1/4-in.-thick material. Cut them about 4 in. wide. Make two a couple inches longer than the countertop’s depth and one a few inches shorter than the countertop’s width.
Make the template
Lay the template base on top of the cabinets or cleats and temporarily secure it with a couple of screws (Photo 1). Position one guide board on either the left or right end and push it up against the side and back wall (Photo 2). Next, you’ll need a washer whose rim is big enough to span the widest gap between the wall and the guide board. Put your pencil tip in the washer’s hole and draw a line on the guide board, letting the washer follow the wall’s contour (Photo 3). Clamp the guide board to your workbench, and use a belt sander to sand down to the line (Photo 4). Check the fit against the wall. When you’ve got a snug fit, screw the guide board to the template (Photo 5). Repeat the same steps on the guide boards on the other side and on the back. Cut the back guide board so it fits between the two side guide boards.
Make a mark on the side guide boards to indicate where you want the front edge of the countertop to line up (Photo 6). Then, remove the template assembly and set it on the countertop to be trimmed. Line up the marks you made with the front edge of the countertop, and clamp the template in place (Photo 7). Note: Build your countertop about 3/8 in. larger in width and depth than the opening.
Rout the top
Using a top-bearing pattern bit with a cutting length at least 1-1/2 in. long, trim around the template (Photo 8; see Sources, below). Stop short of the front left corner so you don’t blow it out, and carefully finish the cut with a belt sander (Photo 9).
Tilt the countertop into place (Photo 10). It should fit snugly, but if it’s too tight, you may need to adjust the fit slightly. To do this, reattach the template slightly off center and rout the exposed edge to gain a little clearance. If you follow these steps carefully, you’ll end up with a perfect fit.
Click any image to view a larger version.
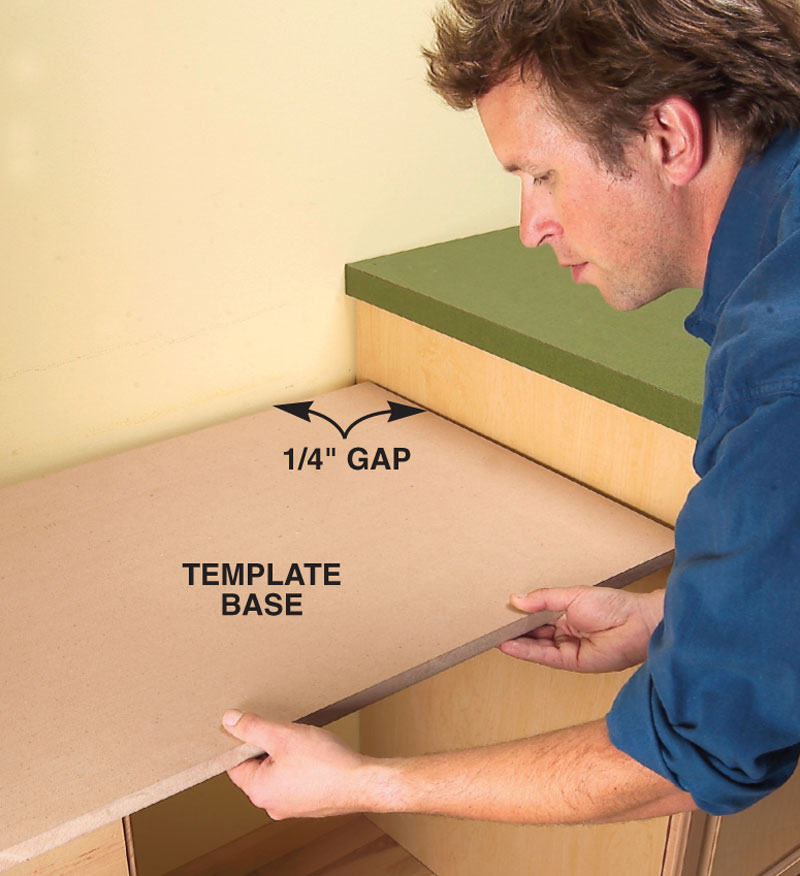
1. Three-wall scribes are tricky because both ends and the back of the countertop all have to fit snugly. My technique removes most of the difficulty by starting with a loose-fitting template base. I’ll scribe three guide boards, one for each wall, and screw them to the template base.
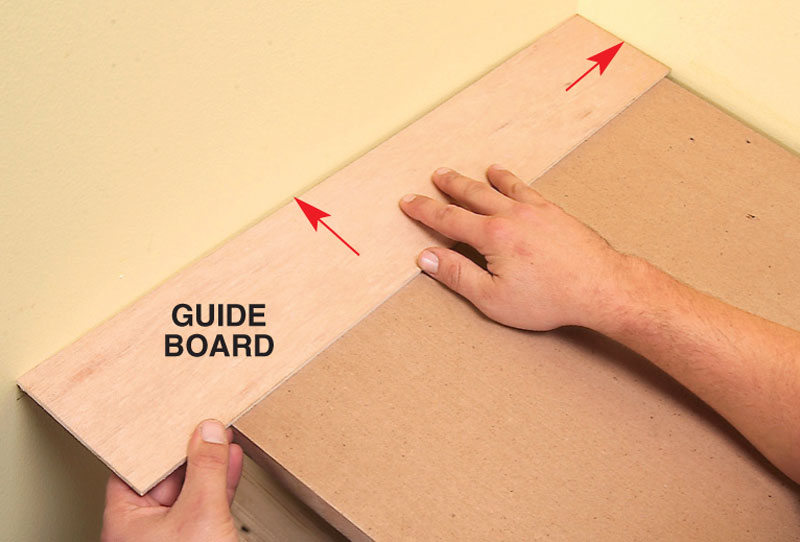
2. Position the first guide board on the template base by sliding it up against both the side and back wall. It must be long enough to overhang the front of the template base by a couple of inches.
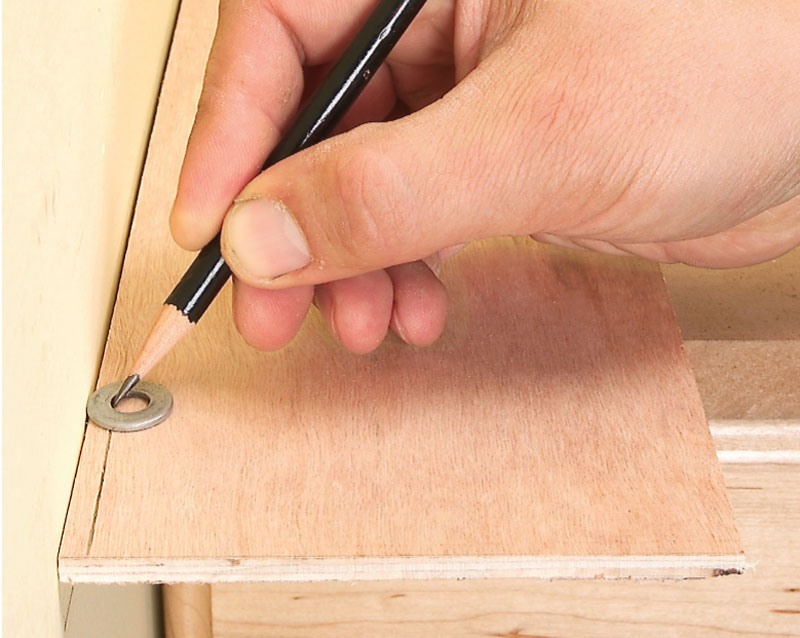
3. Along the side and back wall, mark a scribe line on the guide board using a pencil and a small washer. The washer follows any bumps or curves in the wall. Repeat this step with a second guide board on the other side.
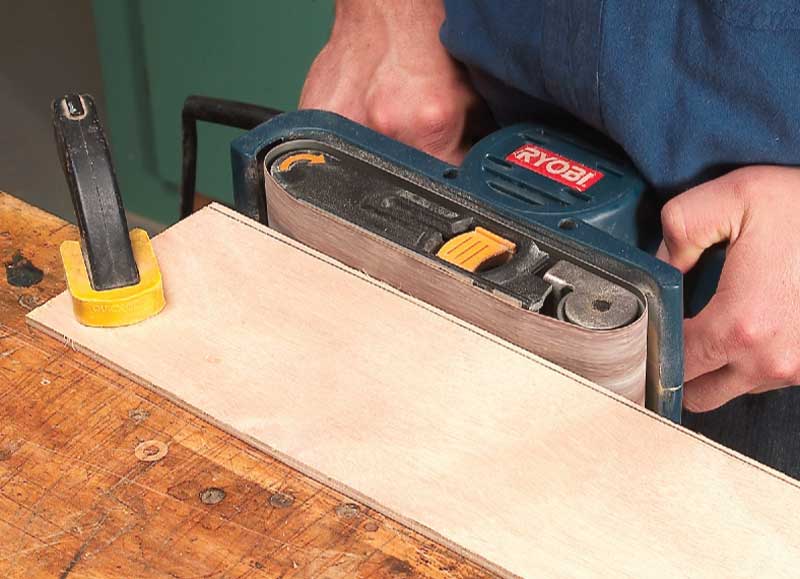
4. Clamp the guide board on your workbench and carefully sand to the pencil line. When you’re done, check the fit against the wall. The beauty of this method is that if the fit’s not quite right, you can just mark and sand again.
5. Screw the scribed side guide boards to the template base. Mark, sand and attach the back guide board last, because it butts between the two side guide boards.

6. Mark both side guide boards at the exact point where you want the front edge of the countertop located. This mark will be used to accurately align the guide boards on the countertop.
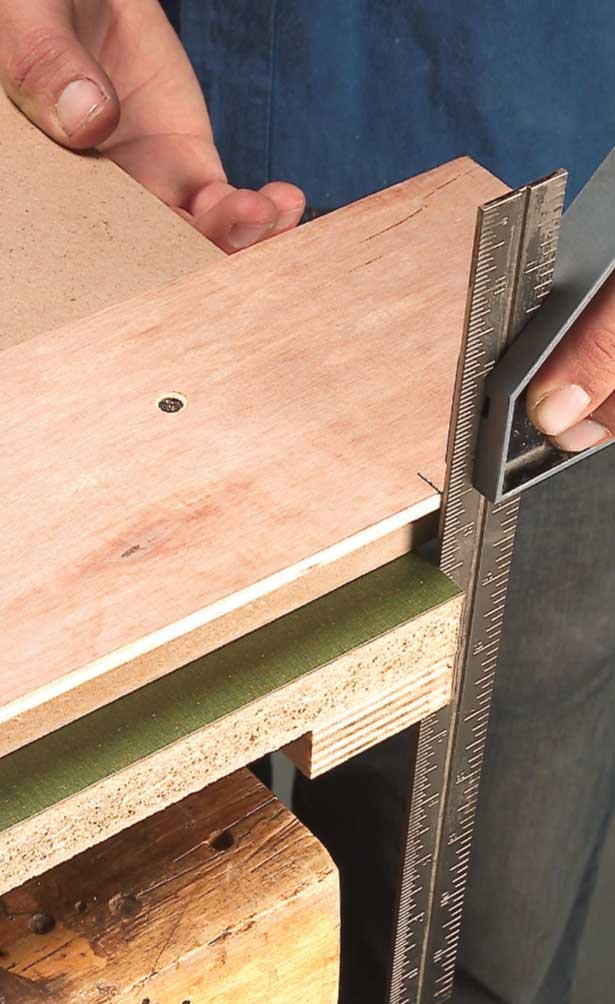
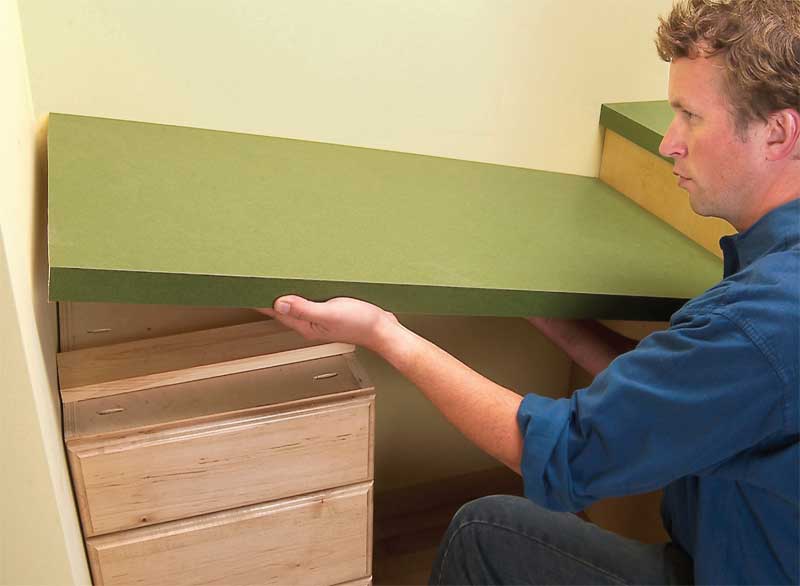
7. Use a square to align the countertop’s front edge with the marks on the side guide boards. The countertop must be slightly larger than the template assembly.
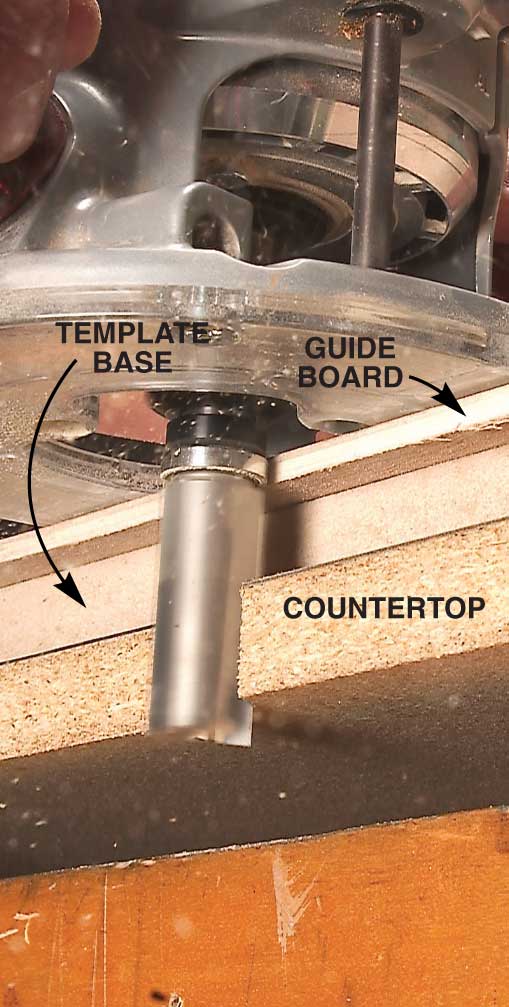
8. Rout the countertop’s finished shape using a topbearing pattern bit. Start at the countertop’s front right corner and rout counterclockwise.

9. Stop routing short of the front left corner and use a belt sander to remove the remaining material. This prevents the router bit from chipping out the front edge. A piece of masking tape provides a clear mark where to stop sanding.
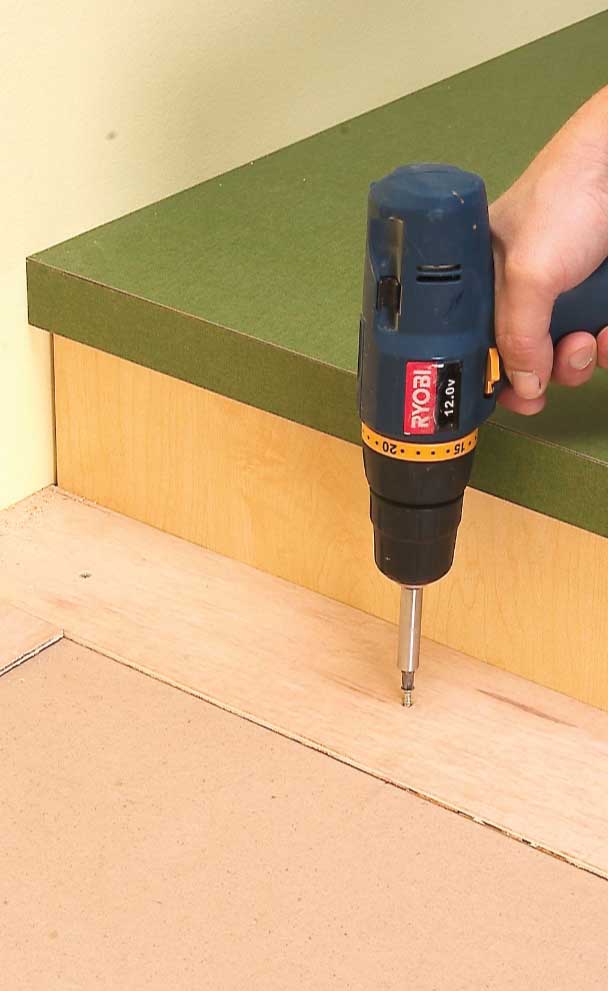
10. Tilt the counter into place. Fasten it with screws from underneath through the top of the base cabinet. A wood cleat screwed to the right-hand cabinet supports this top on the right side.
Source
Note: Product availability and prices are subject to change.
Router Bit World, routerbitworld.com, 800-630-2260, Amana Top bearing 3/4-in.-dia. plunge bit, #45465.
This story originally appeared in American Woodworker February/March 2007, issue #127.
Here are some supplies and tools we find essential in our everyday work around the shop. We may receive a commission from sales referred by our links; however, we have carefully selected these products for their usefulness and quality.


