We may receive a commission when you use our affiliate links. However, this does not impact our recommendations.
Perfect Butt Joints in Laminate
An underscribe router attachment guarantees success.
By Brad Holden
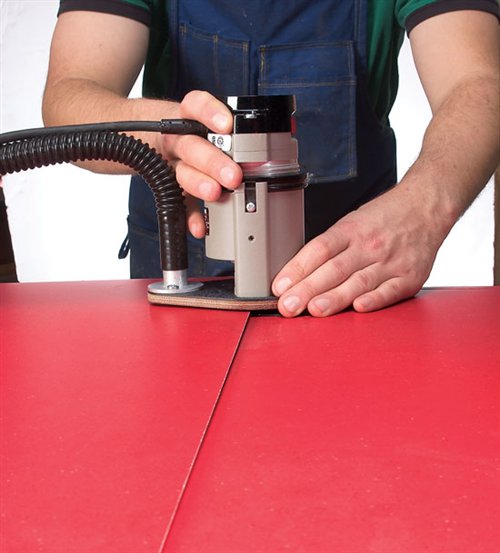
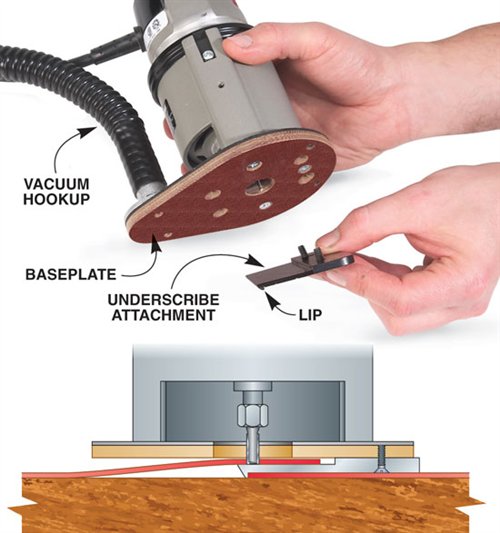
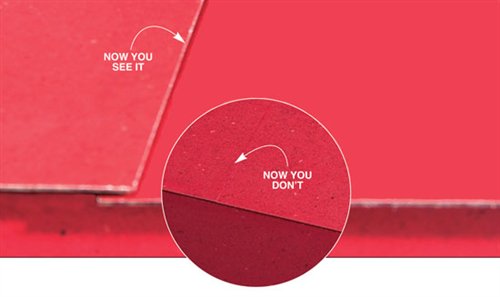
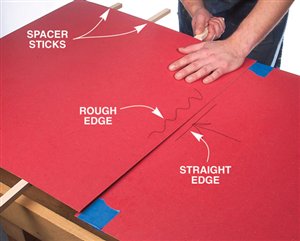
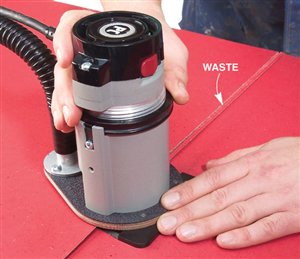
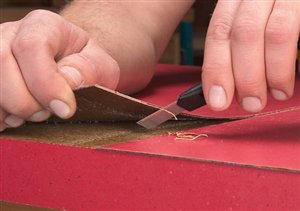
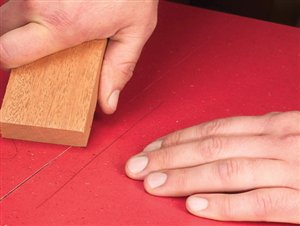
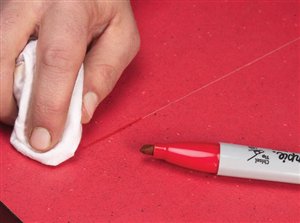
| Long countertops or those that turn corners need butt joints. You can use several methods to make this joint, but the easiest way to get tight-fitting, professional-looking results is with an underscribe attachment on a trim router. The term underscribe refers to the attachment riding under the piece being scribed. The cut is guided by a small lip on the underside of the attachment that follows the straight edge on the bottom piece of laminate (see Fig. A, below). 1. Start by making a couple of small (approximately 12-in. x 12-in.) test countertops from scraps of the same laminate you will use in your finished project. Using the same kind of laminate is important, because even a small difference in laminate thickness will affect the accuracy and fit of the final joint. Use the test countertops and Steps 2 through 9, to set up the underscribe attachment. Rout an inch or two on one of the test tops, check the fit and adjust the underscribe base as necessary. The base has built-in micro-adjusters, so fine-tuning is simple. When you have the perfect fit, run one more test cut using the entire joint on one of the test countertops. You will only get one shot at your project, so now is the time to fine-tune the attachment to perfection. 2. Rout a straight edge on one piece of laminate (Photo 1). You’ll end up with a small burr on the bottom edge of the laminate. Remove the burr with a file, so the laminate will glue down completely flat. Mark a straight pencil line along this straight edge. The lip on the underscibe attachment rides on this edge and guides the router through the cut. As a result, this first piece of laminate is called the guide piece. Mark the adjoining edge on the second piece of laminate with a wavy line to show that it has a rough edge (Photo 2). 3. Position the guide piece on the substrate without adhesive and make a pencil line on the substrate along the laminate’s straight edge. Next, lay down the second piece, overlapping the guide piece by 1/4 in. to 3/4 in. Use pieces of masking tape to mark this overlap. 4. Remove the laminate pieces from the substrate and apply adhesive to all parts. 5. Reapply the guide piece of laminate, making sure it lines up with the pencil mark you traced onto the substrate in Step 3. Use spacer sticks to prevent it from sticking until you have the laminate aligned. Pull out one stick at a time, starting with the edge closest to the pencil line. Use a laminate roller to make sure the laminate is thoroughly pressed down. 6. Apply the overlap piece using the same method. Line it up with the tape on the guide piece, remove the spacer sticks, and roll it down. Roll as close to the seam as you can. This helps prevent chips from getting under the laminate when you rout the seam. Also, a vacuum attachment is available for the underscribe attachment. It removes almost all the debris as you rout the seam so is well worth the money (see Source, below). 7. Clean the laminate surface and your router base, because a small piece of debris between the router base and the laminate could cause a nasty scratch. A little paraffin wax on the router base helps it to slide easily. You’re now ready to rout the joint (Photo 3). With the router turned off, position the lip of the underscribe attachment firmly against the straight edge on the guide piece (Fig. A). Turn the router on only after you’re sure it’s positioned properly. Maintain contact between the lip and the guide piece throughout the cut. 8. Use a utility knife to remove the burr from the bottom edge of the newly trimmed piece (Photo 4). Flick the waste away from the bottom of the joint as you go. Also peek under this piece for any stray chips and remove them. It’s paramount that you leave no chips under this piece of laminate or it will not push down level with the first piece. 9. Snap the trimmed piece into place using a wood block with a rounded edge (Photo 5). Use a laminate roller to press the seam down thoroughly. 10. Hide the seam with permanent marker or an oil stain in a color similar to the laminate (Photo 6). Wipe the seam with a solvent, such as denatured alcohol or lacquer thinner, to remove any excess marker or stain on the surface of the laminate.
Fig. A: Underscribe Attachment DetailThe underscribe attachment has a lip that rides on the
SourceBetterley Industries Inc., betterleytools.com, 800-871-7516, |
Click any image to view a larger version.
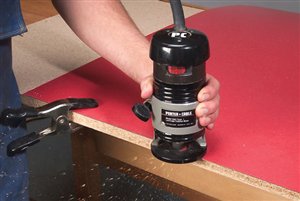
1. The first step to making a perfect plastic-laminate butt joint is to rout a straight edge on one piece of laminate. Use a straight board as a guide and a flush-trim bit to make the cut.
2. Apply both pieces of laminate to the substrate. The piece with the straight edge goes down first; the second piece overlaps it by a small amount. Spacer sticks prevent the laminate from sticking to the substrate, making it easy to align the parts.
3. Rout the joint. Keep the underscribe attachment’s lip in constant contact with the bottom piece’s straight edge while routing and keep the attachment firmly against the laminate surface.
4. Shave the burr off the bottom edge of the overlap piece with a utility knife.
5. Press the overlap piece into place using a block of wood. The piece should fit snugly and snap into place.
6. Hide any trace of the seam by applying permanent marker or an oil stain of similar color to the laminate. Wipe off the excess with solvent and a rag. |
| This story originally appeared in American Woodworker March 2006, issue #120. |
Here are some supplies and tools we find essential in our everyday work around the shop. We may receive a commission from sales referred by our links; however, we have carefully selected these products for their usefulness and quality.


