We may receive a commission when you use our affiliate links. However, this does not impact our recommendations.
Touch up: Repairing a Damaged Finish
Hide blemishes without refinishing.
Touch up refers to techniques used to repair and disguise damage on already finished wood—without refinishing. Whether you’ve rubbed through a finish, discovered glue spots or putty patches that stick out, or been faced with damage to the wood itself, knowing how to touch them up can save the day. Read on to discover the tools and techniques needed to masterfully disguise dings, dents and other blemishes.
Touch-up tools
I’d like to tell you that you can just buy two or three felt-tip pens and a bunch of spray cans. Sadly, that’s not the case. To accurately reproduce the wide range of colors that appear in finished wood, you’ll have to mix them yourself, like an artist.
To do this you’ll need to accumulate a variety of touch-up tools (Fig. A, below) and learn how to use them. You’ll also need good lighting. Ideally, you should perform touch-up work in the same lighting (fluorescent, incandescent, direct, indirect, etc.) under which the piece will be viewed. The next best choice is daylight, or artificial, full-spectrum light.
Repair the damage
If you are touching up a light sand-through or glue spot where both background color and grain are still intact, you can skip to the section called “Adjust the Color,” below.
Auto body filler is well suited for use in wood repairs. It is a catalyzed, highstrength adhesive that cures fast, smooths well and takes a finish. Drop it into the center of the damaged area with a palette knife and work it out to the edges to ensure a good bond (Photo 2). Add more to the center until the patch is over-filled. When the filler has started to harden, but before it has completely cured, shave it flat to the surface with a sharp chisel (Photo 3). If you notice any voids, simply add more filler and shave it down. After the filler has cured, sand it smooth with fine sandpaper, and you’re ready to begin the touch-up process.
Wood putty can also be used for repairs, just be sure it is one or two shades lighter than the lightest color you can see in the wood. It’s quite difficult to hide a darker patch—it always shows up as a shadow.
Seal first, then color
As a first step, and again in between each layer of color, seal the touch-up area with a bit of clear finish. This shows you the true color of the surface under a finish so you can match the touch up correctly. It also provides a base for each layer of color. I like to use thin, dewaxed shellac for the sealer, applied with a small brush, a cotton cloth formed into a pad, or a spray can. Let the sealer dry at least 10 minutes before you continue.
After sealing, check the background color. If it’s correct, go directly to the graining step. If the patch is too light, mix a color one shade lighter than the lightest background color in the area around the patch. Use a brush to create a small puddle of shellac on the mixing tray. Dip the brush into whichever pigments you need and add them to the shellac until you have a thin but opaque “paint,” thinning it with alcohol as needed. If it is too thick it will build up a “scab” of color. Apply the pigment and shellac mixture with a small brush, taking care not to make the touch up larger than it needs to be (Photo 4).
Add the grain lines
As before, seal the color coat and let the shellac dry. Simply put, adding grain lines is painting a picture of the wood onto the patch. Using your finest brush, mix a dark color to match the grain of the wood and copy the missing grain pattern (Photo 5). A good, red sable brush that comes to a fine, sharp point allows you to control the color in thin lines. Use short, careful strokes. If you are not comfortable with a brush, most suppliers also sell fine-point felttip markers specifically for graining.
Work on the graining until you are satisfied with it. If it starts to get away from you, “erase” it with some 0000 steel wool and start over. You can do this because you sealed the previous color coat. When you are satisfied with them, seal over the grain lines before continuing. Note: Even though you have not changed the background color, adding the grain lines makes the overall patch appear darker. That’s why you start with a background a shade lighter.
Adjust the color
Take a careful look at the spot, stepping back and viewing it from several angles. If the grain lines look right, but the patch is still too light overall, add a thin translucent layer of color to blend the spot. When you’re touching up a glue spot or an area sanded through that still retains the grain lines and background color, this will be the only step you need to take.
Mix a small amount of pigment into a puddle of shellac—just enough to tint it but not enough to make it opaque. Imagine that this “wash” is a translucent, colored film that you will lay on top of the patch. This wash should be a weak but fairly dark tint, since you are blending the color already there. For that reason, you should be able to add thin coats over the grain lines as well without making them lighter or muddier. You can also use touch-up markers, or even a mixture of alcohol-soluble dye and shellac instead of pigment. Take it slow on this step. It is easy to go too dark and undo all your fine artistic work.
When the touch up is virtually invisible, seal it again with several coats of shellac. Let the touched-up area dry overnight if you plan to add another type of finish. Make sure you have enough shellac over the last color coat to allow you to rub out the area to match the sheen of the rest of the piece (Photo 6).
One final comment: The object of touch up is to fool the eye by camouflaging the repaired area. The truth is you will always be able to spot your own touch up, no matter how good it is, but those who don’t know it’s there will never see it.
Fig. A: Touch-Up Tools
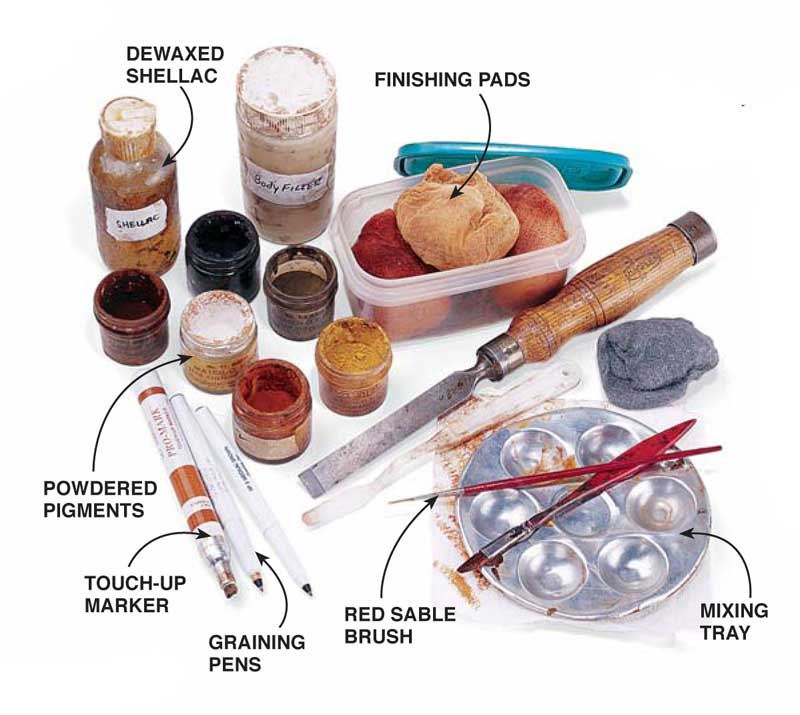
This versatile touch-up kit includes the usual tools for patching dings as well as those for disguising the patch: shelfstable powdered pigments; a mixing tray; fresh dewaxed shellac; one or more very fine, red sable brushes; graining pens; and furniture touch-up markers.
Click any image to view a larger version.
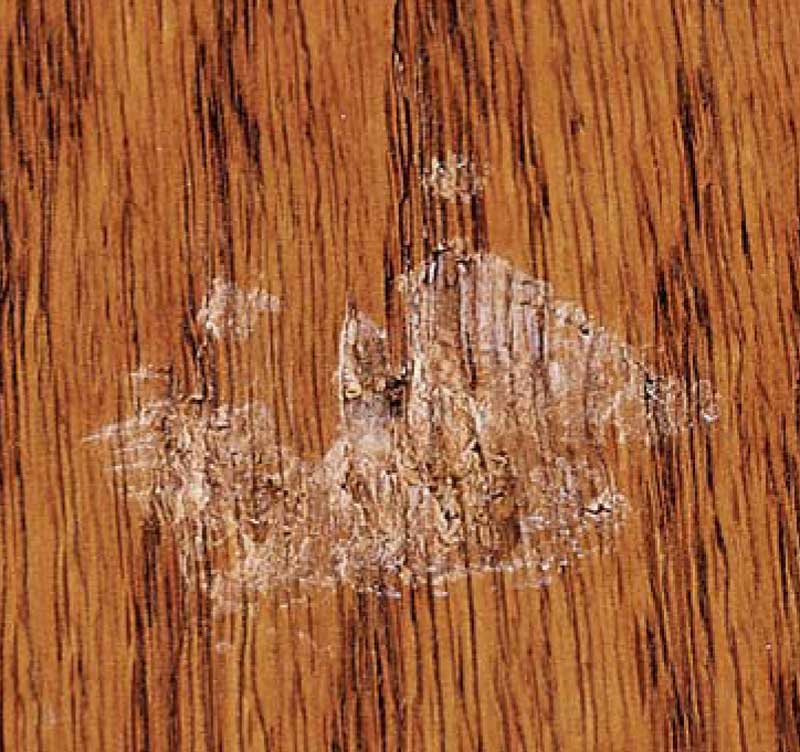
1. Oh, no! When a finish gets dinged, don’t panic. Damage like this can be touched up.
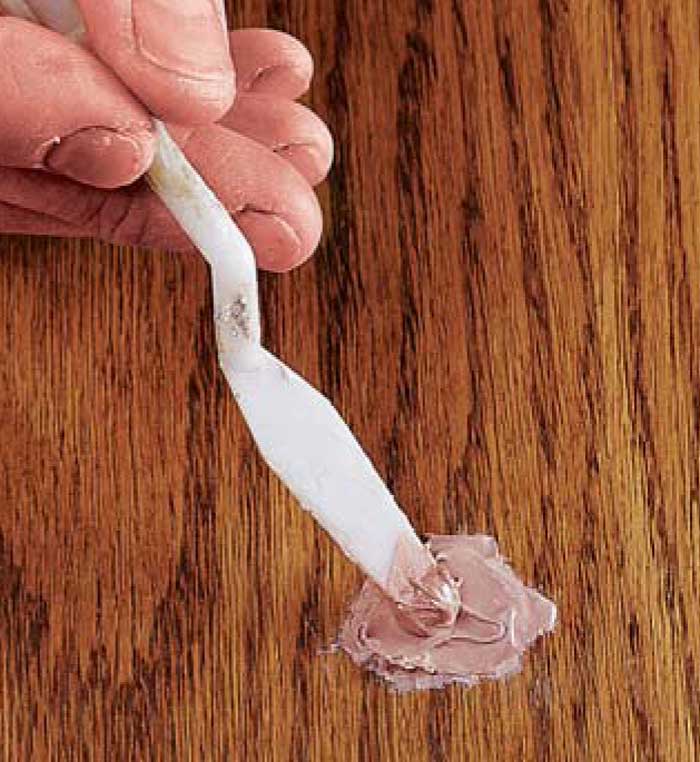
2. Fill the hole. Use a palette knife to drop auto body or wood filler into the center of the damaged area, then work it firmly to the edges.
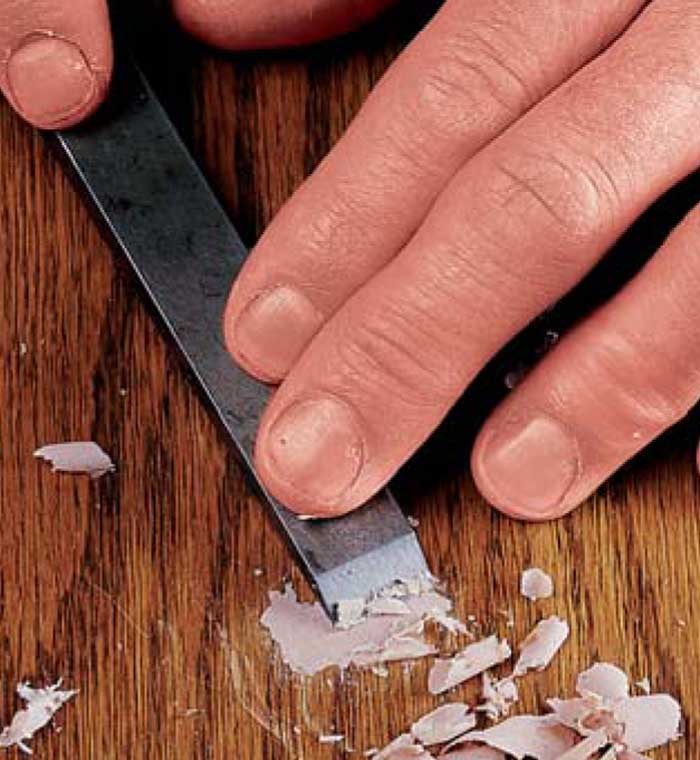
3. Pare the patch flush. A sharp chisel pares the semi-hardened body filler flush with the surface.
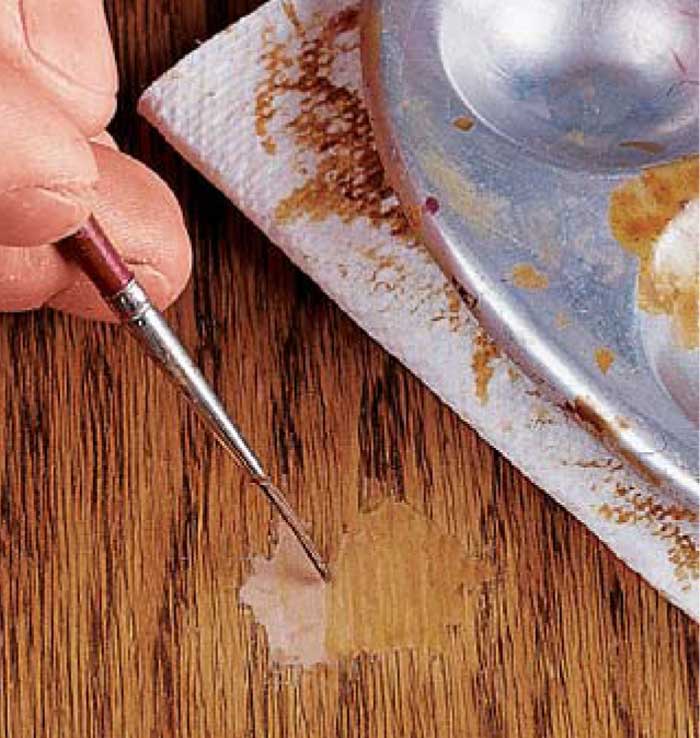
4. Add background color. Brush a thin, but opaque mix of powdered pigments and shellac to color the patch.
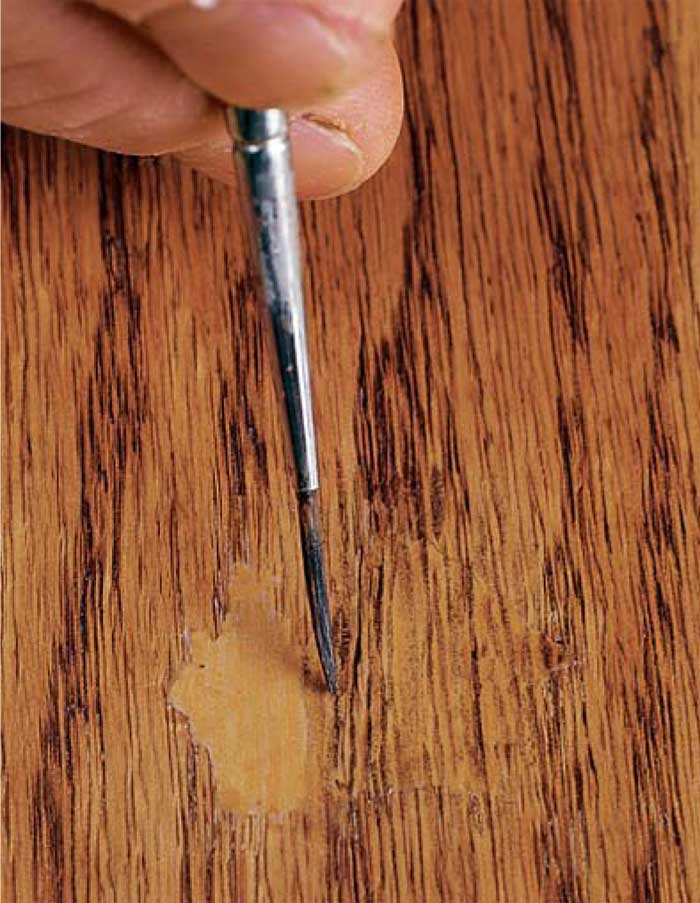
5. Add grain lines. Connect the wood’s grain across the patch with a good, sharp-pointed brush.
6. Voilà! Fine-tune the color match, build the finish and rub out the sheen to match the surrounding area.
Sources
Note: Product availability and prices are subject to change.
Homestead Finishing Products, 216-631-5309, complete touch-up kit including a box, 18 colored powders, and a red sable brush; 12 color kit without brush; several grades of dewaxed shellac flakes.
Mohawk, 518-843-1380, carries all of the components you’ll need to create your own kit: powders, shellac, graining and touch-up pens, and brushes.
Artist supply stores: Red Sable touch up brushes (sizes 0, 1, 2, and 3).
Home and hardware stores: Zinsser shellac in spray cans.
This story originally appeared in American Woodworker June 1999, issue #73.

Here are some supplies and tools we find essential in our everyday work around the shop. We may receive a commission from sales referred by our links; however, we have carefully selected these products for their usefulness and quality.