We may receive a commission when you use our affiliate links. However, this does not impact our recommendations.

Bandsaw Jigs
By George Vandriska
Your bandsaw is one of the most versatile
tools in your shop. These five jigs and
techniques will help you handle
some unusual situations.
Cutting Multiples
Click any image to view a larger version.
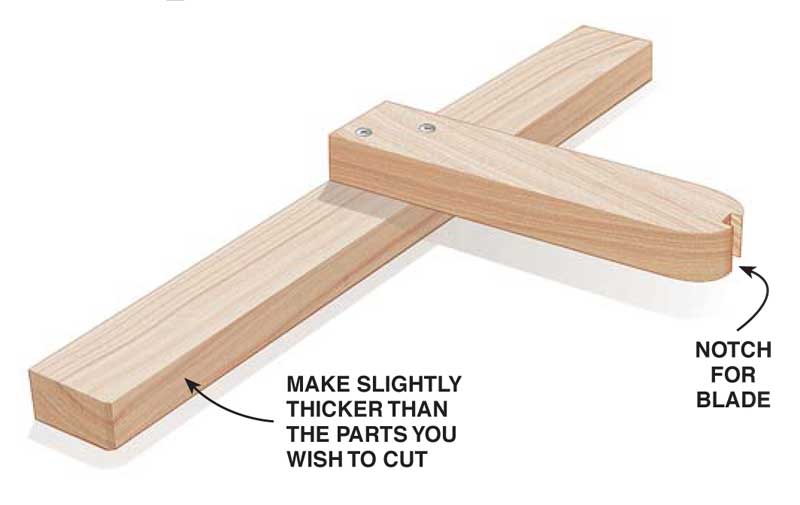
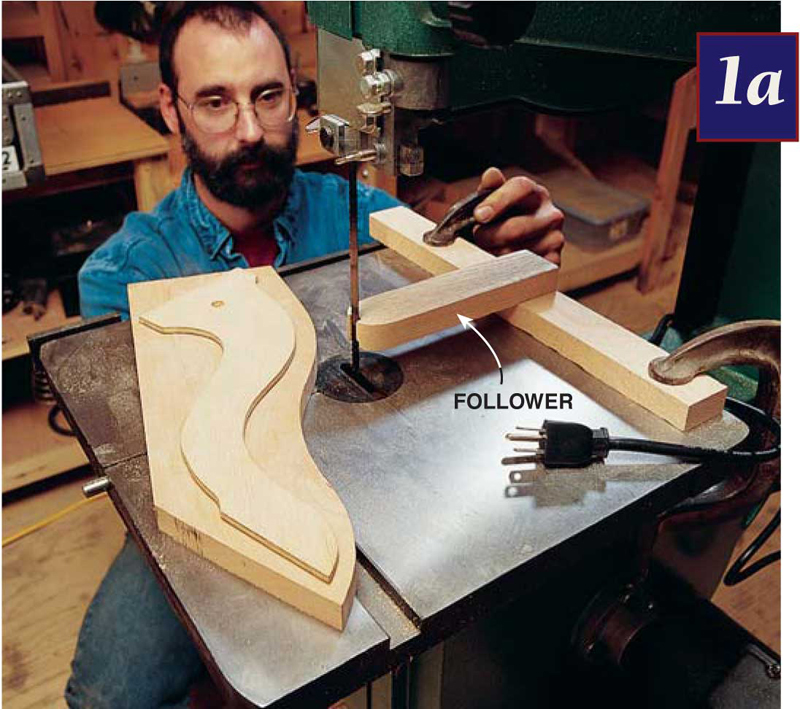
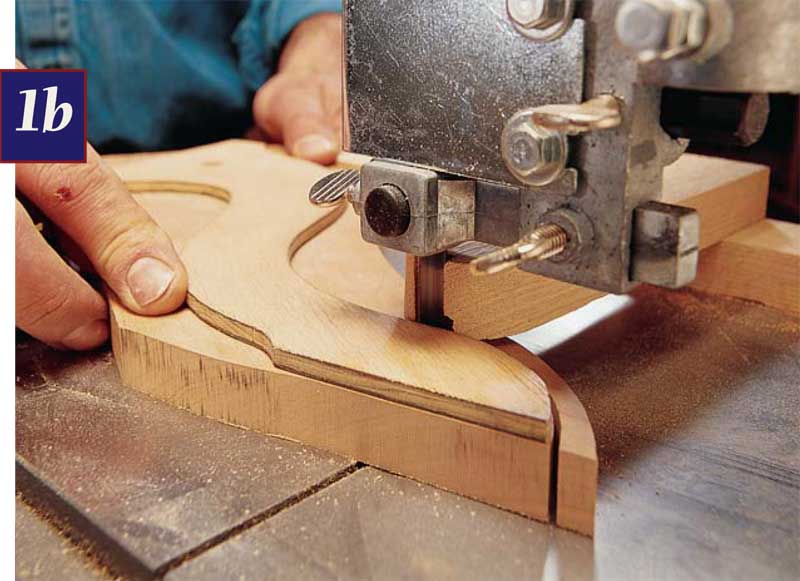
If you need to make a lot of identical
parts using a template, a pattern cutter is very
handy. It won’t completely eliminate steering
the material, but it’s a lot easier than
simply following a line. The pattern
cutter will help you consistently
cut within 1⁄16 in. to 1⁄8 in. of the
template; you can then trim off
the waste with a flush-trim or
pattern-cutting router bit. Every
part you make will look exactly
like the template.
|
Clamp your jig to the bandsaw. |
|
|
Allow the template to run along |
|
Perfect
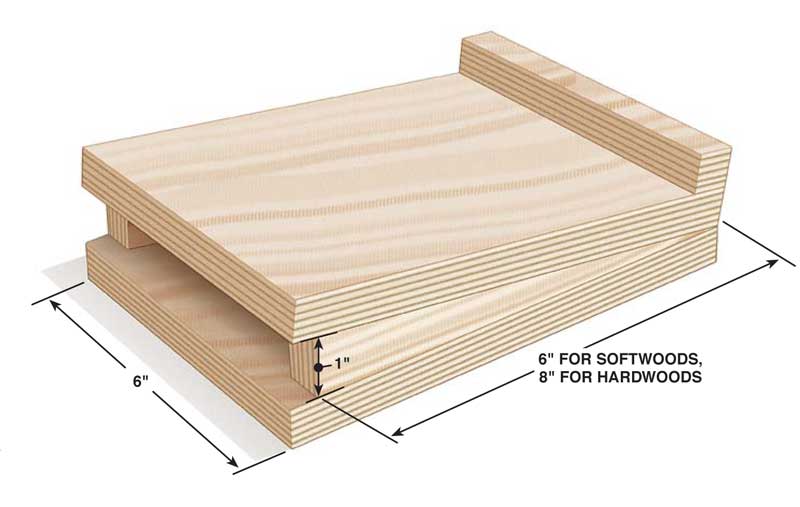
Circles

Whether you need circles that are 4 in. or 4 ft. in diameter,
a jig like this makes it a
snap. Fit the jig to your saw, modifying
the cleats as necessary. Make your blanks
about 1-in. bigger than the circle you
want to cut. With a 1⁄4-in., 4-tpi blade on
the saw, make a notch in the blank. The
notch creates a pocket for the blade to start in,
and should be centered on the width of the blank
(Photo 2b).
Sources
Note: Product availability and prices are subject to change.
McFeeleys, 800-443-7937, Threaded inserts
for jigs.
Woodworker’s Supply, 800-645-9292, Knobs for jigs.
|
Mount this adjustable circle |
|
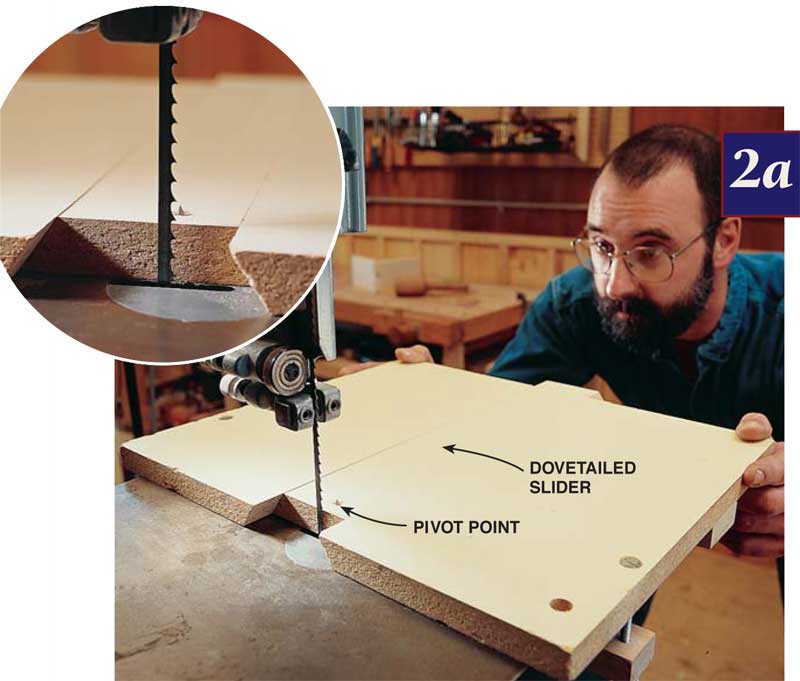
|
Spin the blank to cut a perfect |
|
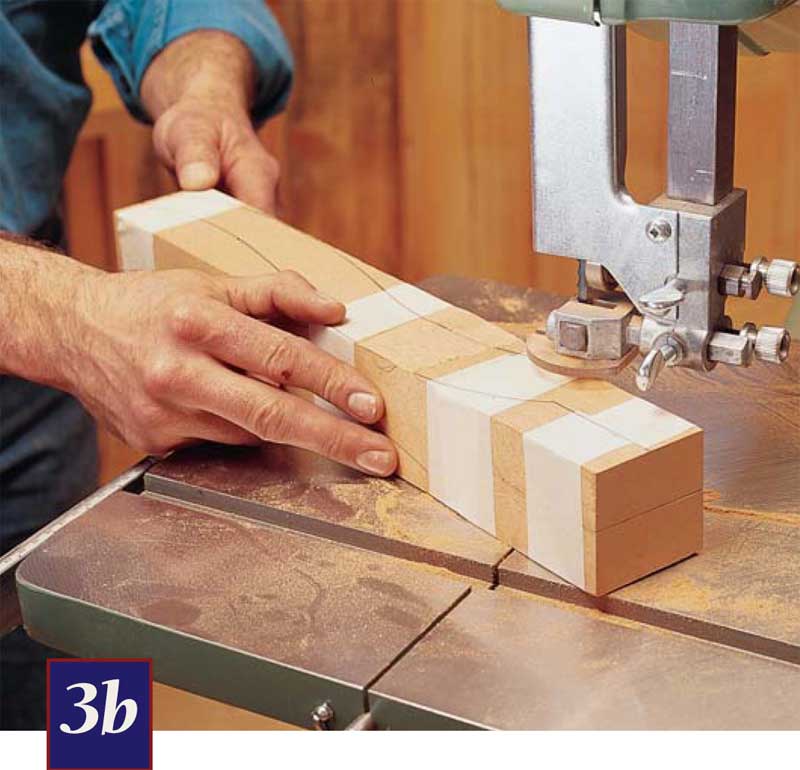
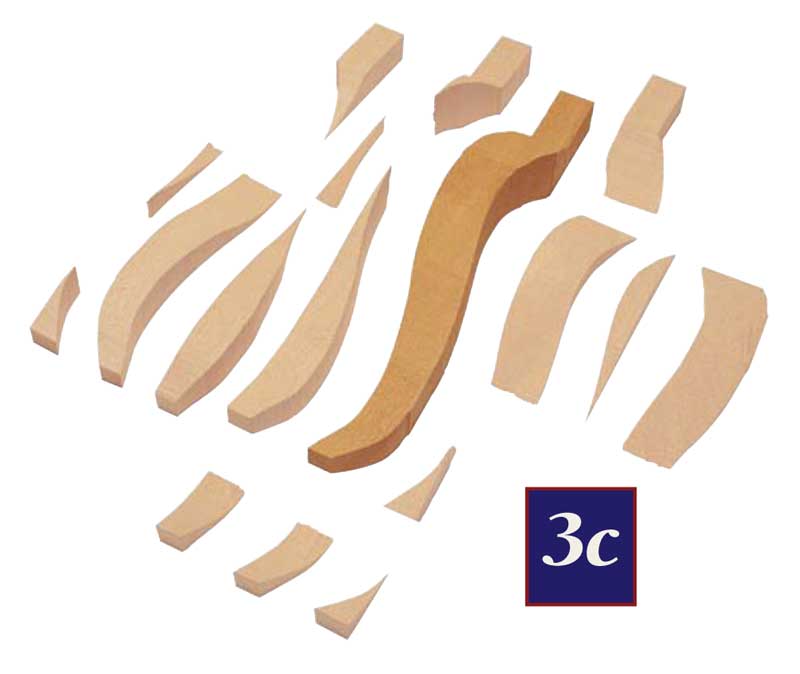
Compound Cuts
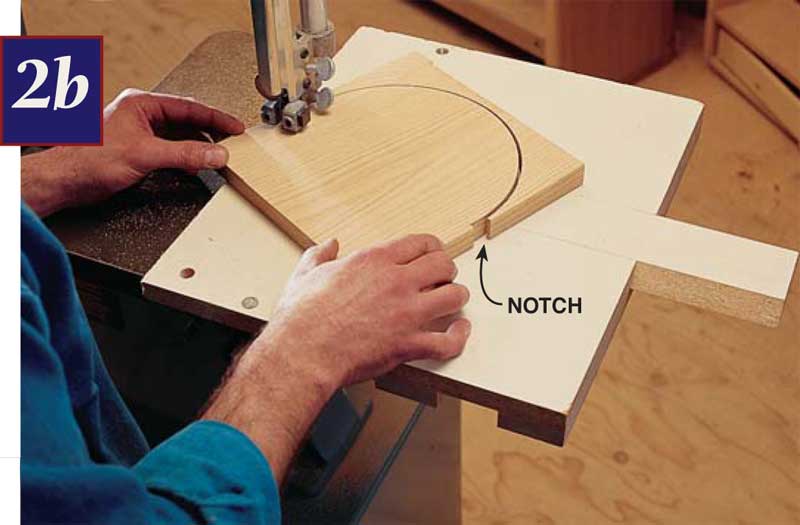
Woodcarvers use this technique
to rough
out carving blanks and
furniture builders use it
to cut cabriole legs.
Blade selection will
depend on the tightness
of the curves you’re cutting.
I did the legs in
these photos with a
1⁄4-in., 4-tpi blade.
|
Trace your pattern on |
|
|
Tape the offcuts back together, and cut the |
|
|
Like magic your part appears from the |
|
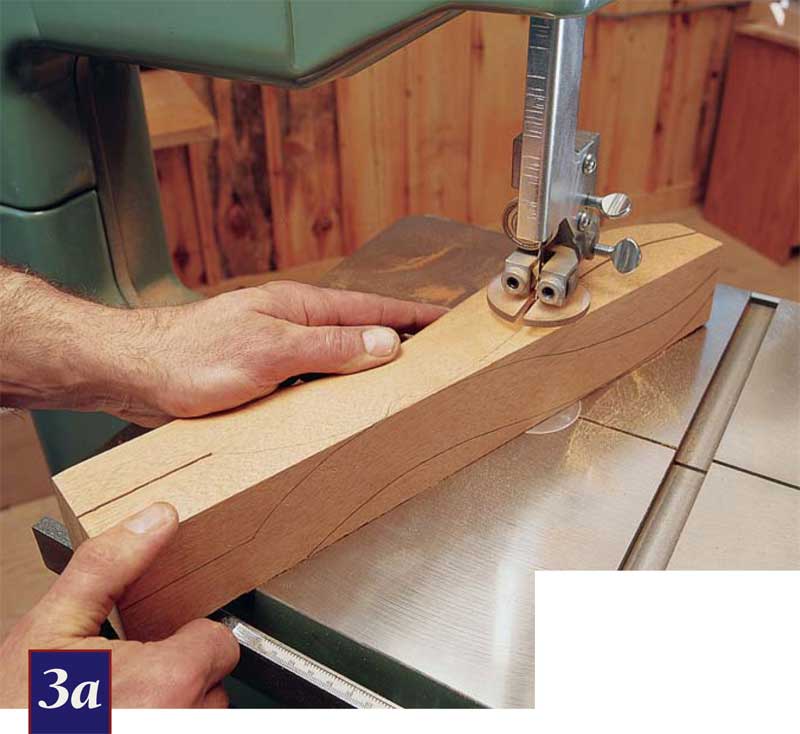
Easy Resawing
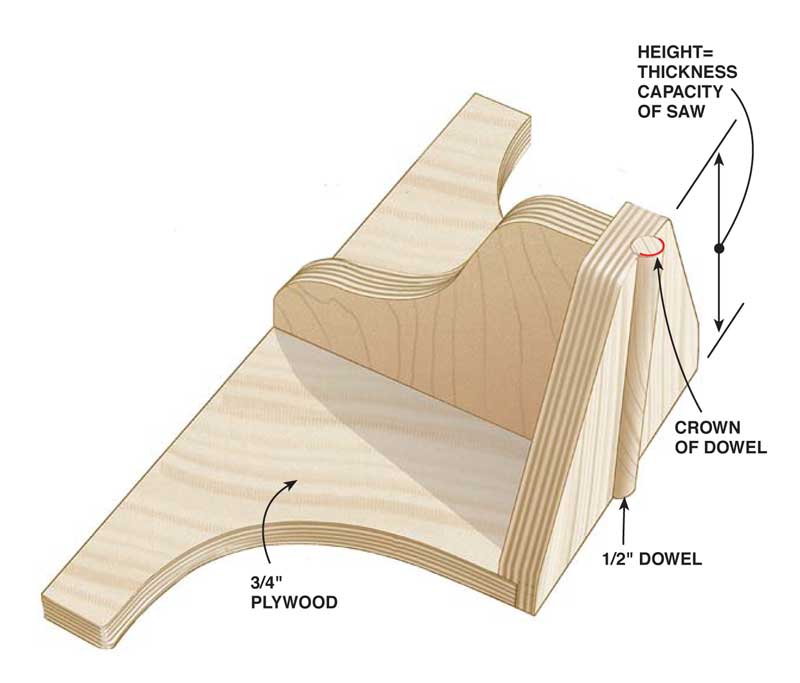
If you have lots of resawing to do, it’s best
to use a resaw fence that compensates for the drift
of the blade. See AW #61, p. 50 for this set up.
If you only need to resaw a board or two, a
single-point fence is the way to go. The round
face of a dowel is the only surface the material
bears against, so you don’t need to compensate
for blade drift.
First, get a good resaw blade for
your saw. I use the biggest blade the
saw will take. In this case, that’s a
3⁄4 in., 3 to 4 tpi.
|
Set the fence on |
|
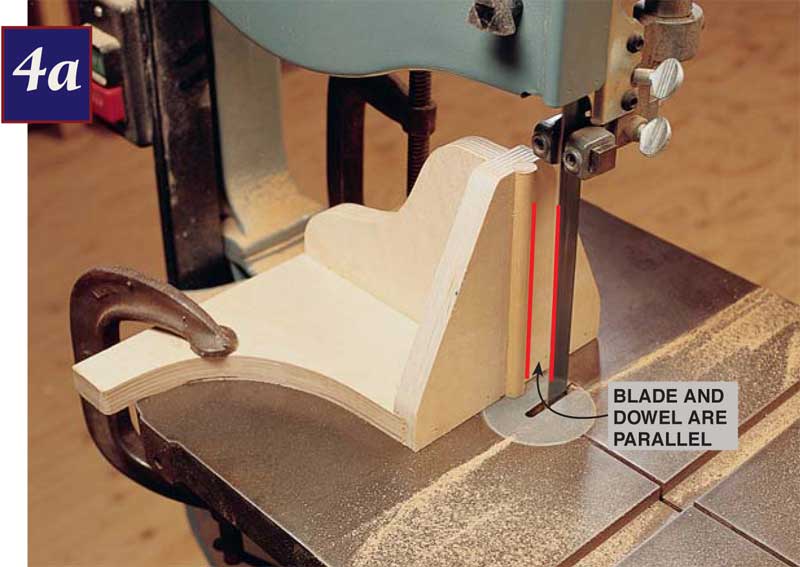
|
Steer the board through |
|

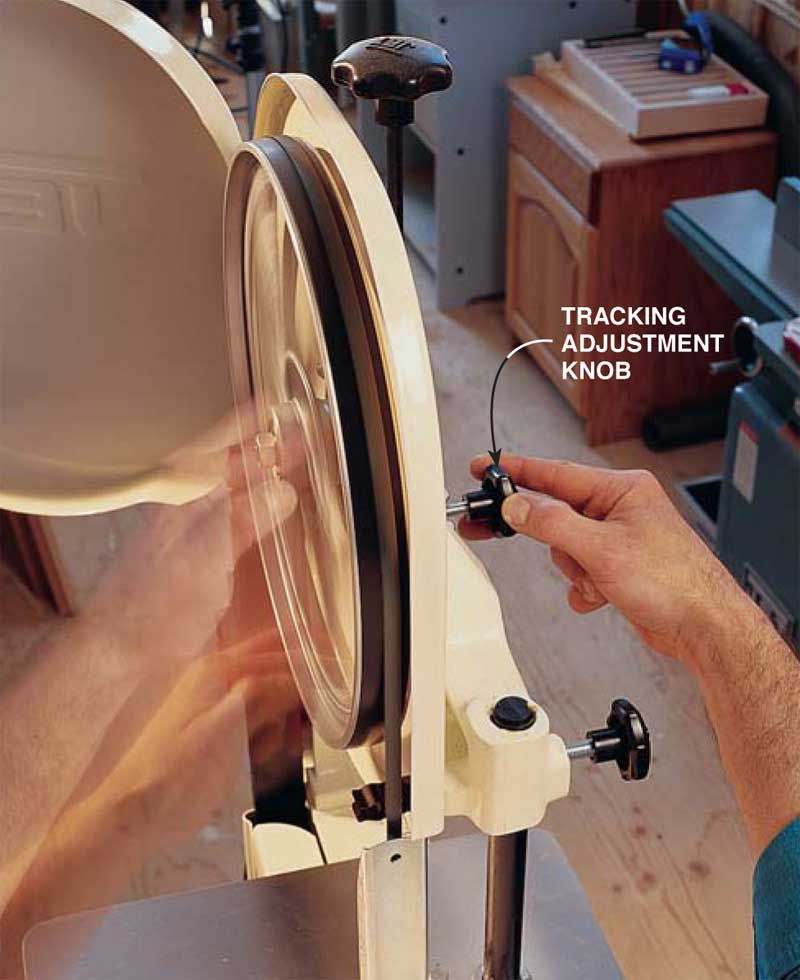
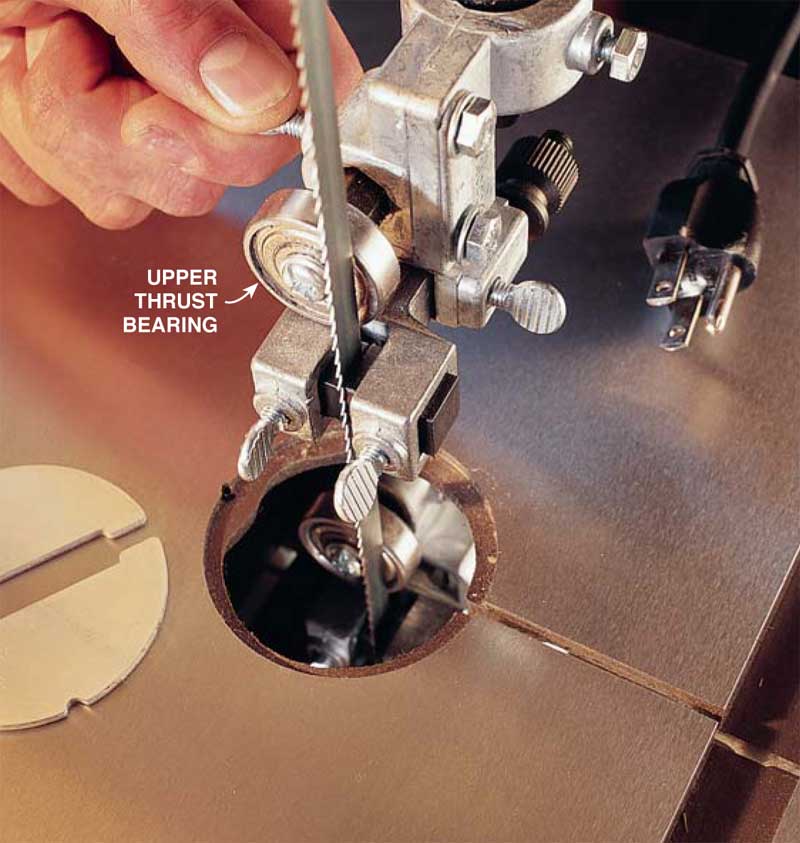
Good Set Up = Good Performance
|
Adjust the tracking. With your saw unplugged, |
|
|
Locate the upper and lower thrust bearings so they’re about .003 in. (the thickness |
|
|
Make sure the tension is right. I check it by doing a test resaw in a 5-in.- |
|
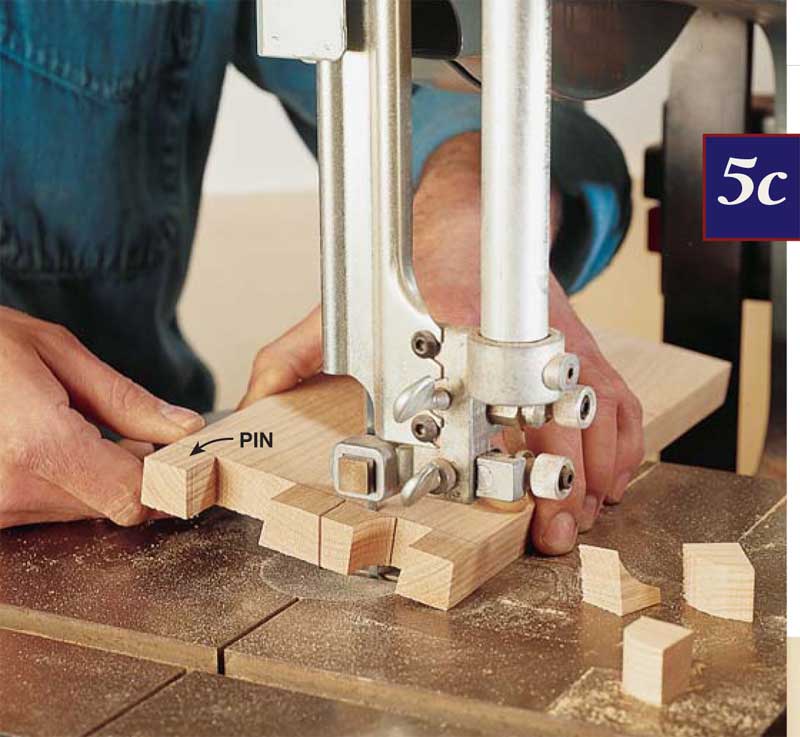
Band-Sawn Dovetails
Here's a great way to produce through dovetails. It’s similar to the way you hand cut
them, but a little easier, and like hand-cut
dovetails, practice helps.
This technique is well suited to cutting large
numbers of dovetails for small boxes or
drawers. The material you’re dovetailing
has to be short enough to fit in the
throat of the saw. Use layout techniques
similar to hand-cut dovetails. (see AW
#54, p. 52). If you don’t mind tilting
your table left and right to make the
angle cuts, you don’t even need to make
the jig. I prefer to keep my table square
once it’s set, so the jig gives me the left
and right tilt I need.
Lay out the depth and width of the
pins and sockets and mark the waste wood.
You only need lines on the face of the material.
For cutting dovetails, I like a 3⁄16-in., 10-tpi blade.
The high tooth count gives a good surface finish, and
the narrow blade easily turns to cut the base of the sockets.
|
With the jig angling up to the right, |
|

|
Turn the jig in the other direction |
|

|
Take out the waste. Remove the jig. |
|
|
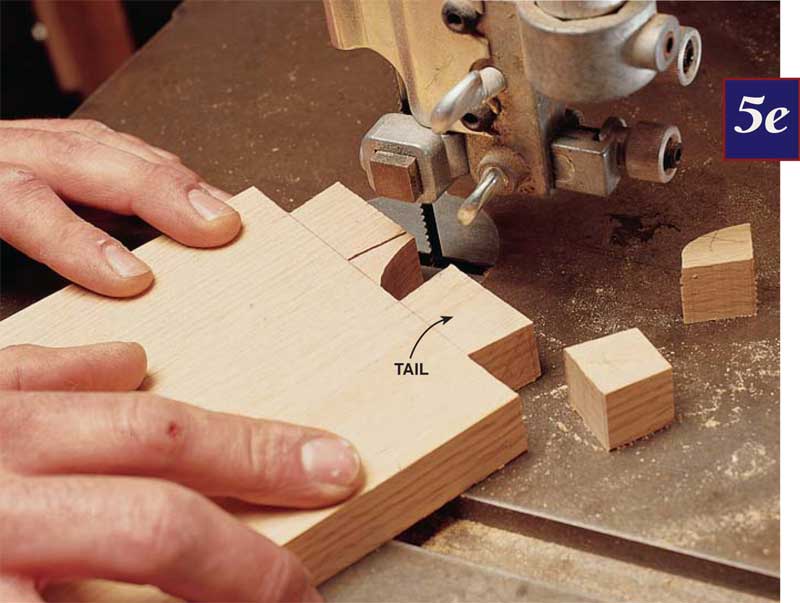
With pins and sockets complete, trace them onto the |
|
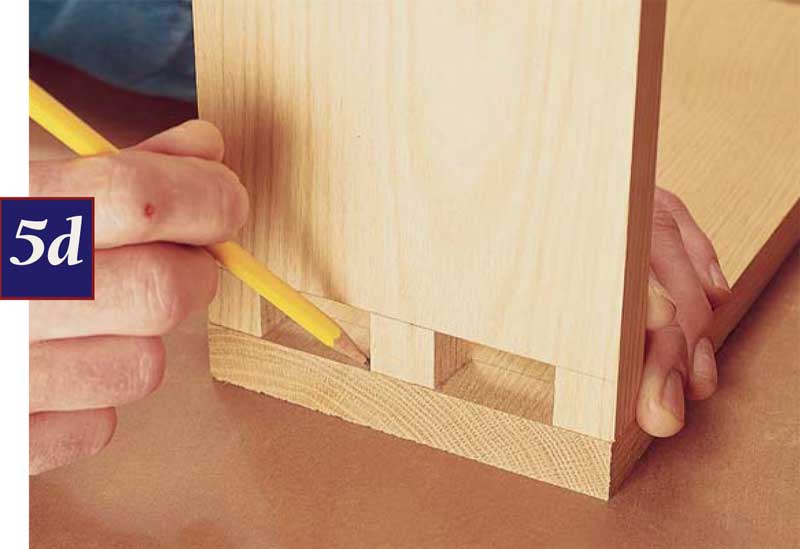
|
Carefully cut on the lines, producing |
|
|
This story originally appeared in American Woodworker August 1999, issue #74.
|
|

Here are some supplies and tools we find essential in our everyday work around the shop. We may receive a commission from sales referred by our links; however, we have carefully selected these products for their usefulness and quality.