We may receive a commission when you use our affiliate links. However, this does not impact our recommendations.
Tablesaw Tenoning Jig
A precision joint-making tool for less than $30.
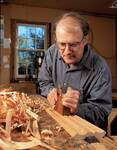
By Frank Gregg
A tablesaw tenoning jig is an essential tool for most woodworkers. But commercial units cost $100 and up, and shop-made jigs that I’ve tried, all riding on the fence somehow, were unstable and hard to adjust. So I devised this jig, which features the safety and stability of a crosscut sled, combined with a micro-adjust tenoning carriage. With it, you can safely and accurately cut tenons, half-lap and bridle joints. Best of all, it’s cheap and easy to make; all you need are a couple pieces of scrap hardwood plywood and $10 worth of common hardware store items.
How it works
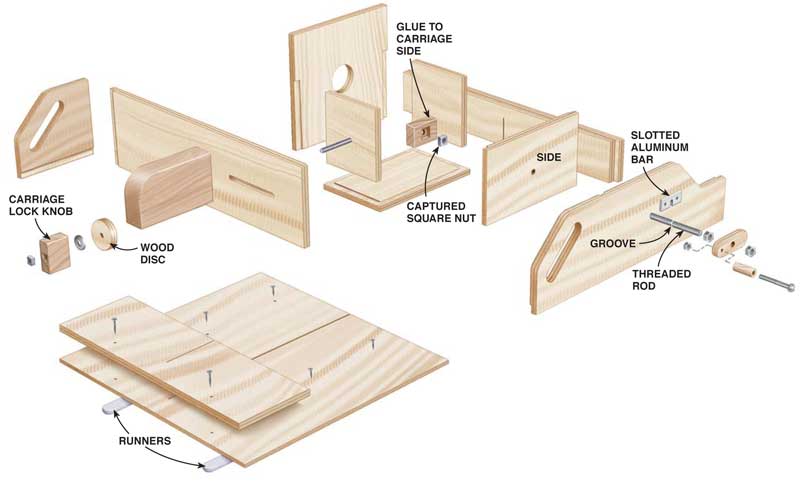
The jig has two parts: a fairly traditional crosscut sled that rides in the miter gauge slots; and a carriage, which is held by a threaded rod (Fig. A). When you crank the threaded rod, the carriage moves 1/16 in. for each full turn. A locking clamp holds the carriage in position when you’ve got it set just right.
To make tenons, clamp each workpiece to the carriage and cut one cheek (Photo 2). Readjust the jig and cut the second cheek on all pieces. Now, here’s a great feature of this jig: To cut the shoulders, you use the crosscut sled part of the jig, and the carriage becomes a micro-adjustable stop, making this second part of the tenoning operation quick and accurate (Photo 3).
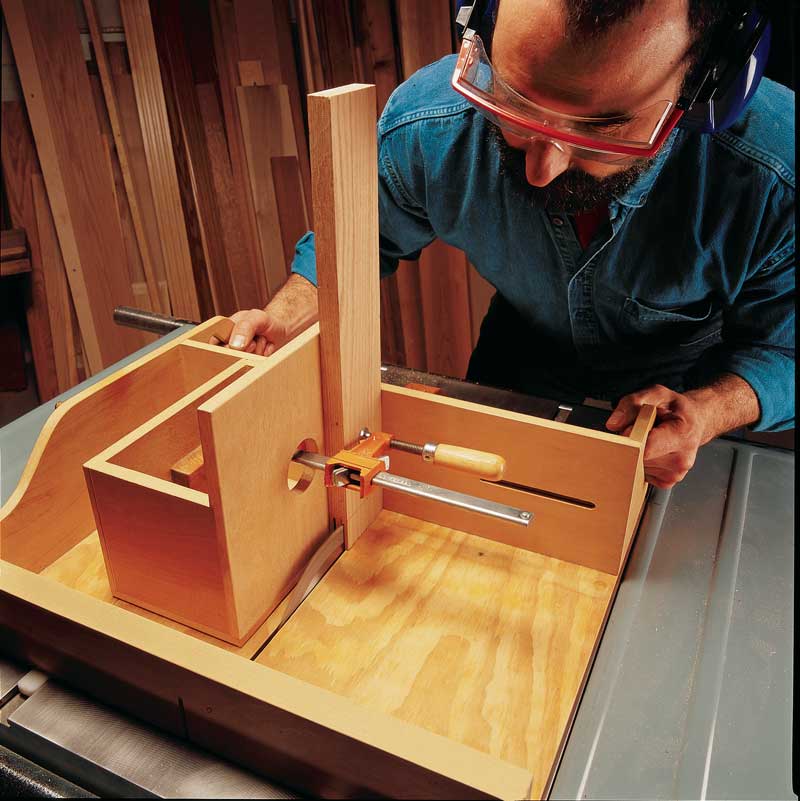
This jig is also designed for safety. Unlike many tenoning jigs, your hands are far from the saw blade at all times. A wooden blade guard houses the blade after it makes the cut, and it’s easy to rig up a stop that prevents the jig from going too far forward (Photo 1).
General assembly
The basic construction of the jig is straightforward, because it’s essentially made of plywood boxes. When you cut the parts, make sure they are dead square, because the accuracy of the jig depends on it. The rabbets help keep the pieces square during glue-up. You may find it easier to make the cutouts for the handle before you cut out the parts, just because you’ll have more material to hold on to. I drill two holes and then use a jigsaw to connect them—you could use a scrollsaw or router as well. Make the clamp hole in the carriage with a hole saw, then save the circular waste piece to use under the lock knob.
I made the locking clamp and the crank from wood, but commercial threaded knobs work, too.
The adjustment mechanism
The heart of this jig is the micro-adjust mechanism, which consists of two parts: an aluminum bar with a slot in it; and the threaded rod, with a groove filed in it. The groove fits in the slot, to capture the rod. To cut the slot, drill a 1/4-in. hole in the aluminum bar (available at hardware stores) and use a hacksaw to cut the sides of the slot. To cut the groove in the threaded rod, chuck the rod in an electric drill or drill press and hold a file to it (Photo 4). Check that the slotted bar fits neatly on the threaded rod. If the groove is too wide, put a pair of nuts on the rod and tighten them against the bar.
To make the crank handle I used a piece of 1/2-in. dowel. You can also use a piece of scrap tubing or pipe. There’s a trick to drilling a hole through the middle: Clamp a piece of scrap to your drill press table and drill a 1/2-in. hole in it. Put the dowel in the hole, and you can drill a 1/4-in. hole neatly through the center.
Assembling the sled
I made my sled runners from ultra-highmolecular- weight (UHMW) plastic (see Materials List, below), which is slippery and makes the jig slide easily. Maple or another dense hardwood would also work well.
The runners must be attached exactly perpendicular to the fence at the back of the jig. Here’s how to do it: First, make sure that your tablesaw blade and rip fence are exactly parallel to your miter slots. Set the runners in the slots and place the sled on top of them. Lock your rip fence next to the sled, and use a large, accurate square (a drafting triangle is good) to set the sled’s fence perpendicular to the rip fence. Drive a couple of brads through the sled into the runners to hold them, then screw them on.
Make test cuts to be sure the sled is giving you square cuts, then attach the tenoning carriage and you’re ready to start tenoning.
Materials List
Fig. A: Exploded View
Click any image to view a larger version.
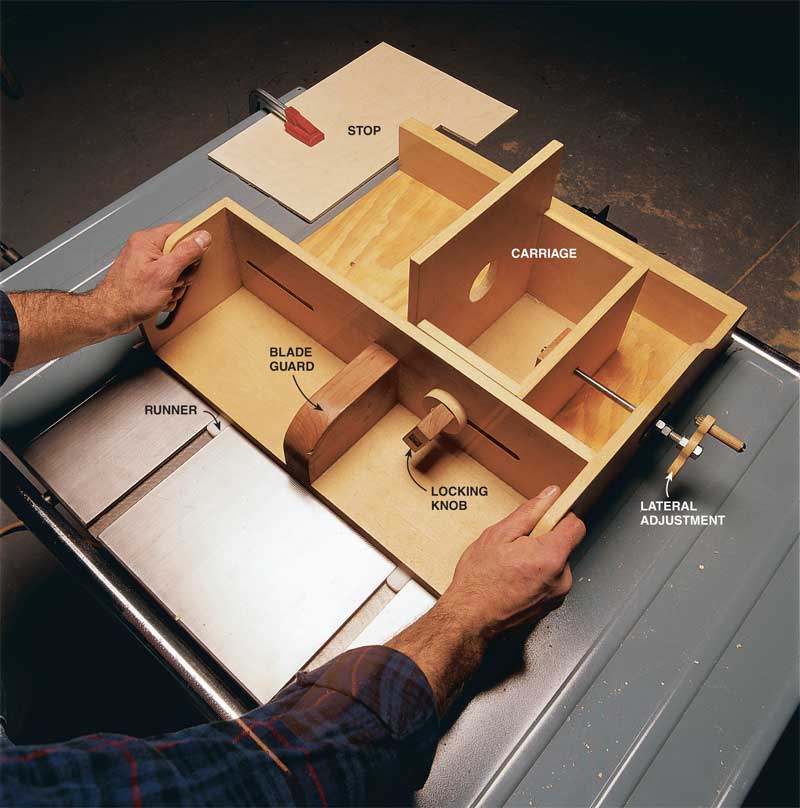
1. The jig consists of a crosscut sled that rides on runners, with a laterally adjustable carriage that holds the workpiece. A stop prevents the jig from sliding too far forward.
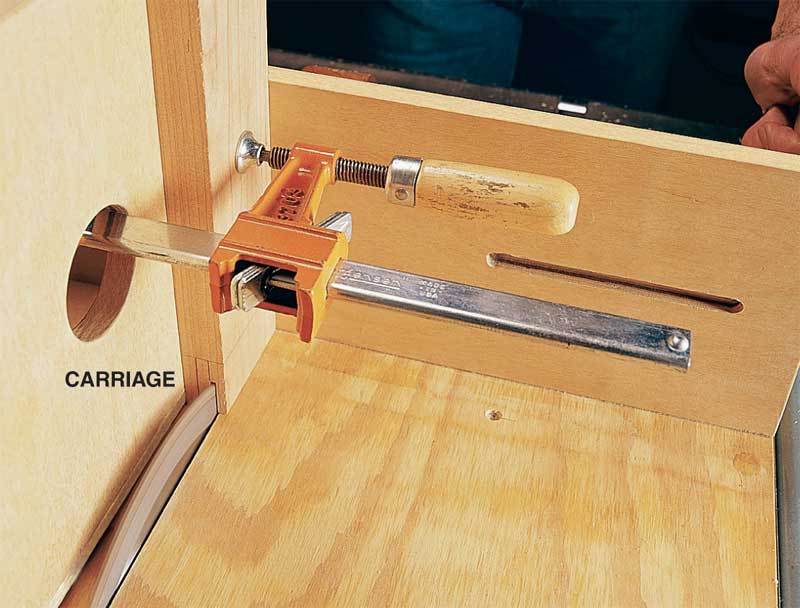
2. Cut tenon cheeks with this jig by clamping the workpiece to the micro-adjustable carriage, which is attached to a crosscut sled.
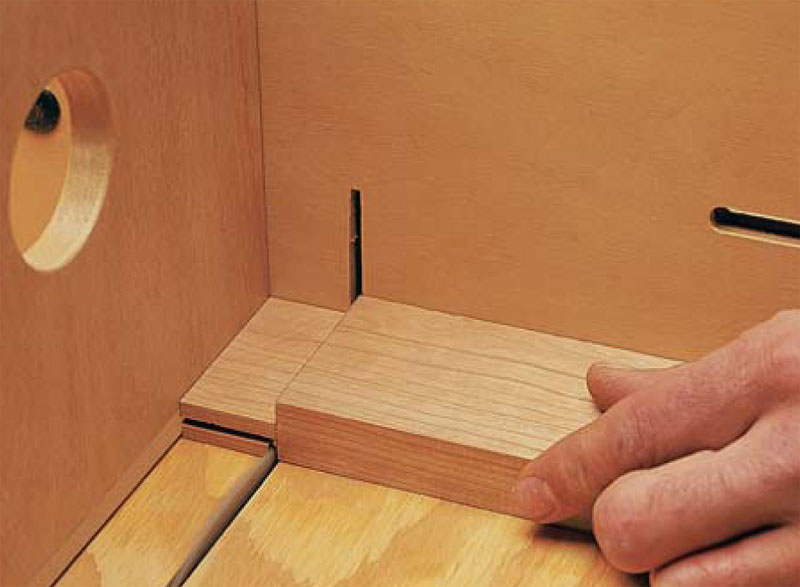
3. Cut tenon shoulders using the crosscut sled part of the jig.The micro-adjustable carriage is used as a stop to control the cut location.
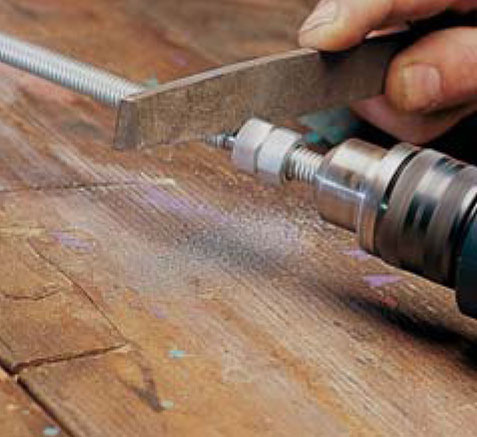
4. A grooved threaded rod is at the heart of the adjustment mechanism.The groove is made with a file while the rod is turned slowly in a drill or drill press.Two nuts tightened against each other make a stop to help control the file.
This story originally appeared in American Woodworker June 1999, issue #73.
Here are some supplies and tools we find essential in our everyday work around the shop. We may receive a commission from sales referred by our links; however, we have carefully selected these products for their usefulness and quality.