|
Everything looked good, until you
added glue and clamps. Then the
wood began to slip and slide, you scrambled
for scrap blocks and more clamps.
The glue ran before it grabbed, welding
the blocks to your project. You’ll have to
saw them off, you can look forward to
scraping hardened glue, and you know
you’ll never quite get it all, so bye-bye
flawless finish. Haven’t you been there?
It doesn’t have to be this way. With
good clamps, knowledge of how pressure
spreads, and most important of all, a
thorough dry run, you can have a neat,
controlled glue-up. Let’s examine the
whole procedure, one element at a time.
Buying clamps
Clamps come in two types: C and bar.
Bar clamps need to be heavy and rigid,
with jaws that remain square to the bar
under heavy pressure. I like Record bar
clamps because they meet these criteria
(see Sources, below). For making furniture
and cabinets, 3-ft. bars will be most
useful, and six of them would be a good
start. Clamps are heavy, and extra length
is not only awkward to handle, but also likely to twist the workpiece. Don’t just
buy the longest and figure they’ll work
for everything. Record clamps can be
joined end to end when you really do
need a longer reach (see Photo 3).
Pipe clamps are widely available and
affordable. However, the cast parts aren’t
very accurate and the pipes bend under
pressure. Consequently, pipe clamps are
difficult to align and untweakable when
you need to square-up the assembly. If
you’ve been using pipe clamps your
whole woodworking life, spring for a
pair of good bar clamps. The difference
will amaze you.
C-clamps are the woodworker’s third
hand. Unlike bar clamps, there’s not
much reason to recommend one brand
of C clamp over another. The 6-in. size
is handy, they cost under $10 each, and
six or eight of them is a good starting kit.
Longer and deeper clamps may sometimes
be necessary, but not often, so buy
them only as you need them. Sometimes
a C-clamp gets bent or twisted from
overtightening. There’s nothing you can
do, except chuck it out and resolve not
to overtighten the next one.
The pressure fan
In direct glue-up situations, such as an
edge-to-edge butt joint, the problem is
transmitting uniform pressure to the
glue line. How many clamps do you
really need? The answer depends on
the width of the wood. Because of the
way pressure fans out from the clamp
jaws, the narrower the wood, the more
clamps you need.
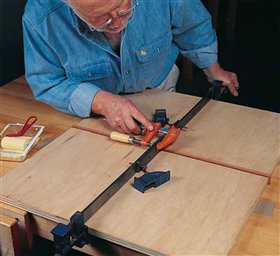
As shown in Photo 1, the pressure
makes a fan with a total angle of about
90 degrees. If you imagine fans like
these radiating from each clamp jaw,
you’ll know how many clamps you
need. With wide boards, although a
single clamp may be enough to distribute
the pressure to the whole glue
line, using three gives you a lot more
adjustability. You can keep the panel flat
by tightening and loosening one clamp
or another, and by shifting the workpiece
up or down on the clamp jaws. It
takes a lot of clamps to glue a narrow
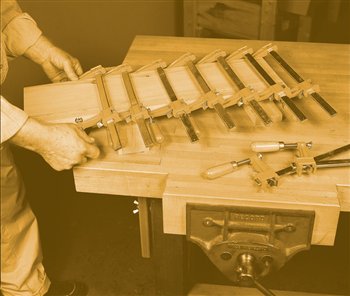
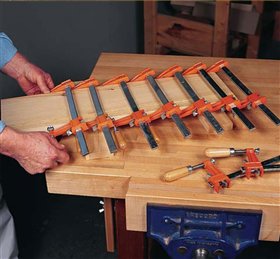
edging onto the edge of a panel (Photo
2), but only one clamp if you glue them
two at a time (Photo 3).
The dry run
The key to a calm and successful
glue-up is rehearsing the whole
thing dry. Clear off the bench, fetch
the clamps, glue bottle and applicators,
and get out your measuring
tools. Fit the parts together, make
clamping blocks, and clamp up.
Use clamping blocks not just to
protect the wood, but also to distribute
the pressure. Cut them out
of hardwood to fit the job—a random
chunk of scrap wood won’t
direct the pressure controllably.
If there’s anything wrong, now’s
the time to fix it. When you do
add glue, it’s the only remaining
variable, and you’ll have time to
control it because you’ve already
taken care of everything else.
While your work is dry-clamped,
make the following four checks:
Before—and after—you glue:
(Photos 4 through 7):
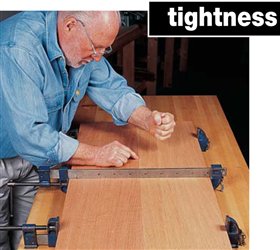
1. Check that the joint has closed.
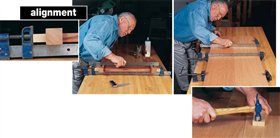
2. Check for alignment.
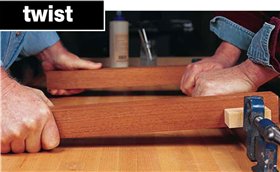
3. Check for twist.
4. Check for square.
Together these four checks help
you take the time to get the glueup
right, without racing against
the glue. It may take a bit of fiddling,
but if you get it right dry,
you’ll be able to do the same wet.
Spreading glue
Spread glue exactly like paint, laying
down a smooth and uniform
coating. Depending on the situation,
you should coat one surface
of the joint (Photo 8), or for sliding
fit joints, coat both surfaces
(Photo 9). With a direct interface,
such as an edge-to-edge butt joint
or when veneering, clamping
pressure will transfer glue from
one piece to the other. However, with a sliding fit such as a mortiseand-
tenon joint, there is no pressure
and no glue transfer, so
you’ve got to wet both surfaces
with glue.
Everybody uses too much glue,
and that means trouble. First, too
much liquid makes the parts swim
around. Second, regular yellow
glue dries by evaporation, but
thick drools of glue slow it down
by trapping moisture in the glue
line. Third, dripping glue makes a
mess on the work and bench. The
right amount squeezes out in tiny,
little beads (Photo 10).
When there are more than two
or three boards in the assembly,
you’ll avoid a lot of sliding around
by gluing them one at a time. Let
each glue line cure for an hour,
then unclamp and add the next
piece of wood.
Slipping boards are not an issue
with leg-rail assemblies and other
joints that slide together, but a
good glue line still doesn’t happen
automatically. For best results,
remove the bar clamp after a halfhour,
and set a C-clamp across
the joint so it squeezes the mortise
cheeks against the faces of the
tenon.
|
|
Click any image to view a larger version.

Careful alignment of
clamps and blocks keeps your work
flat and square.

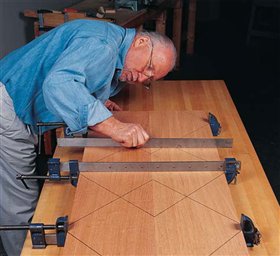
1. Pressure fans out from each clamp to
cover the full glue
line. Fiddling with
the placement and
tightness of the
clamps will keep
the panel flat.
Check for flatness
with a straightedge.

2. Narrow edging will
take a lot of clamps
because the pressure
from each
clamp does not
extend very far.

3. Only one clamp may be
needed when the
edging is sandwiched
between
two wide plywood
panels.These
Record bar clamps
can be joined endto-
end to extend
their reach.
The 4 Checks

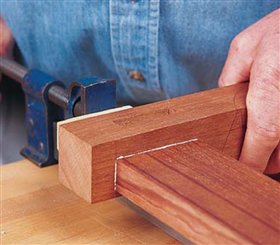
4. Check that the joint has closed. The fit you see now is the fit you’re
going to get when you add glue. If it’s not
what you want, now’s the time to correct
it.The other three checks may disturb
the fit, so look again at the end.

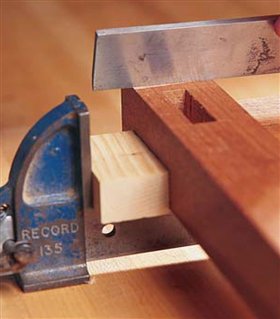
5. Check for alignment. Leg-Rail Assemblies: Use a
straightedge to align the outer
surfaces of the legs. Use a clamping
block the same thickness as
the rail, and move the block up or
down to align the legs’ faces. Panels: Use a straightedge and your fingertips to check across the joint.To make corrections, loosen the clamps a tad and push or tap the board
into line. If they won’t line up, fix the problem now—glue won’t solve it for you.

6. Check for twist. Leg-Rail Assemblies: Press one side of the assembly
down on the bench, sight across it, and see if it
rocks. Eliminate twist by loosening the clamps and
pushing the parts into the same plane. Panels: Take
twist out of a panel by pushing the boards down flat
on the clamp bars. Here’s where heavy clamps, on a flat
workbench, really pay off.

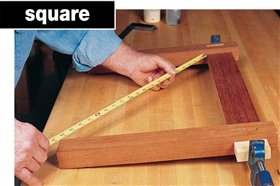
7. Check for square. For boxes and leg-rail assemblies,
measure both inside diagonals. Keep
the tape straight and in the same position.
Again, move your clamp blocks
slightly to get the assembly square. For
panels, this check is unnecessary.

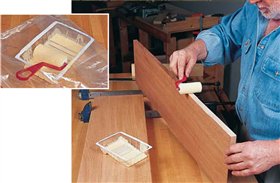
8. Wet one surface for edge joints
and veneering, where the clamping pressure
will transfer glue to the other surface.
Nothing beats a disposable paint roller for
applying the glue. Between glue-ups, seal the
roller and tray inside a plastic freezer bag.

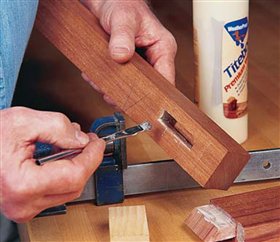
9. Wet both surfaces of sliding-fit
joints, like mortise-and-tenon and dovetails,
because the glue won’t transfer well during
assembly. Paint all mating surfaces with glue,
including end grain. A trimmed-down flux
brush makes a good applicator. Keep it in a jar
of water between uses.

10. The right amount of glue will
give you a thin line of squeeze-out at
the joint. No dribbles, no drools, no mess.
|


