


We may receive a commission when you use our affiliate links. However, this does not impact our recommendations.
Tips For Applying
Tee Molding
Looking for
a quick, easy
way to put
a durable edge
on a project?
By Brad Holden
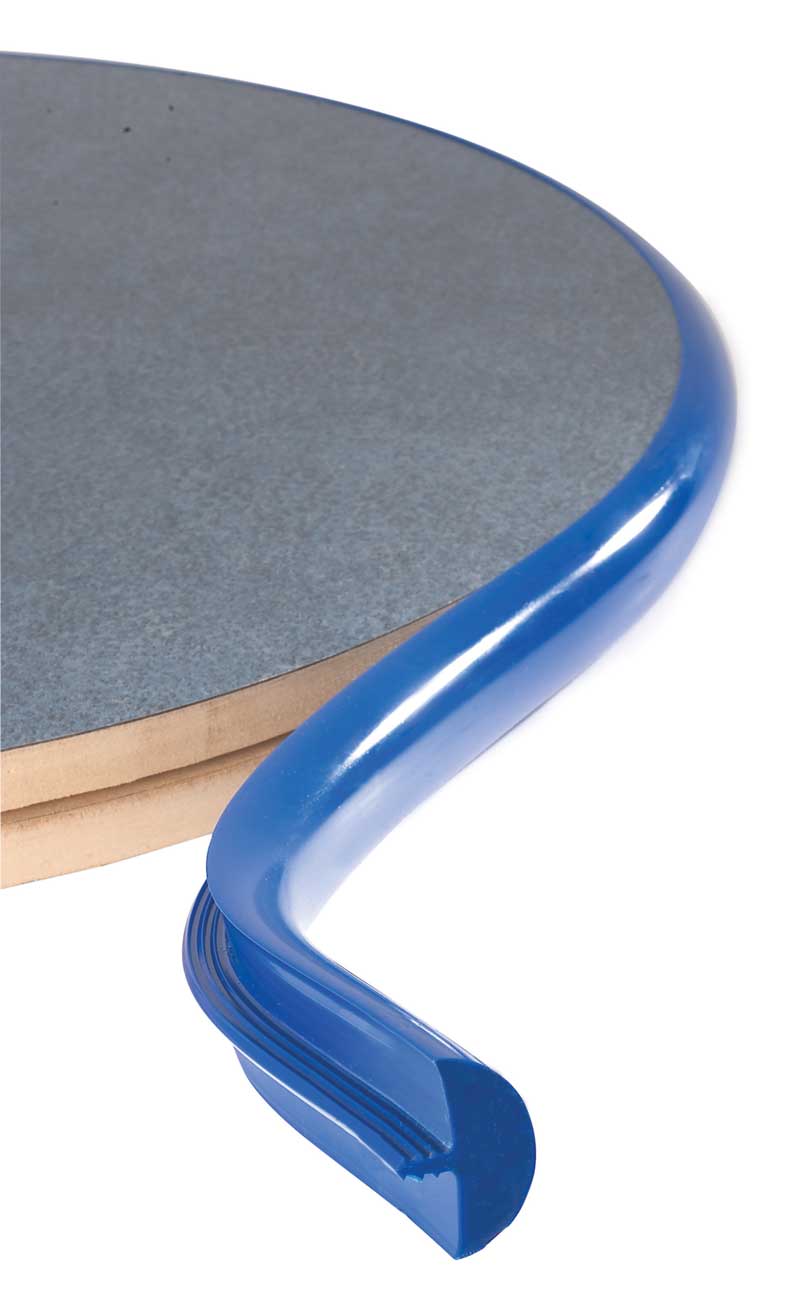
Tee molding might be the perfect answer.
Installation could not be simpler: just rout the
slot and tap the molding in place. There’s no gluing,
no ironing, no finishing, and it’ll stand up to years of
abuse. Used extensively on store and restaurant fixtures,
tee molding is also a great choice for shop cabinets, kid’s
furniture or any other place where a durable, impact
resistant edge is a plus.
Tee molding is available in a huge array of colors
and profiles so let your imagination run wild. Use
it to add bright colors to a child’s playroom
or bedroom. It can transform the ordinary,
like a set of laundry room
shelves, into a colorful highlight.
Check out the eight great installation
tips in this article. They’ll
insure hassle-free success the first
time you try tee molding.
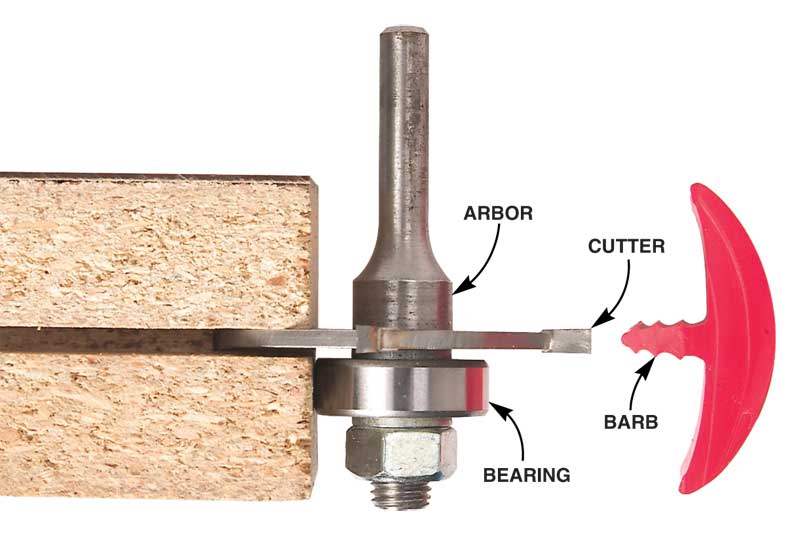
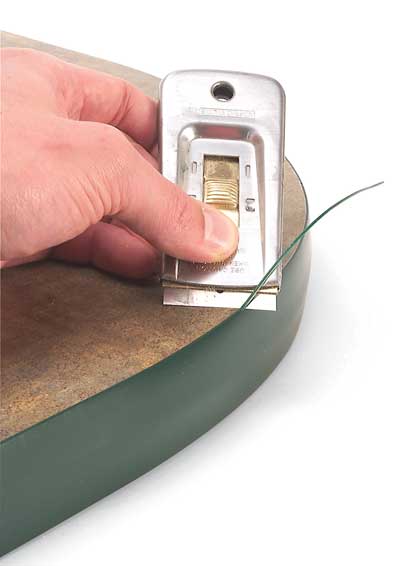
Use the right bit
| Use the appropriate sized slot cutter to cut the slot for the barb. If the slot is too wide, the barb won’t hold properly. If it’s too narrow, it can split the substrate. Suppliers specify what size cutter you need for each tee molding – don’t cheat. Some manufacturers allow you to swap out different sized cutters on a single arbor (see photo right). Others sell each cutter size as an individual bit. (see Sources, below) |
Click any image to view a larger version.
|
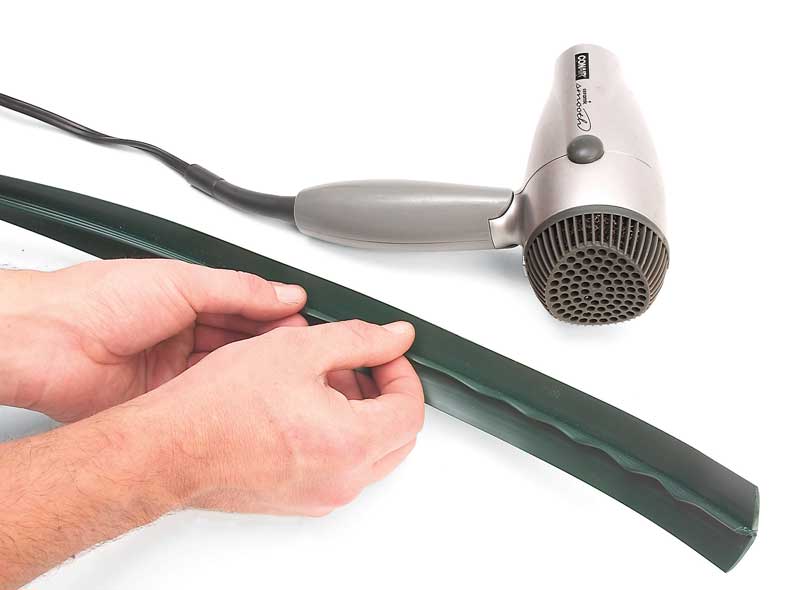
Massage out the kinks
| Remove kinks in the barb before installation. Tee molding comes in rolled coils that can cause kinks in the barbs. The kinks can get hung up on the substrate slot and make barb insertion a real chore. Use a hair dryer to warm the kinked area. Then massage the kink out. If heat doesn’t do the trick, as a last resort you can cut out a kink with a utility knife. |
 |
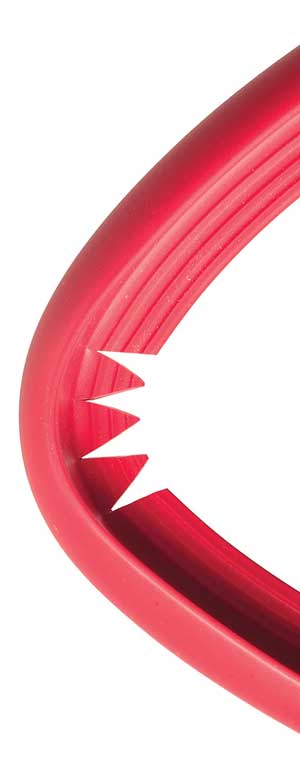
Notch around a tight curve
| Cut “V” shaped notches in the barb where the tee molding bends around a corner. Three or four notches cut with a utility knife are usually enough. If you don’t notch the corners, the barb will “bunch up” in the slot so the molding won’t seat properly, and it could split the substrate. |
 |
Tap lightly
| Tap tee molding into the slot using a rubber mallet. Use only enough force to seat the molding. You’re not pounding in a nail here. Excessive force can cause the molding to compress and stretch. Eventually, it will spring back to its original shape. This could leave gaps along the edges where it was trimmed flush to the surface and at the joints where the ends meet. |
 |
Trim the excess
| Trim any excess with a razor blade. A straight edge razor in a holder, as shown, provides the best control. |
 |
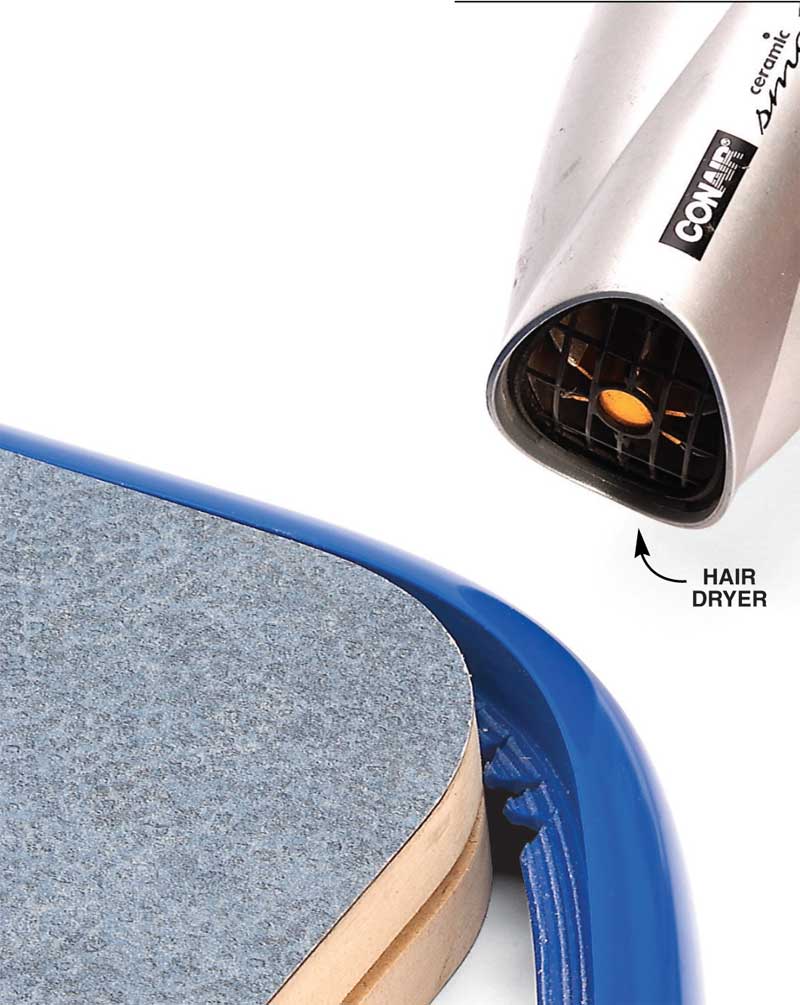
Warm up a tight bend
| Use a hair dryer to install large profile (thick) tee molding around tight corners. A little added warmth makes tee molding much more pliable. Consider room temperature to be a minimum for tee molding installation. Cold molding just won’t cooperate when you install it. |
 |
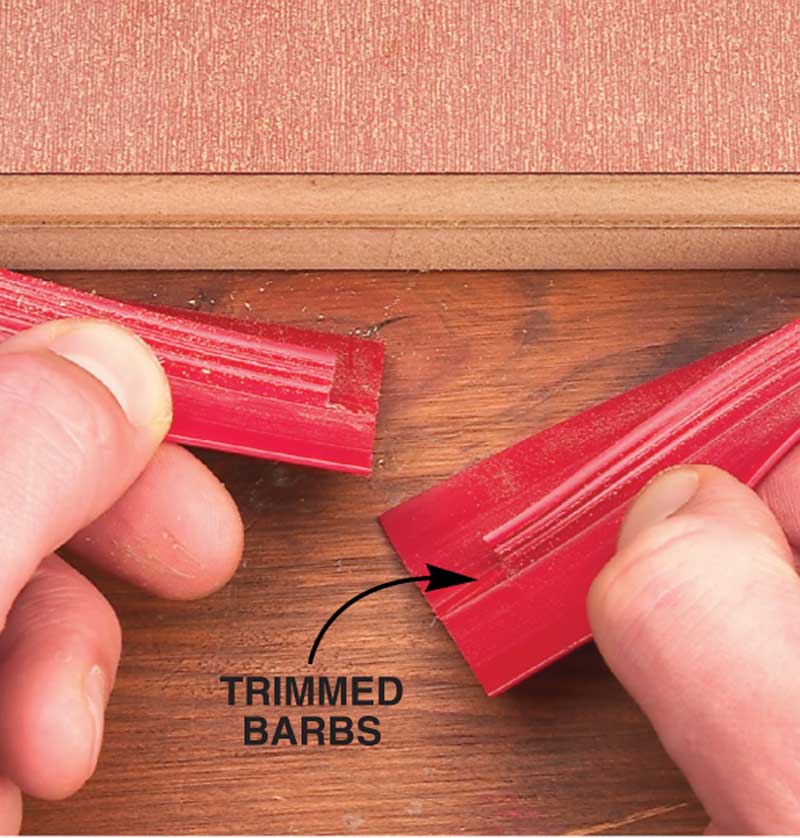
Make perfect butt joints
| Cut molding about 1/2 inch longer than needed. Then trim about 1/4 inch off the barbs at each end. Install one end and overlap the other. |
 |
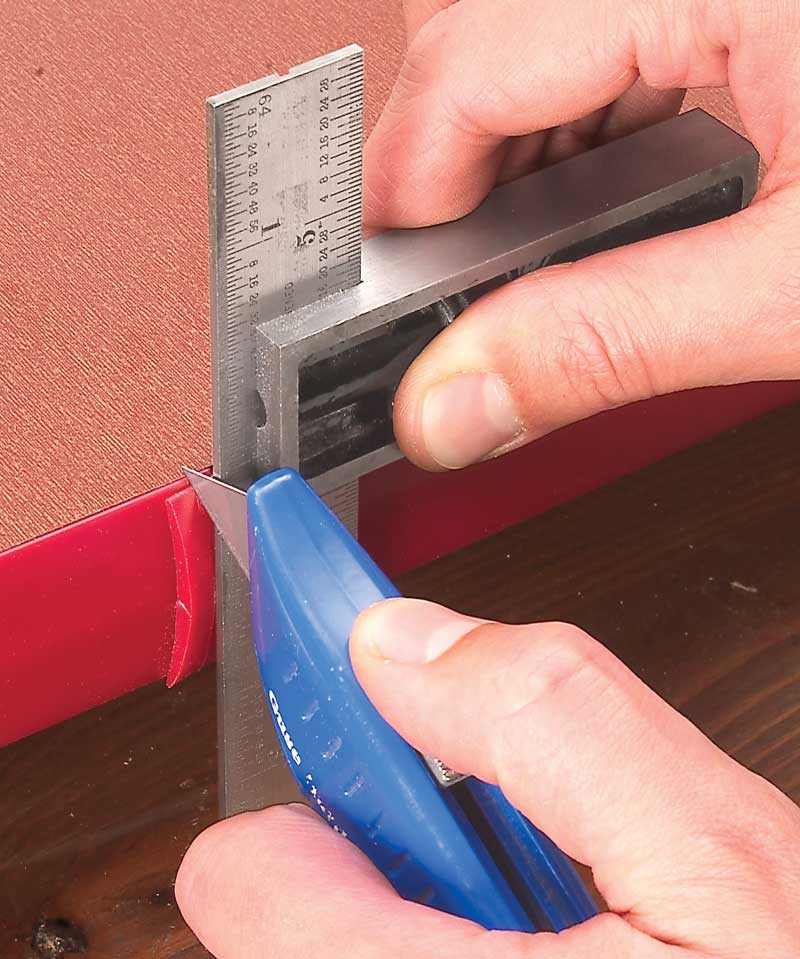
| Cut through both layers with a utility knife and a straight edge. Keep the knife at 90 degrees to ensure a square cut and a tight joint. |
 |
| Voila! A perfect joint. | 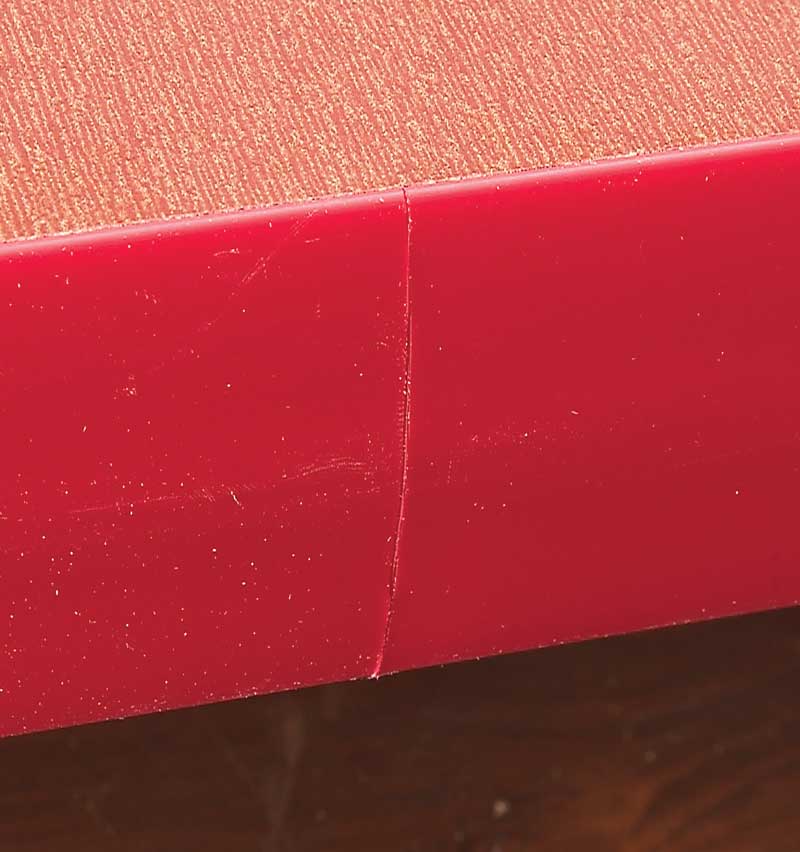 |
SourcesNote: Product availability and prices are subject to change. Outwater Plastics Industries, Inc., outwater.com, 800-631-8375, 25’ Woodworkers Hardware, woodworkershardware.com, 800-383-0130, One size slot cutter assembly (basic T- edging (13/16″ — almond, black, brown, tan, This story originally appeared in American Woodworker May 2007, issue #128.
|
Here are some supplies and tools we find essential in our everyday work around the shop. We may receive a commission from sales referred by our links; however, we have carefully selected these products for their usefulness and quality.


