|
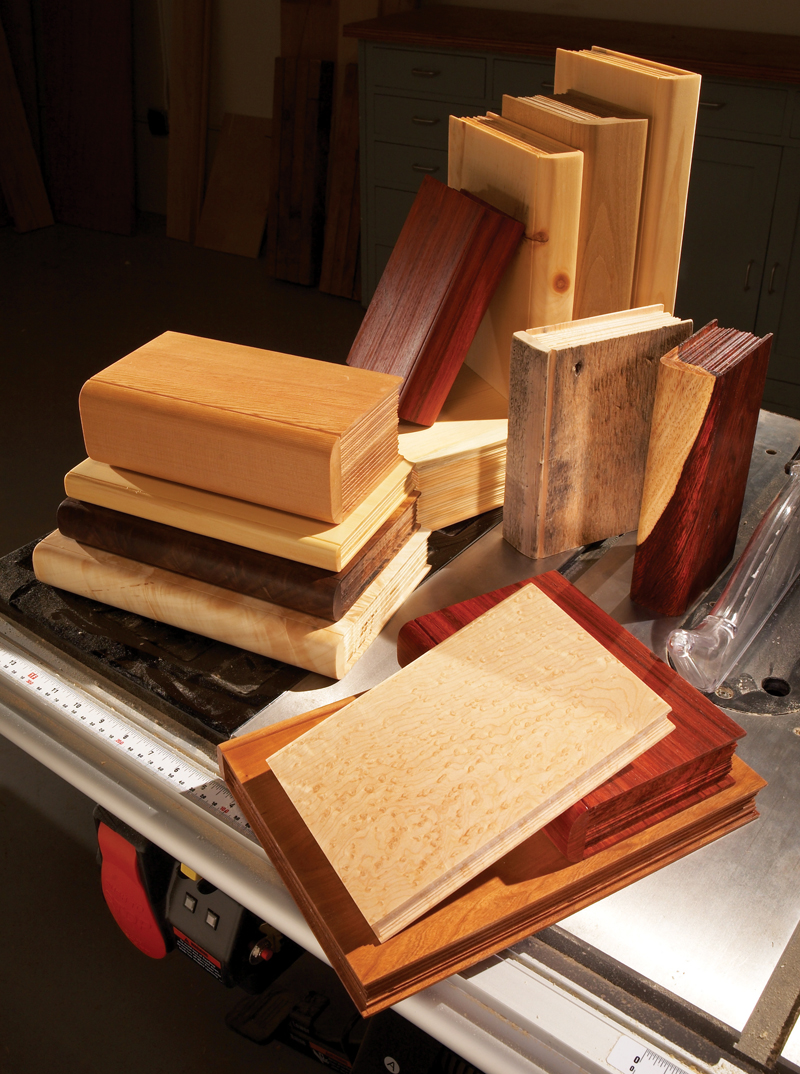
If you can't stand throwing away good wood, you've probably
got a stack of short boards that are
just waiting to become–who knows
what? I've turned my stack into a
library of wood samples, which can be
shelved just like real books.
My wooden books are ideal for
showing customers and friends what
different kinds of wood look like, and
how a wood’s figure varies depending
on how boards are cut.Having made
the books years ago, I also now have a
record of how a wood's natural color
changes with time and exposure.
To make a book, start by milling a
blank foursquare. If you’re using rough
lumber, start with a blank that’s at least
12" long, for safety when jointing and
planing.The blank can be any thickness,
but I've found that books 1" thick
or more look best. For your first book, a
milled 2×6 is just right.
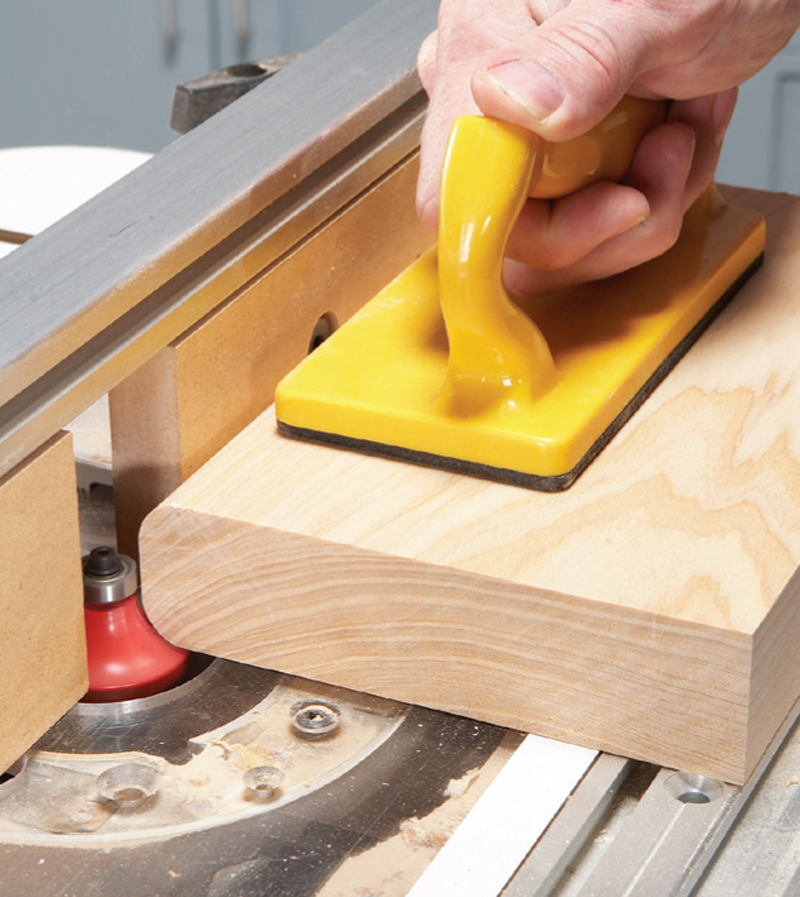
Begin by rounding over one long
side of the blank (Photo 1). For books
that are 3/4" to 1-1/4" thick,use a 1/4"
radius bit; for books 1-1/2" to 2" thick,
use a 1/2" bit; for thicker books, use a
1" bit.
Rip the spine from the body of the
book (Photo 2).Make the cut 1/16”
below the base of the roundover.Mark
the two pieces so you can correctly reassemble
them later.
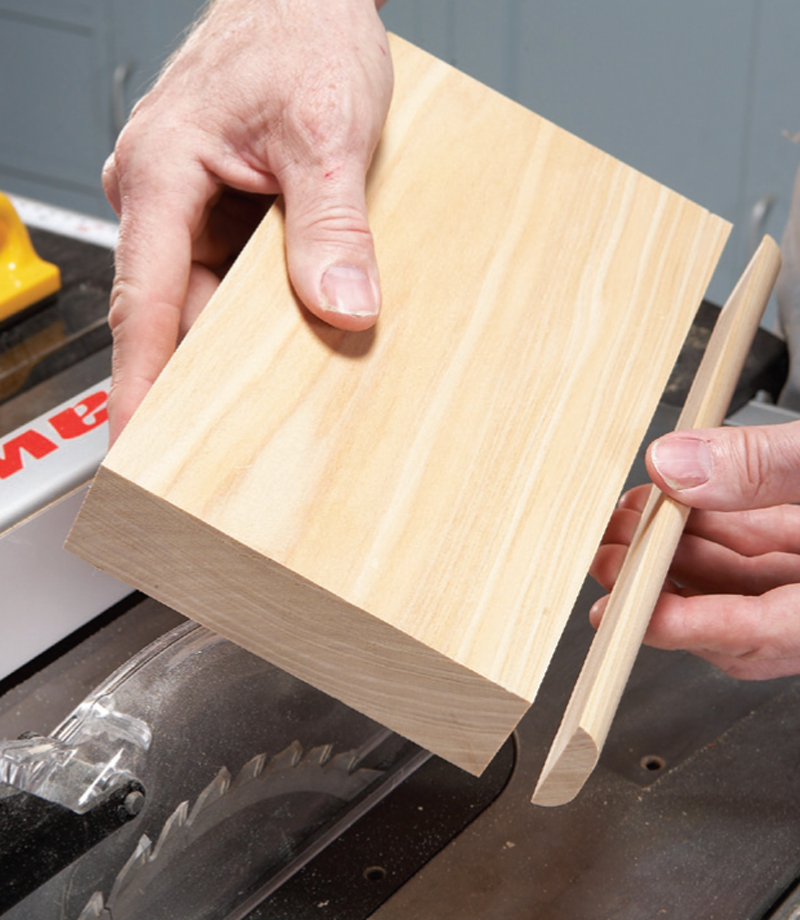
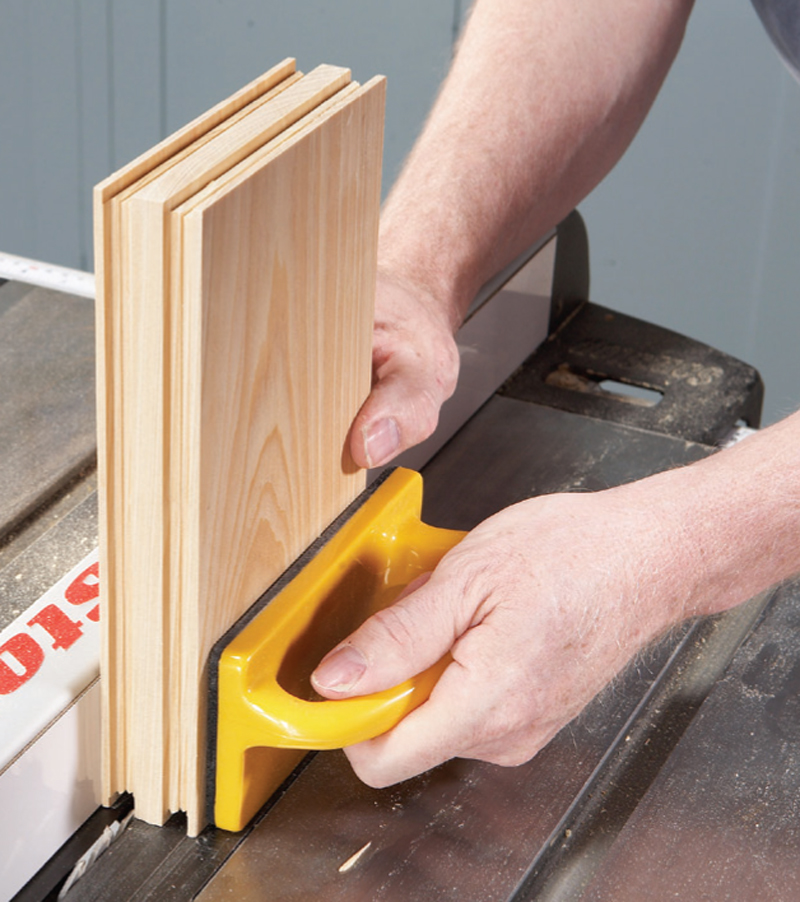
Saw the book's outer pages (Photo
3).An ATB (Alternate Tooth Bevel) style
blade gives the best look. I recommend
that you use a zero-clearance
fence for maximum support. Raise
the blade to make a cut 3/16" deep
and position the fence 1/8" from the
blade. To minimize tearout,make the
first cut with the book upright, leading
with the spine side. Next, make a second
cut on the long side. Then stand
the book upright again, and make a
third cut on the remaining short side .
Turn the book around, and repeat
these three cuts.
To cut the inner pages, raise or
lower the blade a bit, move the fence
1/64" less than the blade's kerf, and
repeat these cuts in the same order.
Continue to make a series of similar
cuts, changing the blade's height and
the fence's position by different
amounts each time,until all the pages
are formed.
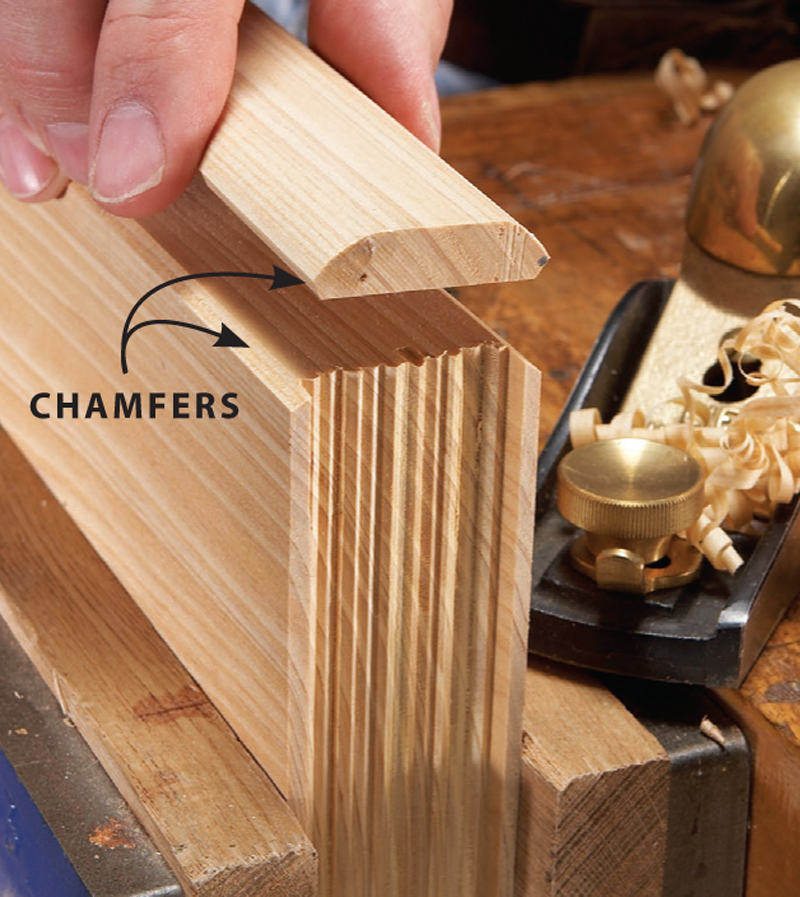
Make a reveal between the spine
and body by chamfering the mating
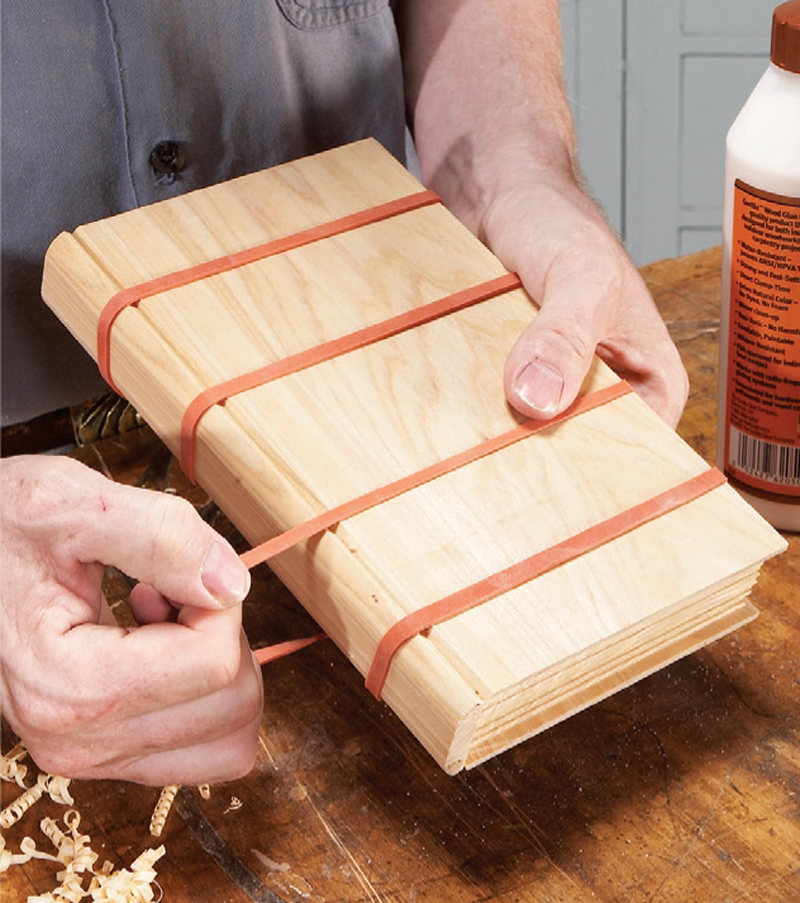
edges of both parts (Photo 4). Spread
glue on the joint (use a small amount
so there's no squeeze-out to clean up)
and bind the book with rubber bands
(Photo 5).Apply a finish–or not–and
it's ready for the shelf.
This story originally appeared in American Woodworker October/November 2009, issue #144.

October/November 2009, issue #144
Purchase this back issue.
|
|
Click any image to view a larger version.
1. Round over one side of a squared-up blank,
to duplicate the look of a book’s spine.
2. Rip the blank to separate the spine from
the body of the book.
3. Simulate a book’s pages by sawing three
sides of the blank.Vary the height and
width of the cuts. Caution: Use a push
pad to support the
work and to keep
your fingers away
from the blade.
4. Chamfer the edges of the spine and body
with a block plane.
5. Glue the spine back to the body.Use rubber
bands as clamps to avoid marring the
book.
|