|
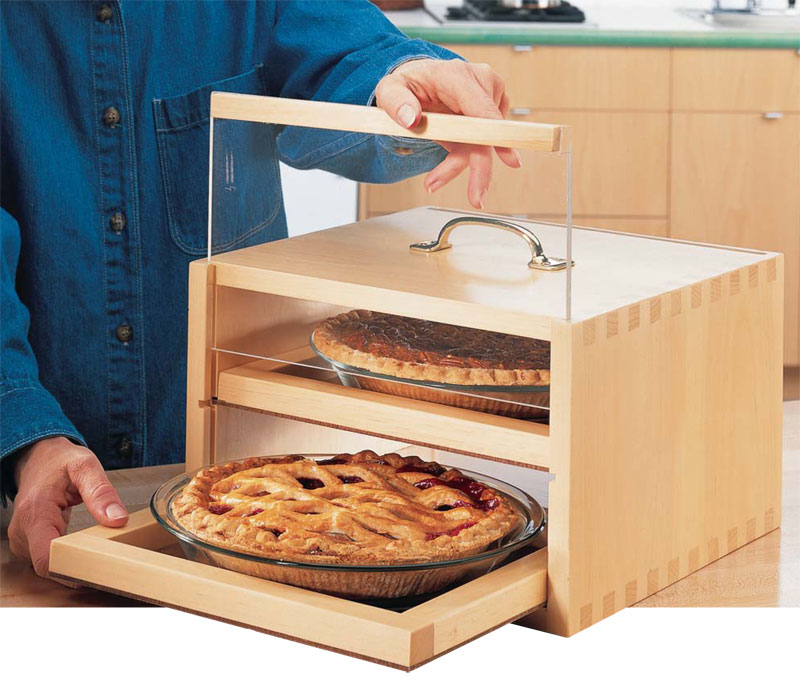
No more smashed frosting, cracked
crusts or capsized casseroles.You
can take your culinary creations anywhere
with this portable food safe.You
can adapt the design to accommodate
two pie plates, a deep casserole dish or
a 9 in. by 13 in. baking pan. If you’re a
bread baker, size the safe for two loaf
pans with a pull-out cutting board on
the bottom.Whatever you’re toting, it
will arrive in style and in one piece!
Pine’s a good choice for wood
because it’s easy to work and light in
weight.Acrylic doors allow for peeking
and the brass handle is an easy grip.
Total cost: around $35. (Note: The following how-to contains specific instructions
for the food safe pictured here.)
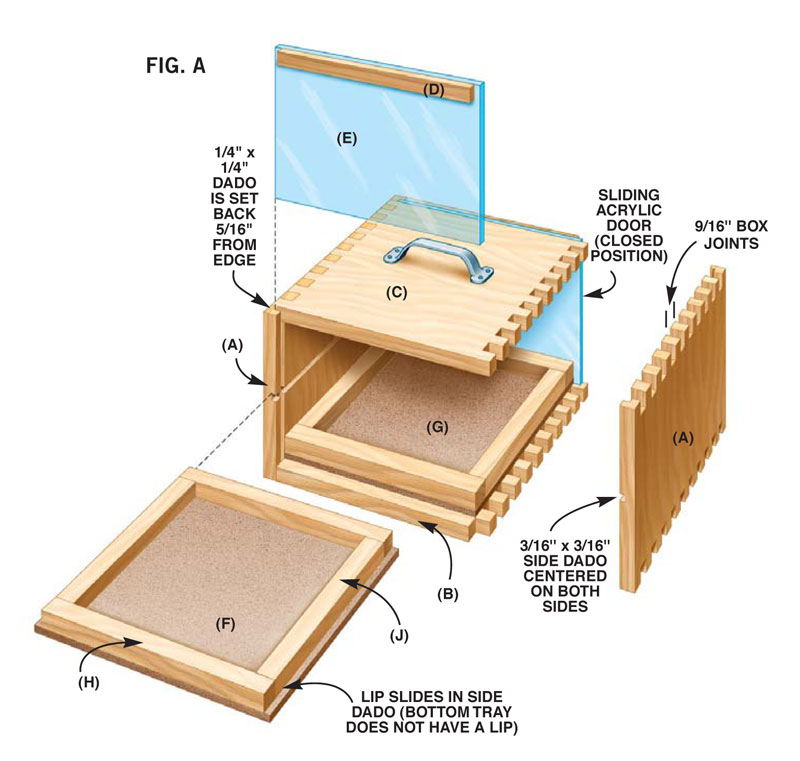
The four sides are wide so you may
have to glue up some stock. Plane the
material to 5/8-in. thickness and mill to
width and length (Fig.A). I like to cut
the parts about 1/16-in. long so each
box joint protrudes about 1/32 in. It’s
better to sand the pins flush to the sides
than the sides flush to the pins! Once
the box joints are milled (Photo 1), take the two side panels and make the
dadoes for the two sliding doors. The
acrylic I used came a little under thickness
so it worked well to make the
dadoes right at 1/4 in. Next make the
dado for the upper sliding tray. Now is
a good time to finish sand the inside
surfaces.
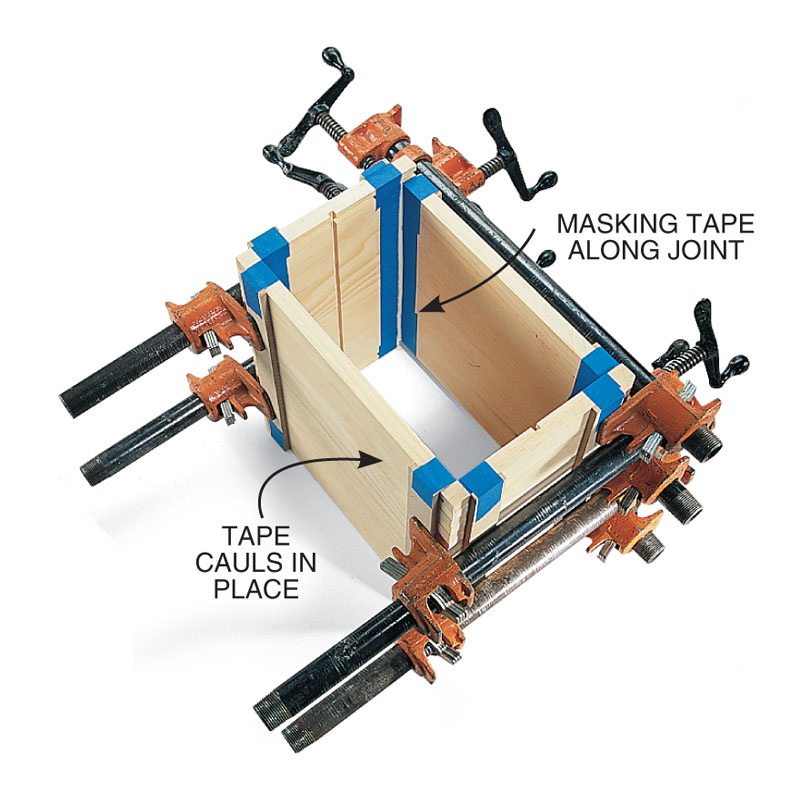
Gluing and clamping all four sides at
once takes four hands; here’s a better way: Dry clamp the four sides, pull the
top off the sides and brush glue onto the
mating surfaces of the exposed pins.
Replace the top and clamp (Photo 2).
Make sure the top is square to the sides.
When dry, flip over and repeat the gluing
process with the bottom panel.
When the glue is dry, you can sand
the joints flush. Cut the tray bottoms
from 1/8-in. hardboard. The
upper tray bottom is wider than the
lower tray because it needs a lip to slide
in the side dado. Cut and attach the
rim boards.
Your hardware store can cut the
acrylic doors for you. If you choose to
cut them yourself, use an 80-tooth, carbide-
tipped triple chip design or a finetooth
steel plywood blade. To remove
saw marks on the edges of the acrylic,
use a sanding block. The wood trim
on the doors serves as a finger grip and
is attached with epoxy. Scuff the acrylic
with sandpaper and tape off any place
you don’t want smeared with epoxy. Peel off the tape when the epoxy is still
semisoft.
Stain and finish to your liking.Add
the handle and you’re ready to go.
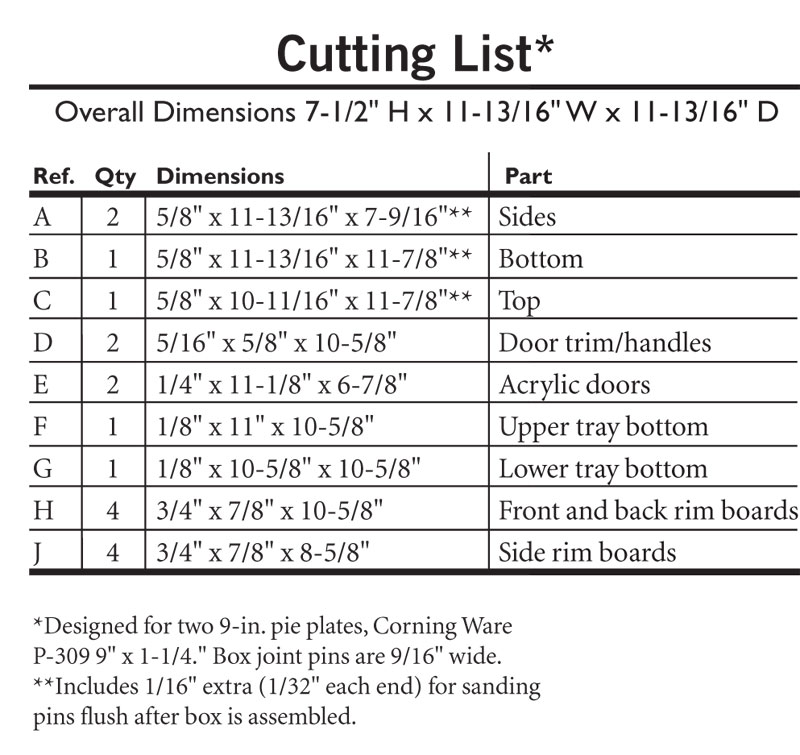
Cutting List

Fig. A:
|
|
Click any image to view a larger version.

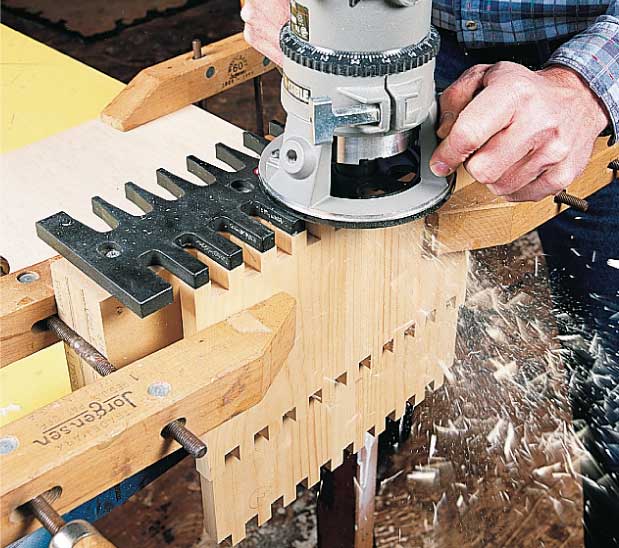
1. Routing box joints with a dovetail jig is
very fast (this one is by Keller).The jig is
easy to set up, reliably accurate and can
also be used to make dovetails.
2. Clamp up the box using cauls to clear
the protruding pins.Taping the cauls in
place makes the job easier. For easy
cleanup, line the corners with masking
tape to catch glue squeeze out.
|