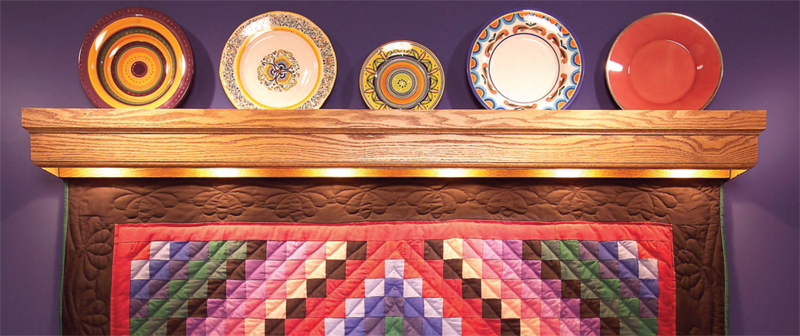
Decorative quilts
make great wall
displays, and this quilt
valance gives you an
easy way to show off a
quilt—with light, no less.
The top of the valance
doubles as a small shelf for
displaying plates or other
collectibles. The design can
easily adapt to any quilt size.
Cut and Assemble the Parts
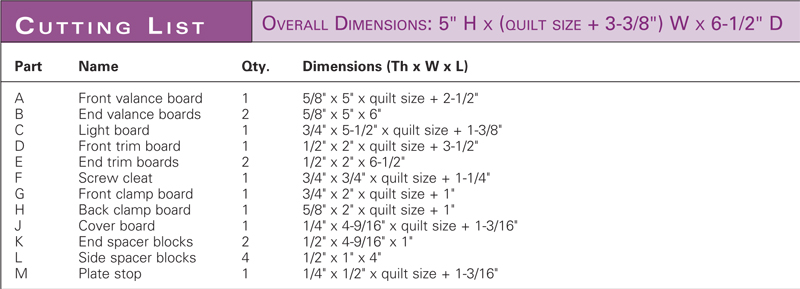
Start by calculating the size of
the parts you need for your quilt
according to the Cutting List (see below). You can machine your
material to final width and thickness
at this time, but don’t cut the pieces
to final length yet.
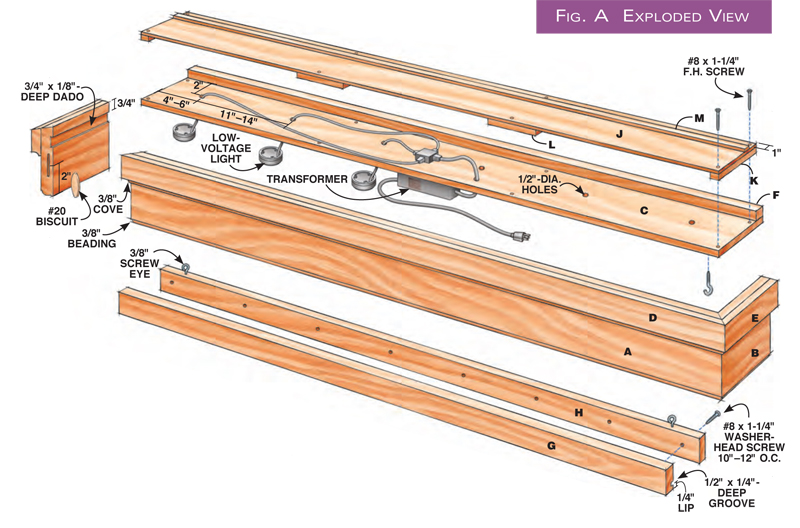
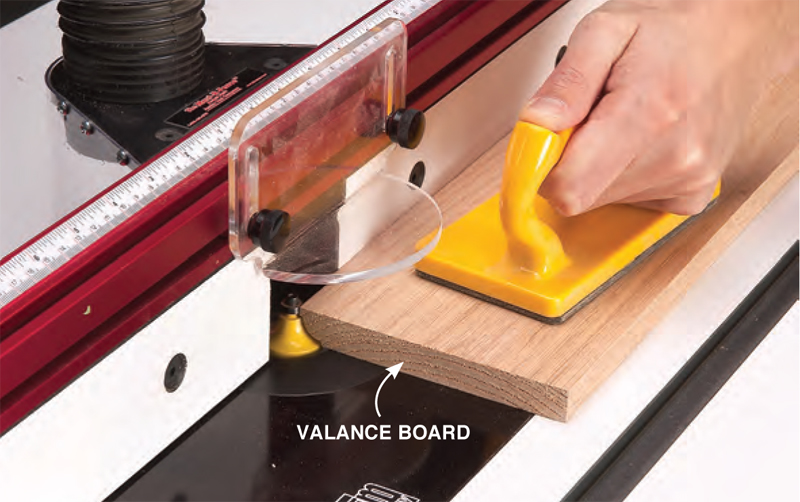
Next rout the profile on the edge
and cut the groove on the back of
the board you plan to use for the
valance pieces (A and B, Fig. A, below; Photo 1, right). Then miter them to
final length and cut biscuit slots in
the ends (Photo 2). Do a test assembly
of the three valance parts and
double-check the length for the
light board (C).
It’s important that the light board
not be too long or too short,
because it would cause the valance
ends to flare in or out and prevent
the miter joints from closing properly.
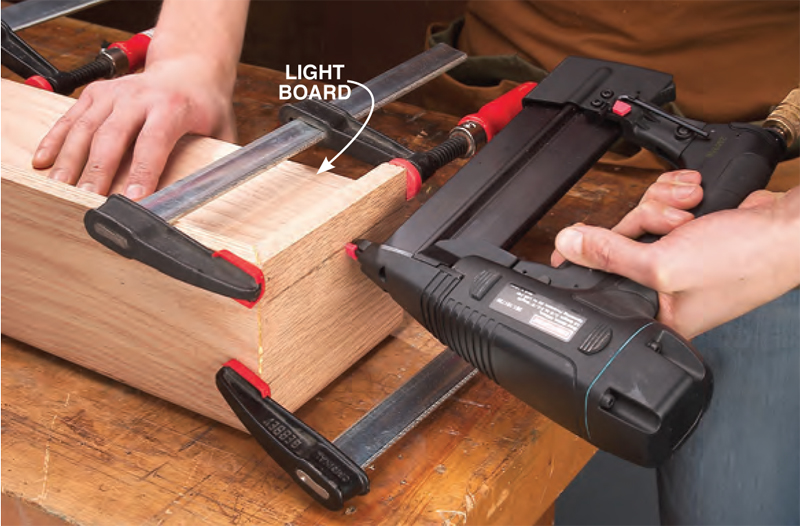
When you have the light board
cut to the correct length, glue and
clamp it to the valance boards. You
can skip running clamps the length
of the quilt rack if you drive some
brad nails through the end valance
boards into the ends of the light
board (Photo 3).
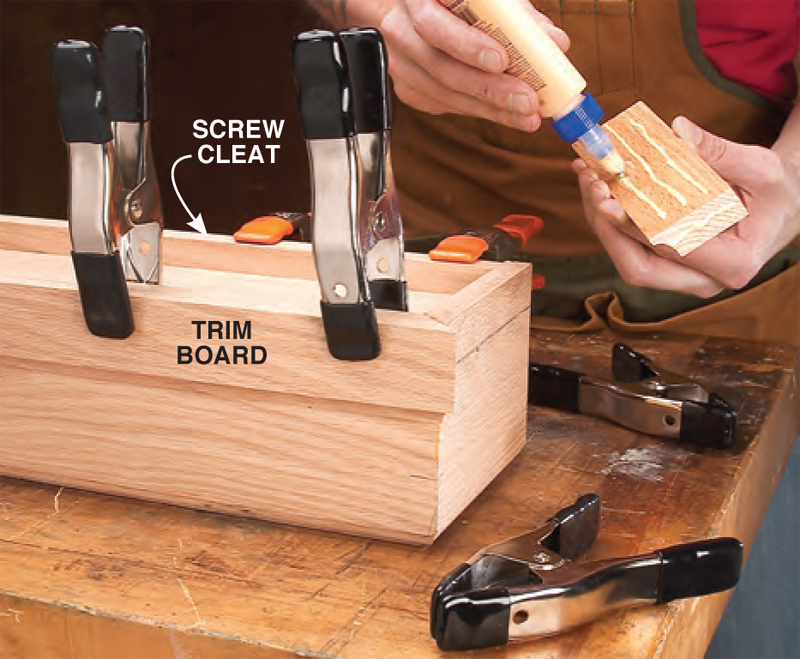
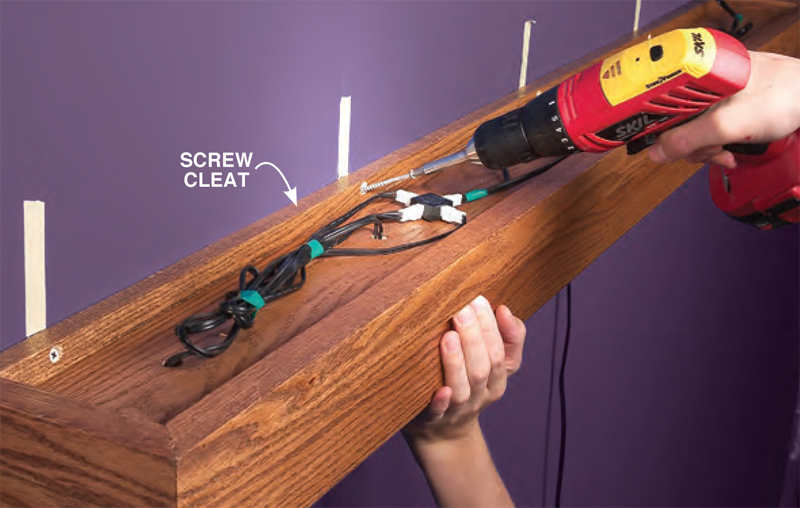
Next cut and fit the trim boards
and screw cleat (D, E and F) to final
length and glue them to the valance
and light-board assembly (Photo 4).
Then make the clamp boards (G
and H).
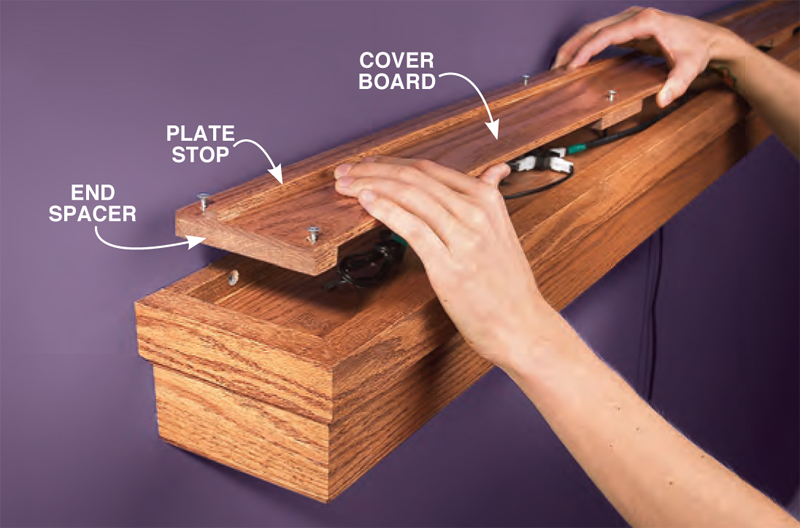
Make the final parts: the cover
board (J), spacer blocks (K and L)
and the plate stop (M). Assemble
these parts with glue and check that
they fit into the top of the assembled
quilt hanger.
Mount the Lights
Now turn your attention to
drilling the holes for the wiring (Fig.
A). The lights’ spacing will depend
on the overall length of your quilt
hanger. It is not critical, but I found
spacing them between 11 and 14 in.
apart to be about right. After the
holes for the wiring have been
drilled, you can sand and finish the
quilt hanger.
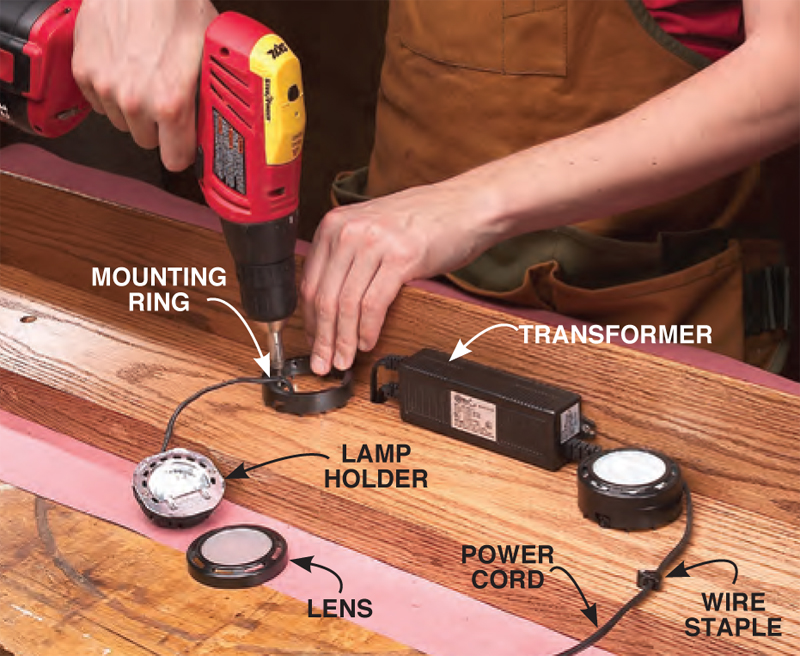
When the finish is dry, install the
lights (Photo 5). Screw the mounting
ring on; then snap the lamp holder
and lens into place. The wires run
through the holes and are hidden on
the top side of the light board.
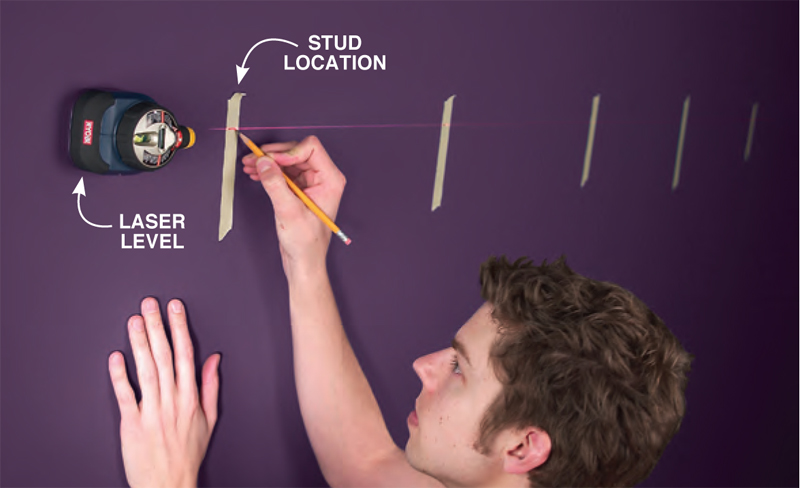
Hang It On Your Wall
Locate the studs in the wall and
mark them with masking tape. Strike
a level line at the height you want
your quilt hanger installed (Photo
6). Drill holes in the screw cleat to
match the stud spacing and attach
the quilt hanger to the wall with
some long screws. This is really a two person
job, so ask someone to help
you hold the quilt hanger in place
while you drive in the screws (Photo
7). After the hanger is attached to
the wall, screw on the cover board
(Photo 8) and fasten the quilt
between the clamp boards (Photo
9). Now simply engage the screw eyes
on the hooks (Photo 10) and enjoy.
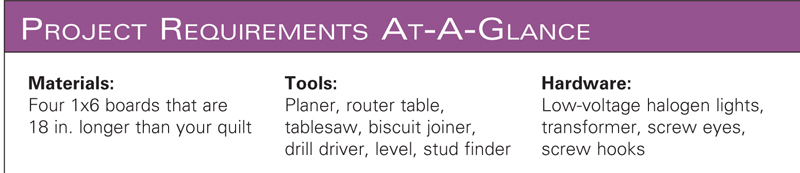
Project Requirements

Cutting List
Fig. A: Exploded View
|
|
Click any image to view a larger version.
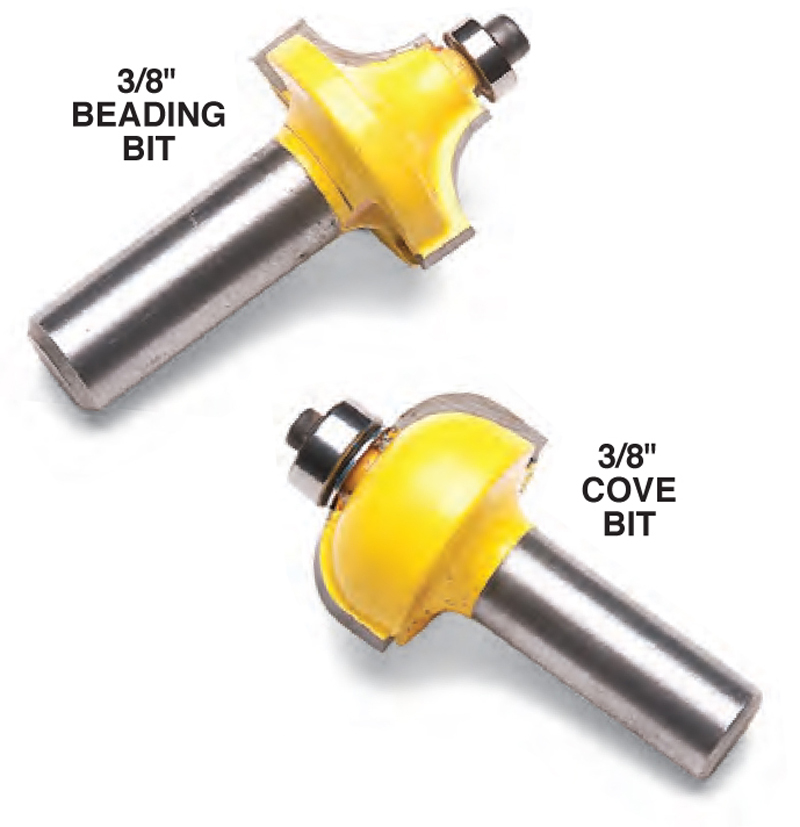
1. Rout the profiles on the valance and trim boards before you cut them
to final length. Two common router bits are all you need to make this
project: a 3/8-in. cove bit and a 3/8-in beading bit.
2. Cut biscuits in the mitered ends of the valance boards. Position the
slots near the miter’s inside edge. This prevents the slot from coming
through the board’s face. The board that the lights mount on will fit into
the groove in the back of the valance boards.
3. Glue the valance boards around the light board. You can remove the
clamps very quickly if you pin the joint with brad nails.
4. Use spring clamps to glue on the trim board and screw
cleat. The trim board covers most of the brad nail holes.
Hide any remaining holes with wood filler.
5. Install the lights and the transformer on the bottom
side of the light board. Snap the light and lens onto the
mounting ring and run all the wires, except the power
cord, through the holes to the top side of the light board.
6. Mark a level line on your wall with a laser or bubble level. Use masking
tape to mark the location of the wall studs, so you have a secure
place to screw in the quilt hanger.
7. Attach the quilt hanger to the wall. Drill holes in line with the wall
studs in the screw cleat on the back of the quilt hanger. After the quilt
hanger is mounted, you can remove the exposed masking tape.
8. Install the cover board with screws. The cover board hides the wires
and serves as a shelf to display plates or other collectibles.
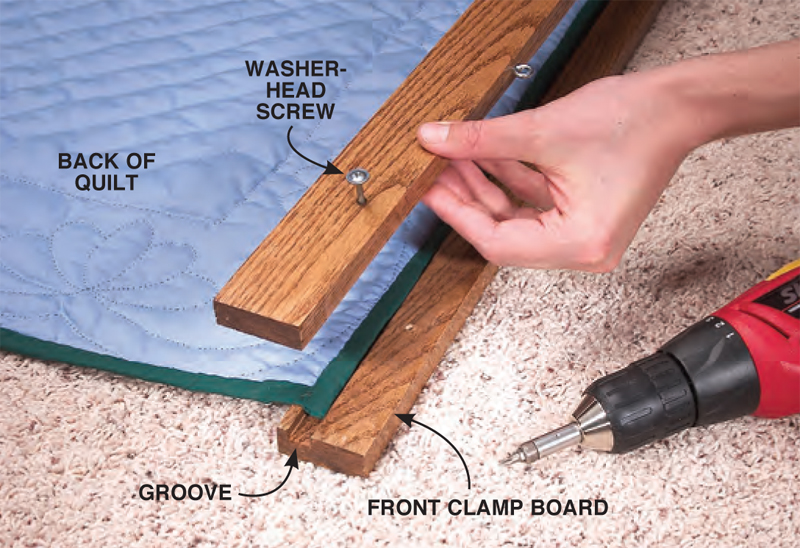
9. Secure the your quilt in the clamp boards. Most quilts have a
thick edge binding; this fits into a groove in the front board. The
simplicity of this clamping and hanging system makes it extremely
easy to switch quilts when you want to change your decor.
10. Hang the quilt by engaging the screw eyes in
the clamping boards to hooks below the light
board. It’s an easy, one-person job. Run the power
cord behind the quilt, turn on the lights and enjoy!
|