We may receive a commission when you use our affiliate links. However, this does not impact our recommendations.
 Contrasting woods highlight the elegant lines of this Gustav Stickley-designed classic.
In days gone by, a chest similar to this would contain a bride’s dowry. The form goes back to Gothic times, but this is an adaptation of a Gustav Stickley piece from 1901. Admiring the lines of this piece, I was curious to see how the design would look with contrasting materials, not the usual Craftsman dark oak. The panels are quilted bird’s eye maple, and the other parts are Jatoba, also known as Brazilian cherry.
The original was made of quartersawn white oak with wrought-iron braces on the corners. What makes this unusual for a Stickley design are the decorative corbels on the panels. These also appeared on a few dining room case pieces made in the early 1900s.
 Decorative curved elements in Stickley furniture are usually associated with Harvey Ellis, who worked for Stickley in 1903. This design appeared well before Ellis worked for Stickley, and before Stickley wrote against using purely decorative elements in his furniture catalogs.
Stickley doesn’t always get the credit he deserves as a furniture designer. Building this bridal chest with non-traditional materials takes his design out of the Craftsman context, and shows Stickley’s remarkable sense of line, proportion and texture.
In many of the original bridal chests I have seen, the center panels have cracked. I think the corbels are the culprits, keeping the solid-wood panels from expanding and contracting in the grooves of the stiles. To avoid this problem, I decided to use veneered panels. The veneer is on a core of 1⁄2“-thick Medium-density Fiberboard (MDF), and the backing veneer is sycamore, a less-expensive alternative to the figured faces.
The veneer on the wider center and end panels is bookmatched. I pressed the panels one at a time in a simple shop-made cold press, and worked on the chest’s solid-wood components while the glue on the panels was curing.
If you think of this chest as a simple box, most of the work is in the five paneled assemblies: the front and back, two ends and the top. The panel assemblies are joined with mortises and tenons, and each of the four legs is really two stiles with the long edges mitered together.
I fabricated all of the stiles and rails, and then dry-fit each of the panel assemblies before cutting and assembling the miter joints that connect the legs.
Arts & crafts bridal chest cut list and diagrams
Managing Bits and Pieces
This isn’t really a difficult project to build; the hardest part is keeping track of what piece goes where. The applied corbels make it necessary for the panel grooves to be off-center on the edges of the stiles and rails. As I cut the parts I decided where they would go in the finished chest, and marked each one with a lumber crayon. As I worked on the joints I paid close attention to which face of each part was the outside piece.

With the dimensions marked on a story pole, the locations for the mortises are marked on the legs as a group.
After cutting the panel parts to size, I grouped four of the leg pieces together and marked them out as left-handed pieces, using a story pole to transfer the measurements. I then laid out the other four leg pieces as right-handed, marking the locations of the grooves for the panels and the mortises that hold the stiles and rails together.

The mortiser is set with the chisel flush with the panel groove. Plunge the bit and chisel to make distinct holes, then come back and clean up the waste in between.
The mortises are the same width as, and in line with, the grooves that capture the panels. These 3⁄8“-wide grooves are set 1⁄2” back from the outside face of the stiles and rails, so I had to be careful to keep all the parts oriented correctly as I milled the grooves.
I cut the stopped grooves with a stack dado set on the table saw, carefully lowering and raising the legs on and off the cutters. Because the mortises fall in the ends of the grooves, the exact length of the grooves isn’t critical. The grooves in the rails and in the intermediate stiles run the full length of those parts. After milling all the grooves, I began making mortises with my hollow-chisel mortiser, setting the distance from the fence to the chisel to match the location of the groove.

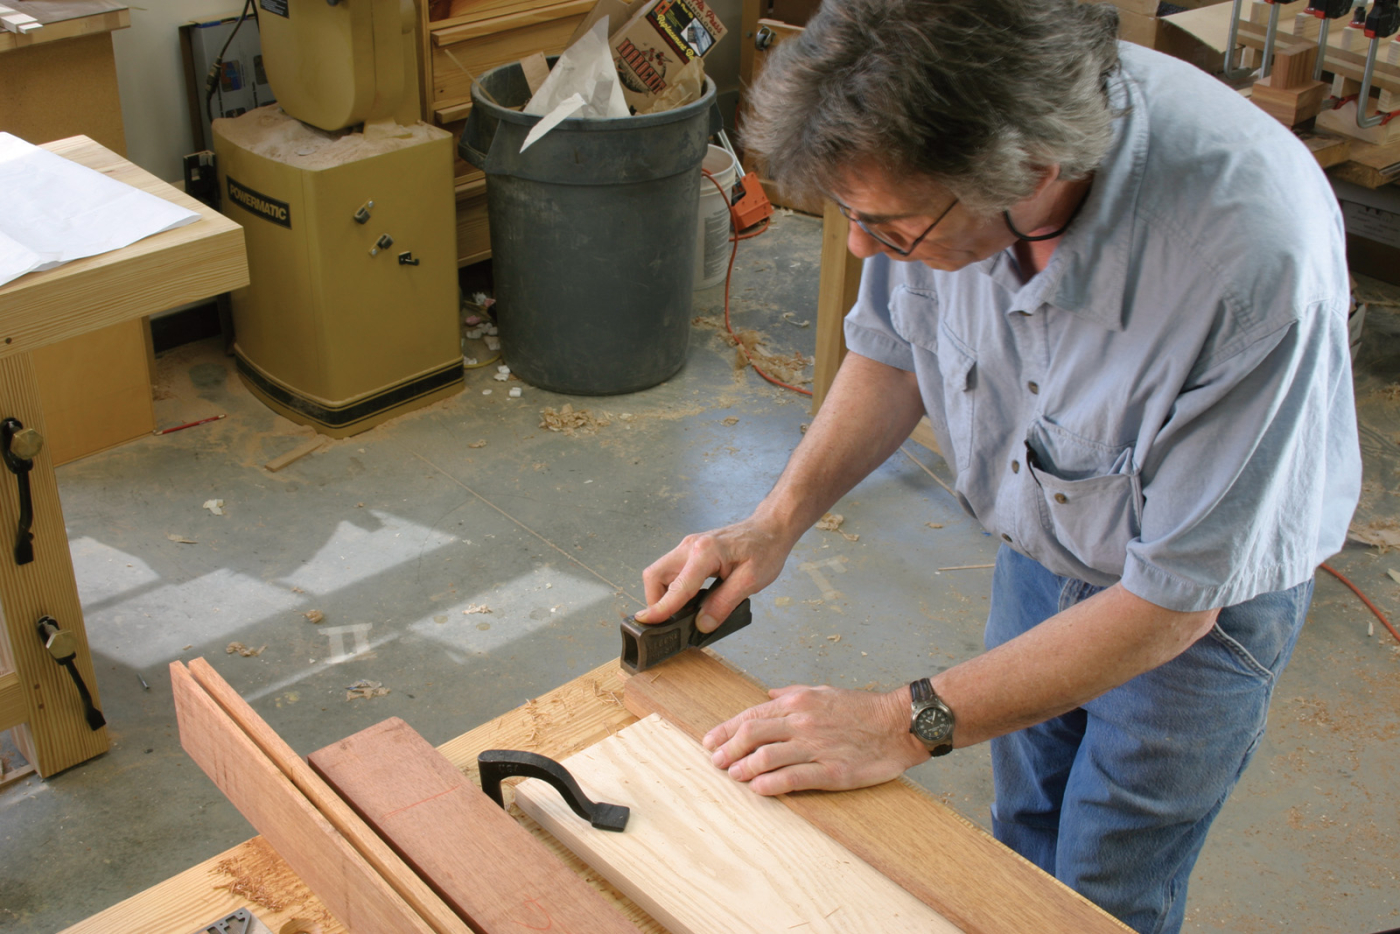
Each of the tenons is planed to fit snugly in its mortise. A batten across the bench eliminates the need to clamp the parts while fitting.
The tenons were cut with a stack dado set on the table saw, and then trimmed to a piston fit with a shoulder plane. With the individual panels dry-assembled, I made sure that the faces of the joints were flush with a few swipes of my smoothing plane.
Getting Ready to Assemble
I cut the veneered panels to their final size, and then milled a rabbet on the back of each panel on the router table. With a slot-cutting bit set just under 3⁄8” above the table surface, I made a tongue that slipped in the grooves of the stiles and rails. This is a good technique when working with plywood panels of inconsistent thickness as the fixed distance between the table and cutter will produce a consistent part that matches the width of the groove. I then sanded the veneered panels to #220 grit to prepare things for assembly.

Setting the cutter above the table surface cuts a consistently sized tongue on the back of the panels.
Before assembling any of the panels, I cut 45° bevels on the long edge of each leg that didn’t have the groove for the panels. I glued pairs of legs together, clamping them with a combination of clear packing tape and clamps. After letting the glue on these joints dry overnight, I glued together the front- and back-panel assemblies. The two end-panel assemblies are put together as the entire case is assembled.

Strips of clear packing tape across the joint let the miters fold together. More tape and additional clamps provide a tight, strong joint.
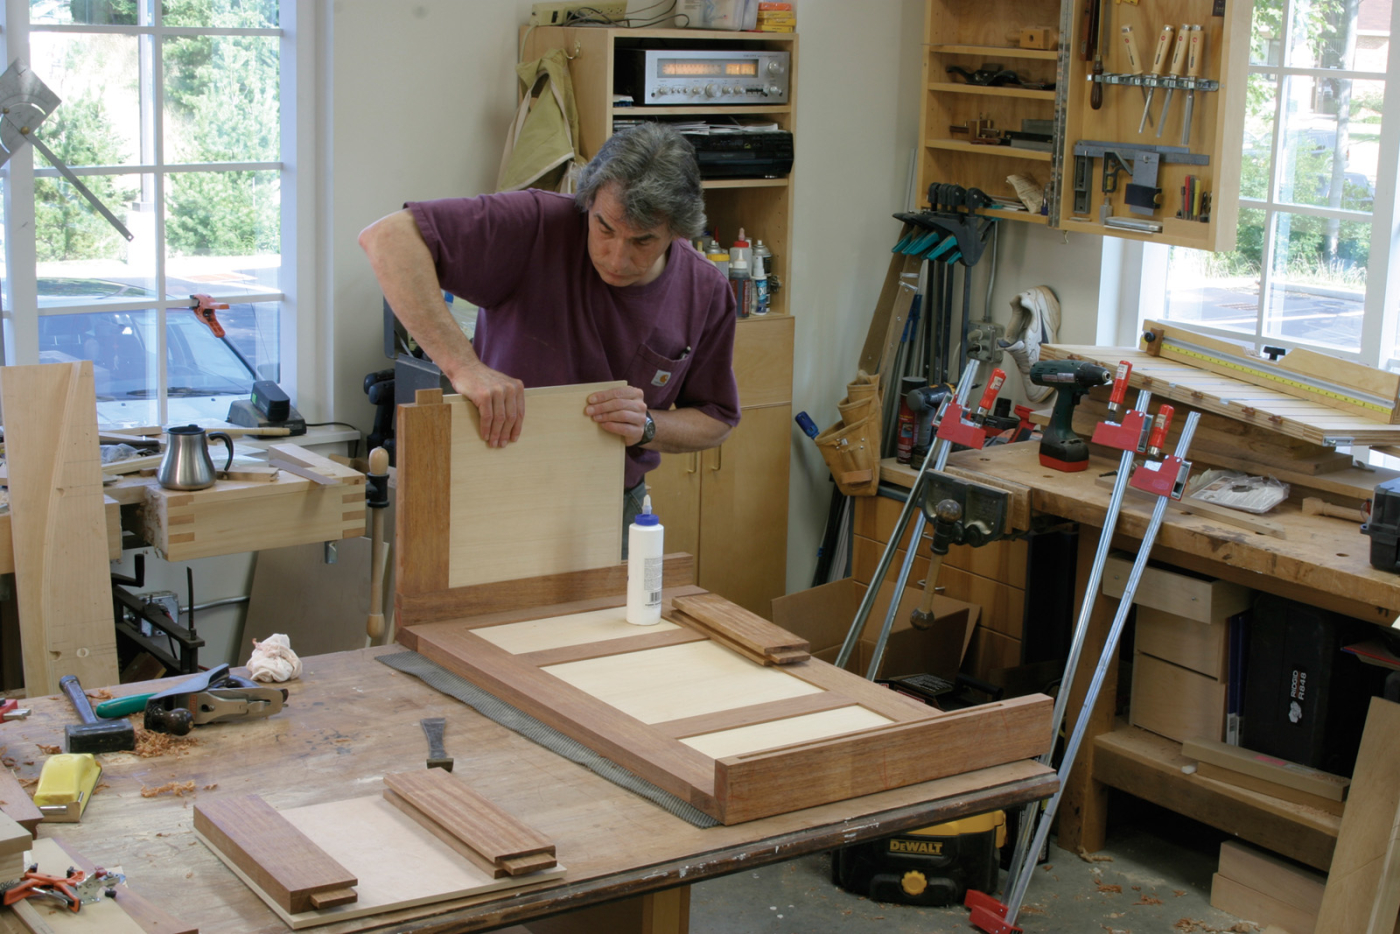
With the back panel lying face down on the bench, I assembled the rails and panels for the sides. Once they were in place, I put glue on the tenons and dropped the front panel assembly in place. I then set the chest upright on my bench and clamped across the ends, checking for square.

Rails and panels for the sides are slipped into the already-assembled back panel.

Assembling the front and back panels first simplifies the final assembly – putting the sides together results in a completed case.

The assembled chest is flipped upright, the corners are checked for square and the case is clamped.
After the glue on the solid parts had dried, I sanded the outside of the chest with a random-orbit sander, working from #100 grit up to #220, followed by a hand sanding with #280 grit. The top panel was then put together and sanded smooth.
Adding the Corbels
I made the 3⁄8“-thick corbels by resawing some of the 1-1⁄4“-thick stock left over from making the rest of the chest. After planing them to thickness, I stacked four pieces together with double-faced carpet tape holding the layers together. I made a pattern of the corbel shape from 1⁄2” MDF, and traced the outline on the top layer of the stack.

A stack of four blanks held together with double-sided tape yields eight matching corbels.
Using stock a few inches longer than I needed, and interlocking the patterns, I was able to get eight corbels from each stack. I cut the pieces on the band saw, and sanded the curved edges on the spindle sander before taking the stacks apart. With a 1⁄8“-radius roundover bit in my laminate trimmer, I eased the curved edges before sanding the corbels.

After cutting, the edges are sanded with the stack still stuck together.
The corbels are glued to the panels and edges of the stiles. I used a couple 3⁄4“-long 23-gauge headless pins to fasten the wider part of the corbels to the panels, filling the nail holes with some sawdust and cyanoacrylate glue. I hand sanded the entire cabinet, and applied three coats of Waterlox wiping varnish before hinging the lid and putting in the tongue-and-groove bottom.

The difference in thickness between the corbel and the adjacent stile and rail adds visual interest.
I used four 2-1⁄2“-long, no-mortise hinges for the lid, spacing them evenly along the top rail of the back of the chest. To hold the lid in the open position, I used a pair of toy-box supports. Because the chest was still bottomless, I could lay it on its back on my bench, and reach inside to position the supports.
Getting to the Bottom
I don’t have a daughter, so this chest will live at the foot of our bed, holding extra blankets. I placed 3⁄4” by 3⁄4” cleats around the perimeter of the bottom, flush with the bottom edge of the rails.
The bottom planks are 3⁄4“-thick aromatic cedar, held together with simple tongue-and-groove joints. I nailed the bottom planks to the cleats at the edges and ends. The cedar is left unfinished.
In the end, this chest has a clean, contemporary look with classic proportions. Changing the material may have disguised its origin, but the strength of the design shines through. Good design, after all, is timeless.
Here are some supplies and tools we find essential in our everyday work around the shop. We may receive a commission from sales referred by our links; however, we have carefully selected these products for their usefulness and quality.


