We may receive a commission when you use our affiliate links. However, this does not impact our recommendations.
 Dado a few sticks, then practice your ABCs.
 Dado a few sticks, then practice your ABCs.
Think twice before you take this puzzle apart. It has six faces, each face has nine squares and each square is lettered. That’s two complete alphabets on twelve interlocked parts, all of which are duplicates, but one. Having so many duplicates means each part can go almost anywhere. But because of the letters, each part can go in only one spot.
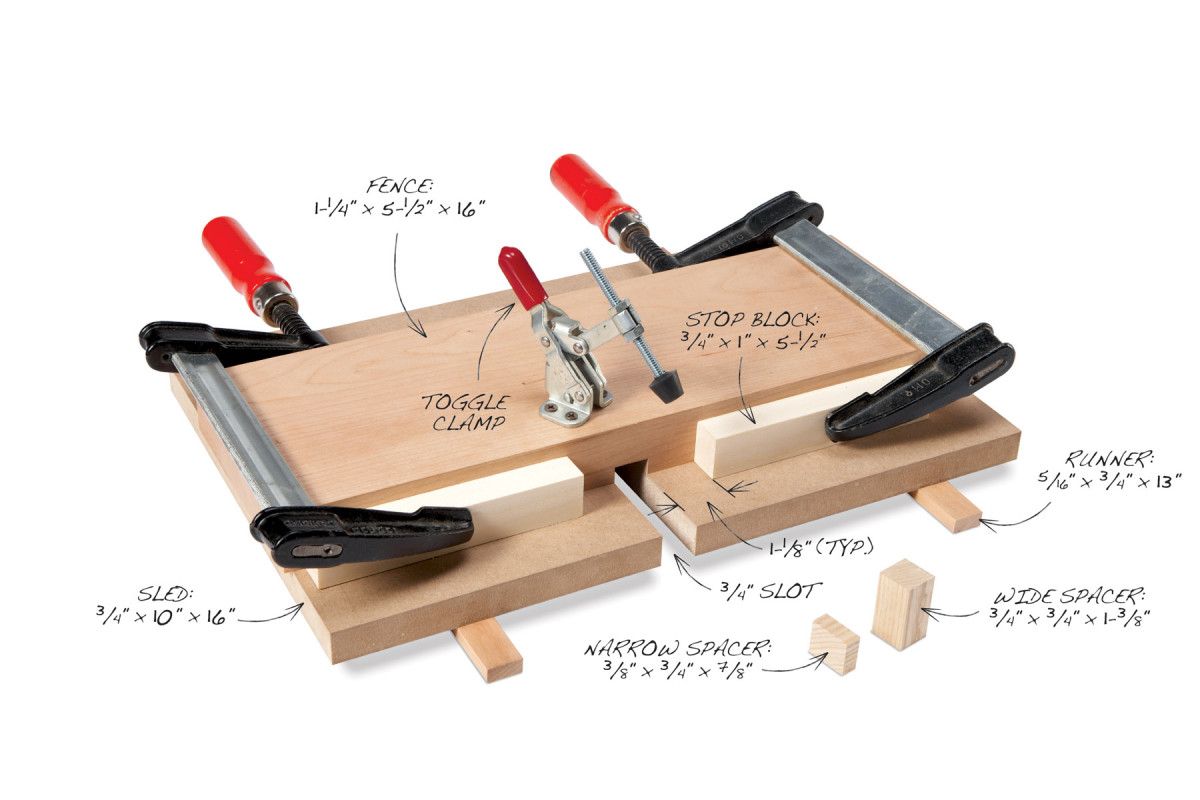
Fig. A) Dadoing Jig
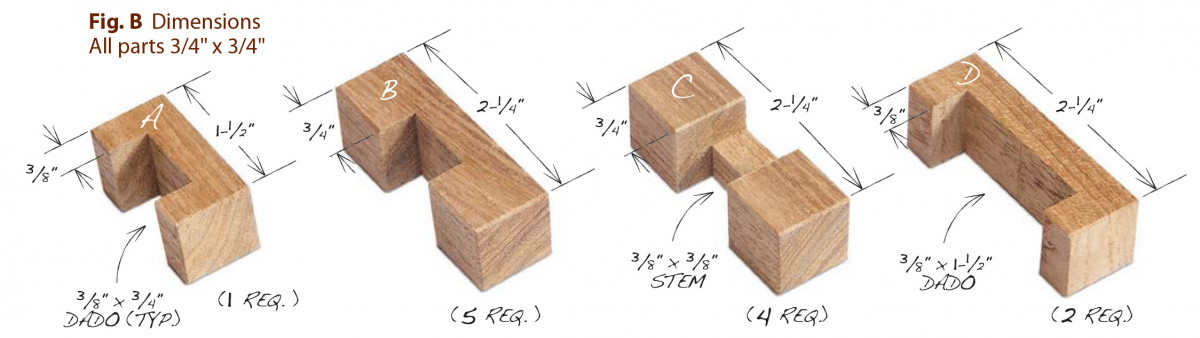
Fig. B) Dimensions All parts 3/4″ x 3/4″
Make the parts
1. Mill long 3/4″ x 3/4″ blanks that are absolutely square.
2. Cut the blanks to length to make the 12 parts (Fig. B), including extras for test cuts.
3. Set up the saw and the jig to cut 3/8″ x 3/4″ dadoes.
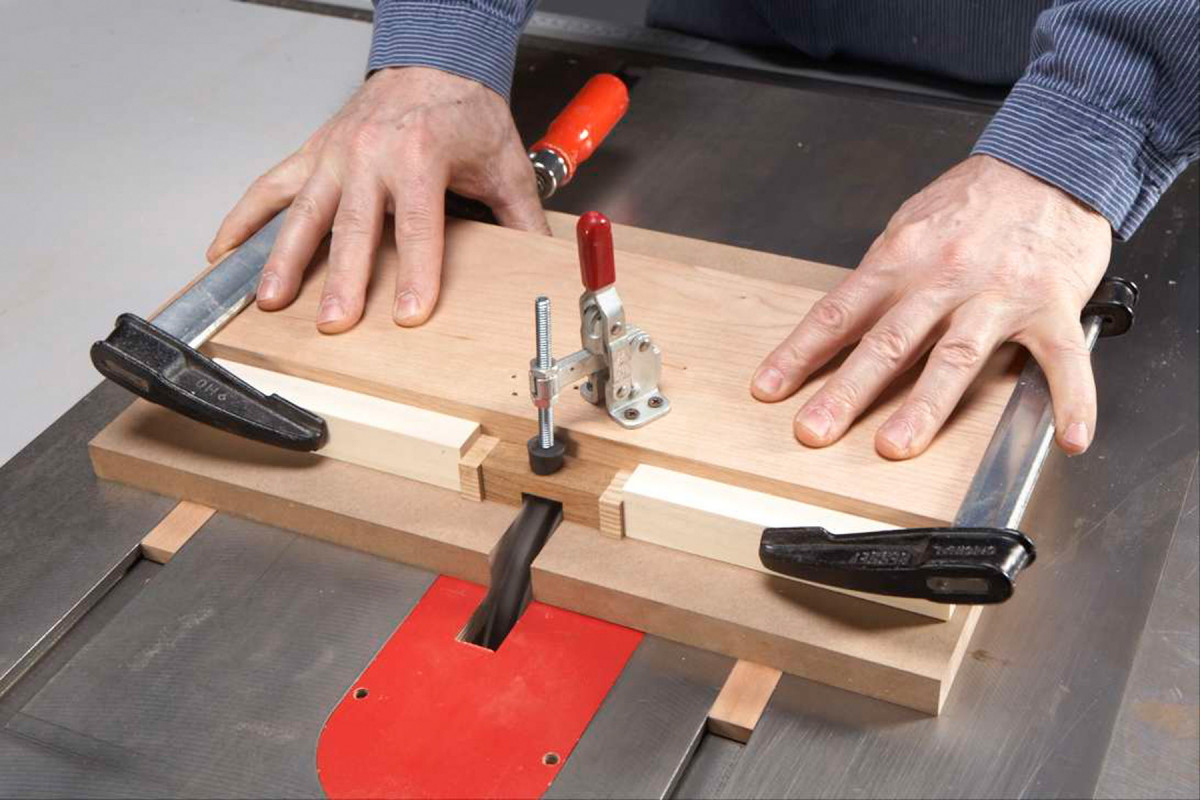
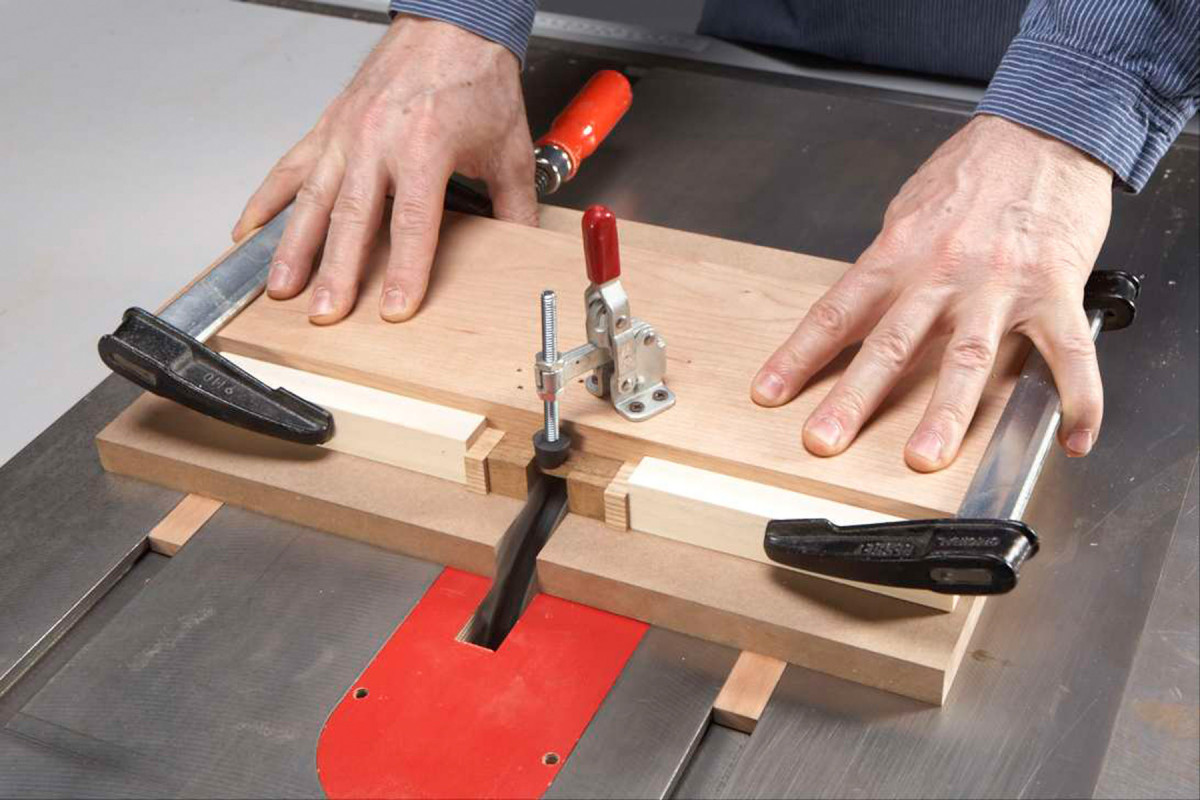
1. Create Part A by cutting a centered dado in the short blank after installing the wide spacers on both sides.
4. To make Part A, install the wide spacers and cut a dado in a 1-1/2″ blank (Photo 1).
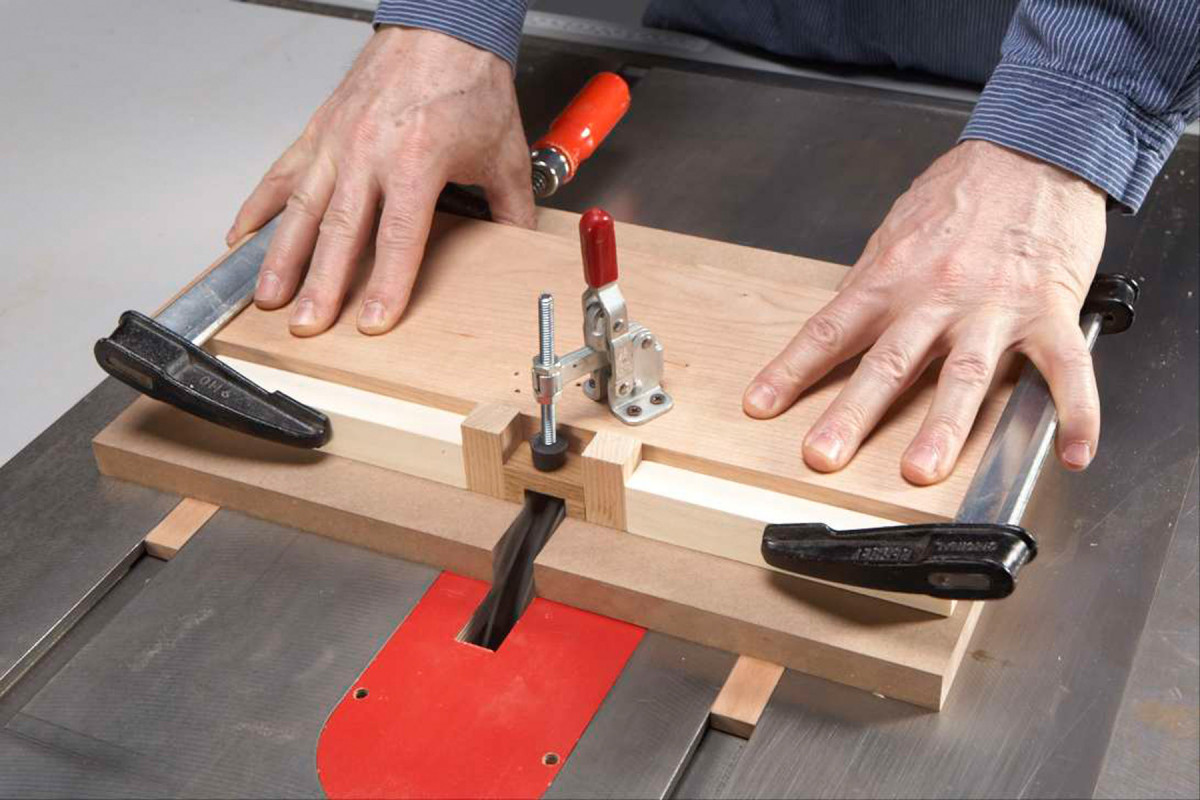
2. Create Part B by cutting a centered dado in nine of the long blanks after installing the two narrow spacers.
5. Switch to the narrow spacers and cut the dadoes in nine of the 2-1/4″ blanks (Photo 2). Set five of these pieces aside as Parts B.
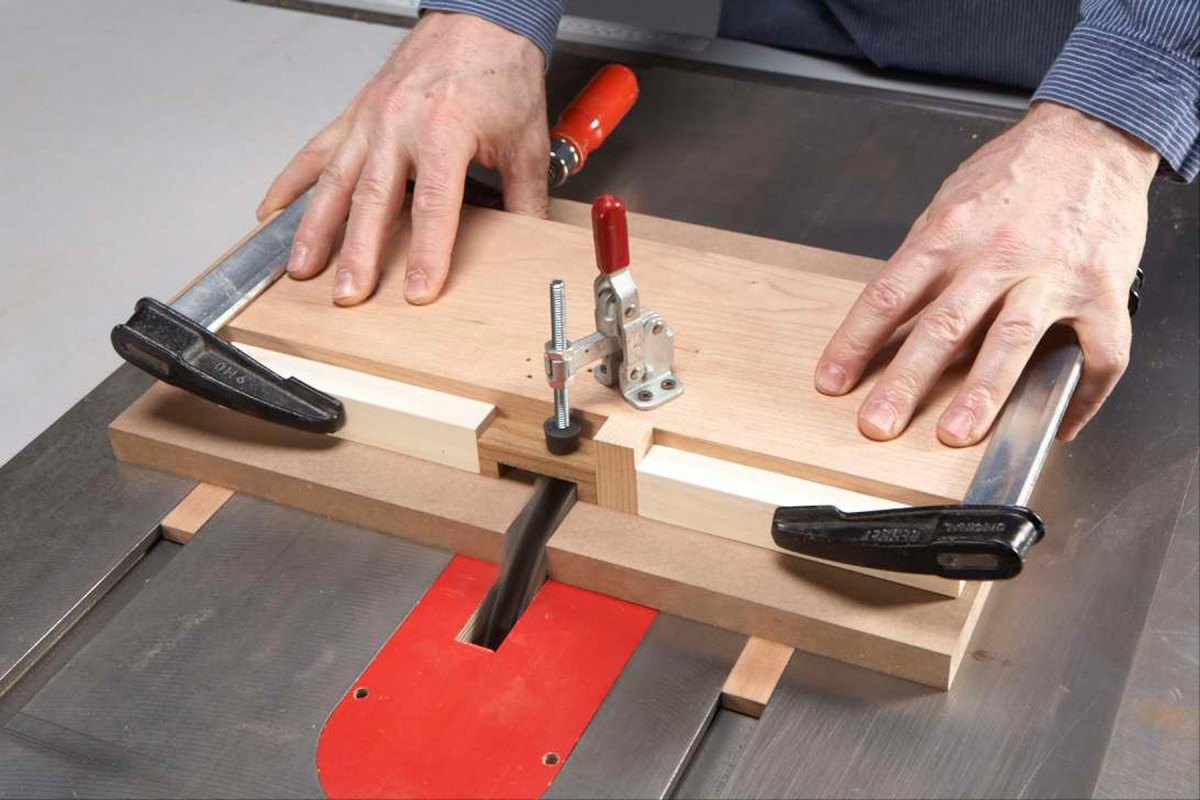
3. Create Part C by rotating four of the Part B blanks 90° towards the blade and cutting another centered dado.
6. Cut a second dado in the other four pieces to make Parts C (Photo 3).
4. Create Part D by cutting a pair of dadoes in the remaining two blanks. Cut the first dado with the wide spacer on one side and the second with it on the other side.
7. Use one wide spacer to cut wide dadoes in the remaining two blanks to make Parts D (Photo 4).
8. Very lightly sand the edges and ends of all 12 parts to create the tiny reveals that define the squares when the puzzle is assembled.
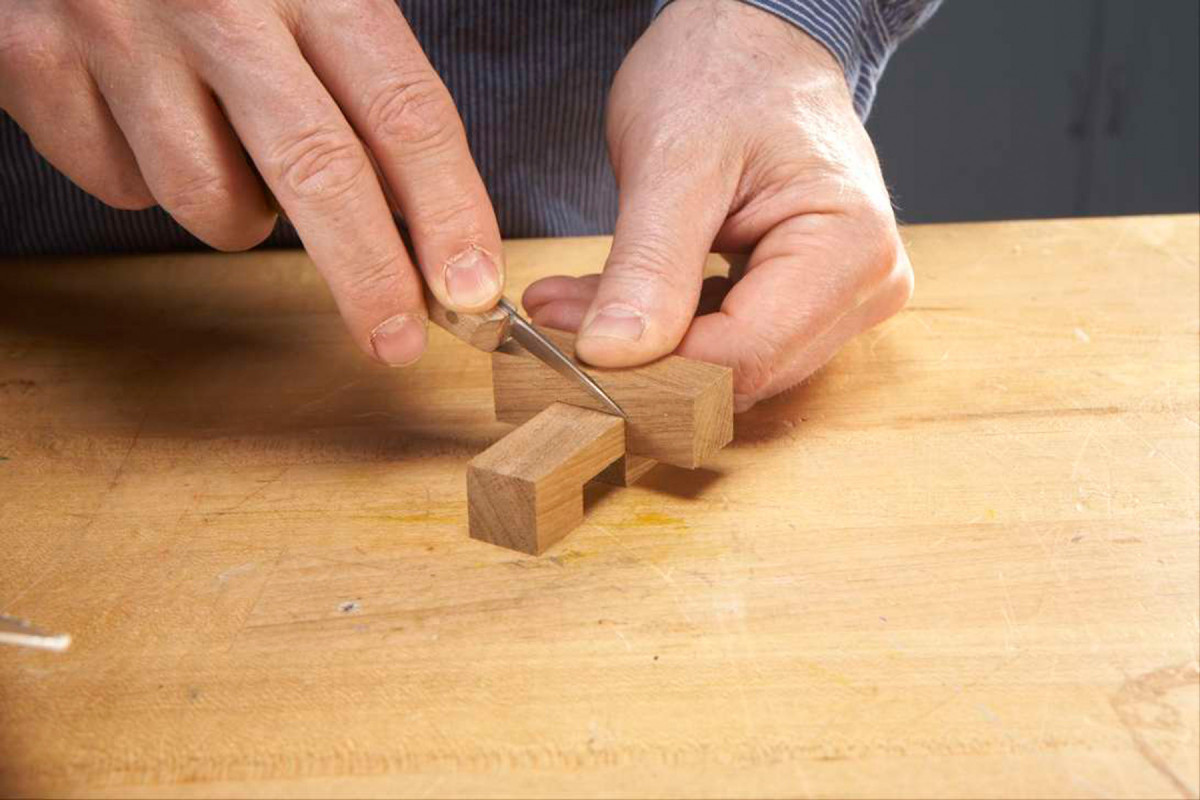
5. Divide the face of each long part into three squares. Scribe each line after installing another dadoed part flush with the end to use as a straightedge.
9. Scribe the middle square on the outside face of all Parts B and D (Photo 5).
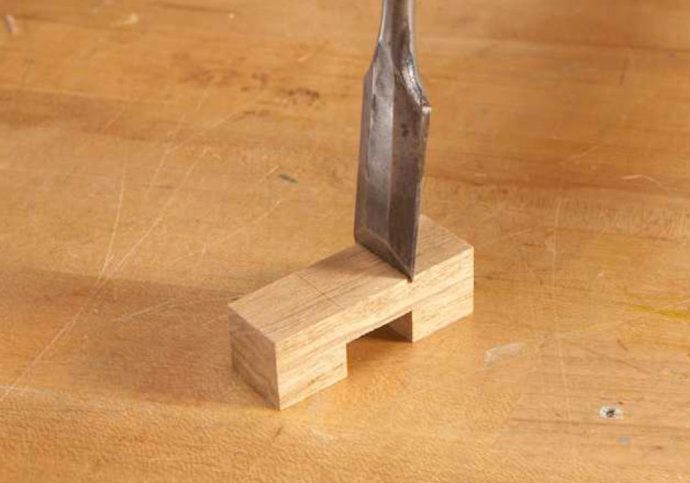
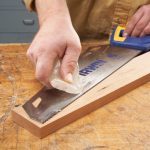
6. Mimic three separate parts by inserting a bevel-edge chisel in each scribed line and tapping it once with a mallet to create a v-groove.
10. Cut v-grooves on all Parts B and D to mimic the sanded reveals (Photo 6).
Assemble the puzzle
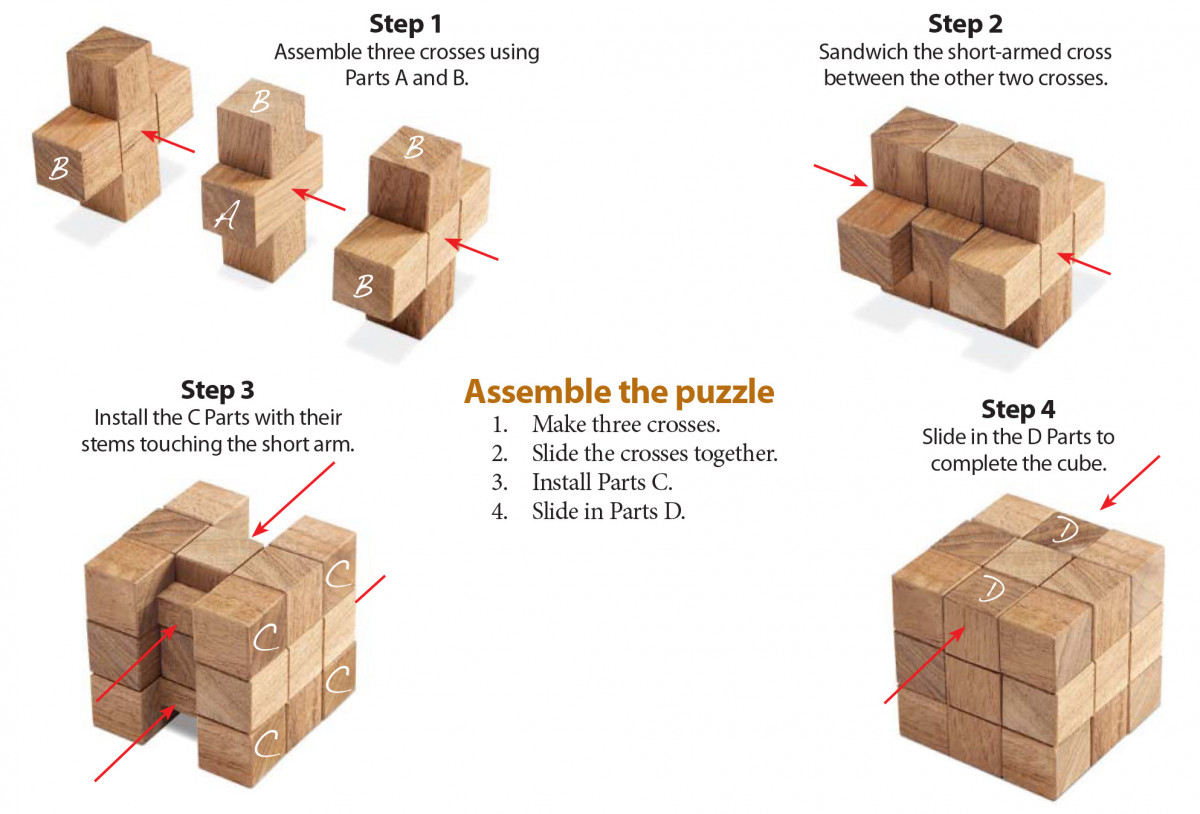 Making this puzzle may be easier than solving it, and once you’re set up, you might as well make multiples. Just think, give a puzzle to each of your (highly motivated and inquisitive) kids, and the house will be quiet for the first time in months!
Without letters, this puzzle is pretty easy to solve. Using different types of wood is one way to way to jazz it up. Adding numbers makes solving it quite a bit more difficult. But adding 27 different characters (26 letters and a question mark) creates the ultimate challenge, especially if their orientation changes on each face. Carving or routing the characters is one option—the puzzle featured on page 49 was CNC-routed. You could also use stamps or stencils or peel-and-stick characters—a single $5 package of 1/2″ letters and numerals (available at office supply stores) allows making four alphabet puzzles and two number puzzles.
For this puzzle to work properly, each part must be accurately milled and cut. If the joints are too tight, the puzzle won’t go together; if the parts fit too loosely, it will fall apart. So, anytime you see a dimension in this story, add the word “precisely” before it.
Dadoes lock the parts together to form the cube. A shop-made jig makes it easy to cut them (Fig. A). This jig consists of a sled with runners, a clamp and a fence. The runners fit the tablesaw’s miter slots, so the sled makes perpendicular cuts. The wide fence houses the saw’s dado set, for safety. Stop blocks and spacers precisely position the puzzle parts, so the dadoes are accurately cut. Like the puzzle parts, the spacers must be precisely cut.
To set up the jig, clamp the stop blocks 1-1/8″ from the slot on both sides. Then install the appropriate spacers and secure the puzzle part with the toggle clamp. The dadoes have to fit perfectly, so always make extra parts and start by making test cuts. Testing the dado widths and depths is pretty easy, because most of the parts go together with lap joints. When the dados fit snugly, their widths are correct; when the surfaces of the assembled joint are flush, the dado depths are correct. That’s it; you’re ready to go.
Here are some supplies and tools we find essential in our everyday work around the shop. We may receive a commission from sales referred by our links; however, we have carefully selected these products for their usefulness and quality.