We may receive a commission when you use our affiliate links. However, this does not impact our recommendations.

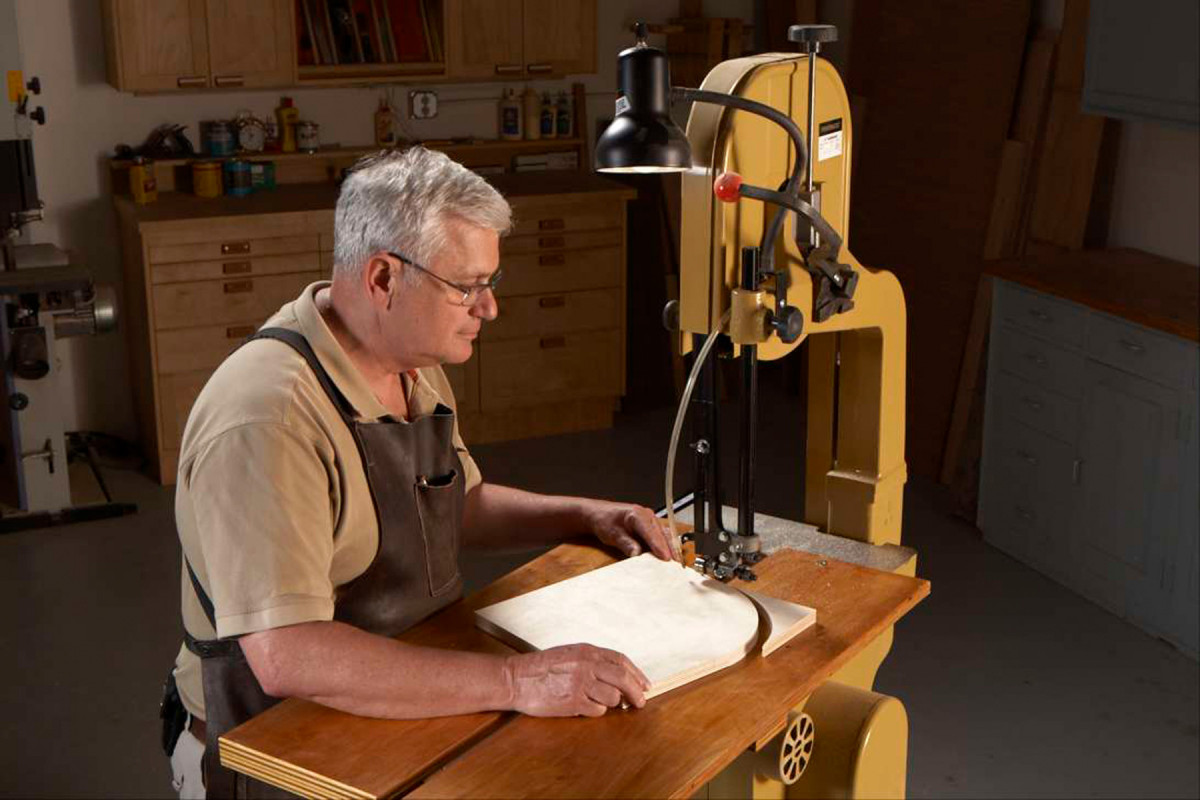
Cut perfect circles up to 4′ across!
Have you ever tried to cut a circle on a bandsaw, freehand? It’s quick, but it sure isn’t exact. Dollars to doughnuts you’ll get flat spots or bumps that are a pain to sand out. Big circles are really tough to get right.
Fortunately, there’s a clever solution. If you rotate the wood on a fixed pivot point, like a record on a turntable, you’ll be able to make a circle that’s just about perfectly round, needing very little cleanup work.
Jigs that can provide this pivot point have been around for a long time, but I’ve never been satisfied with their design. They’re hard to mount, hard to adjust and can’t handle large pieces. This jig solves all three problems. No bolts or clamps are necessary to mount it on your saw. Using just a screwdriver, the pivot point can be adjusted to any radius you desire. And it makes circles as small as 1-1/2″ across all the way up to 48″ in diameter.
Easy to mount
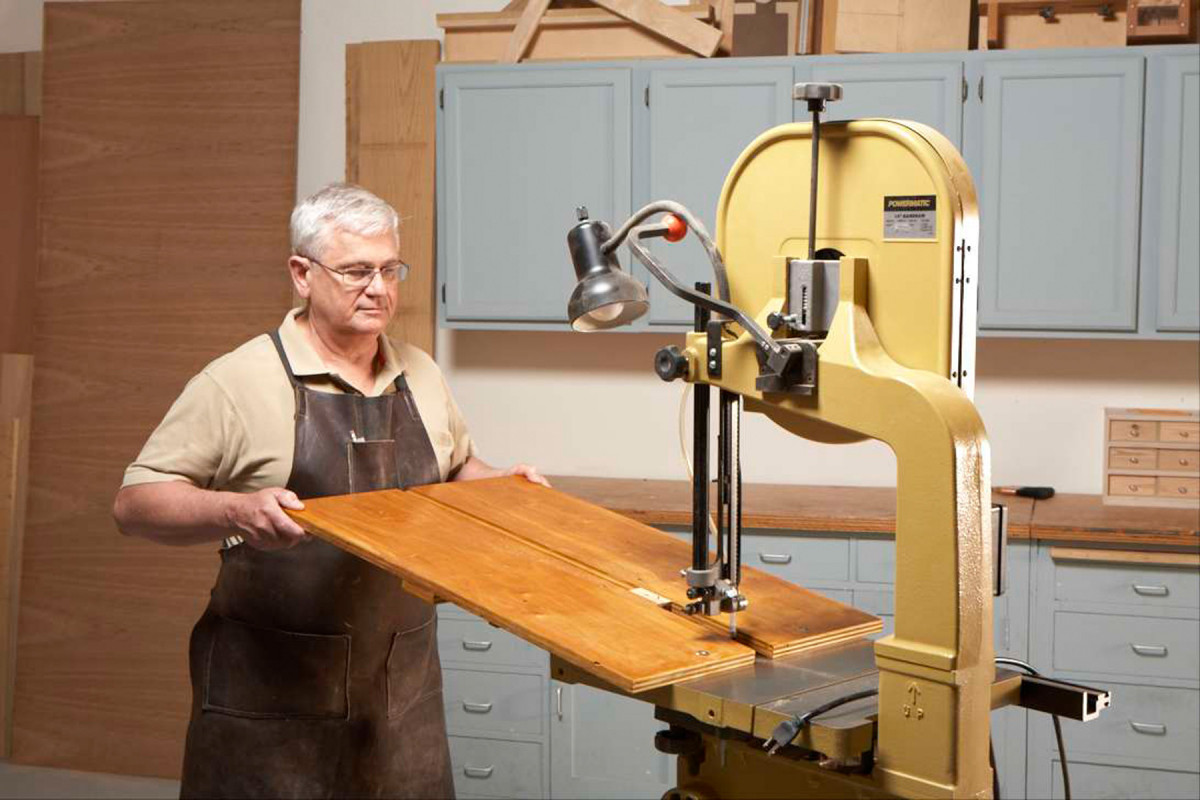 Just slide the jig across the bandsaw’s table until a bar drops into the saw’s miter slot. Done!
Stays put
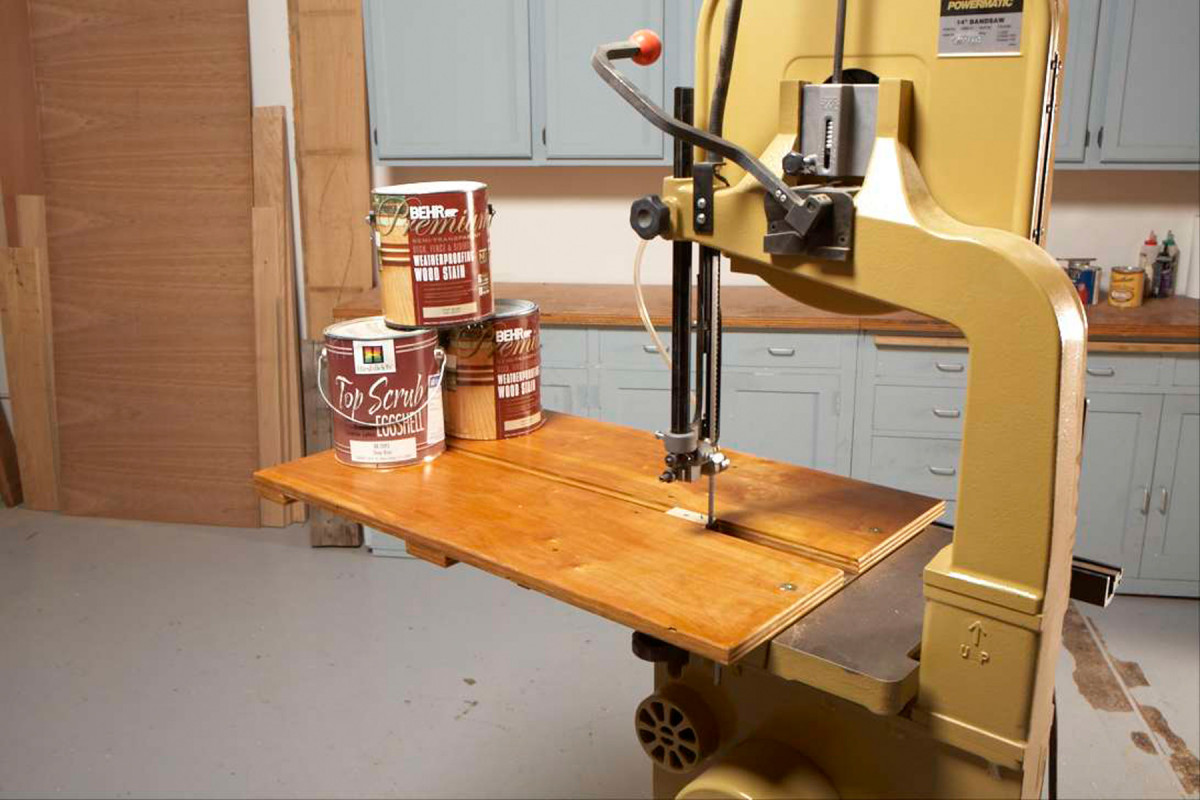
Rare-earth magnets underneath
Two large rare-earth magnets hold the jig—enough force to support three full paint cans. No legs are necessary.
Easy to adjust
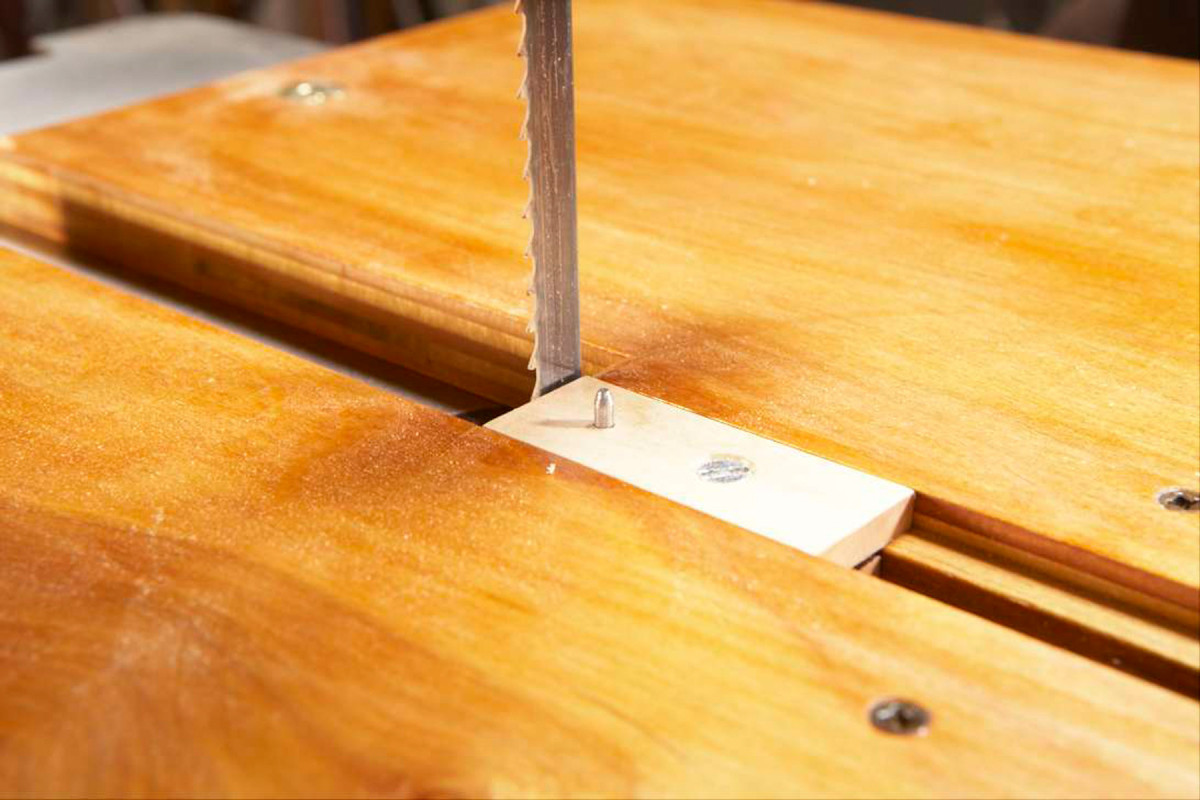
Pivot pin
To change the size of the circle you want to cut, just move this sliding block. The wood rotates on a pin sticking up from the block.
Make the sliding block
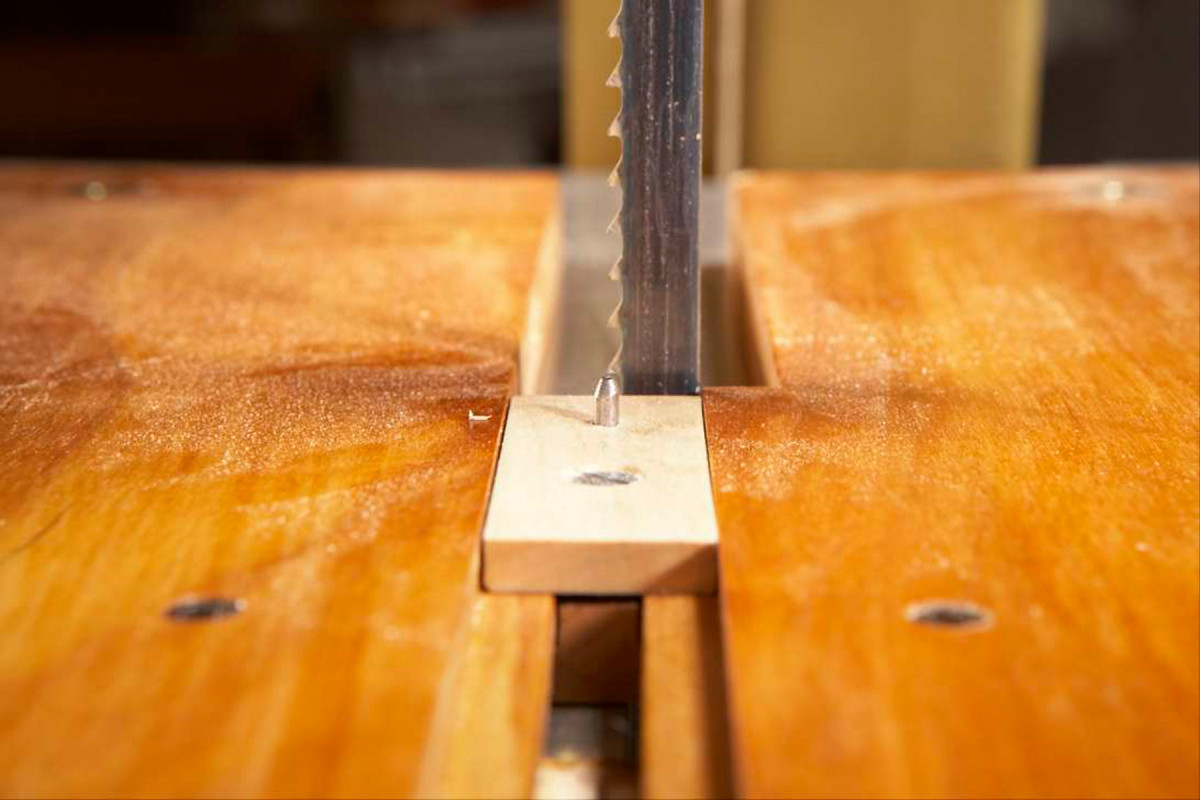
Align the pivot pin with the front of the blade when you place the jig on the saw. Next, move the pivot-pin block the correct distance from the blade (the radius of the circle you’ll be cutting). Lock the block in place by tightening its clamping screw.
As with all jigs and projects, purchase the hardware first (see Hardware Shopping List, page 64). Begin building the jig by starting with the block that holds the pivot pin. The block is composed of two pieces (A and B) that are clamped together with a machine screw. Although these pieces are quite short, it’s best to make them from blanks that are about 12″ long, for safety when machining them. First, mill both blanks to final thickness and rip them to final width.
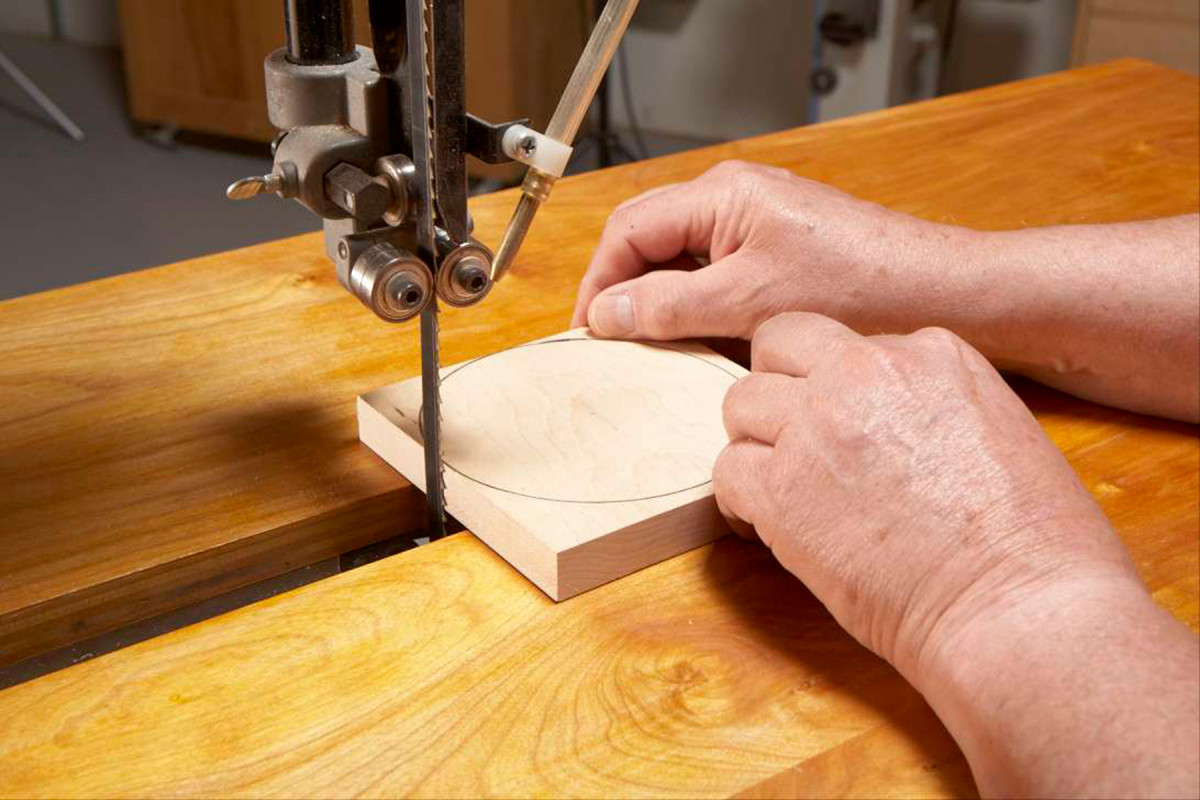
Make a square blank the same size as the circle you’re going to cut. Drill a shallow hole in the center of the blank, on the bottom side, that’s the same diameter as the pivot pin. Place the blank on the pivot pin, flush with the blade. Turn on the saw and rotate the blank to cut the circle.
Using a router table or a dado set, cut rabbets on both sides of the bottom piece (B, Fig. B, page 64). Next, drill a shallow counterbore for the head of a T-nut in the center of this piece, opposite the rabbets. (It doesn’t matter where you drill the hole along the blank’s length; you’ll trim off the ends later.) Drill a 1/4″ dia. hole through the center of the counterbore. Place the bottom piece above the top piece (A) and continue the hole. Countersink the top piece to receive a 10-24 machine screw. Install the T-nut and clamp the two pieces together with the screw.
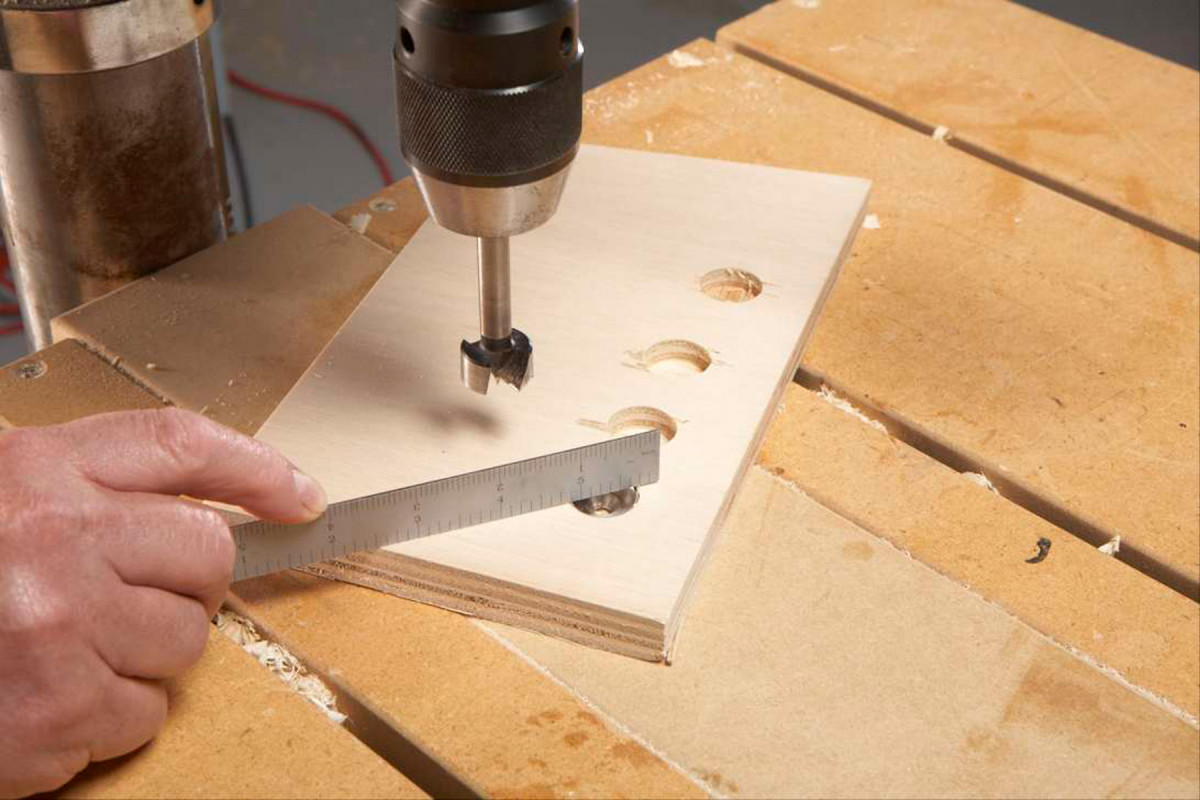
Drill the holes for the magnet cups very carefully. The depth has to be just right, so the magnets will be perfectly flush with the surface. Make some test holes in a piece of scrap before you drill into your jig. Rare-earth magnet and cup.
Make the pivot pin. You can use 1/8″ dia. welding rod or cut off the end of an old 1/8″ drill bit. Test the fit of your pin in a 1/8″ dia. hole—it should be tight. Drill the hole for the pivot pin all the way through the top piece and partially into the bottom piece. Cut both pieces to final length.
Adjustable Circle-Cutting Jig
 Overall
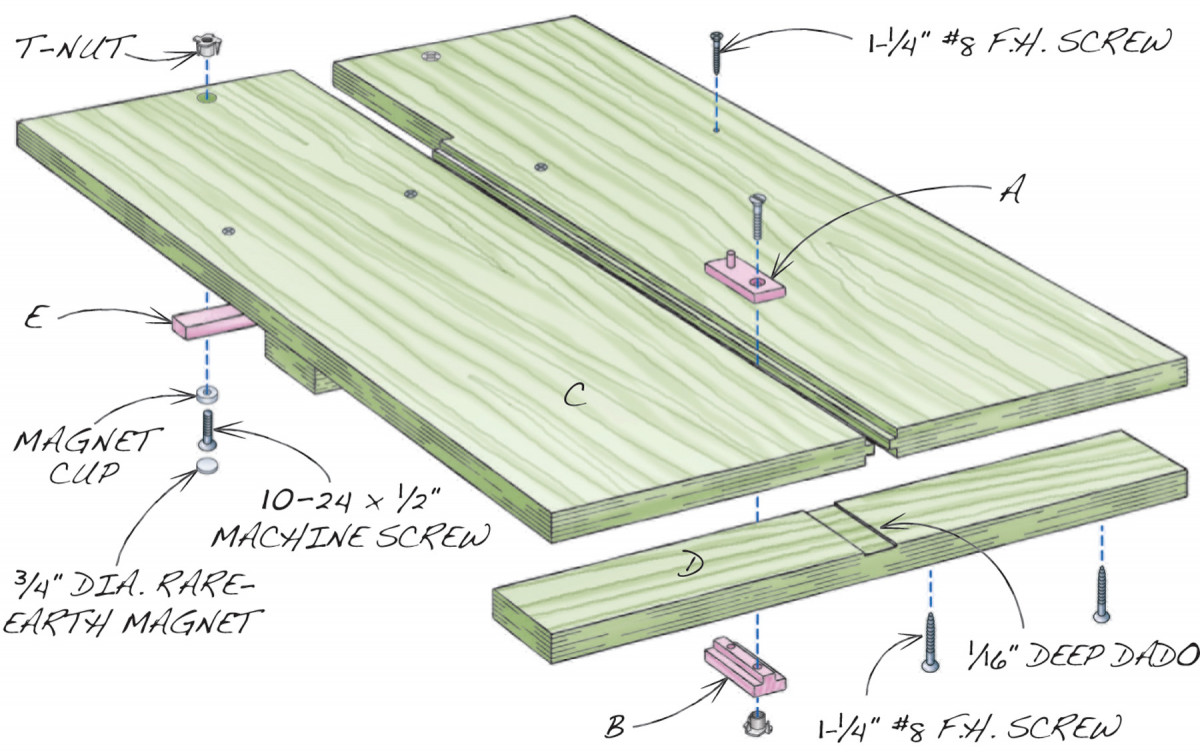
Fig. A) Exploded View
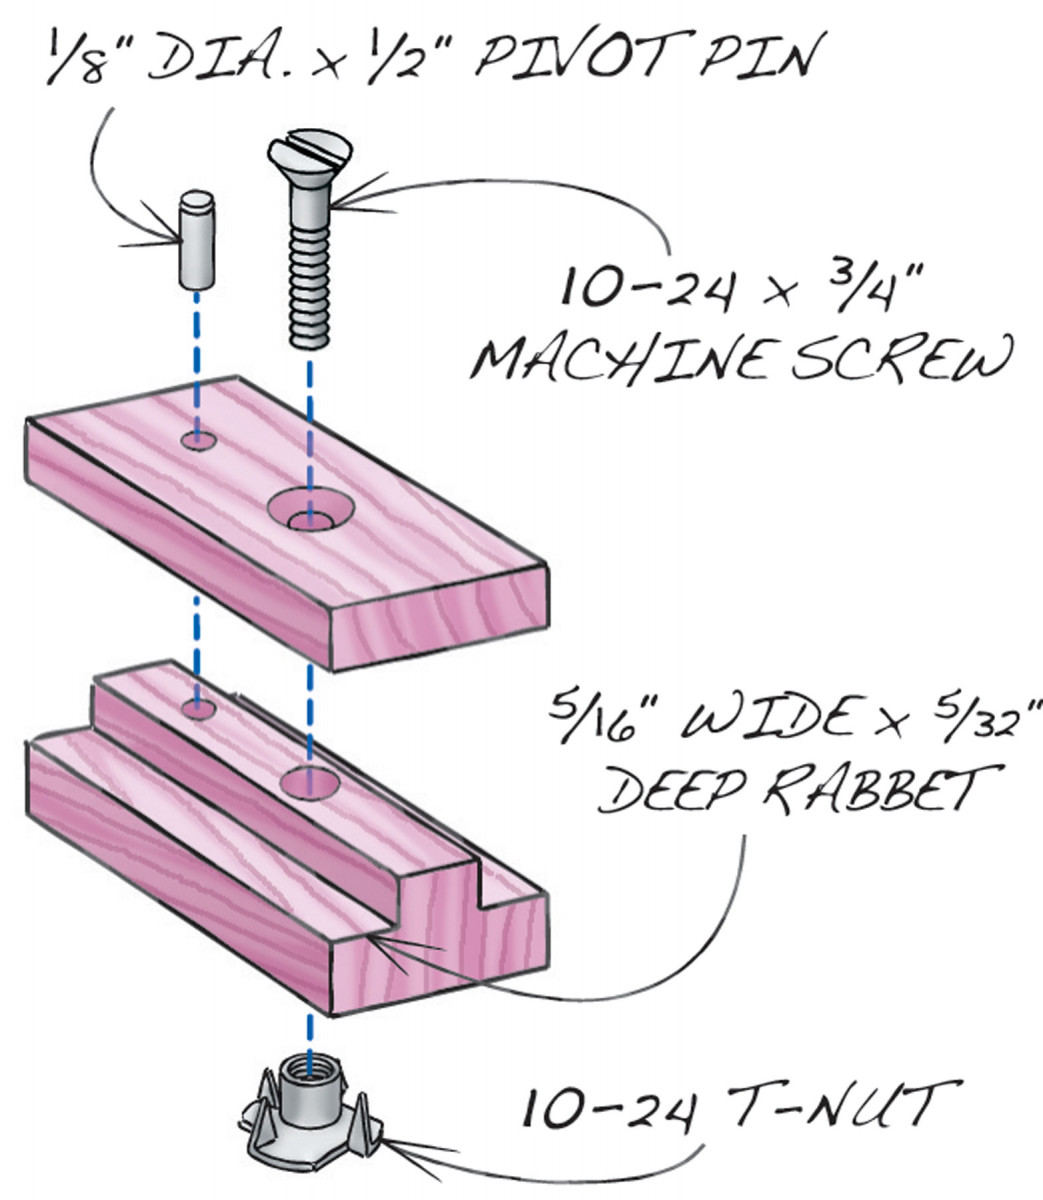
Fig. B) Sliding Pivot Bar
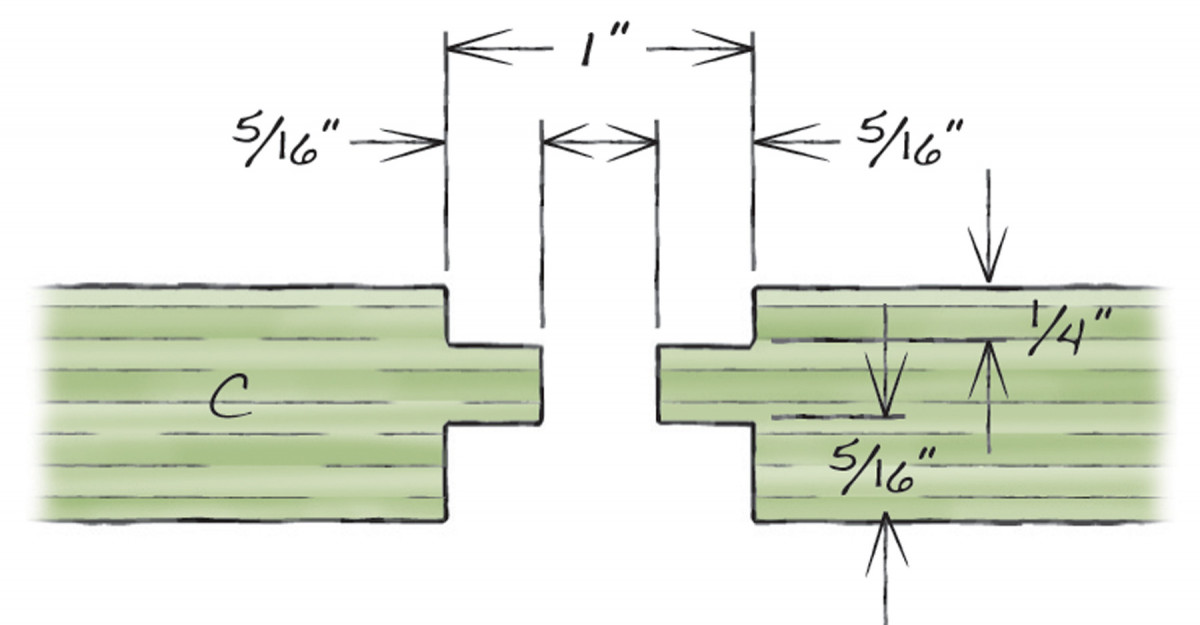
Fig. C) Cross Section of Top
Make the top
Cut the top pieces (C) to final size. Mill the rabbets that will receive the pivot-pin block (Fig. C). (Note that the top and bottom rabbets are cut at different depths.) On the right piece, cut a notch for receiving the bandsaw’s blade (Fig. A). On both pieces, drill holes for the rare-earth magnet cups. The depth of this hole is critical, so drill some test holes in a scrap piece that’s exactly the same thickness as the plywood you used for the top pieces (see “Drill Test Holes for the Magnets,” p. 63). For maximum holding power, it’s important that the magnet be flush with bottom of the jig. Drill the holes for the machine screws that will hold the cups, then flip the pieces over and counterbore holes for the T-nuts using a Forstner bit. Install the magnet assemblies.
Make the cleats (D) and miter-slot bar (E). Cut a 1/16″ deep dado in the top center of each cleat to provide clearance for the pivot-pin block (Fig. A). Make the bar so it fits snug in your saw’s miter slot. Chamfer the bottom edges of the bar.
Fasten the cleats and bar to the tops. To space the top pieces, install the pivot-pin block at one end of the rabbets; place a cutoff from the block at the other end. Clamp across the assembly, then install the cleats. Install the bar last—it must be perfectly square to the jig. Finally, install the pivot pin.
When cutting a large circle on your bandsaw, you may find that the cast-iron table will tip, no matter how hard you’ve tightened the trunnion knobs. The fix is simple: just install a shop-made device that clamps the table at 90°.
Here are some supplies and tools we find essential in our everyday work around the shop. We may receive a commission from sales referred by our links; however, we have carefully selected these products for their usefulness and quality.


