


We may receive a commission when you use our affiliate links. However, this does not impact our recommendations.

The best way for a wayfaring woodworker to bring tools along for the ride.
When we’re moving back and forth between our home shops, the office shop, helping friends, taking classes and even going on vacation, there are always certain tools we want with us. Each of us has different ideas about what exactly we want and need. Andrew makes due with just a couple chisels; David prefers more sizes. Andrew wants more planes; David just needs a #4 and #5. The point is, this tool case should be customized to exactly how you want to do your work.
The basic design of this tool case has been in use for the last century and relies on dovetails for strength. It’s referenced by the seminal woodworking writer Charles Hayward a few times, and that’s where we first discovered it. The ideal size for this toolbox is about 6″ deep, 16″ tall and about 27″ long, but increasing or decreasing these dimensions by an inch or two is fine. It’s big enough to fit a good amount of tools without becoming too unwieldy to be carried by a single person. The length means you could sneak a panel saw into the cabinet (if you need it), and the depth provides space for handplanes, small drawers and most other hand tools you rely on to do your work. You can build it out of pine and plywood, or you can use more exotic lumber (you’ll just need a few bdft). The sides of the case are about 3/4” thick, and the front and back panels are 1/4” plywood.
First, though, assemble your tool kit. Typically, when we’re out and about woodworking, there’s an assumption of things we don’t need to bring: most power tools, screwdrivers, sandpaper and other things that are commonly found in shops. For us, that leaves the tools we use for layout, cutting joinery, and refining and finishing projects. Coincidentally, they’re also the tools that we’re pickiest about.
Once you have your core tools determined, lay out a rectangle on your bench or a sheet of plywood that’s 15″ tall and 26″ long (roughly the interior size of the case), and work through how you’ll arrange everything. You’ll have about 3″ of depth to work with (the typical width of a jointer plane is 3″) on the case side. If you need a little bit more or less space, adjust your rectangle. Don’t forget about the lid—you’ll have an inch or so of depth to hang saws and other tools here, too. Once you’ve determined your final dimensions it’s time to trim your top, bottom and ends to size and cut some dovetails.
Traveler’s Tool Case Cutlist and Diagrams


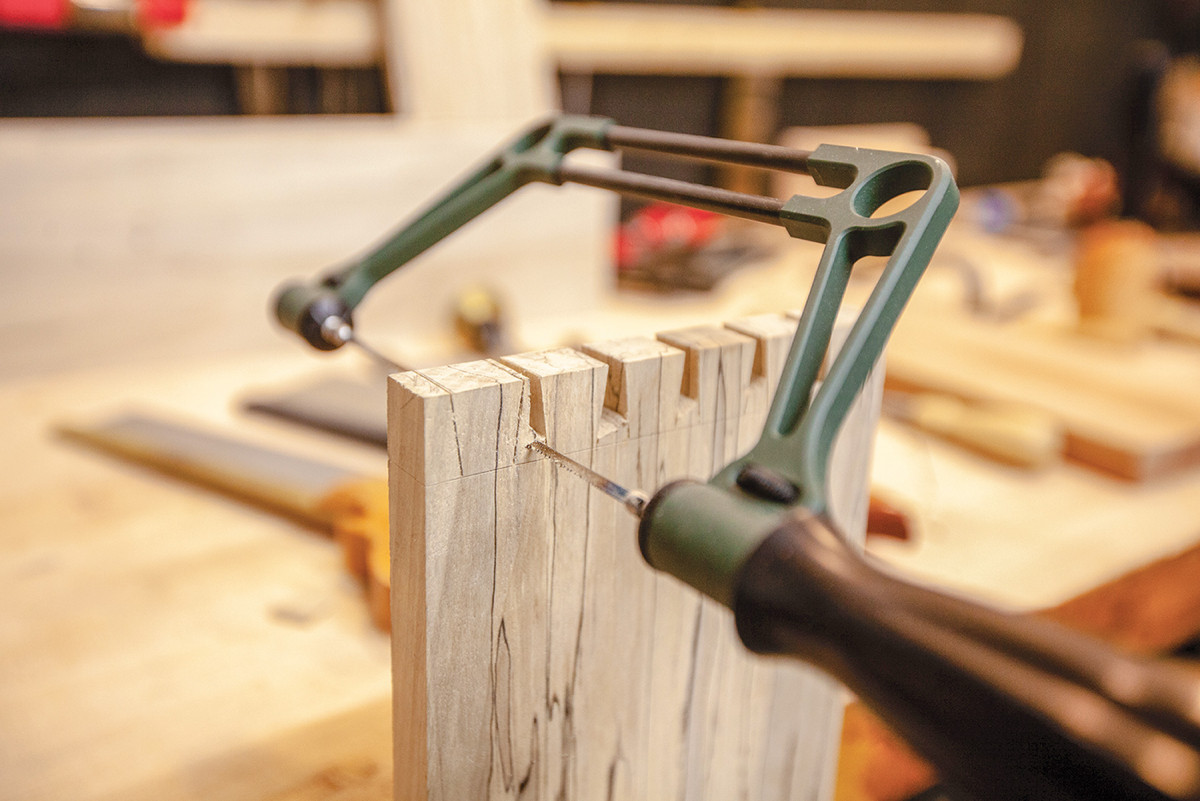
1. Lay out and cut your dovetails. Because we’re basically assembling the whole box first and then cutting it apart, you’ll want to make sure your cut line goes through a tail, and you’ll want that pair of tails to be a bit larger than the rest.

2. The front and back panels of the case are rabbeted into the sides. We used the router table and a 1/4″ bearing-guided rabbeting bit to do this. Rout both sides to final depth (the thickness of your plywood), then square up the corners with a chisel.
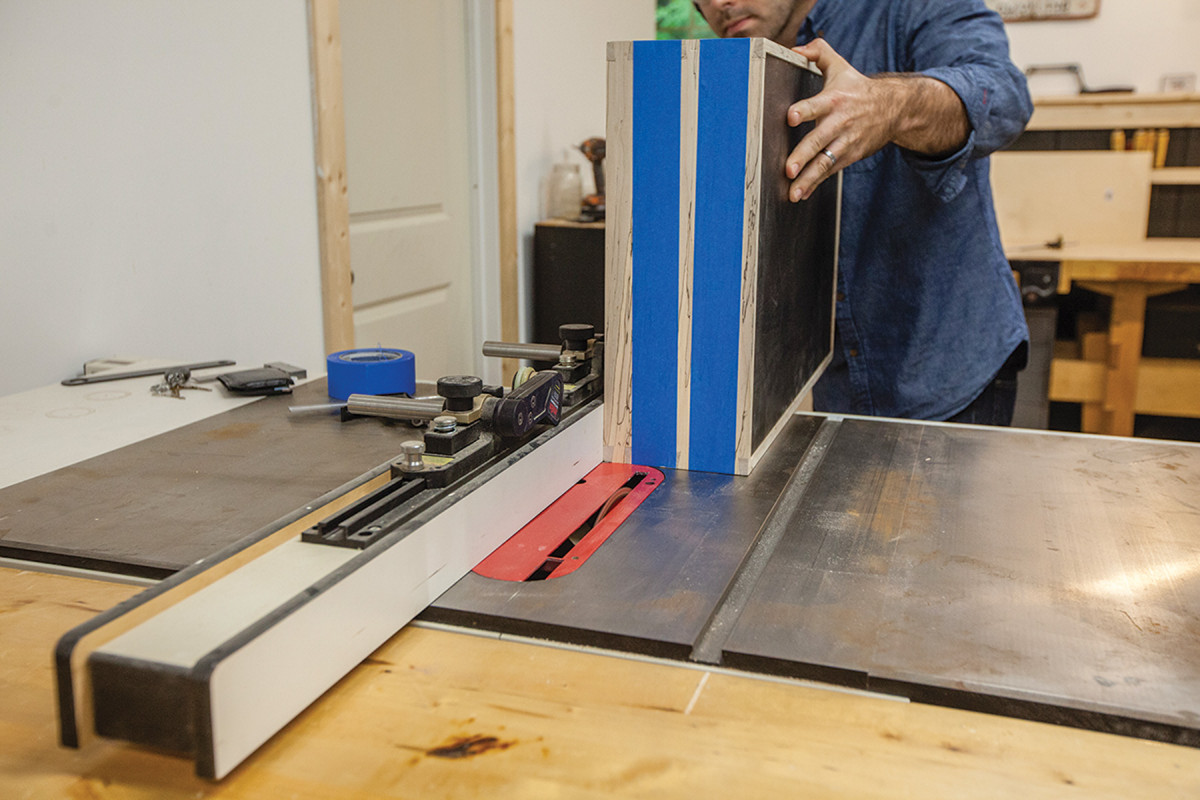
Blue Tape Keeps Blowout at Bay. We used blue tape on all the plywood edges and on the case to minimize blowout. It’s also a handy reference for layout lines and stop lines when it’s difficult to see pencil lines.
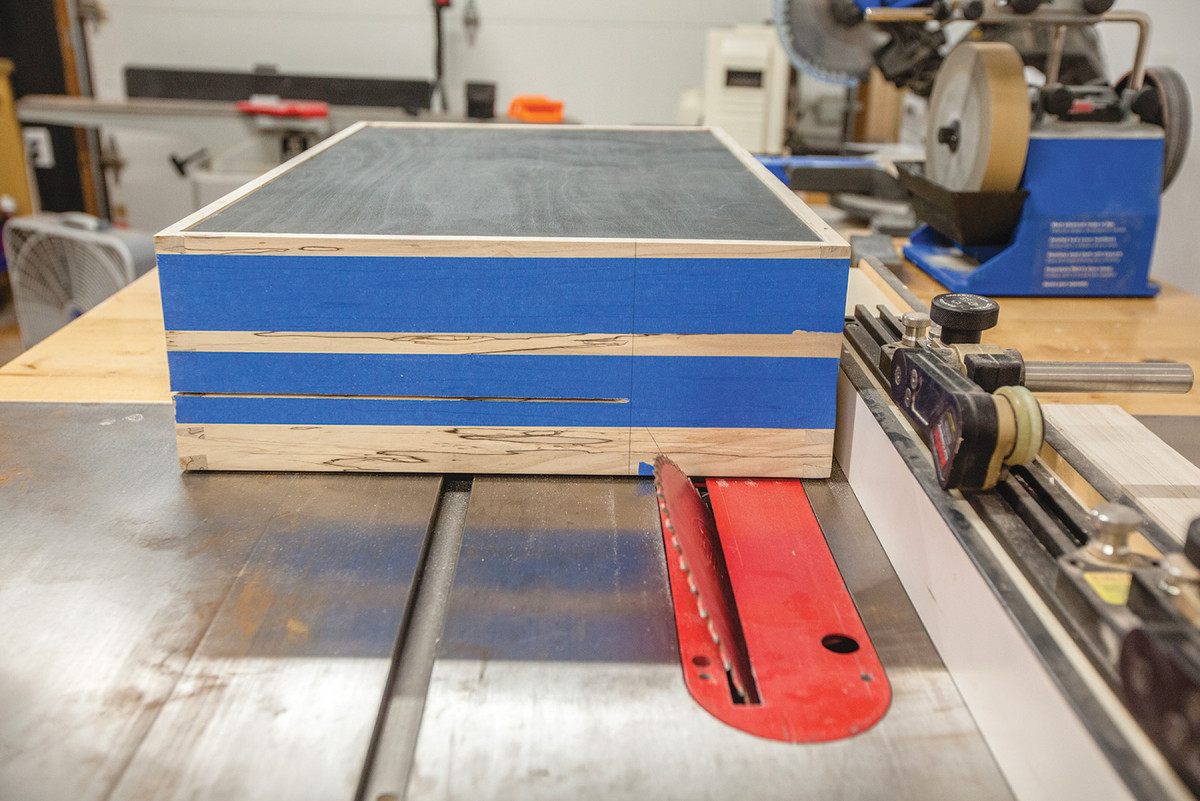
3. You’ve built a beautiful box, and now it’s time to cut it apart. We roughed out most of the cuts on the table saw, then finished it off with a hand saw. Make the angled lid cut first, then the two mating cuts, followed by the top edge cut.

4. Once your lid is cut from the box, clean up the cut edges. The goal is to have the edges perfectly mate with the lid when closed, to keep out dust and debris and have a nice, even reveal.
5. Fitting out the inside of the box is where the fun really begins. This simple chisel holder is just sized so the tang of the chisel fits in the groove.
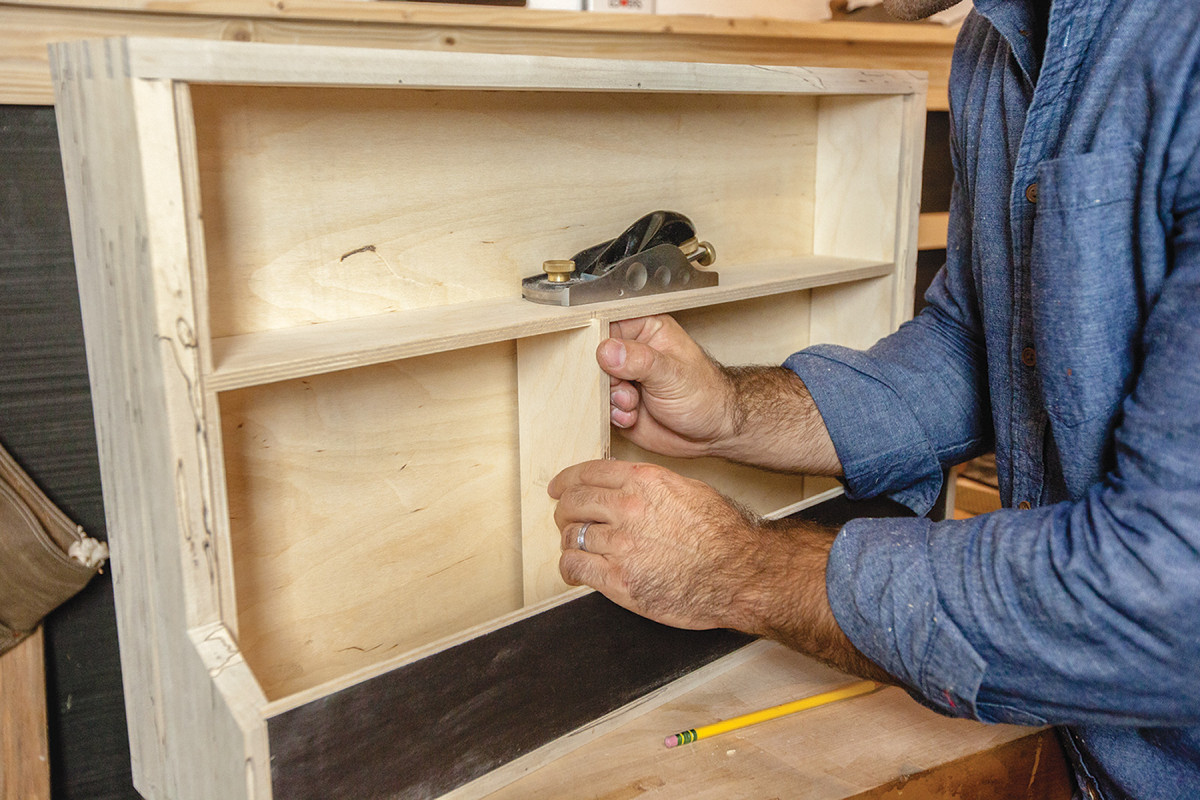
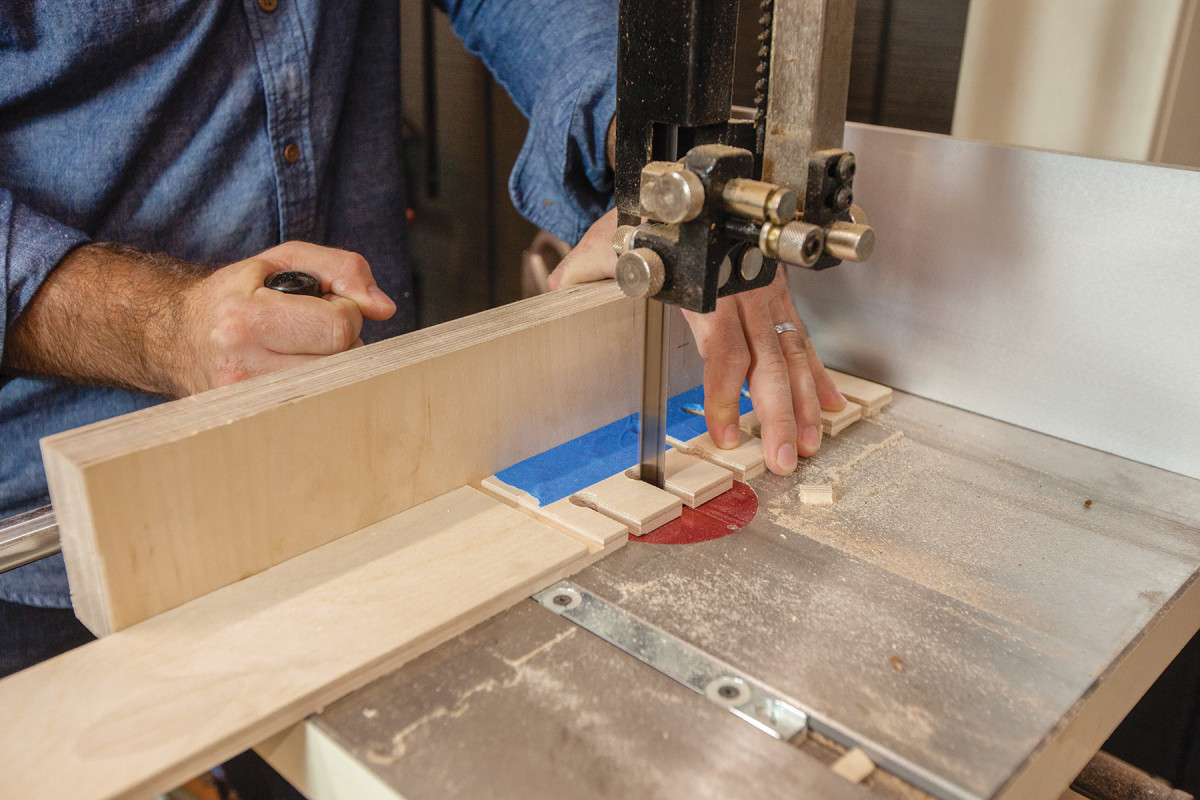
6. The interior dividers (made from 3/8″ plywood) were cut to fit outside the case, then slid into place. The divider is tacked to the case sides so we can remove and re-adjust later as tool preferences change.
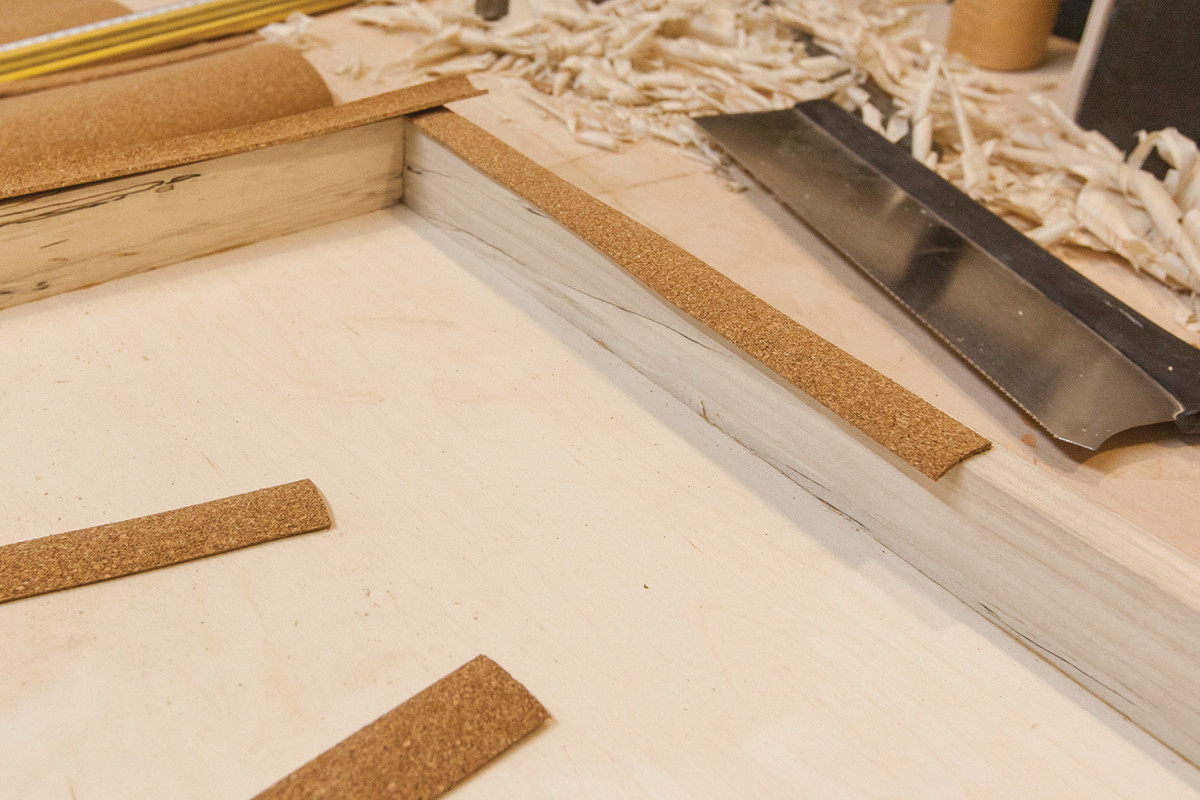
7. Use strips of cork to replace the material removed from the table saw. Contact cement and a new razor blade will provide a crisp install.
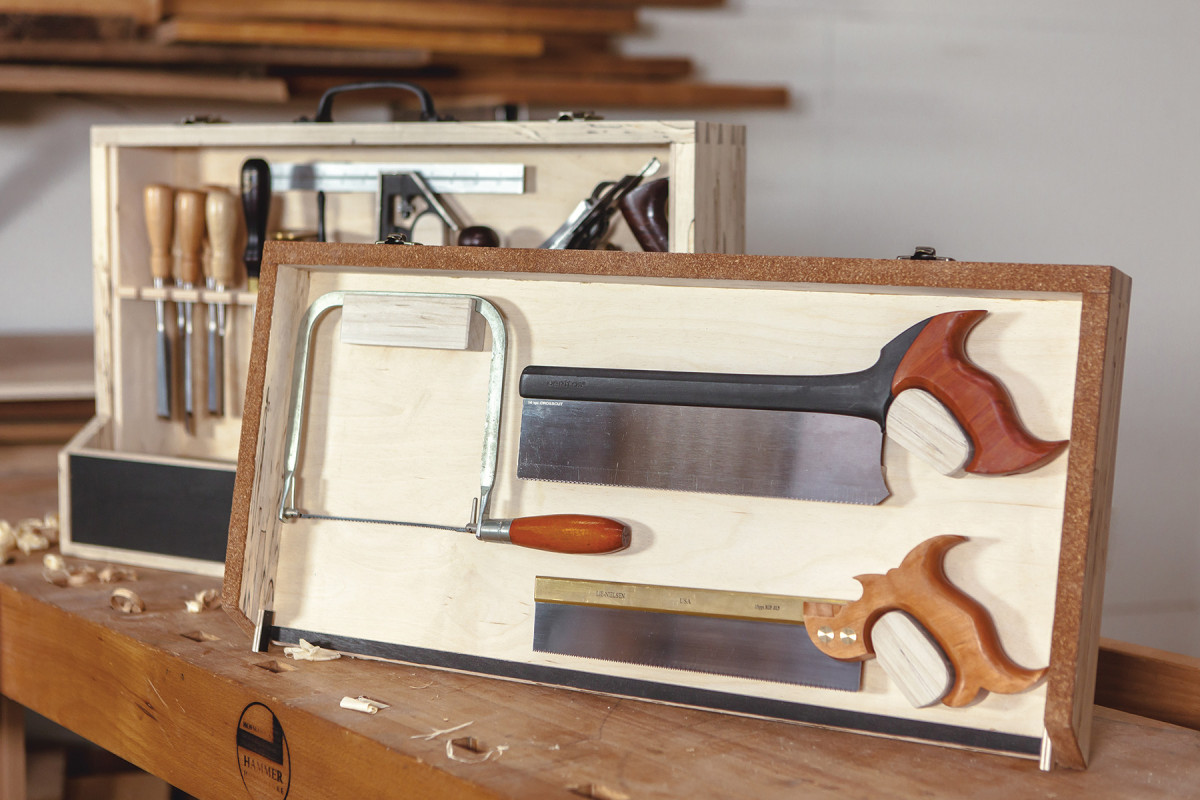
8. David’s preferred tool kit: #4 and #5 bench planes, block plane, 1/4″, 1/2″, 3/4″ and 1″ chisels, marking knife, tape measure, scraper, honing guide and diamond plate, are inside the case. The lid holds a coping saw, dovetail saw and crosscut saw with the assistance of magnets.
Now that you have your go-to tools ready to go, get out there and do some woodworking in the wild! –David Lyell and Andrew Zoellner
Here are some supplies and tools we find essential in our everyday work around the shop. We may receive a commission from sales referred by our links; however, we have carefully selected these products for their usefulness and quality.


It’s a nice design but the article was a little lacking in details.
Of it wasn’t for the final photo I would not have known that the bottom of the removable part was kept in place by two pieces of plywood you fastened at the angled bottom edge.