


We may receive a commission when you use our affiliate links. However, this does not impact our recommendations.
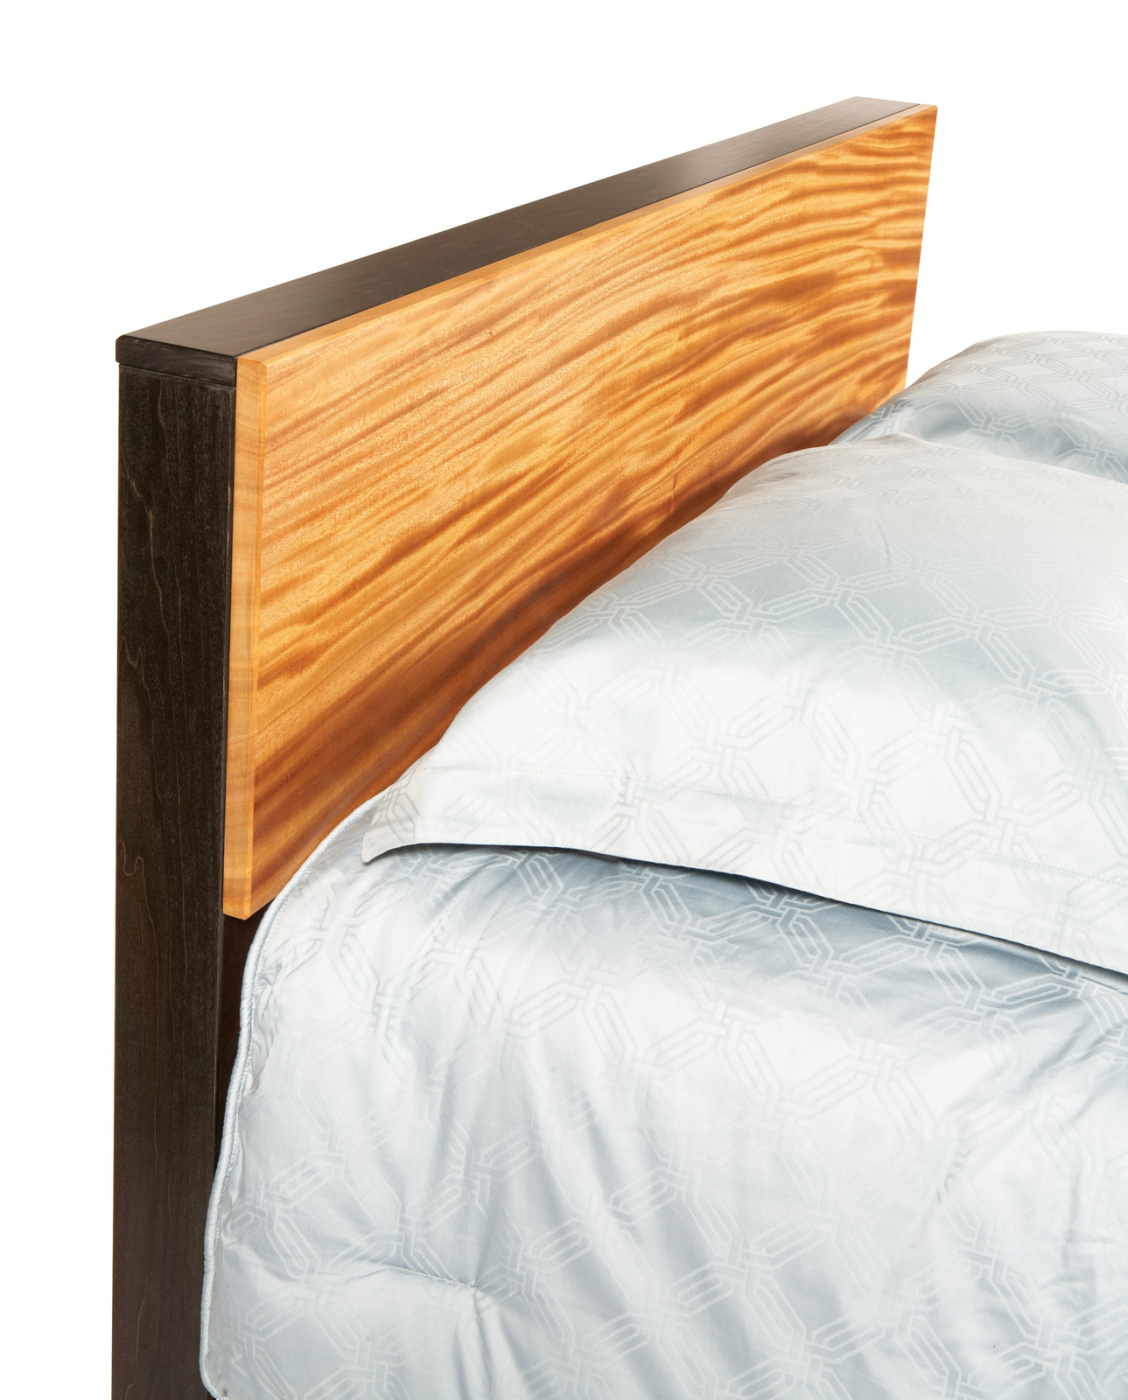
 This weekend project lets you show off one dazzling board.
 This weekend project lets you show off one dazzling board.
True story. I first built a headboard like this years ago using only a miter saw, router, sander and a drill. My shop was just a driveway.
The project really is that simple. For materials, all you’ll need is a huge board (this one is a piece of African ribbon-stripe mahogany) and some poplar 1x4s from a home center. The joinery consists of just gluing together some of the 1x4s.
Most hardwood lumberyards have a few odd boards that are over 12″ wide—ideal candidates for this project. If you find one that’s already been planed and is reasonably flat, you’re good to go. If the board needs to be flattened, don’t walk away. There are a handful of ways you can do this yourself.
Simple Headboard Cut List
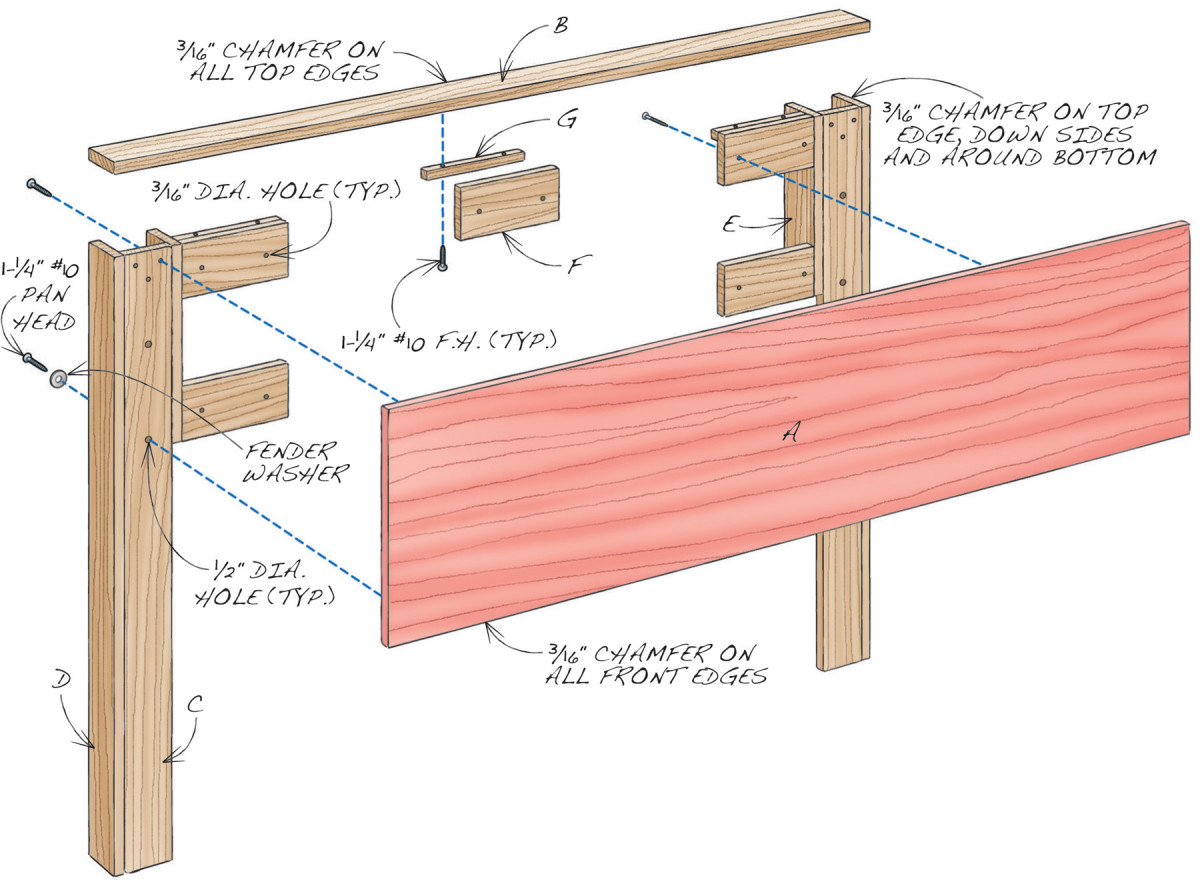
Fig. A) Exploded View

5 Ways to Flatten Wide Boards
If you’re good with planes, you can certainly level a wide board by hand. But you can also do the job using small-shop power tools. Here are five methods:
1) Use a handheld power planer. This method will work on a board of any size. The trick is to figure out how much to take off—and where.
2) Joint and hand plane. If a board is only an inch or two wider than your jointer, you can use the jointer to flatten most of the board, then remove the remaining material by hand.
3) Rip, joint and reglue. If the board is more than 2″ wider than your jointer, rip the board into two pieces and flatten each one separately. The critical step is figuring out where to make the rip cut to best conceal the joint.
4) Turn your planer into a jointer. Running a warped board through a planer doesn’t necessarily make it flat—just thinner. Build a special sled with some strategically placed shims to keep the board from rocking.
5) Use a router carriage. To level a board of any width, build a gantry for your router with two pieces of aluminum angle.
Make the front and top
The front board (A) can be virtually any width. It will have the most dramatic effect if it’s 12″ to 16″ wide. Cut this board two inches extra-long using a jigsaw or a handsaw. Make the long sides of the board straight and parallel using a router, a top-bearing pattern bit and a long straightedge, such as one of your 1x4s.
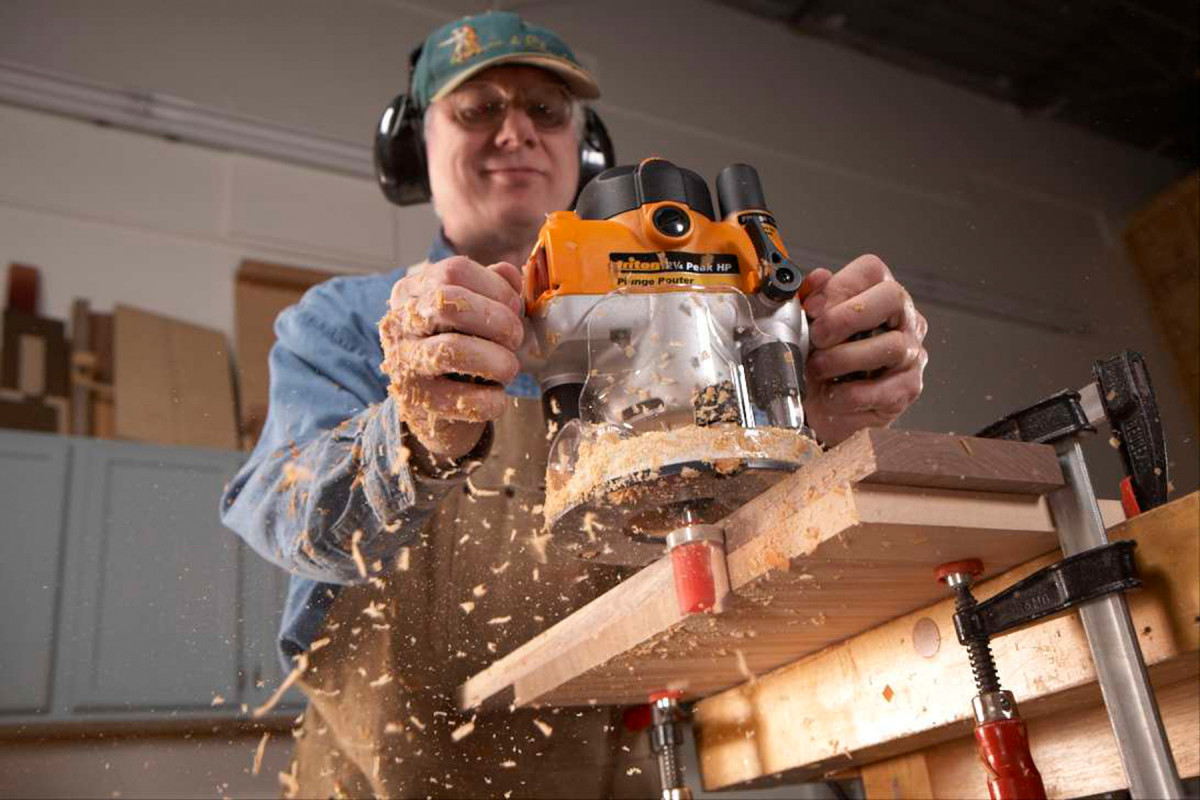
1. Trim the end of the big board with a large top-bearing pattern bit. Guide the router with a straightedge. Clamp a scrap piece to the board to prevent blowout at the end of the cut.
Mark the finished length of the front board, then draw lines across both ends of the board using a carpenter’s square. Crosscut the board 1/8″ longer than these lines. Clamp a 1×4 along each line and trim the board to final length with your router (Photo 1). Cut the top board (B) to the same length.
Make the legs
First, figure out how long the legs should be. This dimension depends on two things: the height of your mattress, as it sits on a box spring and frame, and the width of your front board. To calculate the legs’ length, add the mattress height to the width of the board. Then subtract 1-3/4″, and you’ve got it. Using this formula, the bottom edge of the front board will be 1″ below the top of the mattress.
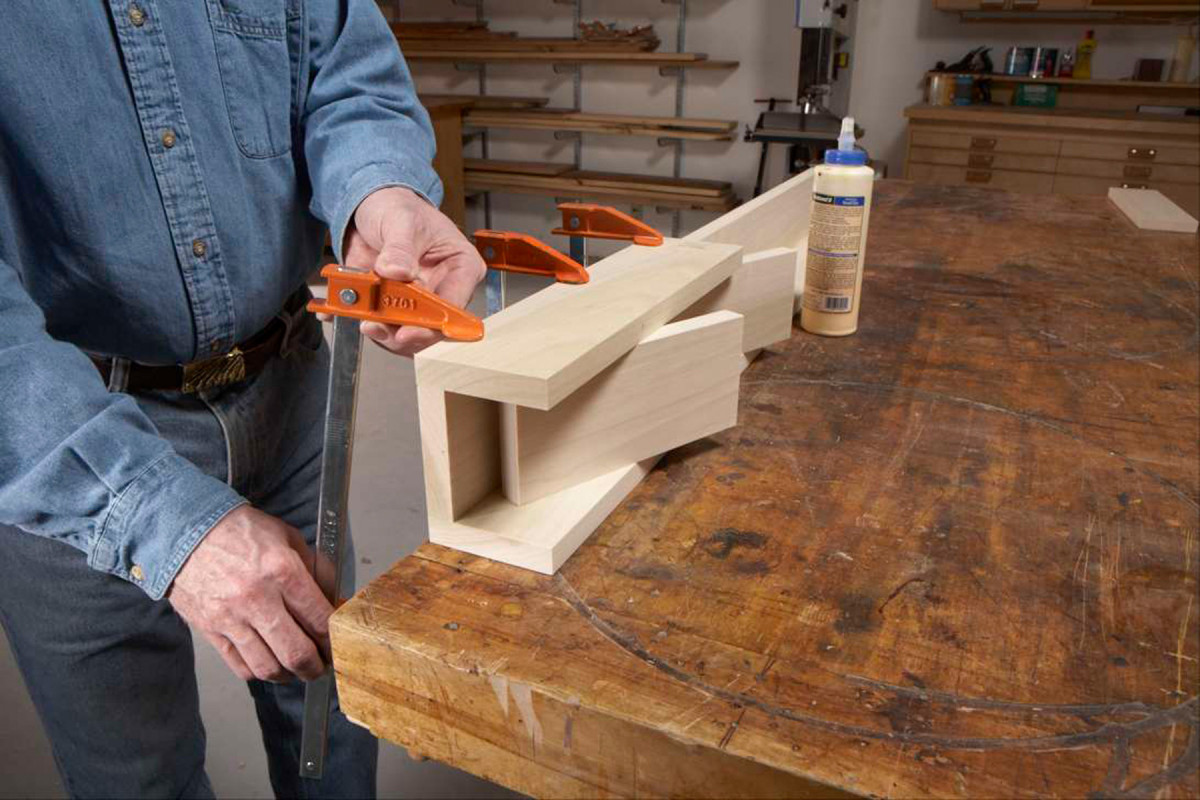
2. Glue the legs together. Place a cutoff under the board you’re gluing to ensure that the joint comes out square. Apply two coats of black stain to the legs.
Cut the legs (C) and leg returns (D) to length. Cut the leg braces (E) to length. (These pieces help keep the front board from warping by stiffening the legs.) Glue the legs and leg returns together, making sure that they are flush. Glue the braces to the legs (Photo 2). Note that the final assemblies will be mirror images of each other.
Drill screw holes in the legs (Fig. A). Use a spade bit to make the large holes. Plane, rout or sand a chamfer all around the legs, including the ends. Chamfer the front four edges of the front (A) and all four top edges of the top (B). Sand all of these pieces to 120 grit.
Cut all the stiffeners (F) and cleats (G). Drill two screw holes in each piece. Glue the cleats to three of the stiffeners. After the glue is dry, trim 1/16″ off both ends of each piece to ensure that the blocks are square and even.
Finishing and assembly
Finish both sides of the front board with an equal number of coats. This will help prevent it from warping. To bring out the figure in my mahogany board, I first applied two coats of 2-lb. dewaxed blonde shellac (mixed from flakes) to both sides. Then I applied three coats of Minwax Polycrylic water-based finish.
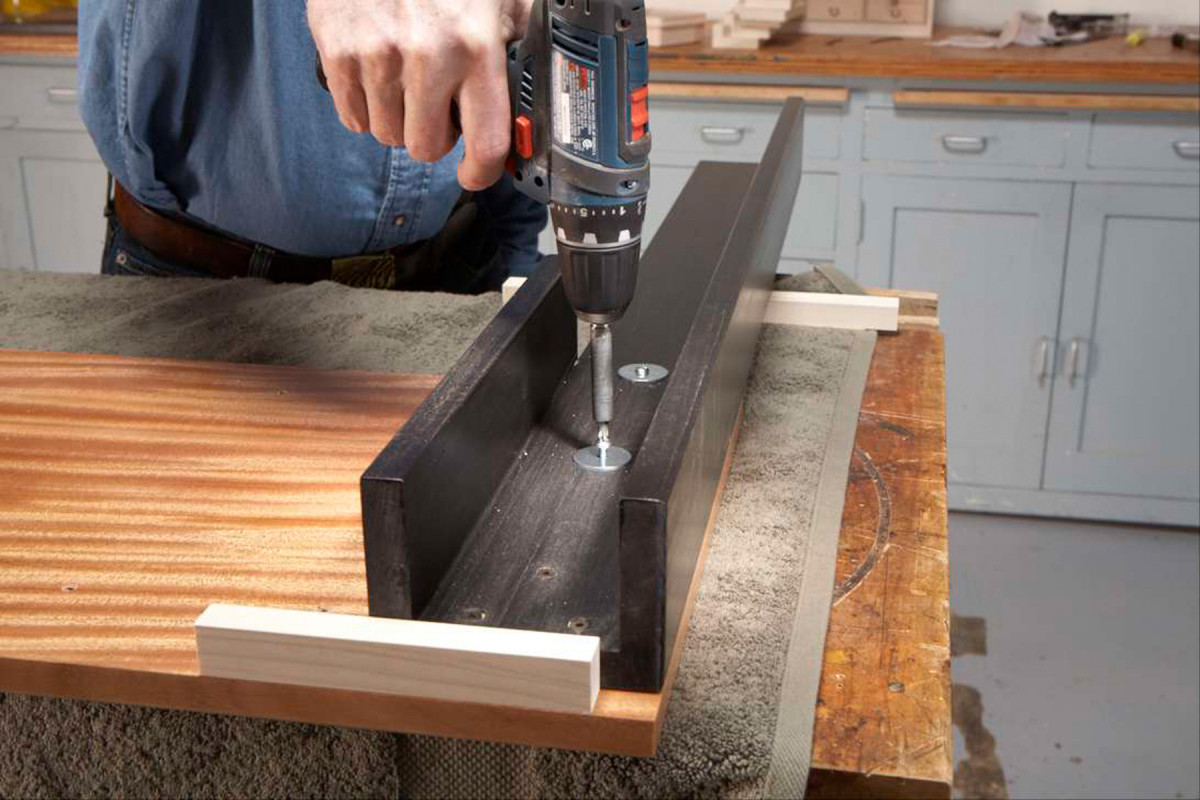
3. Fasten the legs to the front board. Use a spacer to position the leg below the board’s top edge. The screws with fender washers pass through oversize holes, allowing the front board to expand and contract.
Stain the legs. I used two coats of ebony Minwax Wood Finish (it’s actually an oil-based stain), followed by two coats of Polycrylic finish.
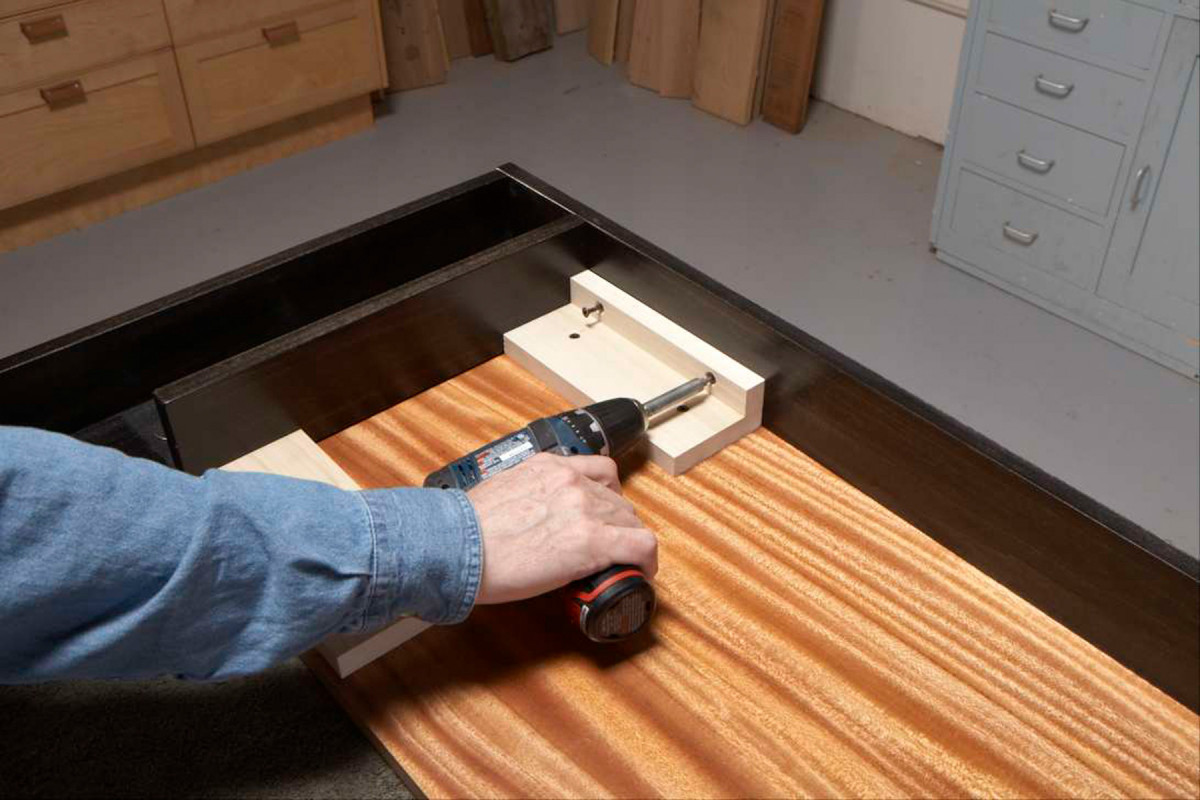
4. Fasten the top board from underneath. Position this piece, and the one below it, snug up against the leg to prevent the headboard from racking side to side.
Start assembling the headboard by fastening each leg to the front board (Photo 3). Using a scrap piece of poplar, make sure the legs are 3/4″ below the top edge of the front board. They should be flush with the end of the front board, too. Then install all the stiffeners. The upper three pieces should also be positioned 3/4″ below the top edge of the front board. Lastly, install the top board (Photo 4).
Here are some supplies and tools we find essential in our everyday work around the shop. We may receive a commission from sales referred by our links; however, we have carefully selected these products for their usefulness and quality.


