We may receive a commission when you use our affiliate links. However, this does not impact our recommendations.

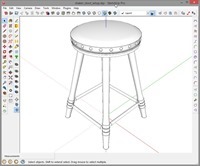
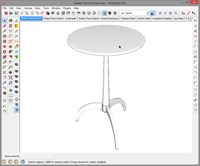
 I posted a four part series on drawing a Shaker Round Stand. The series was titled The Book of Shaker Furniture by John Kassay – A Treasure Trove for SketchUp Generation Woodworkers. The Round Stand was pictured in 2D on page 194 of that book. Today I am beginning a multipart series on how to model The Shaker Shop Stool found on page 222 of that same book and shown at right (click to enlarge).
The 2D drawings found in the John Kassay book can be confusing and misleading if you do not have extensive experience reading 2D drawings. The first thing you have to remember is that the pictures are an artist’s rendition of a 3D object projected on to a 2D plane. Almost all the dimensions are accurate and can be taken at face value so long as you understand what the dimensions are referring to. For example, the dimensions depicting the layout of the leg turning are dimensions along the axis of the leg, which is splayed with a complex angle. They are not dimensions of the projected 2D image on a plane. However, one dimension in particular can not be taken at face value; that is the dimension for the splay of the legs shown as 80 degrees. Actually, 80 degrees is the splay angle of the projected leg on a 2D plane. The actual splay angle of the leg is approximately 76 degrees. This can trip you up big time if you are not aware. You can accurately use 80 degrees to create the splay if you know how to do so, and that is one of the first things I will explain in this series.
 Compound miter cuts, spayed and tapered legs and tapered boxes fall into a category that should be called complex angles instead of compound angles, because they are complex to describe mathematically and their complexity make them difficult to understand and visualize. I have written three articles on this subject that you may find useful as background for following Part 2 of this series when I demonstrate how to model the legs. Here are the three articles:
- Chiefwoodworker’s Newsletter, August 15, 2011 titled Compound Miters for N-Sided Tapered Boxes
- Drawing Compound Miter Faces In SketchUp
- Drawing Tapered & Splayed Legs
I am going to begin this series with a video tour of the finished SketchUp model. I will explain some of the problems we will encounter and hint at the techniques we will use to solve them. This stool is an intermediate to advanced modeling project in SketchUp. So if your skills are not up to it you may want to refer to my webinars located on AmericanWoodworker.tv titled Beginner’s SketchUp and Intermediate SketchUp. In Part 2 we will begin modeling. Now, sit back and enjoy the movie.
Here are some supplies and tools we find essential in our everyday work around the shop. We may receive a commission from sales referred by our links; however, we have carefully selected these products for their usefulness and quality.


