We may receive a commission when you use our affiliate links. However, this does not impact our recommendations.
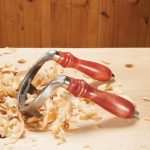
 Bringing a router to the lathe is a great way to add a unique look to your turning projects.
 Bringing a router to the lathe is a great way to add a unique look to your turning projects.
Project #2401 • Skill Level: Advanced • Time: 1 Day • Cost: $35
In woodturning, boxes are really great projects to hone any woodturners skills. Shape and designs are infinite. Loose top lids, pop fitting lids, and even threaded lids can make these pieces tactile, functional, artistic, and really fun projects. Also, large machines are not necessary. A small mini lathe can produce beautiful intricate pieces. For this project I wanted to go a step further by using a router on the surface. I then finished with the addition of colour to add another element of interest to the piece.
 Preparation
The first step with any project is to ensure all safety equipment is working correctly and is safe to use. The machinery is in perfect working order and all manufacturer’s safety guidelines are followed. We are all responsible for our own safety! Therefore with a bit of preparation and common sense, a project can be completed to give job satisfaction and keep the creator injury-free.
Tools and Materials
In woodturning, blunt tools are far more dangerous than sharp tools. With that said a sharp tool used incorrectly or carelessly can cause harm to the user. Materials should be checked for cracks and defects. If you are unsure if the wood to be used is not good enough, well then it probably is not.
 Let’s Get Started
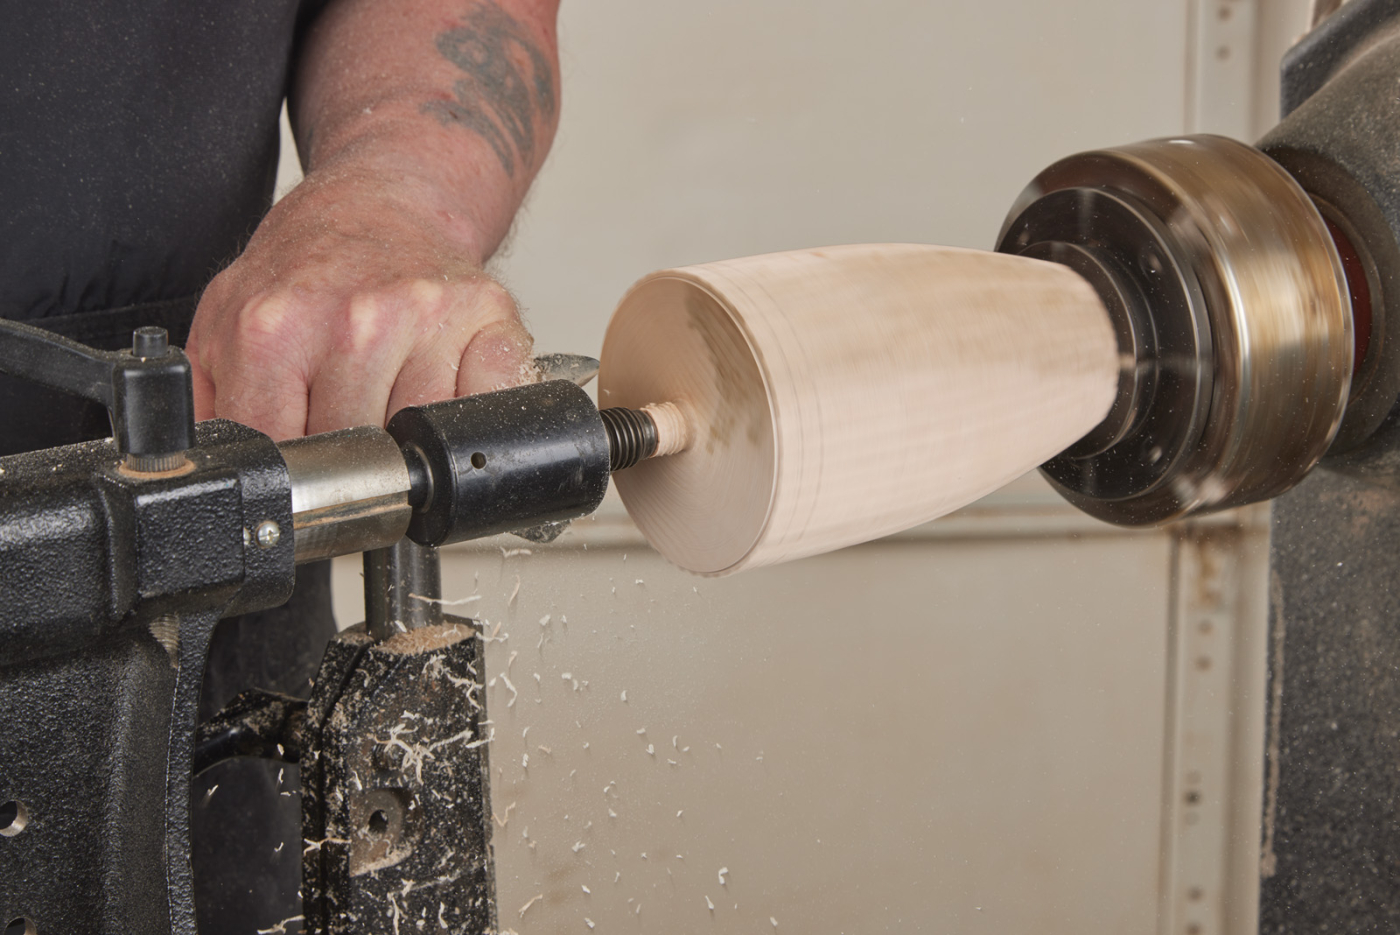
For this project, the timber I selected was maple. It was free from defects and had reasonably straight grain. These factors are very helpful when routing wood! Once I marked the ends, the piece was secured between centres. The grain orientation is parallel to the bed ways, or it could be classed as long grain turning or spindle turning.
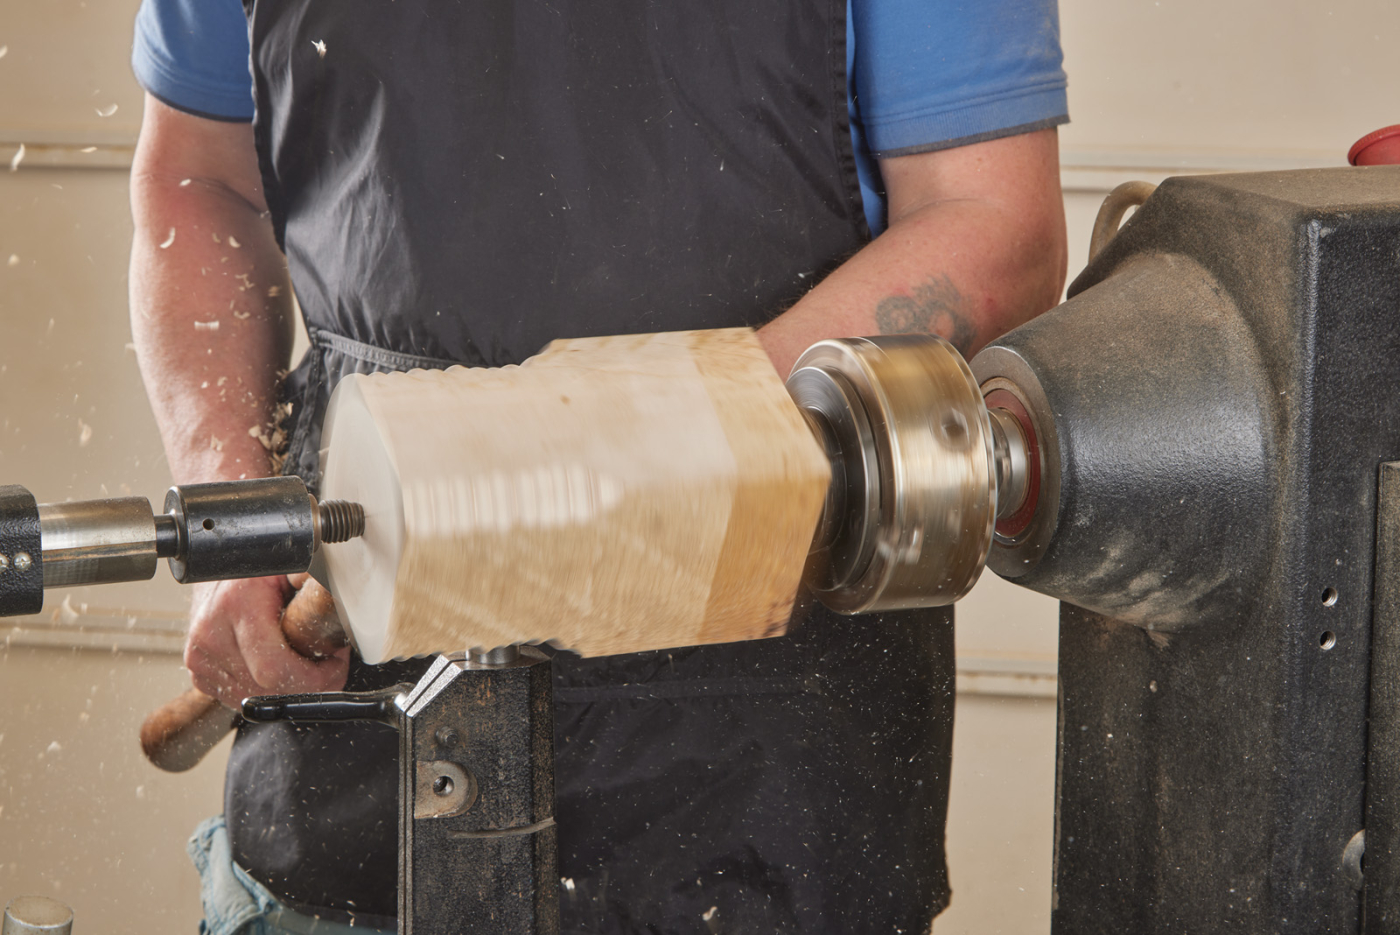
1 Hold your blank between centers for a secure grip.
I began by bringing the piece to a cylinder. To do so, I used a 1“ bowl gouge which has an angle of approximately 45° at a speed of approximately 800 RPM. As the tool rest was wider than the wood, I was able to traverse across the complete surface taking light cuts to reduce the corners and work towards a cylinder shape.
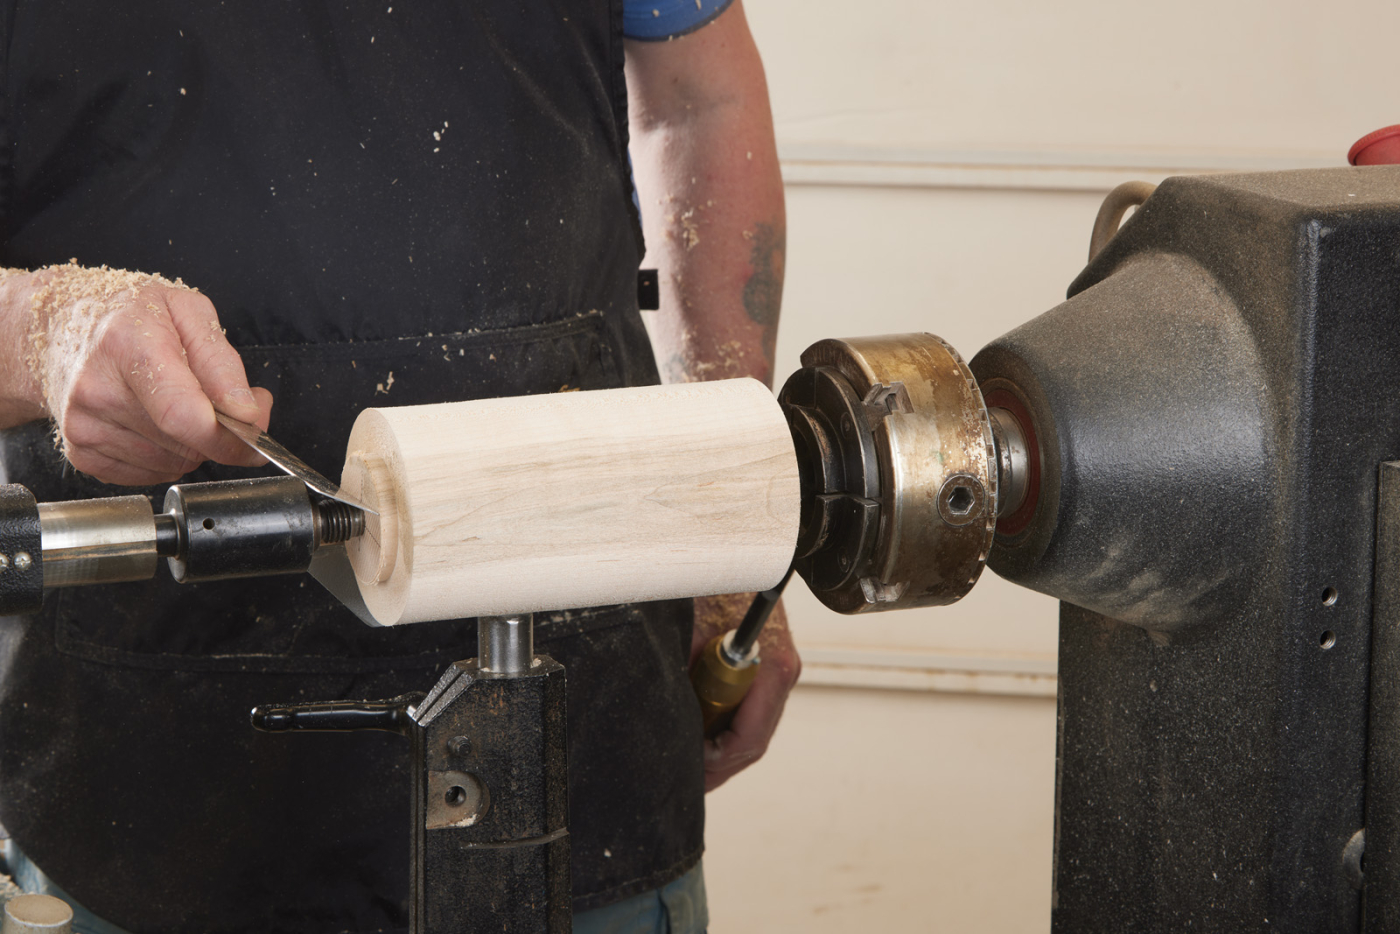
2 Create the tenon for the chuck jaw size you intend to use. Then double check the size before continuing.
Next, size your tenon to the chuck jaw size. This is important as it will ensure maximum gripping power. In this case, I planned to use 2“ dovetail chuck jaws. To create the necessary tenon size, I worked in small increment s with my 1/4“ parting tool. Lastly, with a small skew, I created the dovetail on the tenon to compliment the chuck jaws. Before continuing, I used a metal rule to check the size. Calipers can also be used. Some woodturners are skillful and confident enough to do this with the piece running. If you are unsure, be sure to stop the lathe to check.

3 Establish the box to lid ratio.
Establish Proportions
Once the tenons are established, I turned my attention to the ratio of the lid to the base. The first thing I needed to check is which end will be the top. Grain patterns or distinguishing marks you may want to be shown in certain ways on a piece. I like to secure the lid in the chuck first. The next thing was to factor the tenons into the design. Do I use them or turn them away afterwards? Not taking this into consideration can have adverse effects on the design. For this box, I had decided that the tenons would be removed. Now determine the ratio you would like to use. The ratio I like to use on this type of box is two thirds for the base and one third for the top. Be sure to also factor in the material you will use for your tenon and the waste wood when parting off. Again this can impact greatly on your design!
4 Parting off the tenon with a parting tool, and chamfering the end.
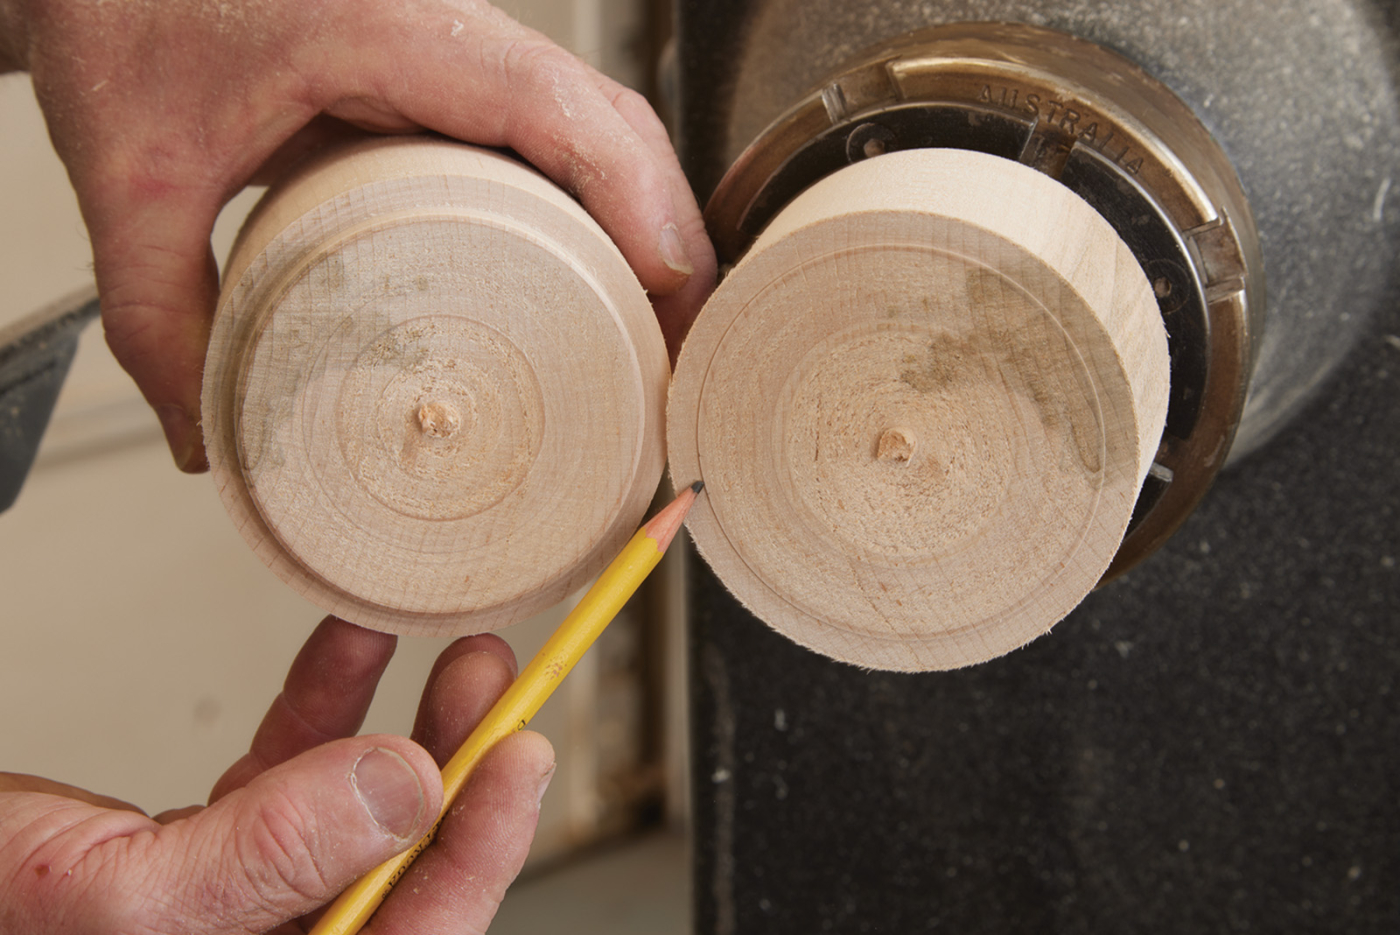
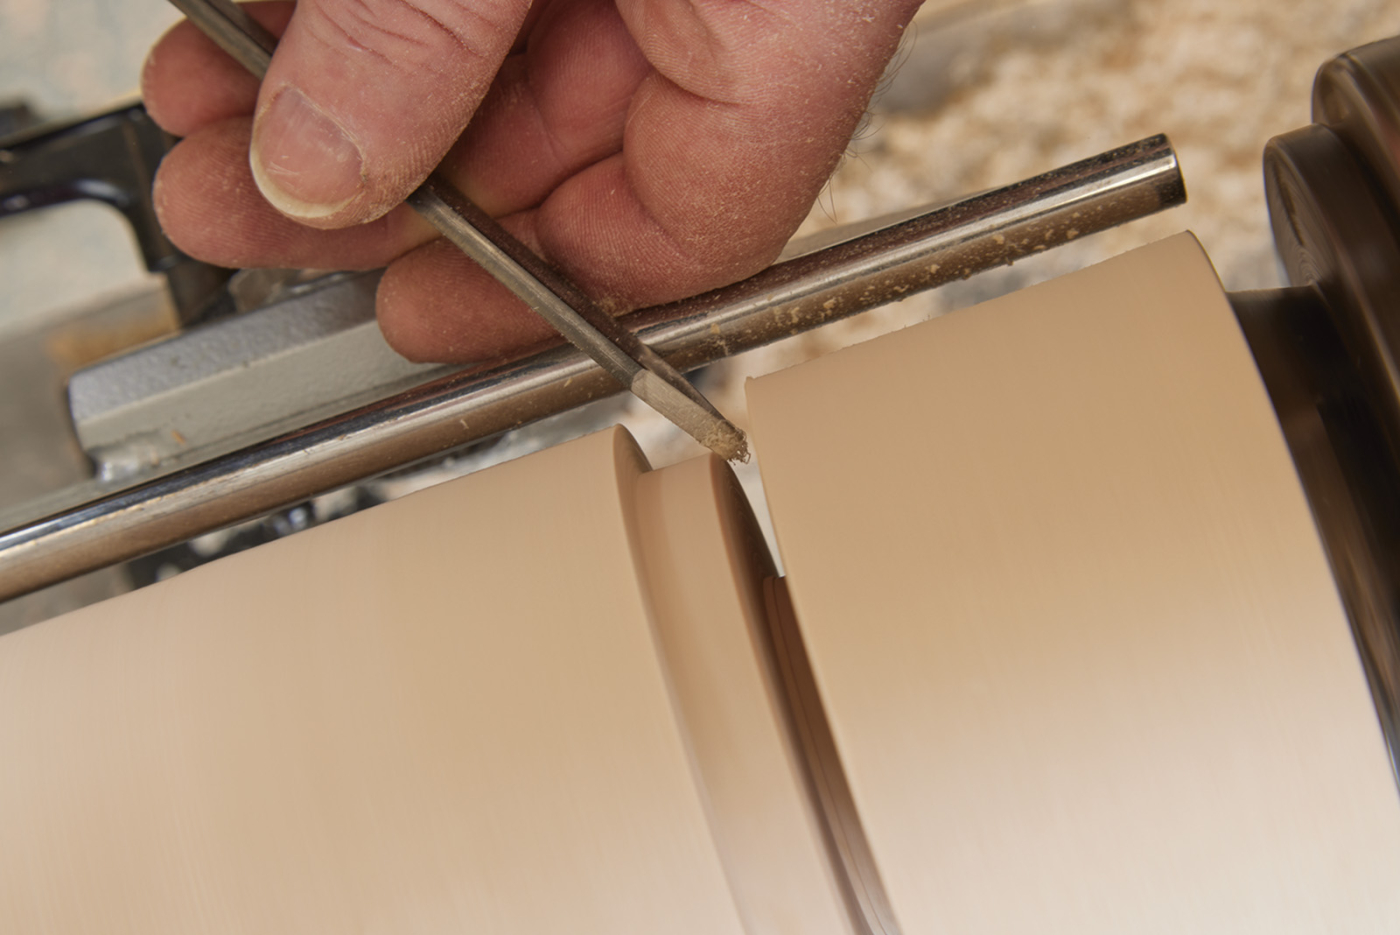
5 The witness mark on the underside of the lid is indicated by the pencil.
After factoring in all of this information, I established the tenon and then softened the corner of it to allow it to have an easier start when fitting on the lid. Now add a witness mark, a mark on the lid which is the exact same size as the tenon. This is a very handy trick when making a piece which involves joining two pieces of wood with a recess and tenon. The piece is then parted off almost completely. Lastly, I used a small saw to completely part the two pieces.
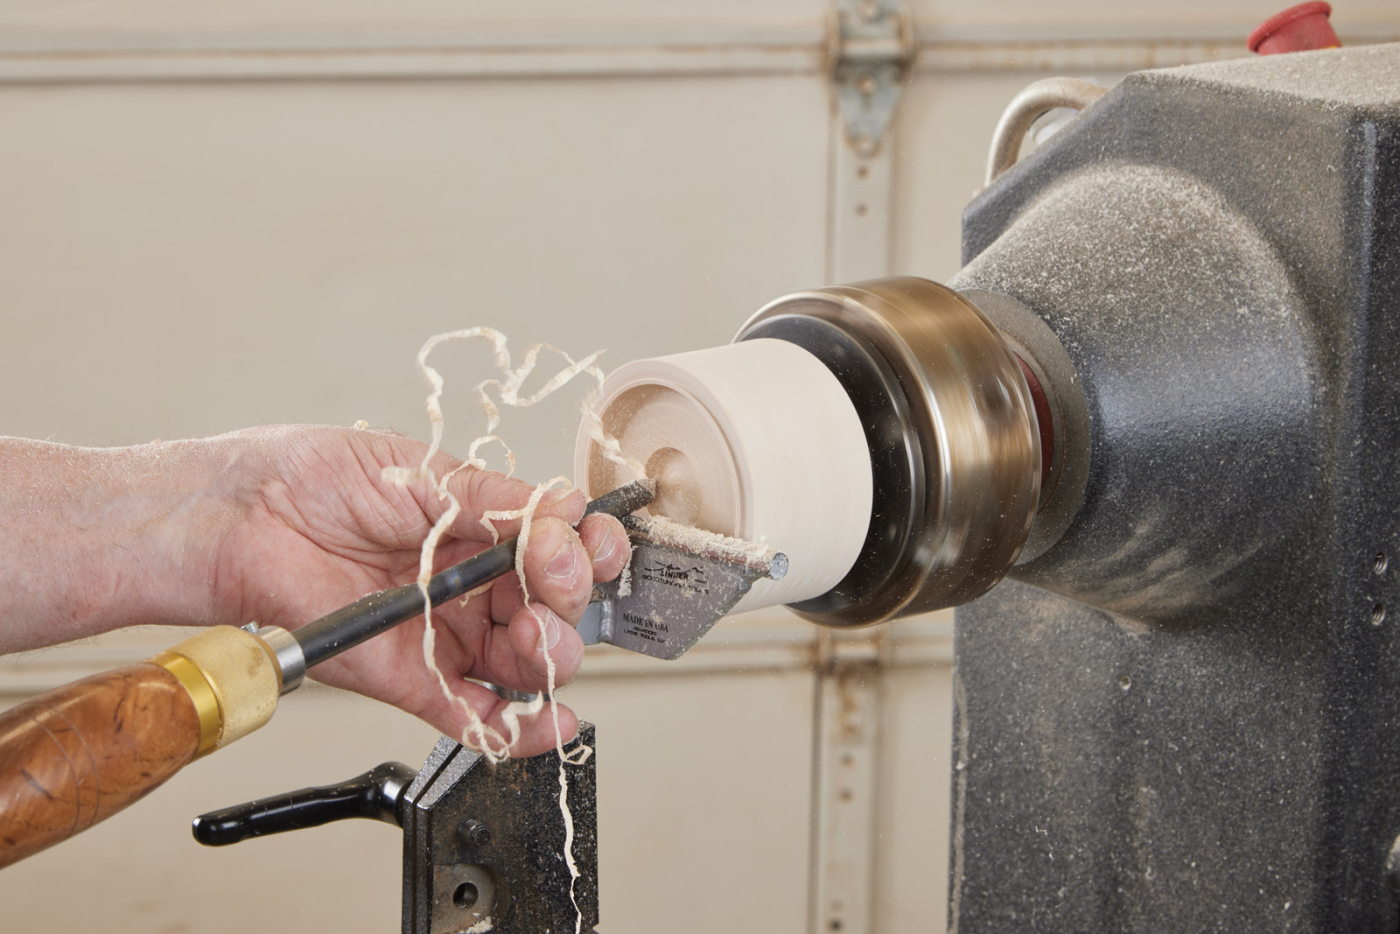
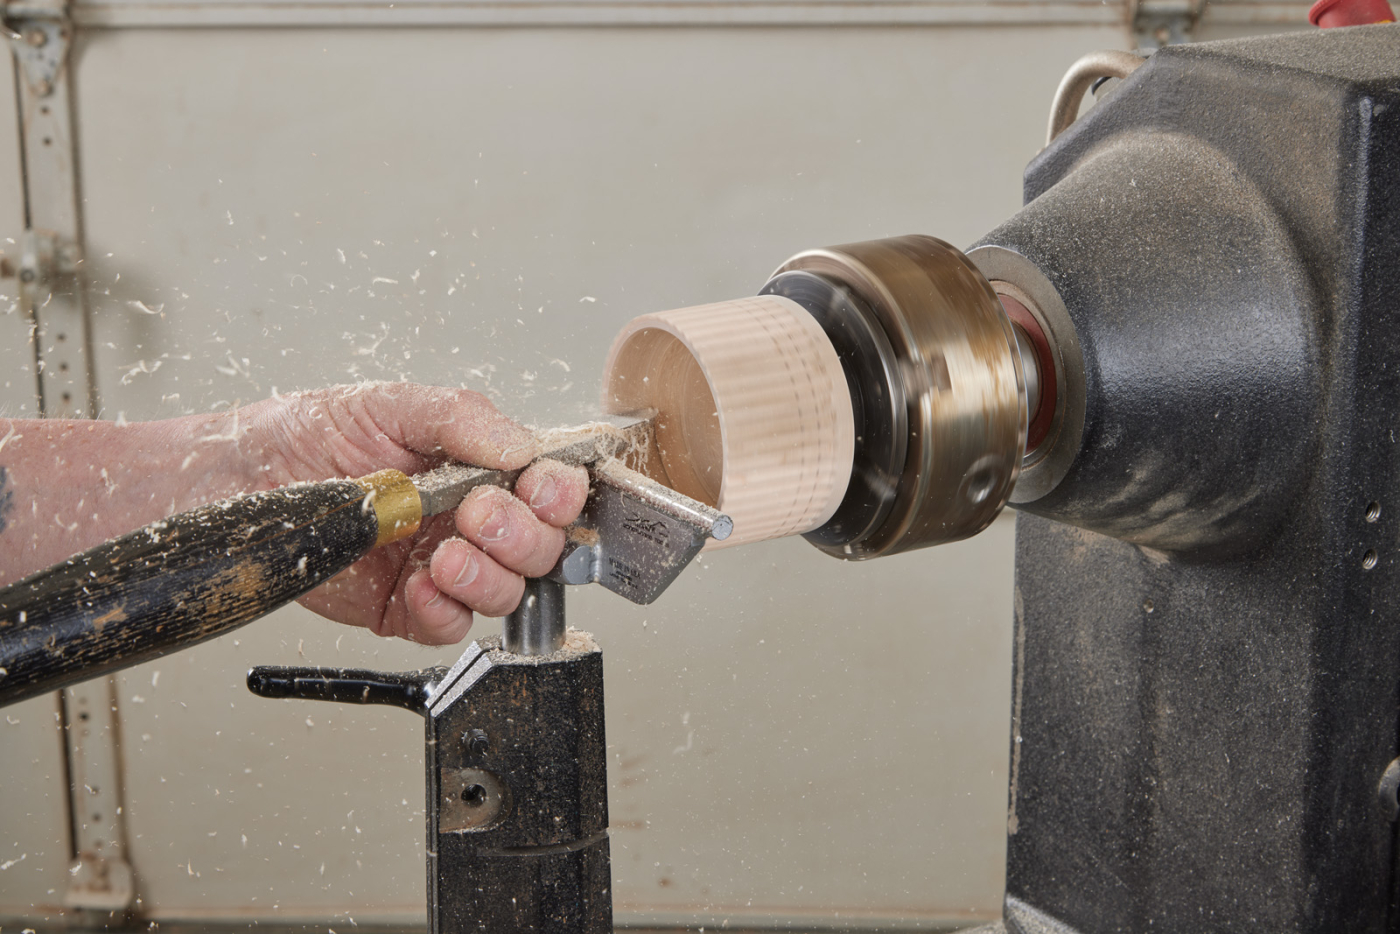
6 To remove the bulk of the waste from the lid, I worked from the centre out in small increments. As the grain orientation is end grain, this technique works really well to remove wood.
Hollow the Lid
I used a 3/8“ spindle gouge with a 45° angle to remove the bulk of the waste from the lid. I started with the tool at a reasonable level, the tip on the centre, and flute open approximately 45° or in the 10 o-clock position. I worked from the centre out in small increments. I then used a 3/4“ skew which had rolled edges to refine the wall of the lid to get a nice tight fit from the base. This fit will be addressed later. The same skew acting like a negative rake scraper was used to clean up the underside of the lid. Now it’s time to move the focus to the exterior of our box.
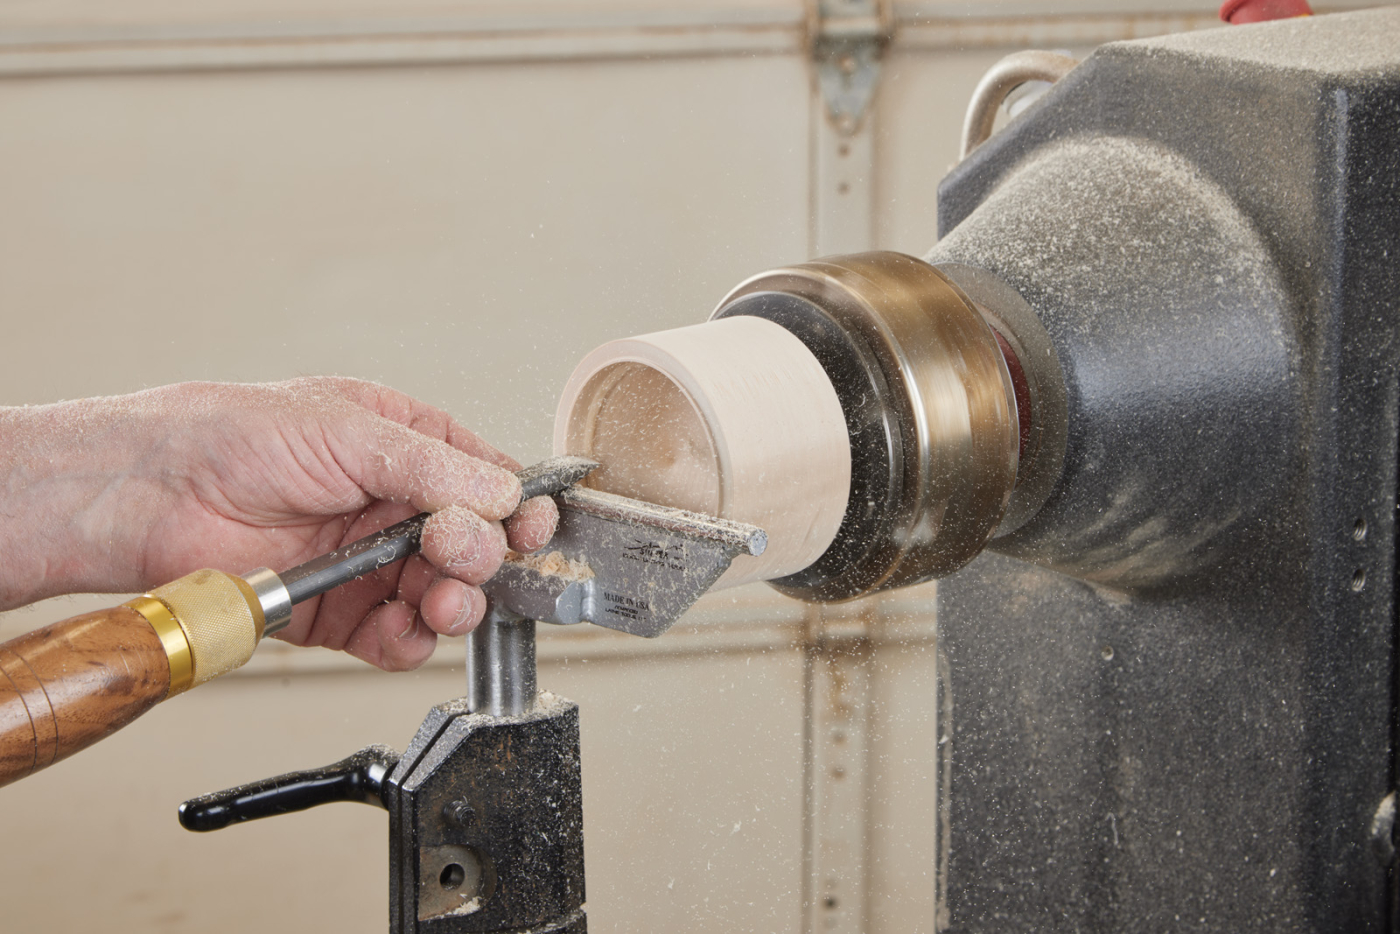
7 Refine the wall of the lid to get a nice tight fit on the base.
Turn Focus to Exterior
Once the fit was established, my focus turned to shaping the exterior. I left the top third relatively straight and gave the lower proportion a gentle curve in towards the bottom. This simple shape lends itself well to this kind of box.
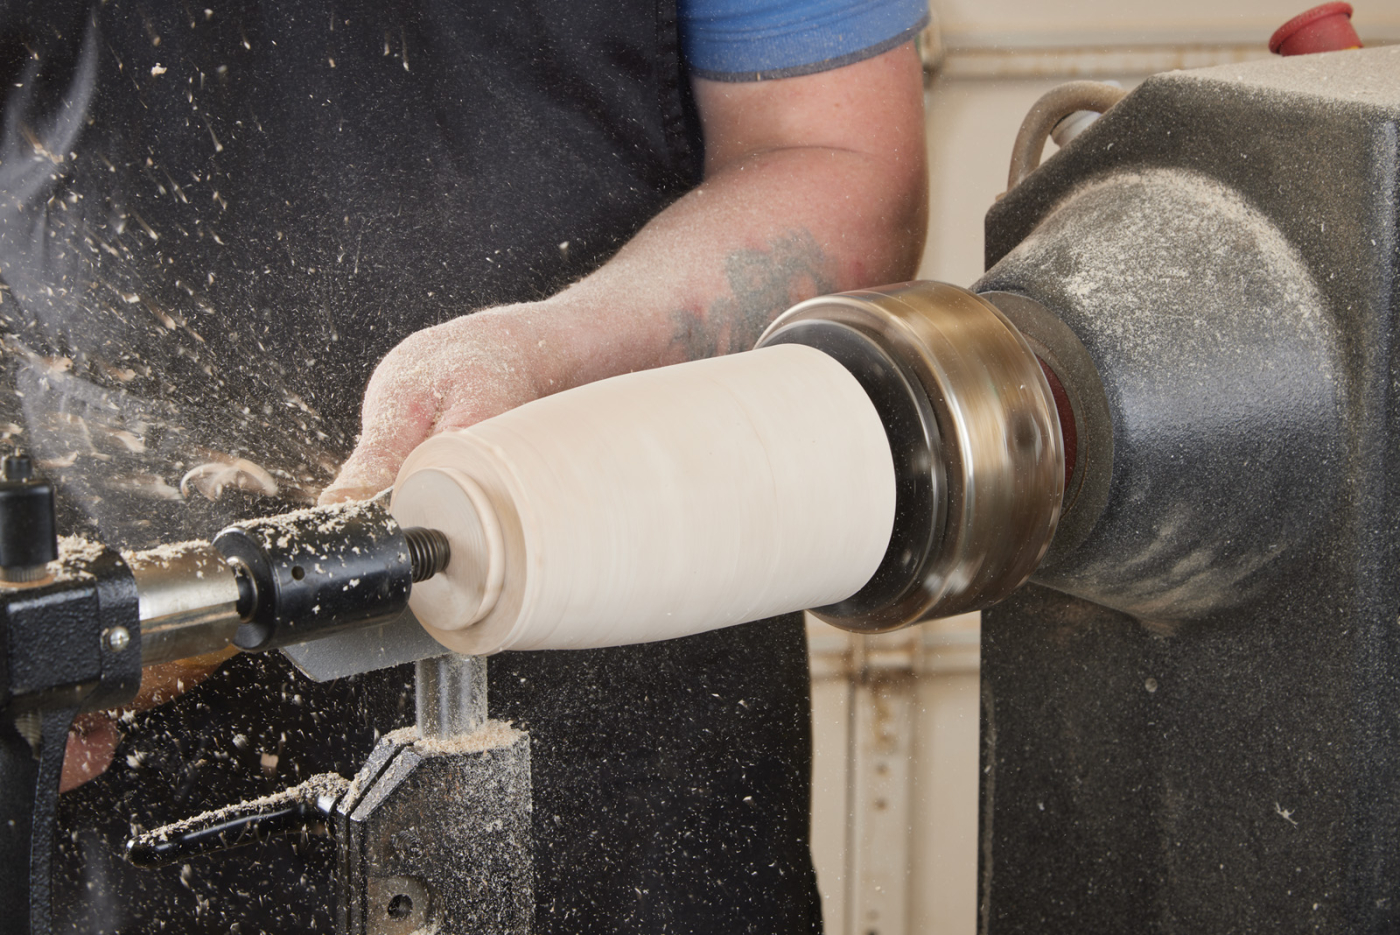
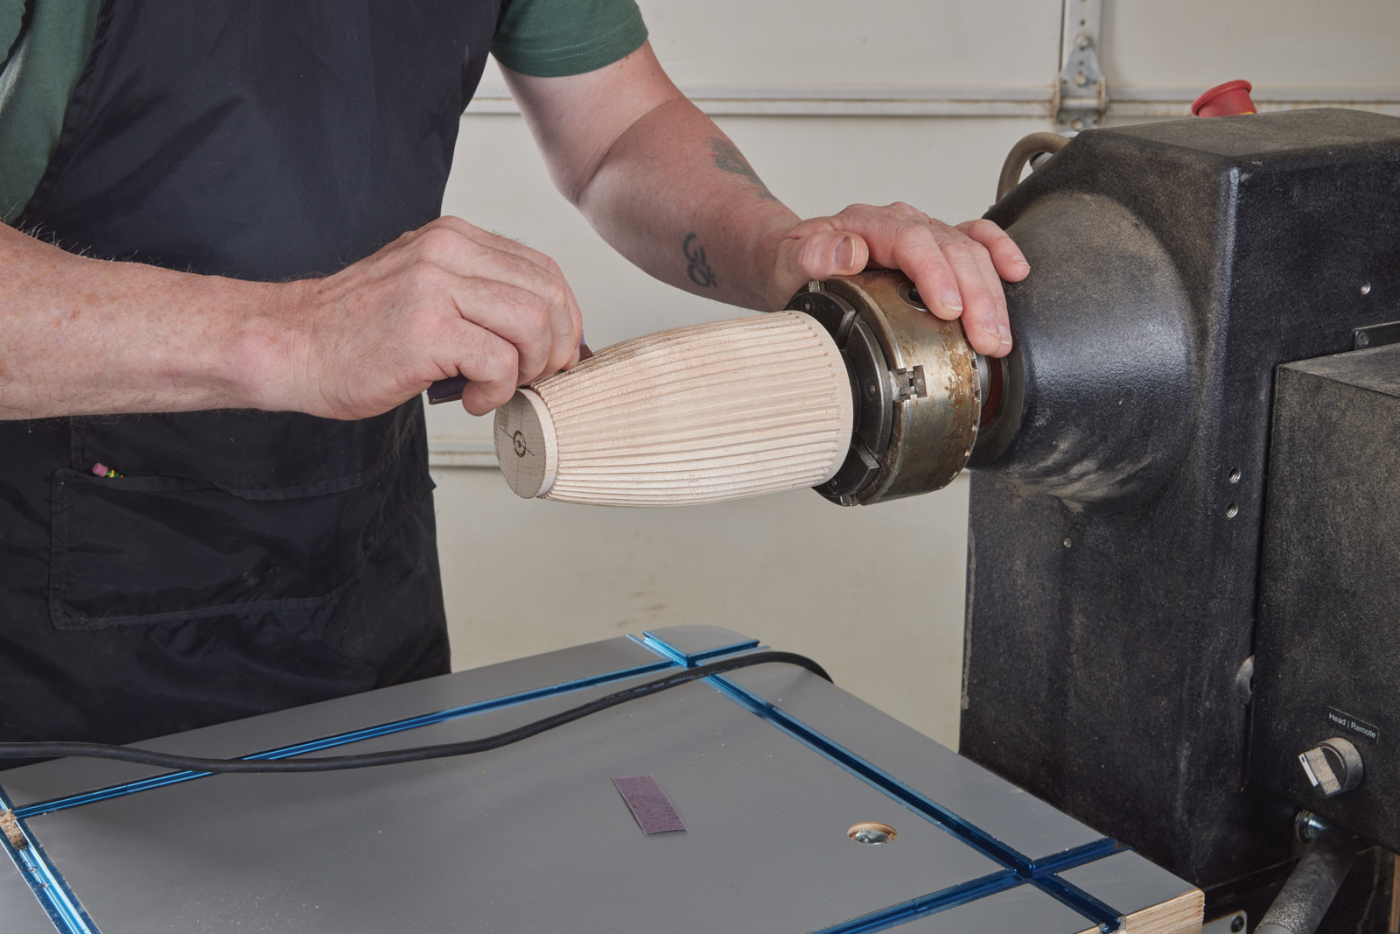
8 Shape the box exterior with your choice of tool, not worrying about the finish due to the routing.
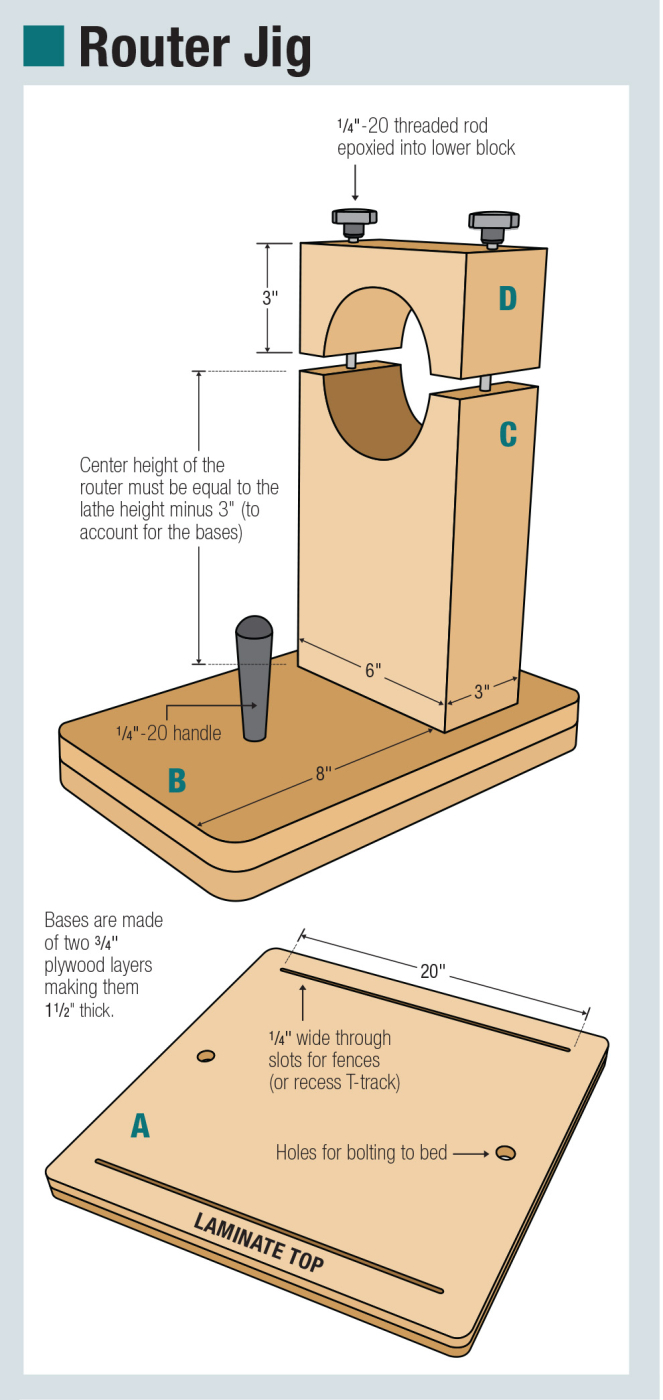
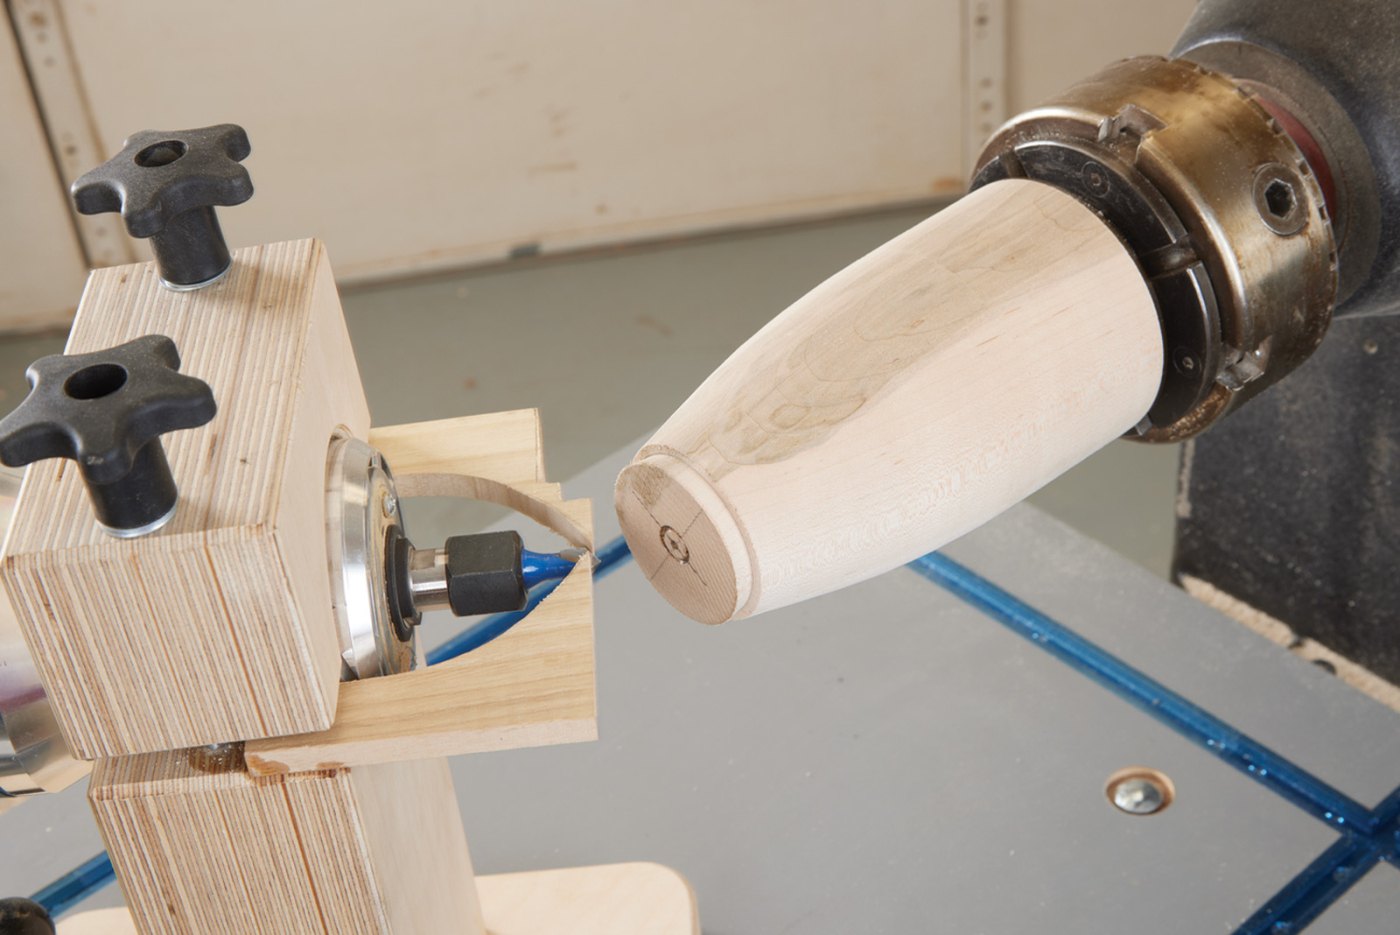
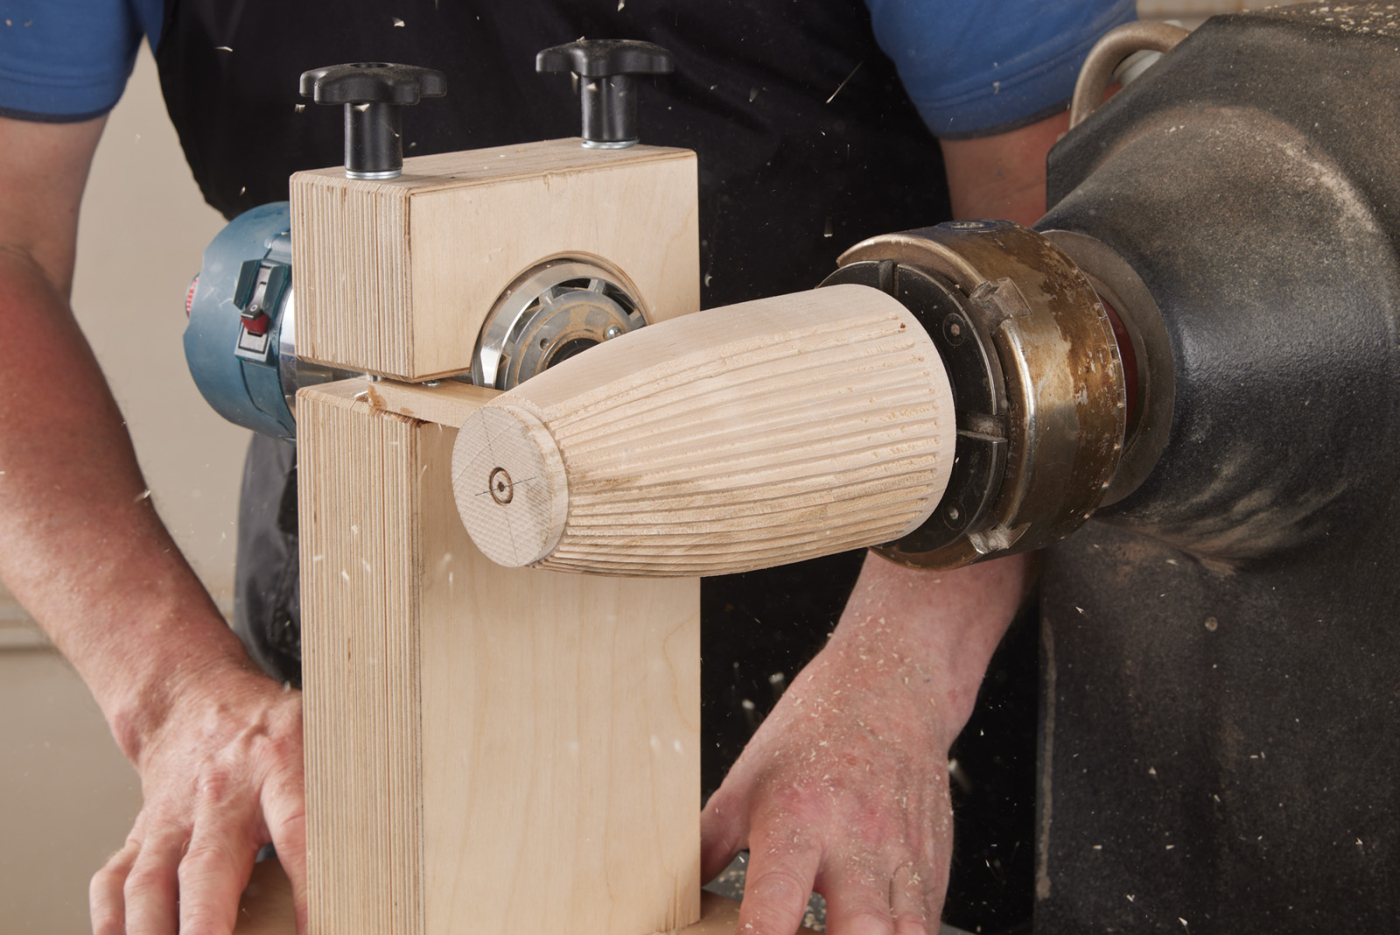
With the shape of the box established, it’s time for the routed surface. For the routing, I used a homemade routing jig fitted with a 3/8“ v-cutter. Guide timbers fitted to the jig allowed the cutter to cut at a depth of 1/8“ at a time. Cutting too deep can cause a lot of tear-out. The direction of the cut is also very important. In this case, the router was used working from right to left. The direction of the cutter going to the other way can cause the router to lift, which can be dangerous to the user and may damage the piece. Another safety point is to unplug the lathe. Our first instinct when working at a lathe is to turn it on. Unplugging the lathe keep us from doing just that. Also, don’t forget to wear full respiratory, eye, and ear protection while cutting.
After three passes with the router, the cuts were complete. You cannot rush this part as the wood will tear and some of the crisp edges will be lost. There were 144 passes in total. Several light clean passes also minimize sanding. A piece of 180-grit sanding paper starts the sanding. Cloth back paper neatly creases to get into the v-cuts, but also be careful not to soften the edges. I continued sanding until I used 180, 240, 320, and 400-grit sandpaper on all routed surfaces.

9-10 This shop-built jig holds the router bit exactly center. Disposable plywood guides are screwed to the jig, depending on the project.
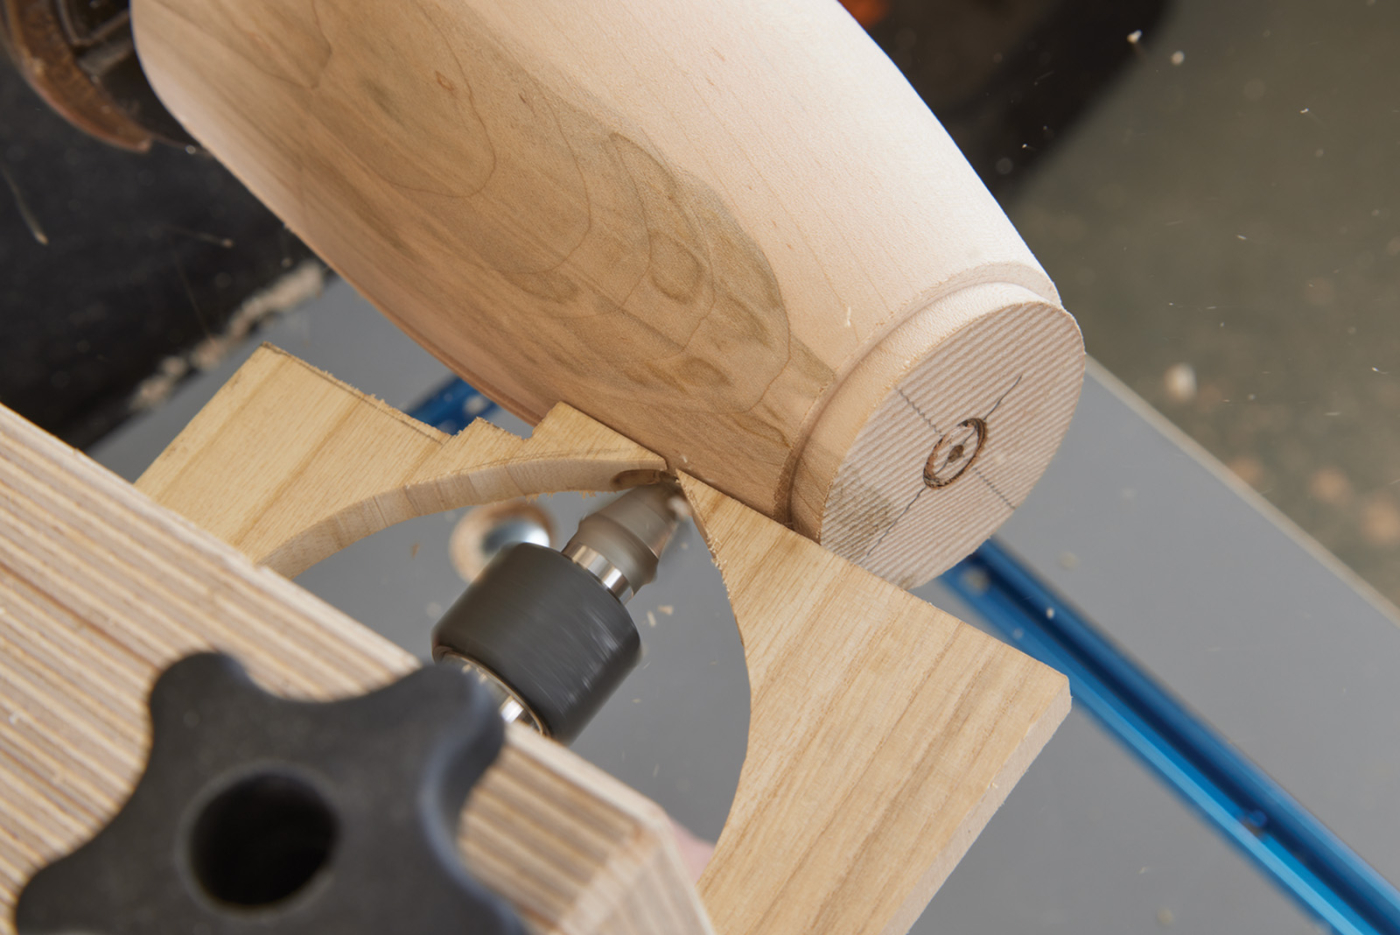
11 Guide timber fitted to the jig allowed the cutter to cut at an even 1/8″ depth.

12 Take into account safety factors before beginning. This includes noting the direction the cutter must go to prevent the router from lifting and unplugging the lathe so you don’t accidentally turn it on.
13 Don’t forgot to wear full respiratory, eye, and ear protection!
14 Complete the passes with the router, then sand using 180, 240, 320, and 400-grit sandpaper.
Further Refine the Lid
Before turning the focus to the surface of the top of the lid, further refinement needs to be done on the lid. Start by marking lines on the outside of the lid — one where the outside surface will finish, and another where the inside will finish. Hollow down until you’ve reached the inside depth of the lid. Finish up the inside corner to a crisp finish with a box scraper or parting tool. A few detail lines on the inside of the lid always add a little something when you open the box. Then, the inside of the lid can be sanded.
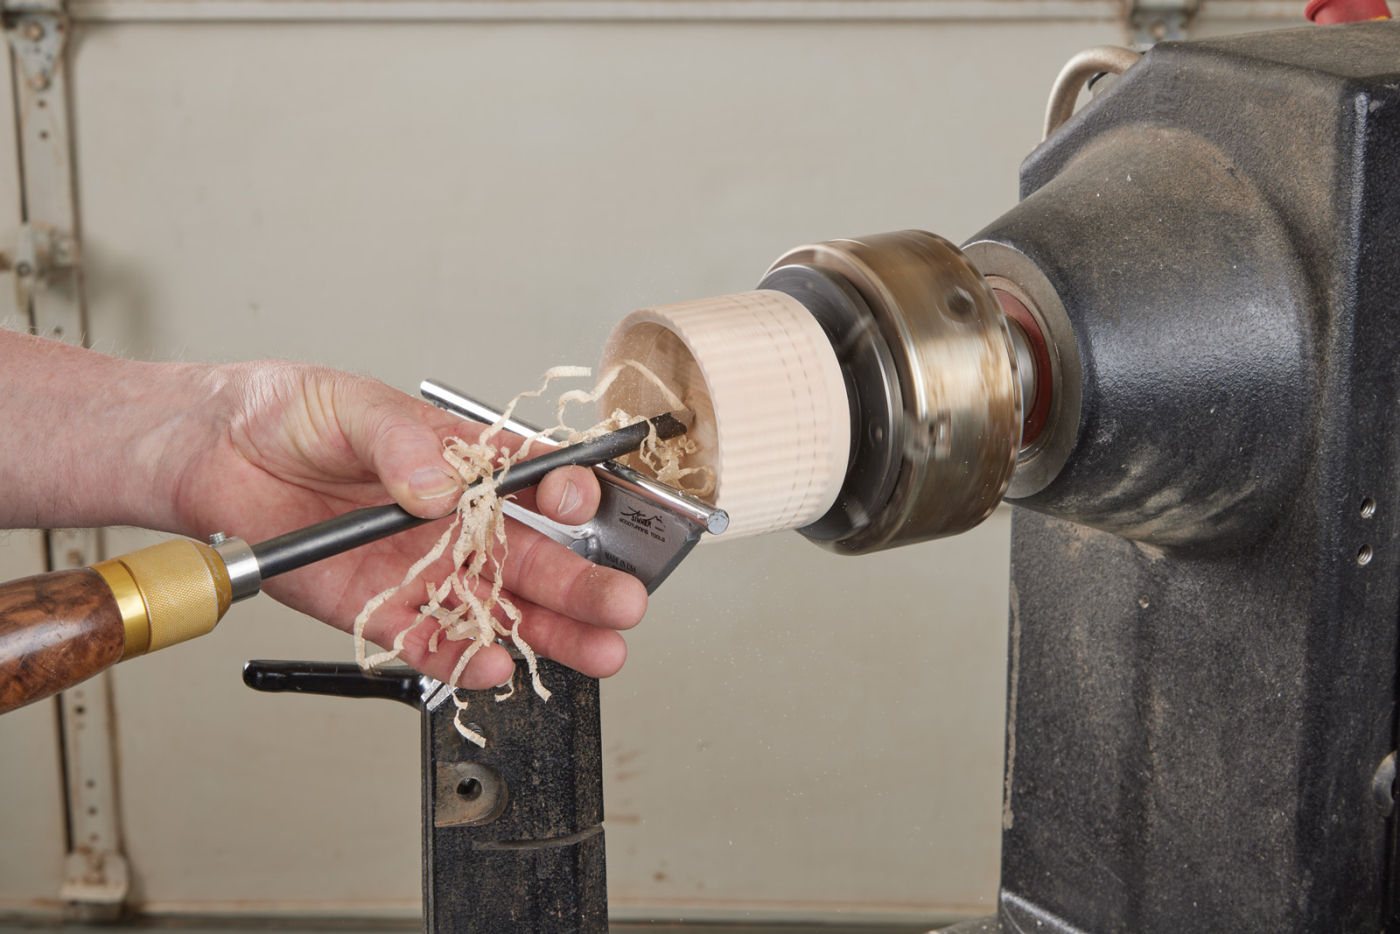
15 Finish hollowing to the final depth. As before, a bowl gouge from the center out quickly hollows the endgrain.
16 A sharp box scraper leaves a square wall with a clean inside corner.

17 A point tool adds detail lines to the inside of the lid.
18 Replace the lid to the base. Secure it into the chuck and rout the lid exterior.
Back to the Exterior
Replace the lid back on the base and secure the base into the chuck. The tailstock was brought up for support and the top of the lid was refined using a 3/8“ spindle gouge. At this point the box still has a good secure fit. With the router set at the centre, the guide was set in place to create the grooves on the top of the lid. The bit finishes at the centre with a 1/16“ depth whereas the outside was set to match the depth of the side. The piece also had to be rotated in the chuck so as to align the tip of the router with the centre of the groove on the side. Rout the grooves in the same manner as the sides. This includes routing each groove three times and use of all four sandpaper grits.

19 Remove the guide timber from the jig and use a fence to guide the router jig base.

20 Be sure to rotate the lid in the chuck so as to align the tip of the router with the centre of the groove on the side.

21 Once the lid is complete, sand the top in the same manner as the sides.
Embellishing the Surface
While the piece was still joined with a tight fit, I painted the outside black with an ebonizing lacquer. This stopped paint from getting on the interior. Several light coats were applied until all the surfaces were adequately covered. Trying to paint a faceted surface with heavy coats would cause the paint to run. After all the routing and sanding, it’s important to keep the details crisp.
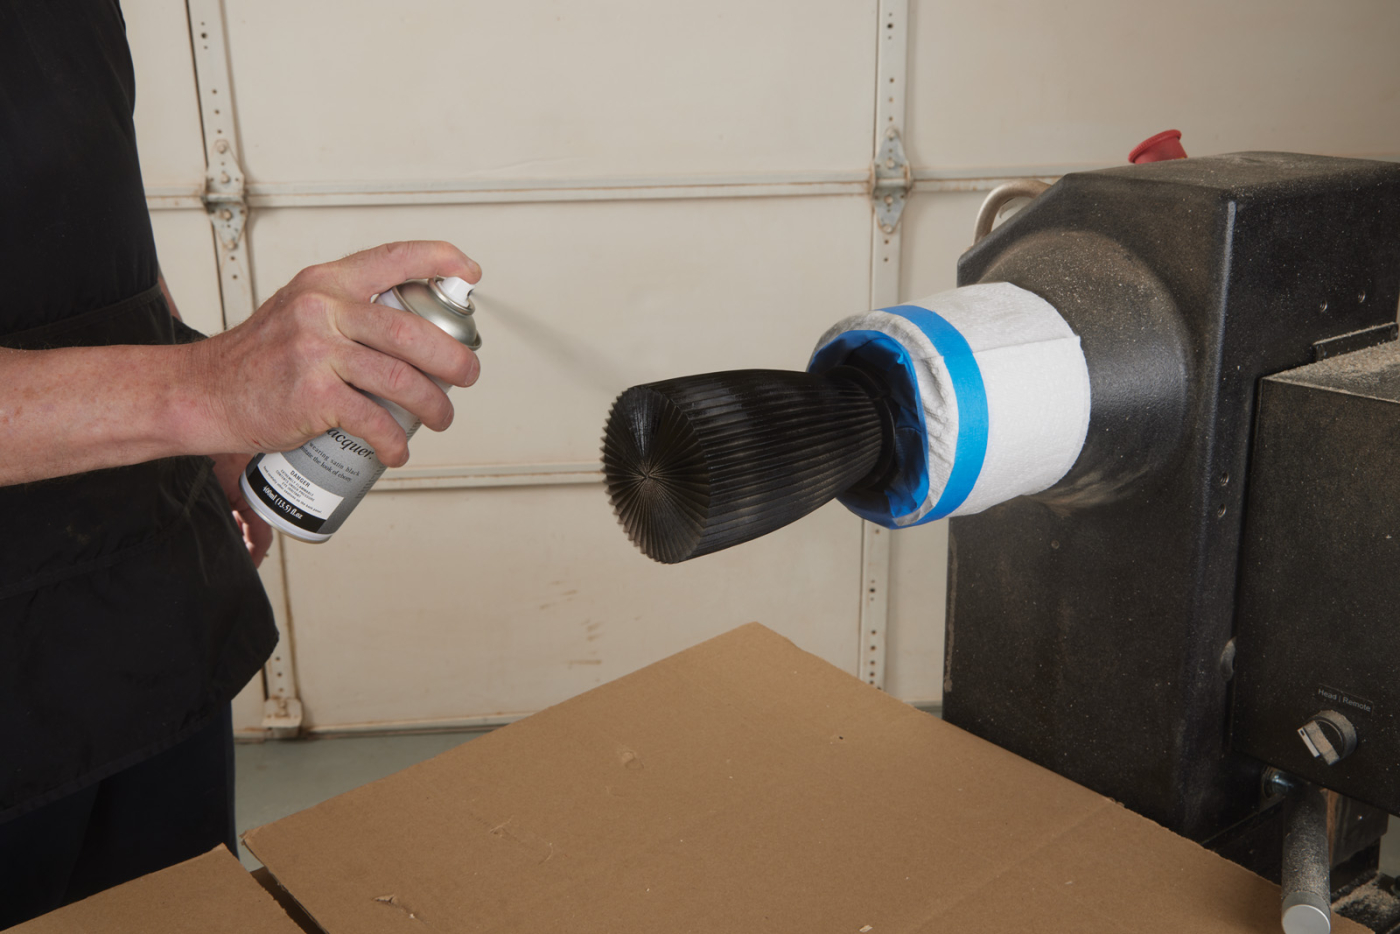
22 Spray several light coats of ebonizing lacquer until all surfaces are adequately covered.
Once the ebonizing lacquer was dry, I applied multiple layers of different coloured gilt cream. Gilt cream is often used to restore gilding on picture frames. However, in the woodturning community they are often used more like a grain filler providing a surface embellishment to turned pieces. I used Jimmy Clewe’s Metalic Cream Filler which can be purchased at WoodWorldTX.com. If desired, one could use just one filler to create a solid one-colour look… however applying multiple colours to the same piece would give a truly unique look! Sparingly applying the cream with a soft brush allowed the colours to build up. I kept applying the creams until I had a patina that I liked. Don’t be afraid to experiment with paint on your various woodturnings!
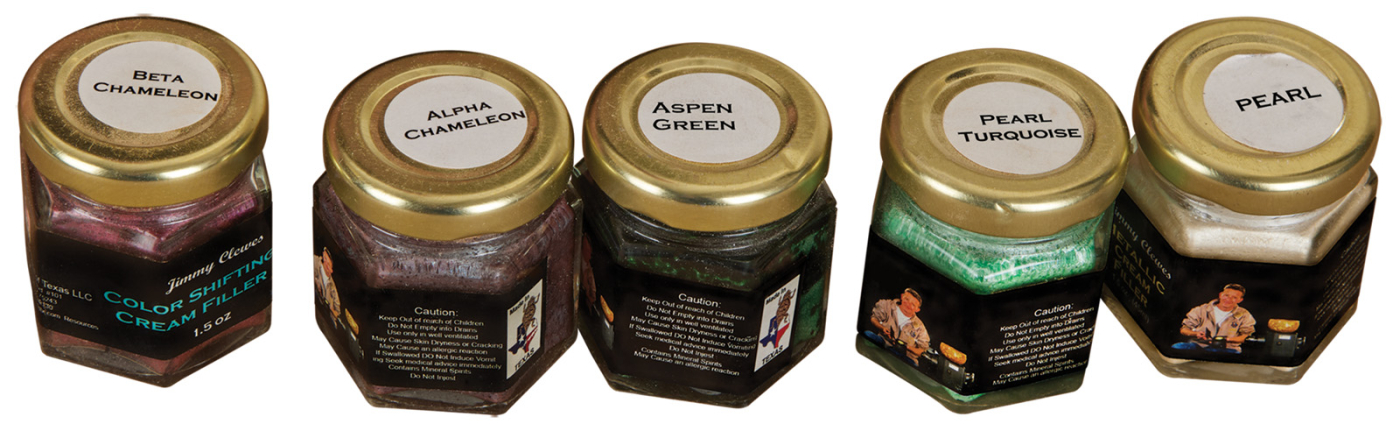
23 The colours which were used for the box include the following colours of Jimmy Clewe’s Metallic Cream Filler: (from left to right) Beta Chameleon, Alpha Chameleon, Aspen Green, Pearl Turquoise, and Pearl.
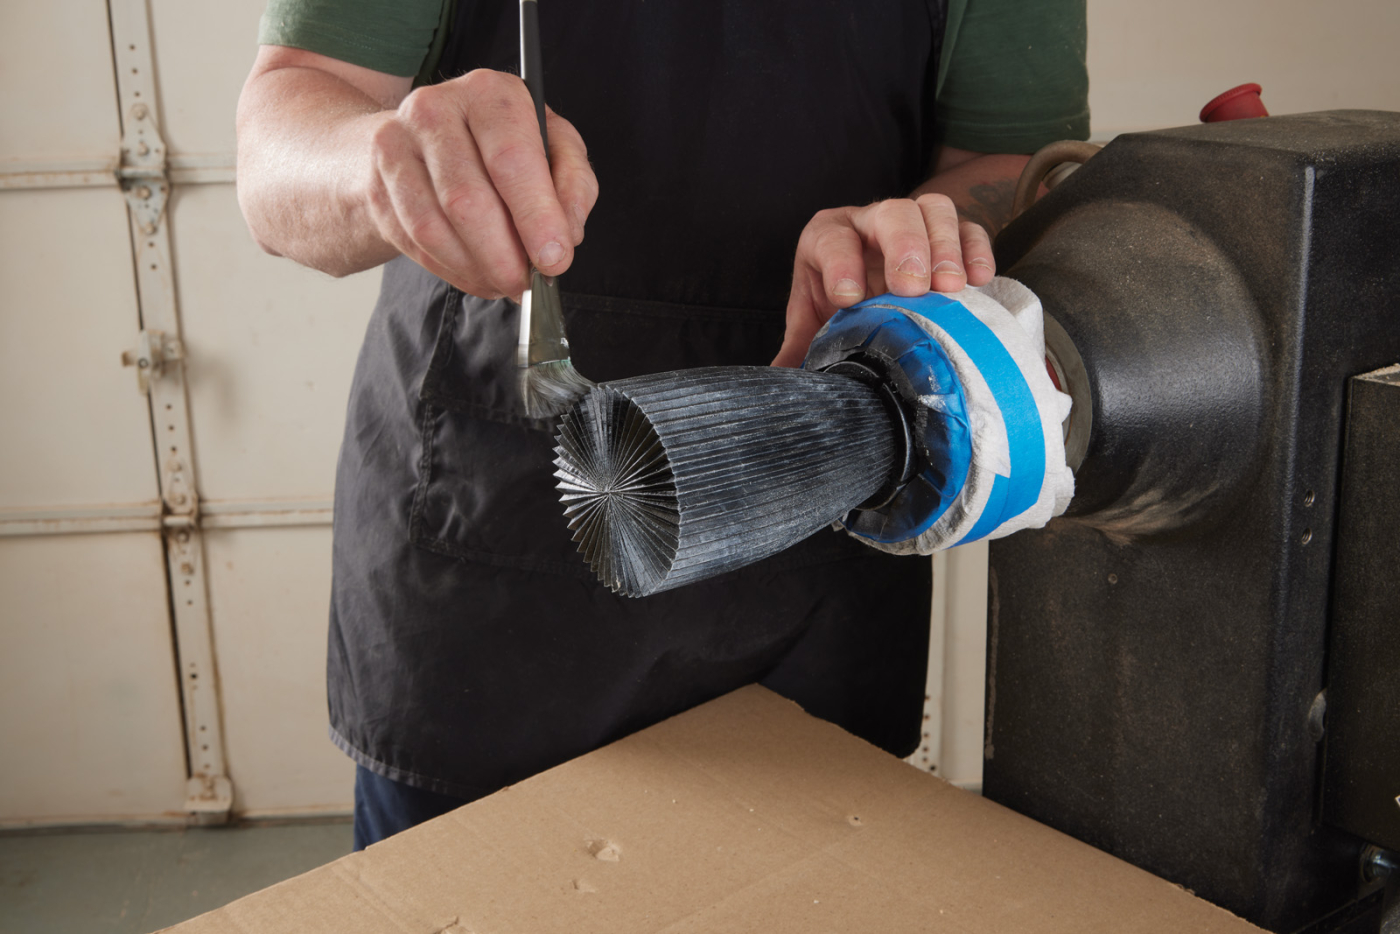
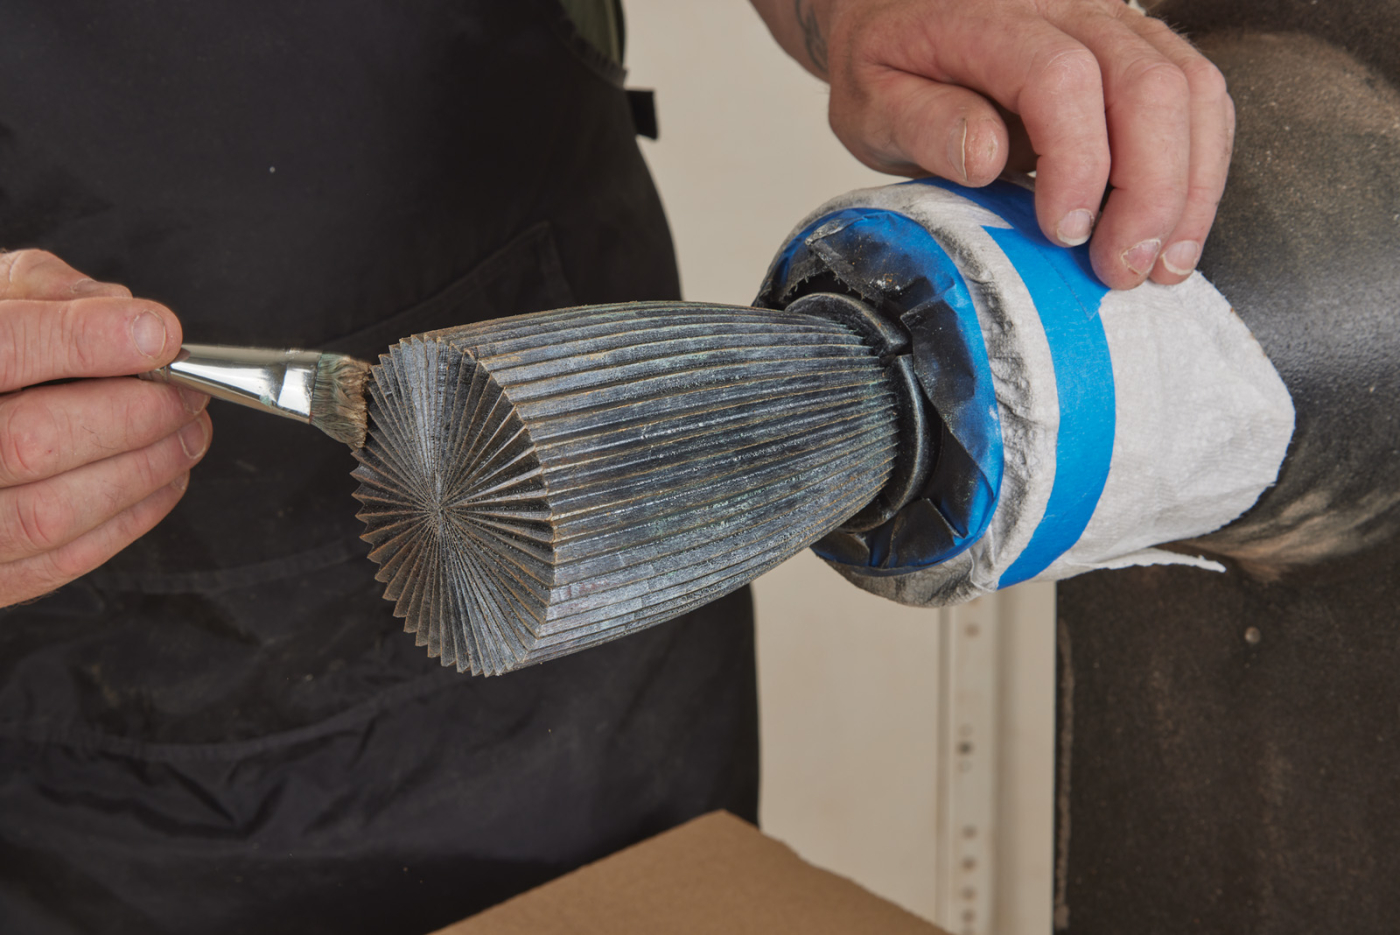
24-25 Once the lacquer is dry, apply multiple layers of different coloured gilt cream with a soft brush until you achieve the patina you like. The colors can be layered on top of each other, and after applying a variety of colors, you end up with a shimmering look that changes colors in different light.
Finalizing the Base
Next the lid was removed to finalize the base. A hole was drilled to the depth required and a piece of tape wrapped around the drill bit acted like a depth stop.
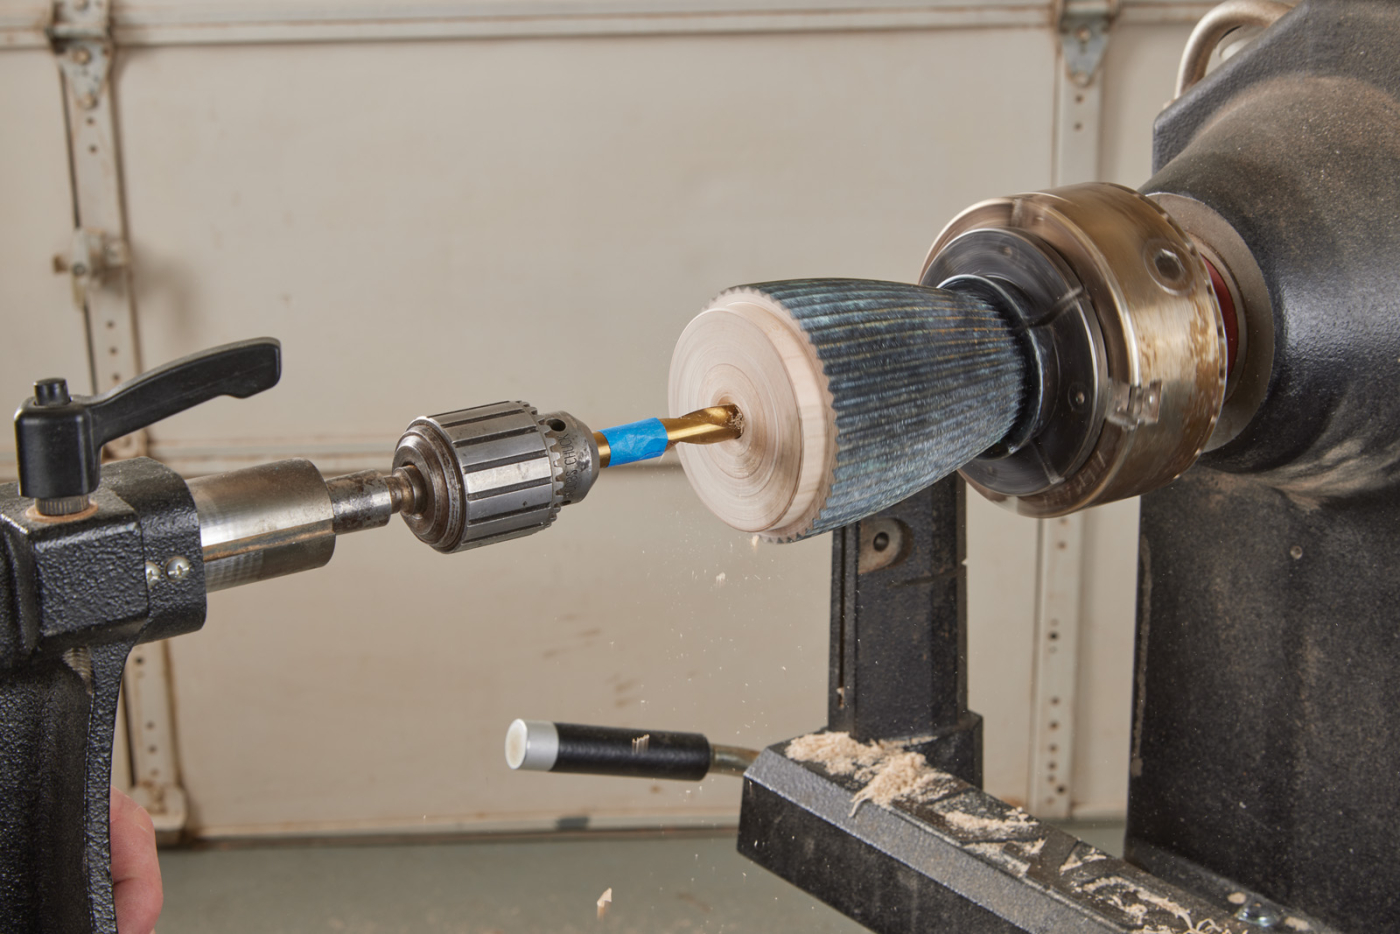
26 At the centre of the base interior, drill a hole to the depth required. The blue tape serves as a depth stop.
To hollow out the base, I used a mega mate tool. As this was the end grain, hollowing from the centre out was far more efficient. I am always aiming for the best finish possible from the tool. Once the inside was hollowed, I sanded it with the same four grits of sandpaper as the exterior. I also sanded the tenon to loosen the fit of the lid. As the piece would be finished with lacquer, I took this consideration with the loose fit I felt worked best on the box.
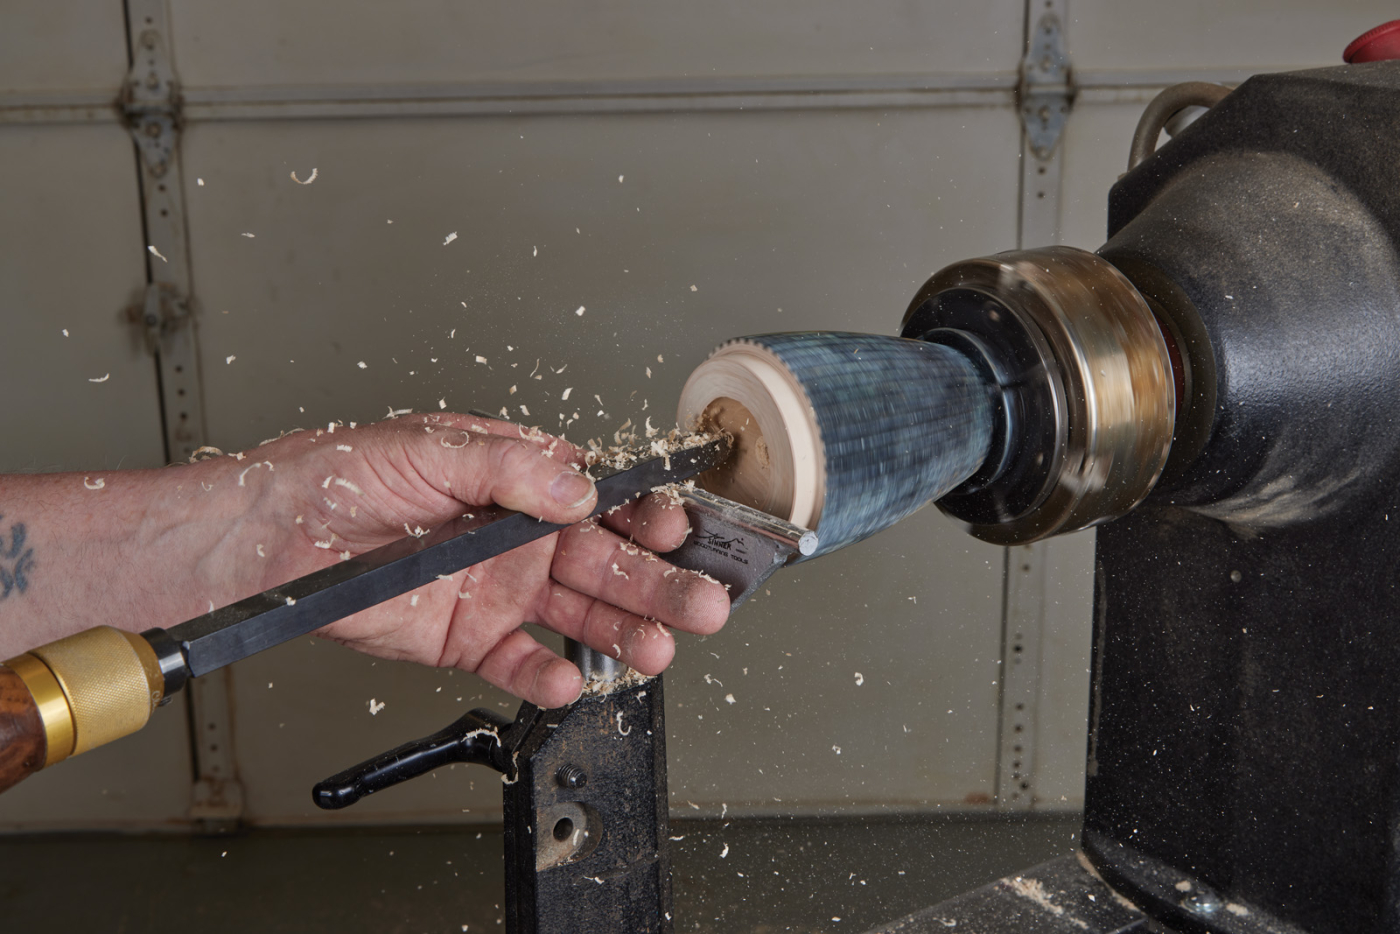
27 Hollow out the base interior using a mega mate tool being sure to work from the centre out.
To finish the bottom, a scrap piece of wood was held in the chuck jaws. It was turned to fit the base onto it as a jam chuck. Sneak up on the fit and check the base’s fit often. You want a gentle “pop” as you remove the piece from the jam chuck. Tail stock support was used to ensure safety and security of the piece. Light cuts with a 1/2“ spindle gouge cleaned up the surface as much as possible. The base was made concave so it would sit evenly on a surface. Sanding was completed and the small centre piece was removed. The centre area was hand sanded off the lathe.
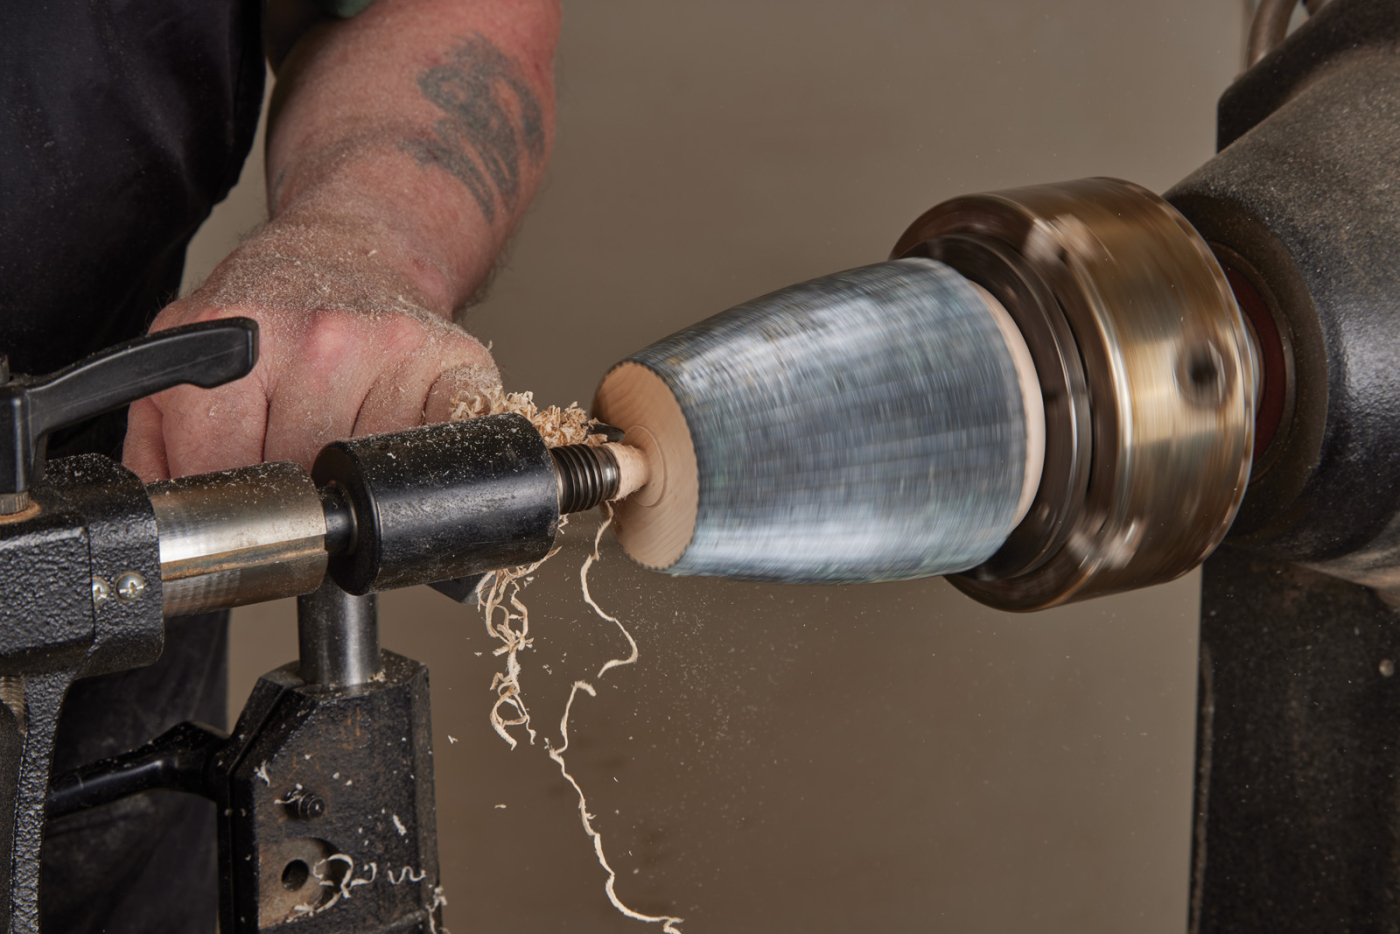
28 Jam chuck the base, using the tailstock as support and remove the tenon.
Apply the Final Finish
Several light coats of lacquer were applied to the interior and exposed wood on the base. The coloured area received two very light coats to help protect the surface. Note that it is important to apply spray in a dust-free, well-ventilated area. It is also important to wear respiratory protection to ensure your safety while using any finish which can cause harm.
Now find a place to display your unique box and enjoy showing it off to your guests. Don’t forget to always experiment with surface textures and finishes. The same router jig can be used with a variety of bits for different effects. Experimenting with the router height and orientation can also effect the overall look!
Here are some supplies and tools we find essential in our everyday work around the shop. We may receive a commission from sales referred by our links; however, we have carefully selected these products for their usefulness and quality.